

Hirobo Lama 30 Bash!
 Joe B.
Hirobo Lama 30
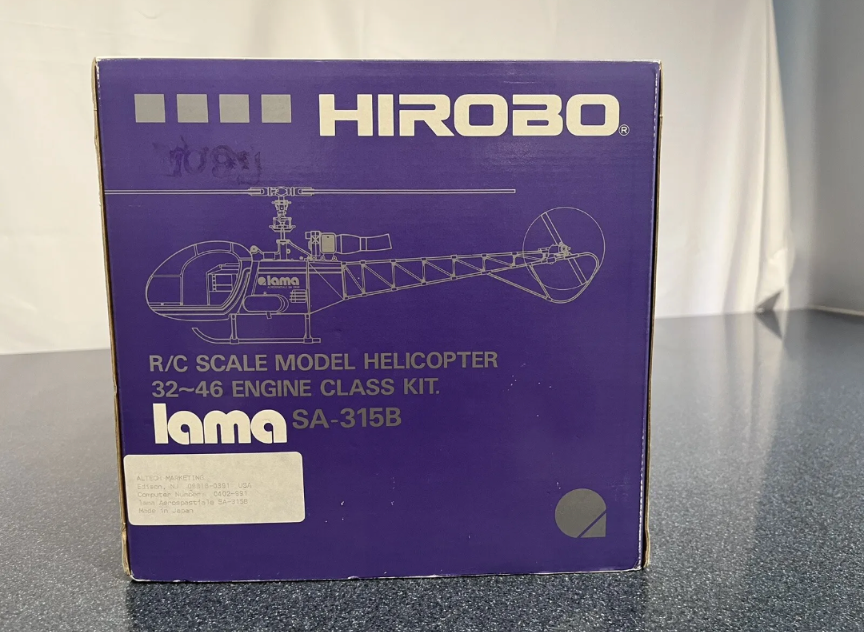
I found this in the box, complete Hirobo Lama 30 kit on eBay for a pretty decent price and scooped it up.
Was supposed to be something to build over the winter, but of course, it somehow got started. I am going to convert it to electric and try my hand at as much scale detail as possible.
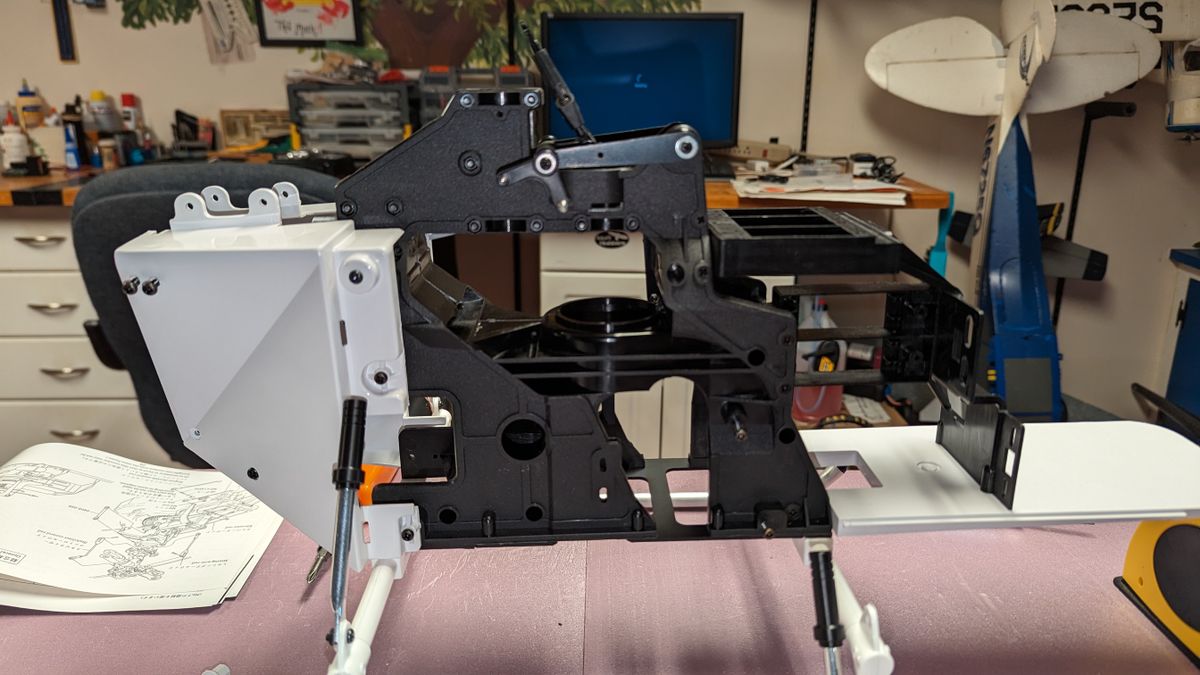
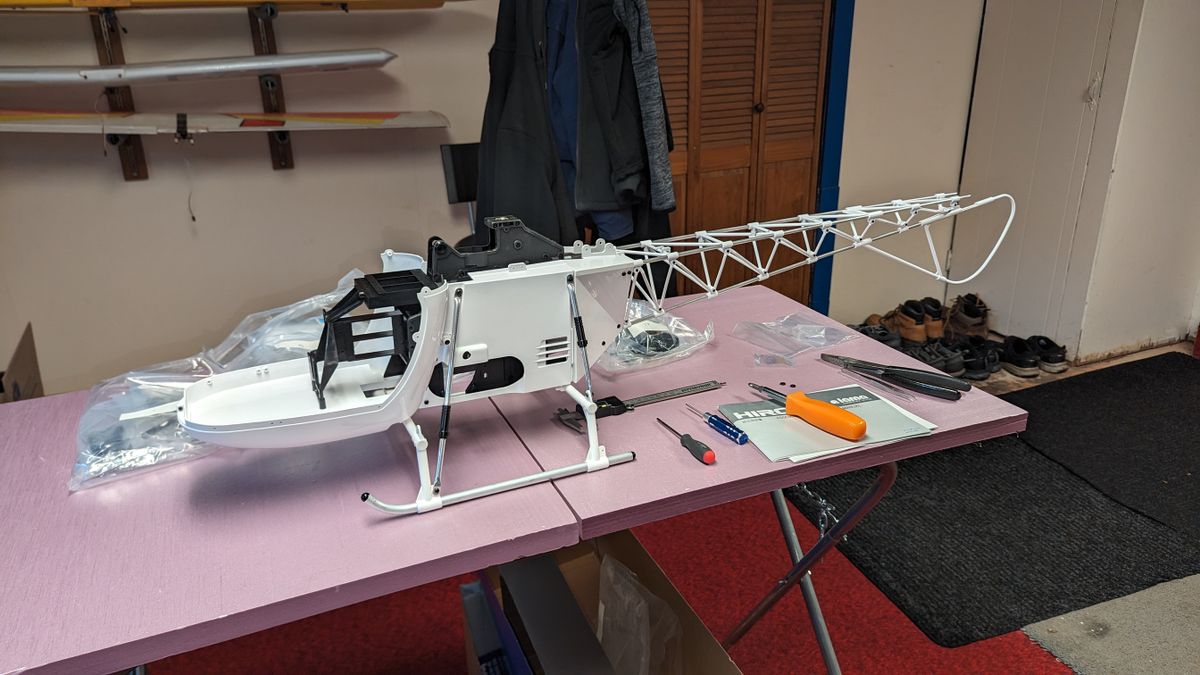
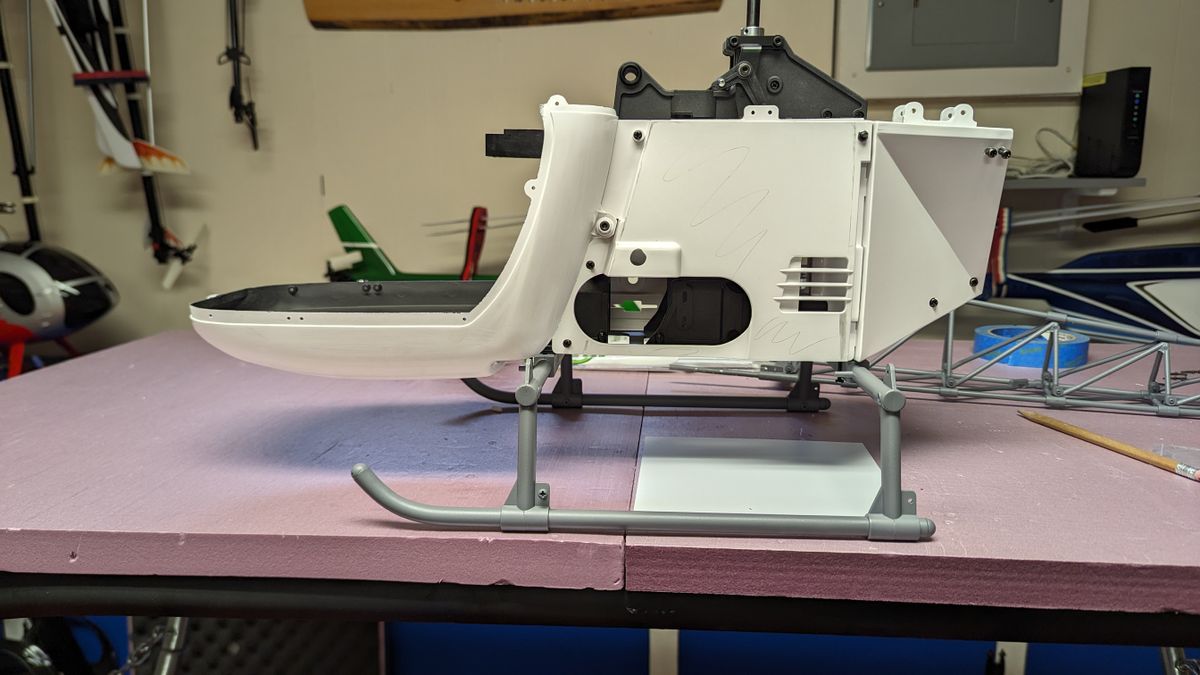
The mechanics and fuselage are built up just to see how things go together and to get an idea of what to change. The mechanics are older, first gen Hirobo S30 mechanics. They are lacking the familiar "Hirobo" logo on the rear top portion of the frame sides. The main rotor head in the box is the early design with the flybar on top. The head will more than likely be upgraded, although those top flybar heads are pretty smooth!
What to do, what to do...
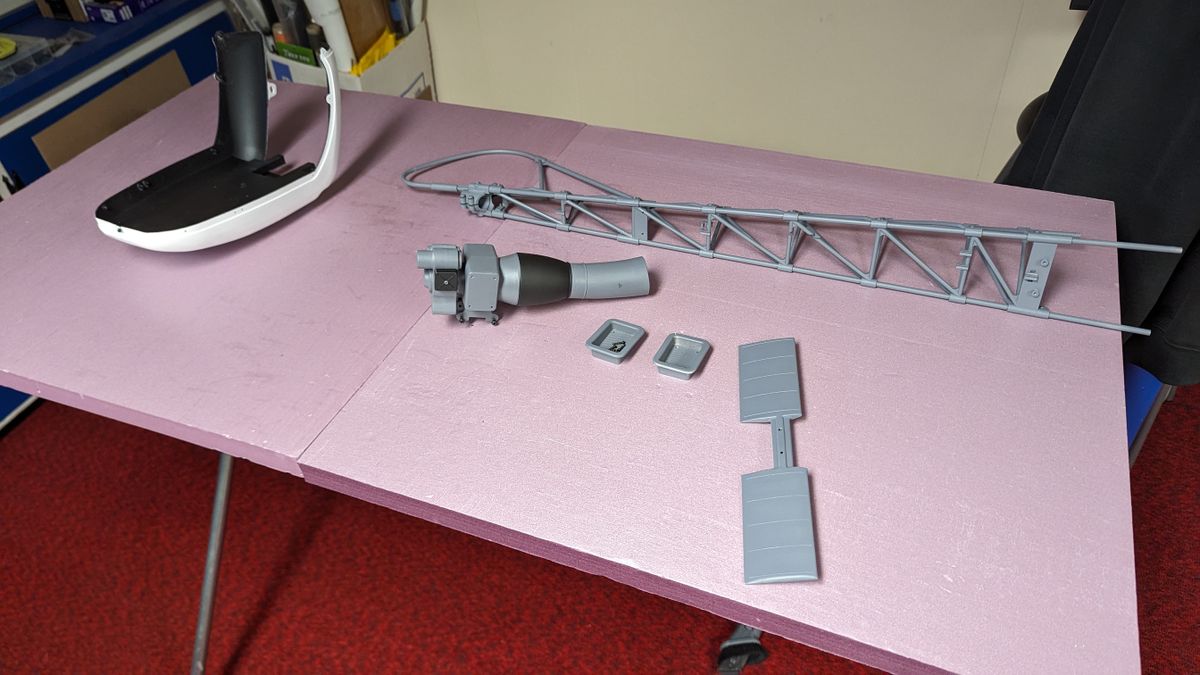
Started to look at different things and to get most of the assemblies in primer. Not sure what color or scheme I want to go with yet so it will all be in primer for a while.
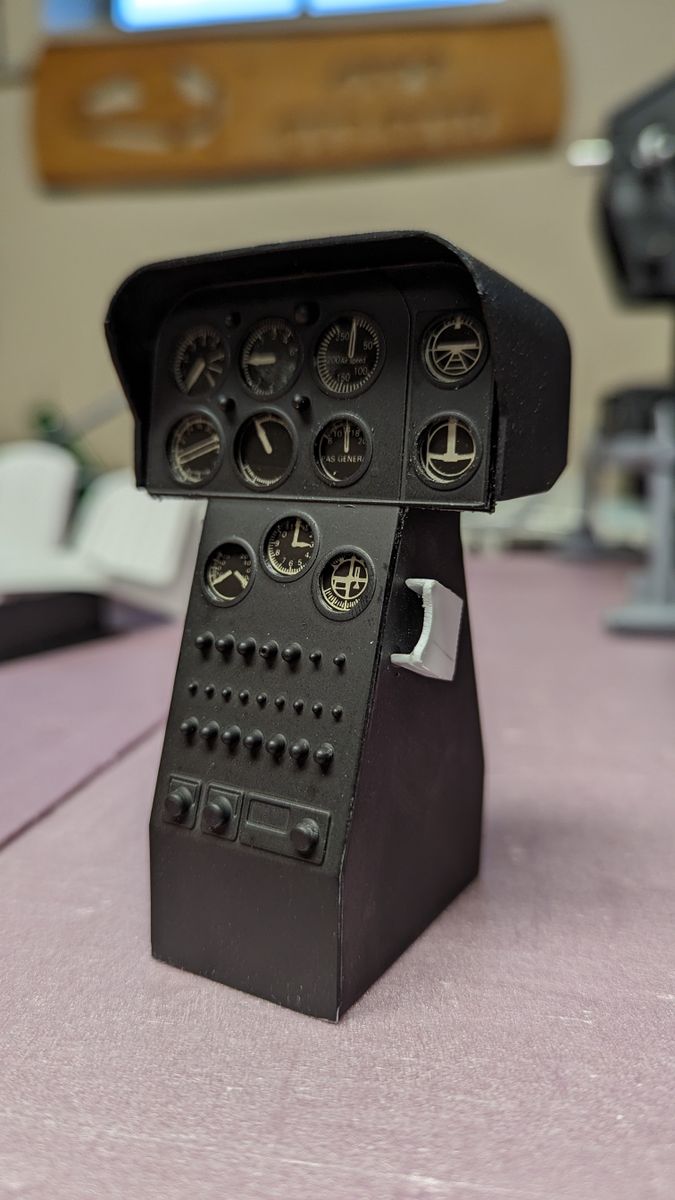
So far I have had good luck finding misc. parts like a SWM conversion, the parts for the nitro to electric conversion (I will not be using the clutch with this setup) and a scale Hirobo cockpit. Believe it or not, there is still a lot of this stuff out there.
So it begins...
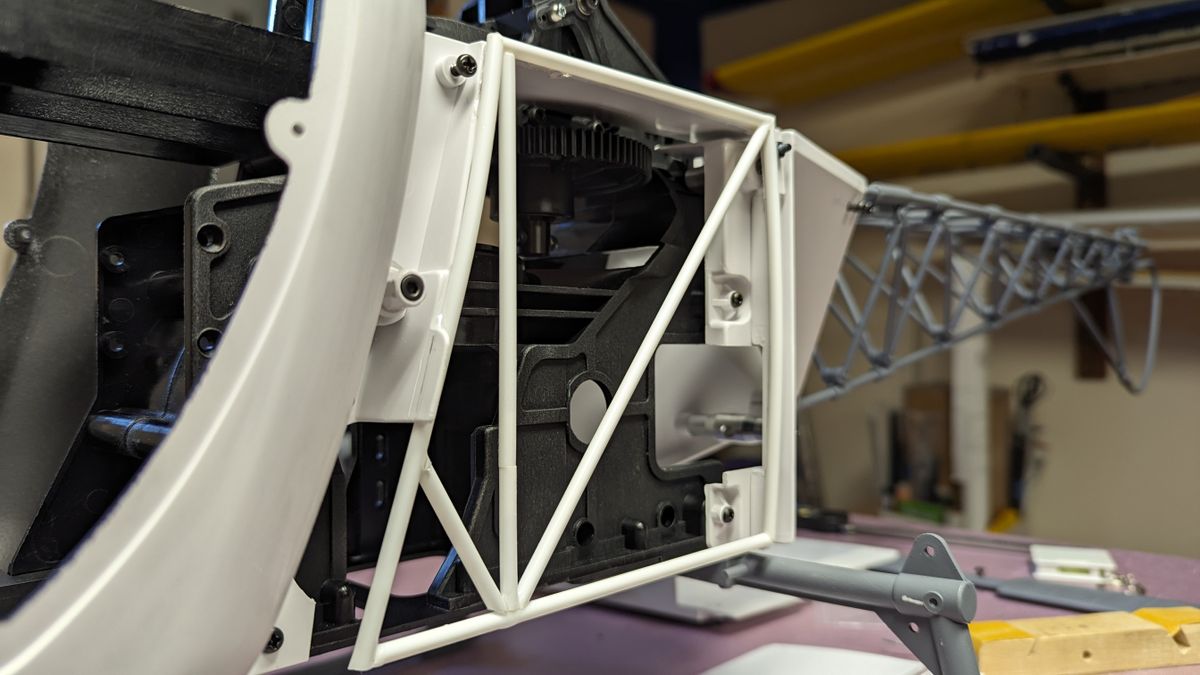
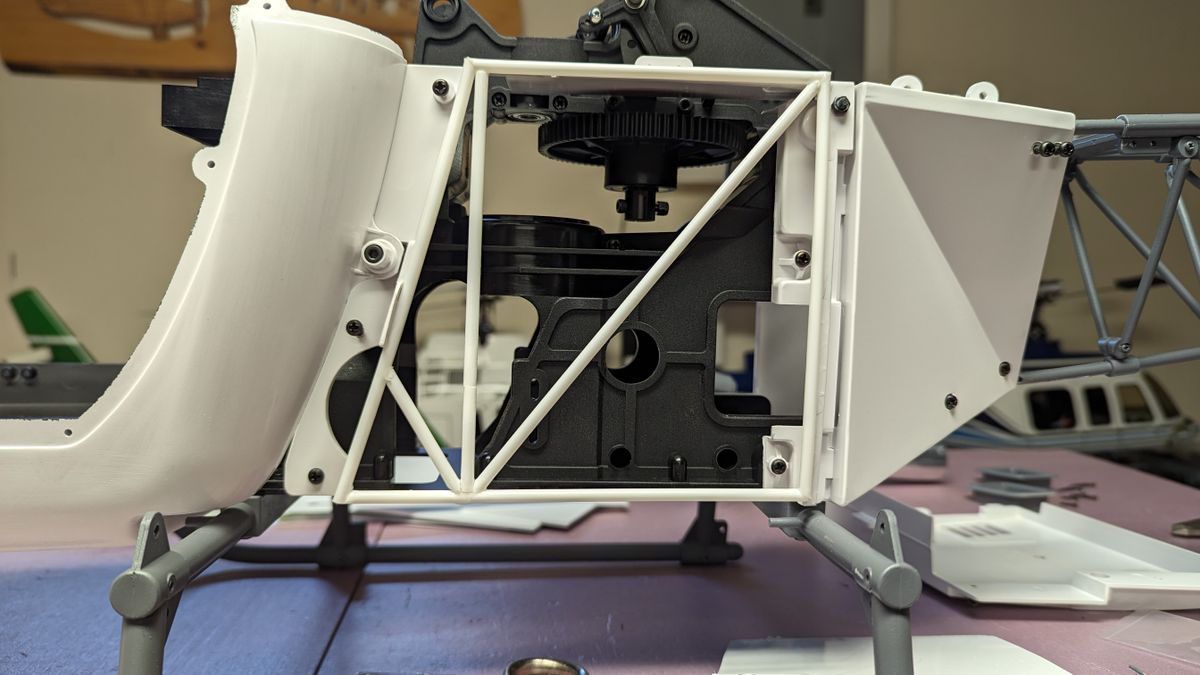
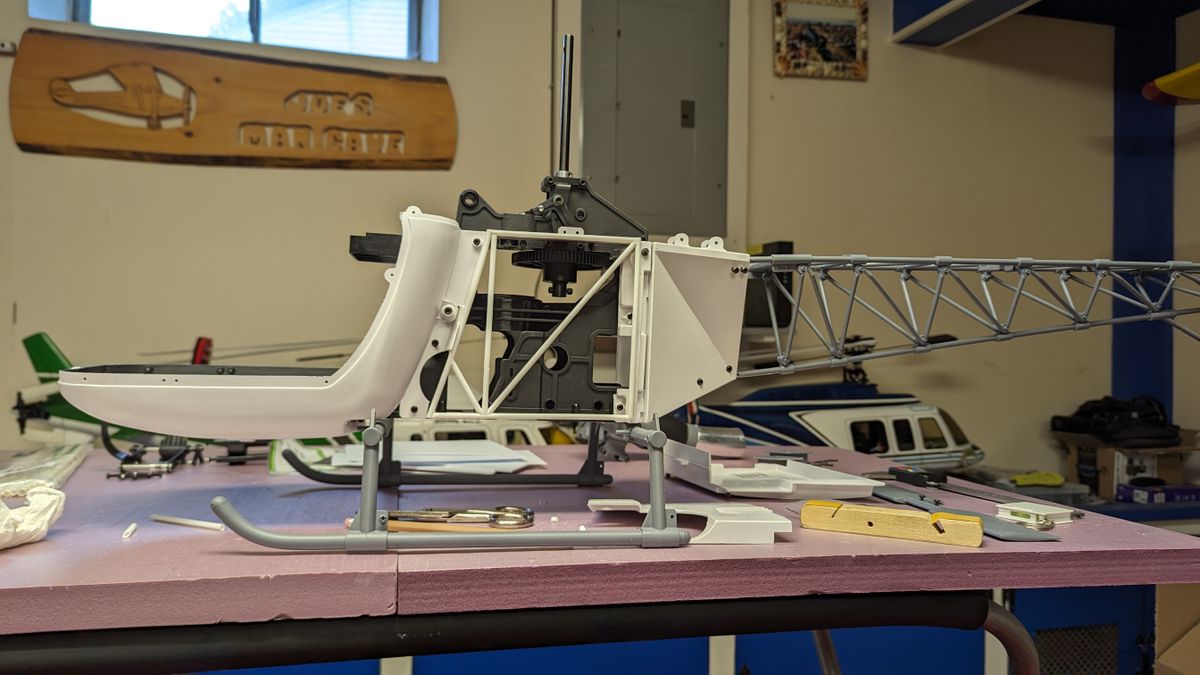
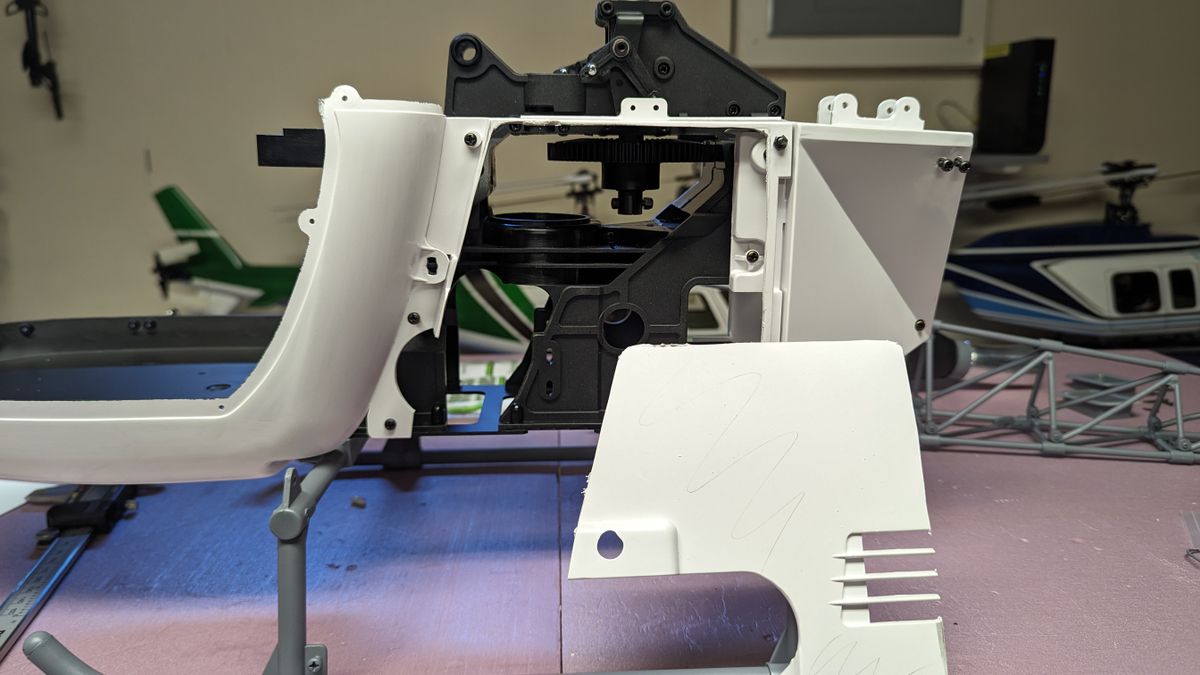
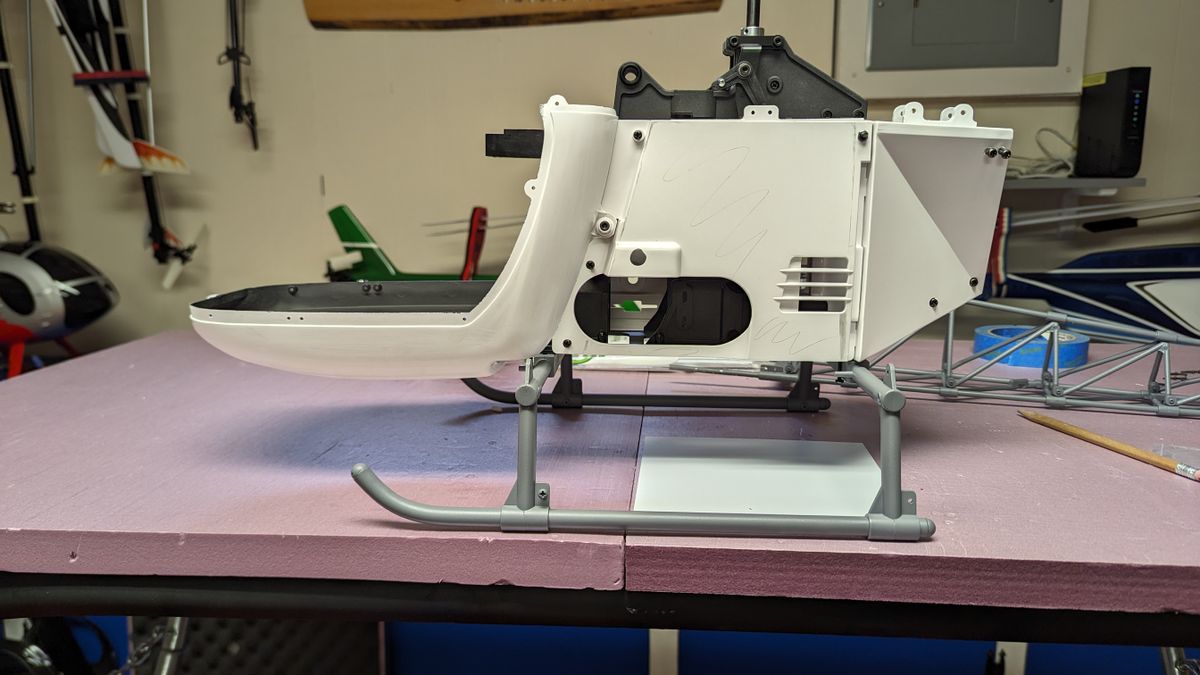
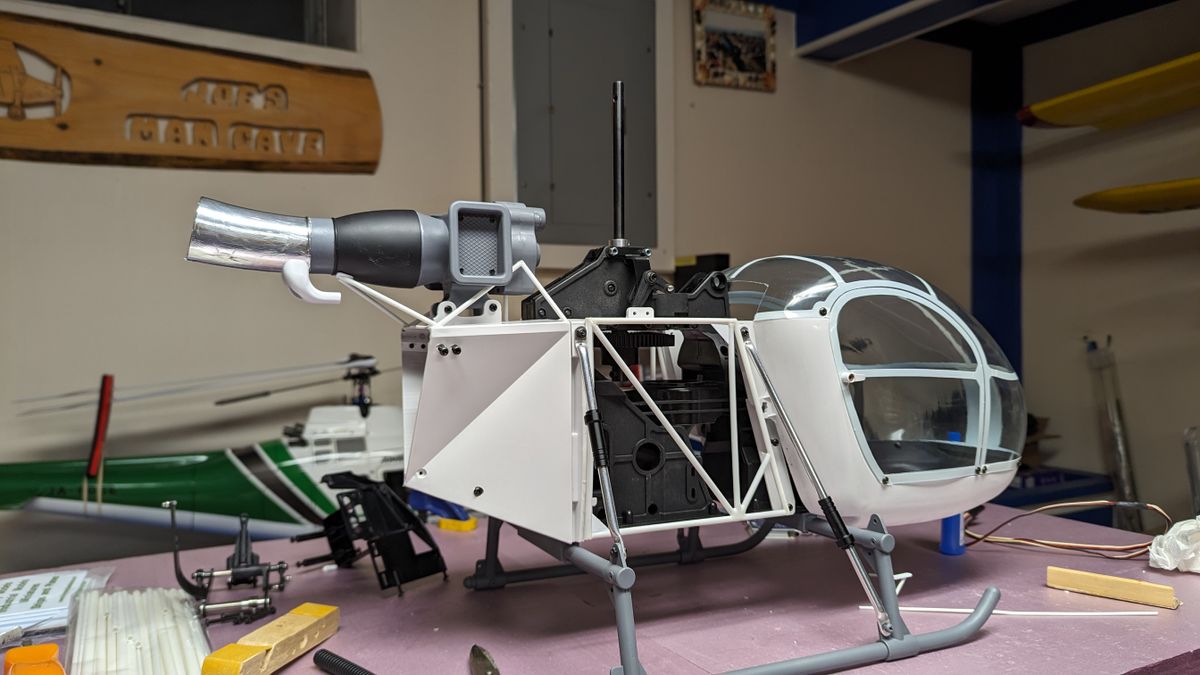
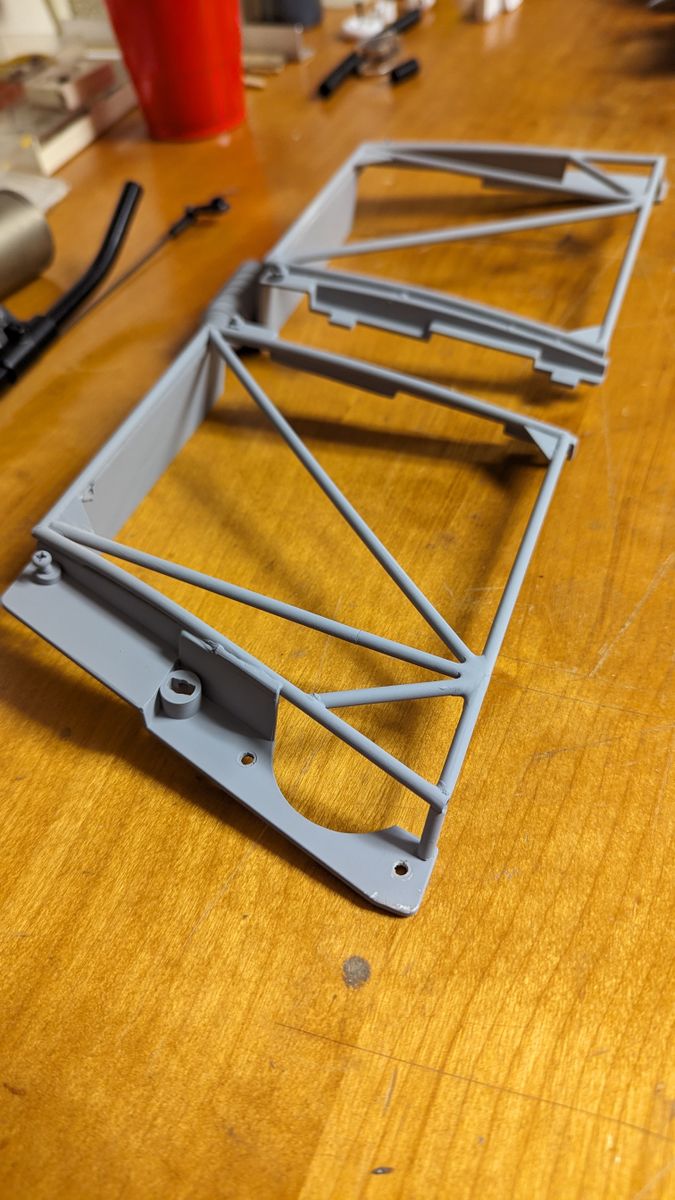
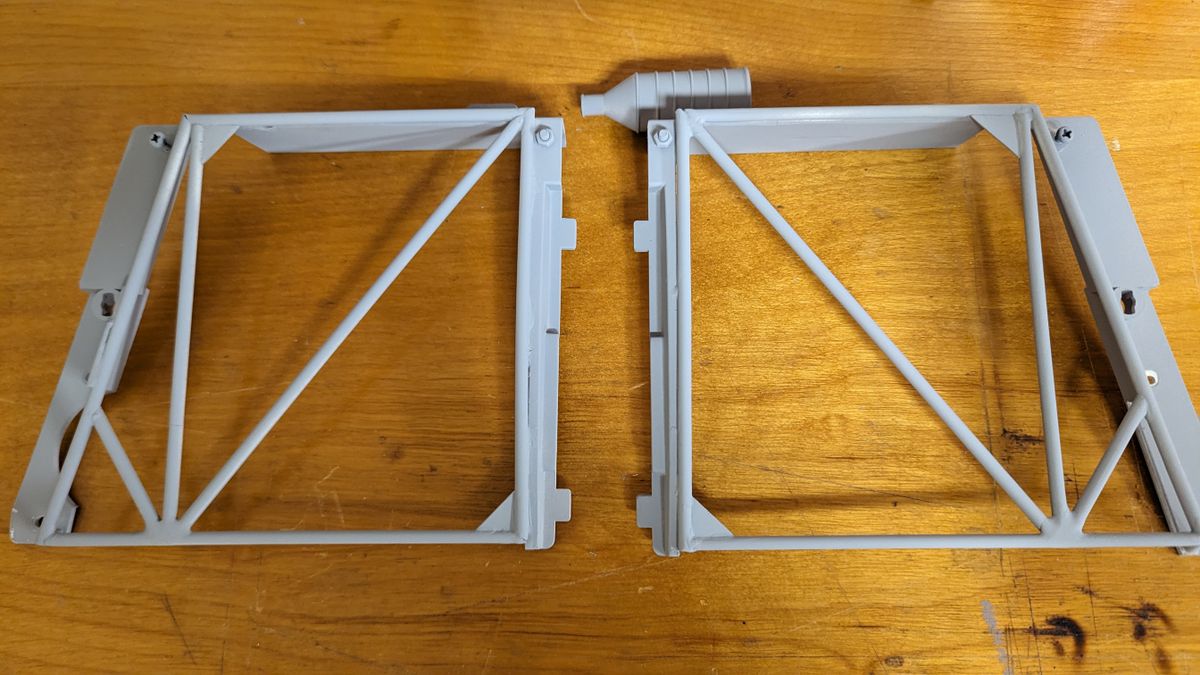
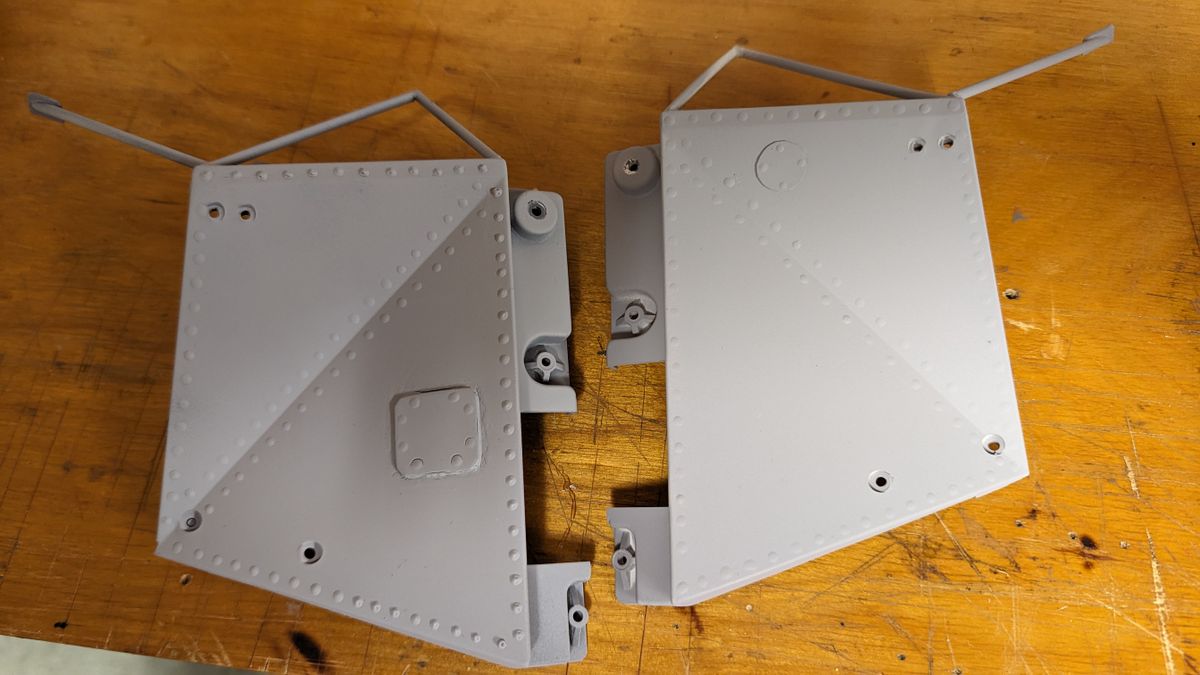
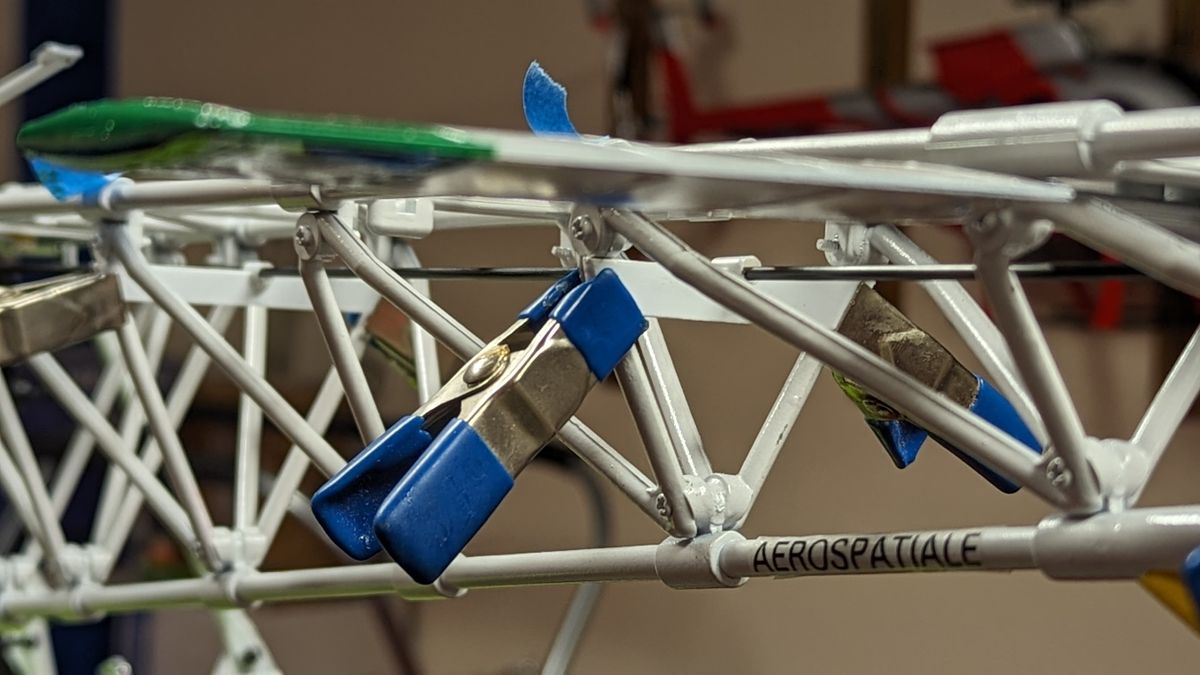
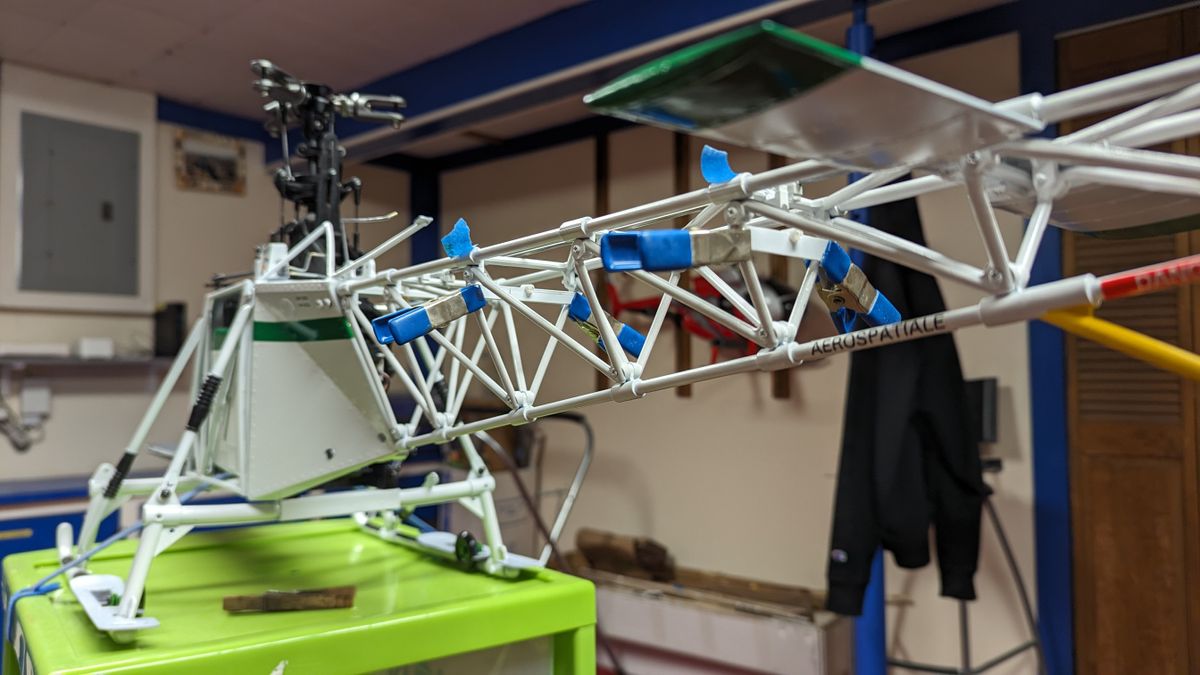
After looking at many Lama images I realized that the side panels on the Hirobo have to go. I found another build on SRCH that removed the bulk of the panel material and used styrene tubing to build the tubular frame. I think I can do that!
I will flow all the joints with thick ca or epoxy and blend them in better then prime. I am hoping that with paint and other add on that the frame of the side panel will "disappear" and not be such an eye sore. I did it this way for ease of mounting and for the canopy to attach to.
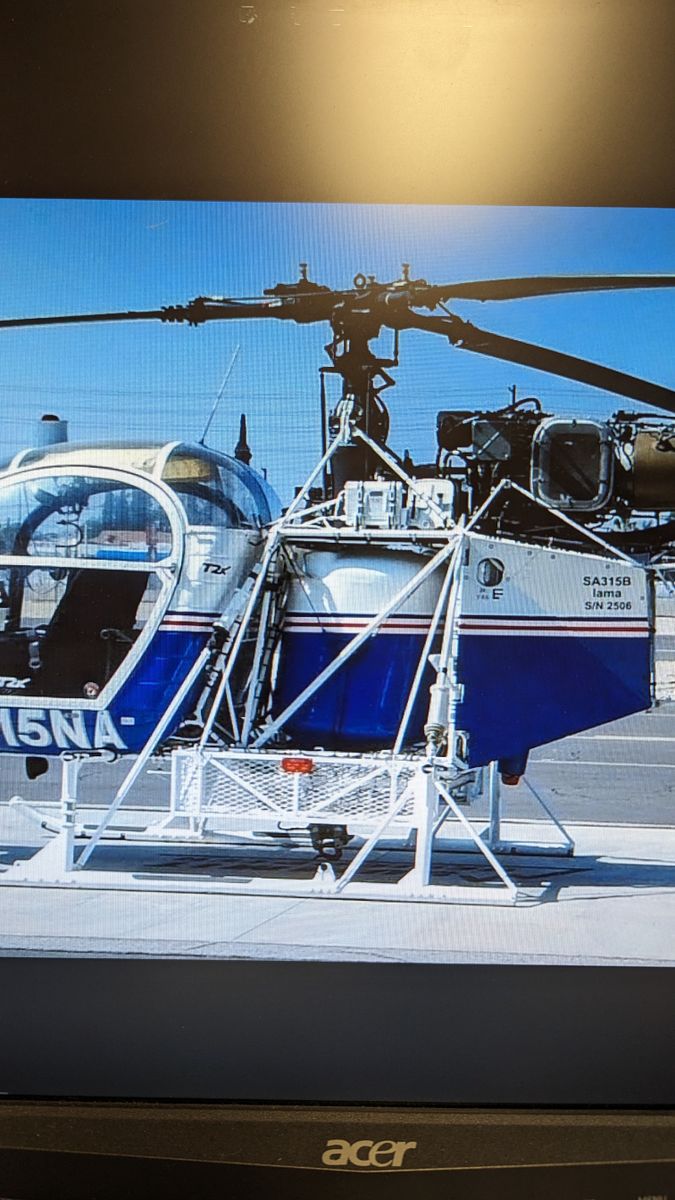
Thinking ahead.
While I wait for more tubing to be delivered, I started to locate the canopy.
This heli is 1:8.3 scale. Would it be worth it to make the mold line doors into actual working doors. The white abs portion of the canopy has a nice step to it that could act as a jamb. I would just need to build a jamb on the clear portion and make a front post for the hinges.
Worth it or avoid the headache and just add detail? 🤔
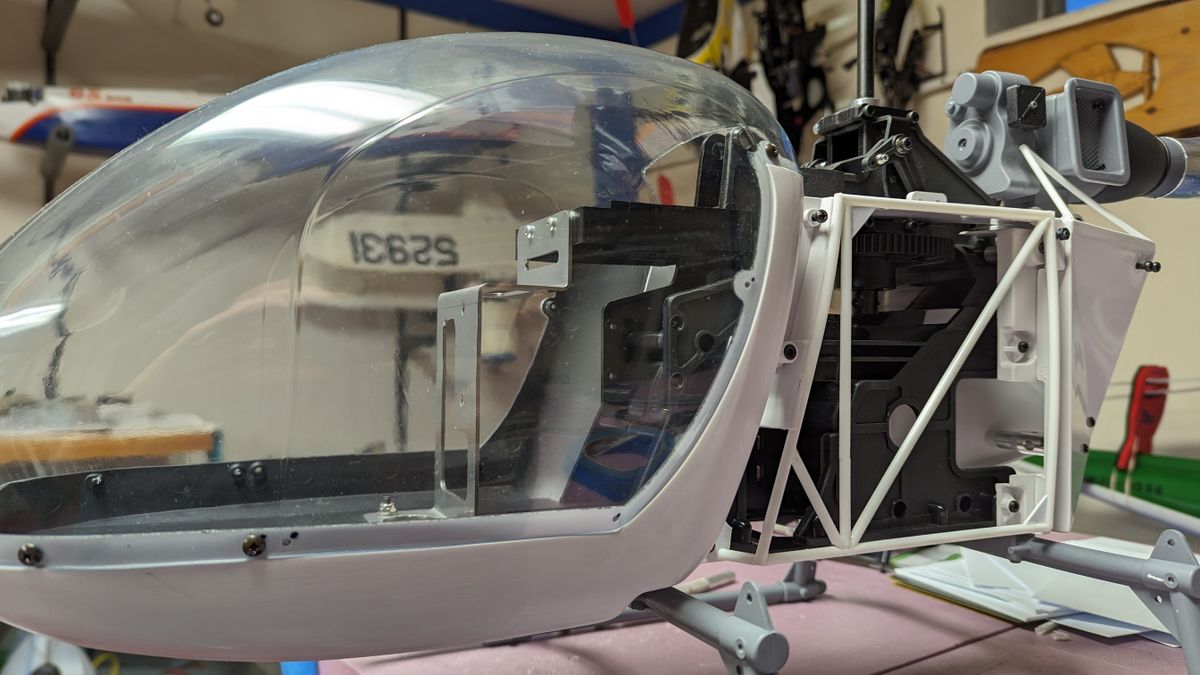
A little more progress
I haven't had much time save for an hour here and there lately to work on the Lama. I did manage to get a few more details built.
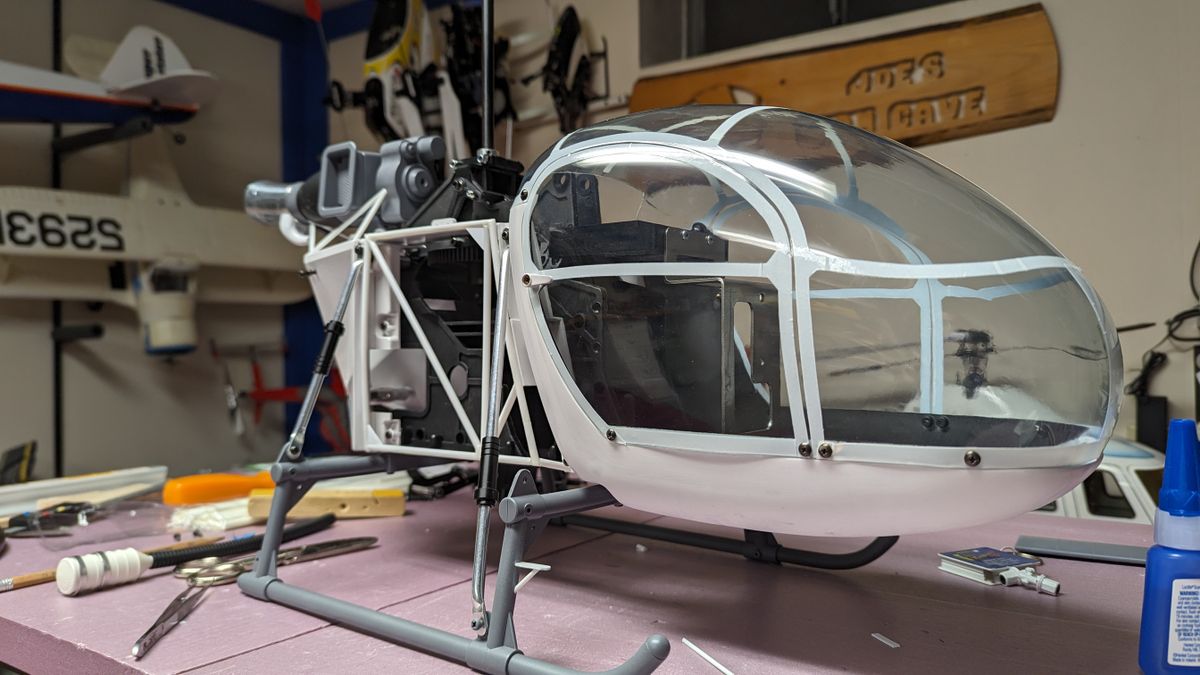
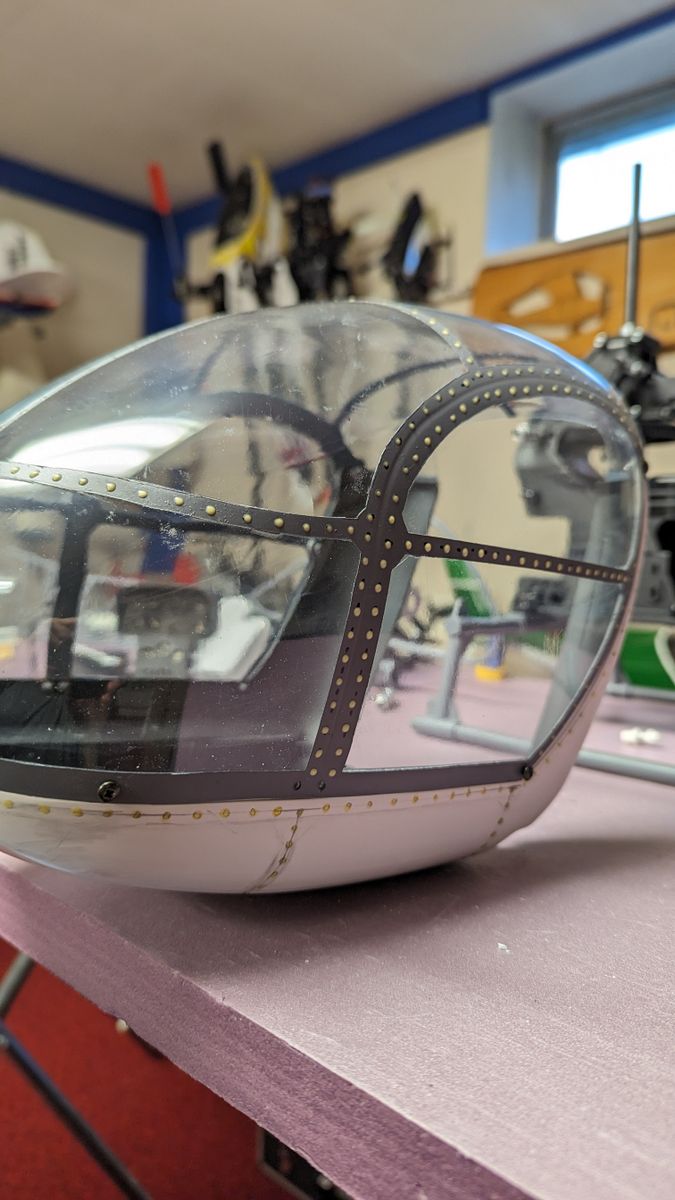
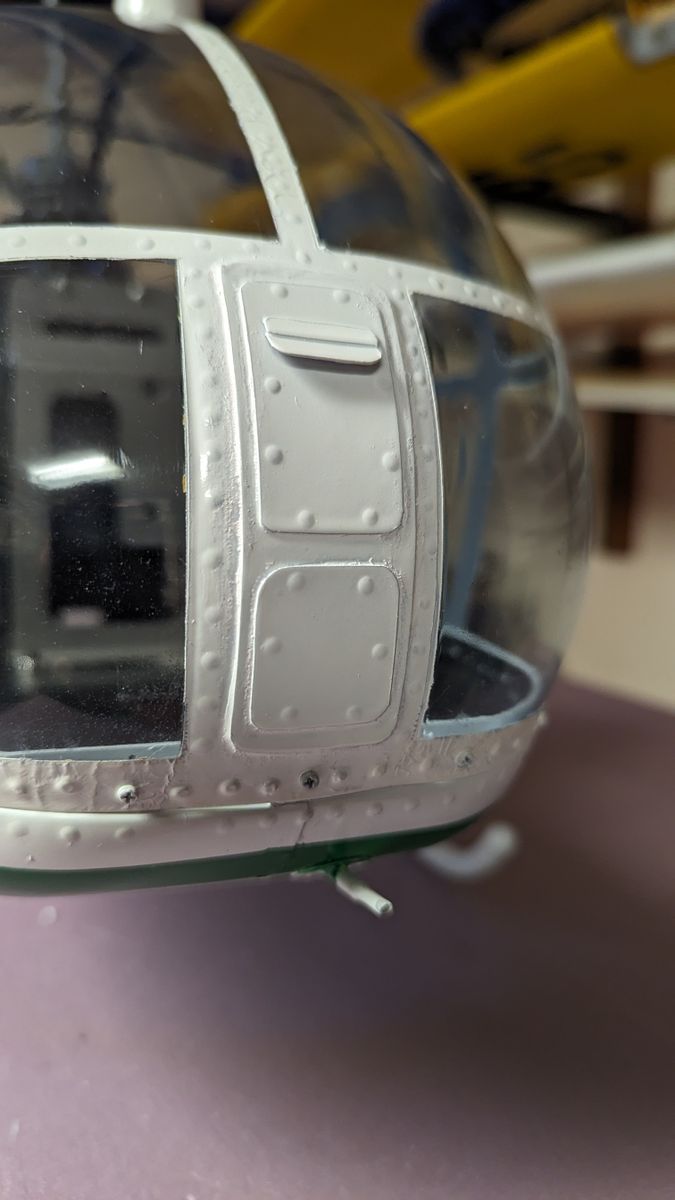
I absolutely hate the look of the canopy with the supplied Hirobo decals. After careful consult with the experts here at SHP, I will not be making the doors functional. At this point my next idea is to use the decals as masking outlines then remove and paint the canopy framing. A few paint layers should yield some panel lines. Then I can apply rivets.
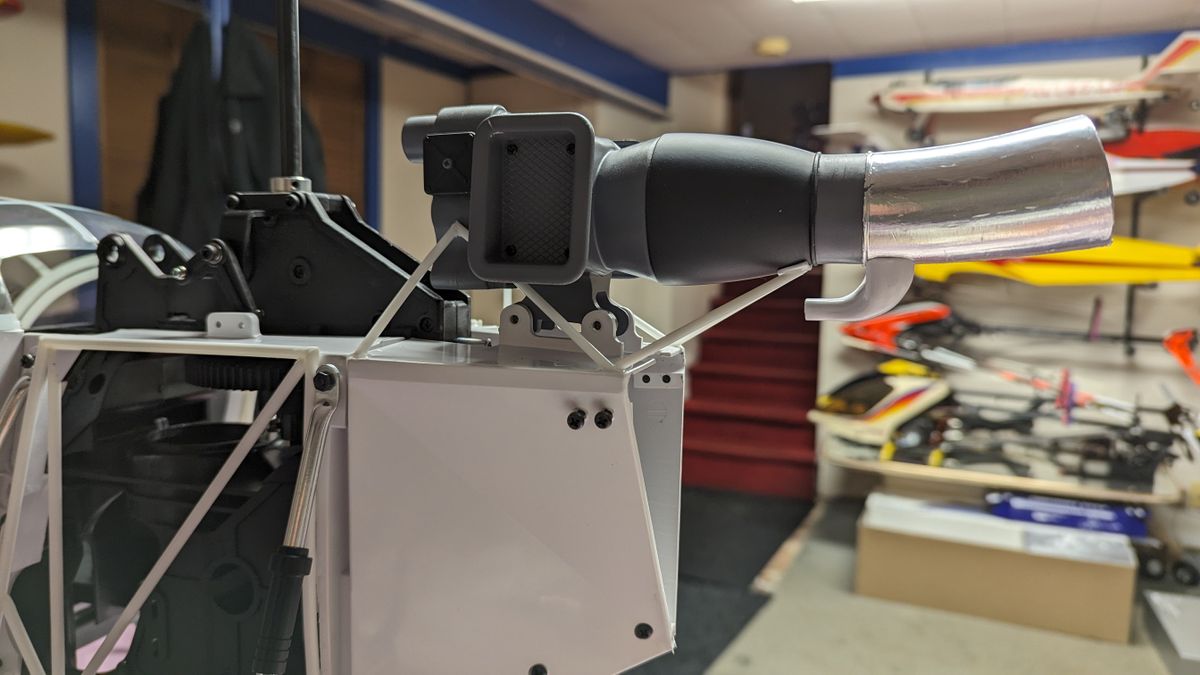
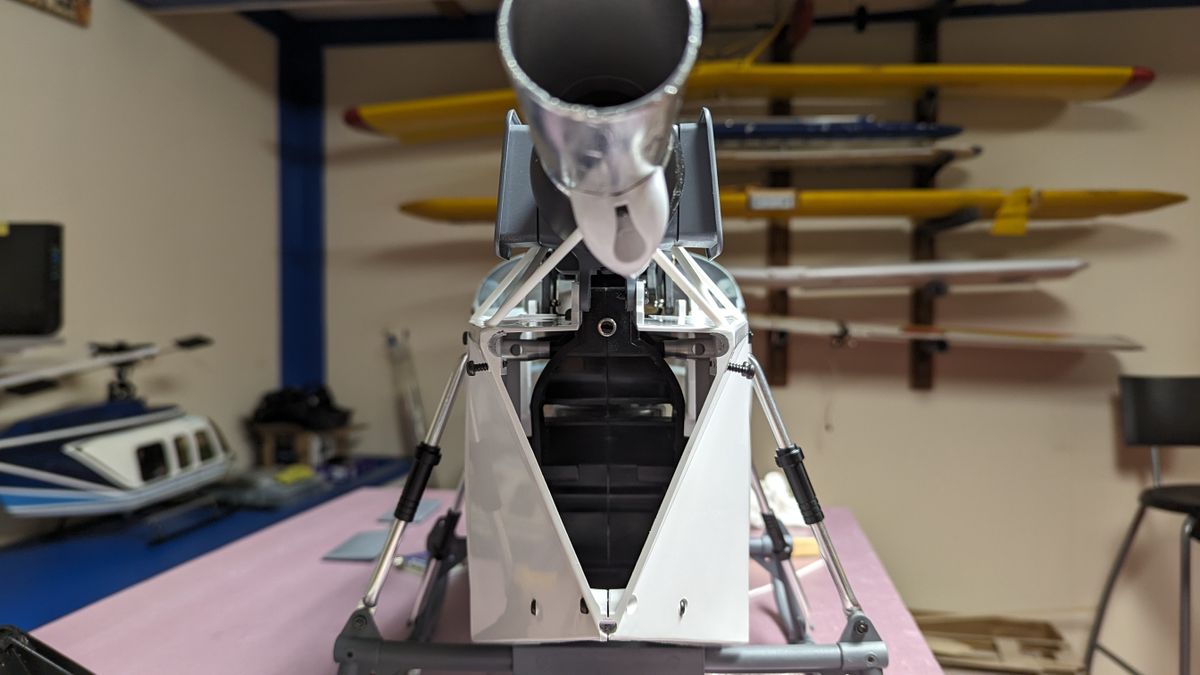
Chugging along
I have gotten some more work done on the Hirobo Lama these past couple of weekends thanks to the crazy rain we have been having.
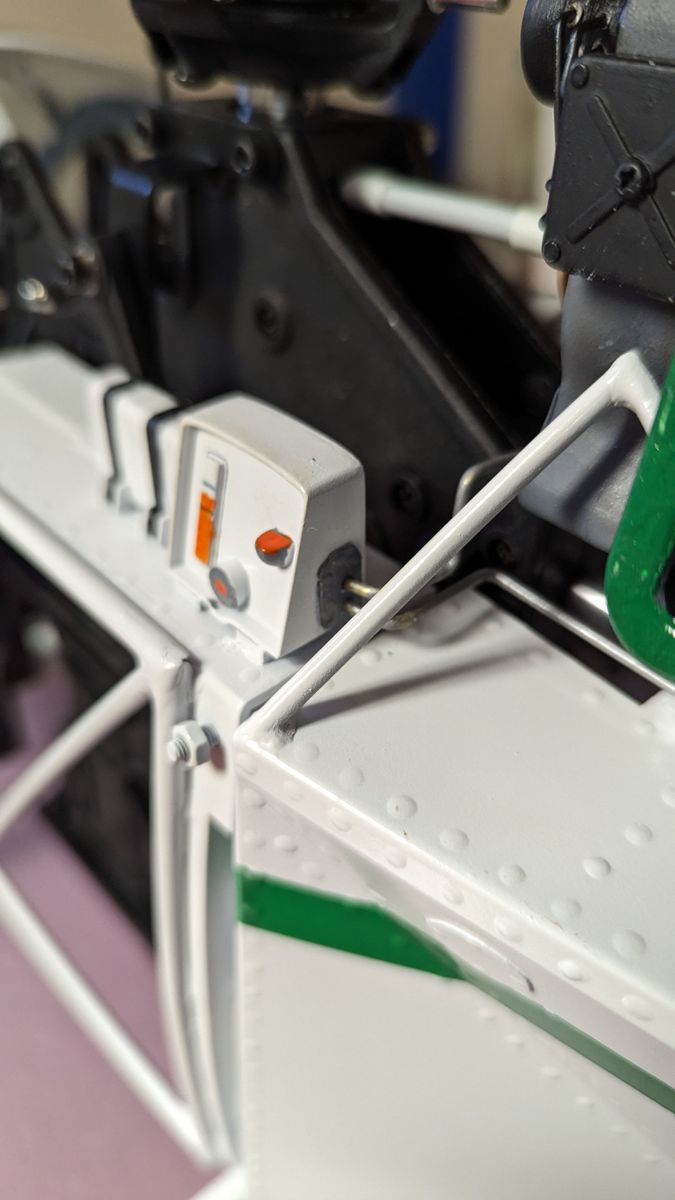
I got the side panels in primer with rivets and a couple access panels. Also the canopy came out pretty good and added rivets and some nose scale work. I have to fill some spots with epoxy and micro balloons and rework . All in all, I'm happy with it so far.
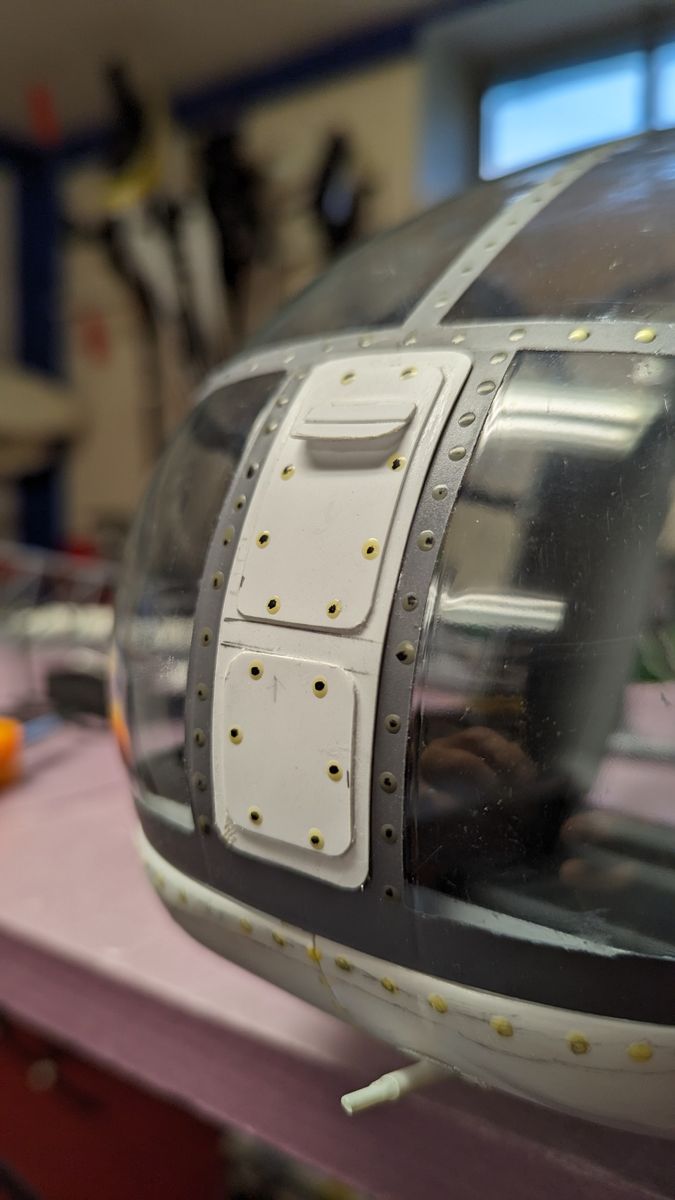
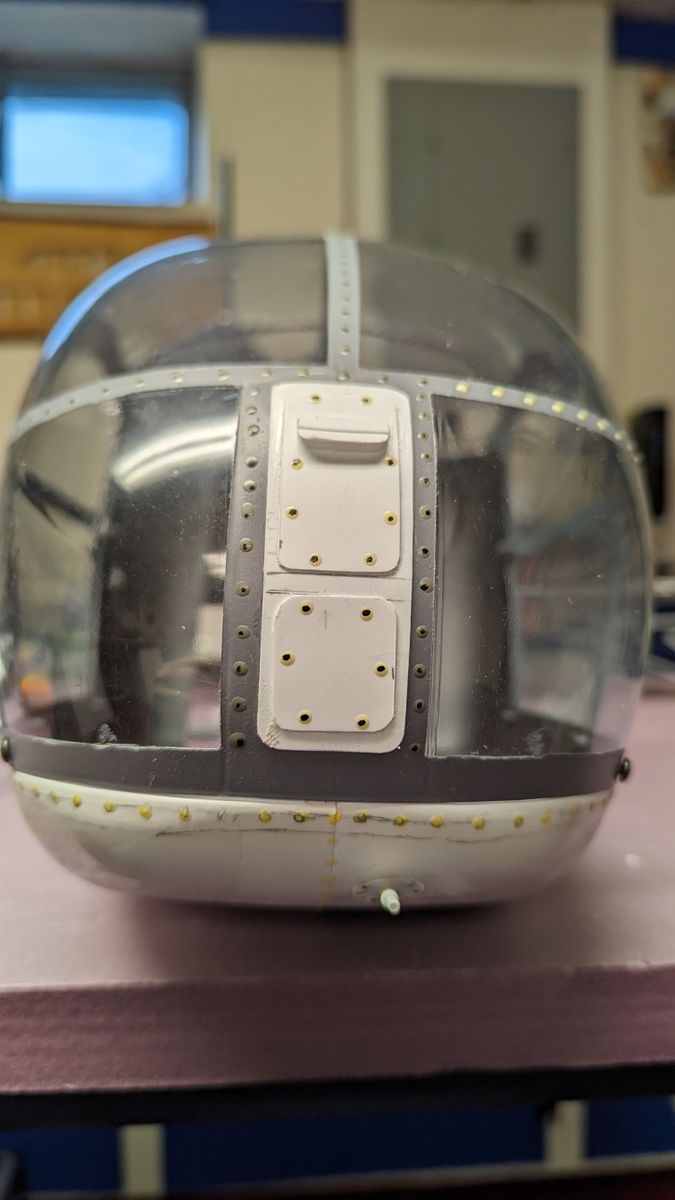
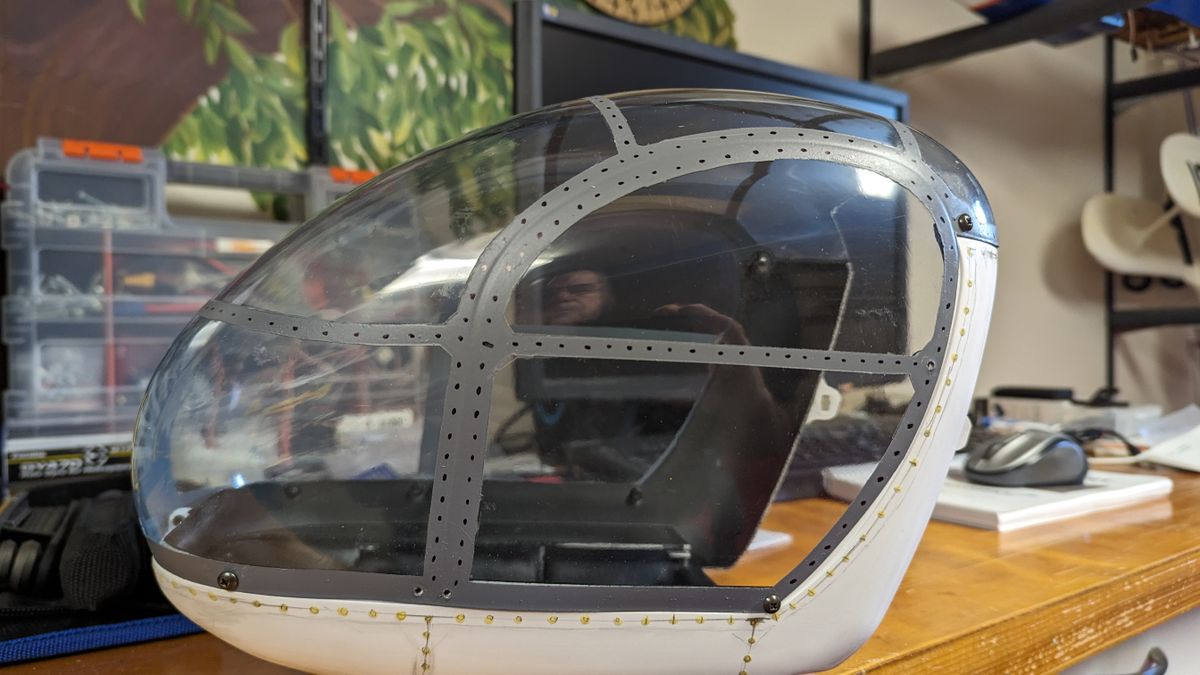
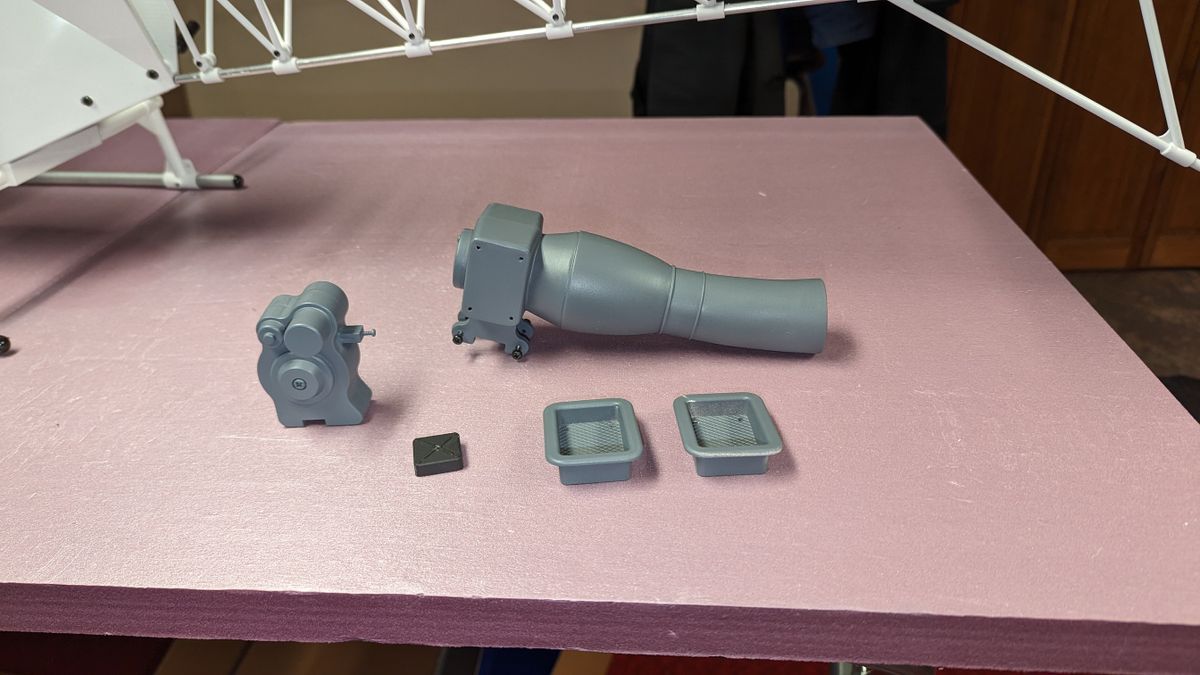
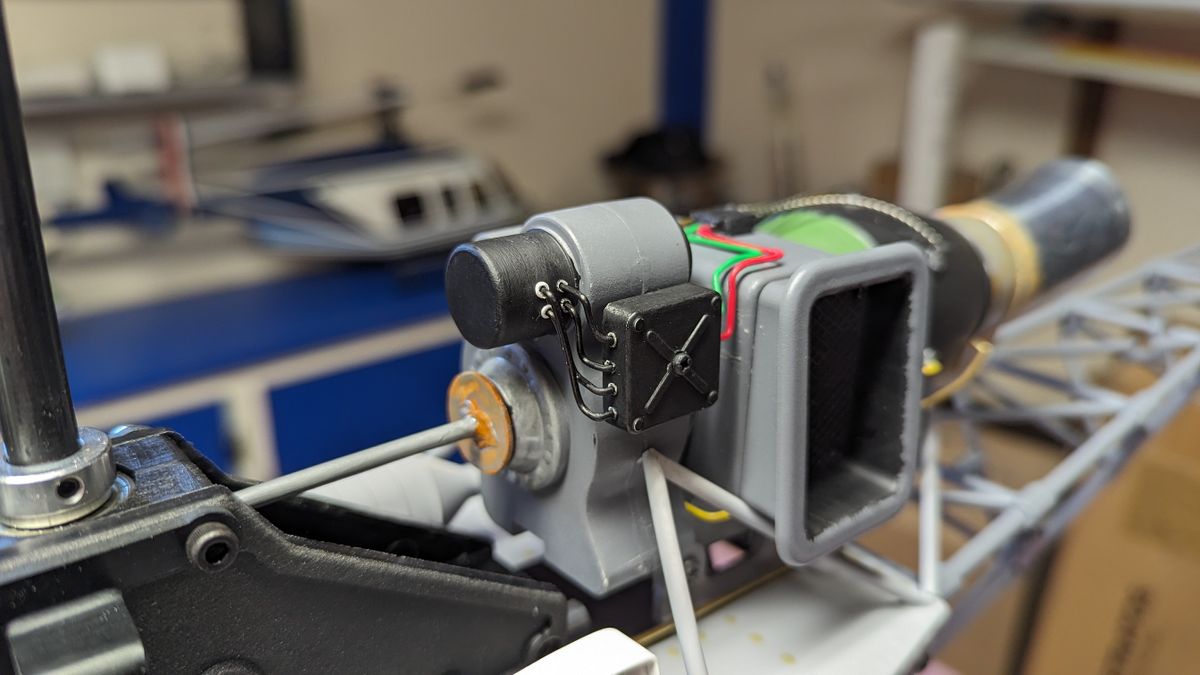
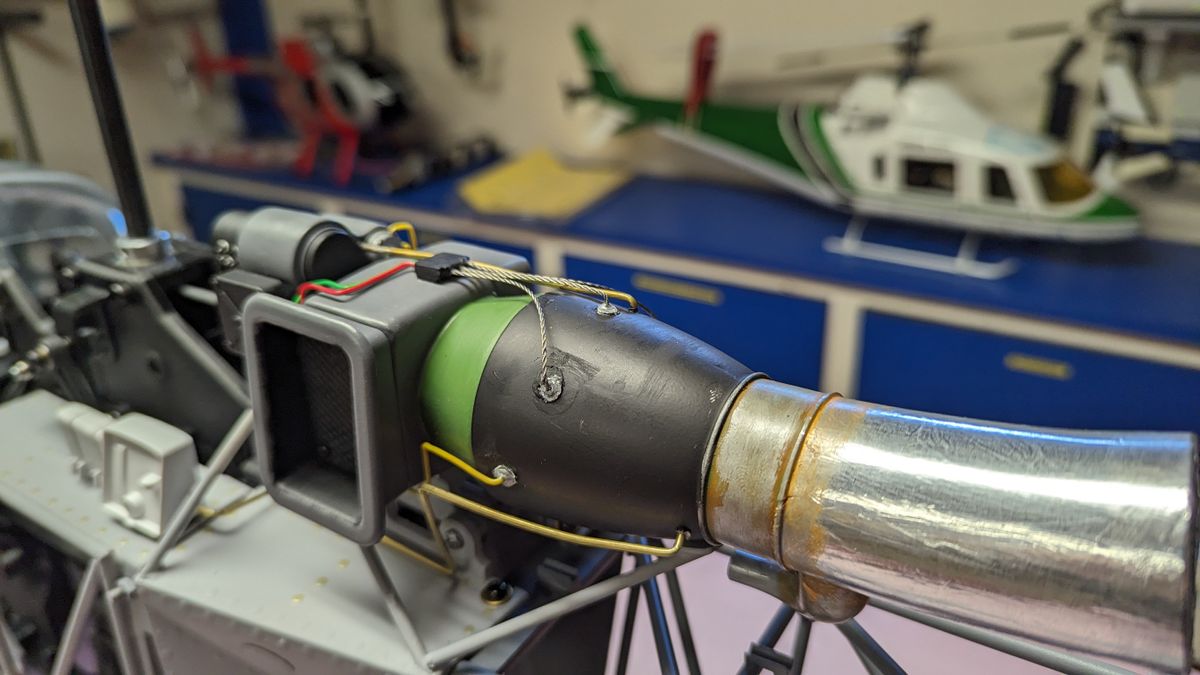
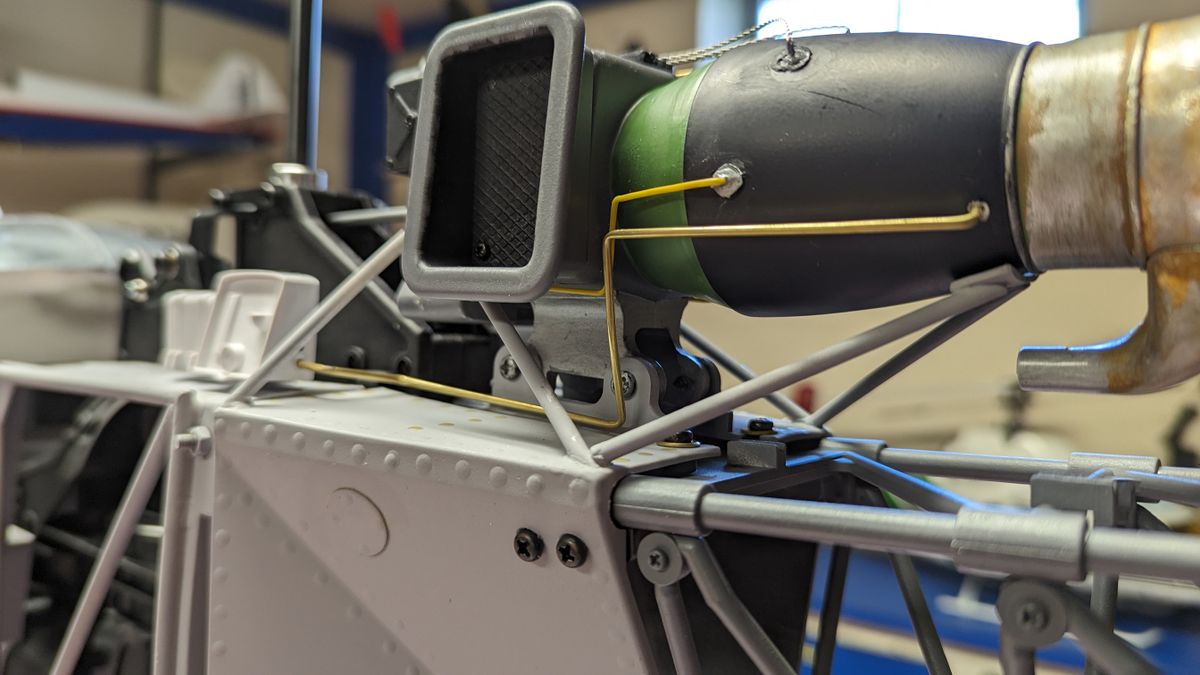
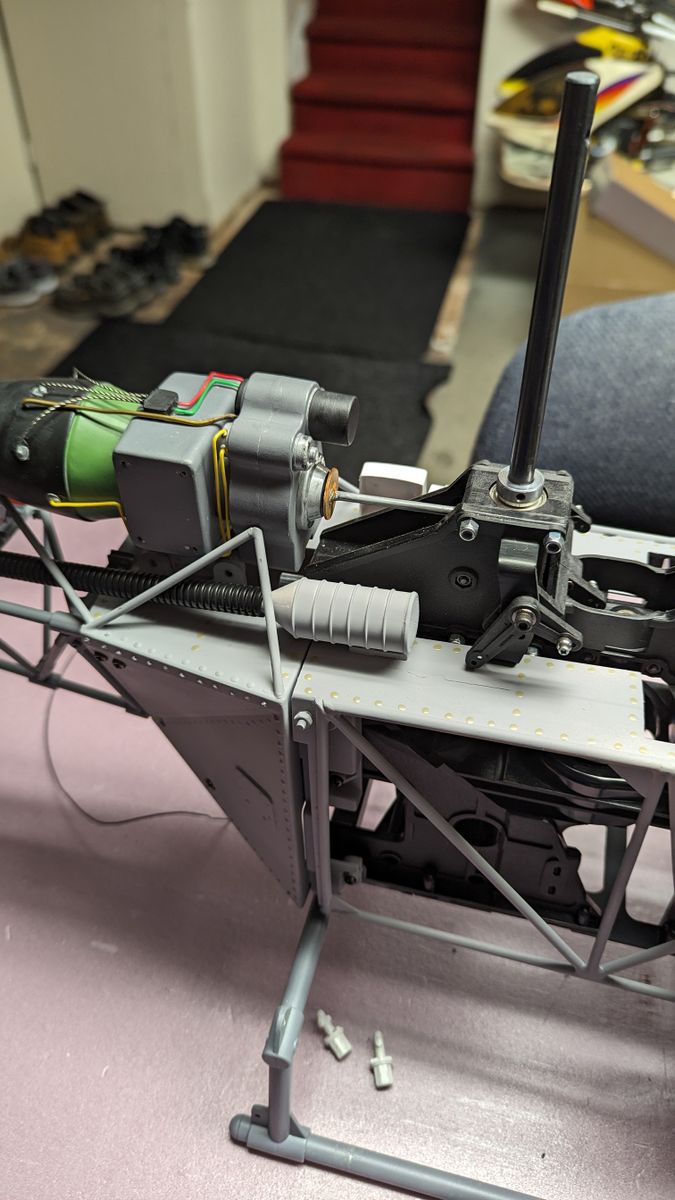
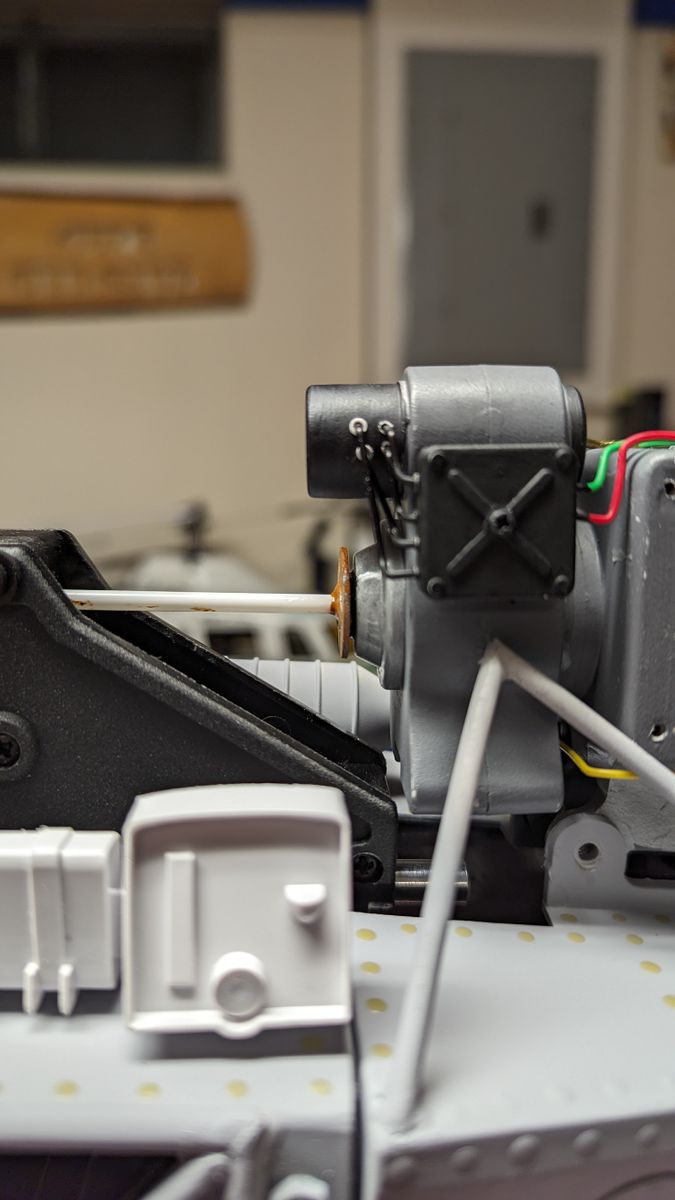
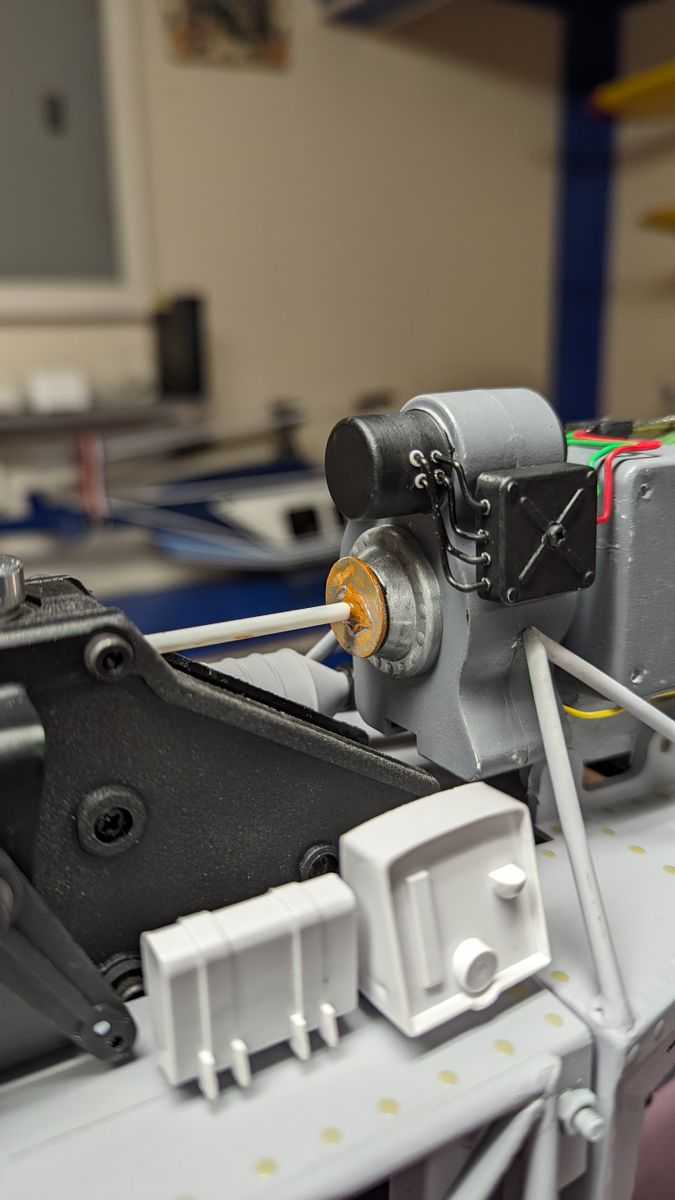
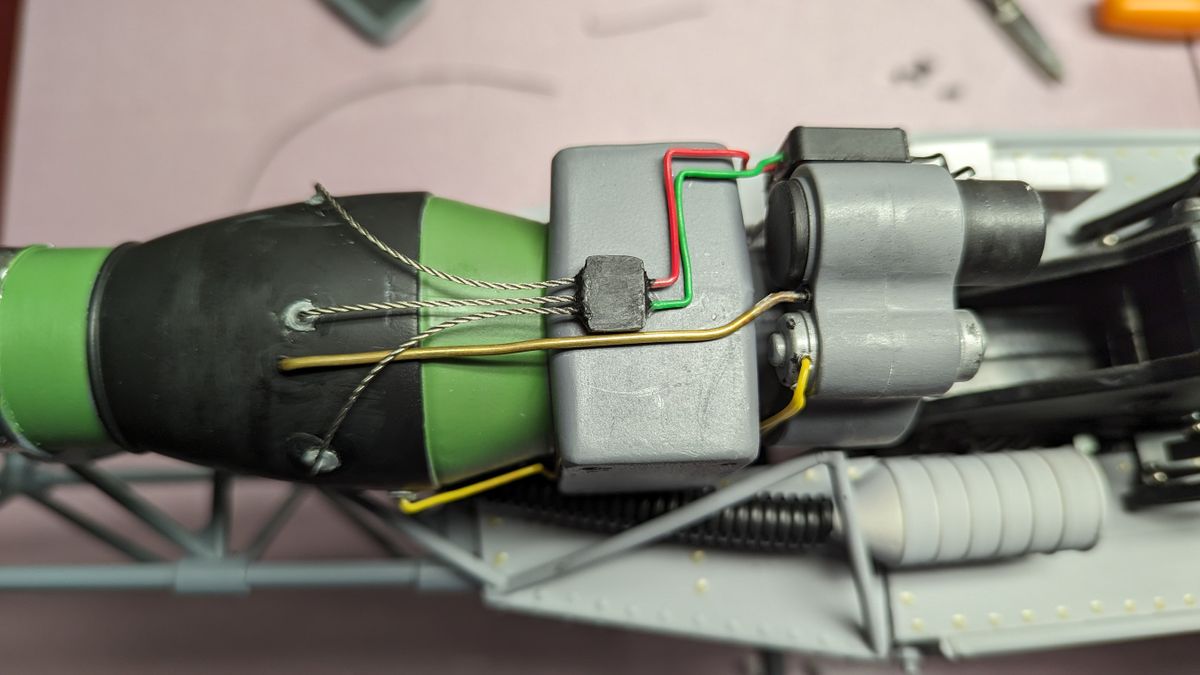
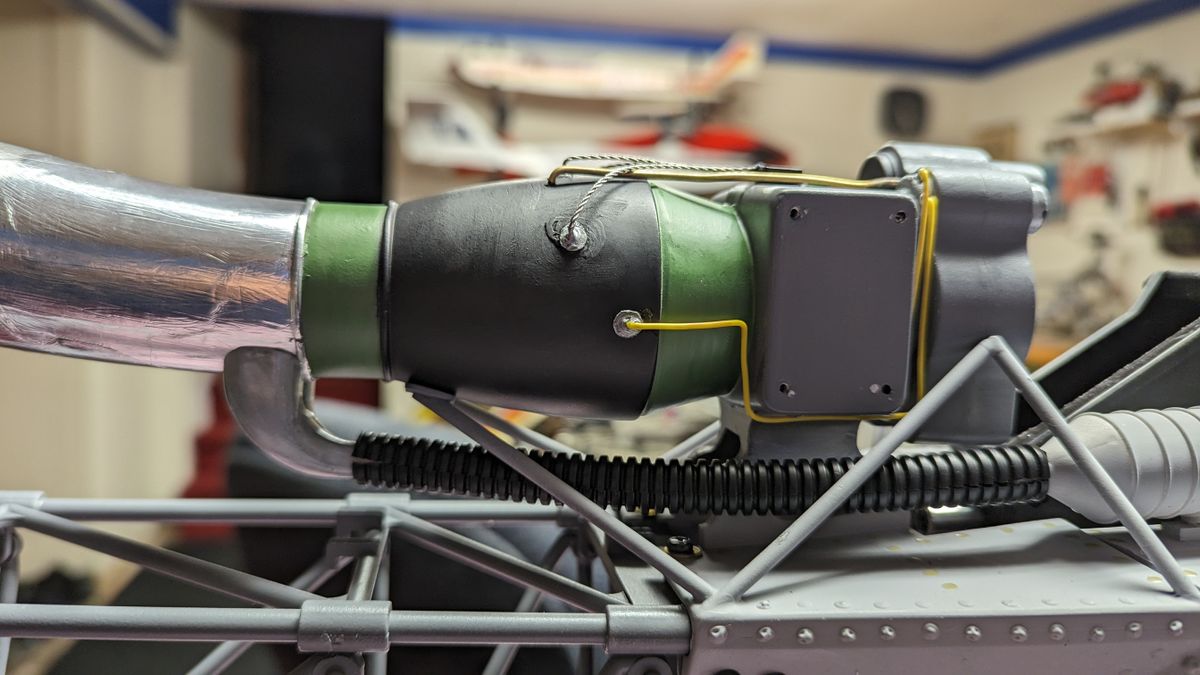
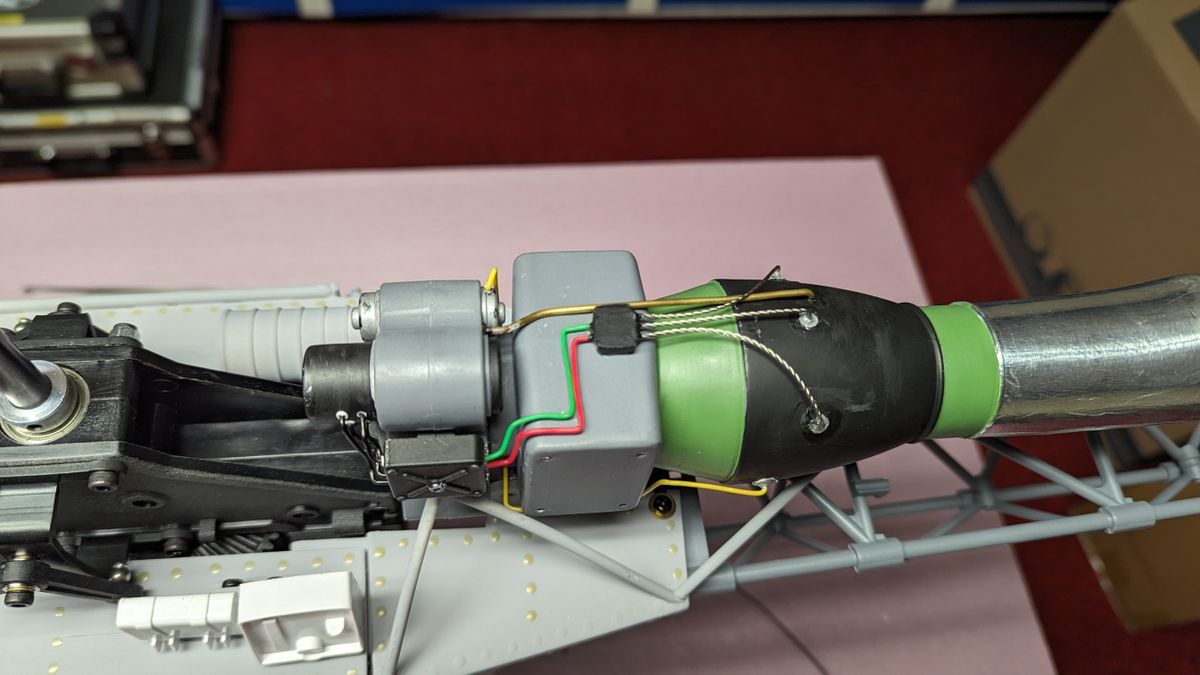
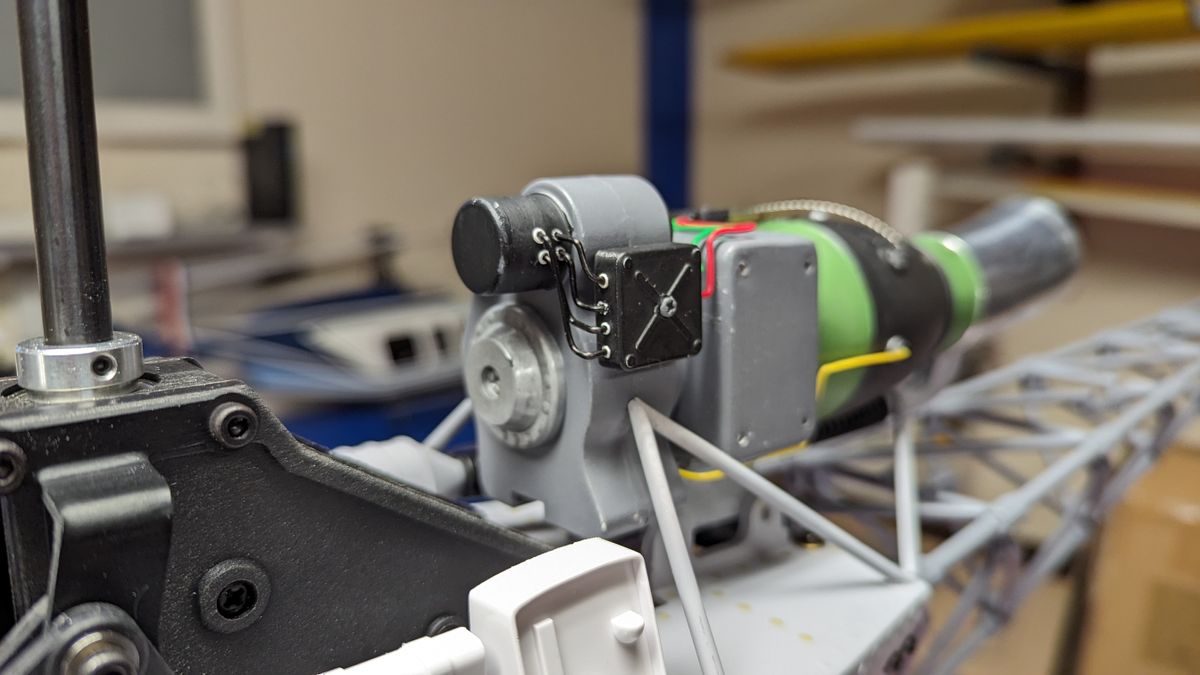
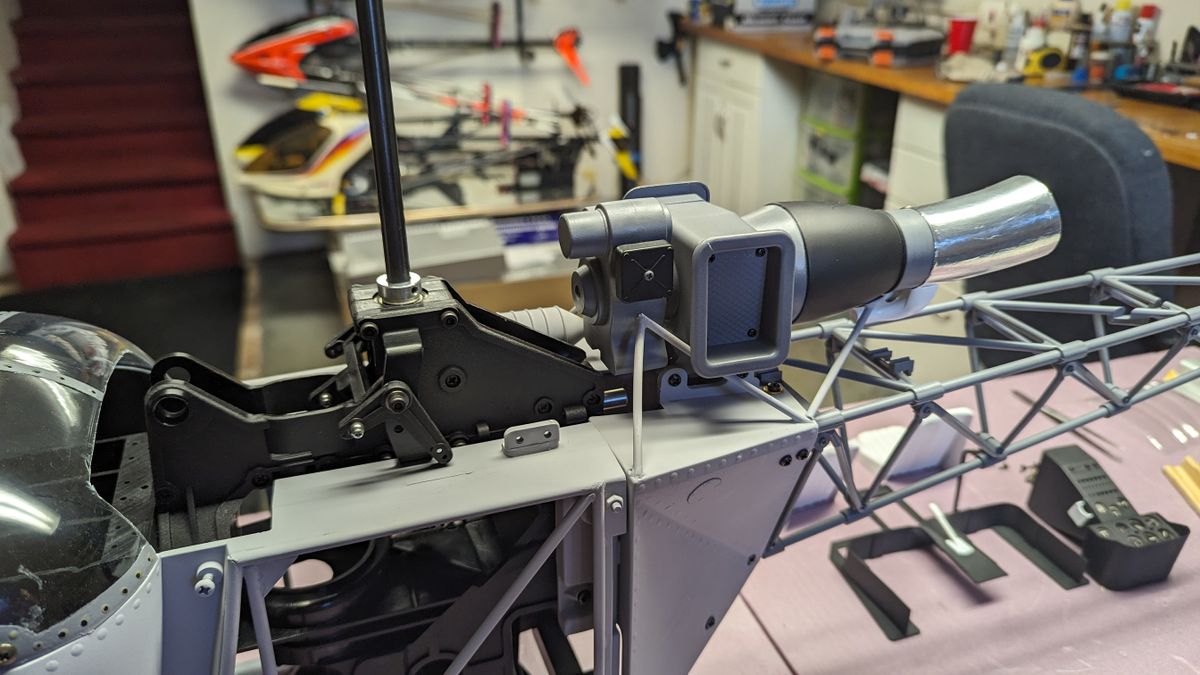
The "DTD's" (dummy turbine details)
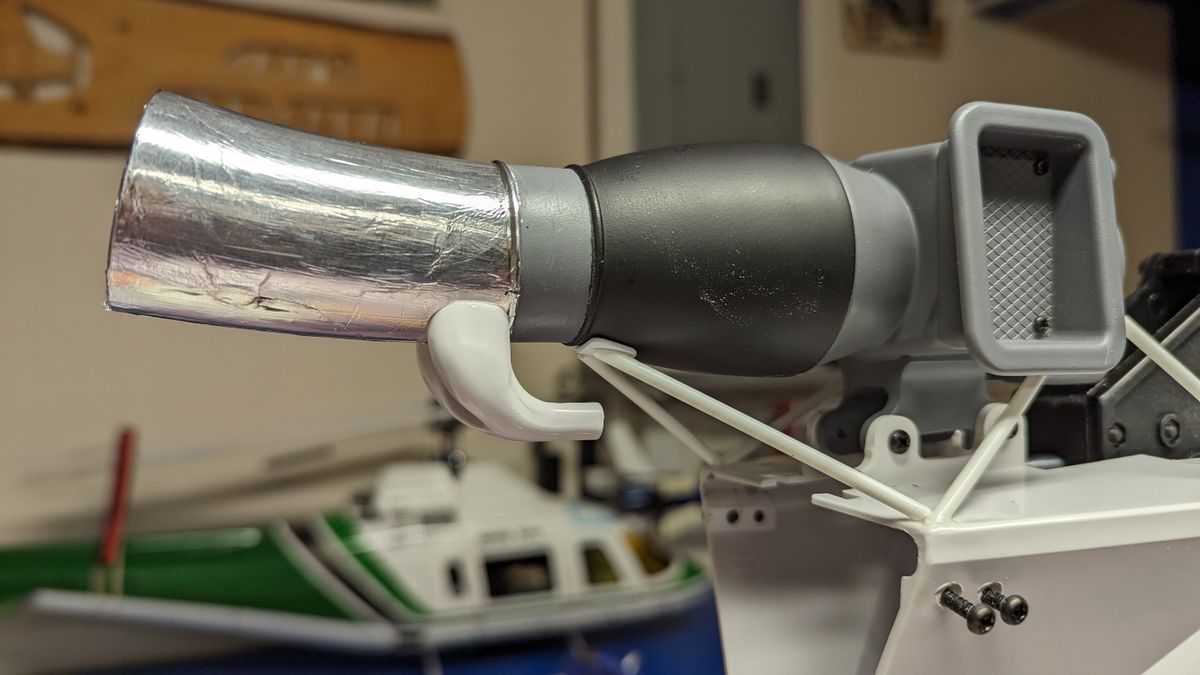
So... I started working on adding detail to the dummy turbine. I know I needed to reproduce things like wires, ignition leads, plumbing, fuel lines etc. I even managed to make a quasi rotor brake and high speed shaft.
The materials used are sections of telephone wire, 1/16 brass tubing, scrap pieces of aviation safety cable, and styrene for the fittings and driveshaft. Also keeping in mind that I have to have a way of removing what details I add in the case of disassembly.
While it is not complete and needs some airbrush details, to me it is becoming a bit cartoonish and unrealistic. I may order another turbine and start over. Any advice is appreciated!
Paint!
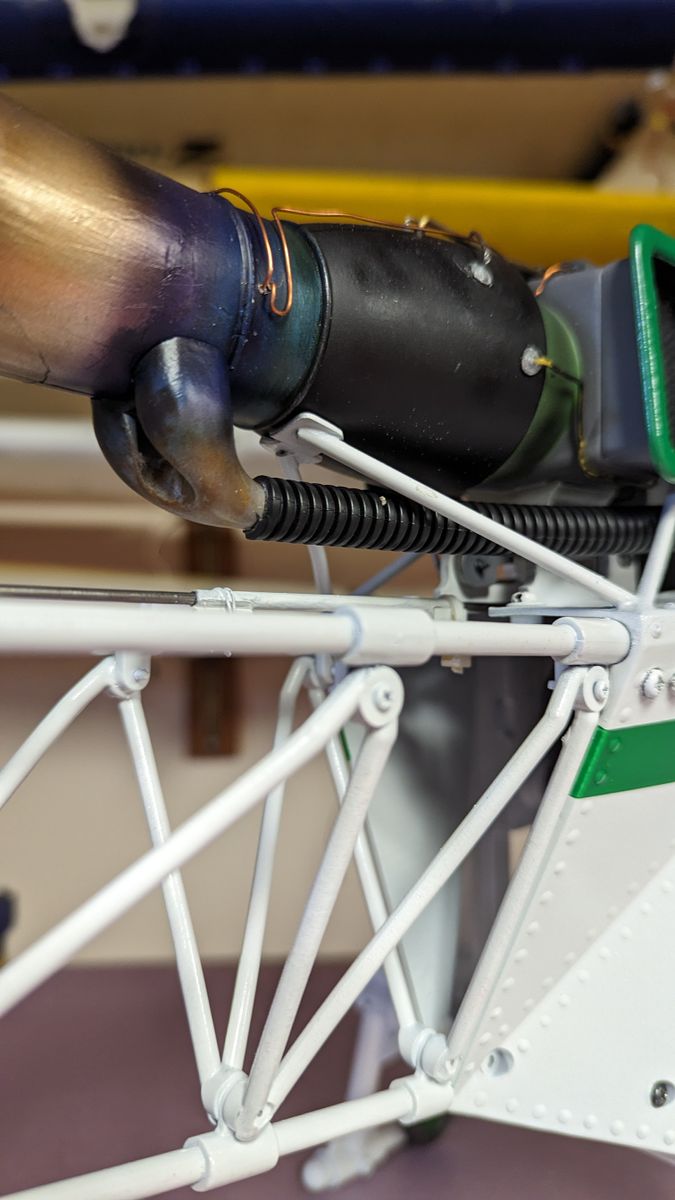
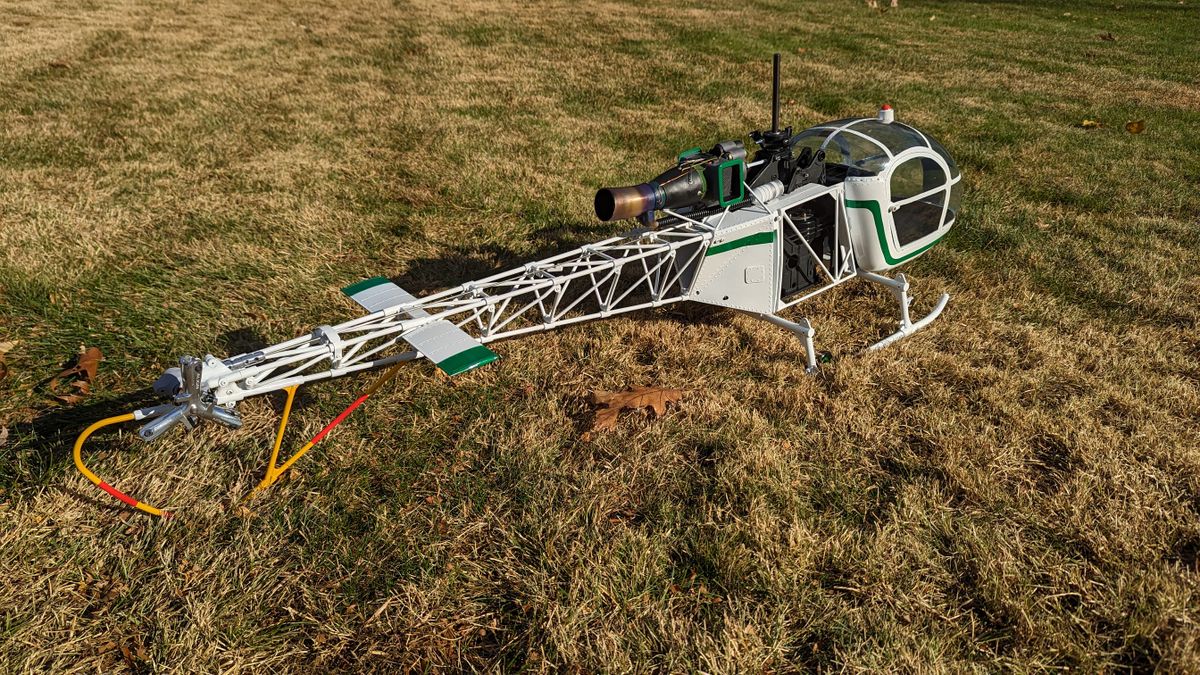
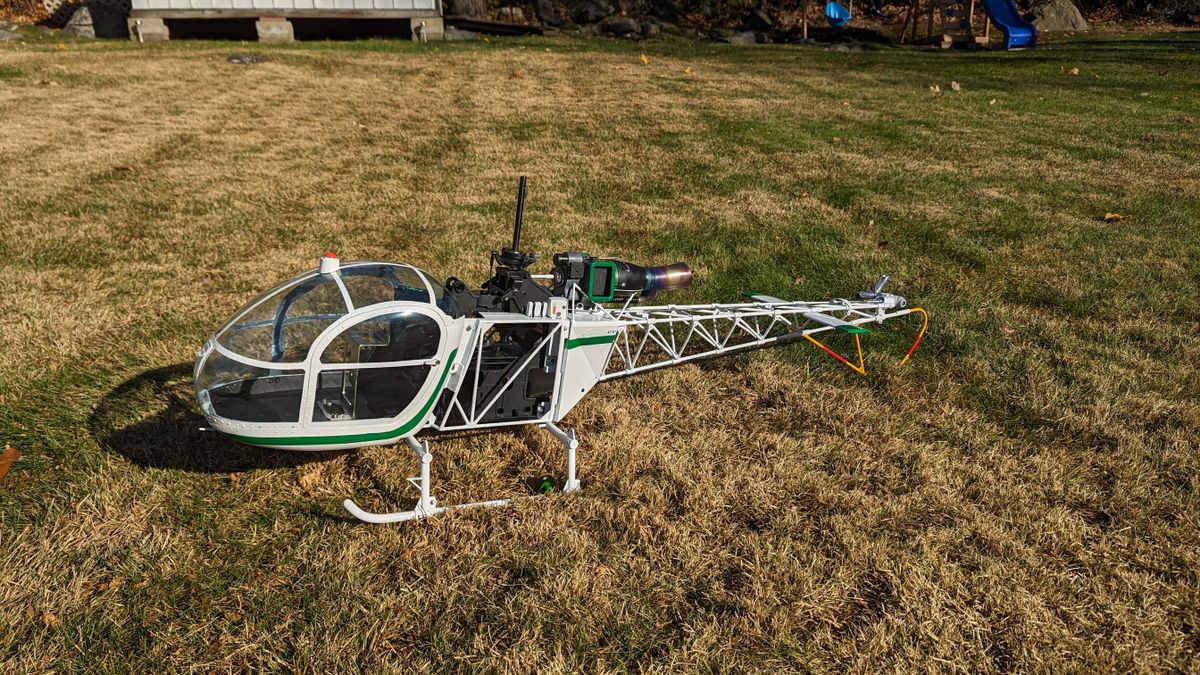
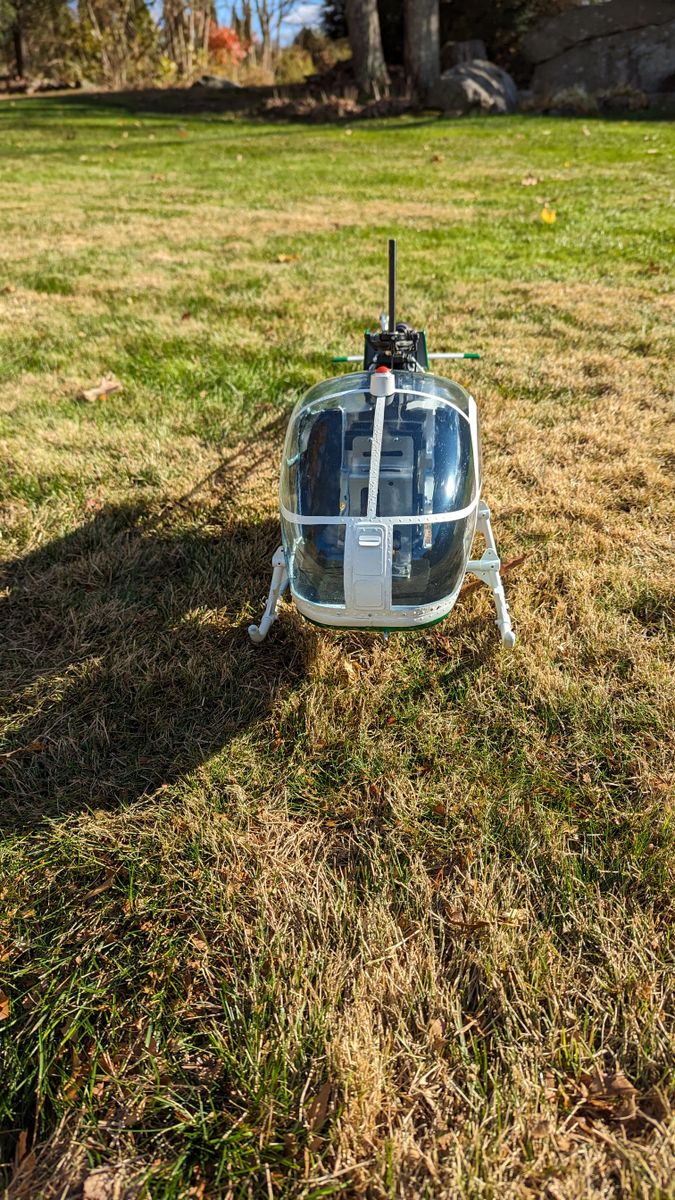
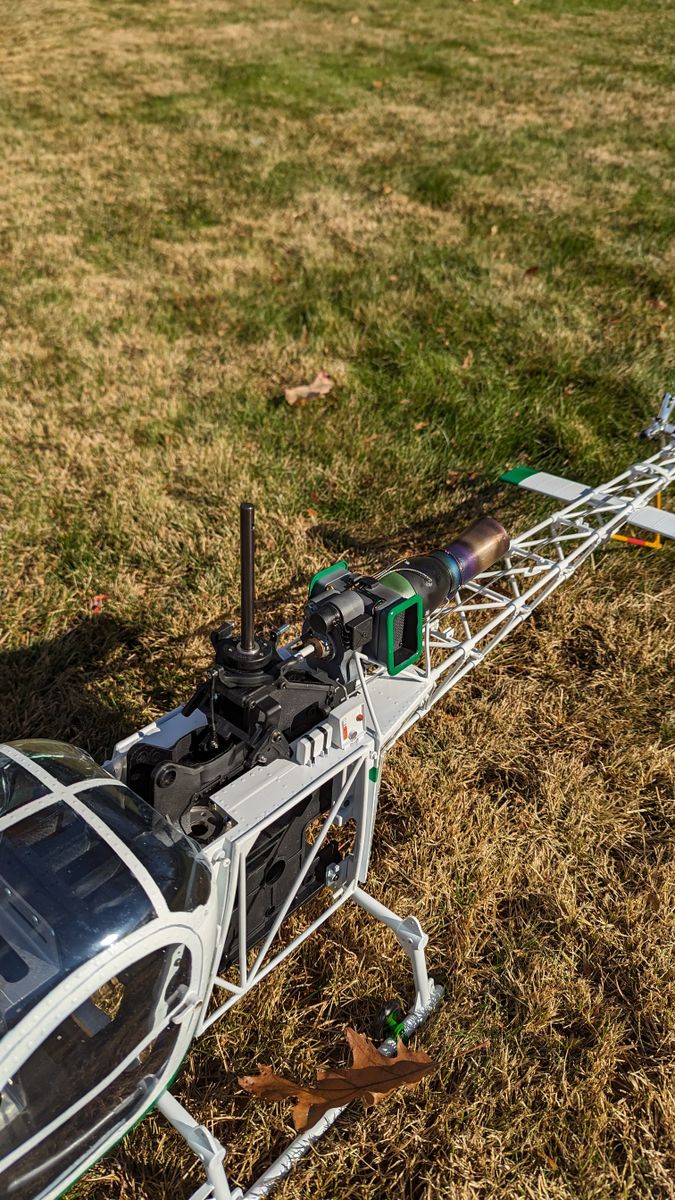
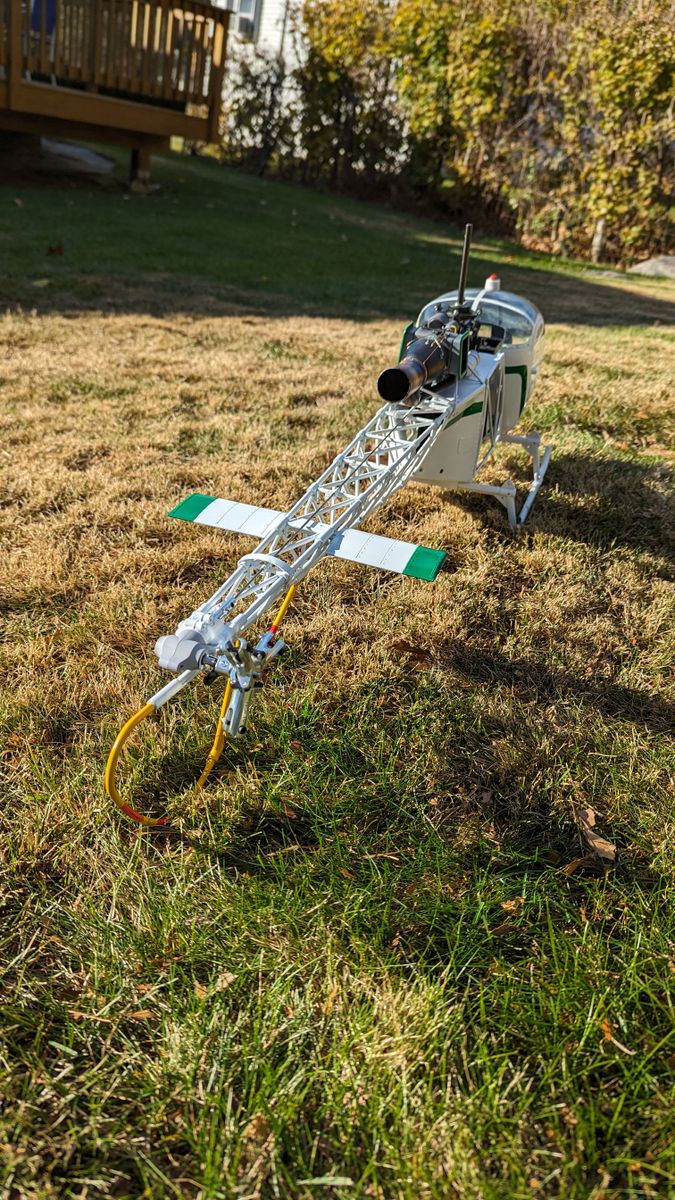
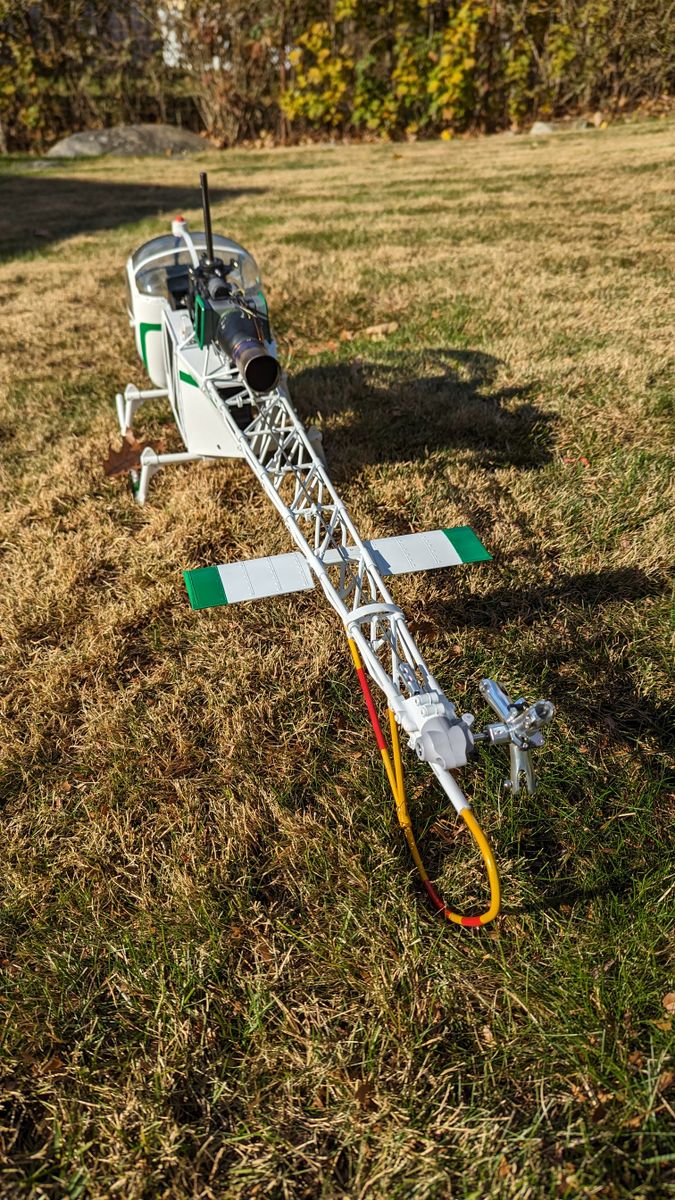
A little update. Got the Lama painted. Not very happy with it. The white paint wrinkled in several spots on the canopy. Not sure why. I cleaned everything with a wipe of a tack rag and then alcohol before spaying. The primer was Rustolium and the White is Rustolium also.
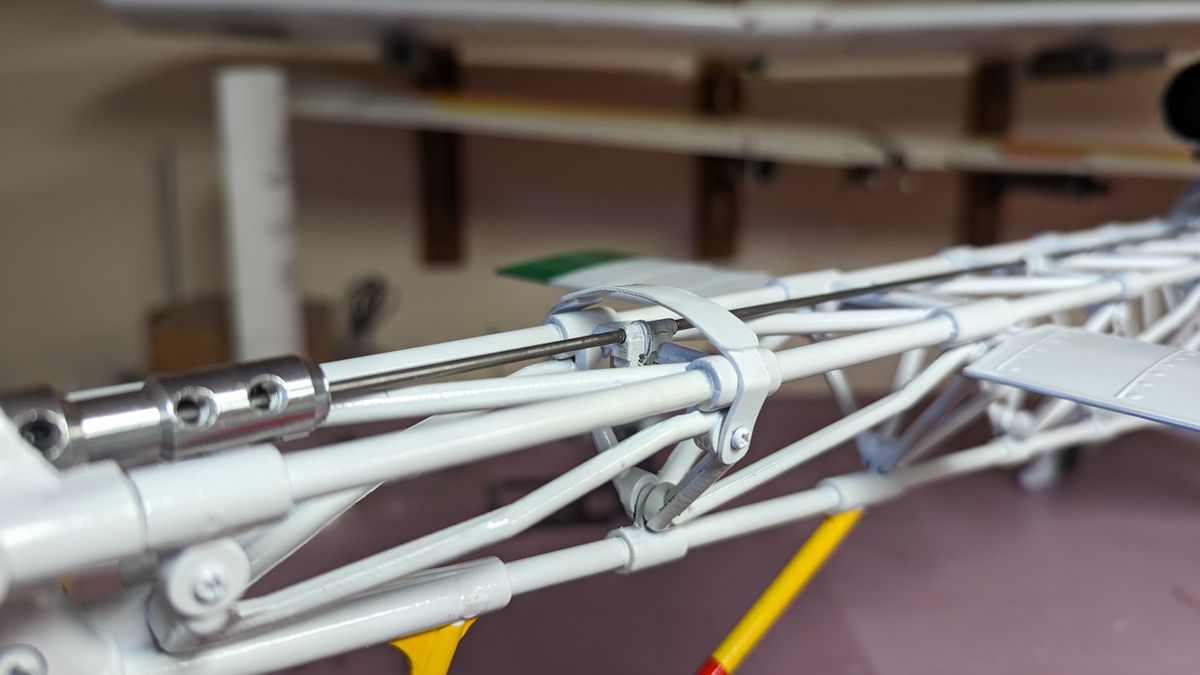
I sanded the wrinkled spots back down and repainted but the same spots wrinkled again. Not sure what to do now... Anyway, I will move on to more detailing and eventually start ordering some electronics. I also need to figure out a slider setup for the tail rotor. It is an Align 3 blade TR for a 550.
I am also thinking of painting the mechanics a flat grey or even white as I think the black is just too much. What do you think?
Let's Try This!
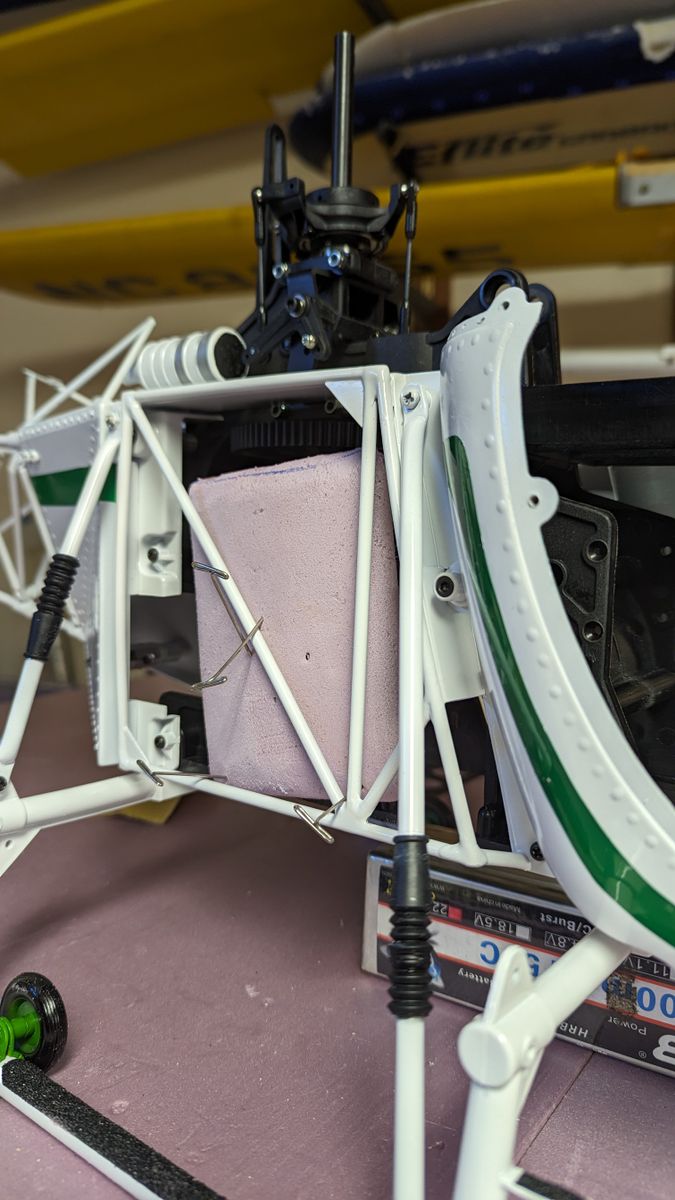
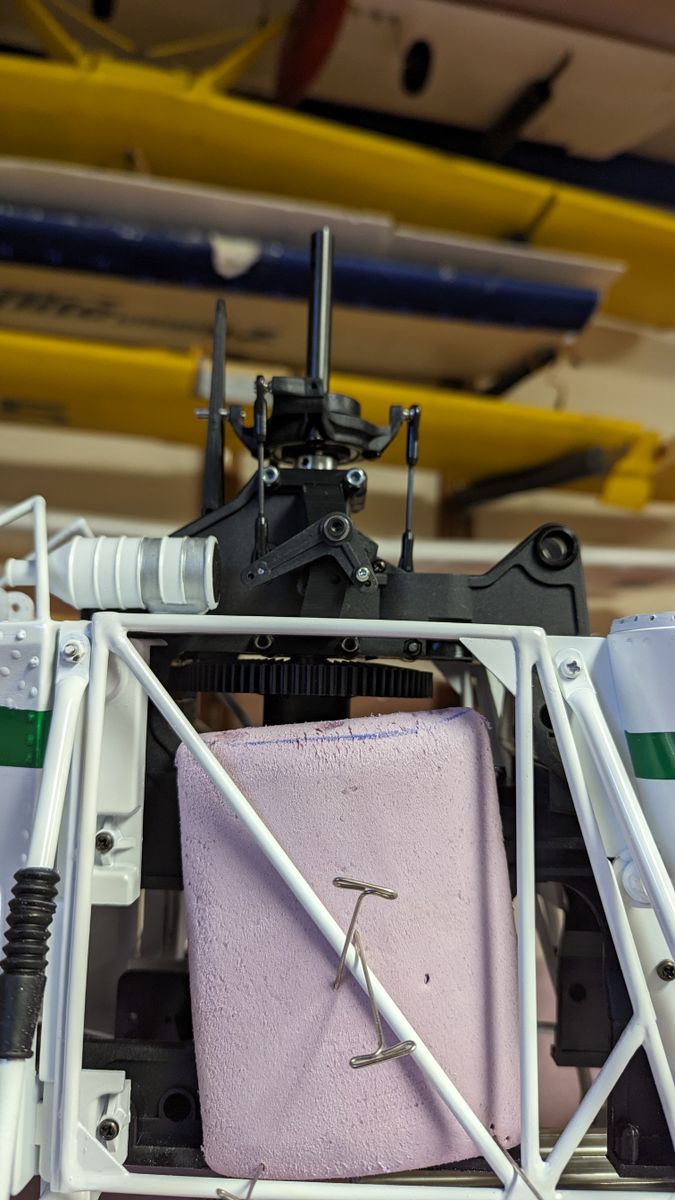
Since I started this project, the one thing I have been unsure of, is how to do the faux fuel cell.
I don't have a 3d printer and short of talking someone into printing a set, I figured, let's try and build a set.
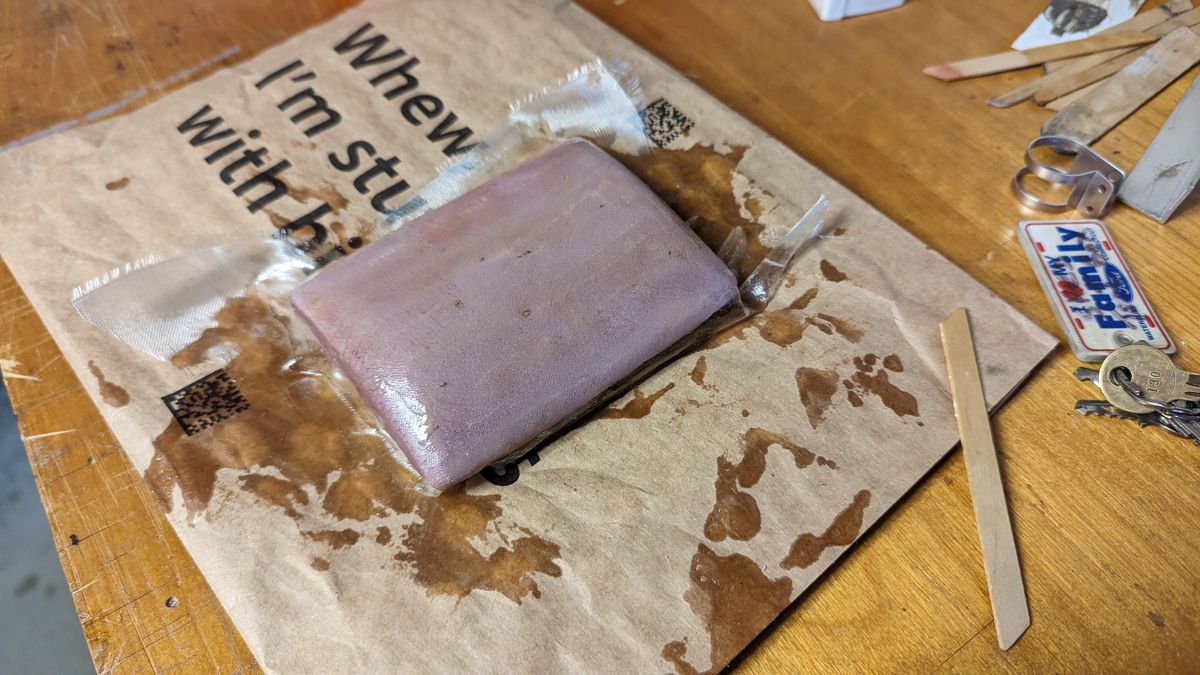
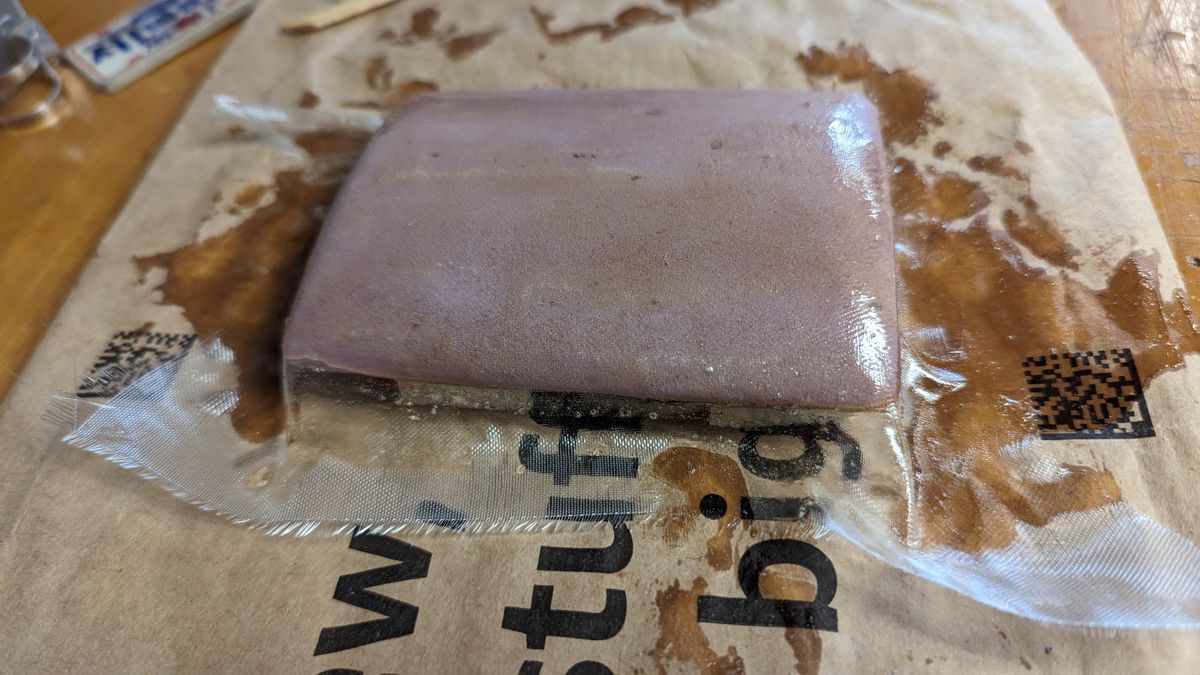
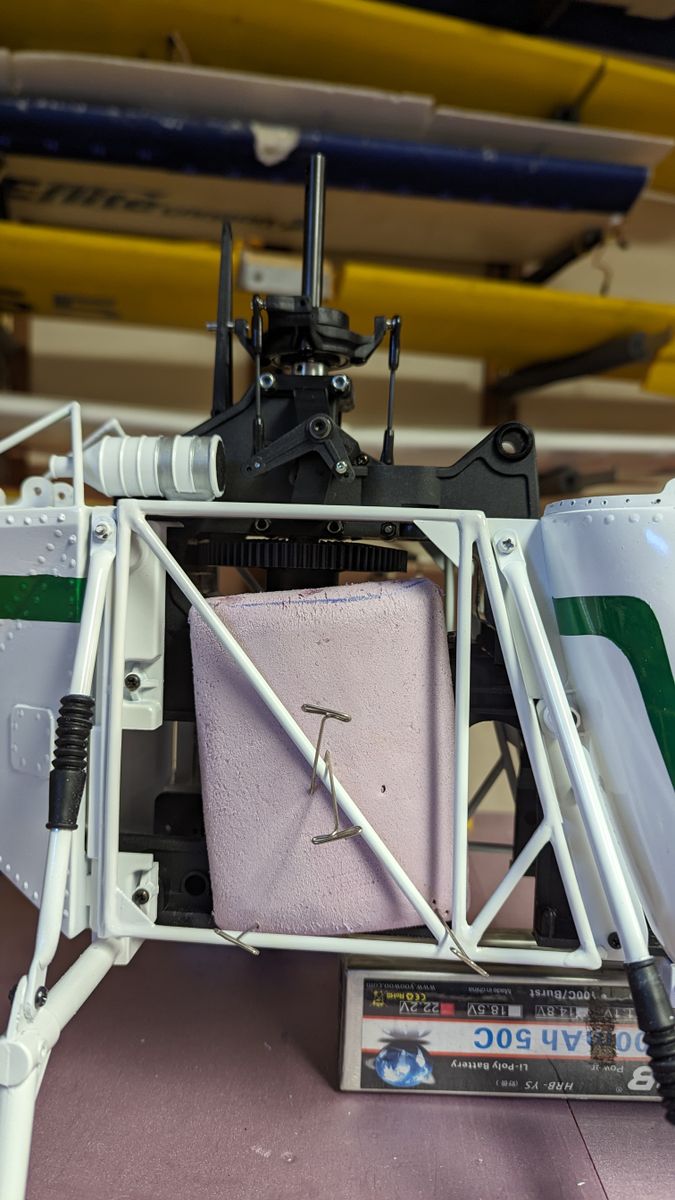
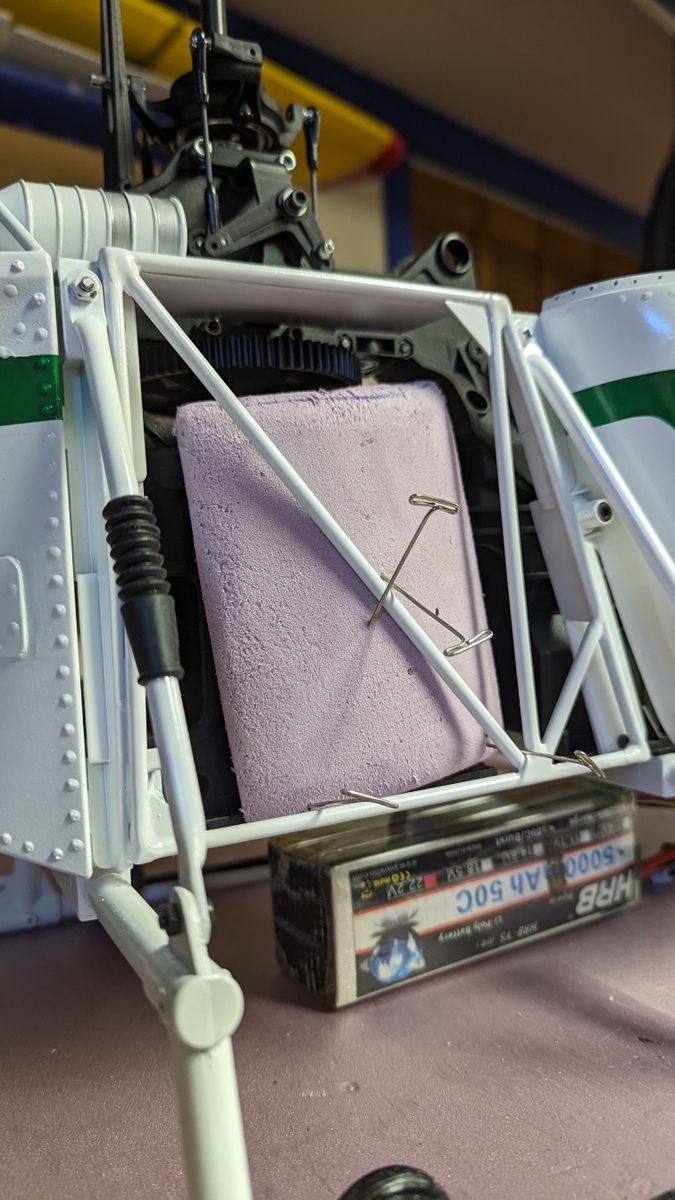
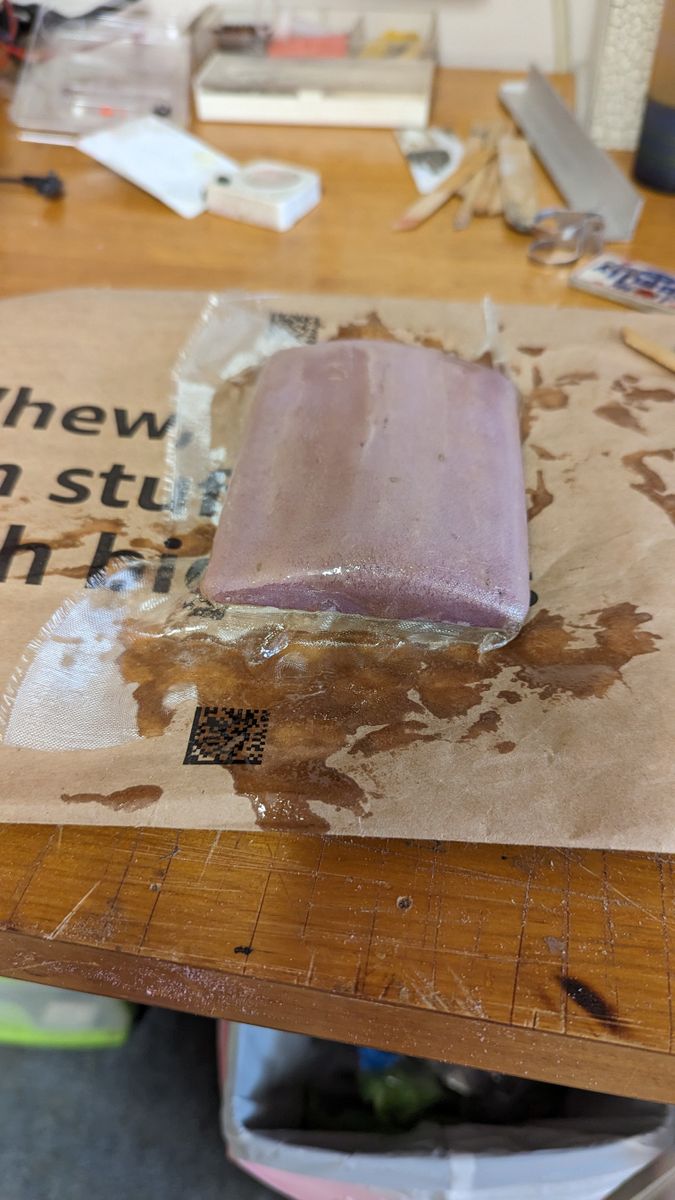
First thought was balsa and fiberglass. But shaping would be a pain. I have plenty of Pink Owens-Corning insulation board and shaped a piece I think will work. I did make a template out of balsa of the radius of the tank I am looking for. I have laid it up with fiberglass clothes and finishing resin. Hopefully this works and turns out acceptable. If so, I will hollow out most of the foam board and fill the weave with high build primer and paint to match.

Lane Change
I stepped away from the scale details for a bit to start figuring out the electronics.
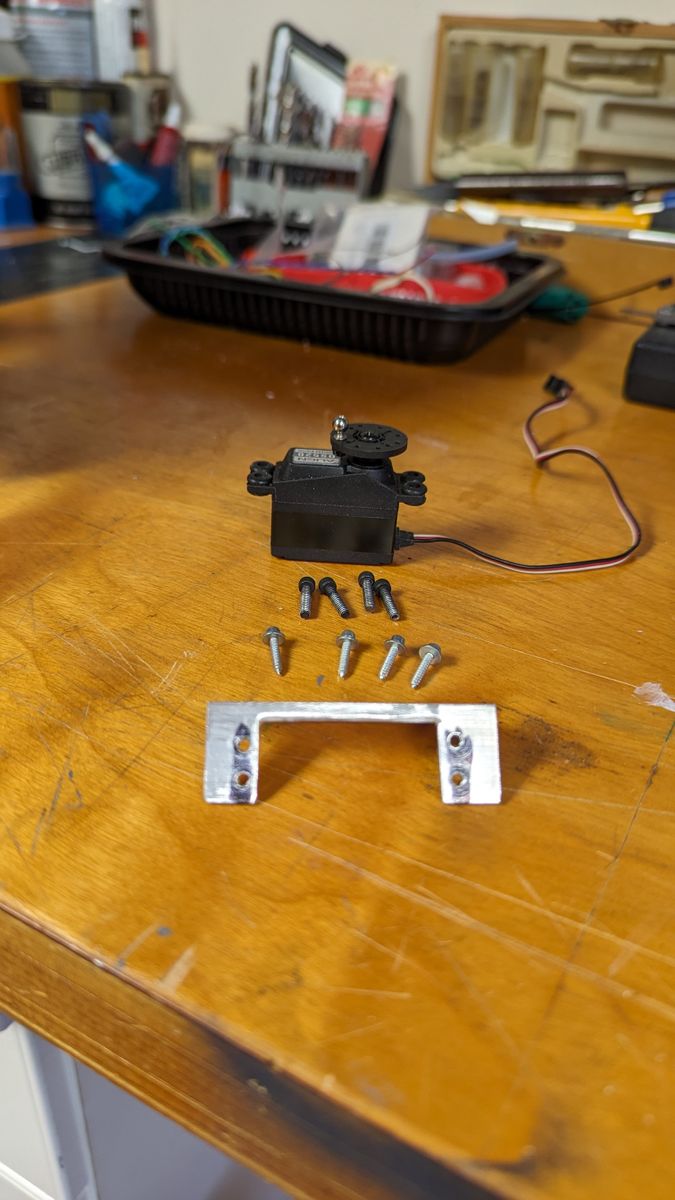
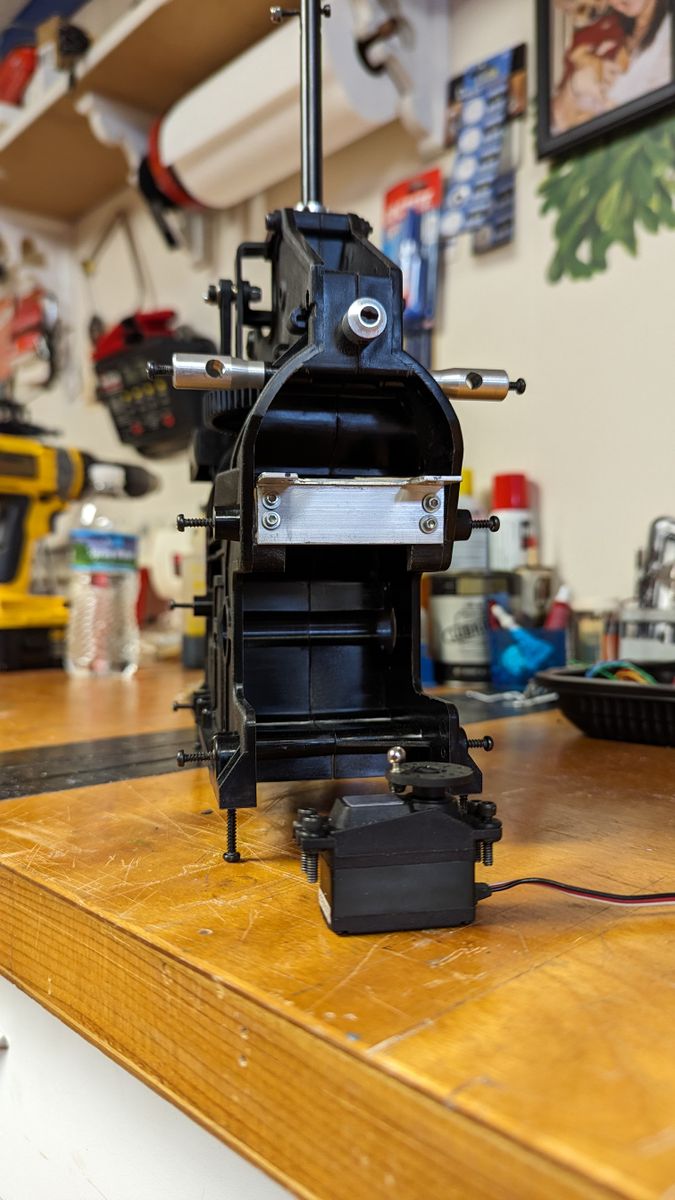
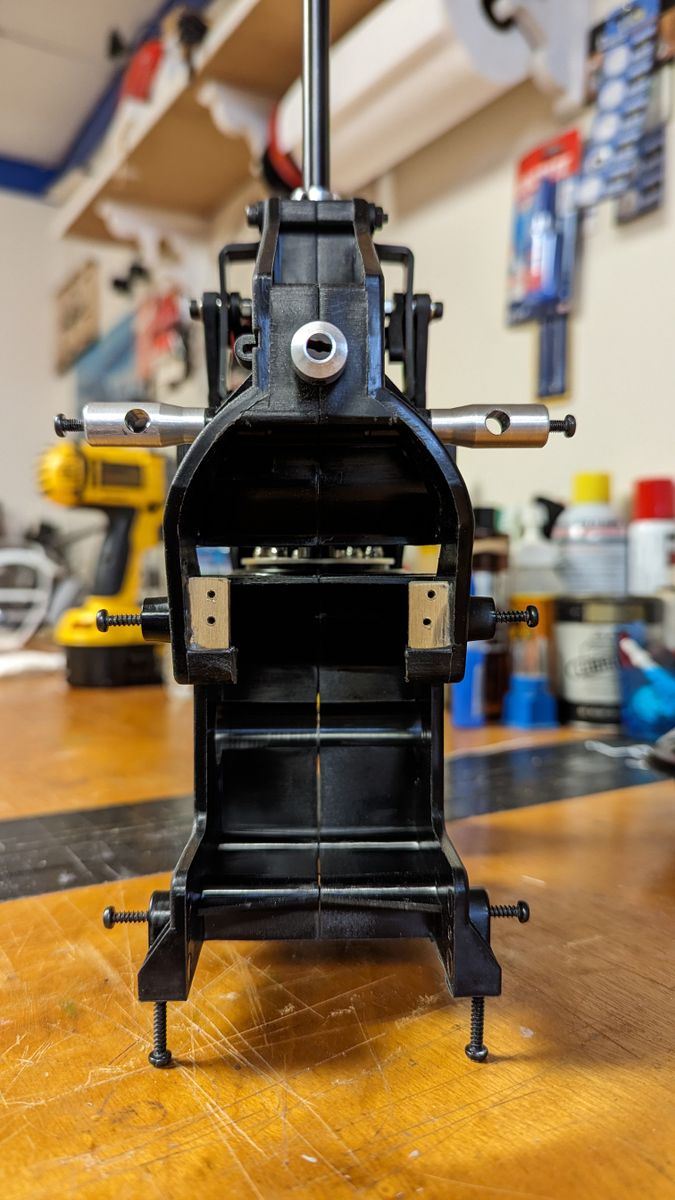
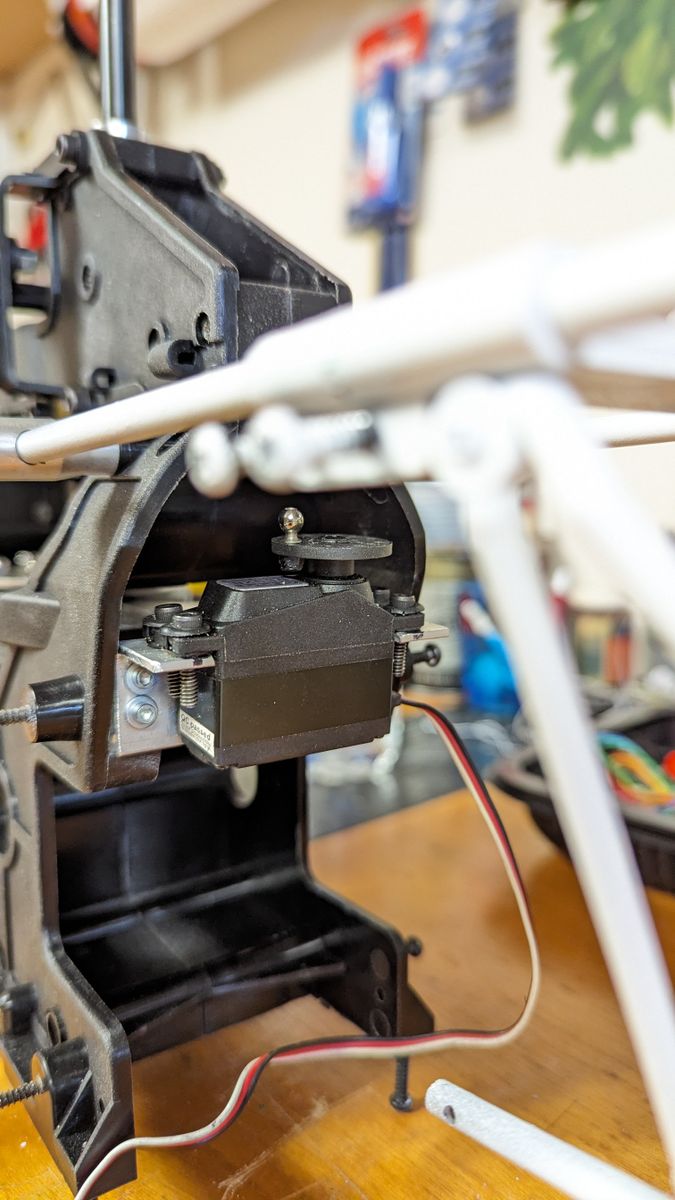
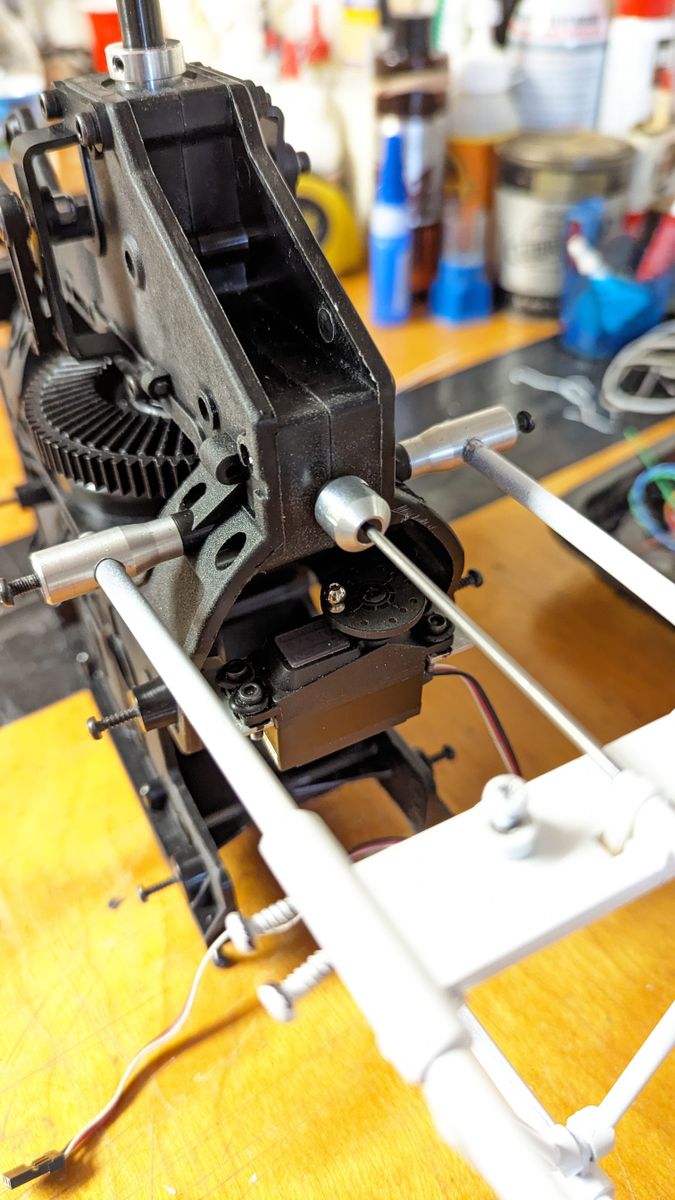
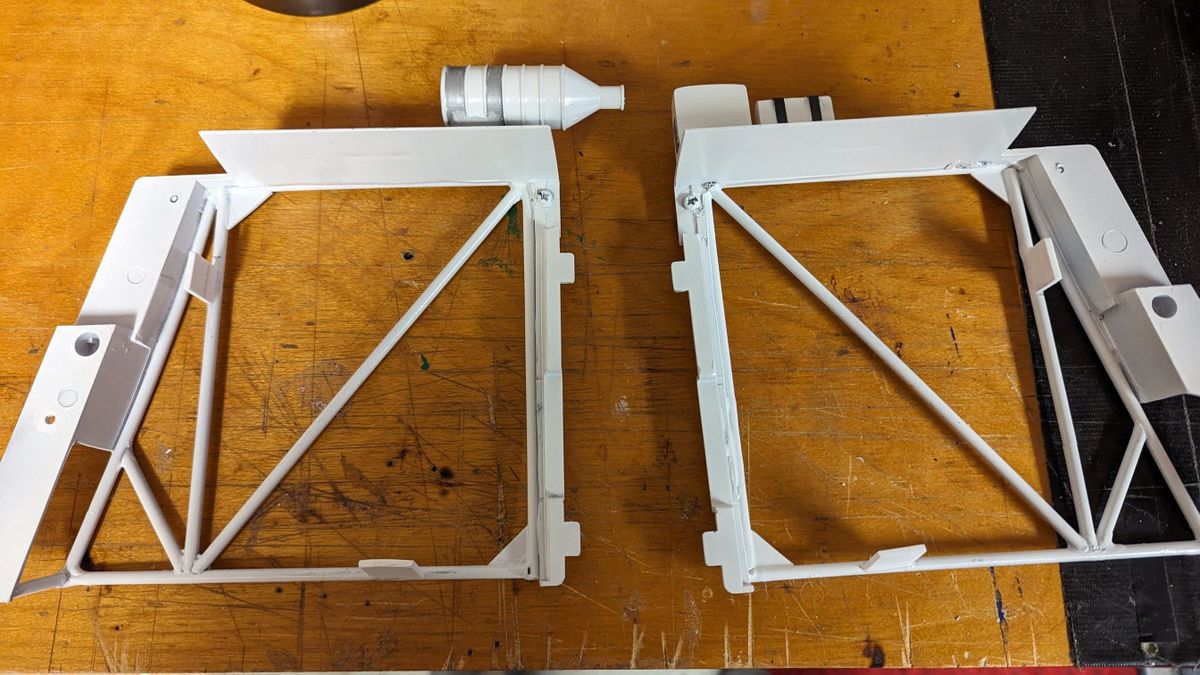
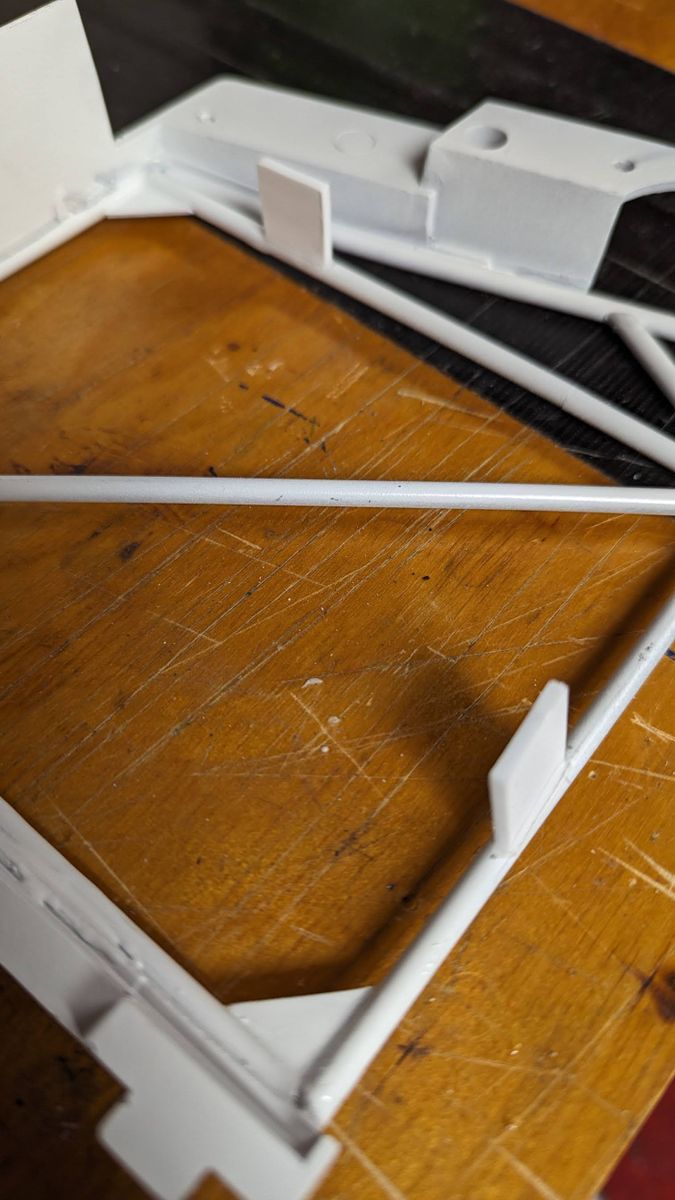
Since I made the switch from the old servo setup to SWM, I needed to rethink the tail rotor servo. This is what I came up with. Used a piece of aluminum angle and some hardwood blocks. It seems very strong with the bond from JB Weld.
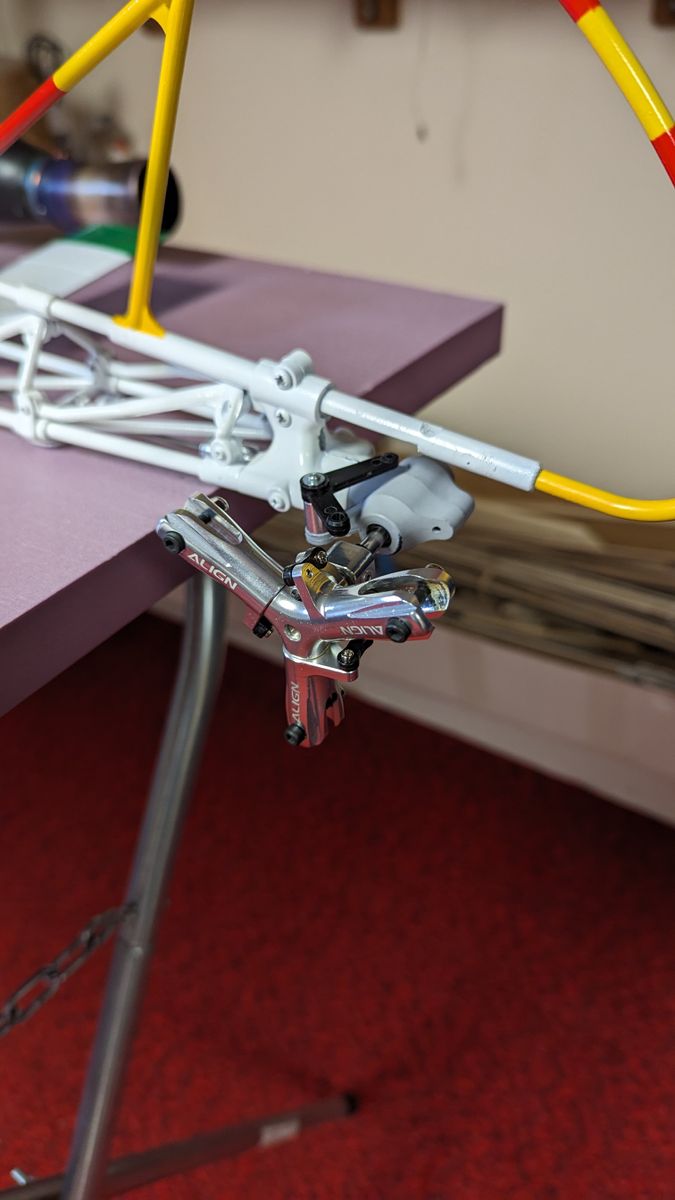
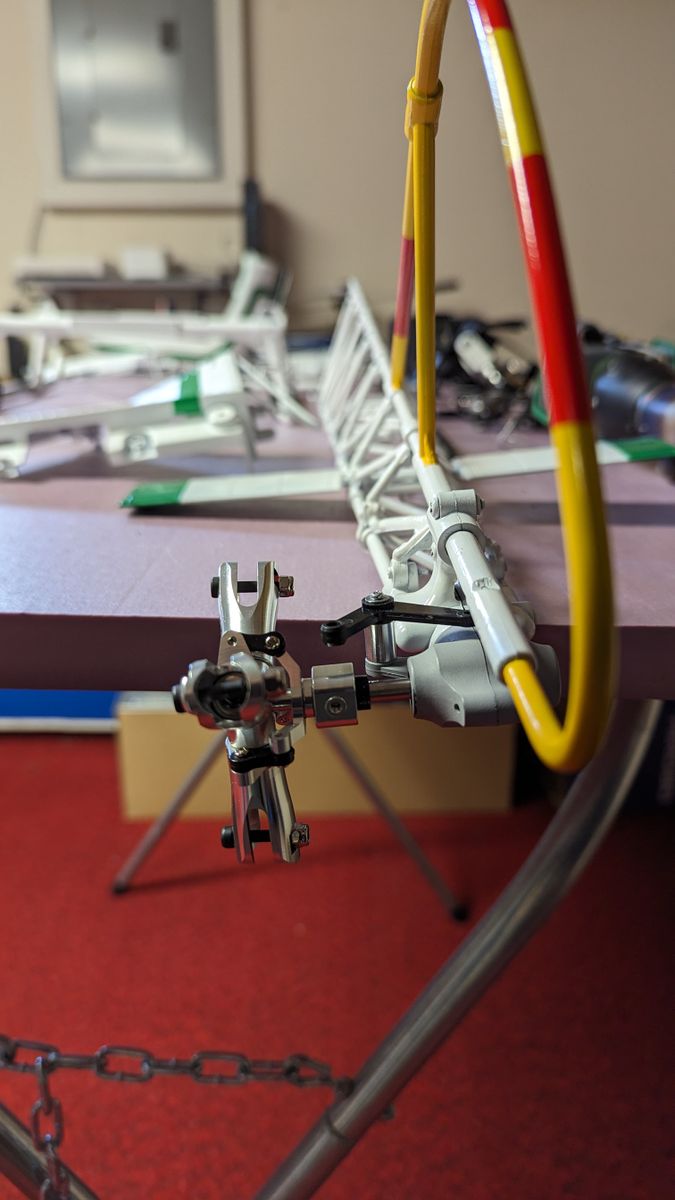
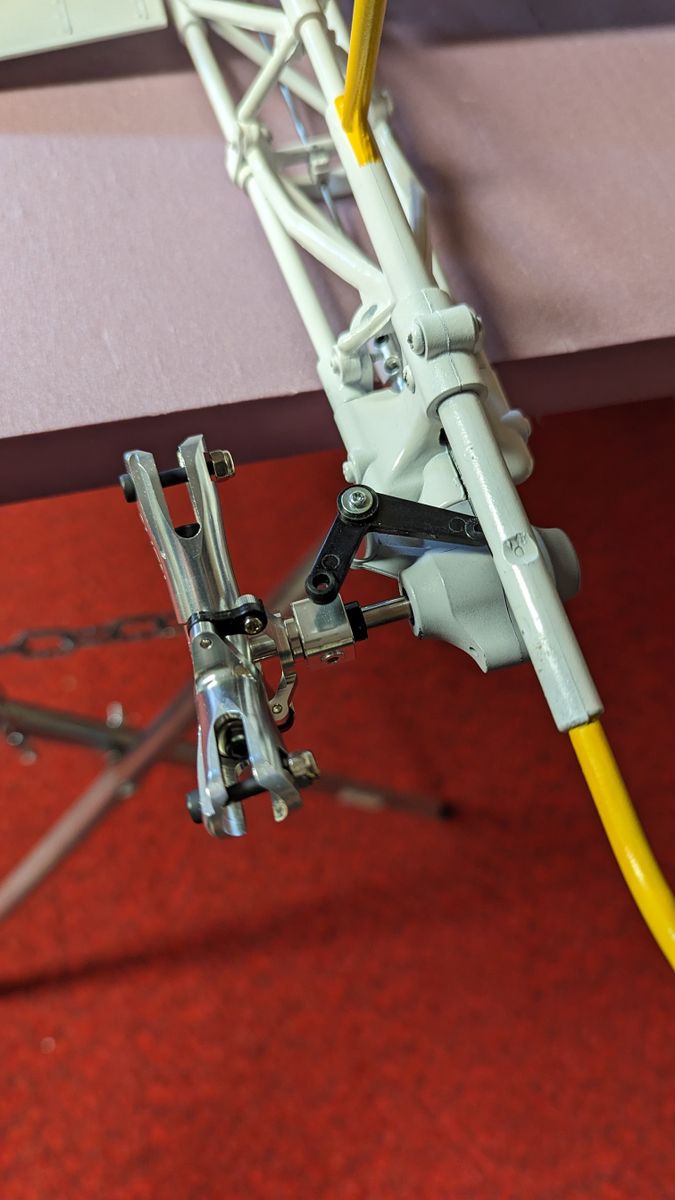
I also am going to use the 3-blade t/r from Align. The next hurdle is coming up with something to use as a pitch change lever. I have the Hirobo "fork" style lever, but it is too wide for the Align slider block and the geometry is just not right.
Update to chapter 9
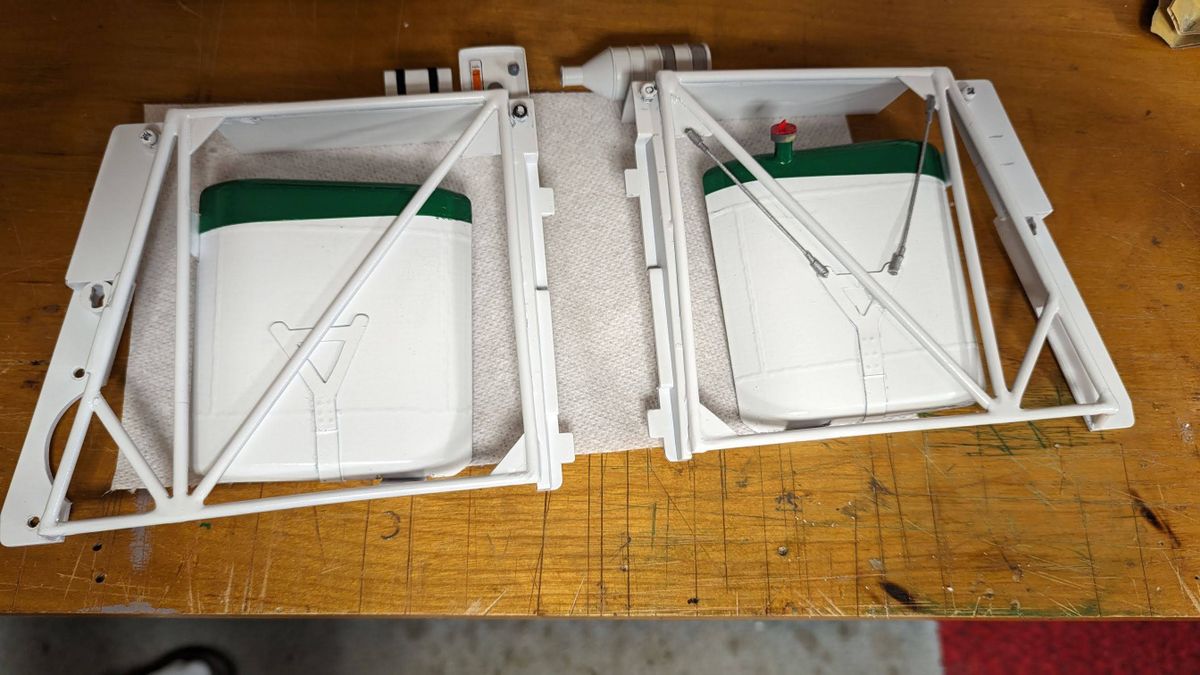
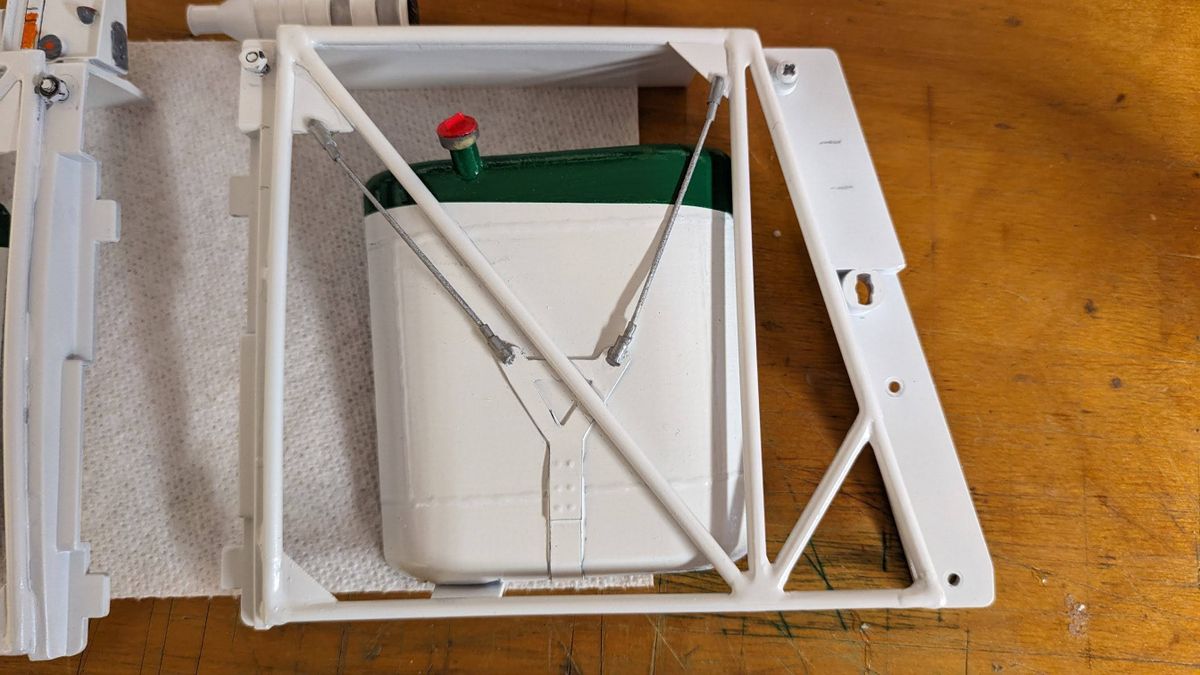
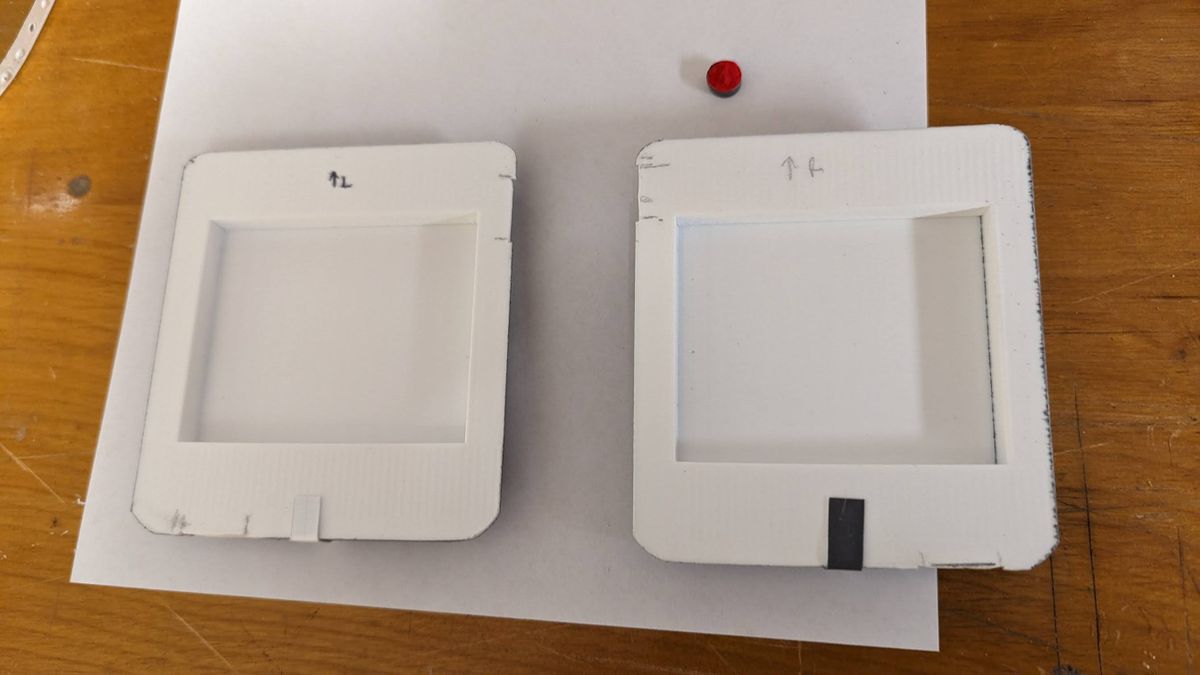
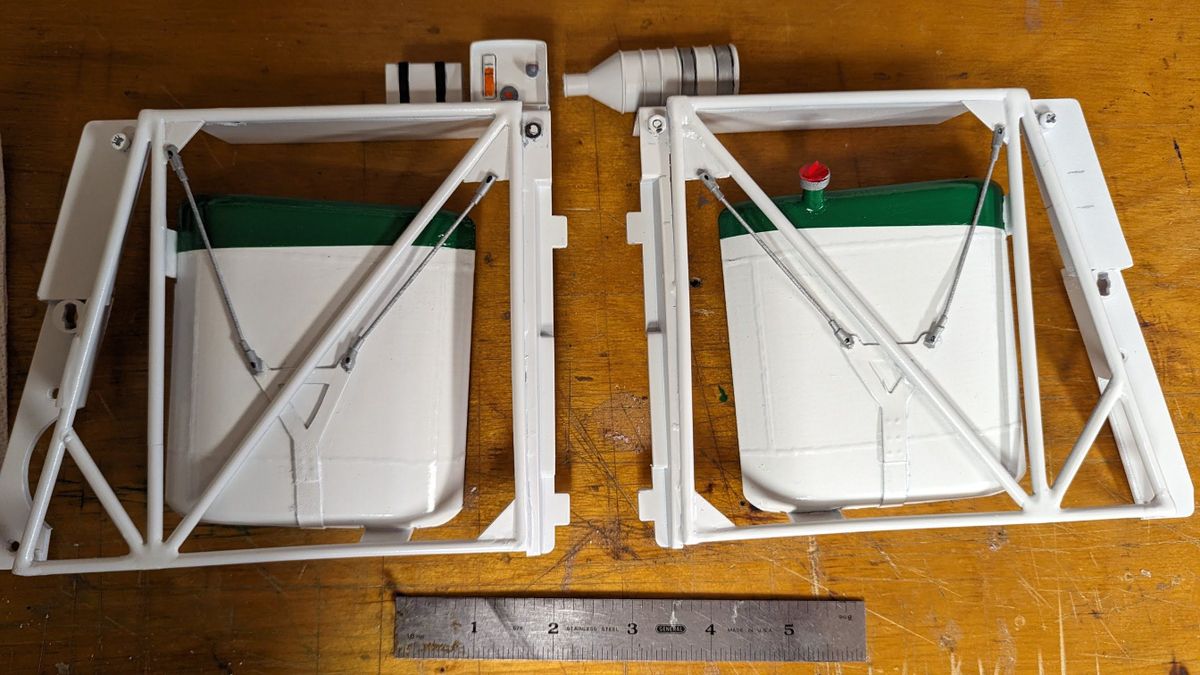
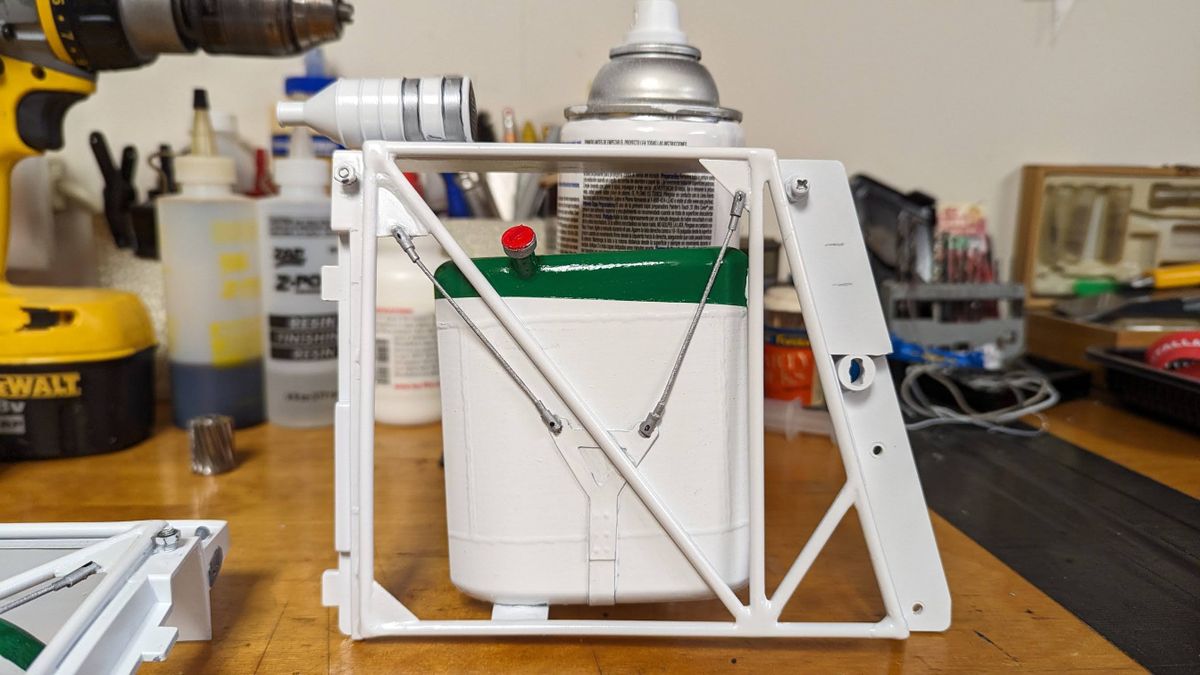
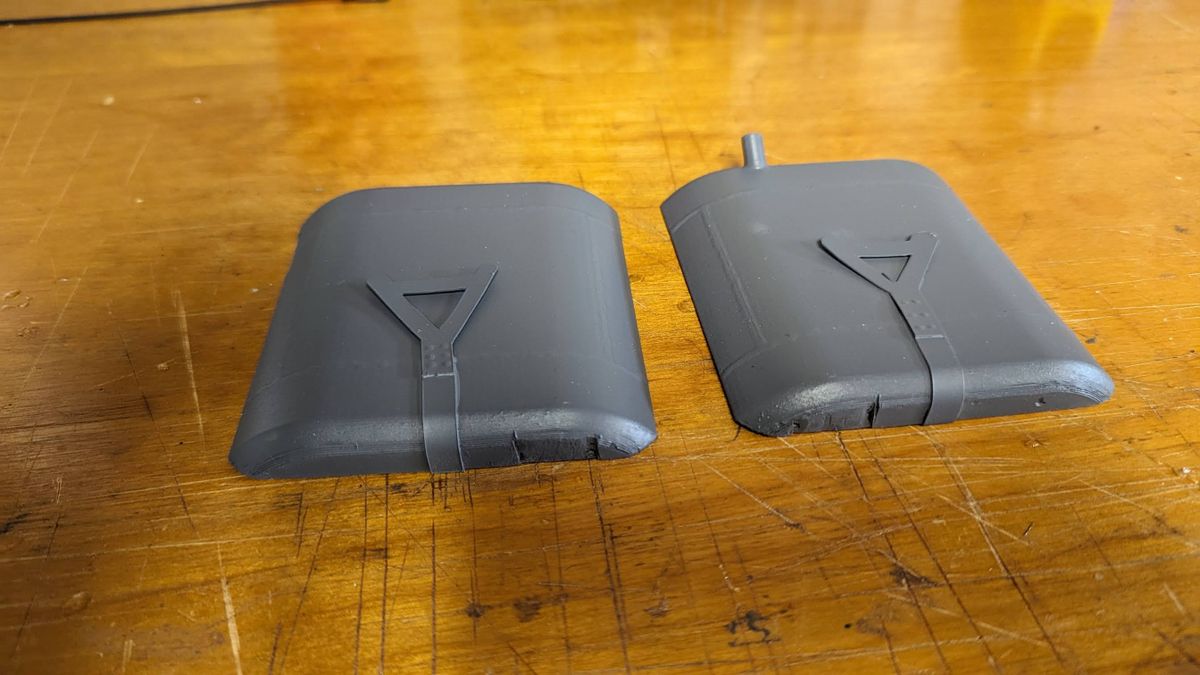
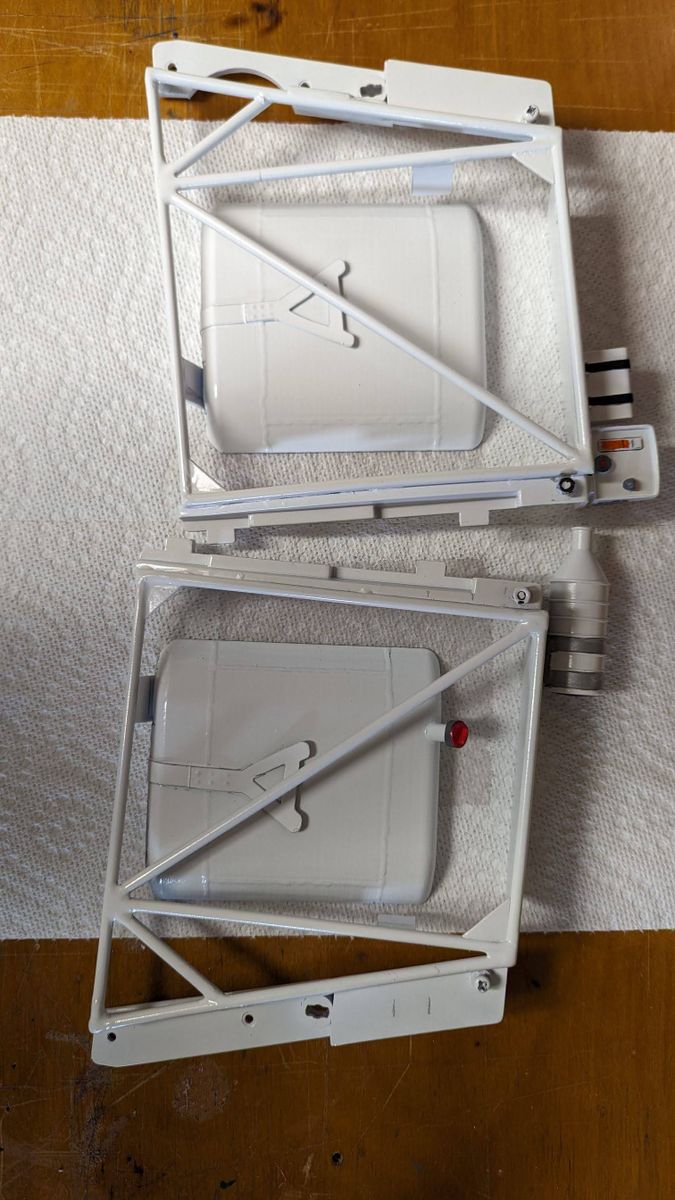
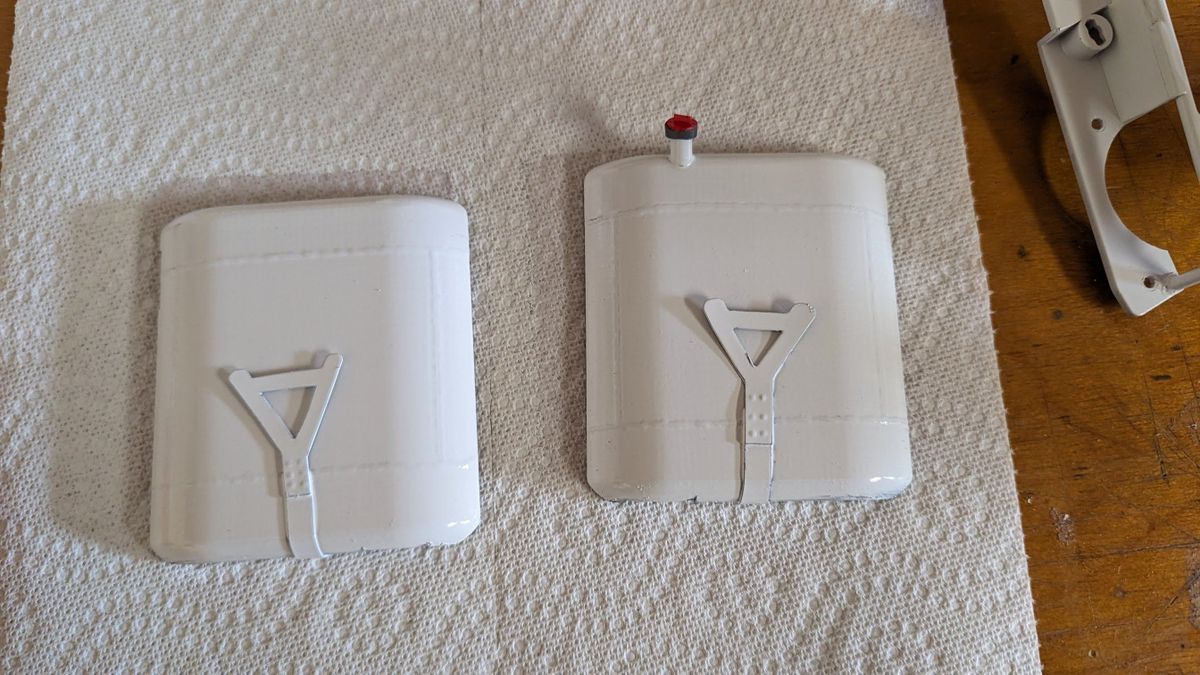
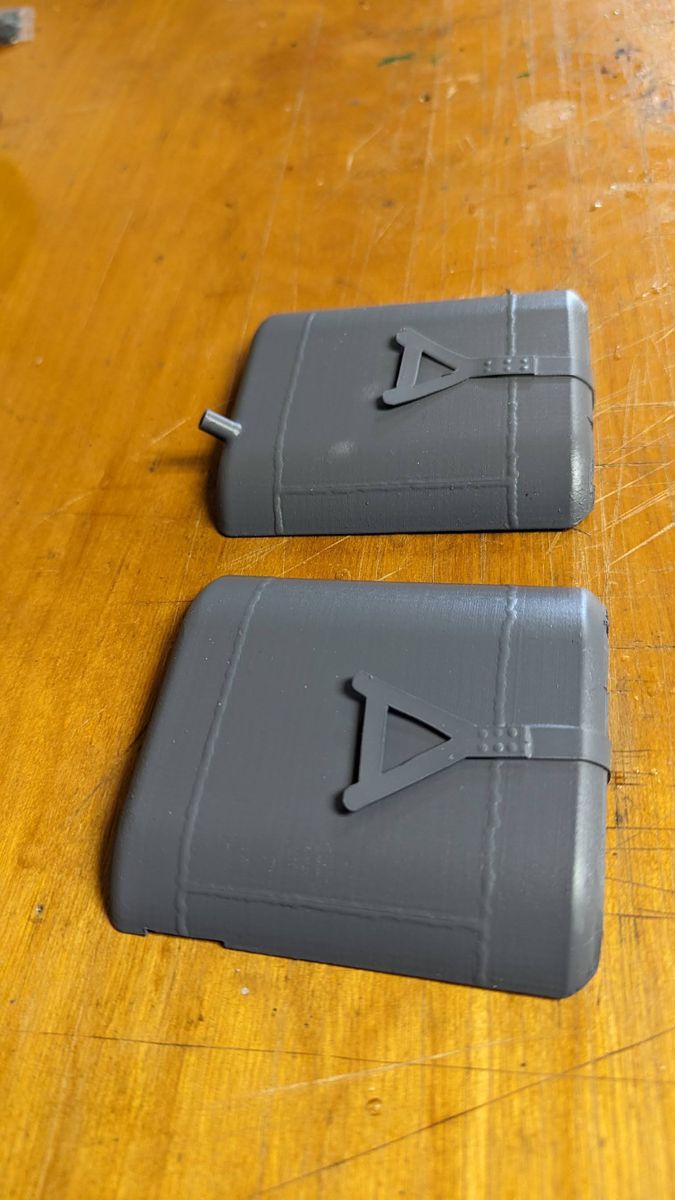
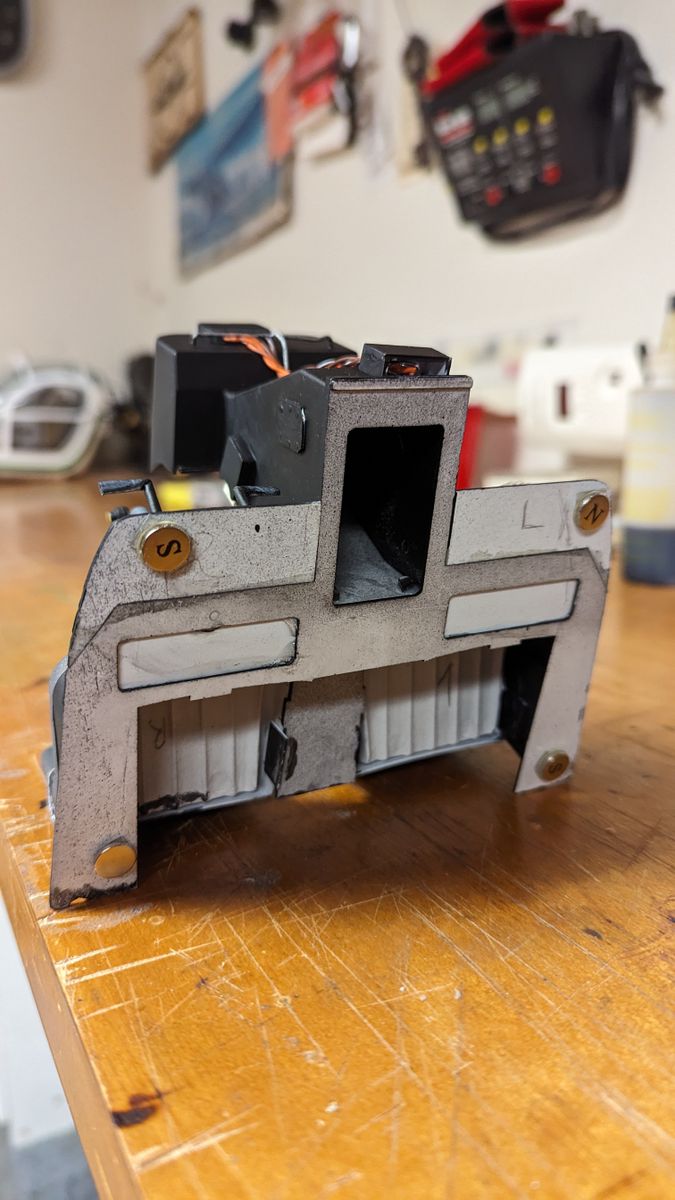
Back in chapter 9 I was toying with making a faux fuel cell out of foam sheet. They actually came out pretty nice, however, I came across an .stl file I liked better and had them printed commercially.
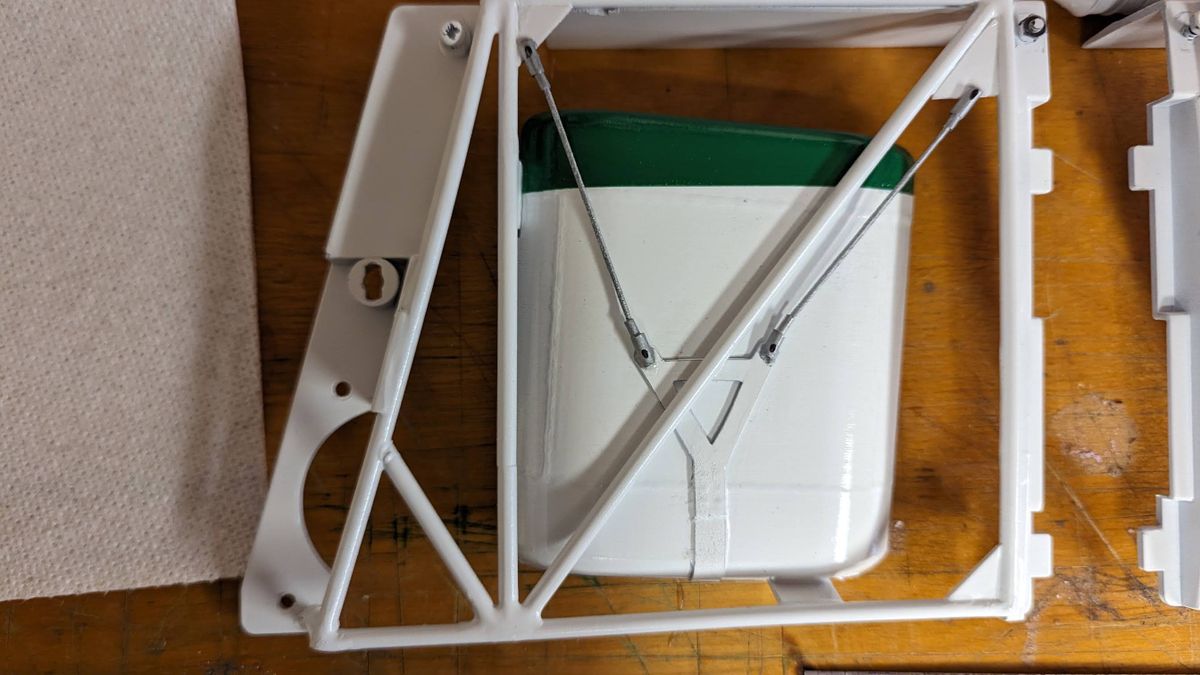
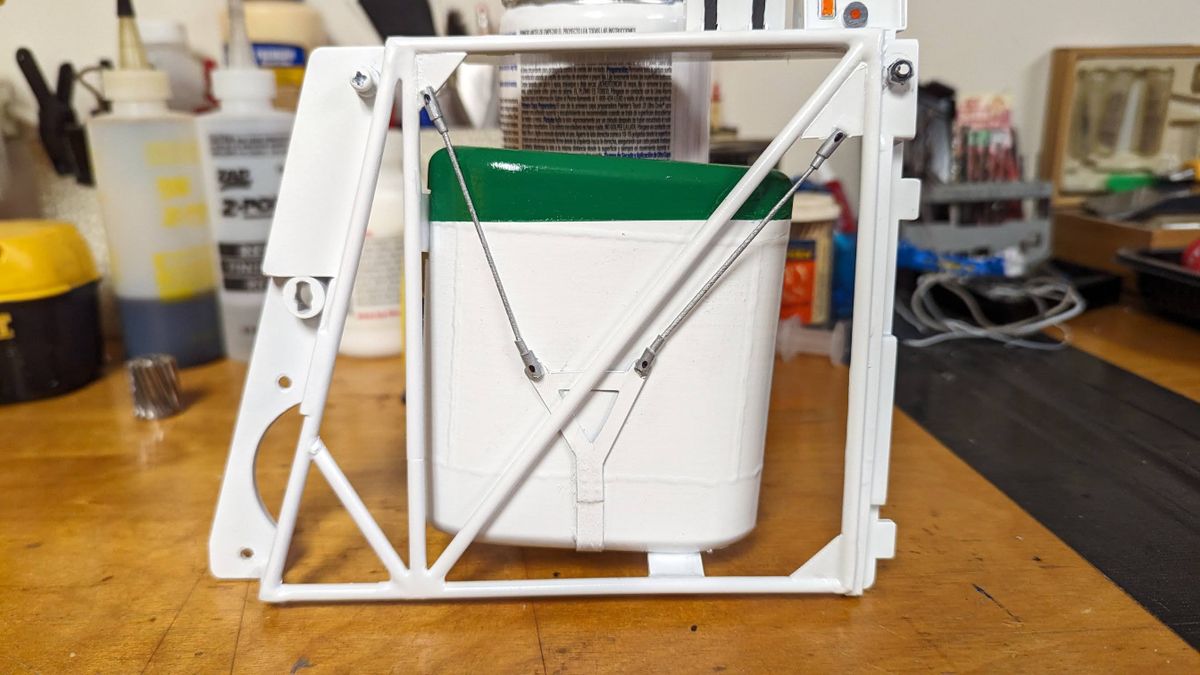
I filled them a bit with high build primer to erase the print lines and added fake weld joints using the same process as adding rivets then dragging together with a tooth pick.
The suspension cables are made from styrene tubing and elastic cord.
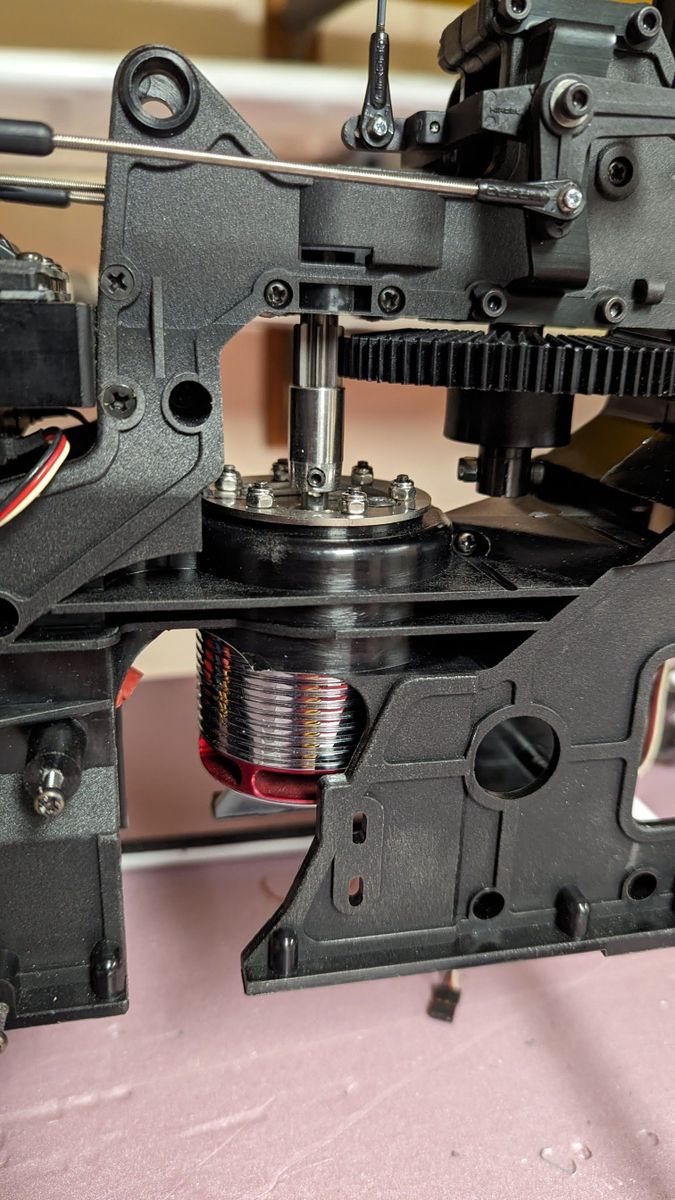
I think they came out pretty slick. I have also gotten the motor installed. It's 850kv and if the math is right I should be in the 1500rpm range.
Micro Designs!
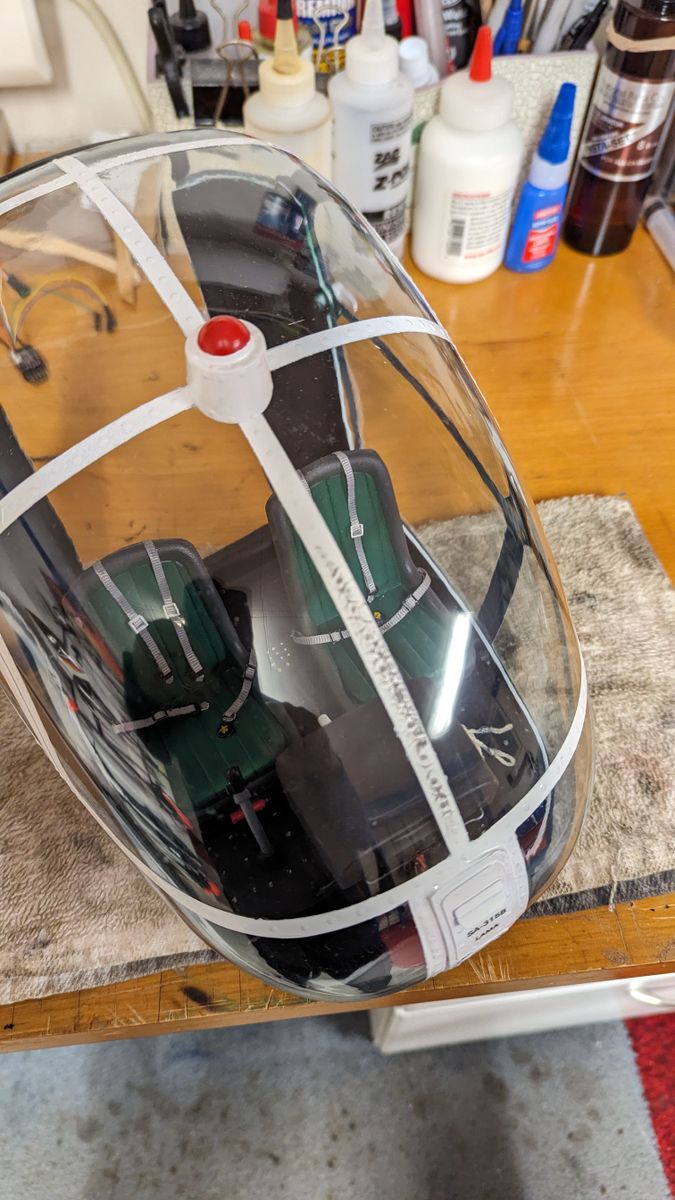
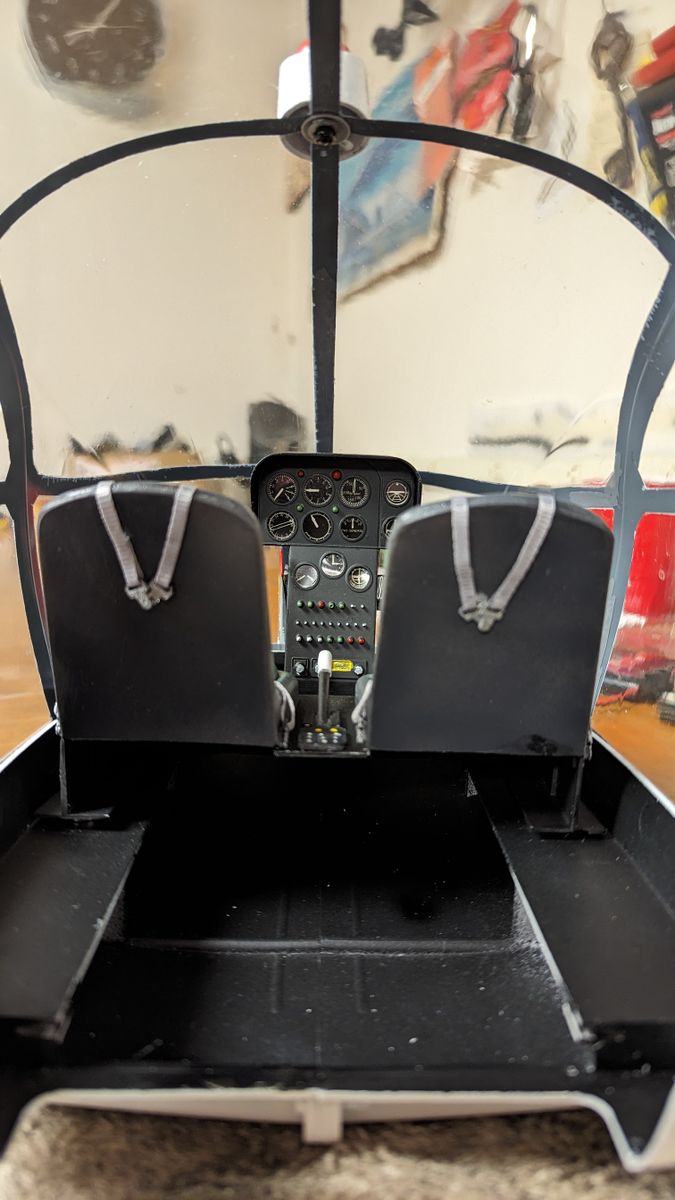
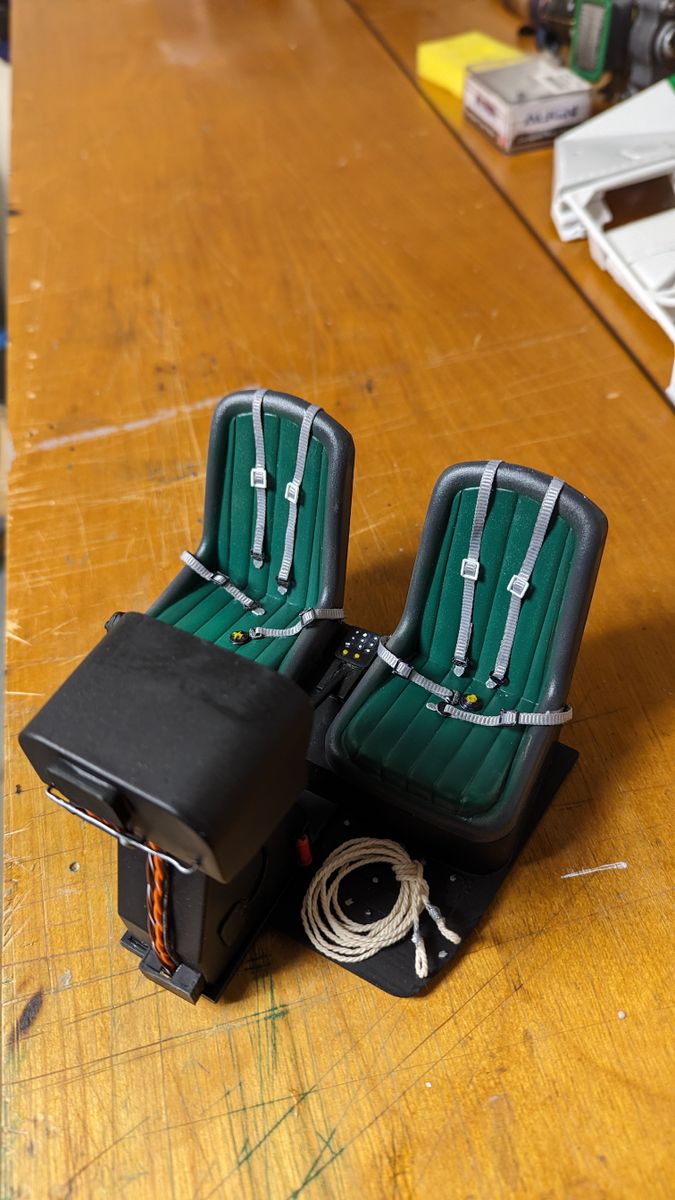
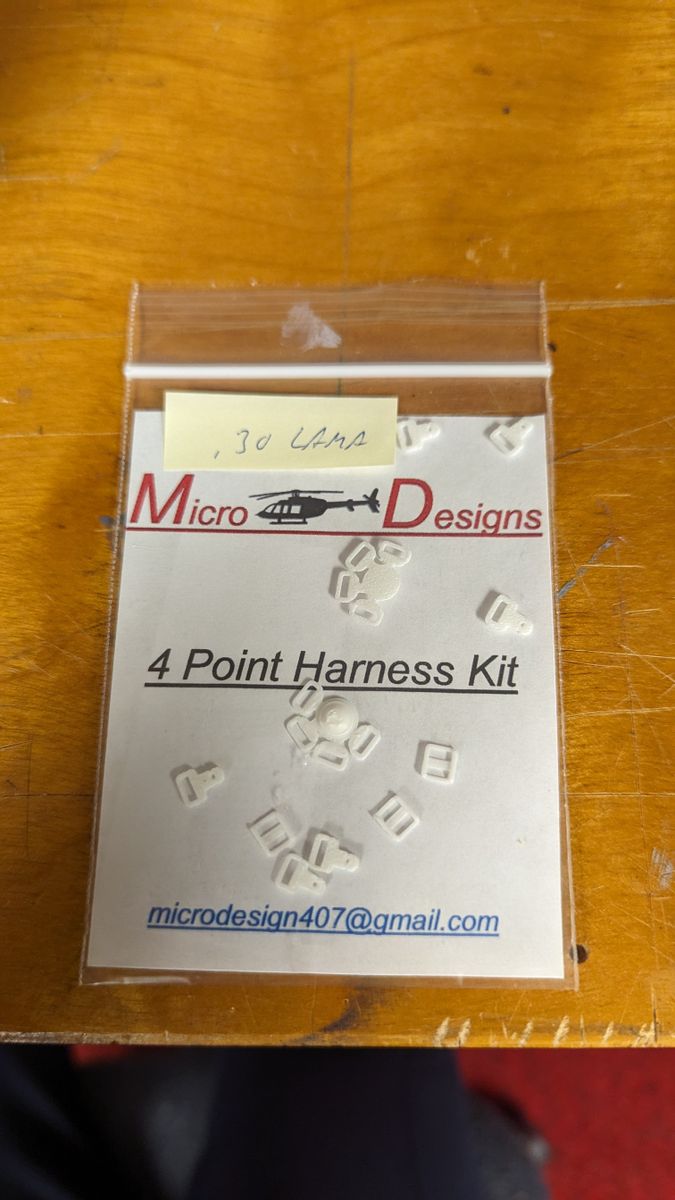
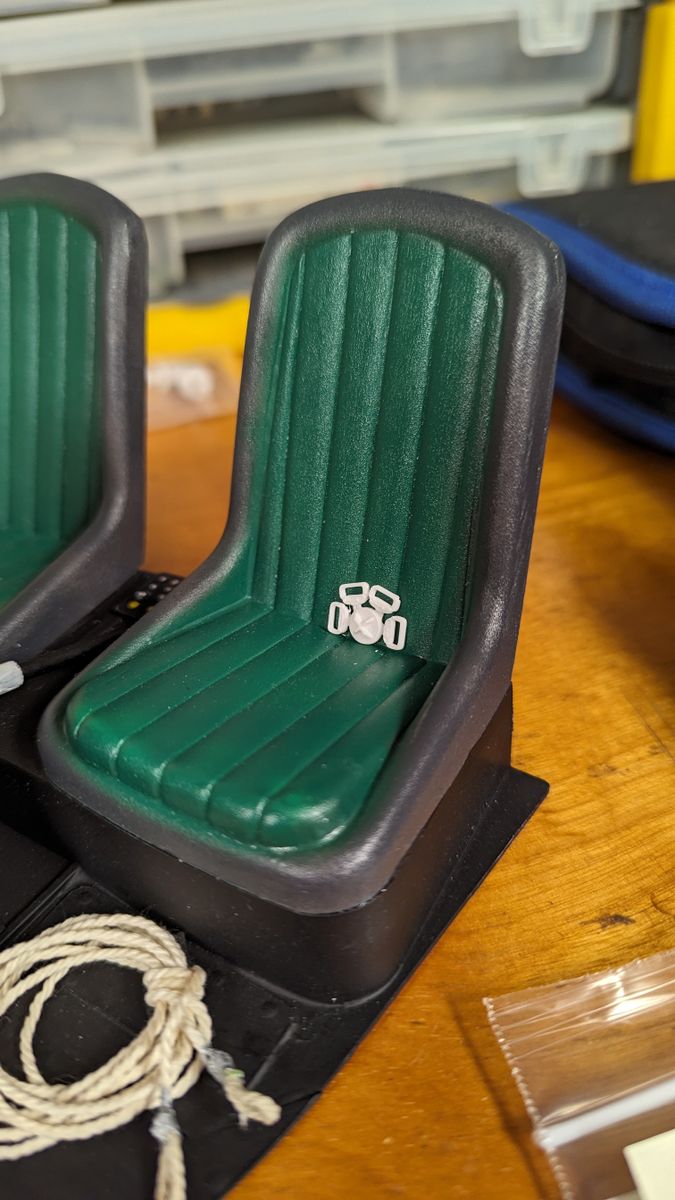
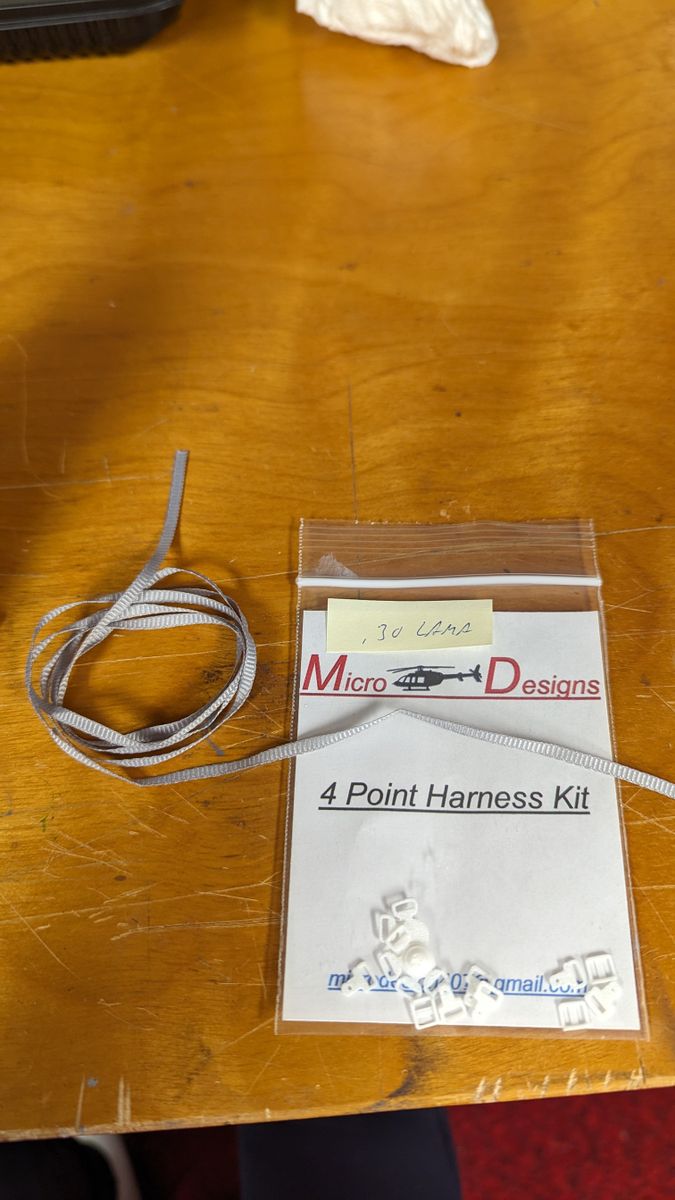
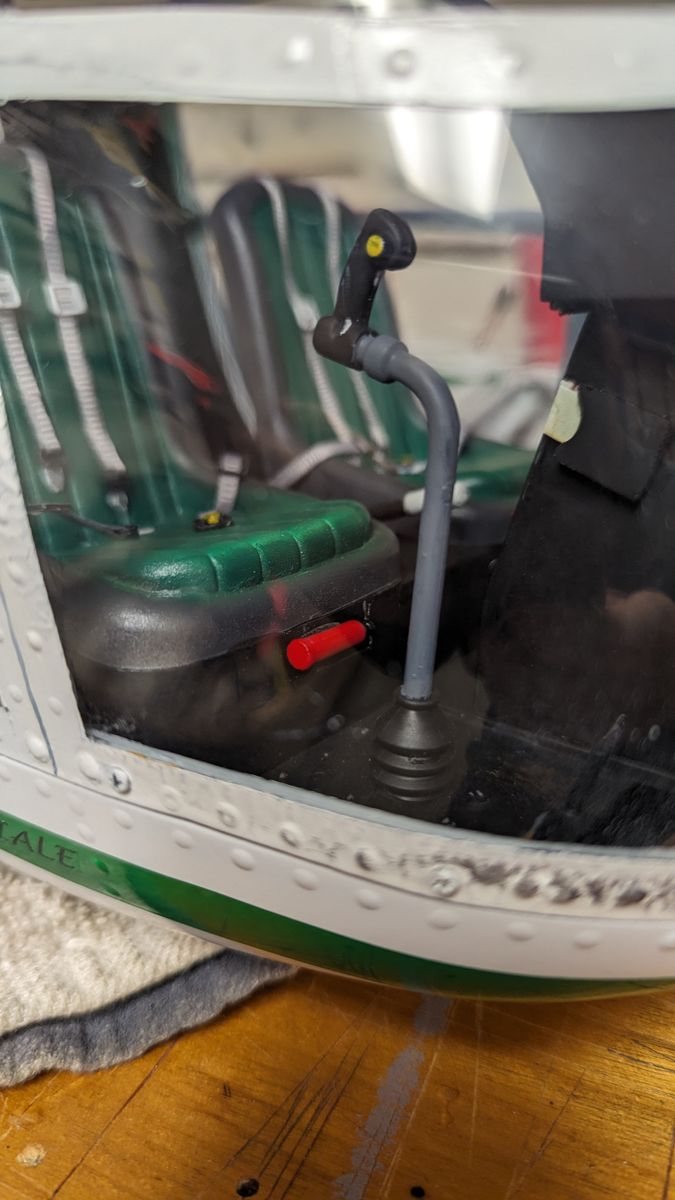
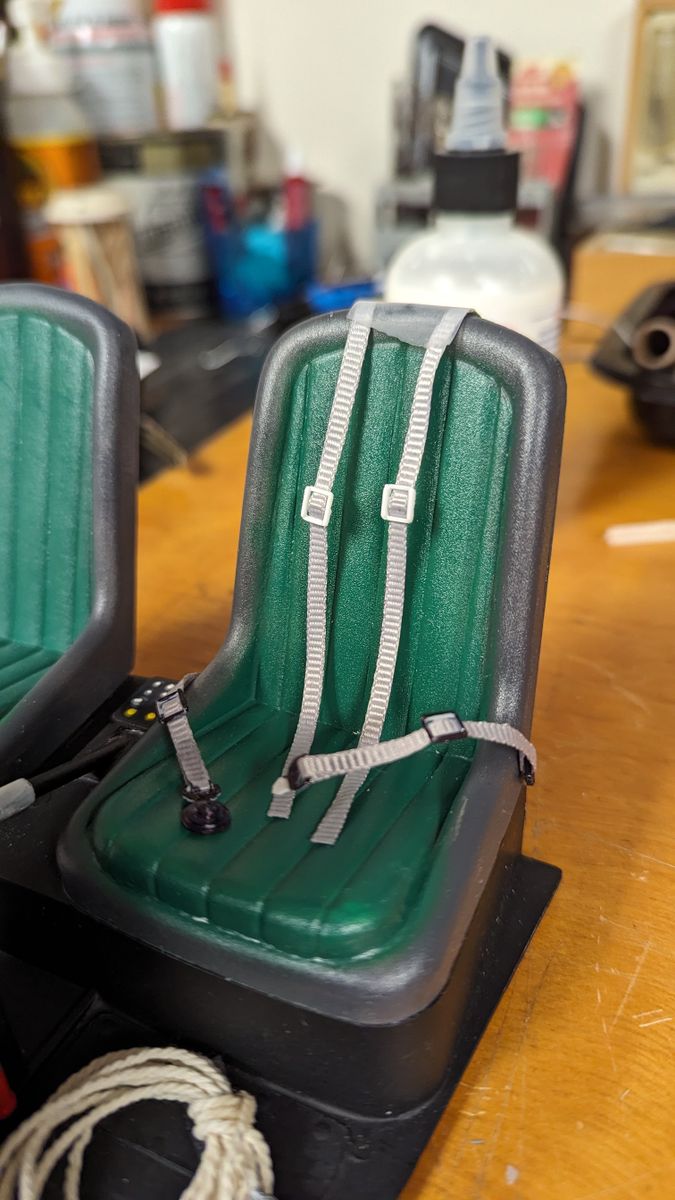
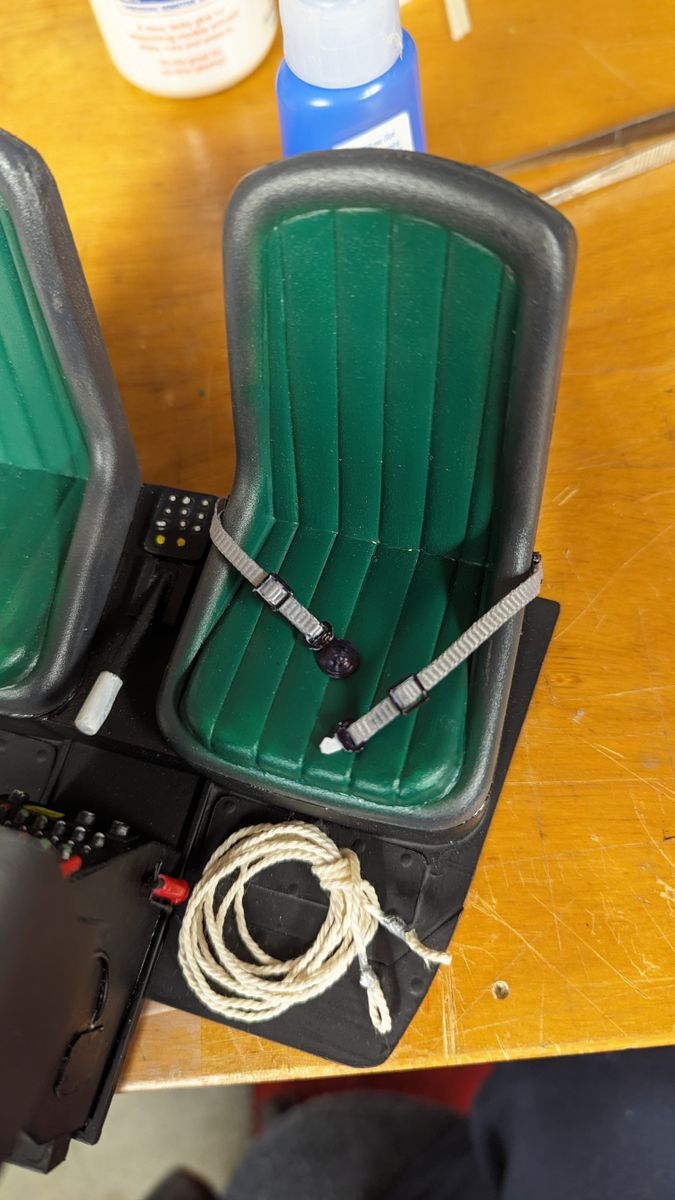
I am sure many of you are familiar with Micro Designs. I contacted Mark about ordering a couple 4-point harness sets for the cockpit seats of this Hirobo Lama.30. He informed me that he didn't have anything in this scale (1:8.2) .
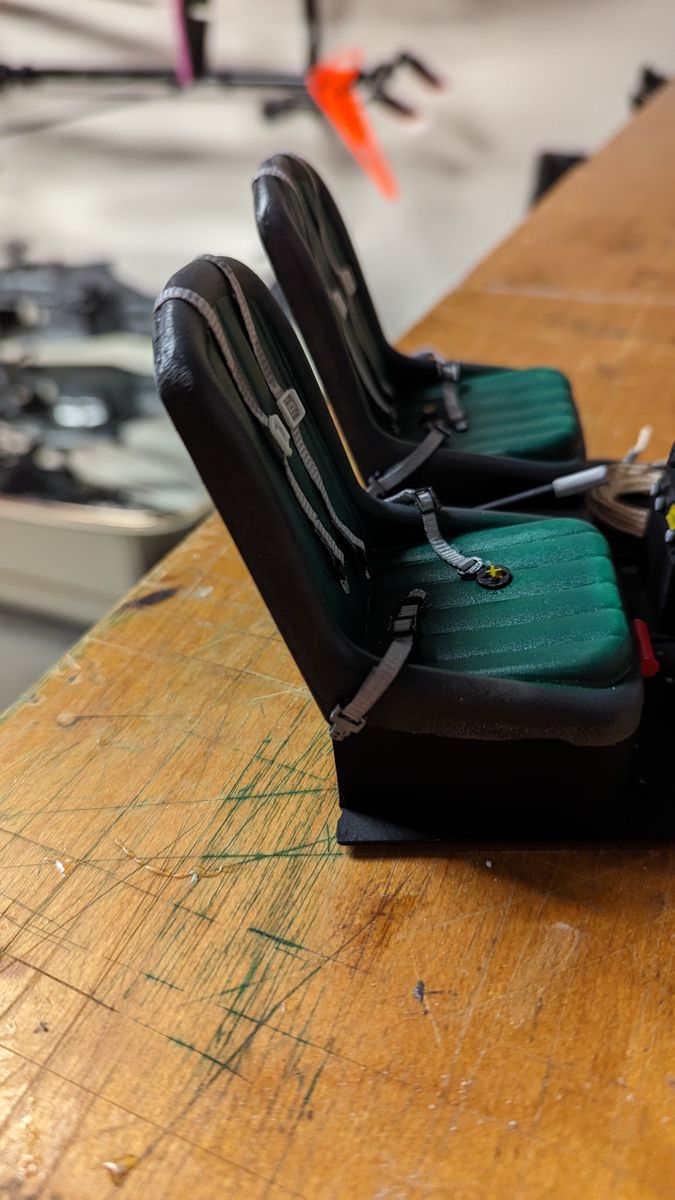
He said he would try to scale a set of his 1:6 size down and see how they would come out. After a preview I ordered 2 sets. The parts are very tiny. The anchor points and length adjuster are only 5mm across. The 4-point buckle assy is 15mm wide and 10mm high.
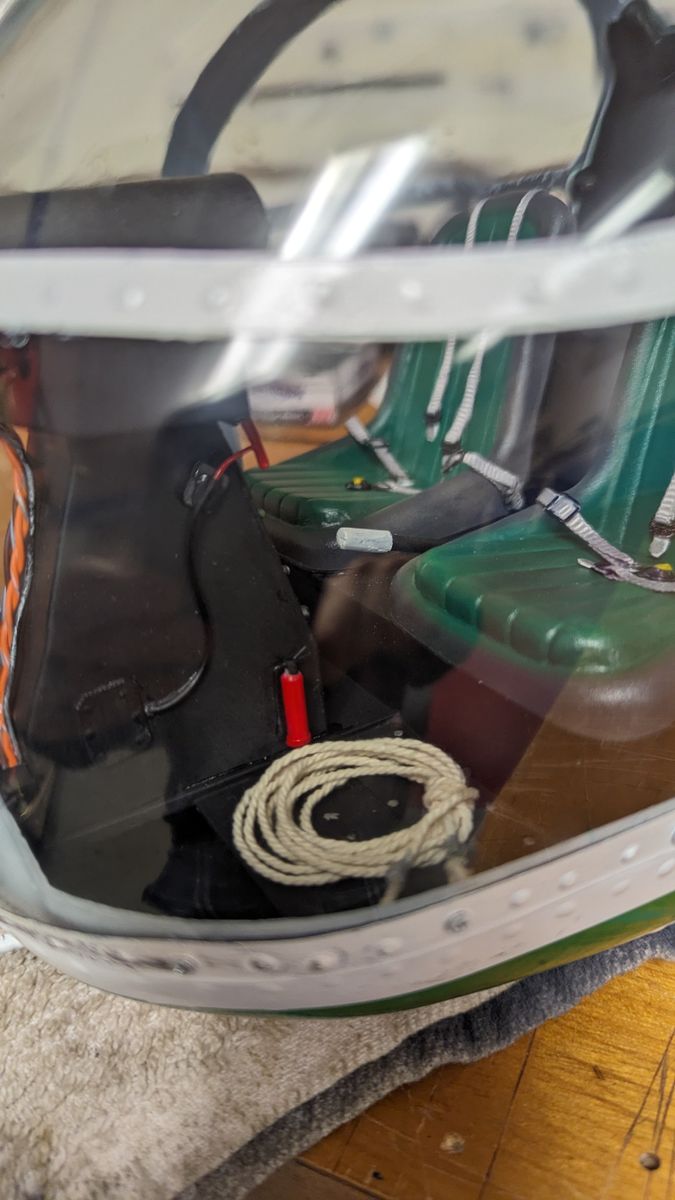
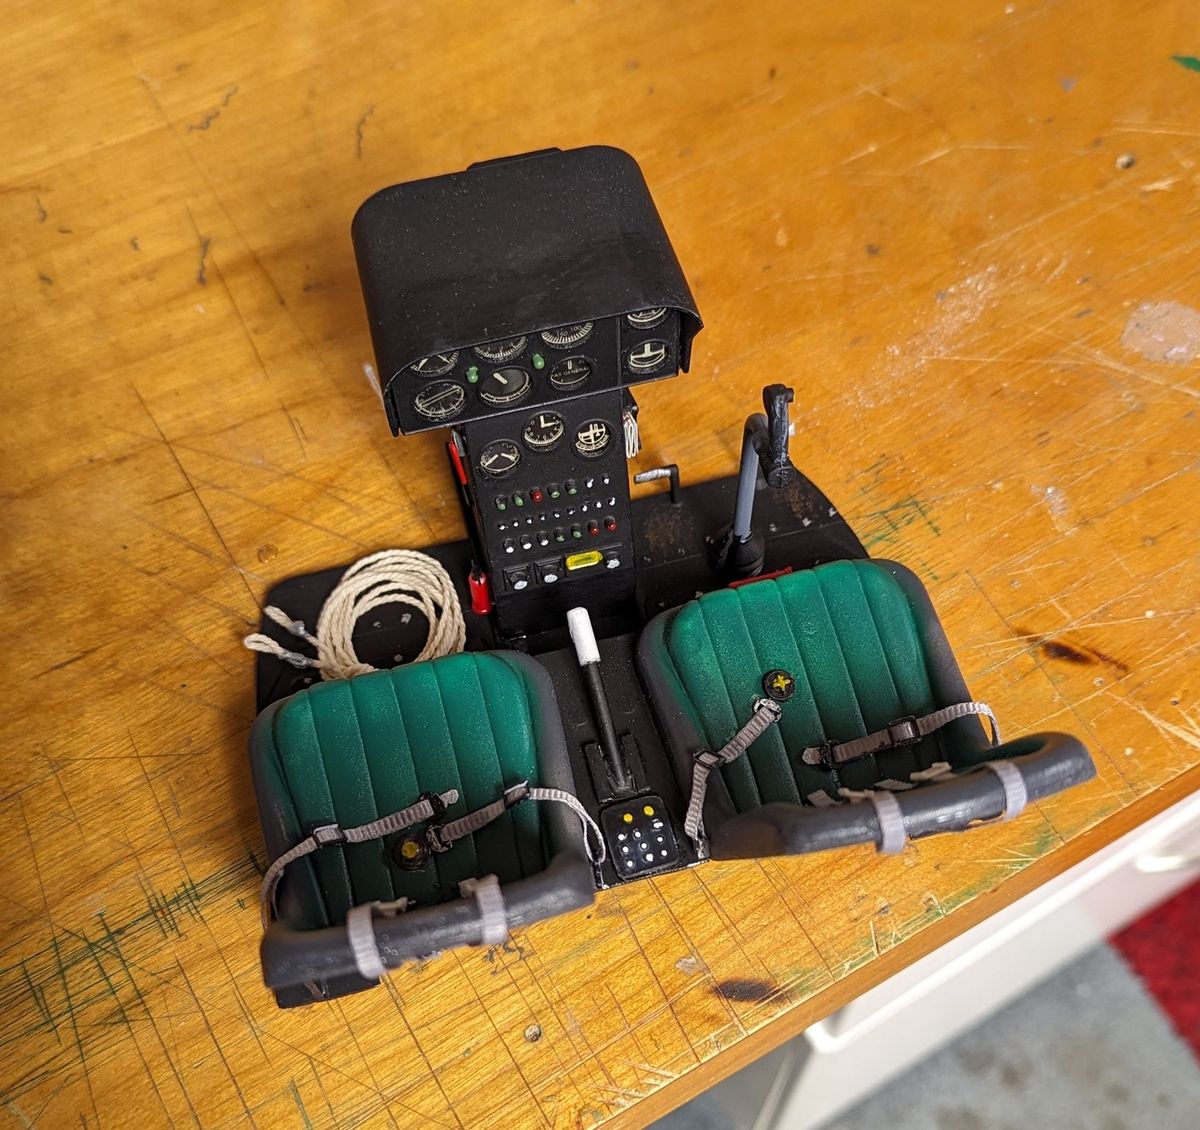
I separated the buckle assy to make it look like it would as if no one was sitting in the seat. I think it adds a lot to the cockpit detail and look great. Thanks Mark!
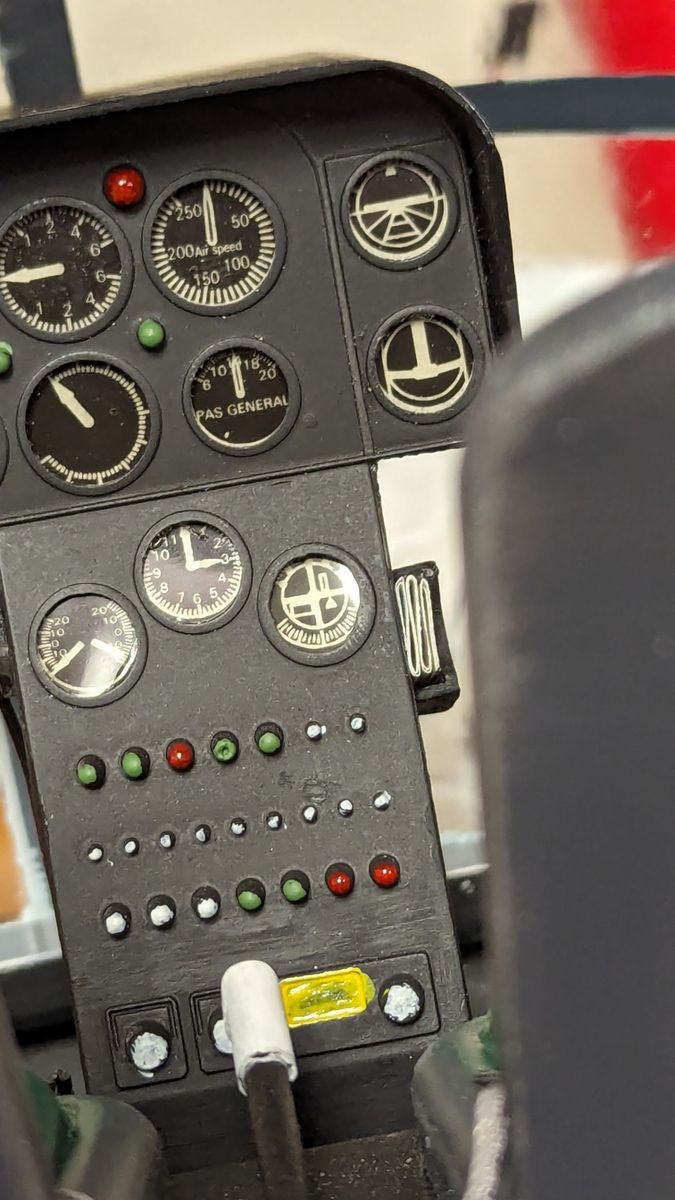
I also set the cockpit up on magnets so I can utilize the space underneath for the reciever and fbl controller.
Tail Setup
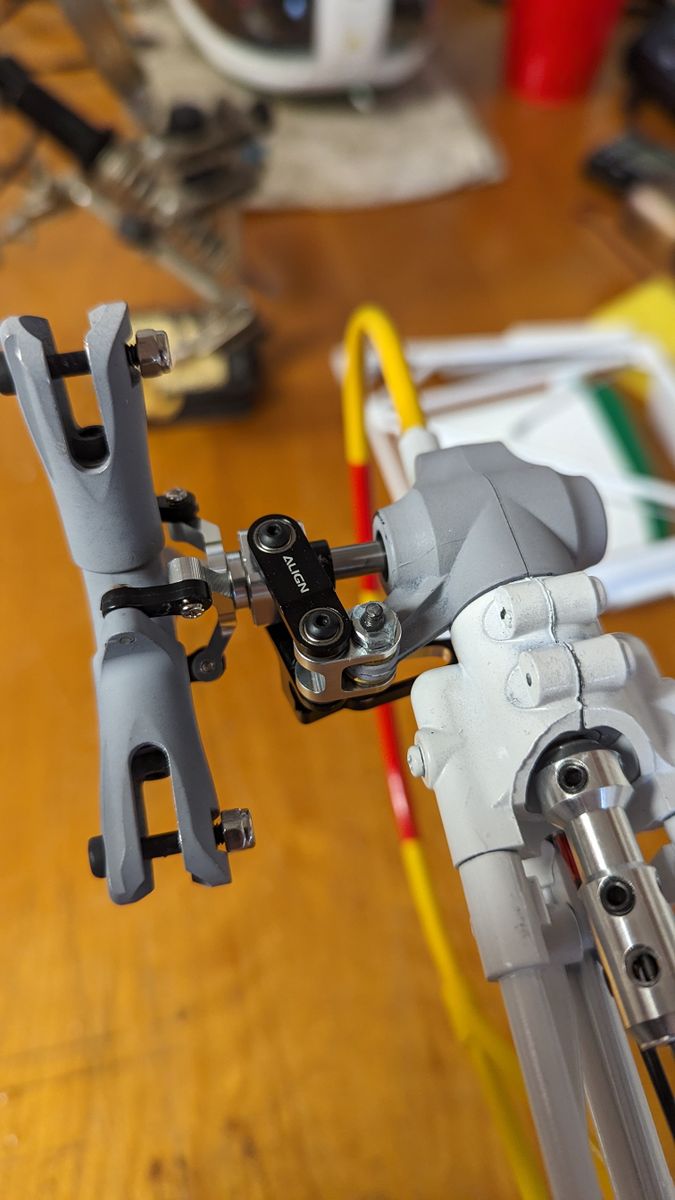
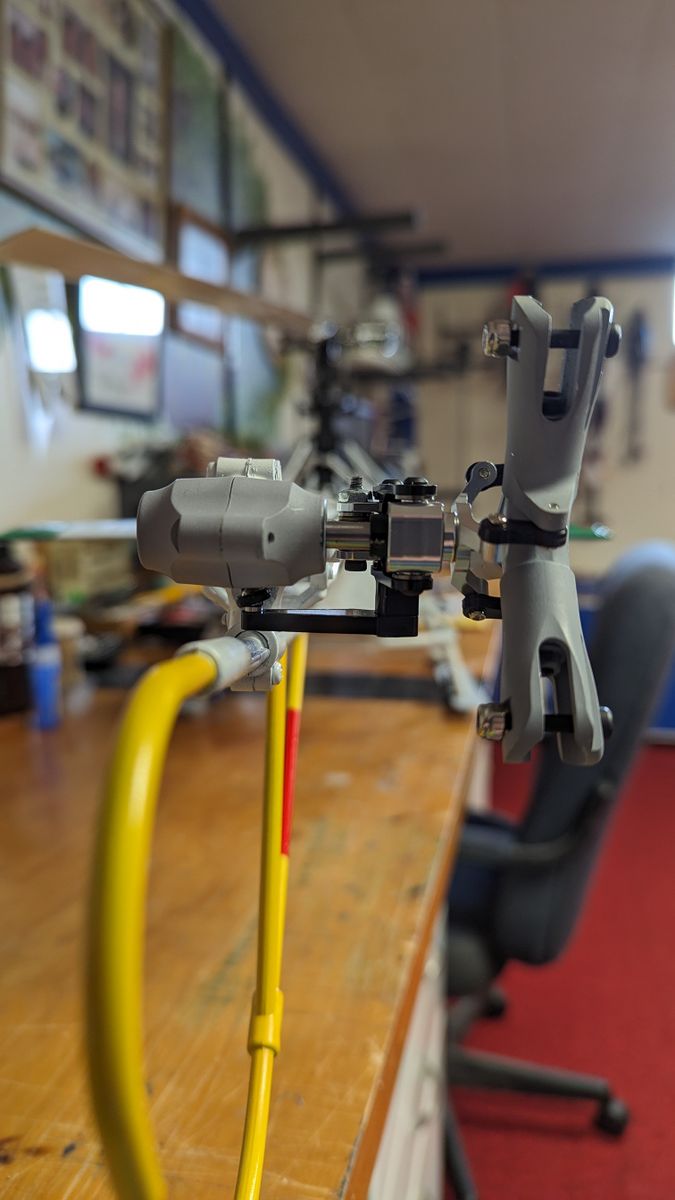
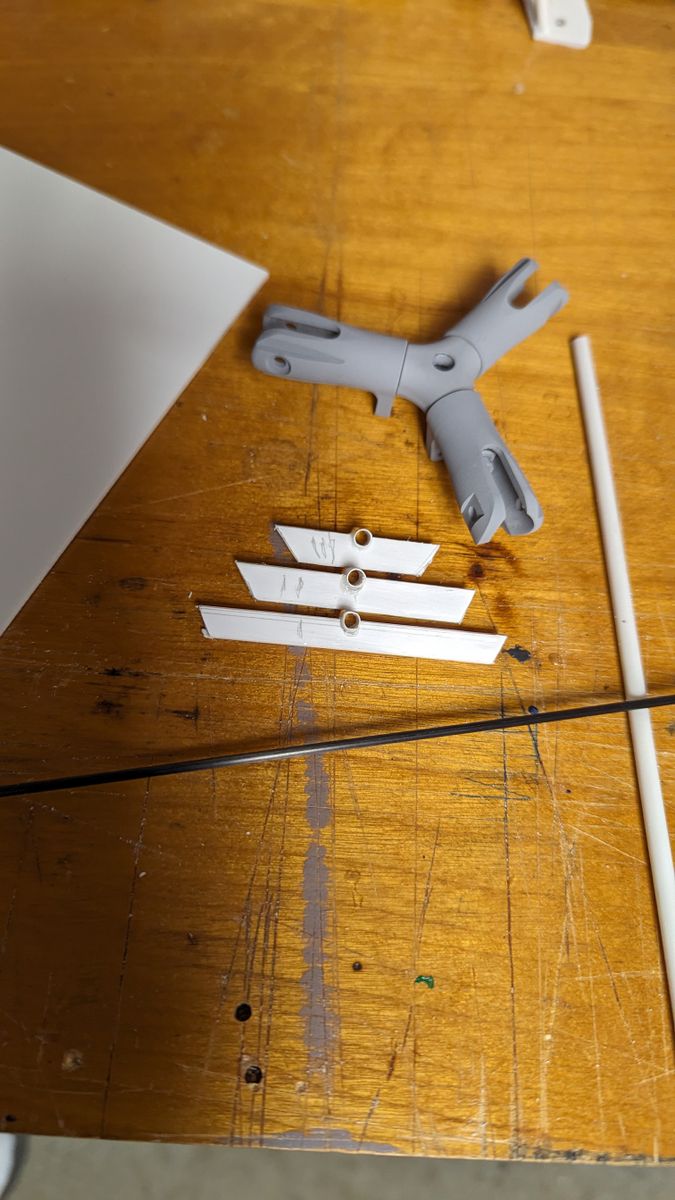
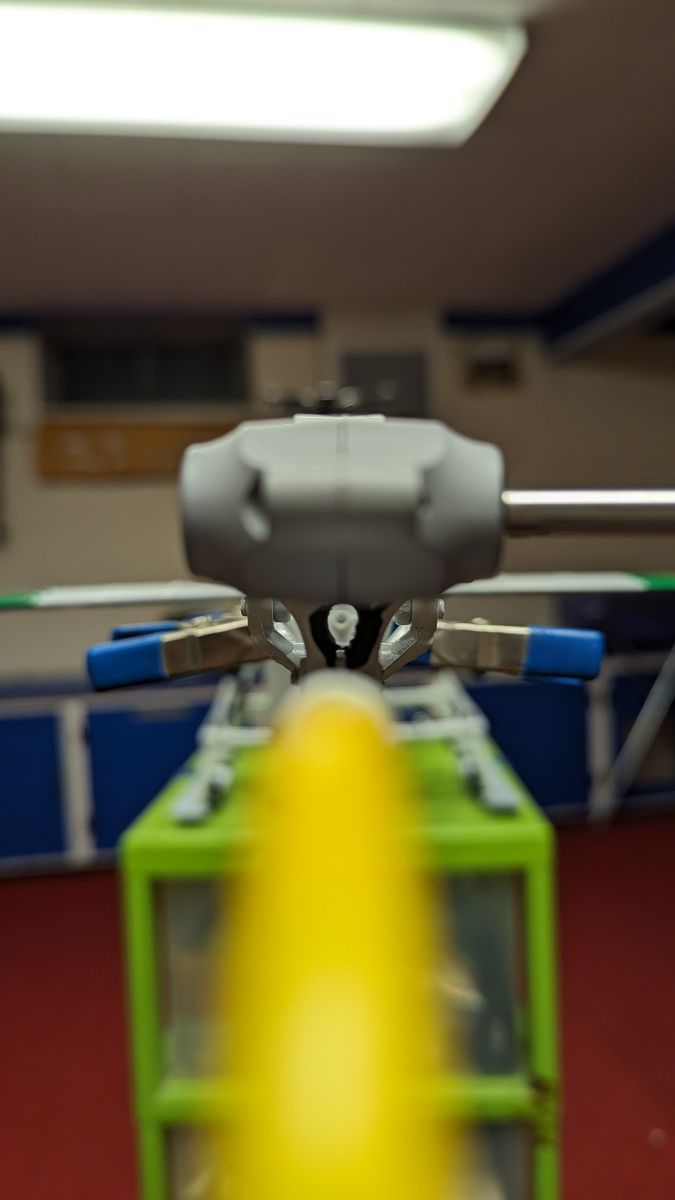
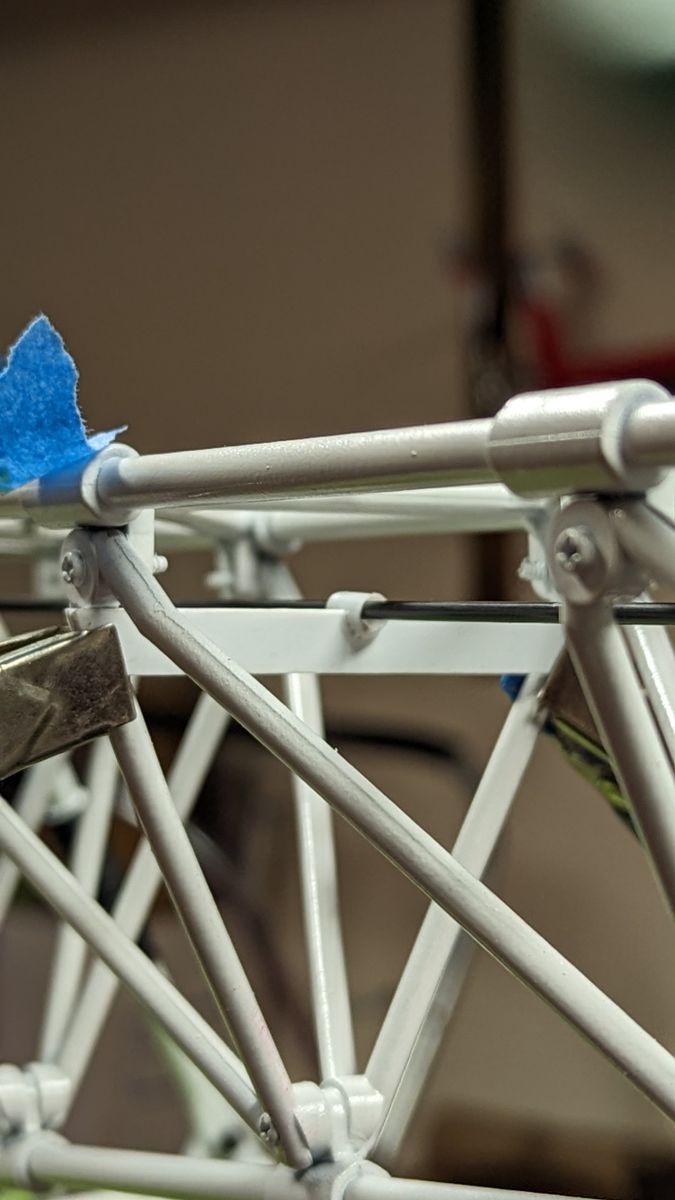
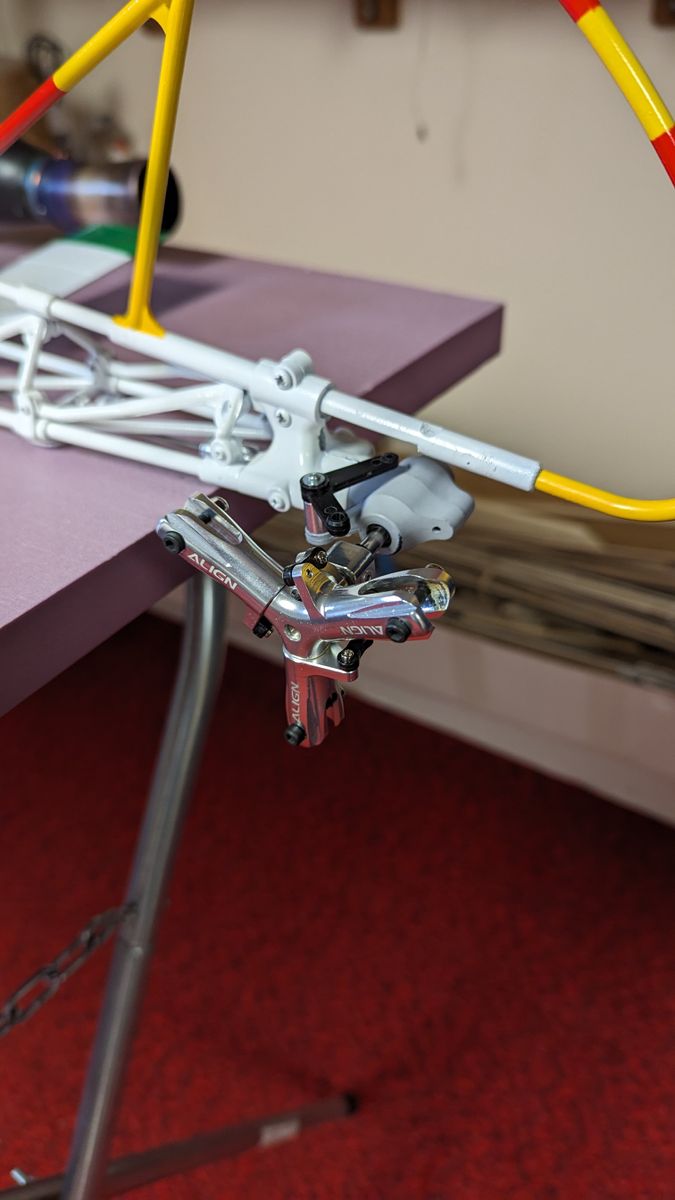
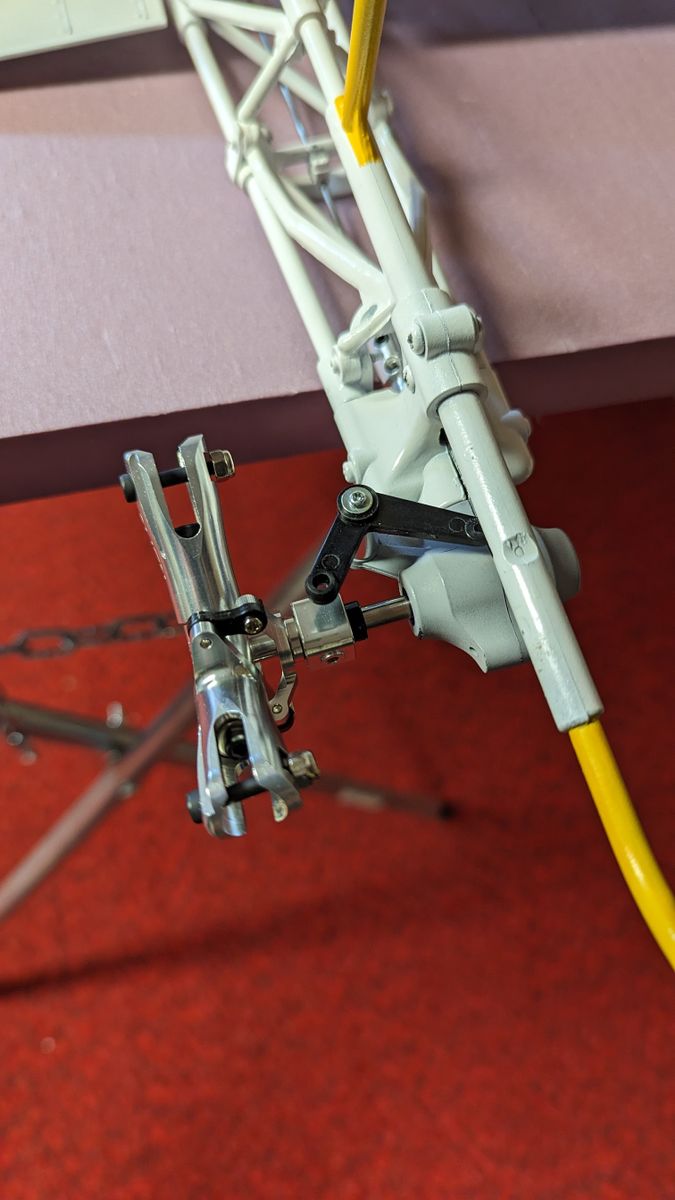
In an earlier chapter I wrote of having an issue with the geometry of the stock Hirobo tail rotor lever arm to the Align 3 blade slider. I tried Hirobo 's "Y" arm but it was too wide for the slider and way too long.
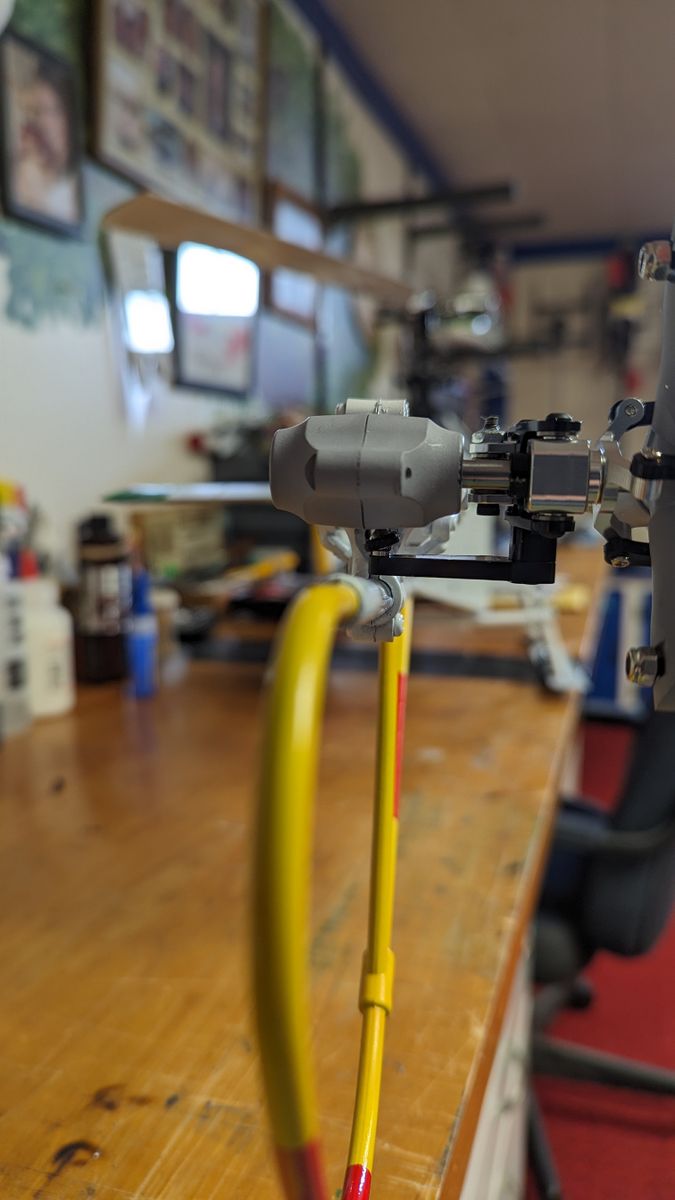
Without having to buy a complete Align 550 tail rotor gearbox, I was able to find just the side plate and parts that make up the pitch change assy. Luckily, with the addition of a few washers for spacers, the assy fit, and works well.
I had to do a bit of modification and make some supports for the control rod. I am not sure if I like it this way or should I try to use a flexible control rod and semi-hide it?
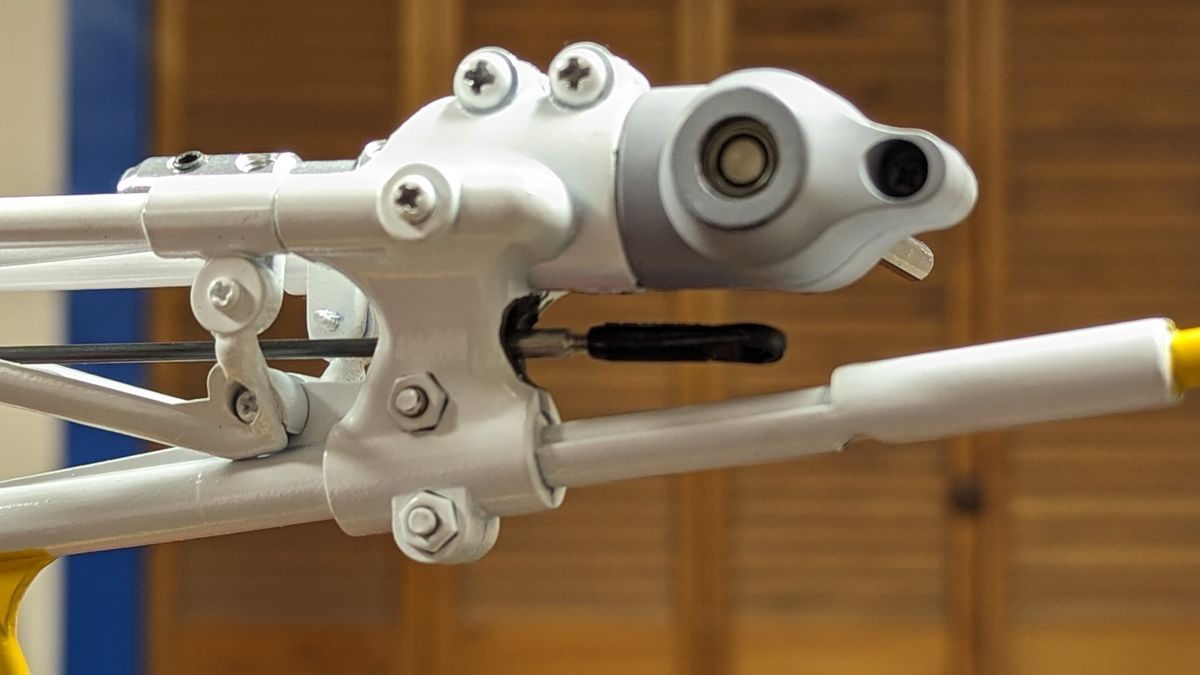
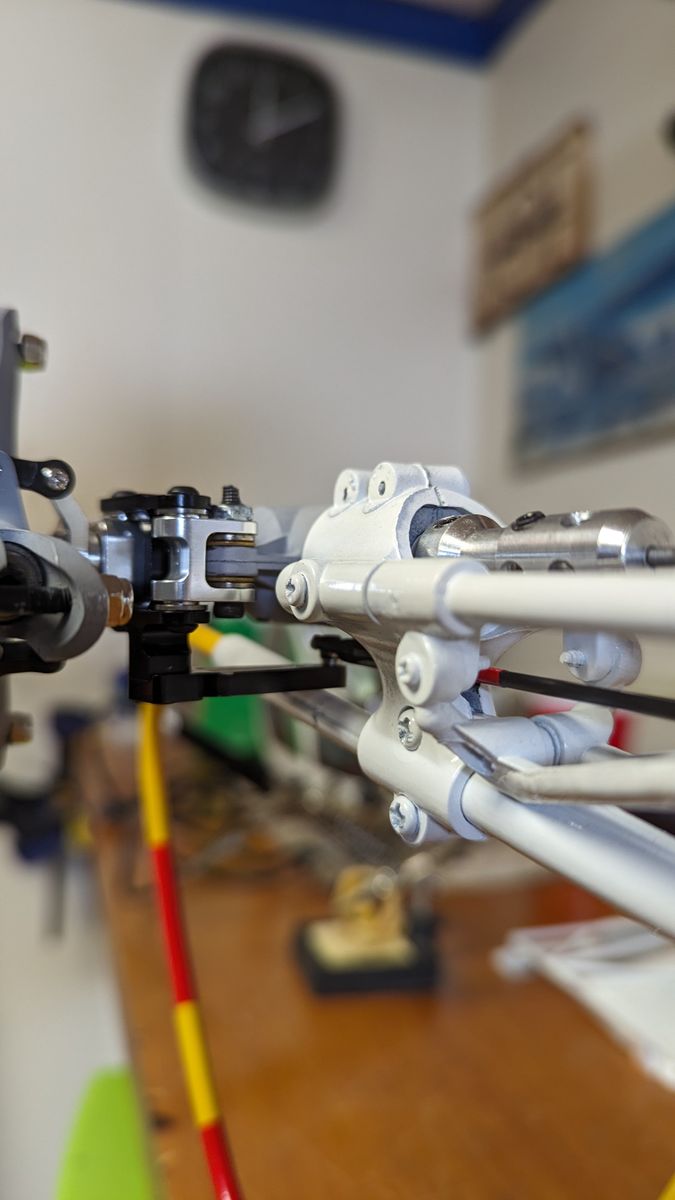
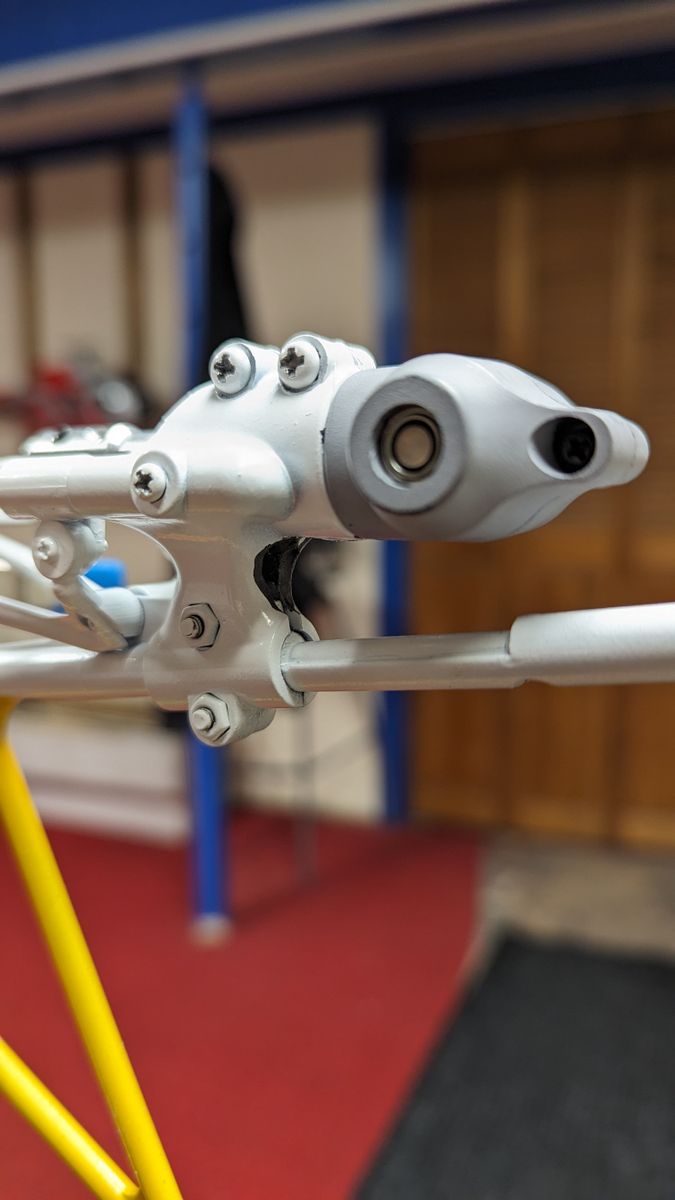
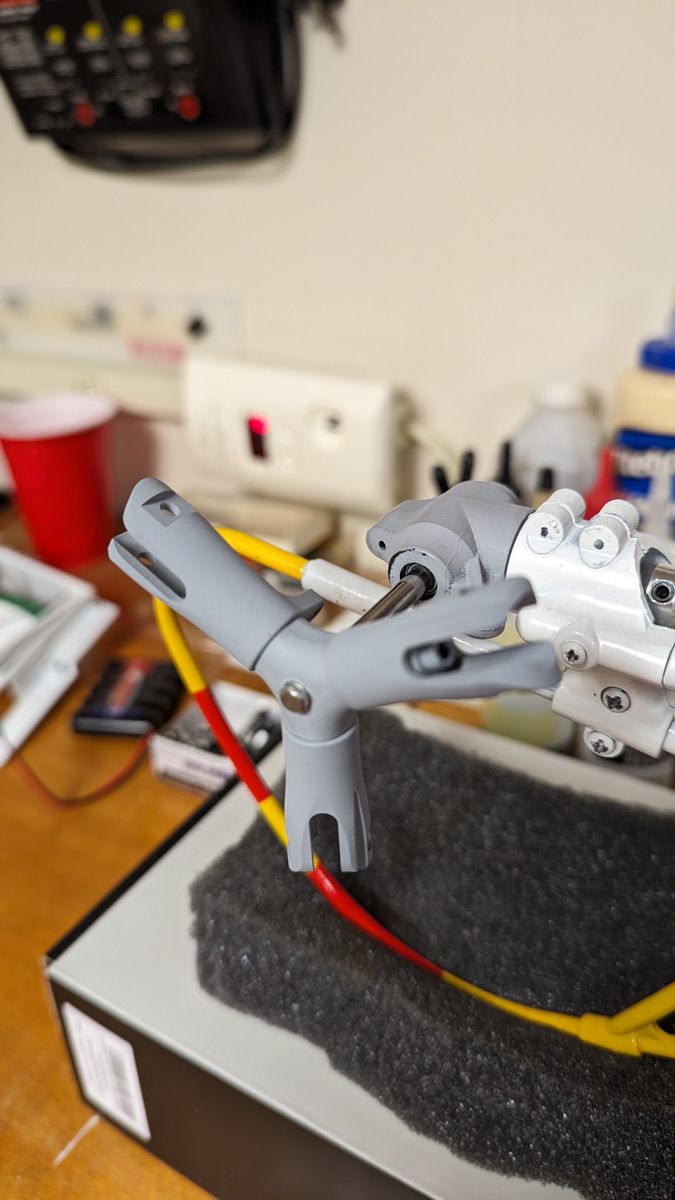
It's Alive!
A little update... I have gotten the electronics installed. For this heli, I will be using the BD 3x. I have never used this controller before and the setup went quite easily. I am using a FrSky Archer RS Plus reciever, F-Bused into the controller and X20s radio. I will probably run through the setup once again, just to be sure.
Upon the first spool up, I noticed the main gear has quite the wobble! That is going to need some attention...
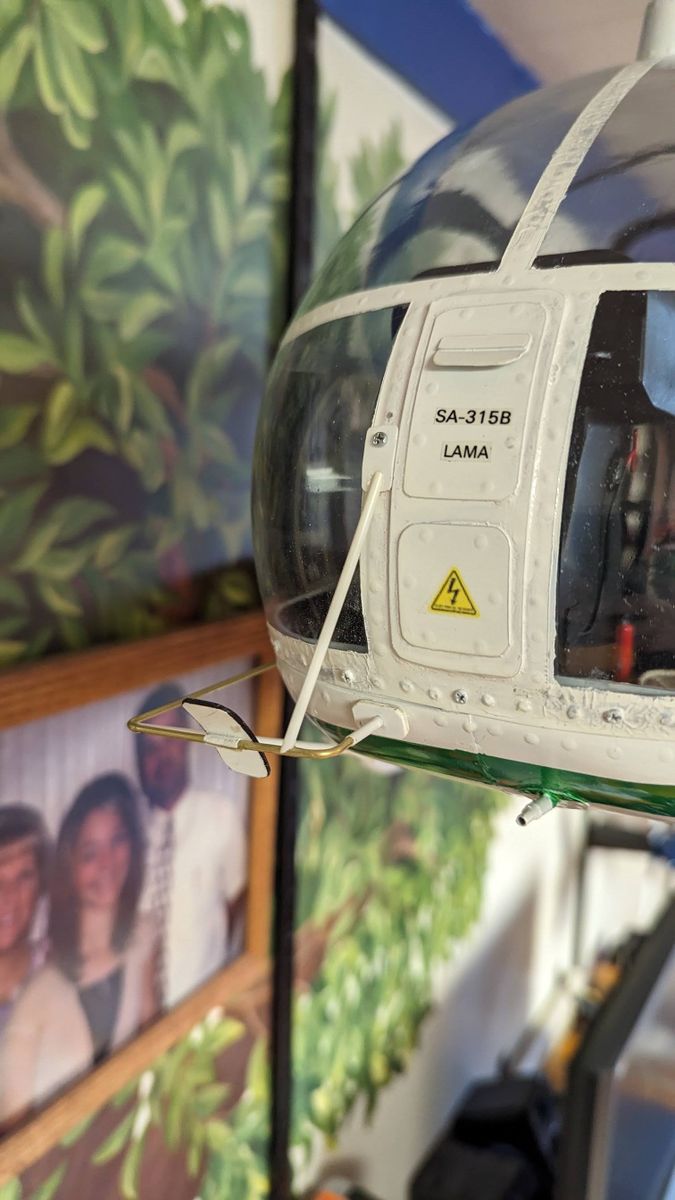
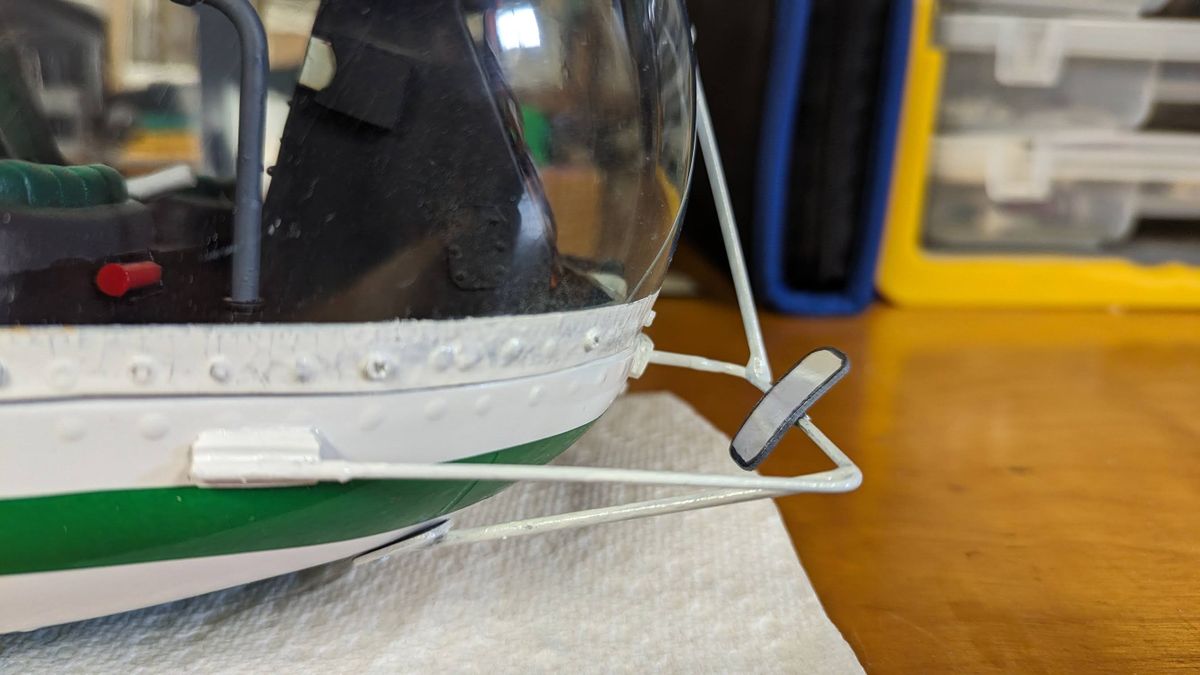
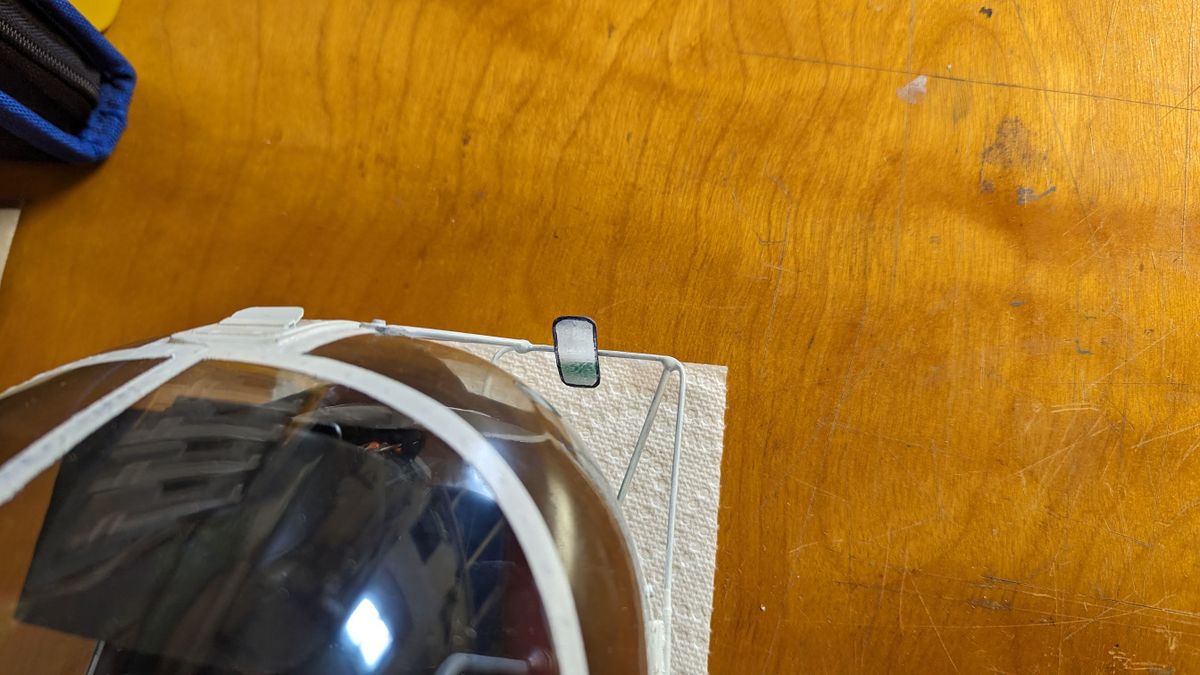
I also added more detail to the canopy by way of the mirror rigging. Next will be antenna and weathering. I had trouble with the paint on parts of the canopy wrinkling, so I will use that as some weathering detail also.
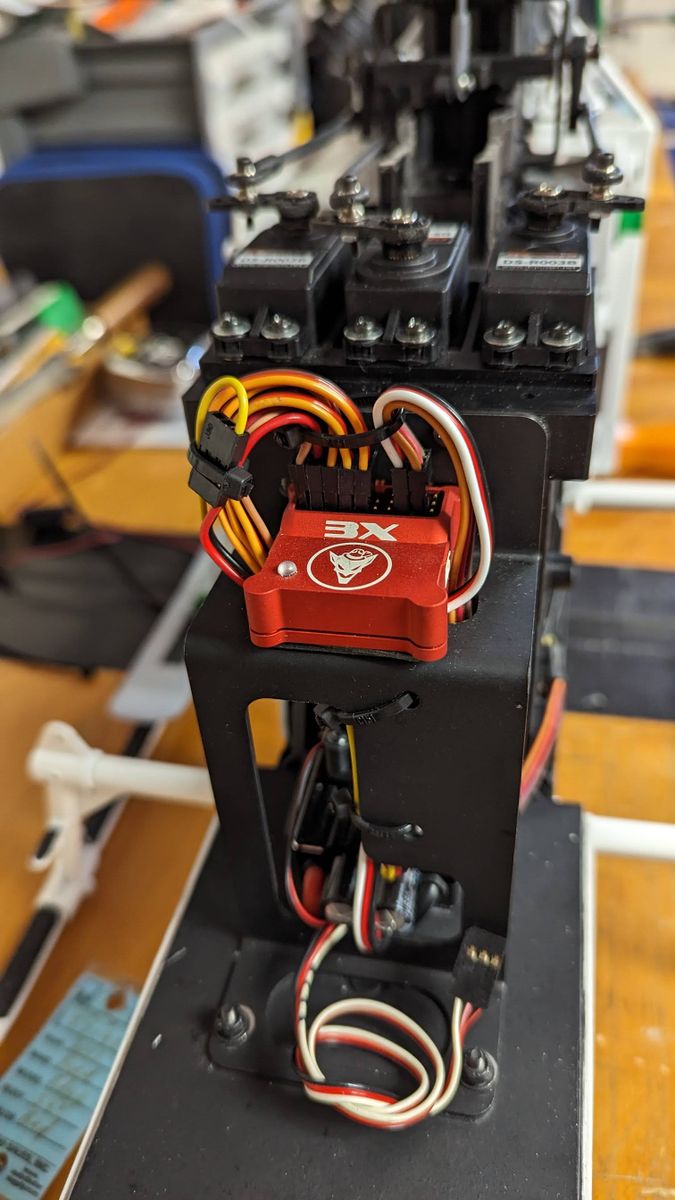
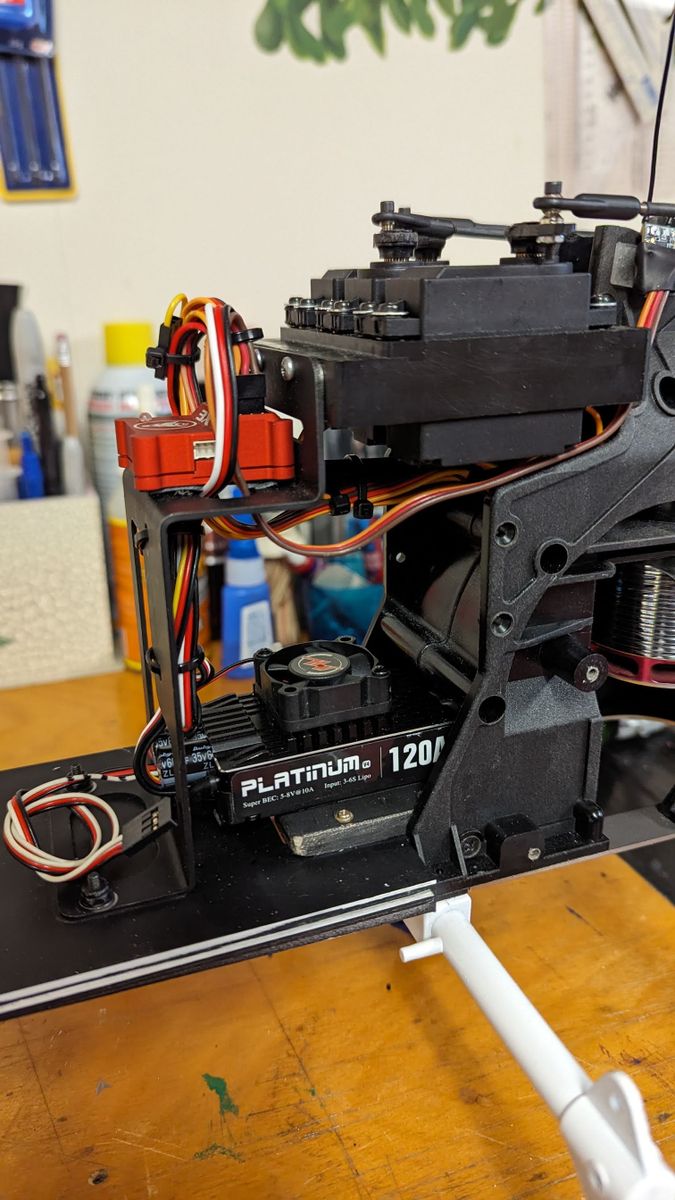
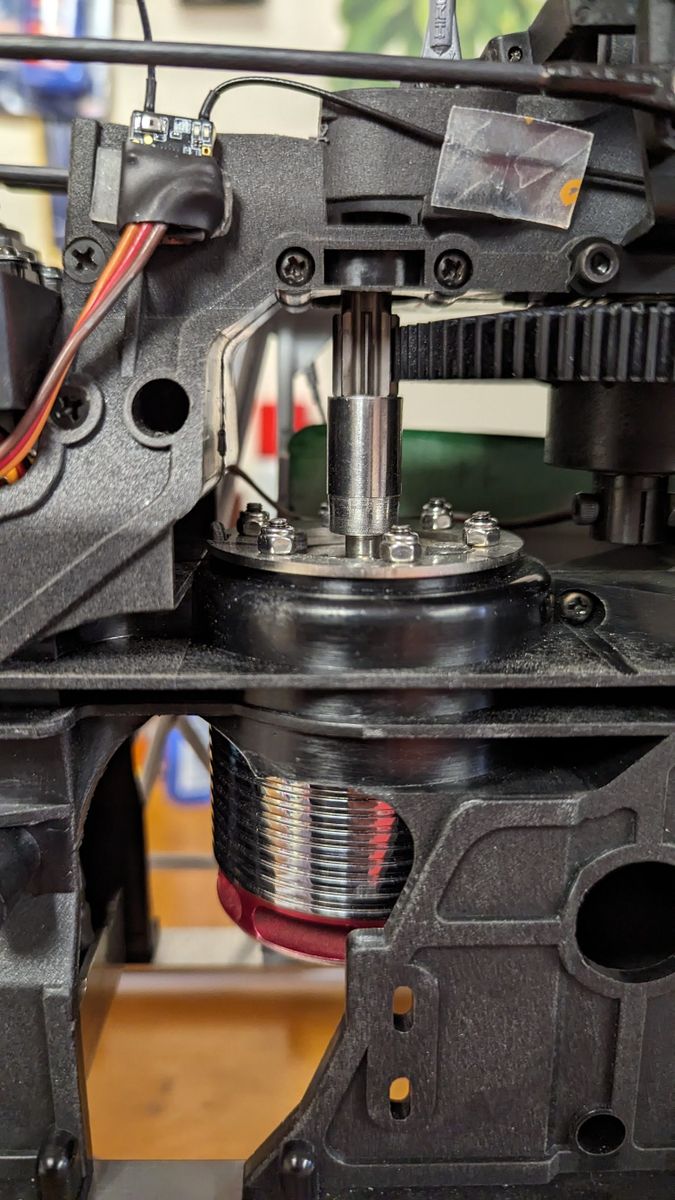
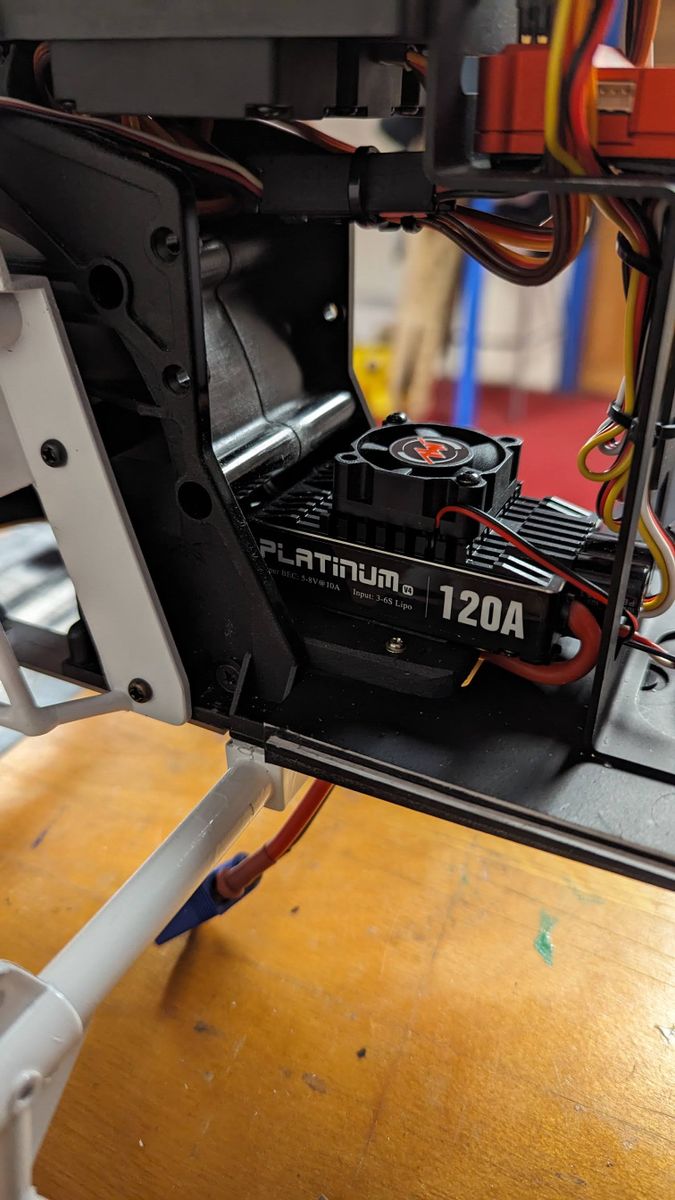
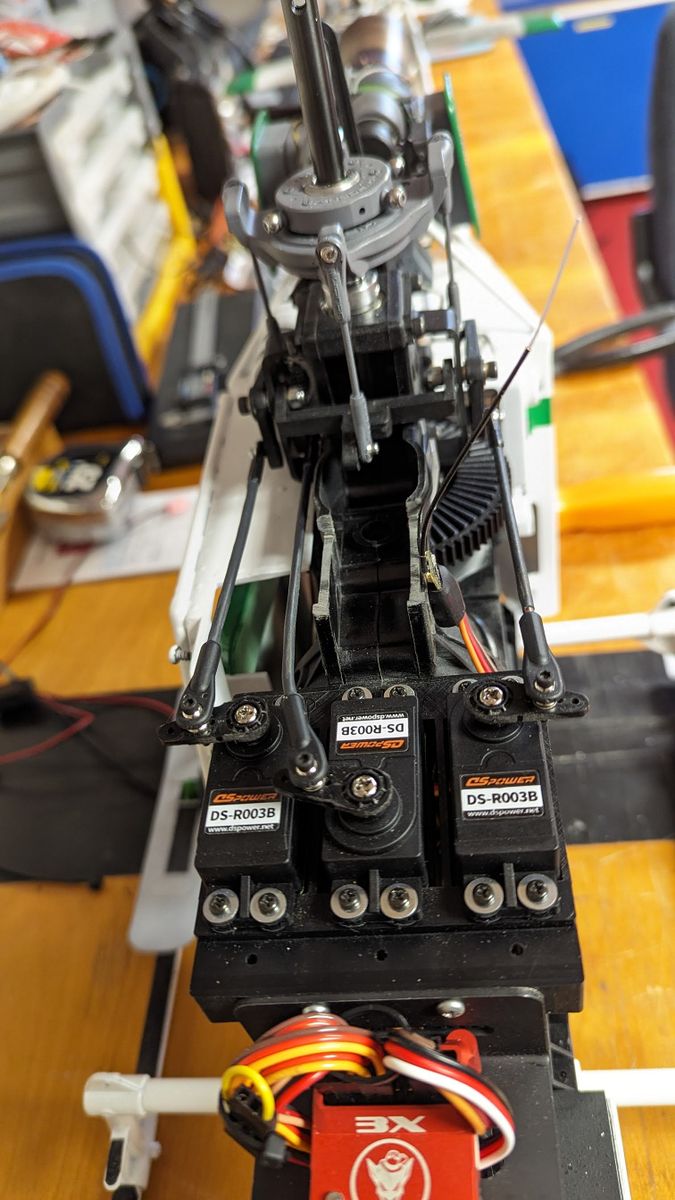
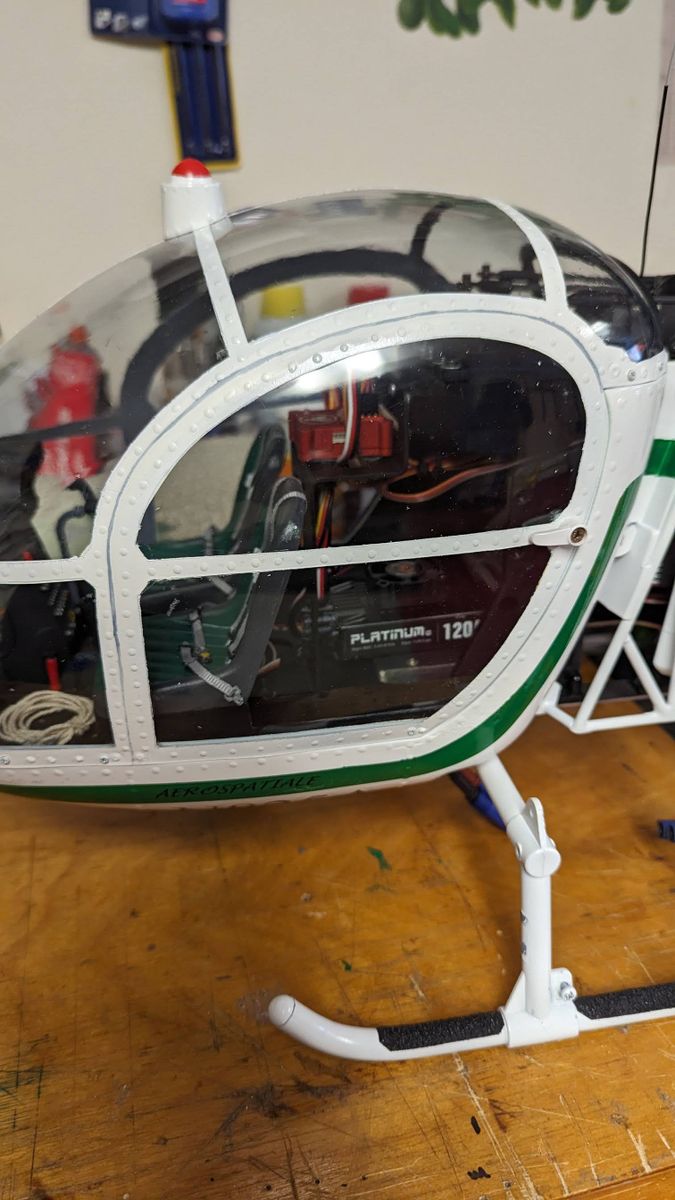
Just about there...
Just about ready for the maiden flight. Going to paint and rebalance the blades first. I did spin it up under its own power with the blades on to set the gov store on the Hobbywing esc. Then set throttle for approx headspeed and pitch curve.
This is my first time using a BD 3x fbl controller. I will run through the setup 1 more time to be sure.
I also picked up a used 3d printer for $75. Kingroon KP3s 3.0. It actually prints quite well! I drew the antenna on the top of the canopy in Fusion360 and printed it as my first bit of scale add on! I was planning on printing the cargo hook support, but won't be able to because of the batteries. I want to draw and print the external baskets and maybe put the batteries there.
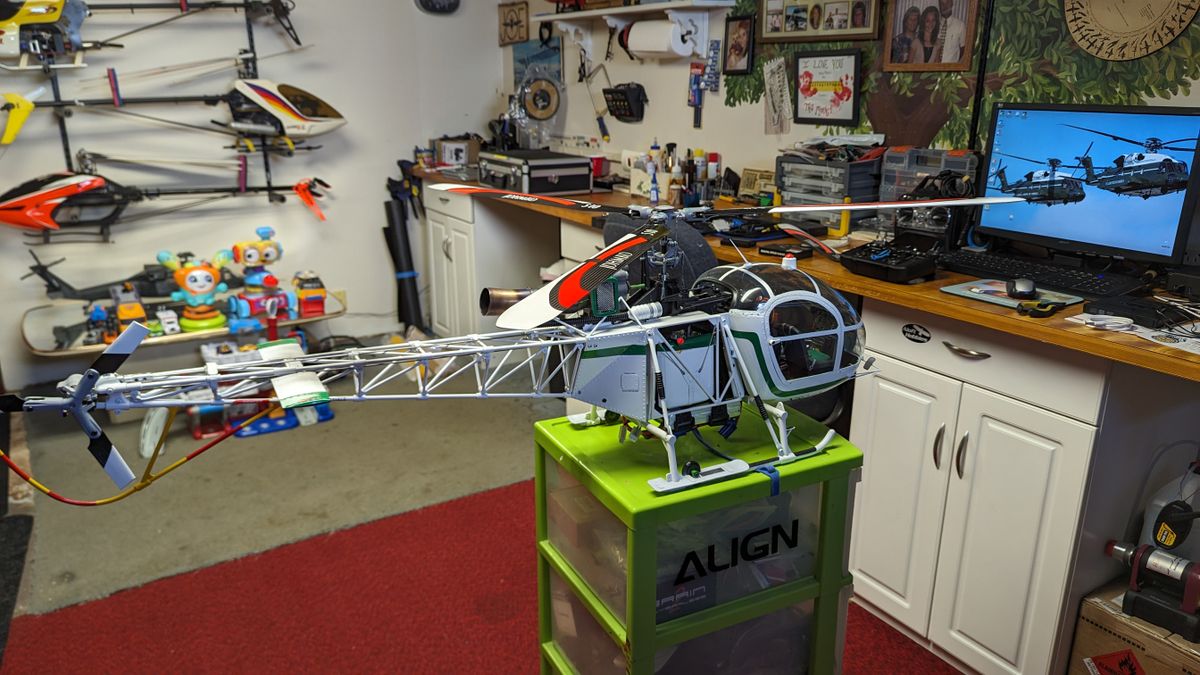
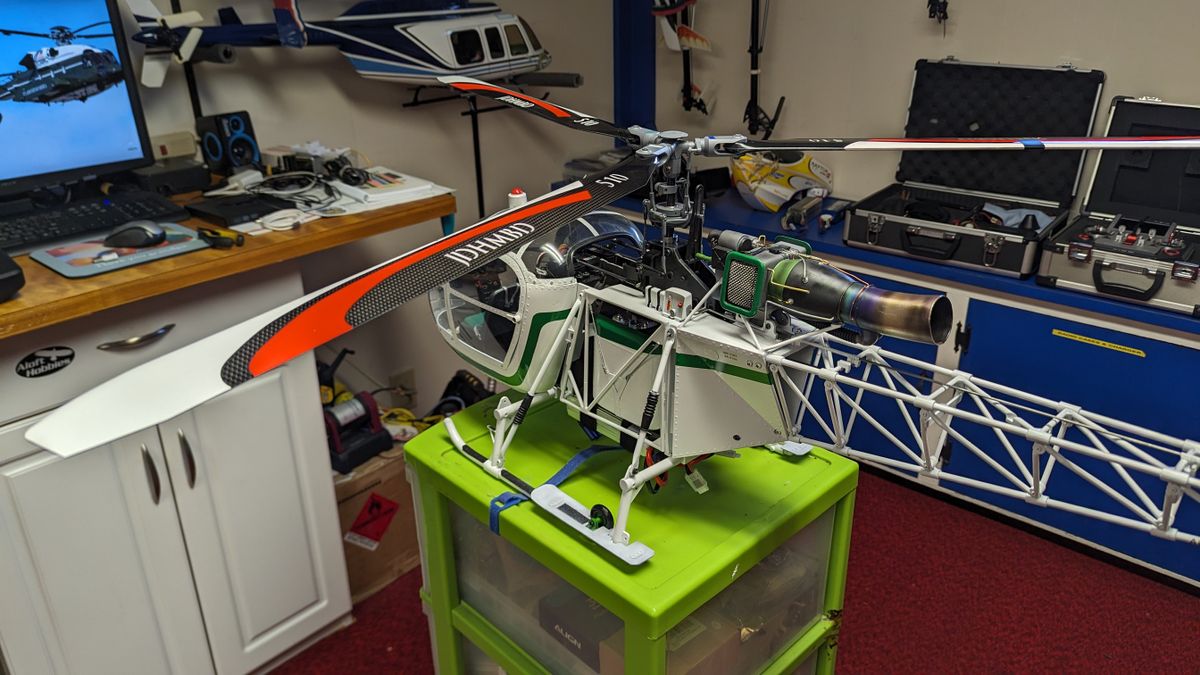
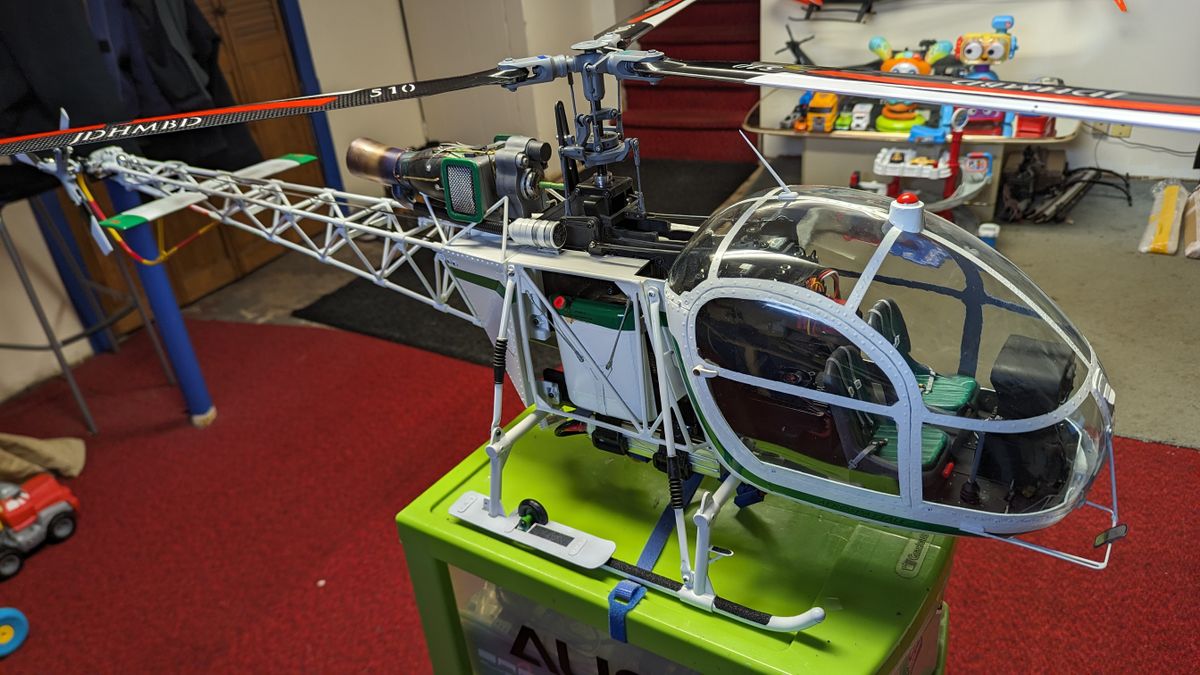
Hovered!
So... You know how I mentioned I was going to use a BD 3x for this build? I chickened out. Went with what I know, MSH Brain2 (mini). I haven't given up on the 3X, I put it into another pod and boom heli until I figure out the whole head gyro tuning thing.
Anyway, I was able to get a couple test overs in this morning in my back yard. Between crazy rain and wind for the last month, things are looking better.
I have 1400, 1500, 1600 set for rpm. 1600 is way too much! 1400 is ok but I tend to chase the pitch around in a hover, like I'm trying to bounce a balloon. 1500 is better but seems too high of a head speed also. I may try 1450-1475 and see what that does. Also tweak my pitch curve for more pitch around center.
Cyclic is good and as expected. No complaints there. Hoping to maiden soon (looks like rain and wind for the w/e again, go figure).
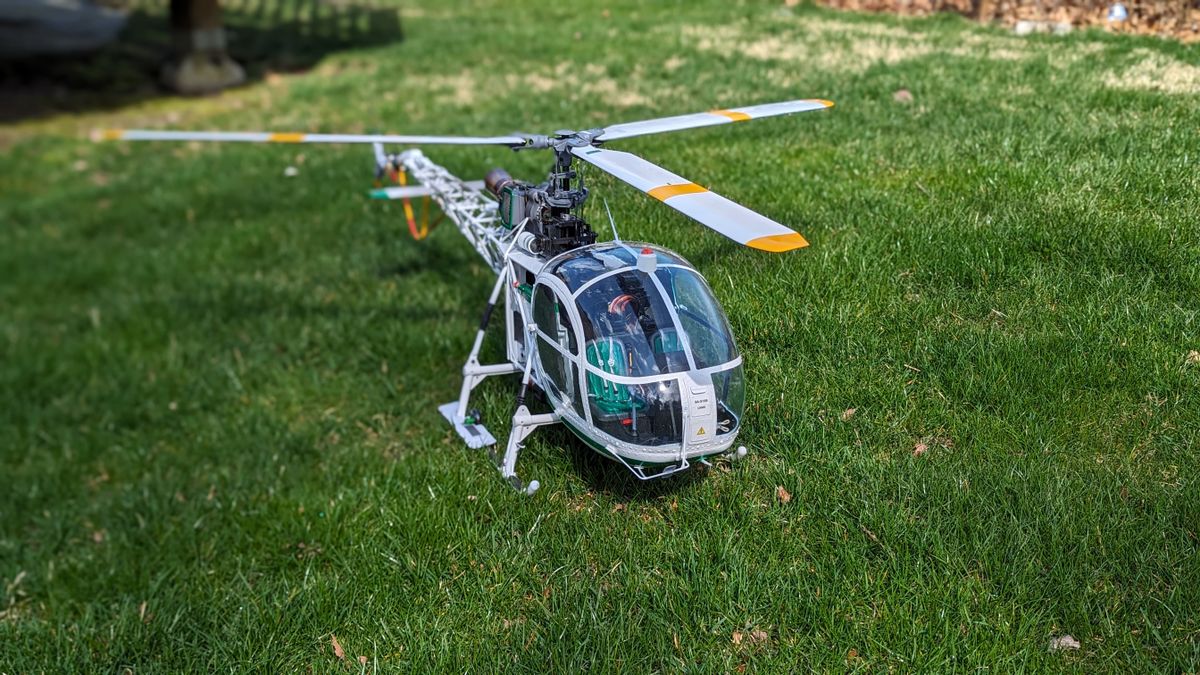
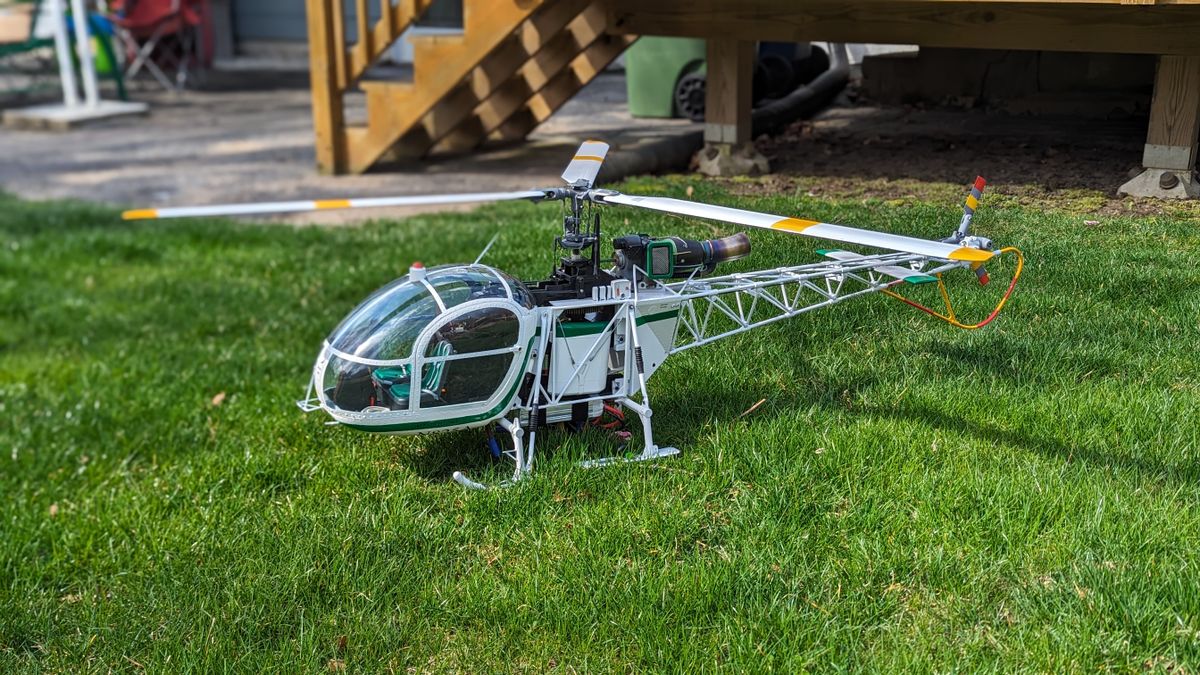
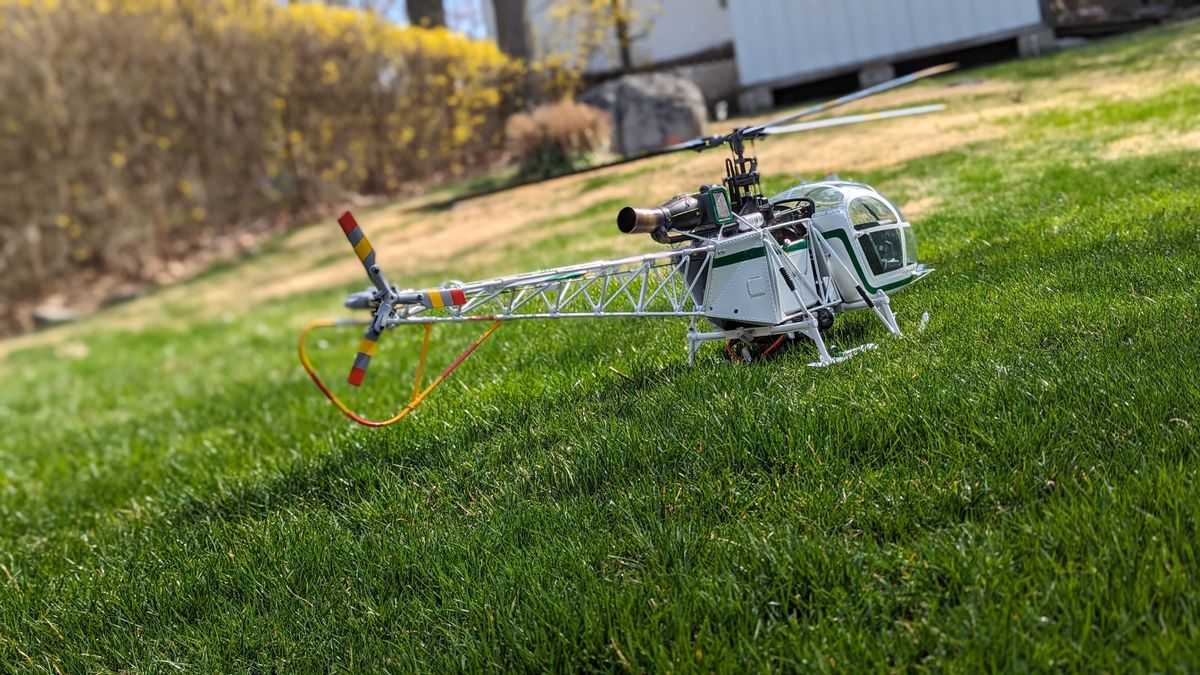
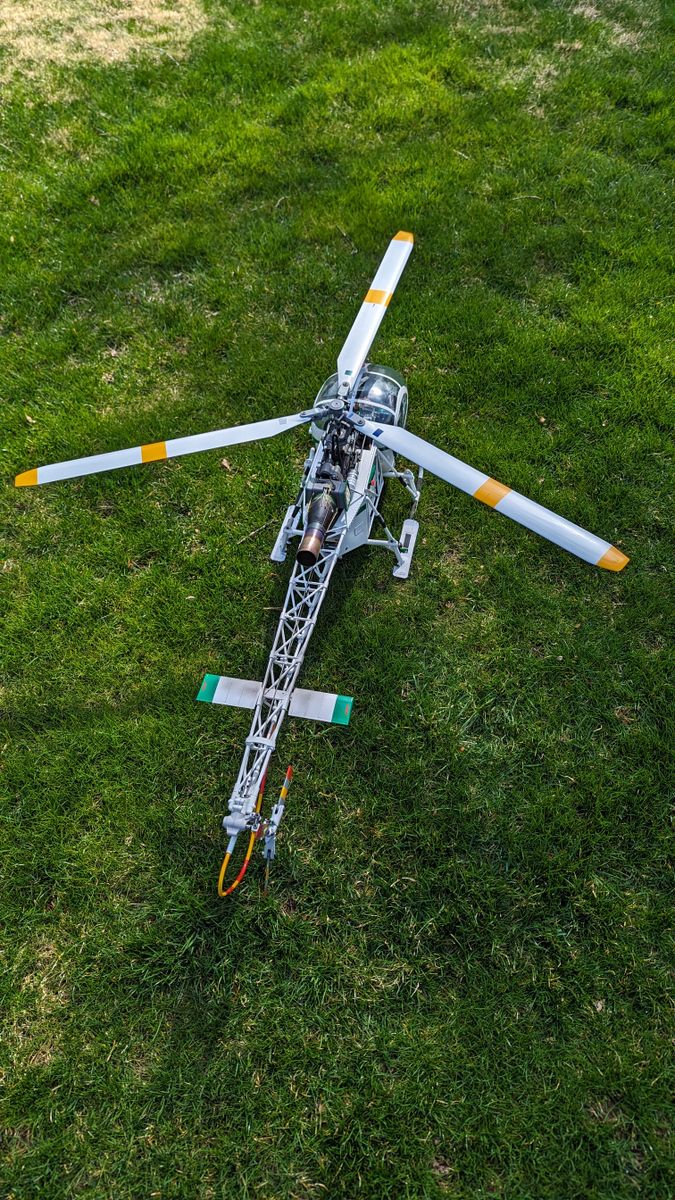
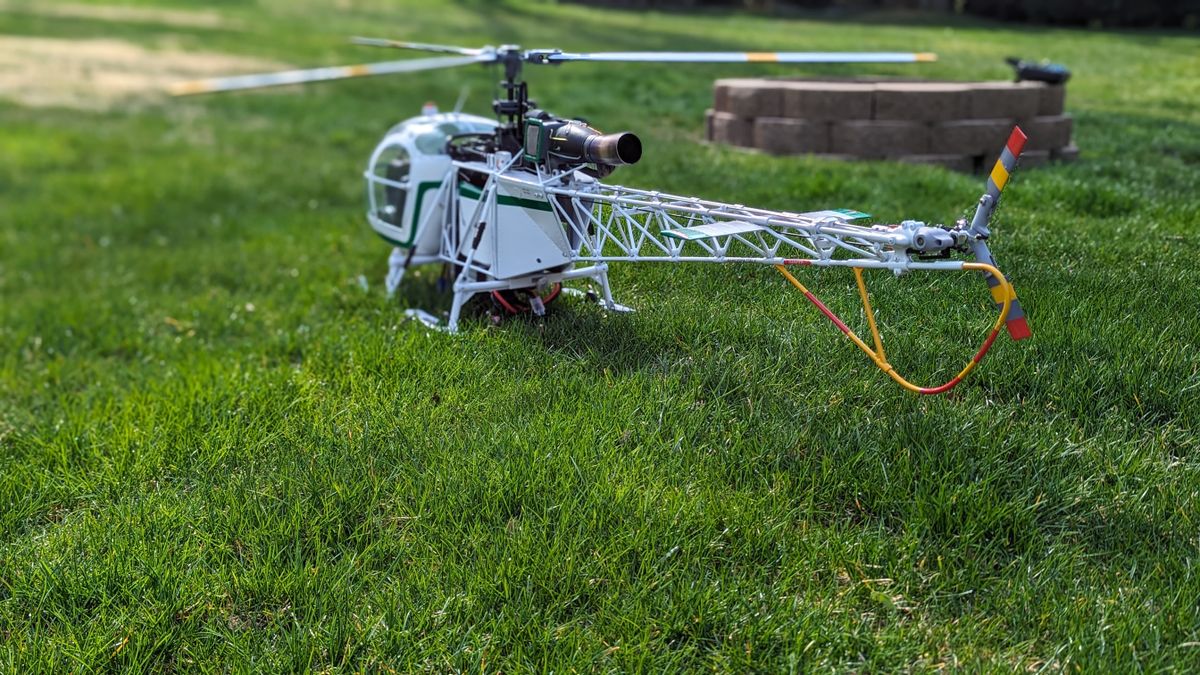
Finale!
Going to call this done. Other than maybe some weathering and scale do-dads, I will just fly it.
After adjusting head speed and pitch curves, I flies pretty good for what has been done to it. I have another project in mind... Till then.
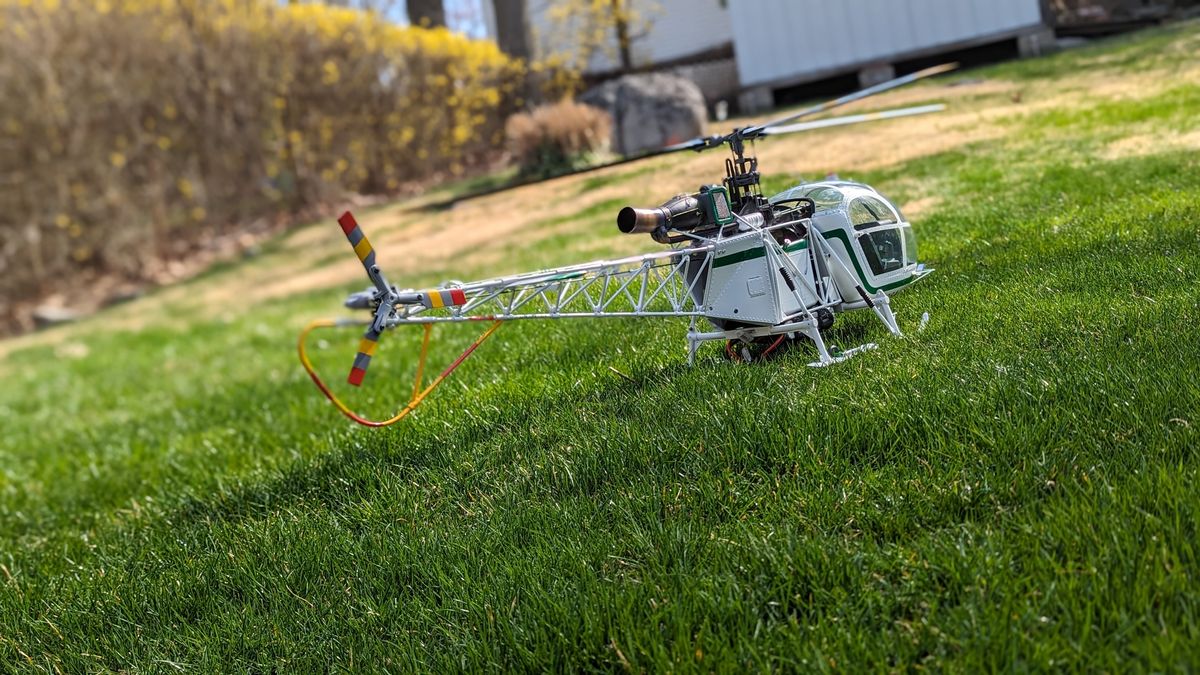
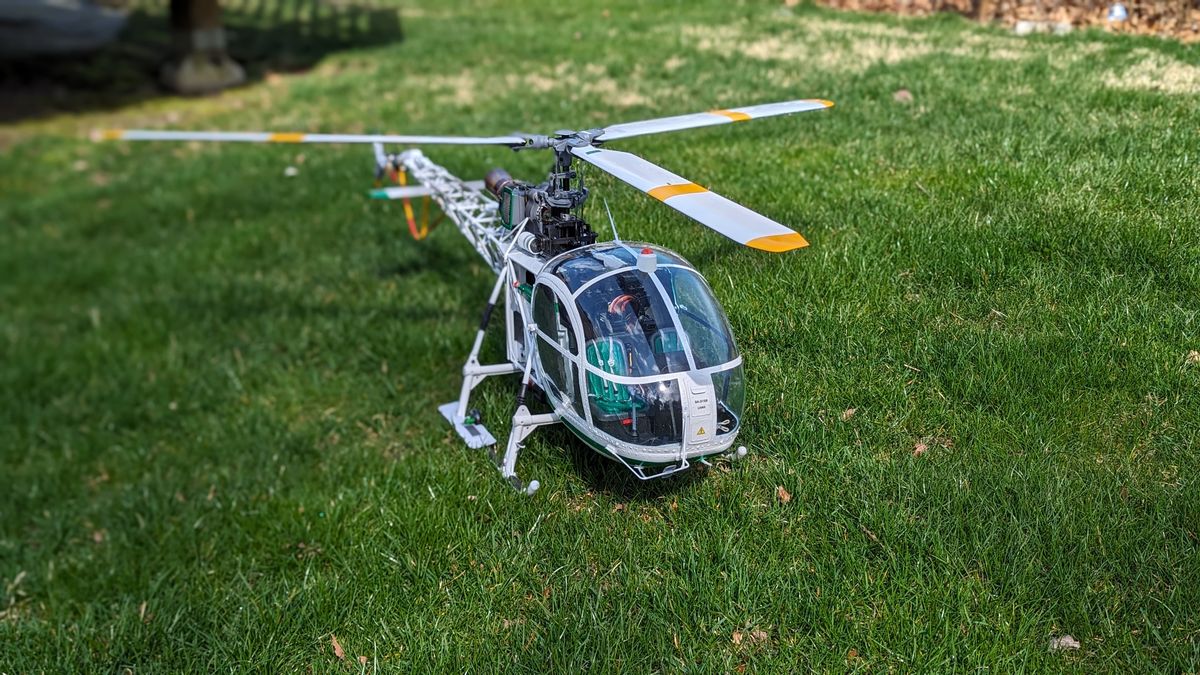
Hirobo Lama 30 EP Conversion
Hirobo SWM conversion with 3 blade head.
Align 3 blade tail rotor
Align 730mx 870kv motor HW 120a esc
MSH Mini Brain2, FrSky Archer RS, full integration
77 Comments
Looks like a good deal!!
Not quite what I wanted (Baby Lama) but I'll make it work.
After I finish the Lama build, I'll let you know what I think in terms of a Lama in that size range. It's pricey but good quality.
And a lot more scale...
Looks great so far
Cool project. Nice to be able to find stuff as well.
Nicely done Mang.
I would punt, but I’m known for being lazy!
There a high probability I'll be punting.
That a good question. Many years ago I worked to have functional doors on my first Len Mount Comanche. A nice touch for any scale helicopter. Thought about it, came up with a plan, thought about it some more and I was off. Well some of the best laid plans may not always work out as planned. Anyway some things to consider.
First if I biff this up can I get a replacement canopy? This is a biggie.
It will need substantial structure to support the doors. Can that be added and not biff up the canopy?
What hinges and latches are out there, how do they attach and when drilling or gluing in place will I biff up the canopy, etc. etc. etc.
There is my 1/4 of 1 cent.
B
Thanks Butch! So far the consensus is to punt and avoid biffing up the canopy. Coming from you guys, it's sound advice.
Dang,
That looks great. Good Idea for the canopy frame work. There are a ton of possibilities for detail on the engine. Have a look at Detail Master.com They have a bunch of detail items that could be used to dress up the powerplant.
B
Oooh, thanks for the tip! I have been saving scraps of safety cable from work to use as braided cable and hoses. I also have 1/16in brass tubing. Going to get the rest in primer first.
Nice Access to DMC Safety Cable. That great stuff. Bell Wire, strip the casing off, from HD is good for detail too.
WOW!!!!
That looks great mang.
Awe shucks...
Nicely done there on the side mods
Thanks!
This is very nice Joe!
Suggestion1: have a bigger shaft to make it closer to real one.
This part is quite visible in flight.
If already installed, you might want wrap it with some extra tube.
Suggestion2: weathering yellow, red and green wirings (otherwise toy looking)
Suggestion3: The last bit of exhaust could have a different color to reproduce heated metal (burned brown)
Thanks Remy. I agree with the red and green wiring. I think that is what's making it look off. I will rework the high speed shaft also.
These colors are not 100% but still showing the idea
Correct. My plan is to "blue" the exhaust at the beginning of the exhaust stack where the gasses would be hottest. Then air brush some soot at the exhaust exit.
I think you are off to a great start on the engine detail. Let me see if I can take some photos of the Arriel 2D power plant in the A-Star here for some basic reference.
B
One of the best Hirobo’s I’ve seen
Joe,
That looks great mang. Personally I like the black mechanics. Its had to see in the photos but would it be possible or is there enough room to make some "faux" covers to give the appearance of the fuel cell? Plastic can be a PITA no matter how well you clean and prep the surface. I have used the Krylon Fusion paint for plastics with good luck. The other option is a pricy trip to the auto paint store.
I hope to see this great machine at some local events this coming year.
B
Thanks Butch. Yes there room for faux fuel tanks. In fact I have been given the .stl files to print them. Just need to find someone to print for me. I am thinking of leaving the paint imperfections and call it wetherizarion! Lol
I like the “weatherizarion”.
Nicely done.
B.
I opted for quick Vivak sheet, which is light and easy to remove for maintenance. Overall aspect not looking too bad from far. Definitively not scale but got very limited space with Align 700X and didn't want challenge that one.
Tip: used crushed gold servo shims to reinforce the holes.
Thanks for the idea. That would definitely be easier!
Looks nice, to me
Nice job on the servo mount. Is that the stock Hirobo tail drive shaft?
yes. That is the stock drive wire. Is it something I should be concerned about? Honestly, I think it is going to be the source of much vibration...
Joe, The wire drive should be ok. Just make sure there are flats when the set screws seat.
I see my question was about as clear as mud.
Is that the stock TGB out-put shaft. Its Monday. Lol.
No. That is the upgraded, metal tail drive gear. I didn't like the stock setup with the plastic gear and the sleeve over the drive wire output. This one will secure the drive wire a lot better. Good advice on the flats. 👍
Sorry Butch, re-read your reply, it is definitely Monday... It is the stock TGB. I am going to try to adapt Aligns setup. There is def room to move the unit in on the shaft and still get enough throw.
Amazing
Well, not quite amazing, but it'll do.
Where did you pick up the .slt file? it has potential...
cults3d.com
https://cults3d.com/:1464541
Looks great Joe. Nicely done as always.
B
Amazing details..
Thanks, Massimo!
WOW!!!
That looks great Joe.
Thank you, sir.
Happy New Year 2024 Joe and All the best to you and family.
Fantastic Micro work !!
You know that these amazing details won't be all seen in flight, therefore proper static display is best.
Too many helis are just laying on the ground when not flying, while public not able to appreciate scale details being too far (security).
Stand device, info panel, transport and team in action are much appreciated,
eventually!
Thanks Rémy!
Nice mod on the tail and the control rod
Comments
First spool up without main blades: put a finger on the carbon pushrod to confirm doesn't vibrate.
Nylstop allows perfect adjustment, maintenance tuning and no risk to get loose (no need to glue/loctite then).
Thanks Rémy. Yes I need to change the hardware there. There is an issue with with the nut hitting and limiting the travel of the black arm.
I had to radius the nut a little to get the travel I needed. I also will flip the cap screw over and install top down. Thanks for the tips.
So cool 😎
This is quite visible - I use auto-styling matt vinyl film (or permanent pencil for small area)
Does wrap and stick well, easy to remove if needed one day.
Application example
Thanks for the tip, Rémy!
Dammit Mang,
That looks great Joe. You will like the 3X. Been flying the BD for many years. It will really come together once the blades are painted.
Nice Job Mang,
B
Thanks Butch!
Question for you. In the setup for the 3x, what would be a good starting point for the head gyro, rigid stabilization? This is the only point of the setup I am not 100% sure about. I have the channel on a pot for adjustment, just not sure where to start.
That a good question. If you ask 10 modelers you will get 12 opinions.
Every heli is different. Each have many variables that will affect the stab system and how it reacts. Get it in the ball park and adjust from there.
I usually set a reference number of 70. Lets call that the "home" setting. I will set up banks to have 3 different setting but always have a "home" or "base setting" to return to if needed. Using banks I will set 70, 75, and 80. Once comfortable with the "home" setting flip the switch ( I prefer the switch) or adjust the slider to the next higher setting (75) and see how it fly's . Is it better? If so give the next setting a try (80). I take small steps and work my way to the point where it feels like I want it feel. Remember there are several other parameters that can affect things as well. The default settings once you select the helicopter rotor diameter are a good starting point and adjust from there.
Hope that helps.
B
Ok. I get it. That is very similar to Brain/iKon bank setup for flying styles. I will go in that direction instead of the pot. Thanks!
Heli looks Fantastic!, If you ask 10 modelers you will get 12 opinions. Good one Butch LOL
I use the 3x in all my helis, and the default settings will work for most right from the get go, i personally don’t use the remote head or tail gains on a pot once setup,
Once everything is adjusted to me liking everything comes off the switch. Heck, sometimes my sausage fingers get mixed up between the landing gear and stabilizer functions. Last thing I need is to turn off the head or tail gyro. Ha
B
Good morning Butch, and that’s why I do it, even just putting your radio in and out of case, the chance is probably pretty high you’re going to move the knob or slider., personal preference
Some photograph took couple picture in flight. When looking at those afterwards, we found very visible that there was no pilot onboard! Not something we focus on when flying.. Find picture prior enhancement.
Any provision for your beautiful machine?
Hi Remy, I understand what you are saying. however I find the scale pilots to not be very realistic looking and would rather not add one that looks cartoonish. Besides, I doubt a professional photographer will be photographing my heli for any magazines. LOL!
Ghost Pilot ! lol
At least it wont look cheesy as most do. IMO
@Joe Bessette
Wrong assumption 😄
Rèmy, I have come across this pilot. Lol
Doesn't look too bad. I will have to take some measurements to see if it will fit.
Sorry, I wasn't implying your heli wouldn't be photographed for a magazine. I meant mine. I edited my comment
Yep, nice. Exact size to be checked indeed.
Note the servo operated head and random motion generator options. Not cheap but you might like it.
Joe that looks great. Fine job my friend. Hopefully I will see it at one of the upcoming events up here in the northeast.
What kind of collective pitch range are you running?
B
Thanks Butch! I have -4 to +10 at the top. Around +4 right now mid pitch. Blades are 510mm. Normally the 2 blade head would be 550mm.
I am hoping to make it to MA. this summer. Yours is closer to me but driving through the city gives me anxiety! 😂
Looks awesome 👌👏👏 ... I'll wait for the video 😉
Joe,
Glad to here it flying well. I think it needs a "cross country" trip from CT to LI in a couple weeks. If not hope to see you and your machines at the Joe Howard Memorial in MA.
B 😊
Thanks as always, Butch!
How's the ferry ride across the Sound? 😂
Take about an hour+ and roughly a 45 minute or so drive from Port Jeff to our field once off the boat. Ferry runs about $75 for car and driver each way.
The drive around, as long as there in no Zoo York traffic takes roughly the same amount of time however the big variable is traffic. If heading over for the day (Saturday) The morning drive should not be bad but all bets are off for return drive in the evening. If you are able to make it, maybe drive around in the morning and take the ferry back and make a reservation.
B
Don't know how you do it daily.
Just the thought of coming through Co-op city gives me anxiety!
Ha. I only drive about 20 minutes each way to work now.
When I was traveling for work, I would get through the city on Monday morning by 0600 so it was smooth sailing. 1 hour 6 minutes form home to TEB. 62 miles. Drive home on Friday at 1200 was almost 3 hours.