

600 Size OH-58A Kiowa (Funkey Conversion)
 Michael R.
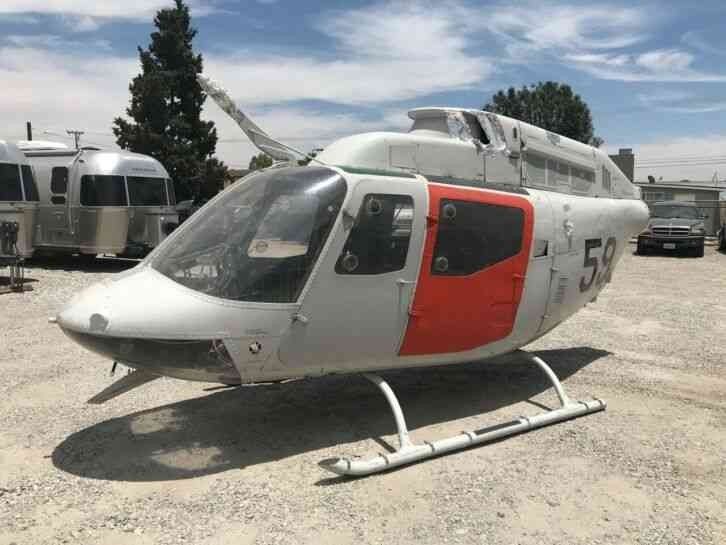


The Subject: OH-58A 68-16936
A few years ago, I picked up a blade 550X at a swap meet, and have been trying to figure out my next project. After some consideration, I bought a Funkey 600 size Jetranger fuselage for it, and stretched the 550 to a 600. However, I didn’t want to build your run of the mill Jetranger. Instead, I will be converting it to a Vietnam War OH-58A.
I knew I wanted to replicate one that carried the mini gun, so that severely reduced my options. I did however find some great photos of one machine, OH-58A 68-16936 of the 3/17th Air Cav, A Troop, “Silver Spurs”. It appears to have an ammo box mounted to the side of the copilots armored seat to hold extra smoke grenades. There was just one problem.. I couldn’t make out the text on the upper cowling..
Like any good scale modeler, I started a deep dive for reference photos. All searches turned up empty. I contacted Veterans who were in the unit, and no one remembered the name. I even contacted the Army Aviation Museum, who redirected me to Army Records at Redstone. Many emails were exchanged over several months, and I had to file a Freedom of Information Act request to get them to look for records of that airframe. And they told me that the records were missing for that airframe..
In the process of this search, I learned a great about the history of the real 936. It survived the Vietnam War and served in the New Mexico National Guard until the mid 90s. The airframe is currently listed for auction. The cutout for the mini gun mount is still visible in the rear door. I became set on modeling this airframe, but I still needed to figure out that marking, or at least make up something..
Finally, I had a breakthrough. My brother, a software engineer, has able to apply filters to un-distort the text visible in the photo. With some photoshop and squinting, we were able to discern that it reads “Chef’s Special”. With the markings solved, I finally moved back to actual work on the airframe.
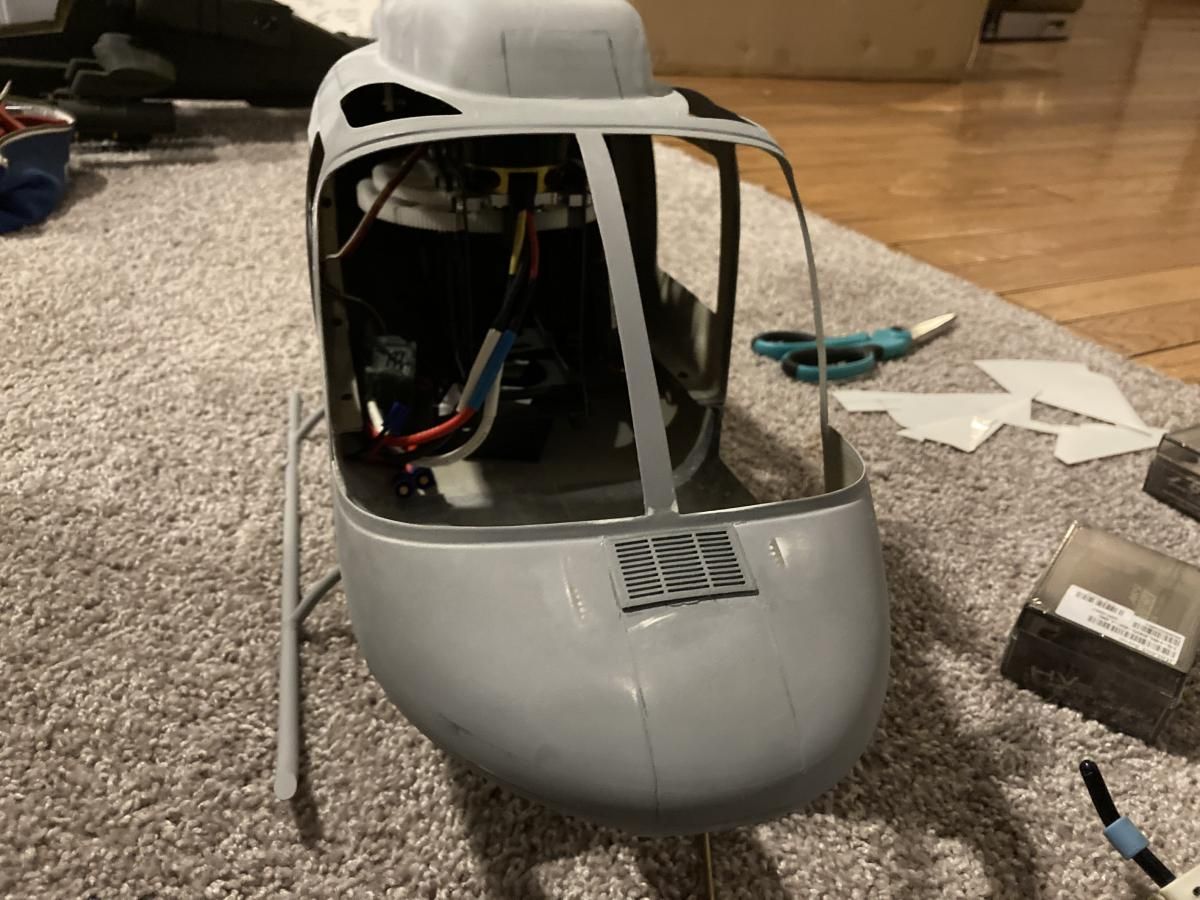
Initial Changes - Removing Doors and TR driveshaft Cover
One of the main changes I wanted to make to the airframe was to remove the tail rotor driveshaft cover to replicate most OH-58s in Vietnam. The majority of aircraft flew with them removed for both the weight reduction and ease of maintenance.
First, I cut the driveshaft covers from the tailboom, leaving a large open gap in the top of the boom. Using some 1/32 balsa, I filled in the gap to create a solid base for fiberglassing. I then applied 2 ply of fiberglass cloth, and did a wet layup over the balsa wood.
After a bit of trimming and sanding, I now have a round boom with no drive shaft fairings! Still have to do some priming and sanding to get the finish smooth though. Next will be the tailcone fairing and bearing blocks for the false drive shaft, which will conceal my tail rotor push rod.
I also completed a few other minor mods. I converted to mechanics to CCW rotation. Also removed the doors.
Surface Detailing & Access Hatch mods
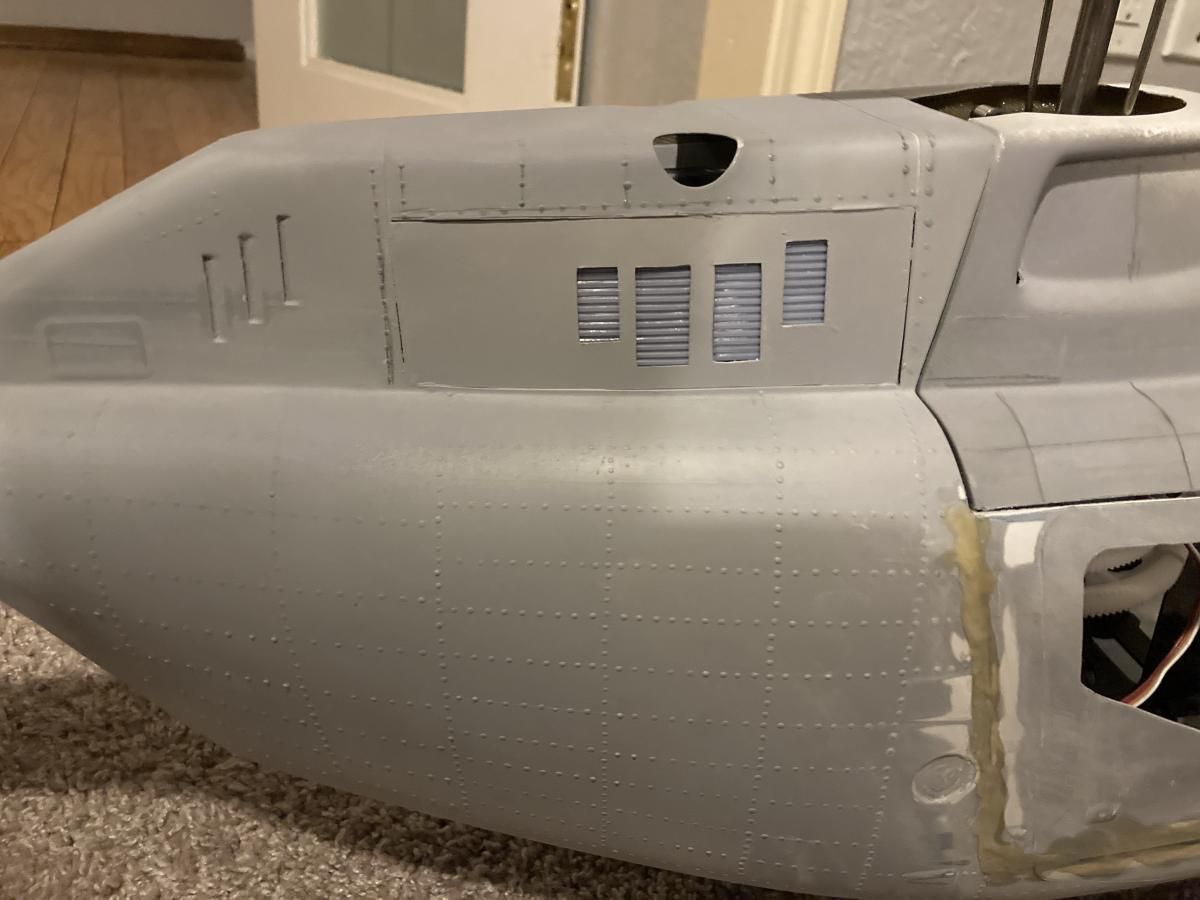
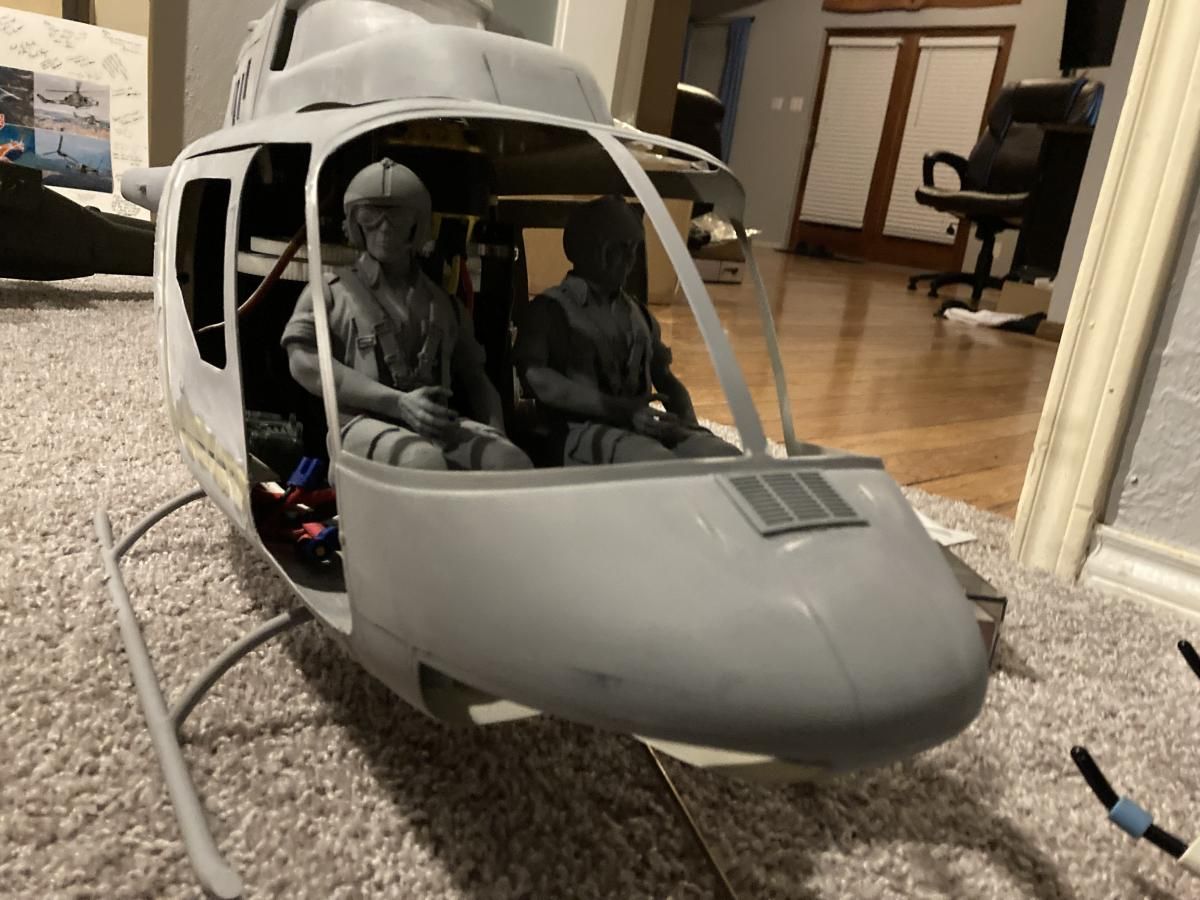
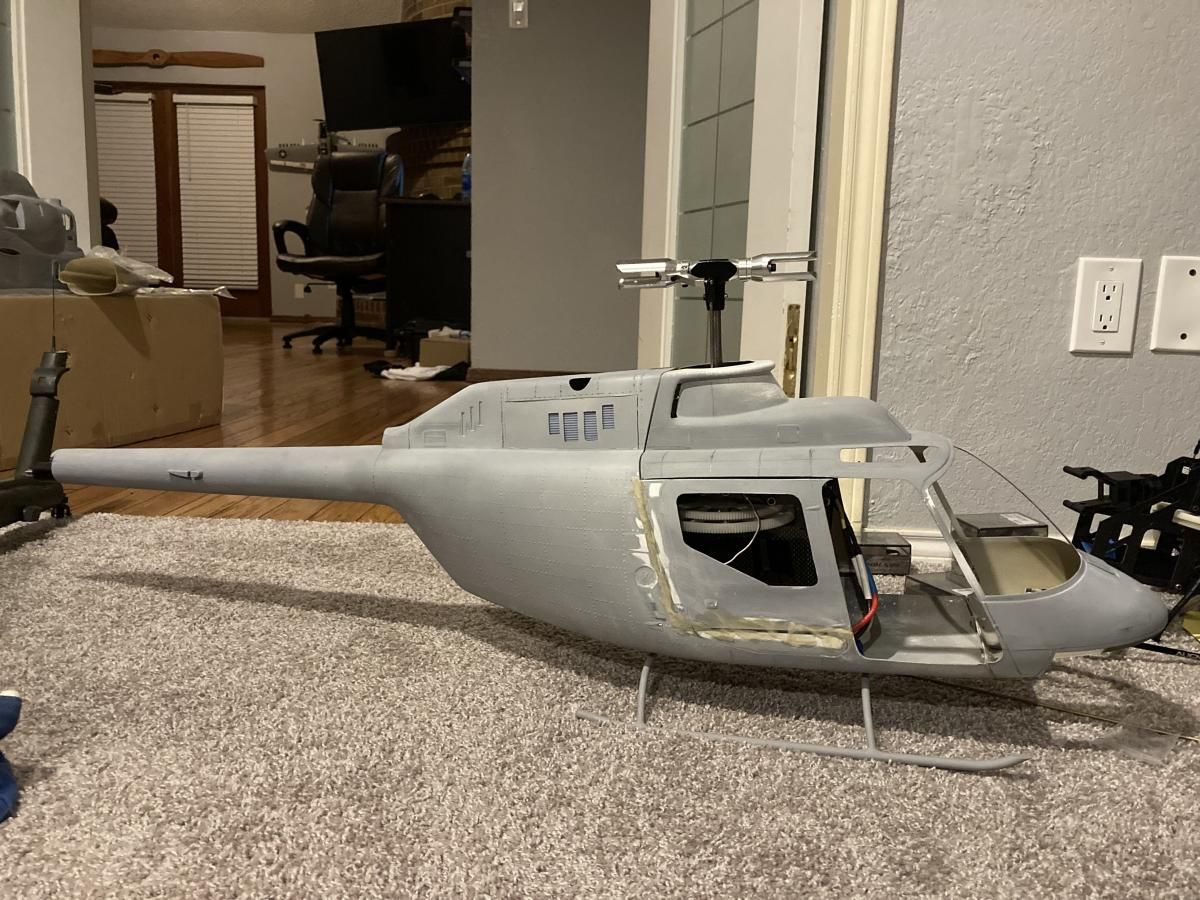
First order of business was to sand out and eliminate all the original paint and surface detail. This took a while as much of the original surface detail is actually thin tape underneath the clear coat. I filled in these lines everywhere except for the rear door seam lines.
I also removed both the engine bay doors and fabricated new ones to match the original OH-58A cowlings. The doors themselves were made from styrene with 3D printed vent detail behind them. I also 3D printed a new pilot air vent for the nose. The model was then coated in primer, and rivet detail applied to the rear section.
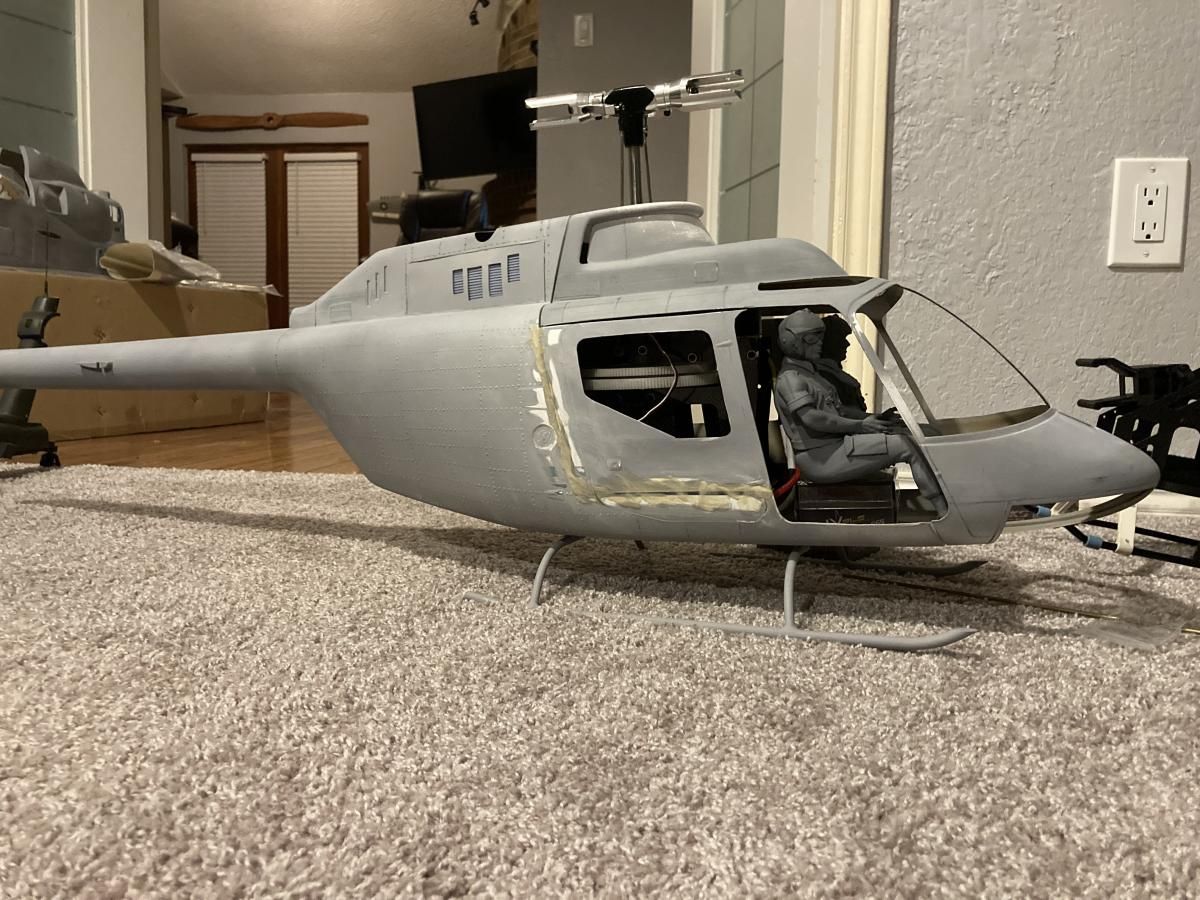
One of my major gripes with the Funkey Jetranger fuselage was always the placement of the hatch seams. I could never stand how it sliced through the middle of the rear door and fuselage along no existing lines. Most other manufacturers try to hide a hatch by making it follow a seam line. So, I decided to redo it, and move the hatch seam above the rear door. Still working on the mating surfaces between them, but it’s already an improvement In my eyes.
Tailboom Angle Correction
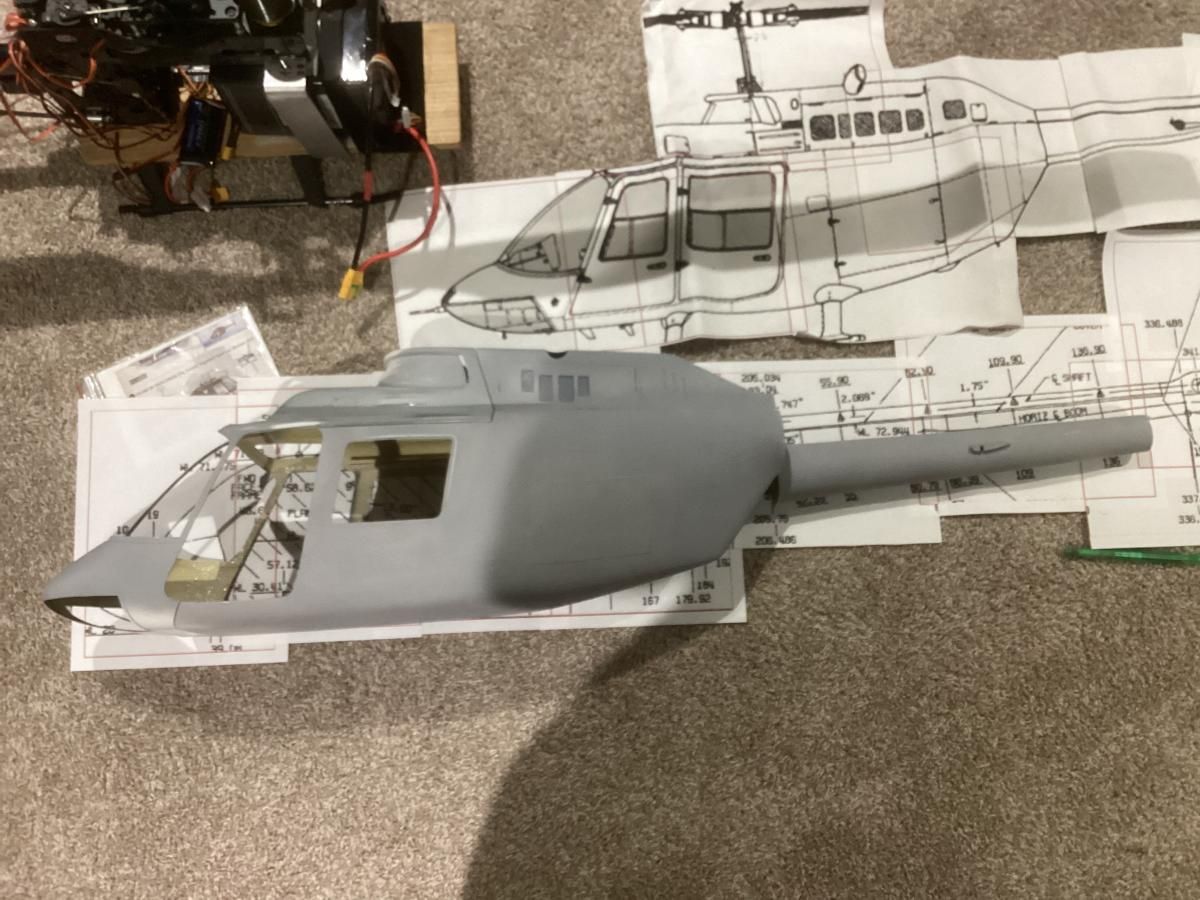
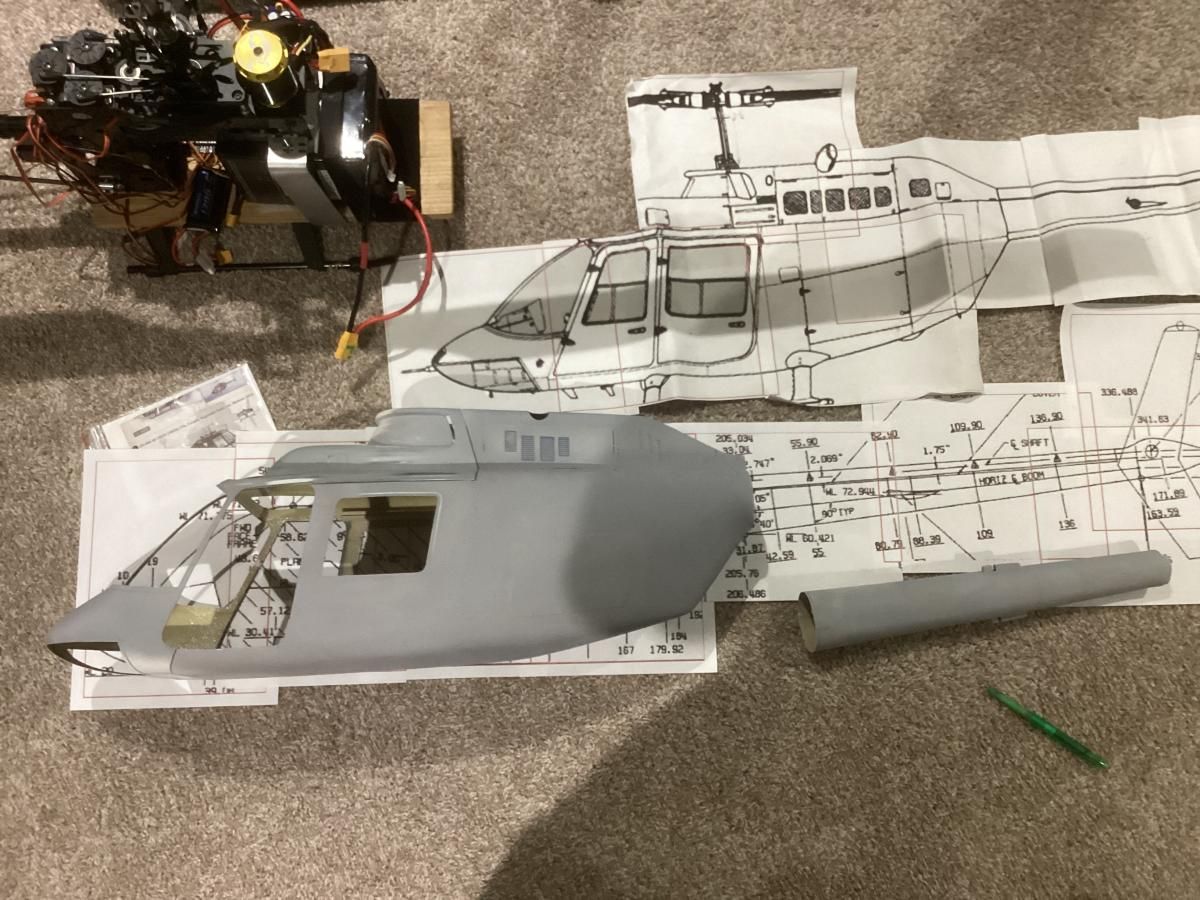
One of the first things I wanted to tackle in this project was to correct the tail boom angle. The OH-58 has a few degrees of up angle in tailboom relative to the floor of the cockpit. The stock Funkey Jetranger fuselage has these parallel, and doesn’t look quite right. So, I got out the dremel and removed the tailboom. Both surfaces were sanded flat, and the appropriate angle was added at the seam.
Before re-attaching the tail, there is some further work required. I will be relocating the H-stab to the scale position (farther forward) and to a scale scale angle of incidence. I will also use this opportunity to fabricate the tailcone extension, and mount for the Vertical fin.
6 Comments
Roz, you are a creative genius!!
Thanks! For this project, the background research has almost been more intensive than the actual build. What started as a simple project has snowballed into a lot more..
That amount of research is impressive! I am curious if the text may read "Chiefs Special" More than likely a Warrant Officer would be primary pilot of the Heli. Just a thought. Look forward to following the build!
Thanks! It was fun and interesting to do a deep dive into the history of one airframe. I’ve even been able to get some photos of the data plate, which I will add to the model in decals form. As for the text, I don’t believe so, but I’ll double check. The way I saw it, there was not an “i” present.
You are quite the builder Michael, I always enjoy seeing your helicopters so expertly done.
Amazing work!