

"Align 700E/E1" MD530F build - NZ
 Scott S.
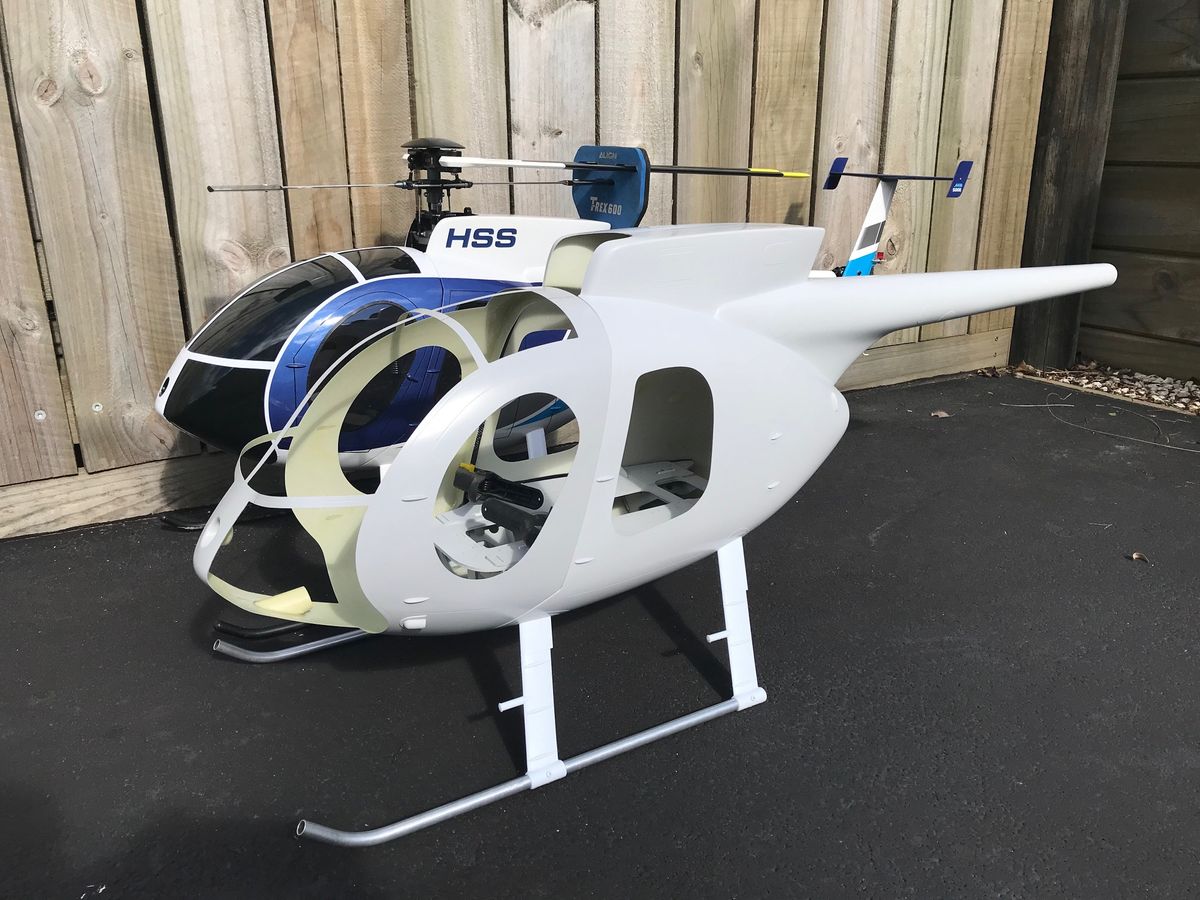
New 700 size heli build, outlook and purpose
Following many years of "flybarring" around a "stand off scale" 600 size Fun-Key MD500E with quite a few hrs on it and lifting external "scale" loads around all on 6S - I decided it was time to consider a replacement.
So, given the growing scarcity of the earlier Align 600E parts I am familiar with, the intent of lifting external loads and the possibility of 5 blades, It was very obvious that a different mechanics should be considered and that 12S was best moving forward.
It had been suggested to me that I should also consider 700 size. This simply makes sense as others have explained that although not too much bigger than 600, they are just better in terms of presence in the air, "knuckle" room when working on it, and a bigger rotor span taking the sling loading better than 600 size. Also....jokingly or seriously - a "north of 50yr old " size model!
I also then felt that the cost of building up a such a model in 700 over 600 size is not significant enough to be concerned with.
So, given happy with the iconic MD500E, I decided an unpainted version of the 700 size Fun-Key fuselage will be the replacement. Then... what to do mechanics wise....well it is also fairly obvious that the earlier Align 700E mechanics are a perfect choice for me, in particular when I discovered that this now older frame set is entirely compatible with the later current 700X transmission parts.
I then found what may have been the last remaining Align 700E combo kit in the world sitting on a shelf in a shop in Canada! A fellow modeller I owe so much to for extensive help and advice already, helped me acquire the kit and get it sent out to NZ for which I am very grateful!
So, the intended purpose of this build could be best described as "stand off scale" with limited scale detail and more focus on building a neat and tidy simple but strong, practical and capable model that will do many hrs of my usual fun "shenanigans" at a cost I "cannot" afford! - well! can any of us "afford" our models LOL?!
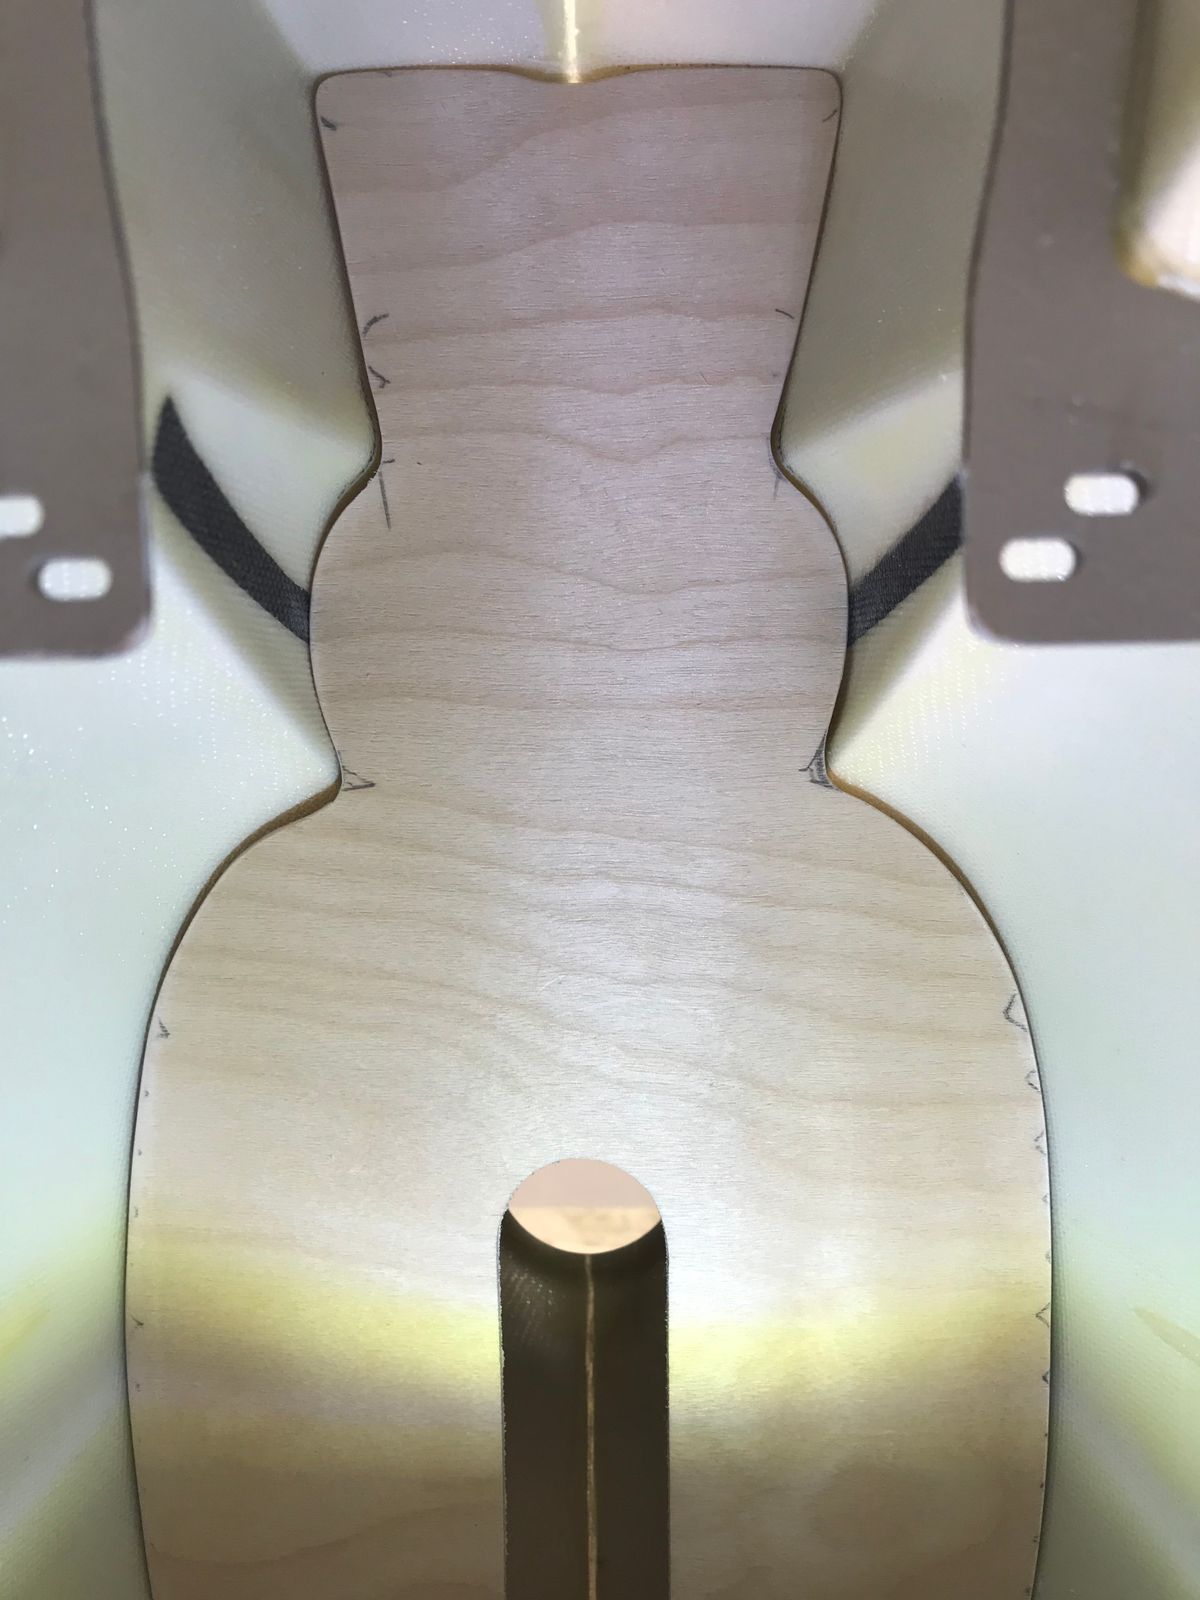
Making a ring frame template
Some info to help those who may not know:
The Fun Key line of fuselages as good a quality as they are, are an older design and having been designed originally for methanol power it was intended for the front canopy to be screwed on.
This then stiffens up the overall fuselage including lateral or sideways rigidity of the fuselage boom, which is important as in general there is no room on 600/700 size 500 fuselages for the original mechanics boom supports, therefore its natural that the fuselage itself needs to become part of the the lateral mechanics boom support.
My intention is to use the "pin and magnet" method of front canopy fitting and given being electric power, by fitting the rear ring frame it no longer relies on the canopy being fitted with screws solidly to increase lateral fuselage boom support.
Only a theory, but I suspect this will reduce the tail servo from working over time to correct for otherwise lack of good lateral support also, after all... we wouldn't fly a Raptor/Align/Hirobo type mechanics pod and boom without its boom supports!
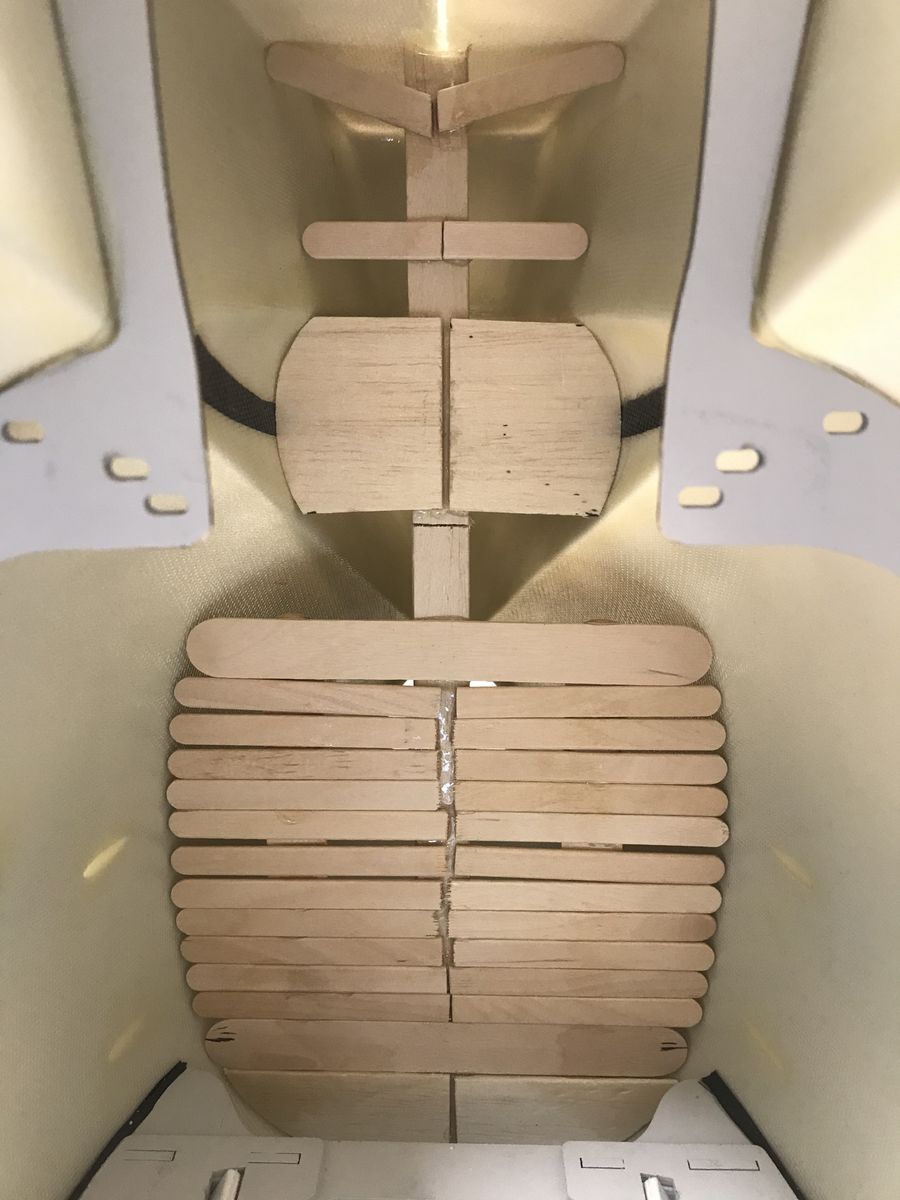
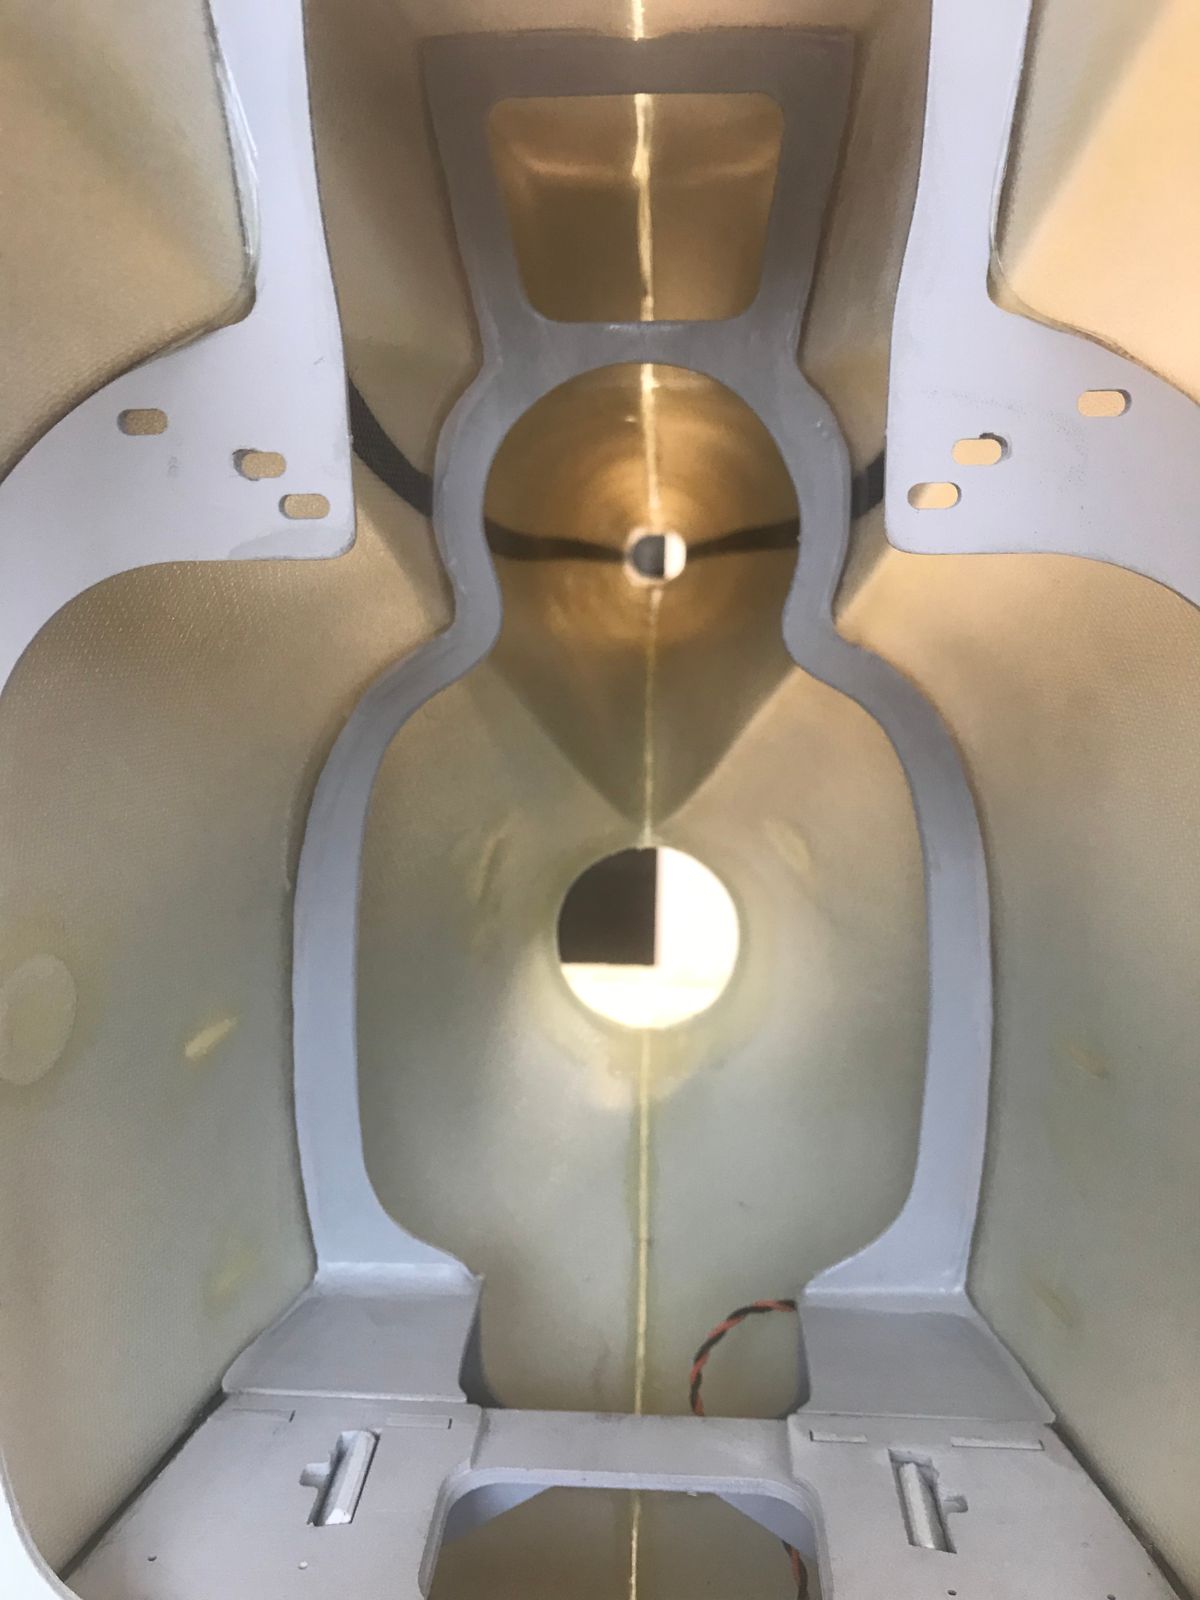
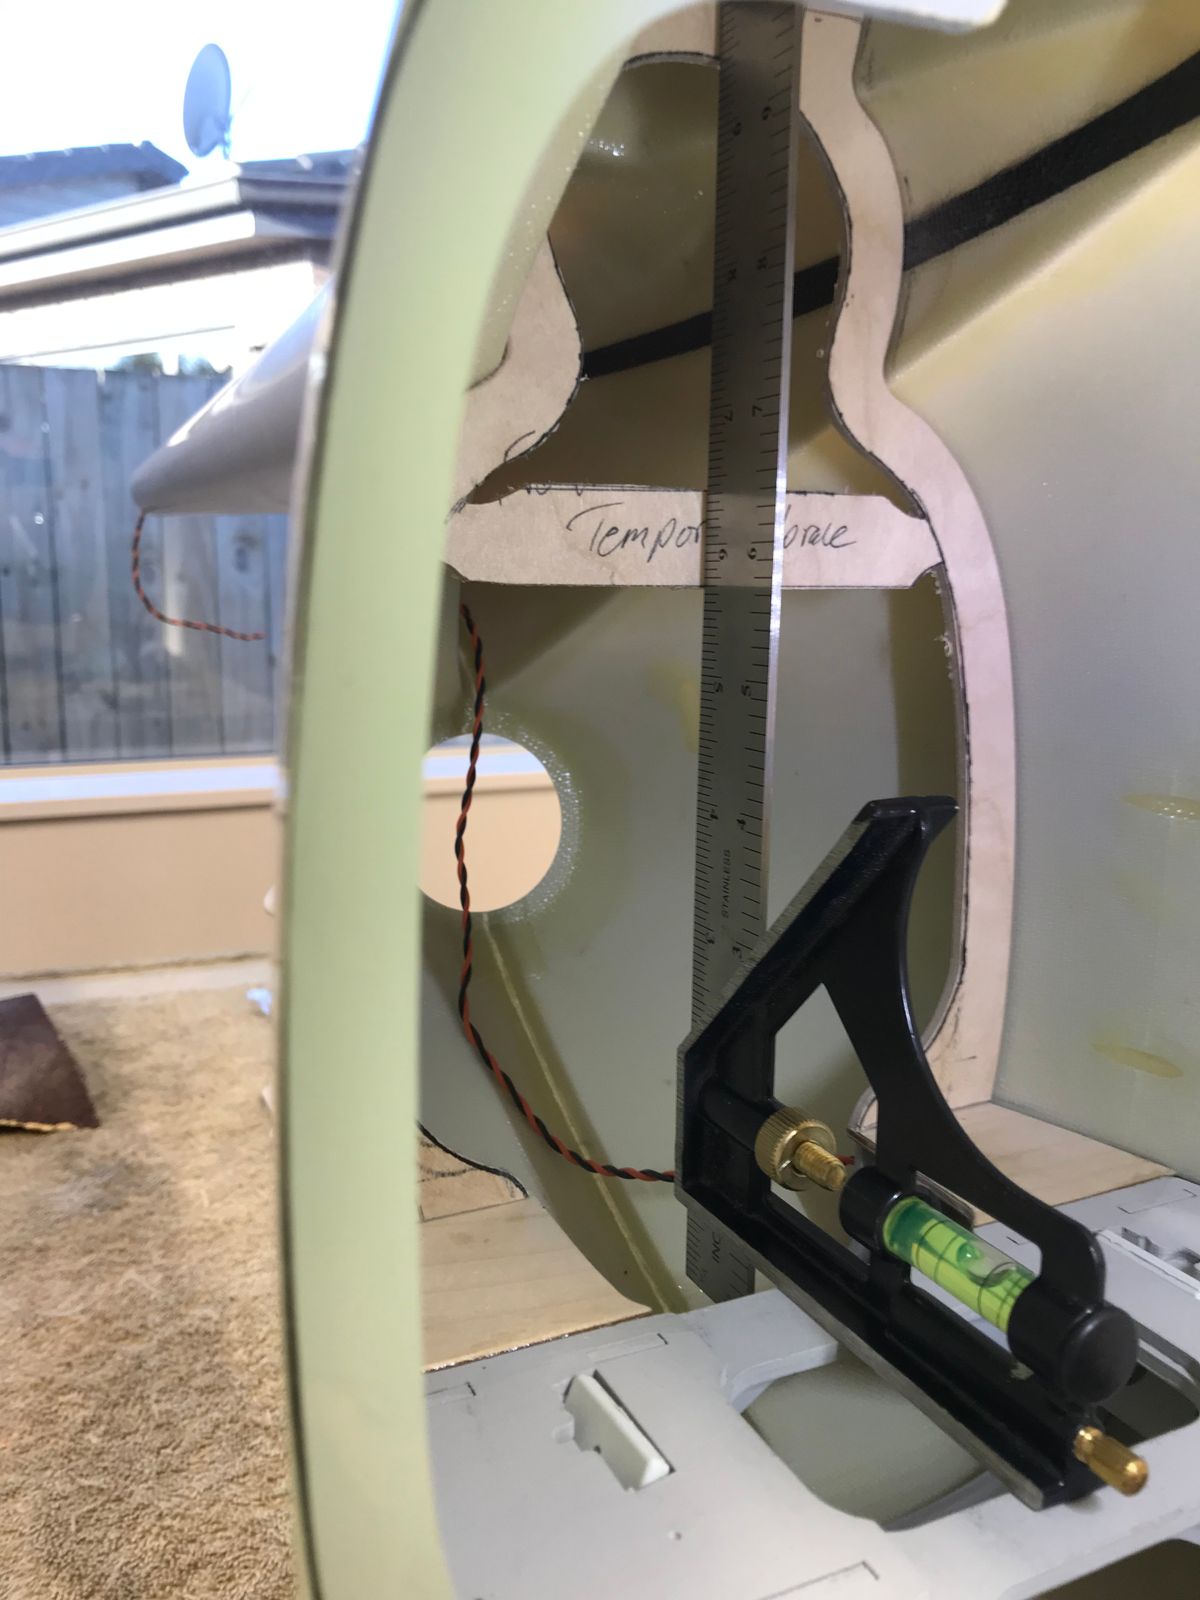
Images of the start of getting the outside shape of 3mm ply fitting as well as I could - involves a variation in bevel off the back edge to fit the profile of the fuselage and is not consistent!
The intention will be a small belly frame that will be connected to the floor with some small side plates after which the main frame will come down the side and glue down at the floor level.
Adding ring frame parts
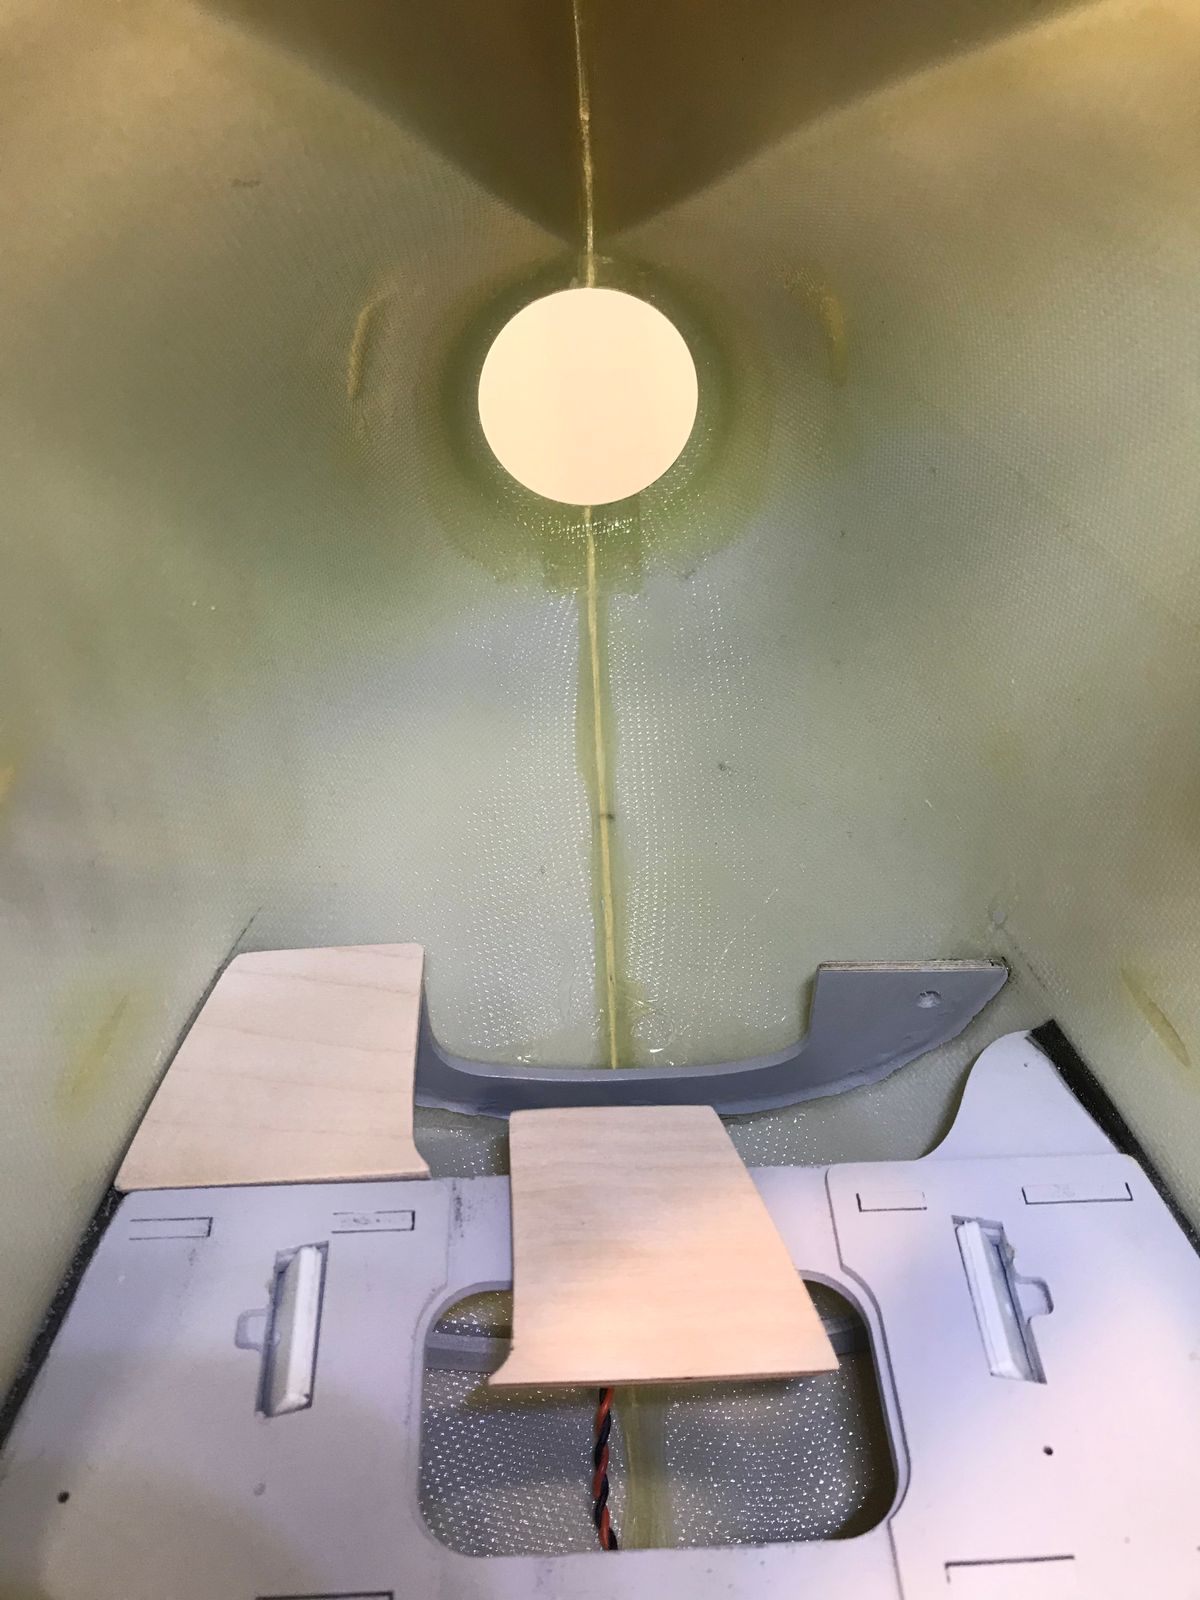
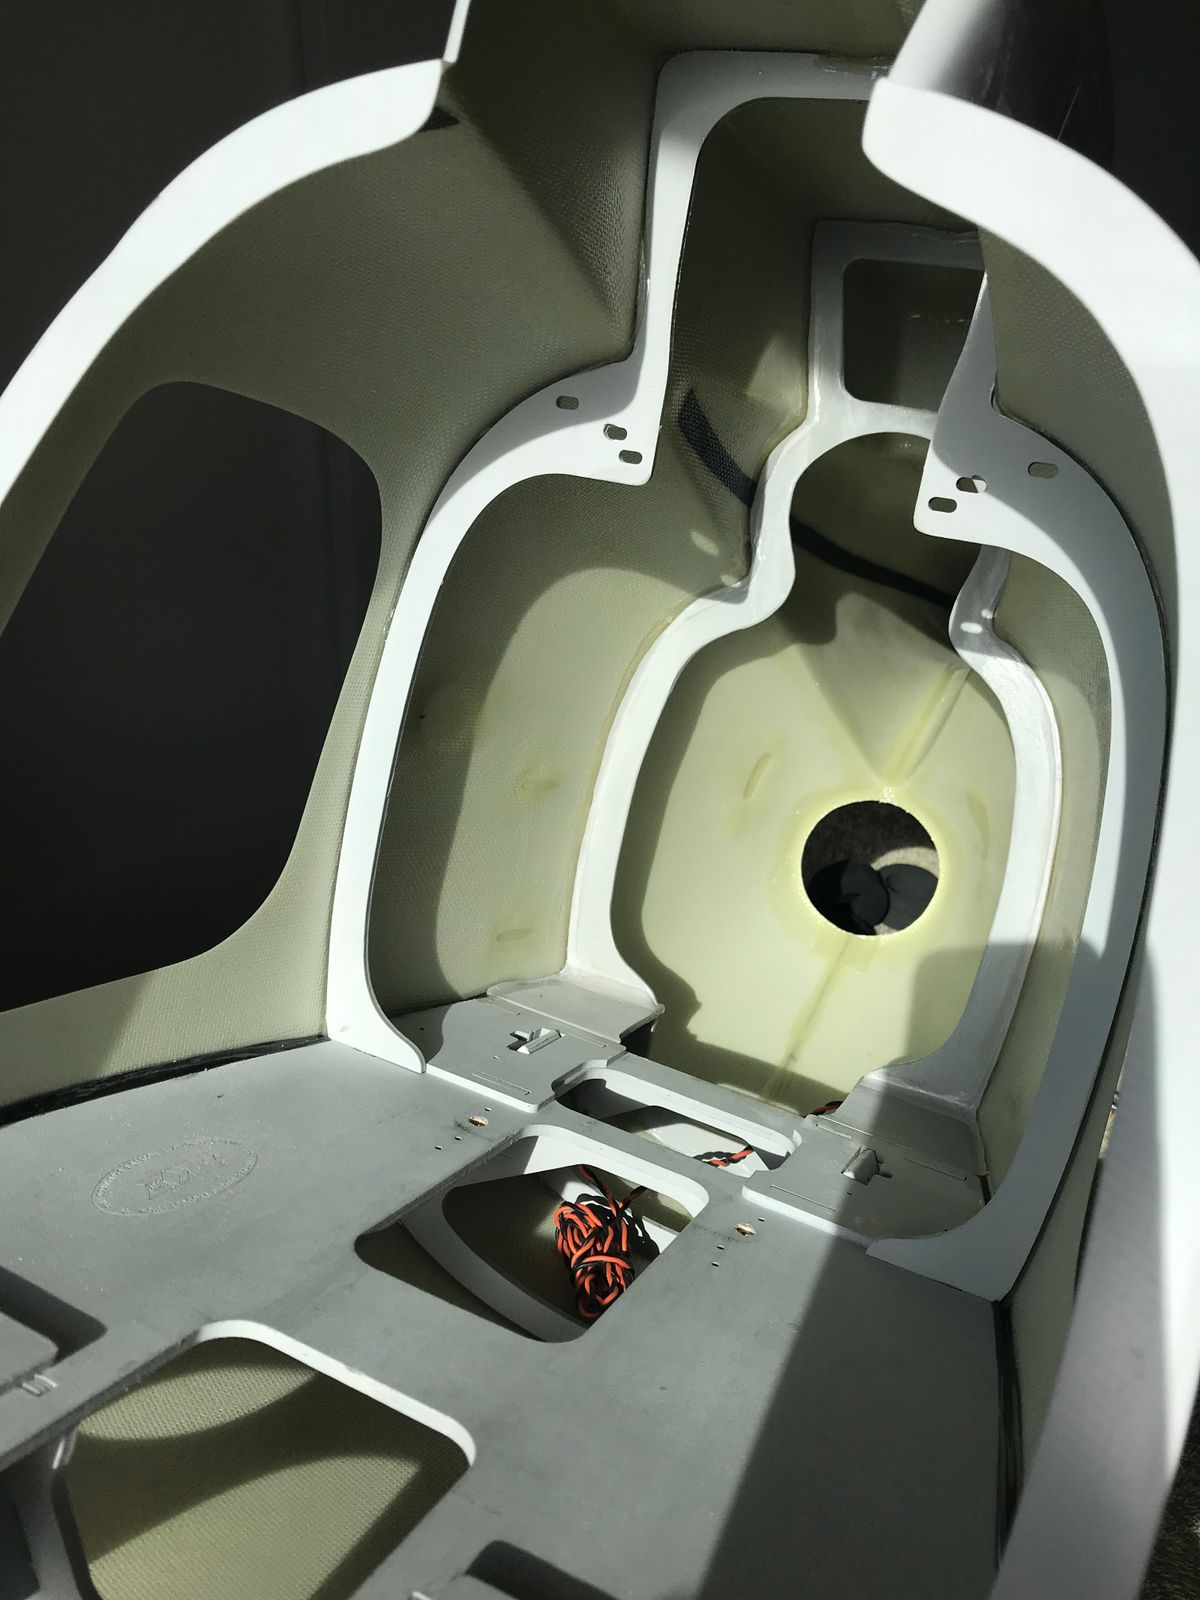
Because the floor structure is already in place in a Fun Key fuse, the ring frame needs to be made in two parts.
I also considered a simple method of bridging the frame back to the floor for added rigidity.
A small piece at the belly with side plates achieves this with the main frame joining down onto the side plates.
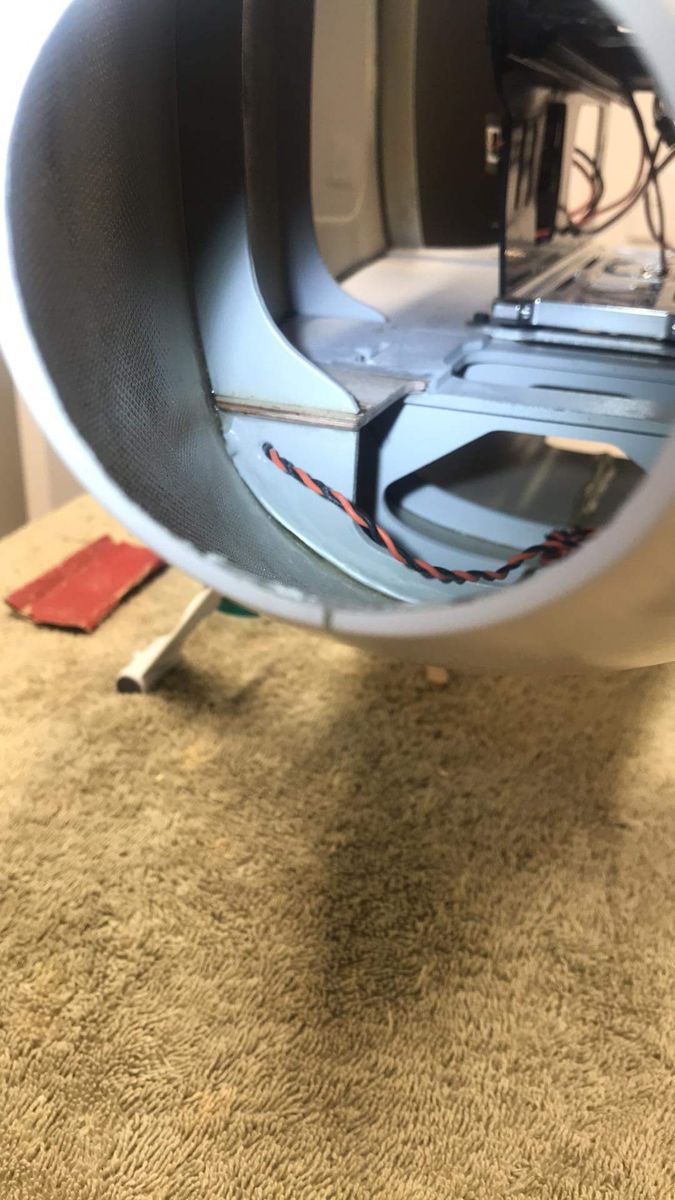
I positioned the main frame before bonding and fitted the mechanics and tail boom foam donut temporarily and only then “tacked" the frame into place.
Removed mechanics and completed bonding the frame, then refitted mechanics again for longer term curing to maintain tail boom alignment.
Front canopy work
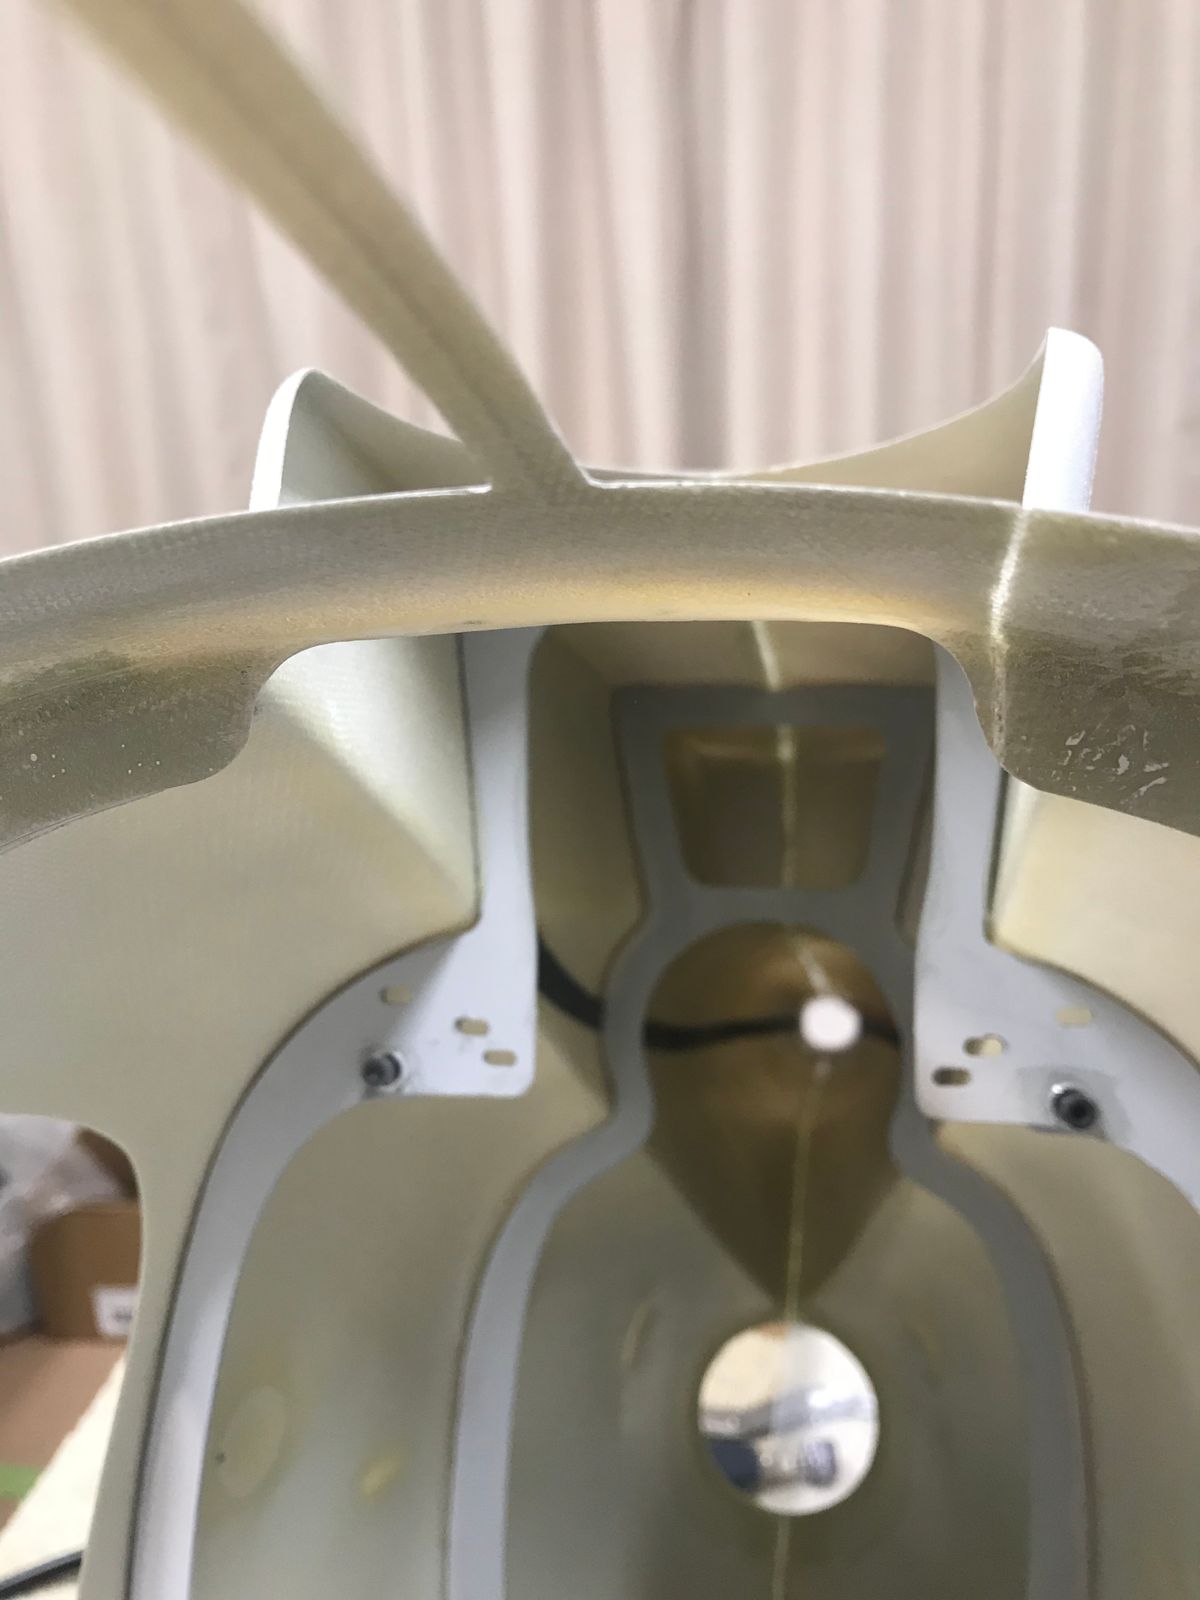
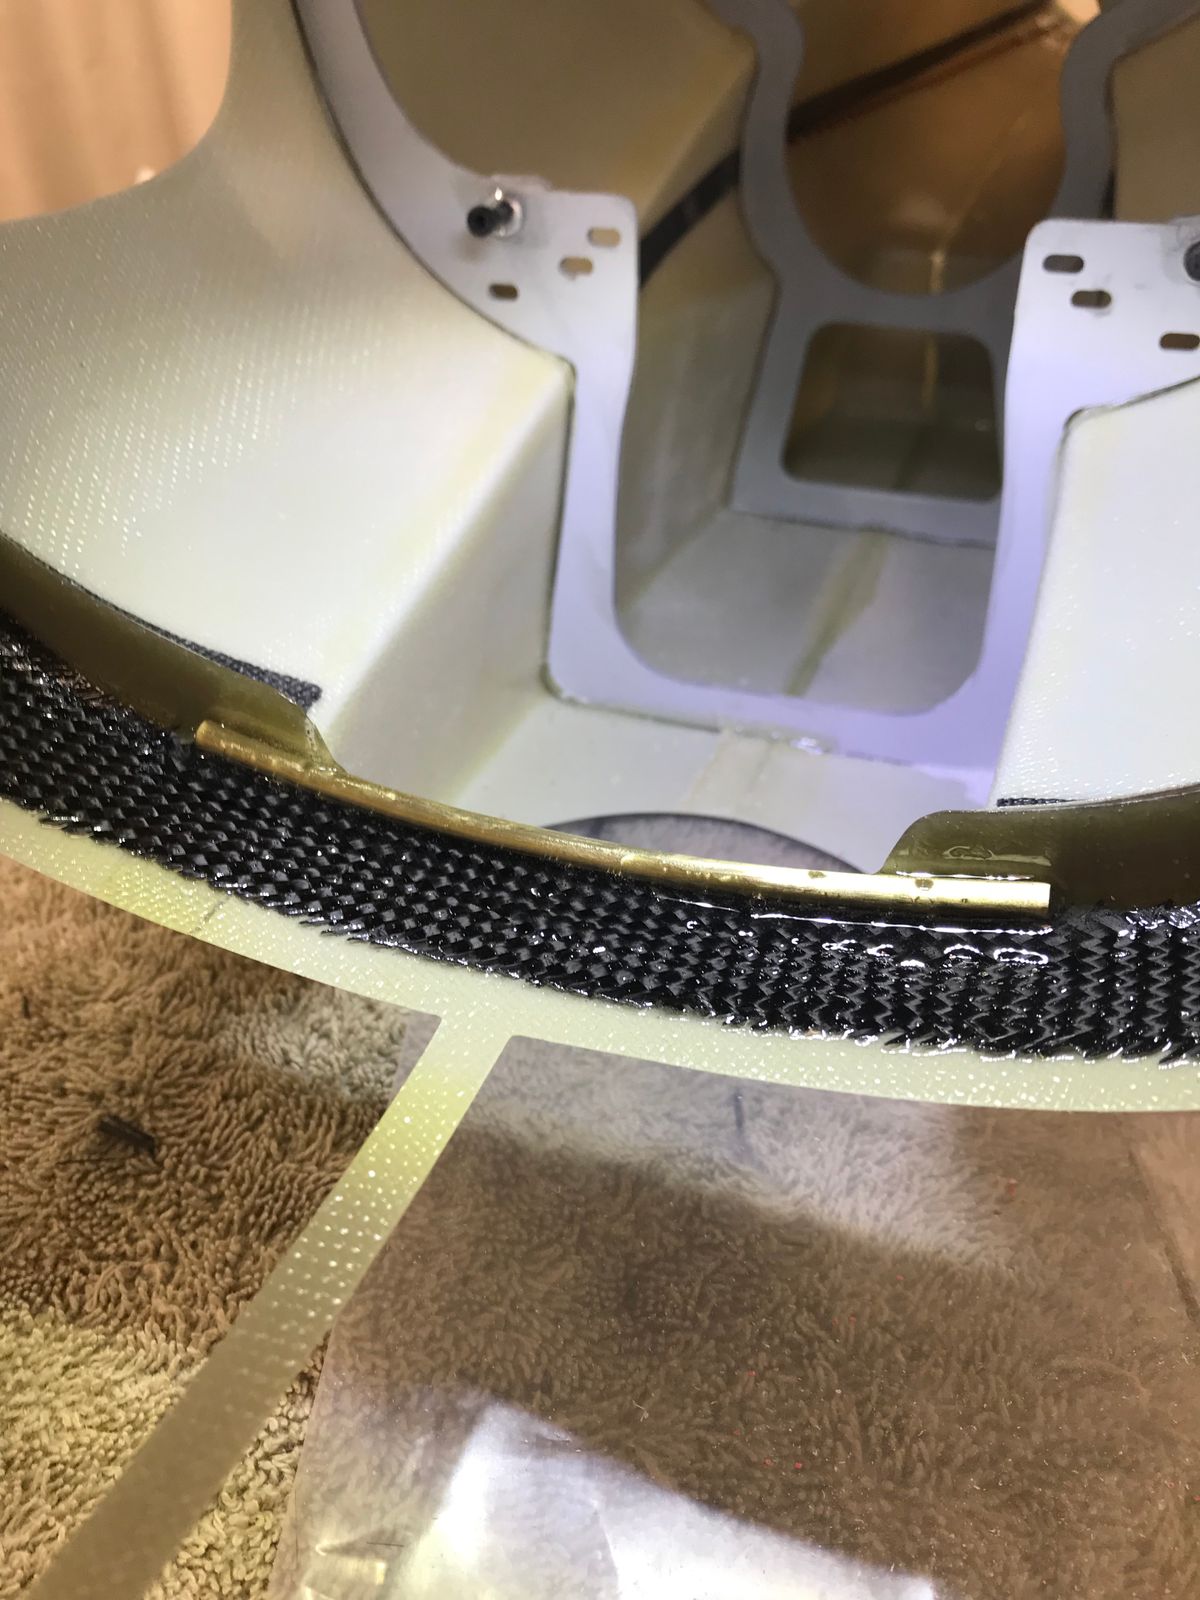
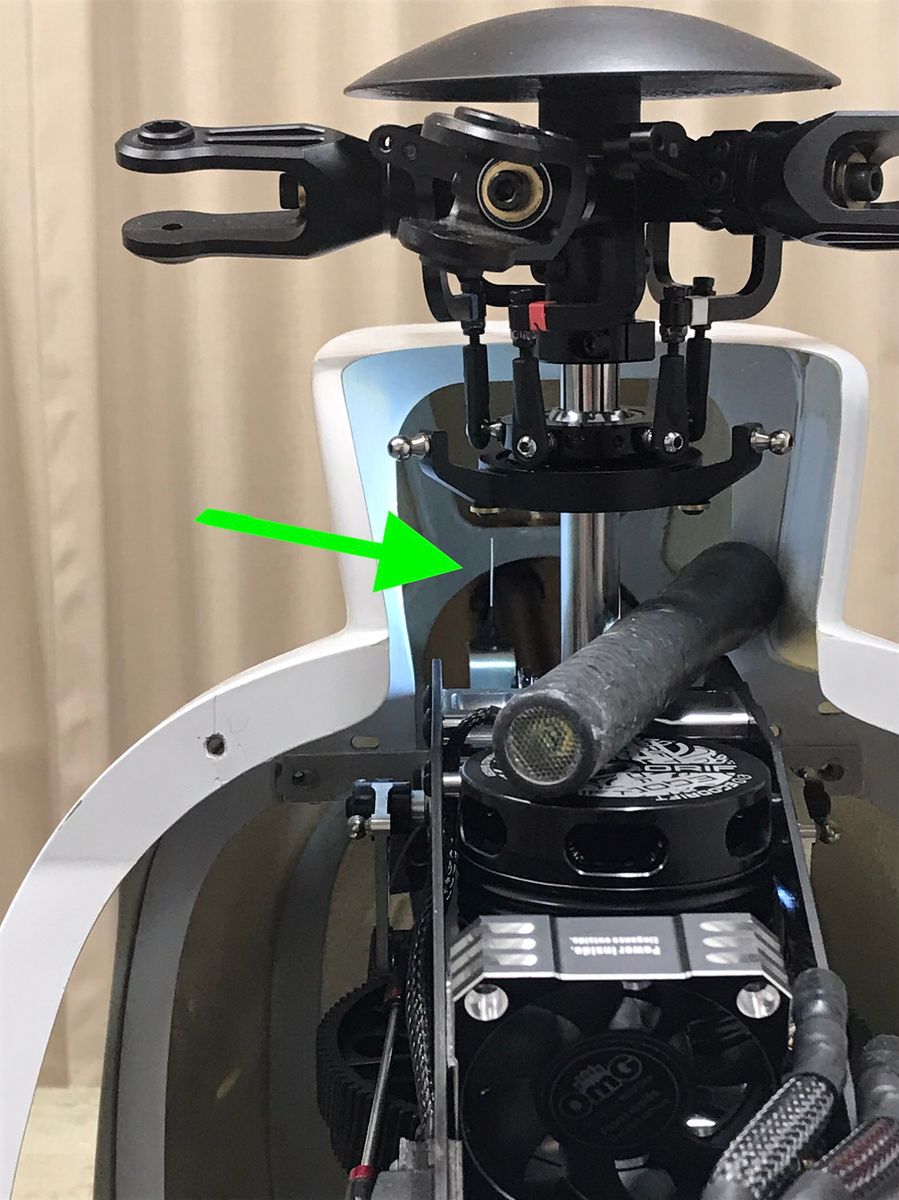
Not required for motor clearance, however I decided while the opportunity is there to take out the canopy flange directly behind the motor for better air exit past the motor.
Then I just added some carbon fiber to reinforce and added a piece of copper tube just as a round profile for the back edge as this is where the canopy is pulled off the fuse.
Roban Landing Strut to Fun-Key 700 mod
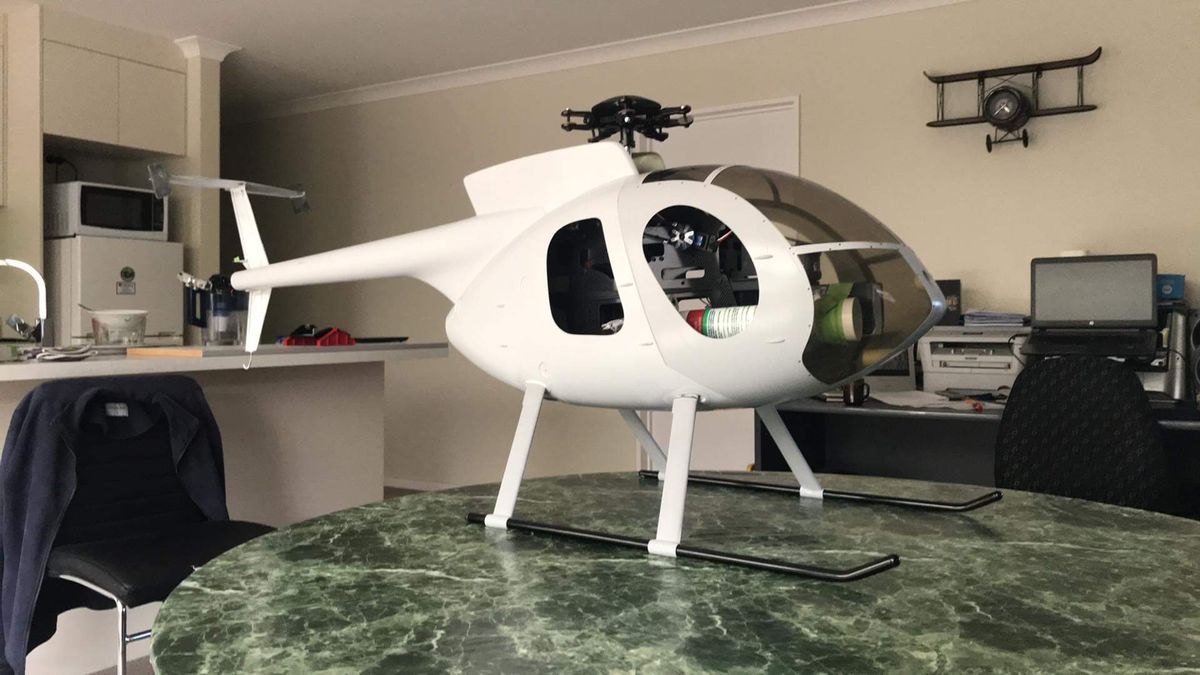
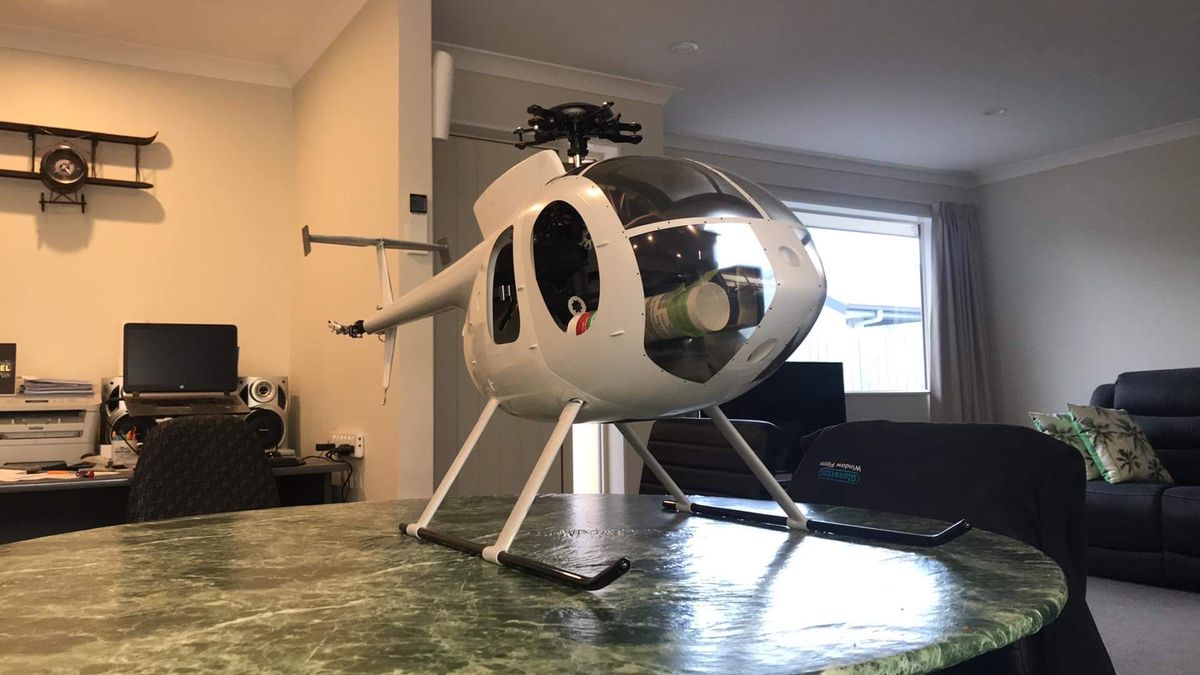
Not much to see but a milestone for me in getting the Roban struts from planning to alteration, height and stance that I wanted (within the compromise that they are at 700 size) with high structural integrity.
Happy new year to all!
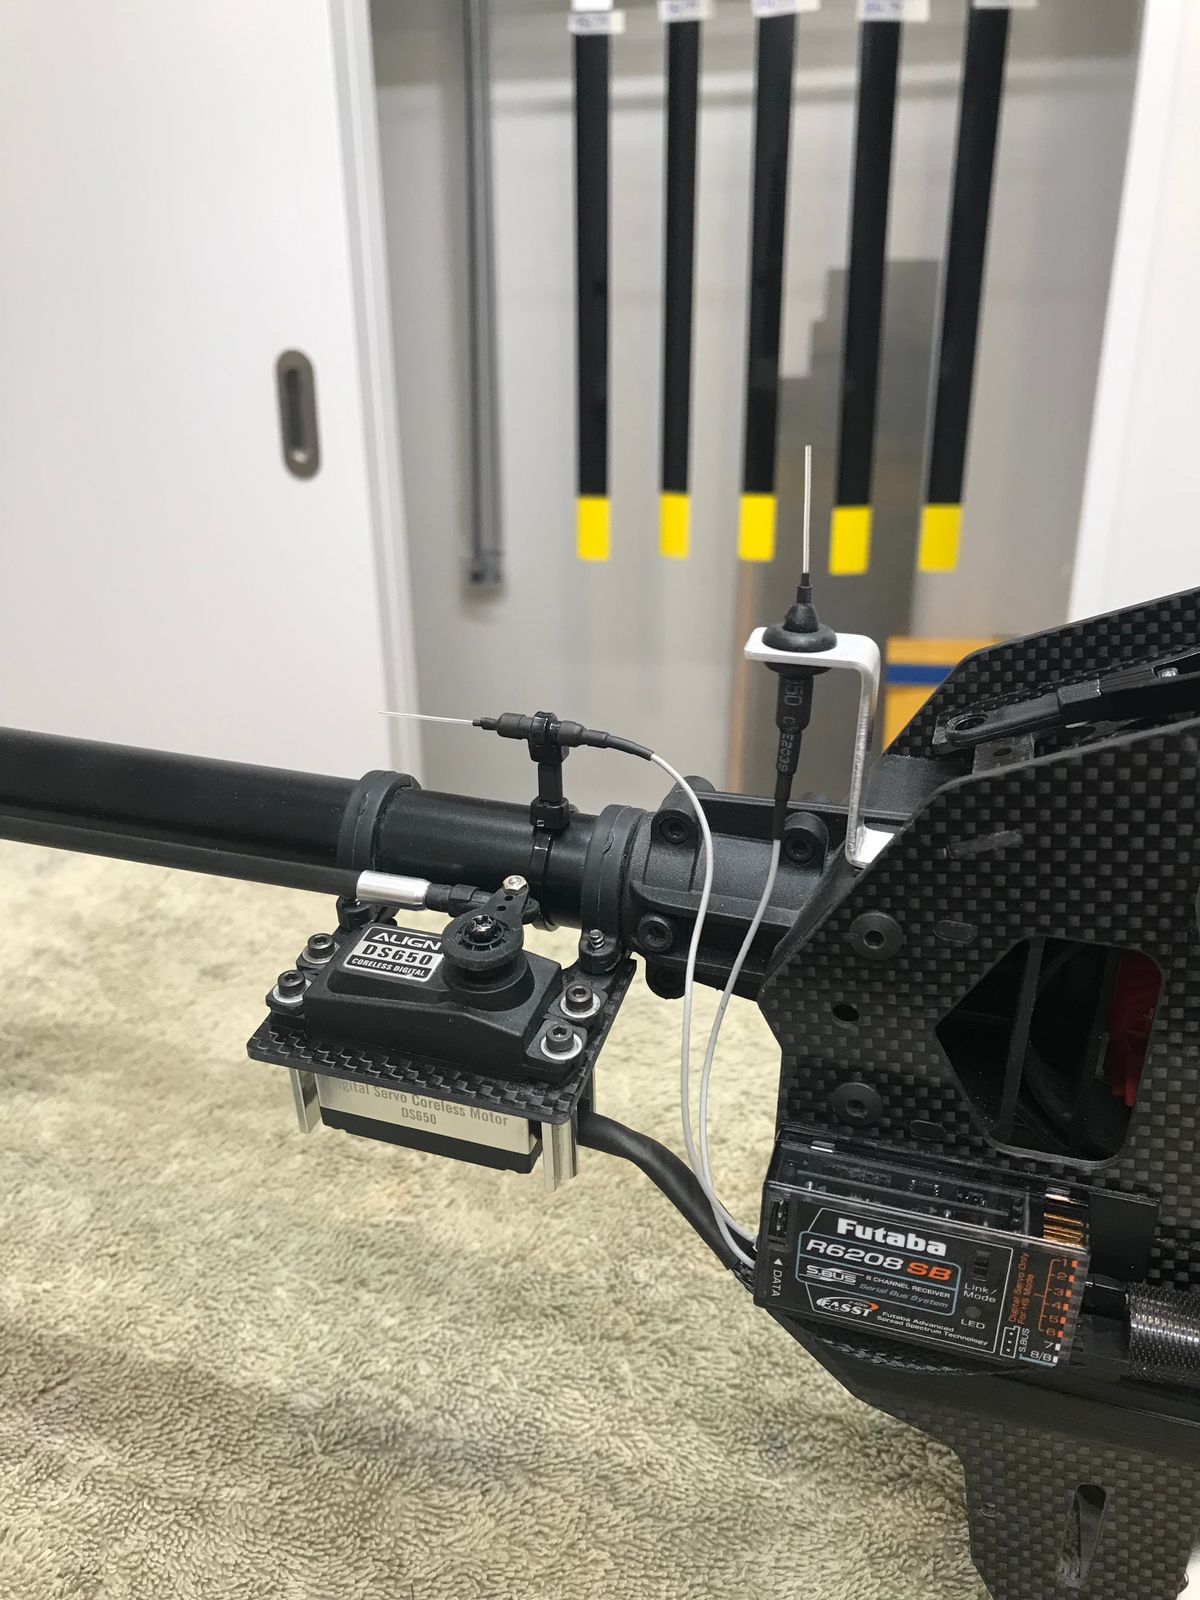
Tail control mod
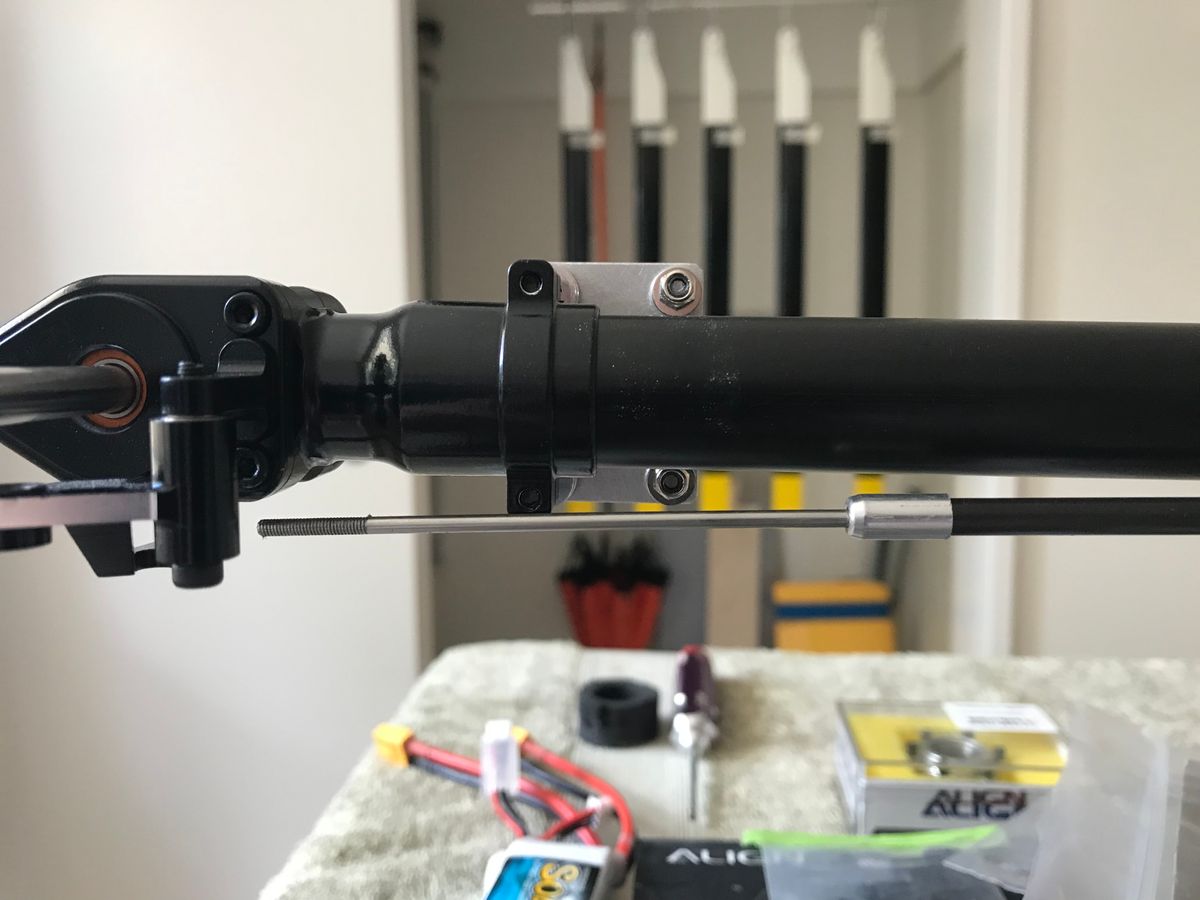
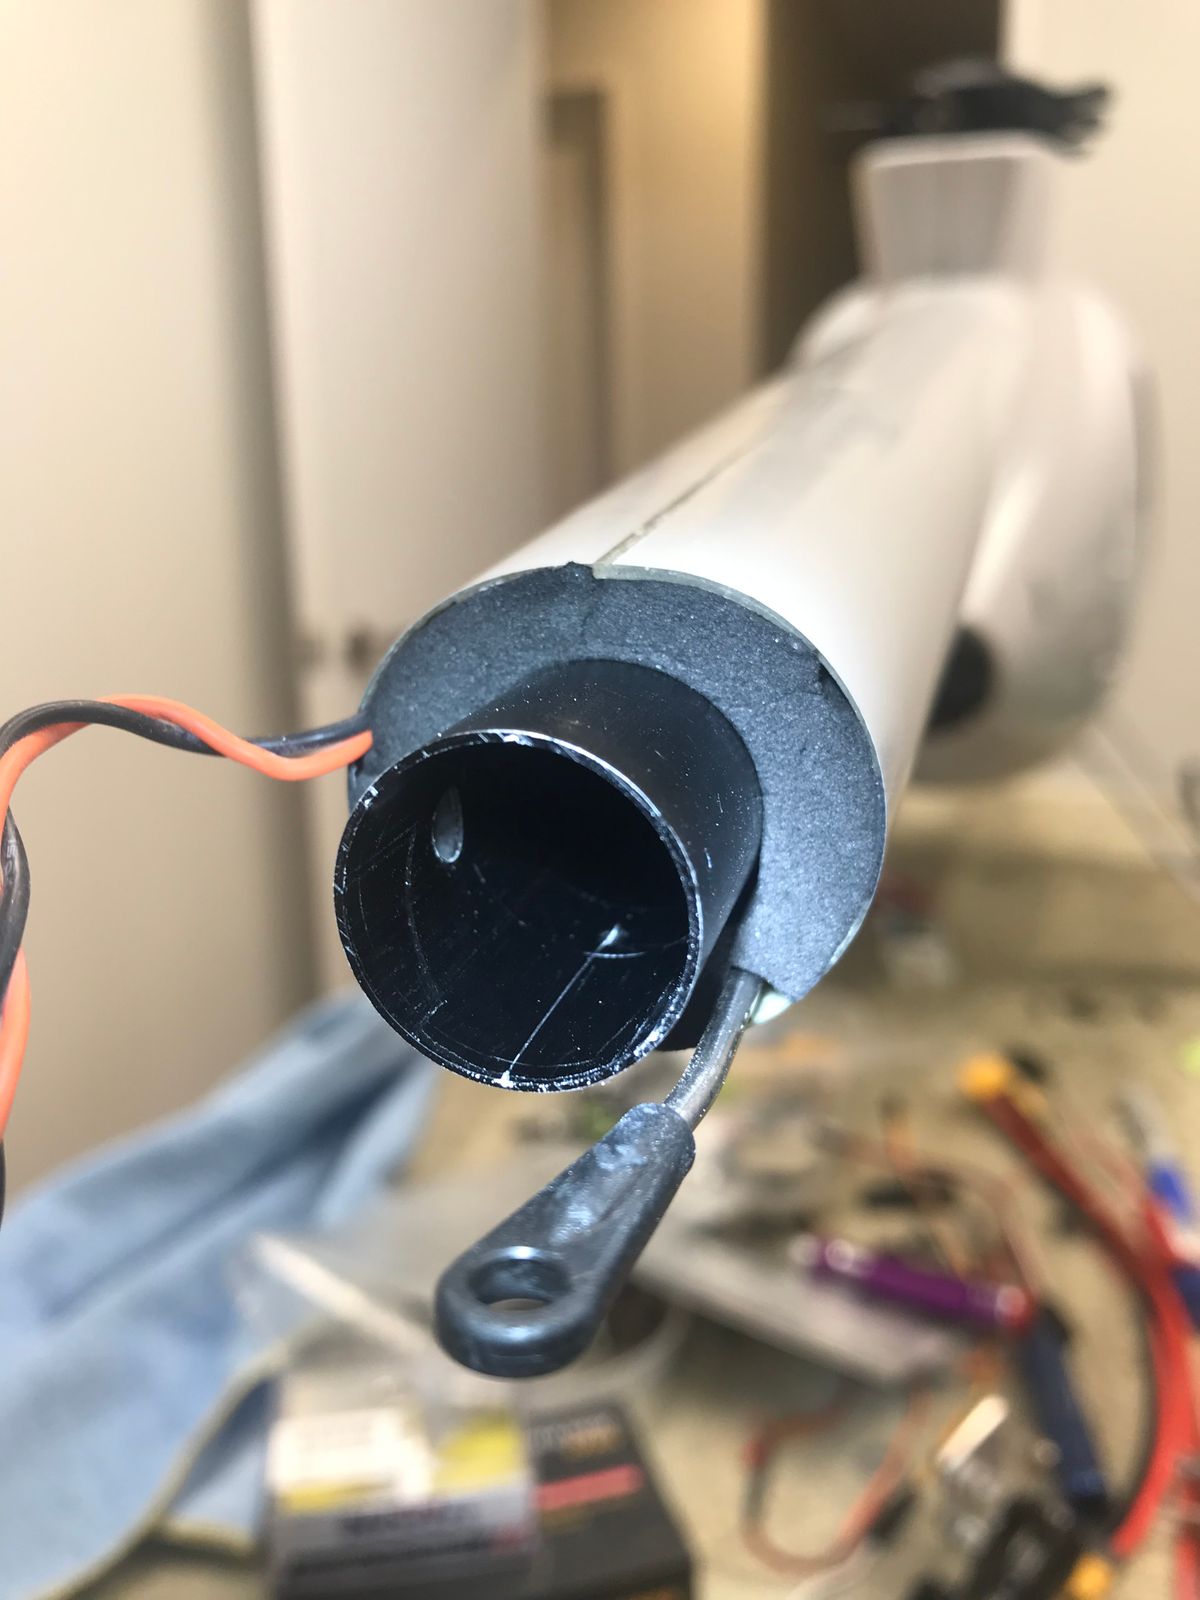
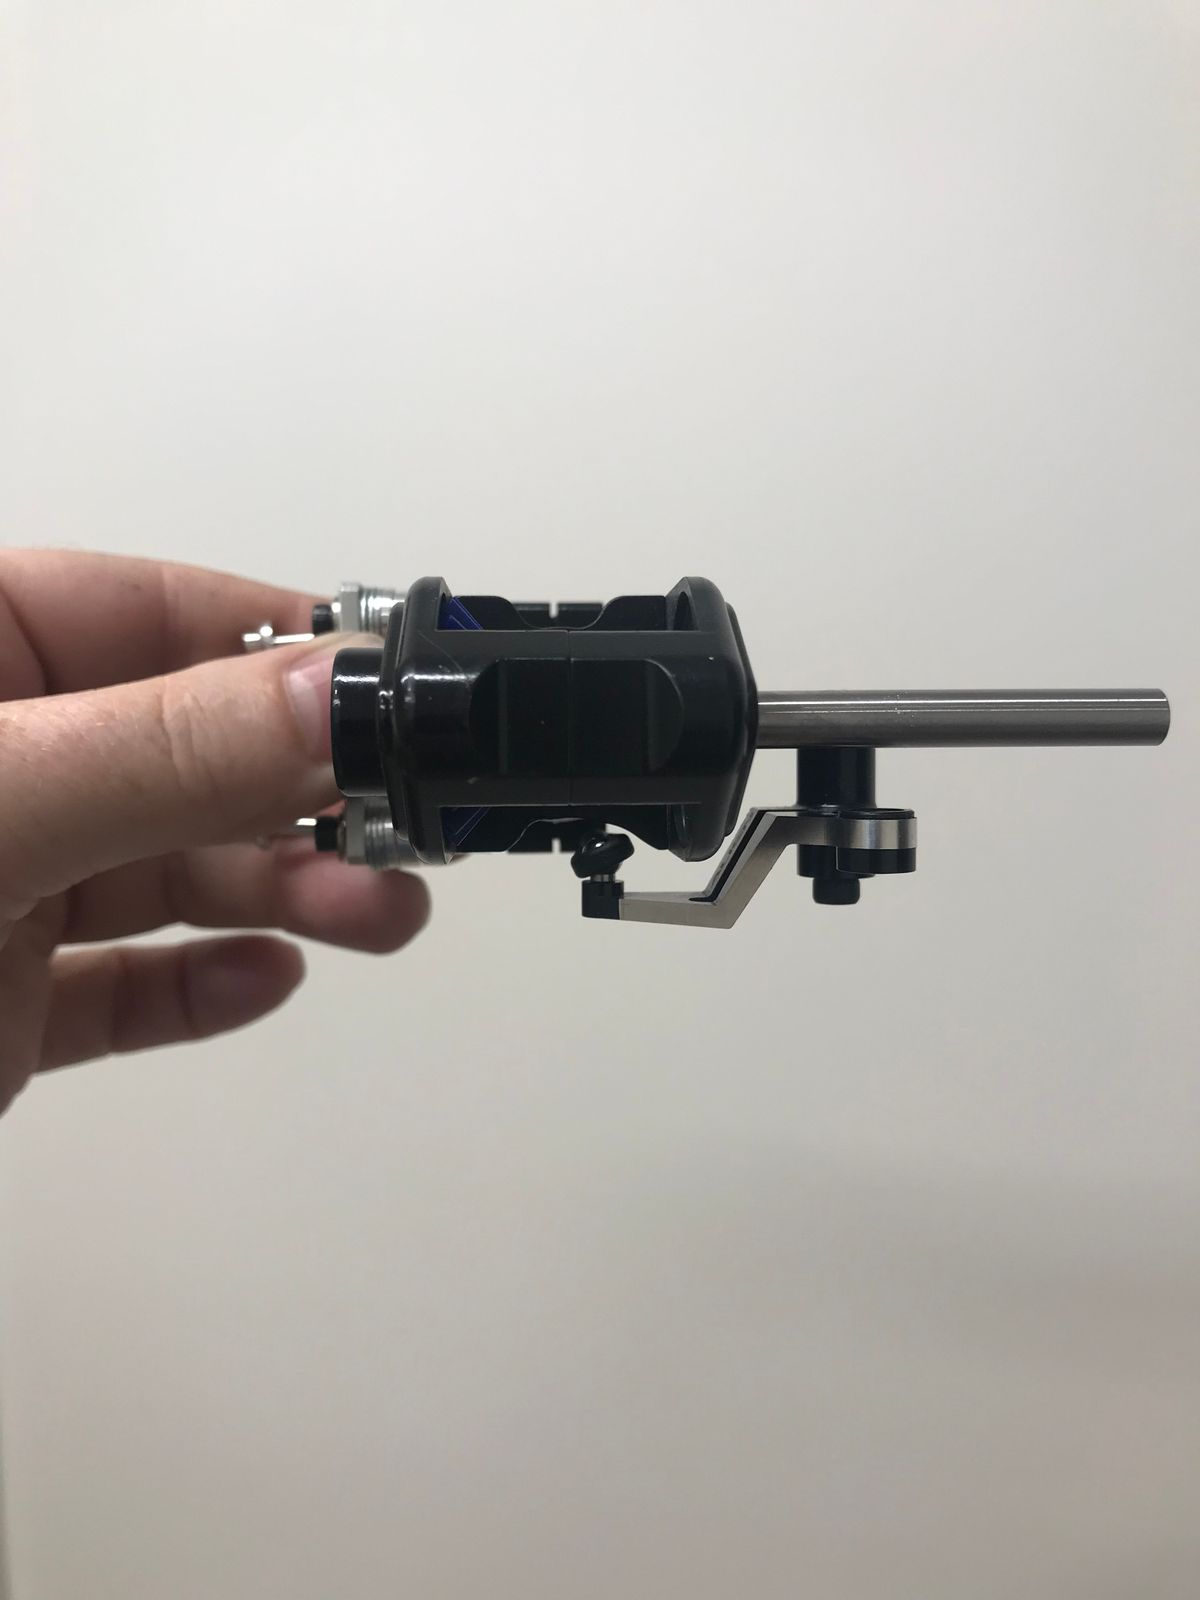
Tail control mod completed where the last step was to cut down the T-Rex 700E carbon rod and make up a threaded rod with 50mm of thread JB welded inside the carbon rod with original carbon end cap drilled out and refitted.
I then made clearance where needed on underside of tail box for control link travel clearance and put a slight bend back from threads some to go around box clamp at the side and onto the more centrally located control ball in the invert position on bell crank.
The action is direct, free, and with no slop and will make removing/installing mechanics so much easier than the usual "Z bend" through a slot in fuse boom. Thanks to Trooper 7 for the mod tip! 🆒
Mechanics and electrical components
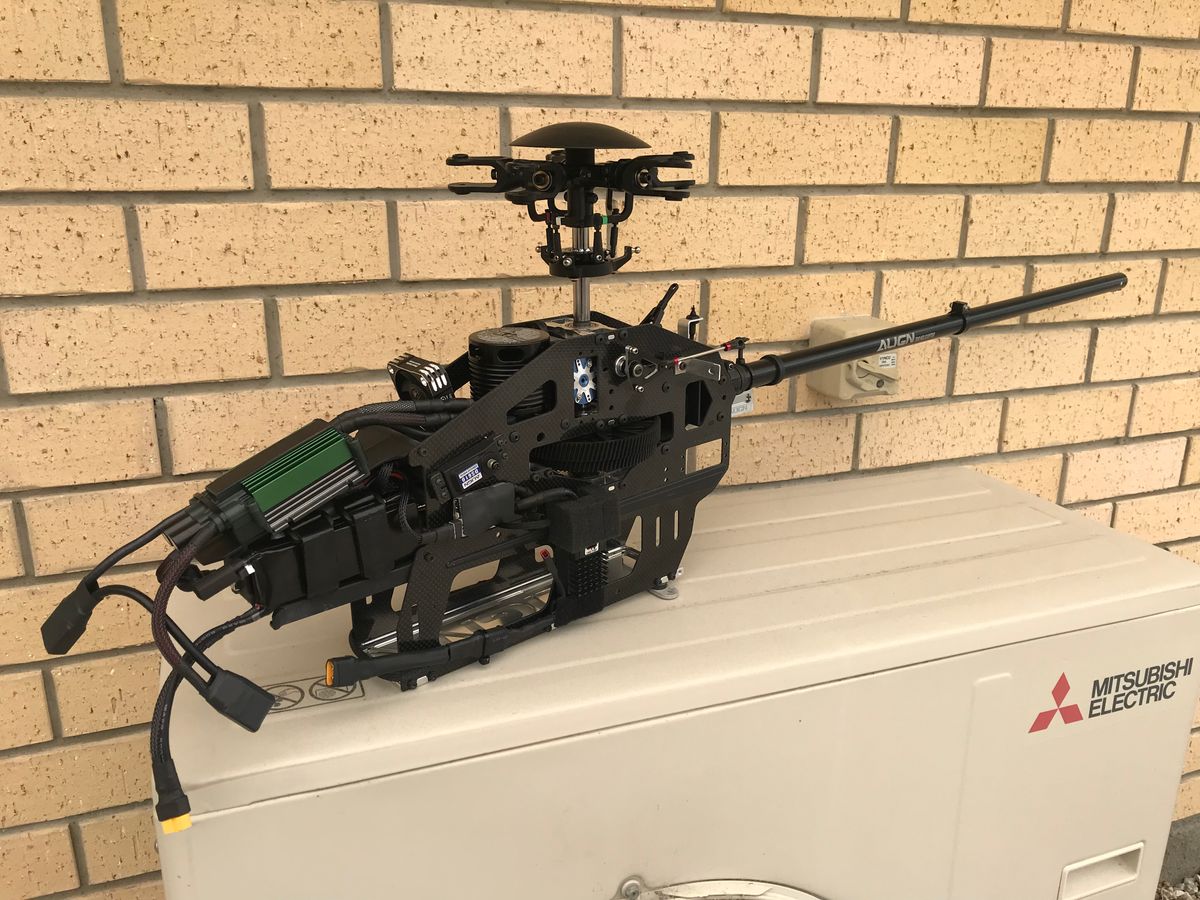
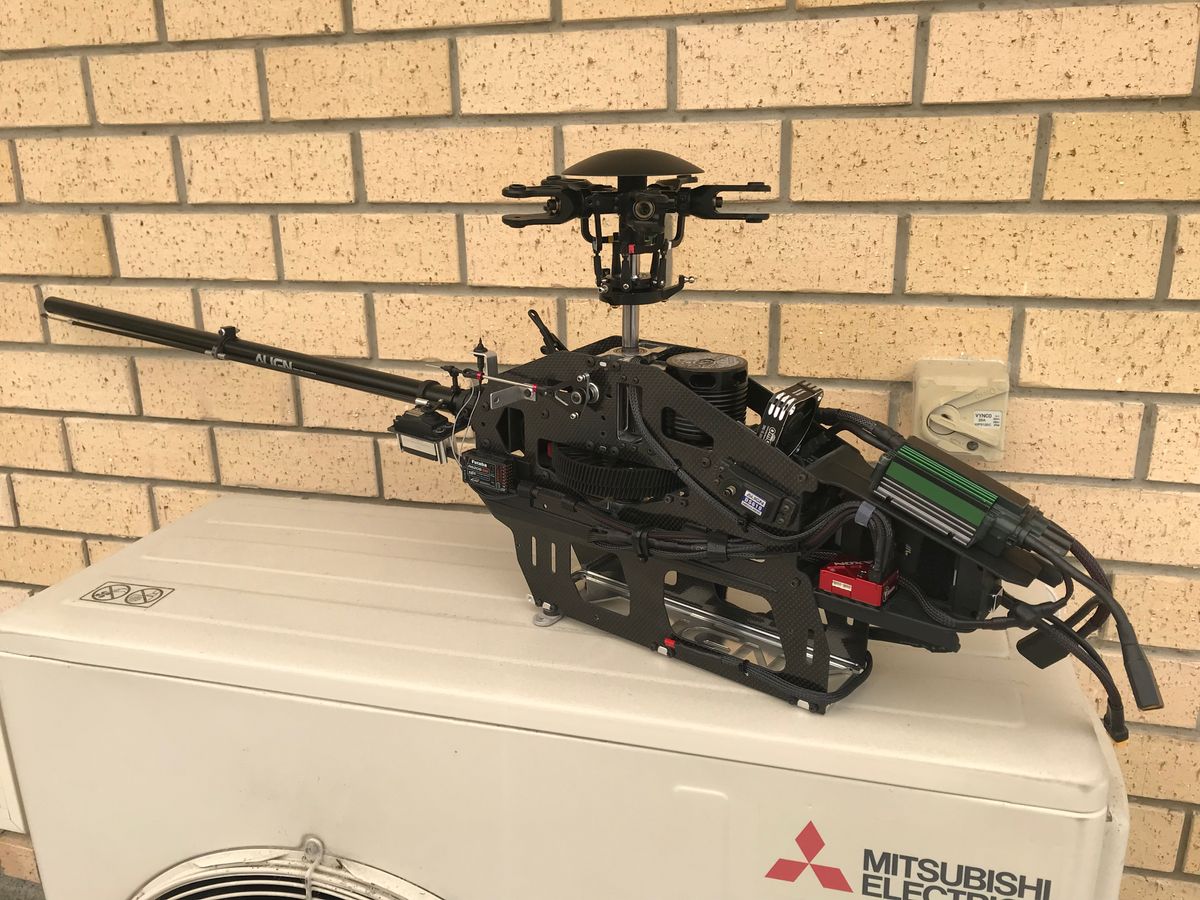
Some progress on setting up electrical and components:
Futaba R6208SB on FASST protocol (since replaced with R7308SB)
Castle Edge 160HV
Castle BEC Pro
BD Axon
Scorpion back up guard 2 powered by 1000mah 2S pack in behind main 2200 3S pack mounted left side radio tray.
Omg cooling fan
*Taller elevator A Arm with extra short extension used (HN7033T) to lift swash plate to the higher position for Roban head height as fitted to the top hole of standard FL shaft Front servo rods (Secraft turnbuckles used) as needed to level swash at servo neutral with 5 degrees collective pitch at mid stick at TX. Turnbuckles then serve to provide mechanical trim in both lateral and pitch cyclic.
Scale details
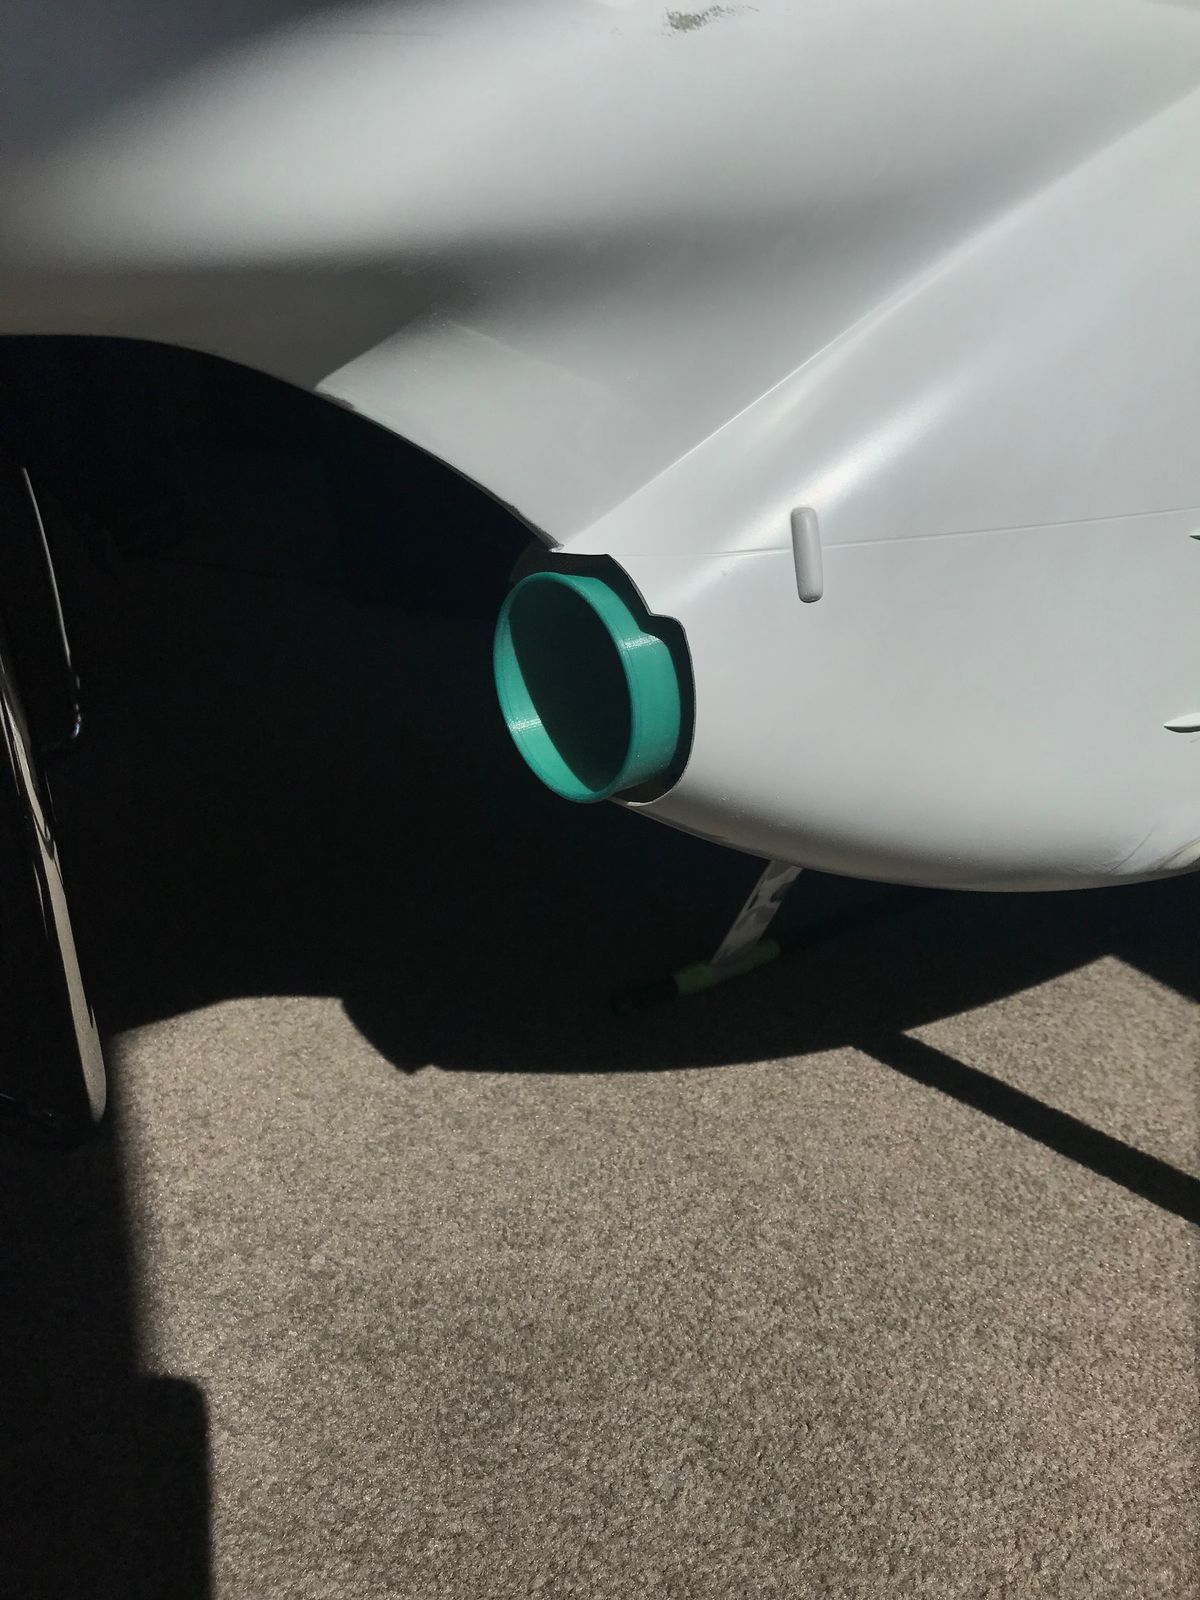
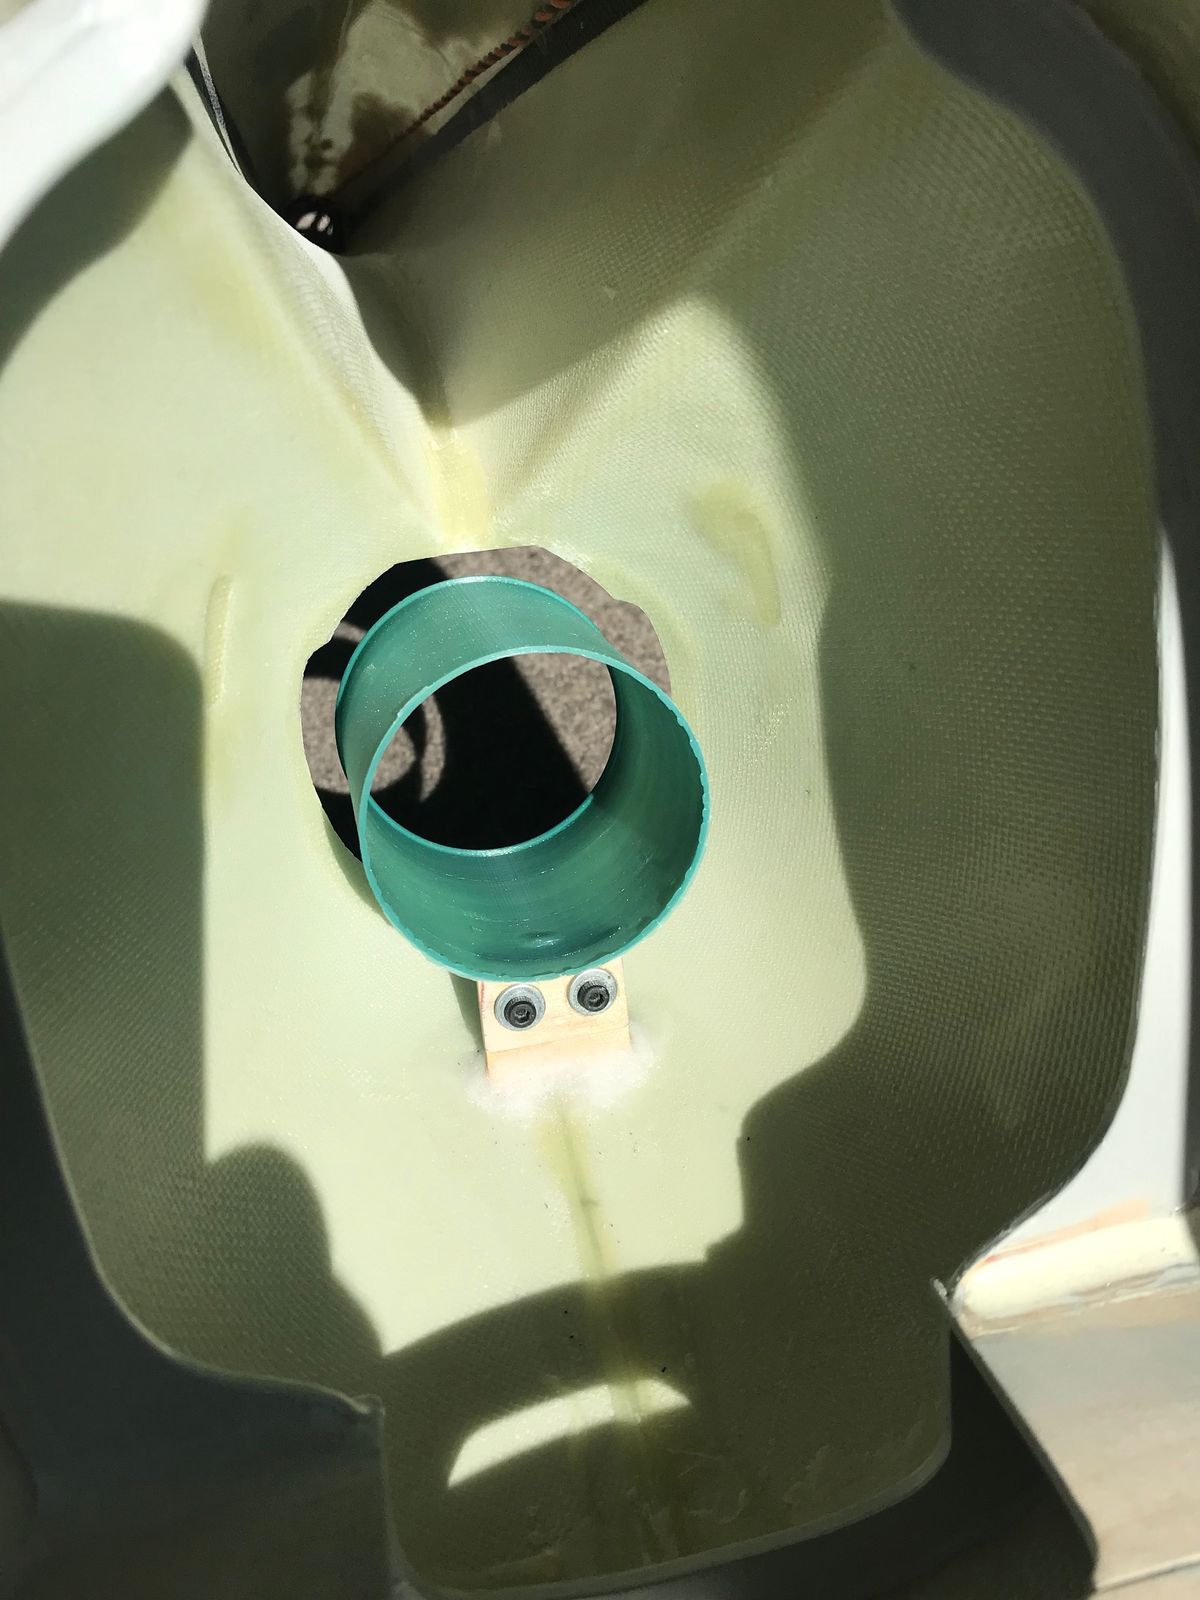
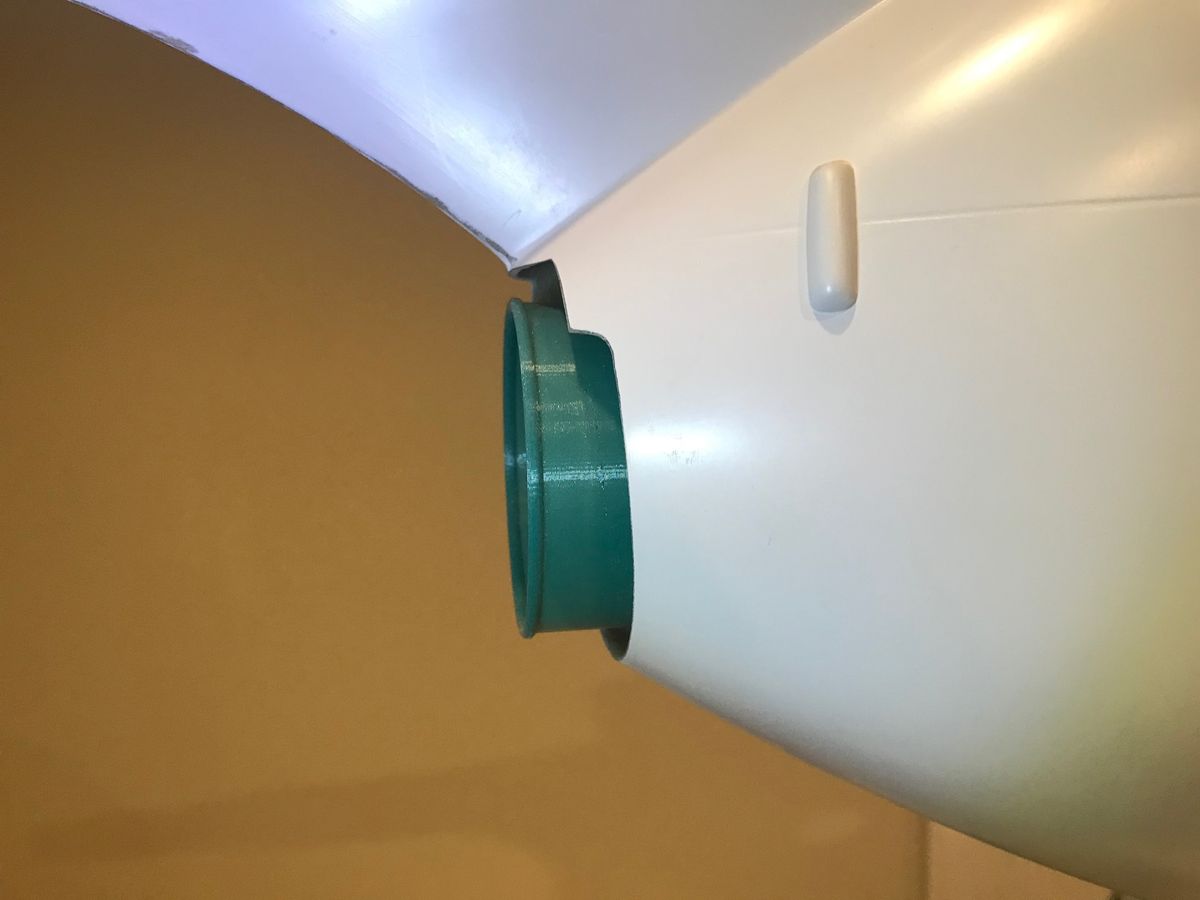
a start on MD530F exhaust detail
Roban to Fun Key landing strut mod
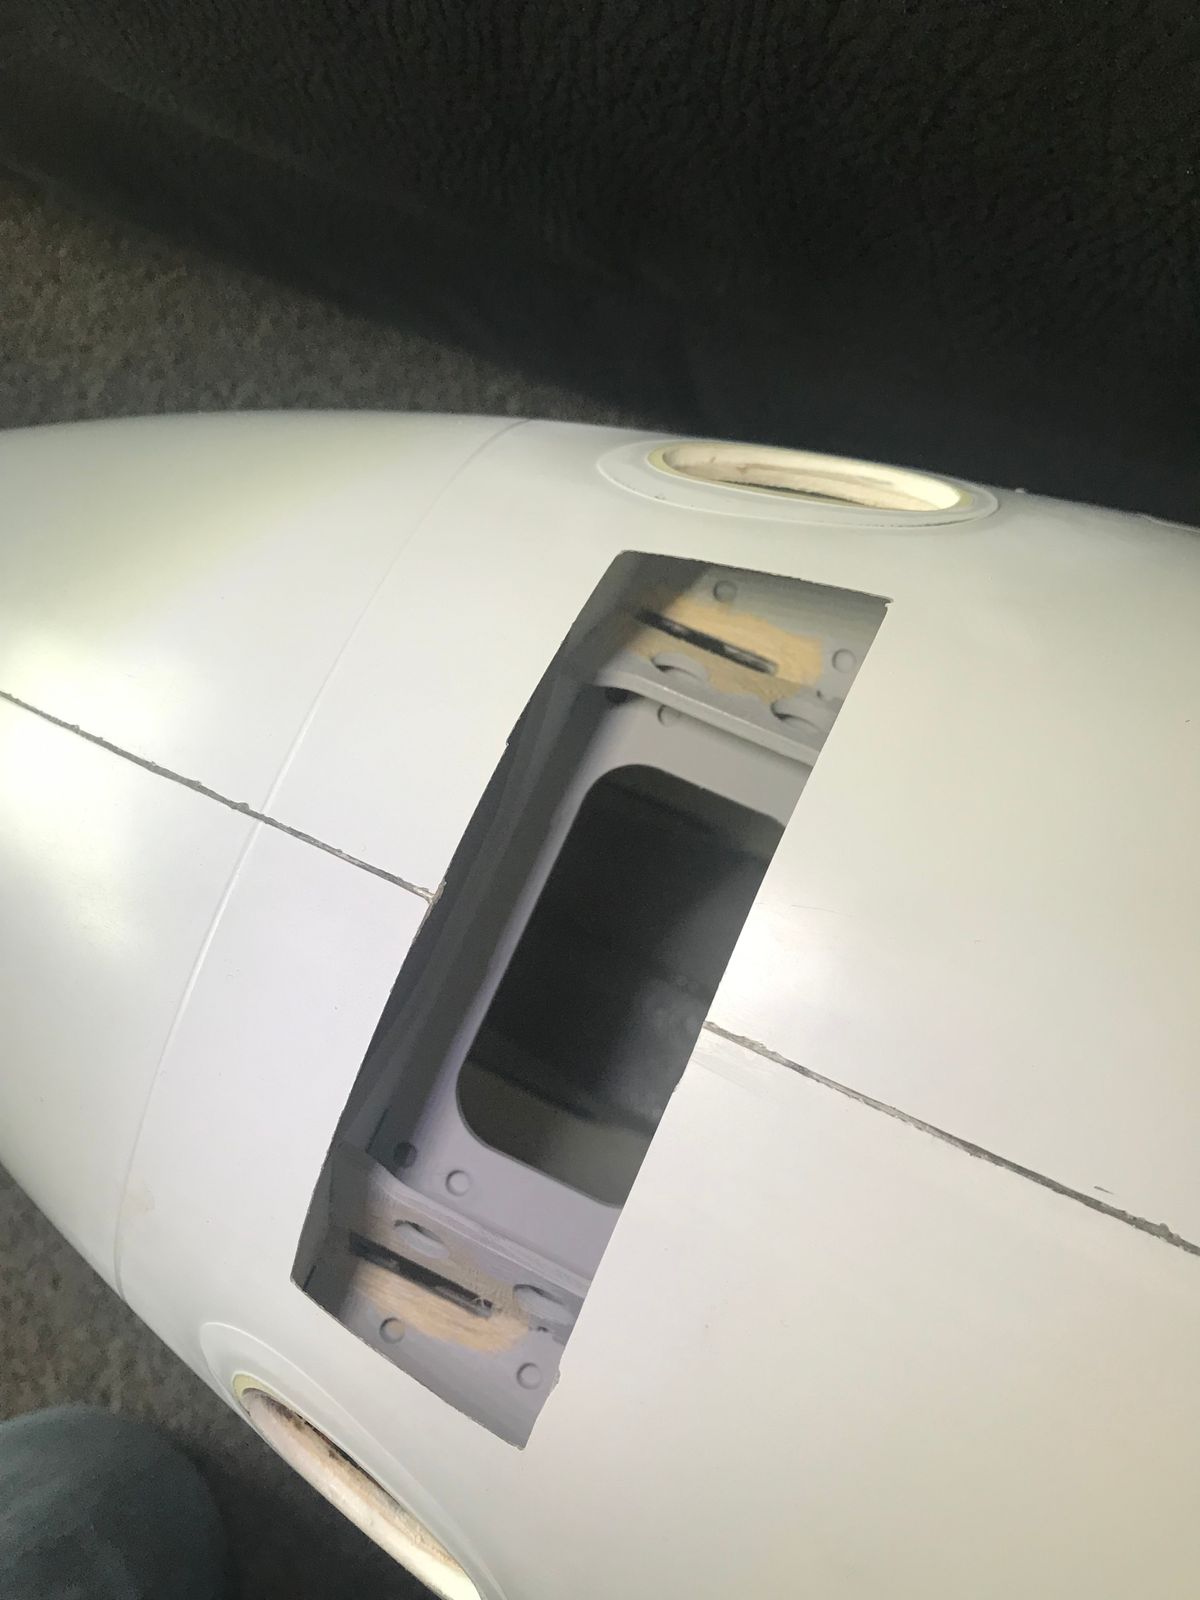
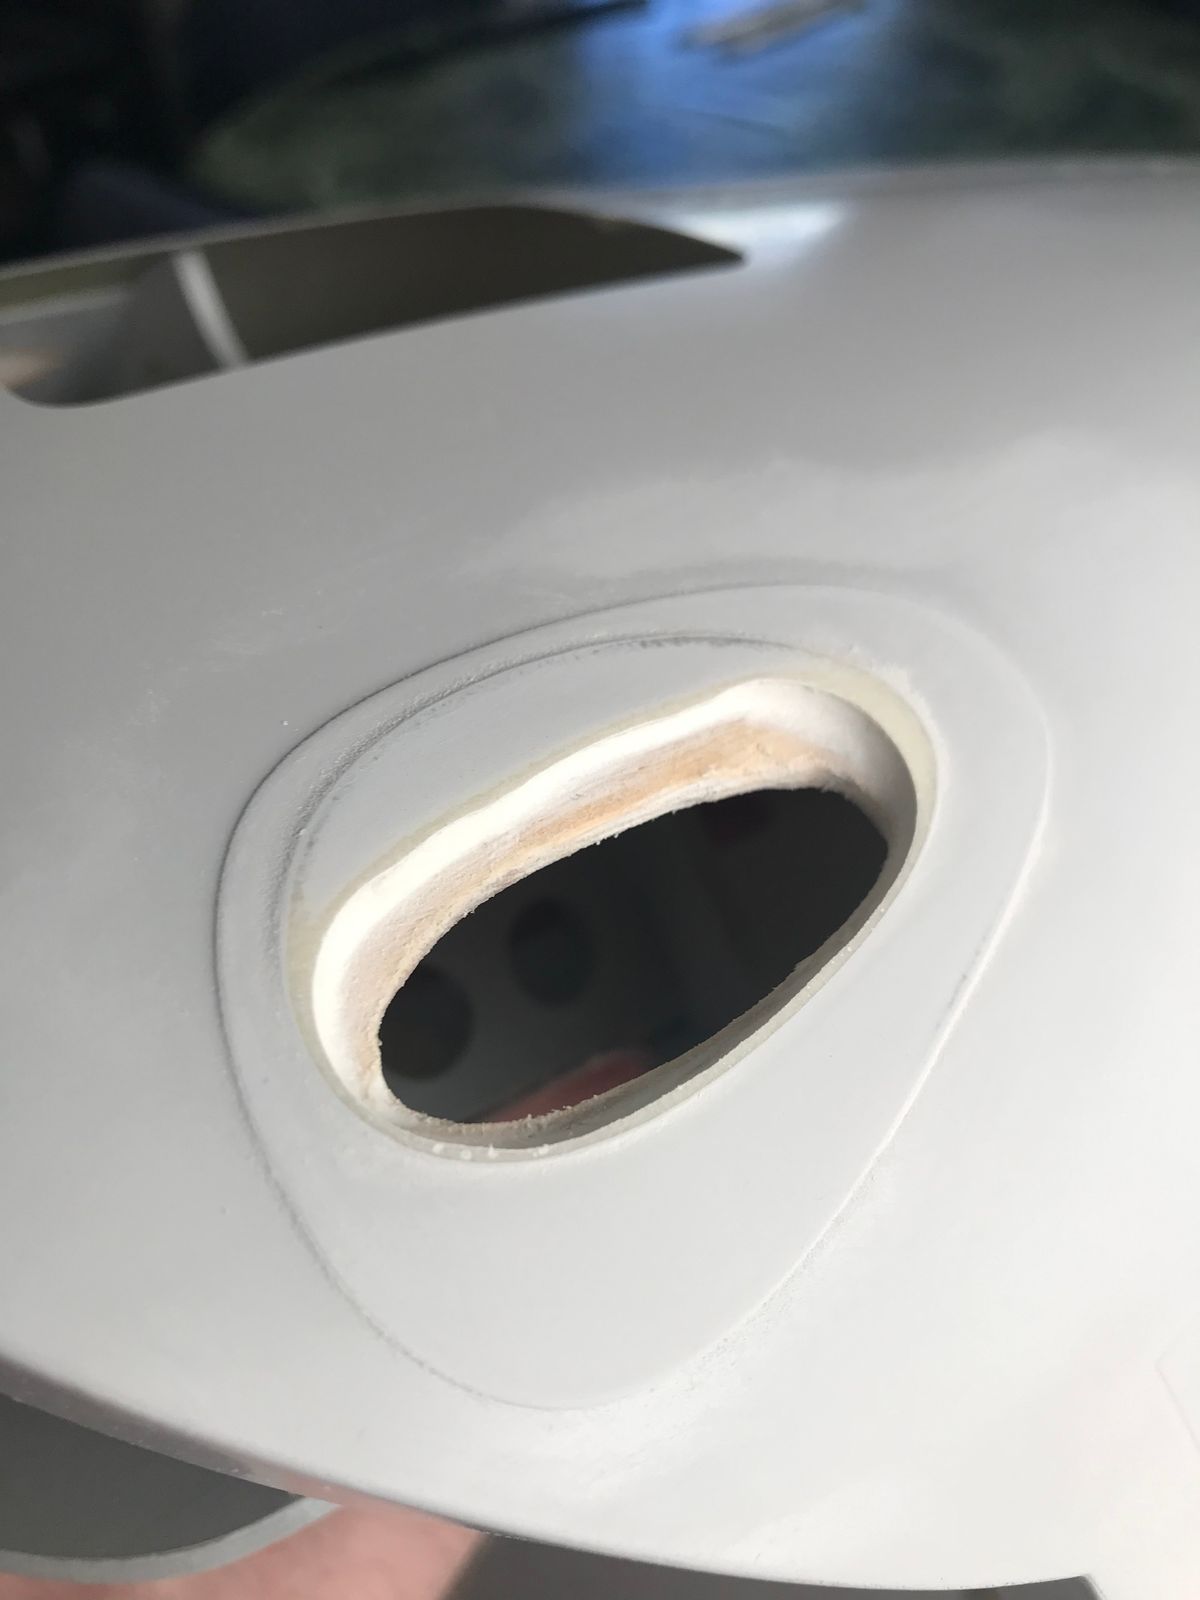
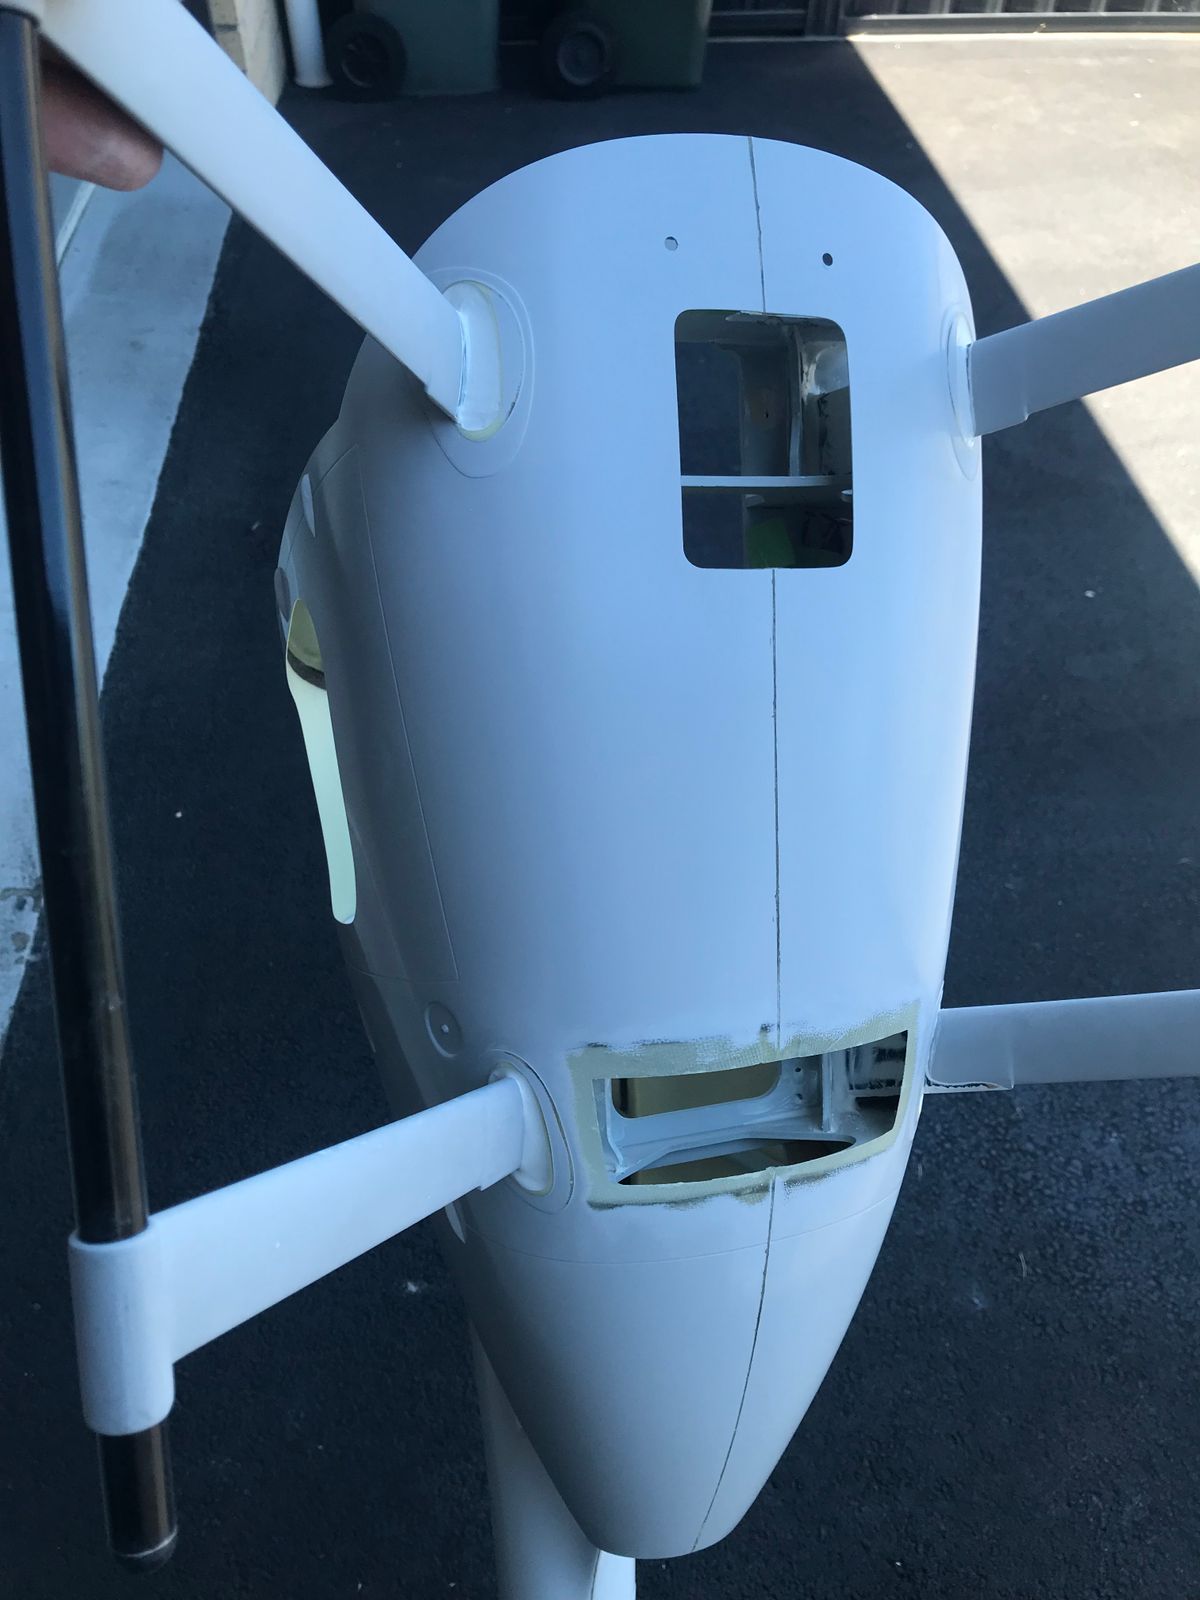
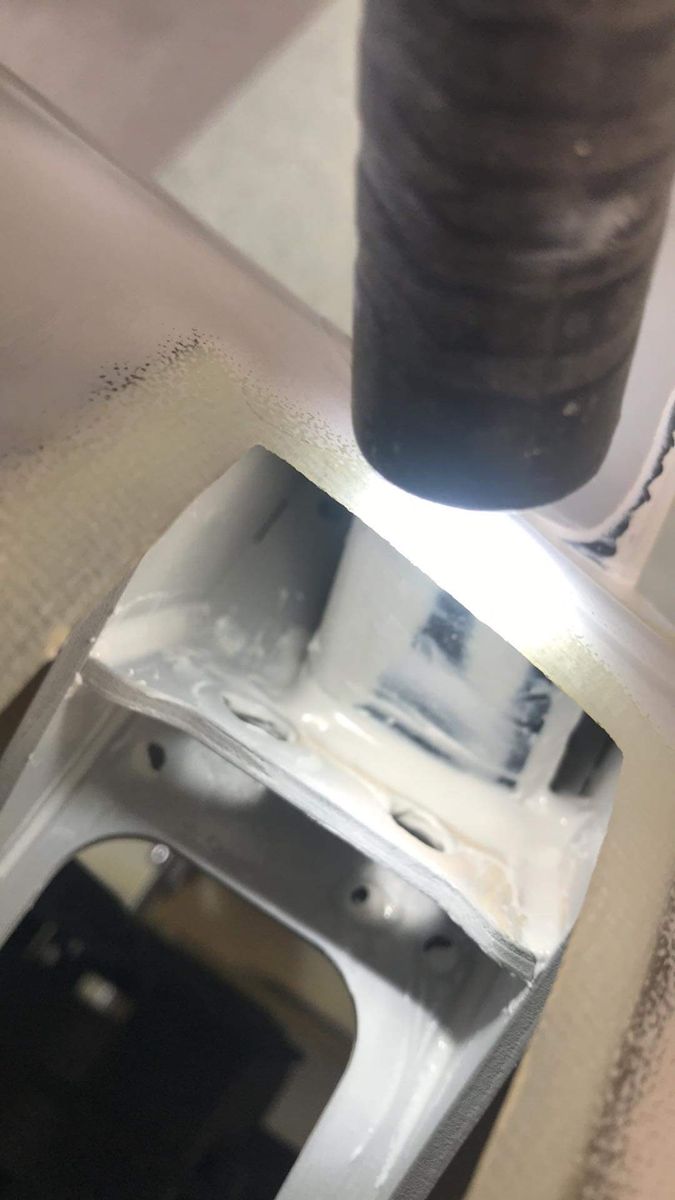
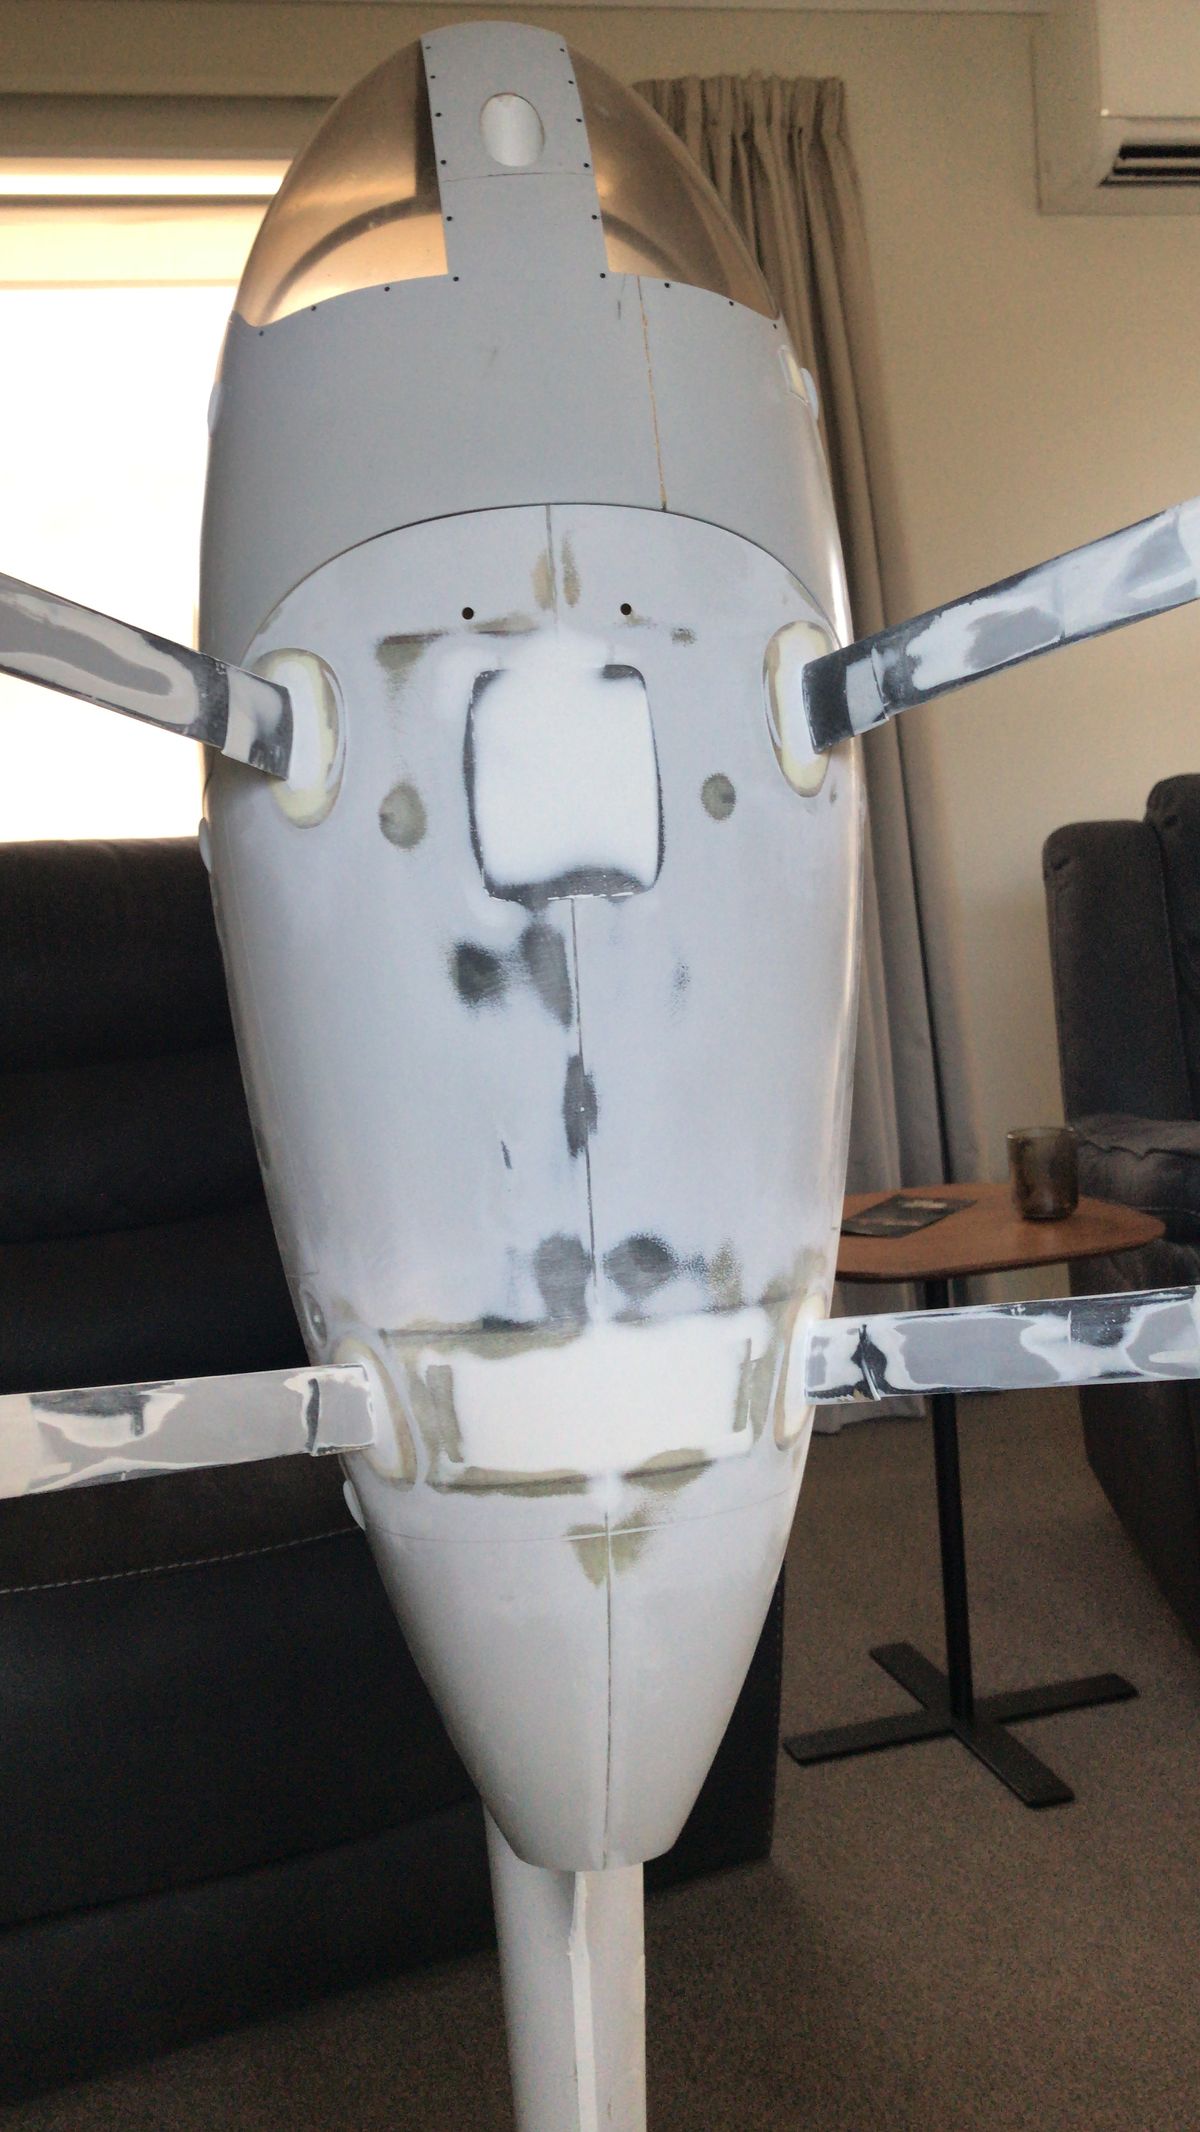
Having had zero issues with the 600 "Roban landing strut to Funkey fuse mod", and knowing the 700 will be considerably heavier "on its feet" I wanted to do the same thing.
Firstly some pics taken earlier of the strut upgrade, where I went the "extra mile" and made a temporary hatch in the belly to more effectively access that area to to bond what is the weaker strut fitting (given the shorter distance between belly exit and floor) I also filled between the skin and ply floor structure at the exit points for added strength. Finally refitting hatch and filling in nitro cooling vent neatly as well
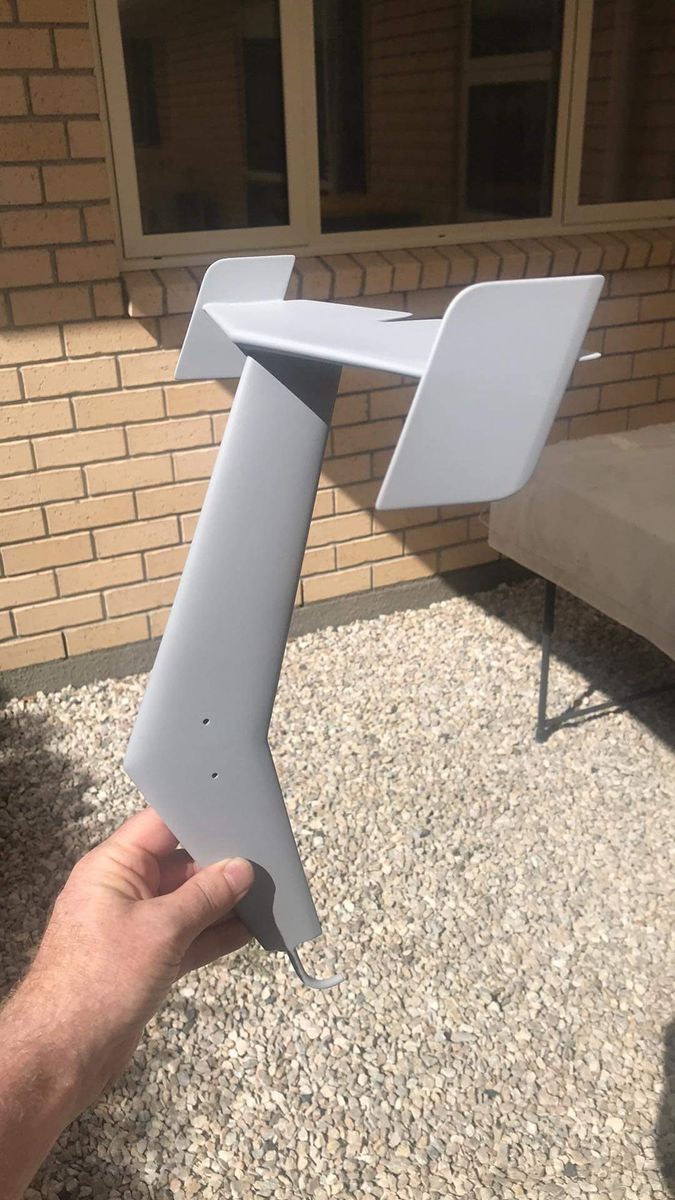
Fun Key vertical fin stengthening
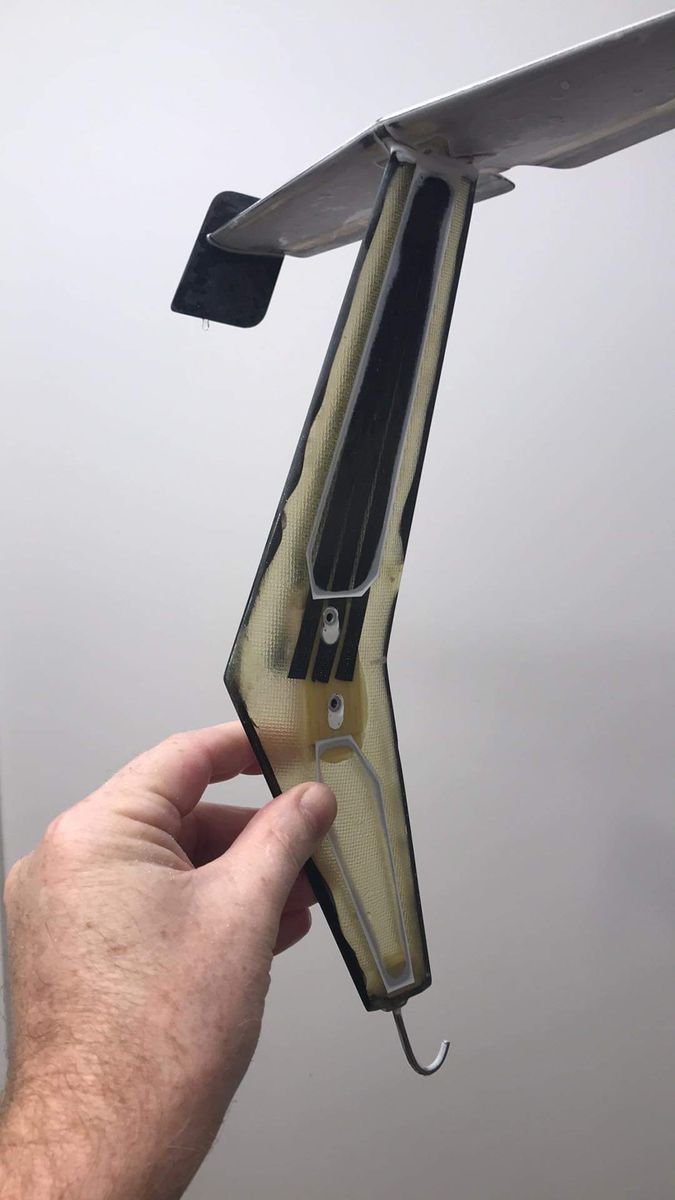
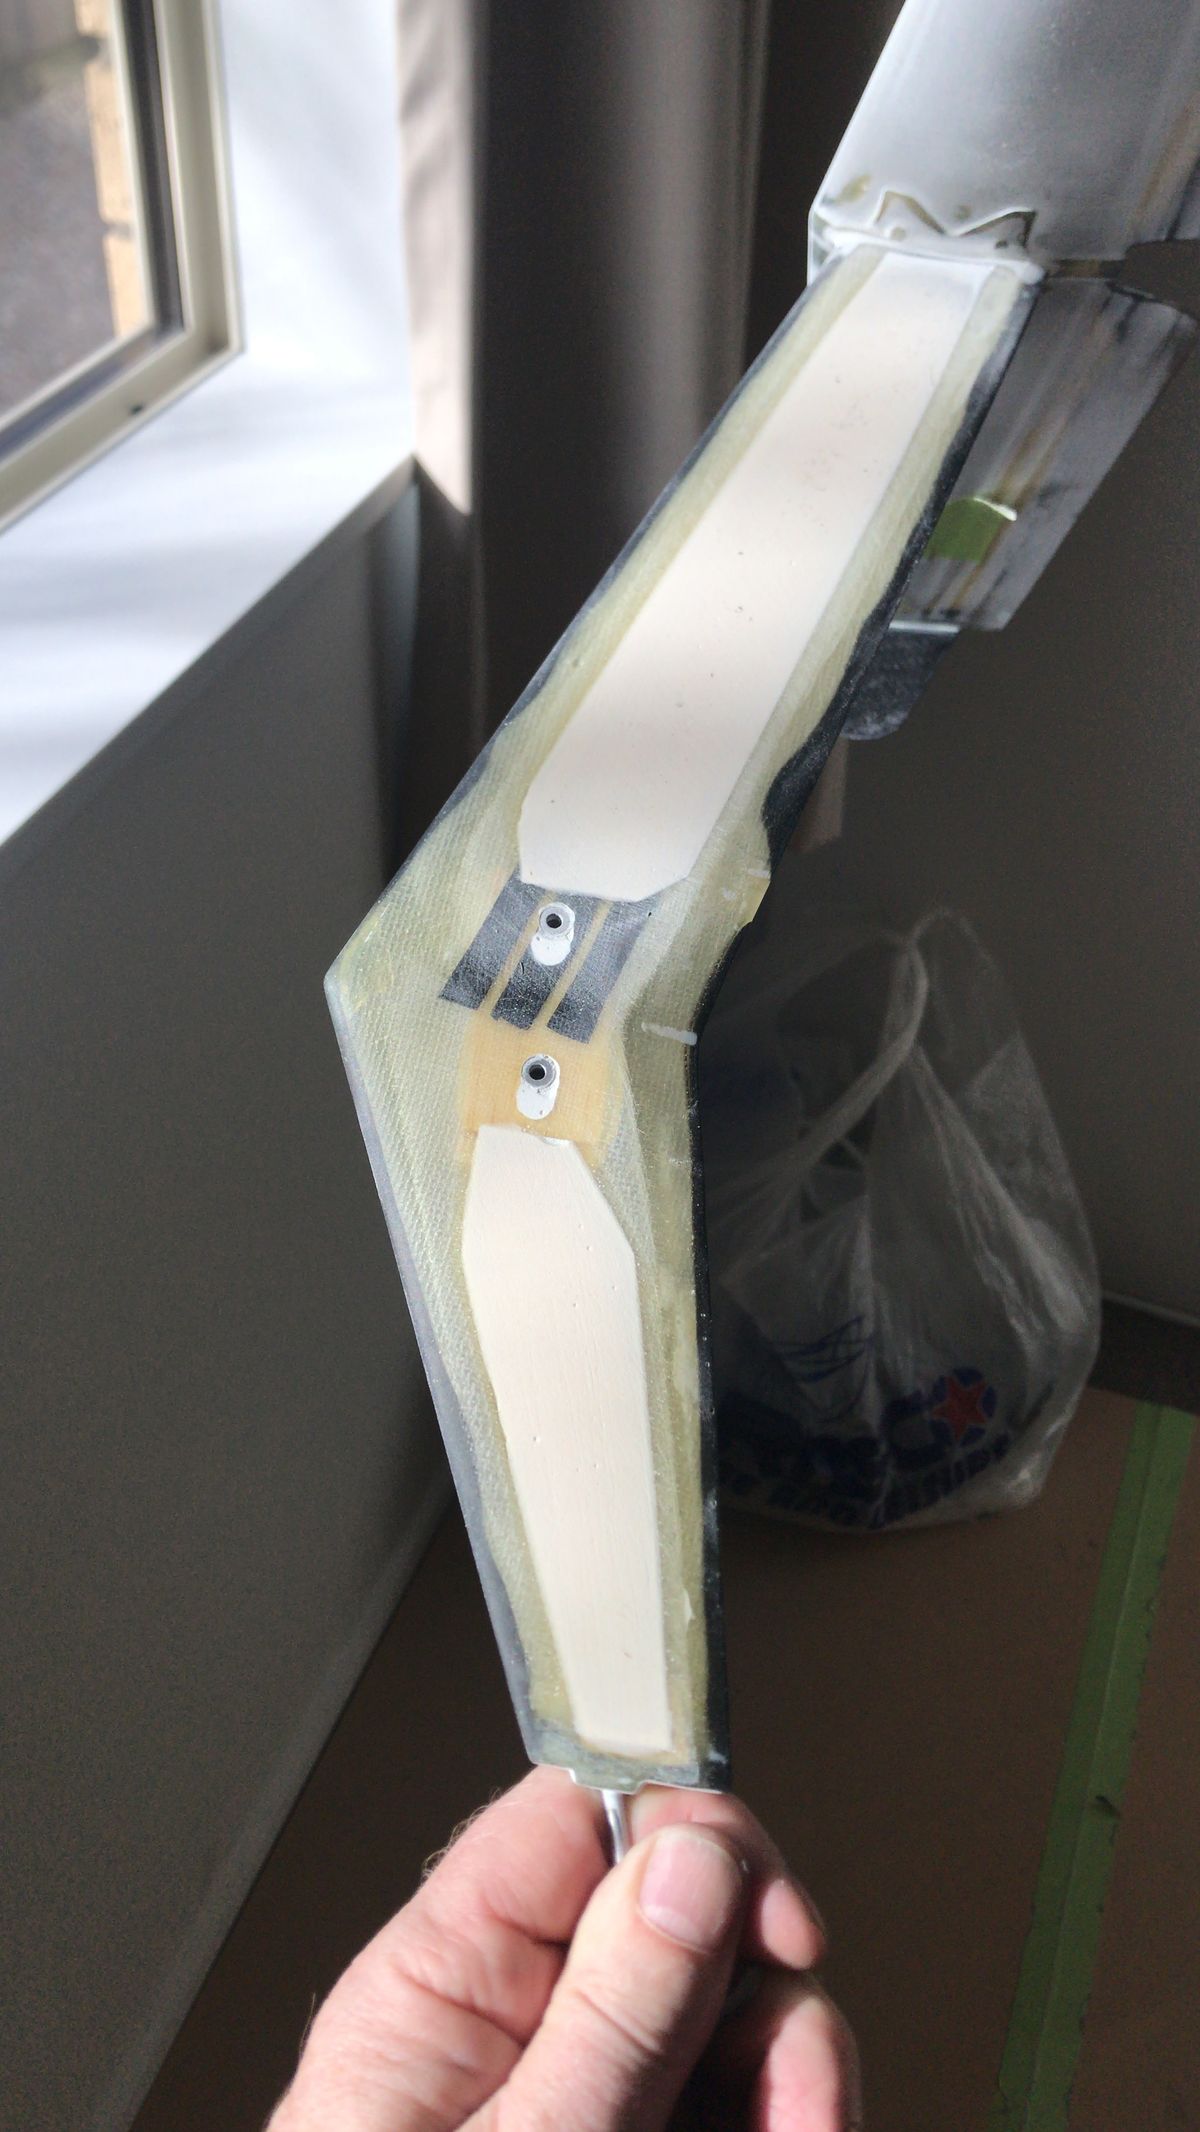
Fin mod. Those that know the Fun Key fuselages know the vertical fin is a little weak in the "twist plane" and can display an annoying wiggle at times in the hover with varying air currents swirling around. I wanted to eliminate that as a small cost of minor added weight.
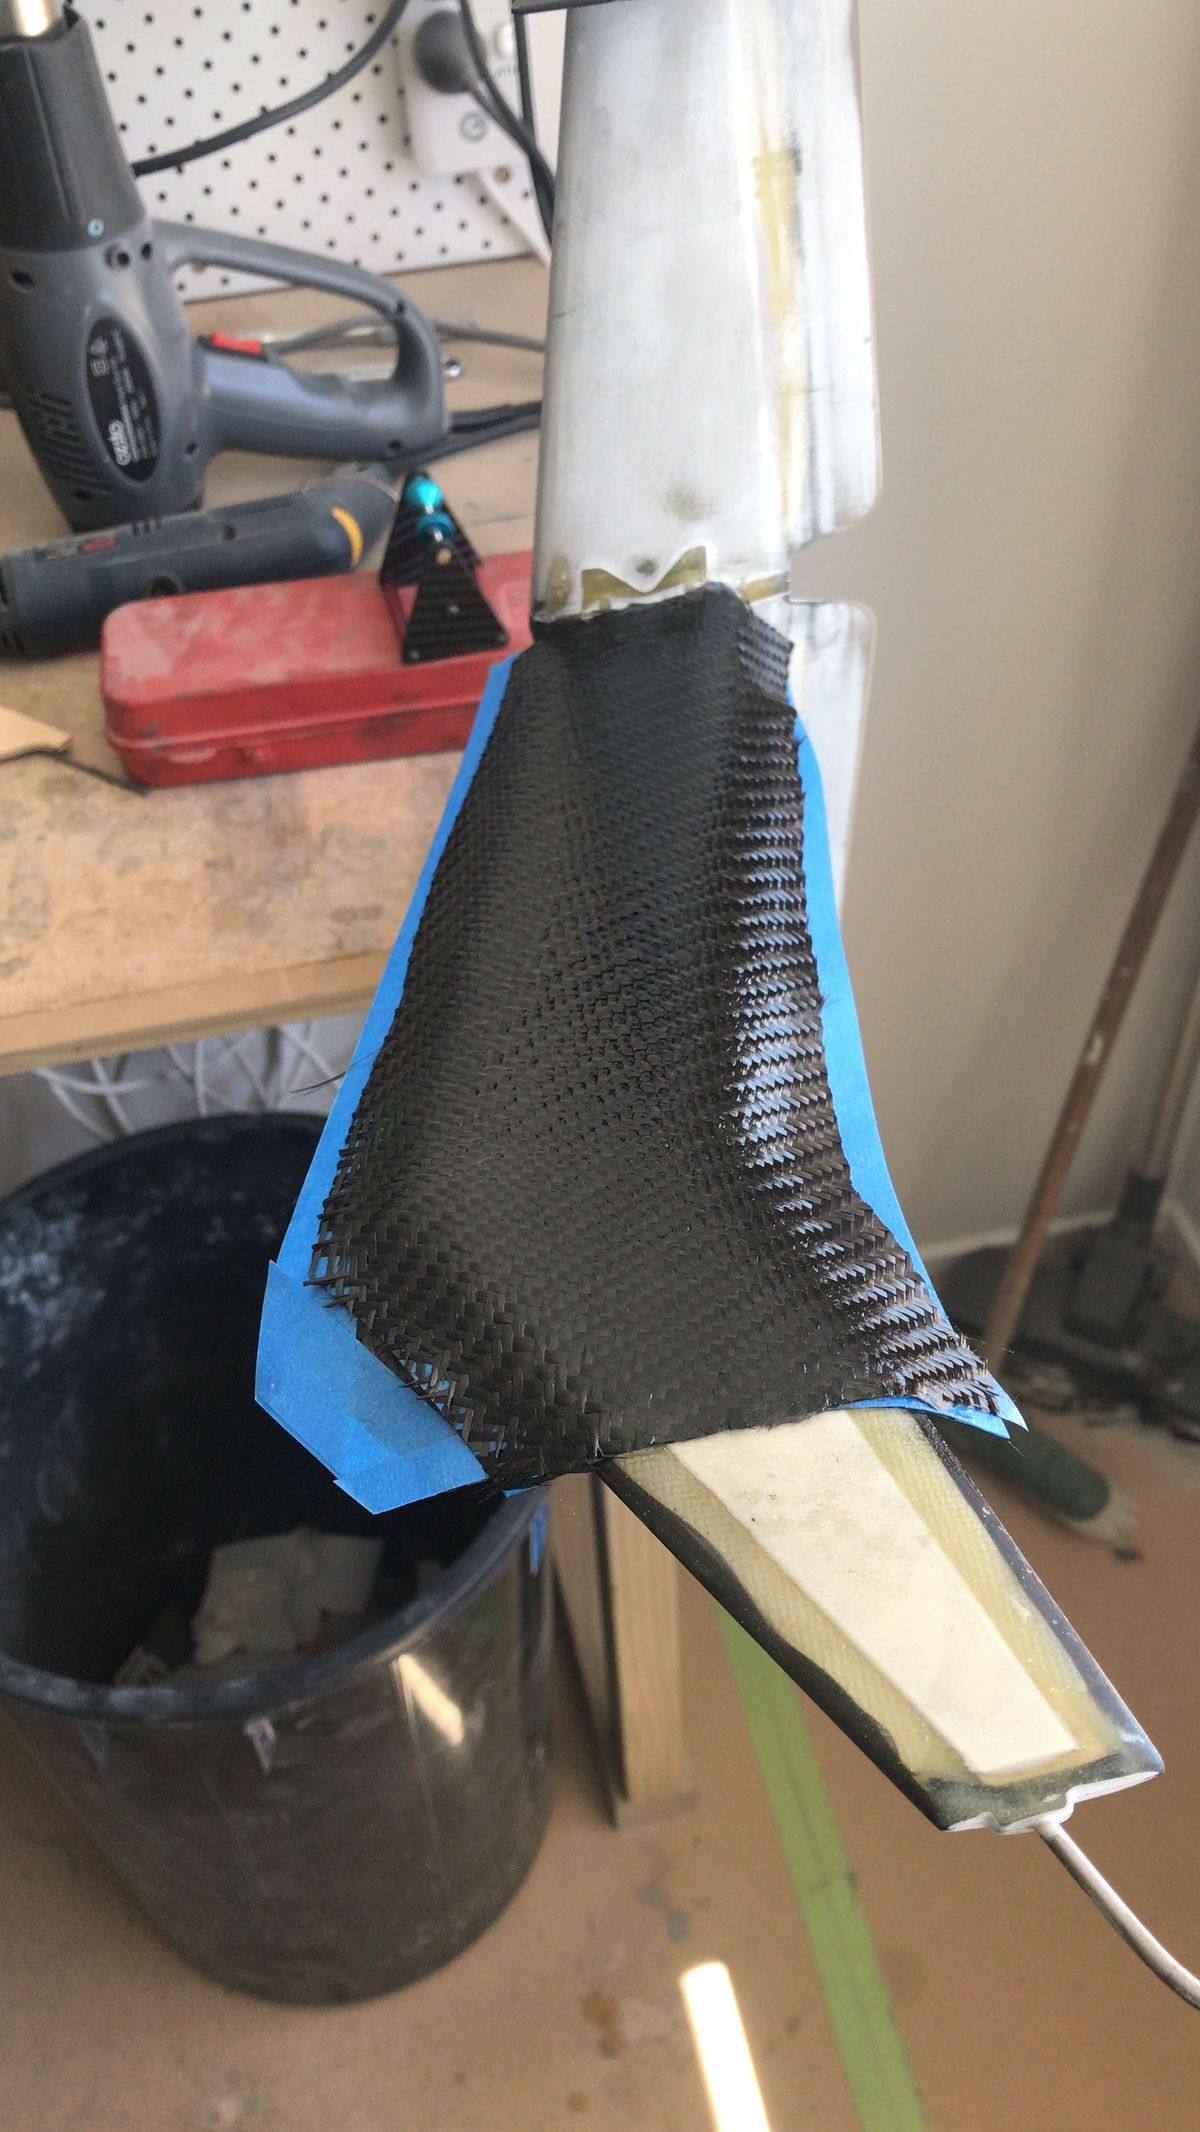
I covered the upper part of the fin above the mount points. Sanding it right back reveals what Fun Key did to strengthen it, which LOOKS good, but its just not quite there, partly because as the design narrows toward the top more than perhaps what is scale.
Not really knowing what I am doing with carbon fibre and resin, I chose to forfeit the indent patterns in the fin in order to not have complications with a thicker carbon cloth later.
After subsequent 2 layers each side in total the fin is rock solid, and had not added a significant amount of weight - in fact because of the "CG friendly" 700E frame set the heli is still well CG forward at the moment.
There are other clever ways to strengthen it I guess however I had already bonded the H stab on so this was my fix. Being "stand off scale" I am not so concerned about the indent detail in fin sides. The result achieved the intention.
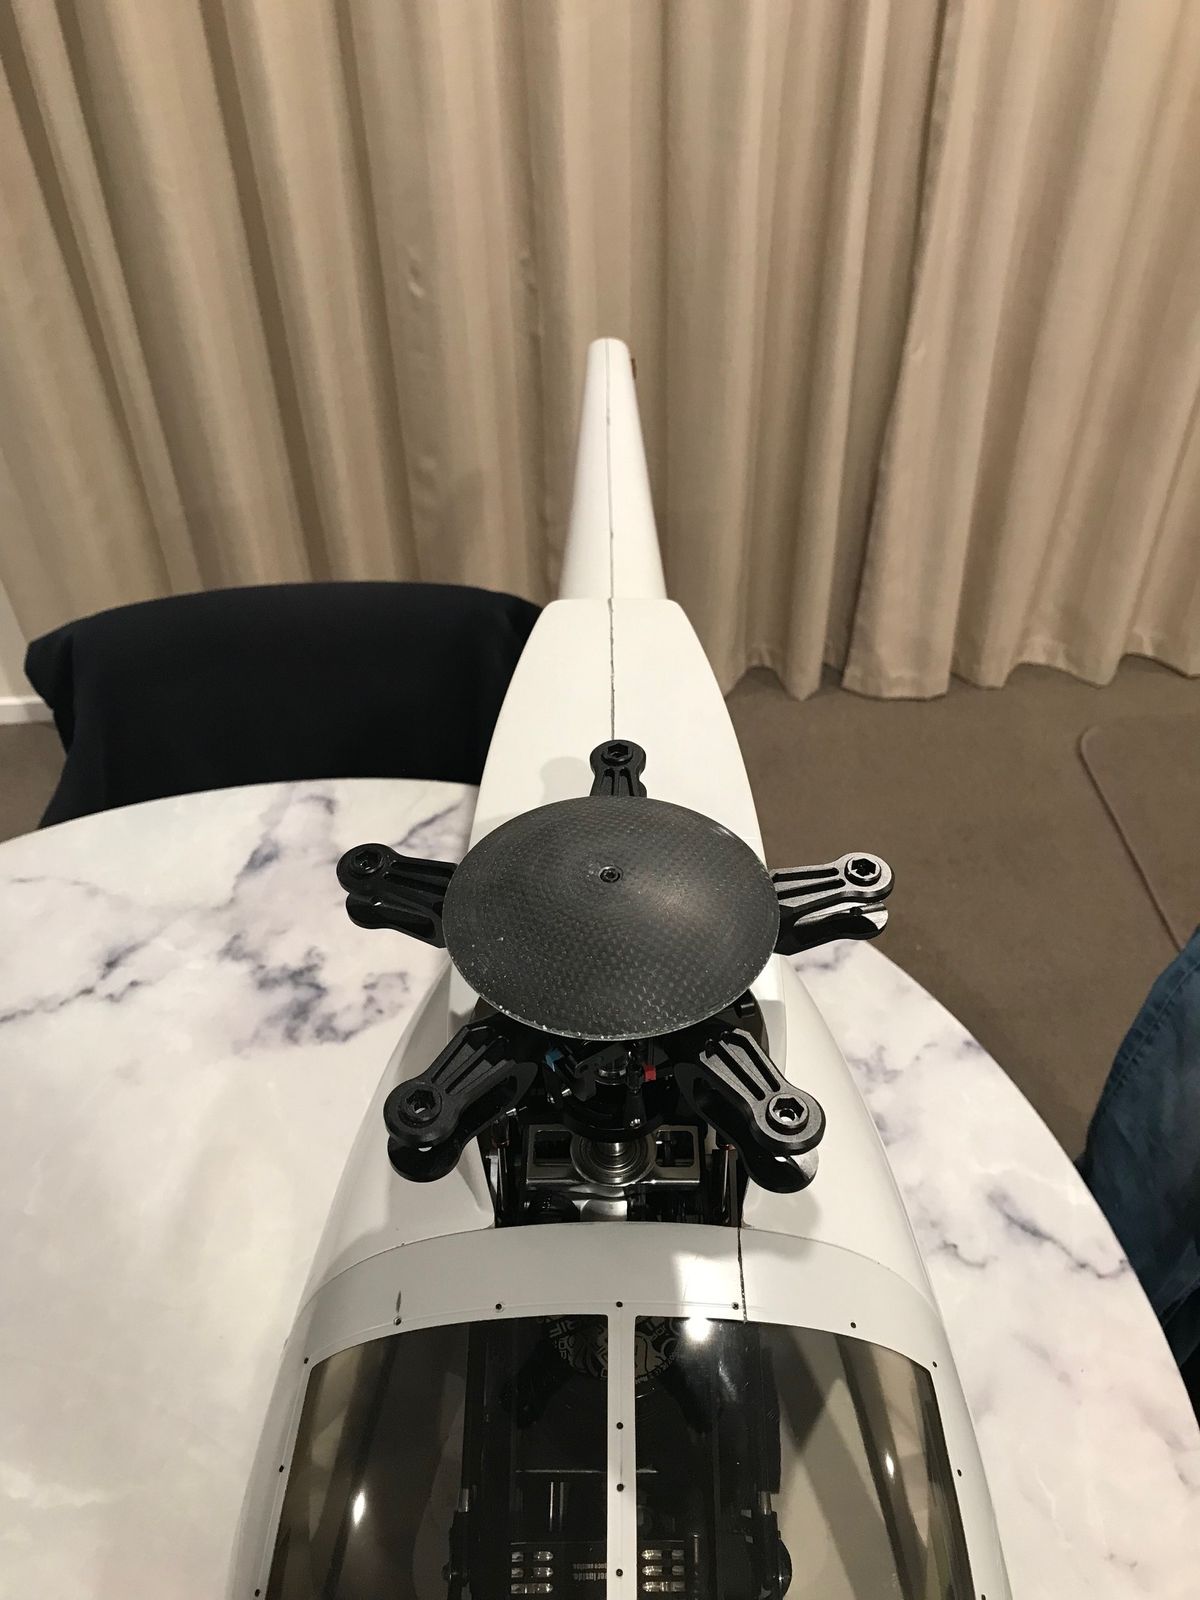
Making rotor head cap
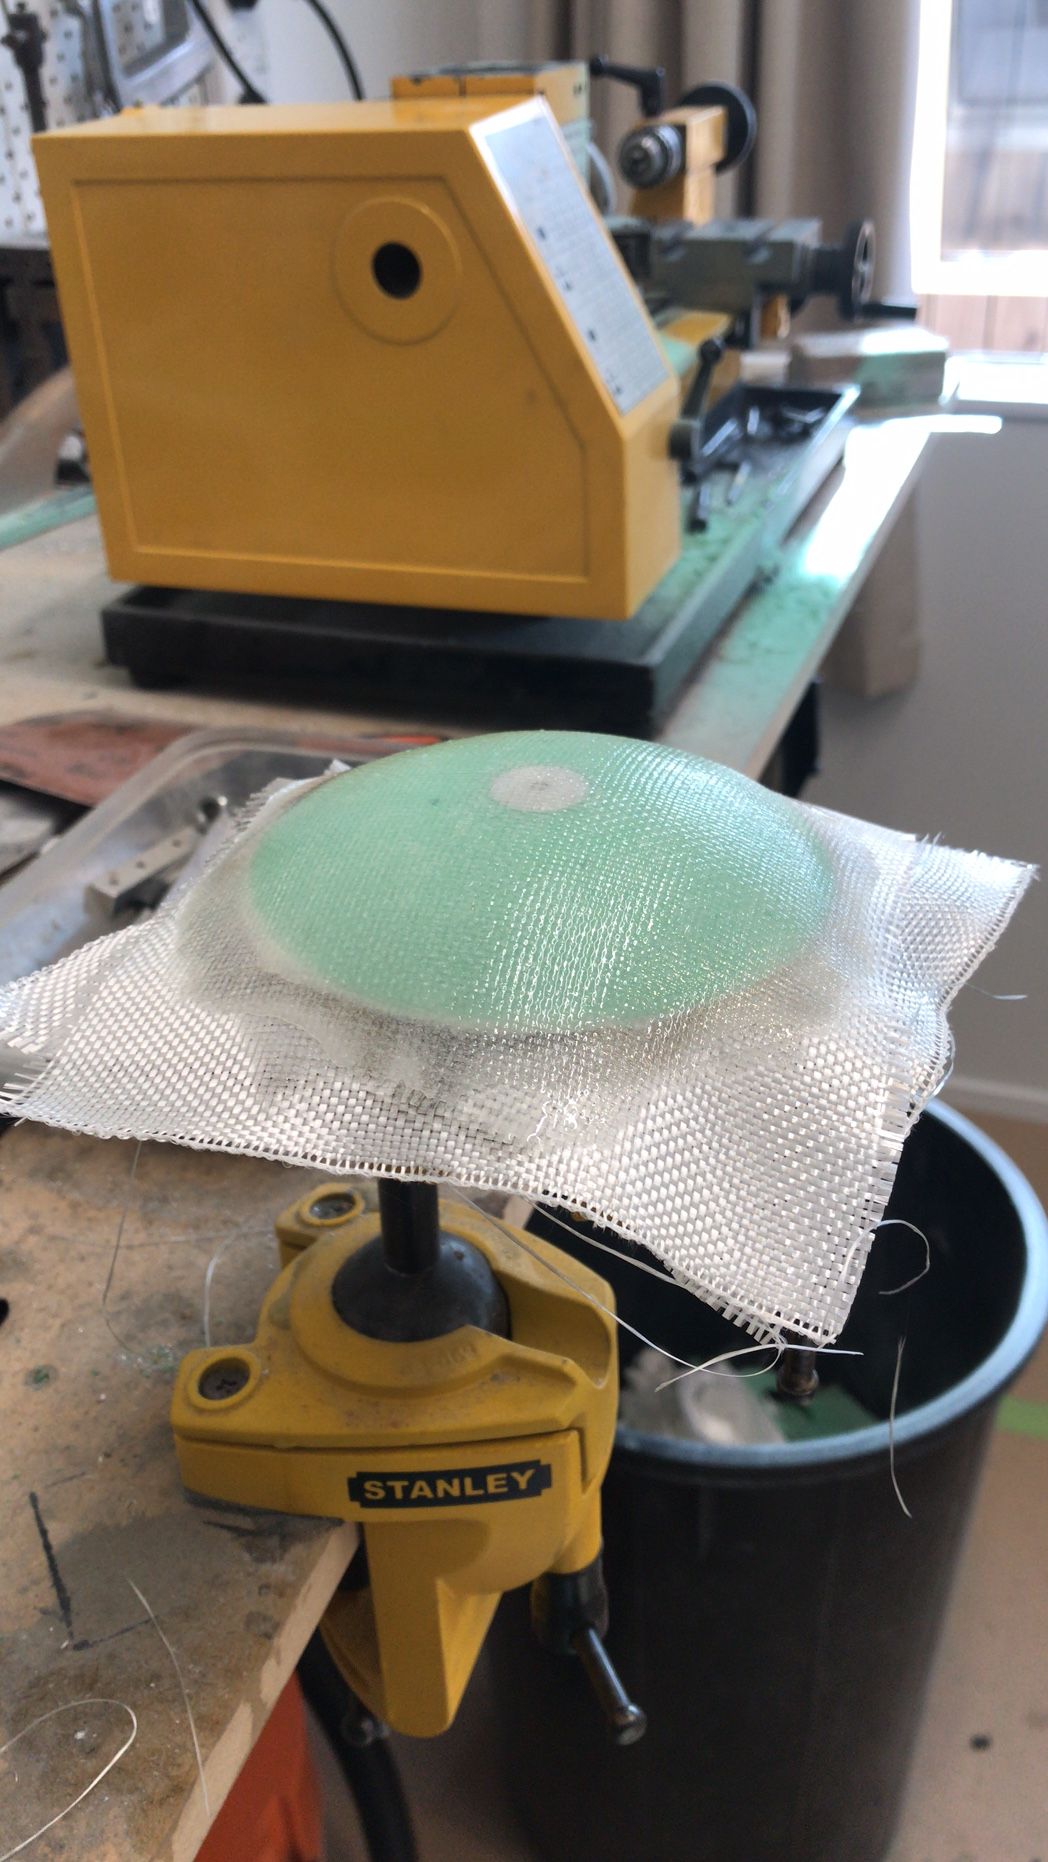
Rotor head cap made from first machining an alloy "post" and then gluing a piece of green foam onto it.
Fitting up to lathe chuck and shaping and then covering both sides with glass or carbon cloth
Cargo hook mods
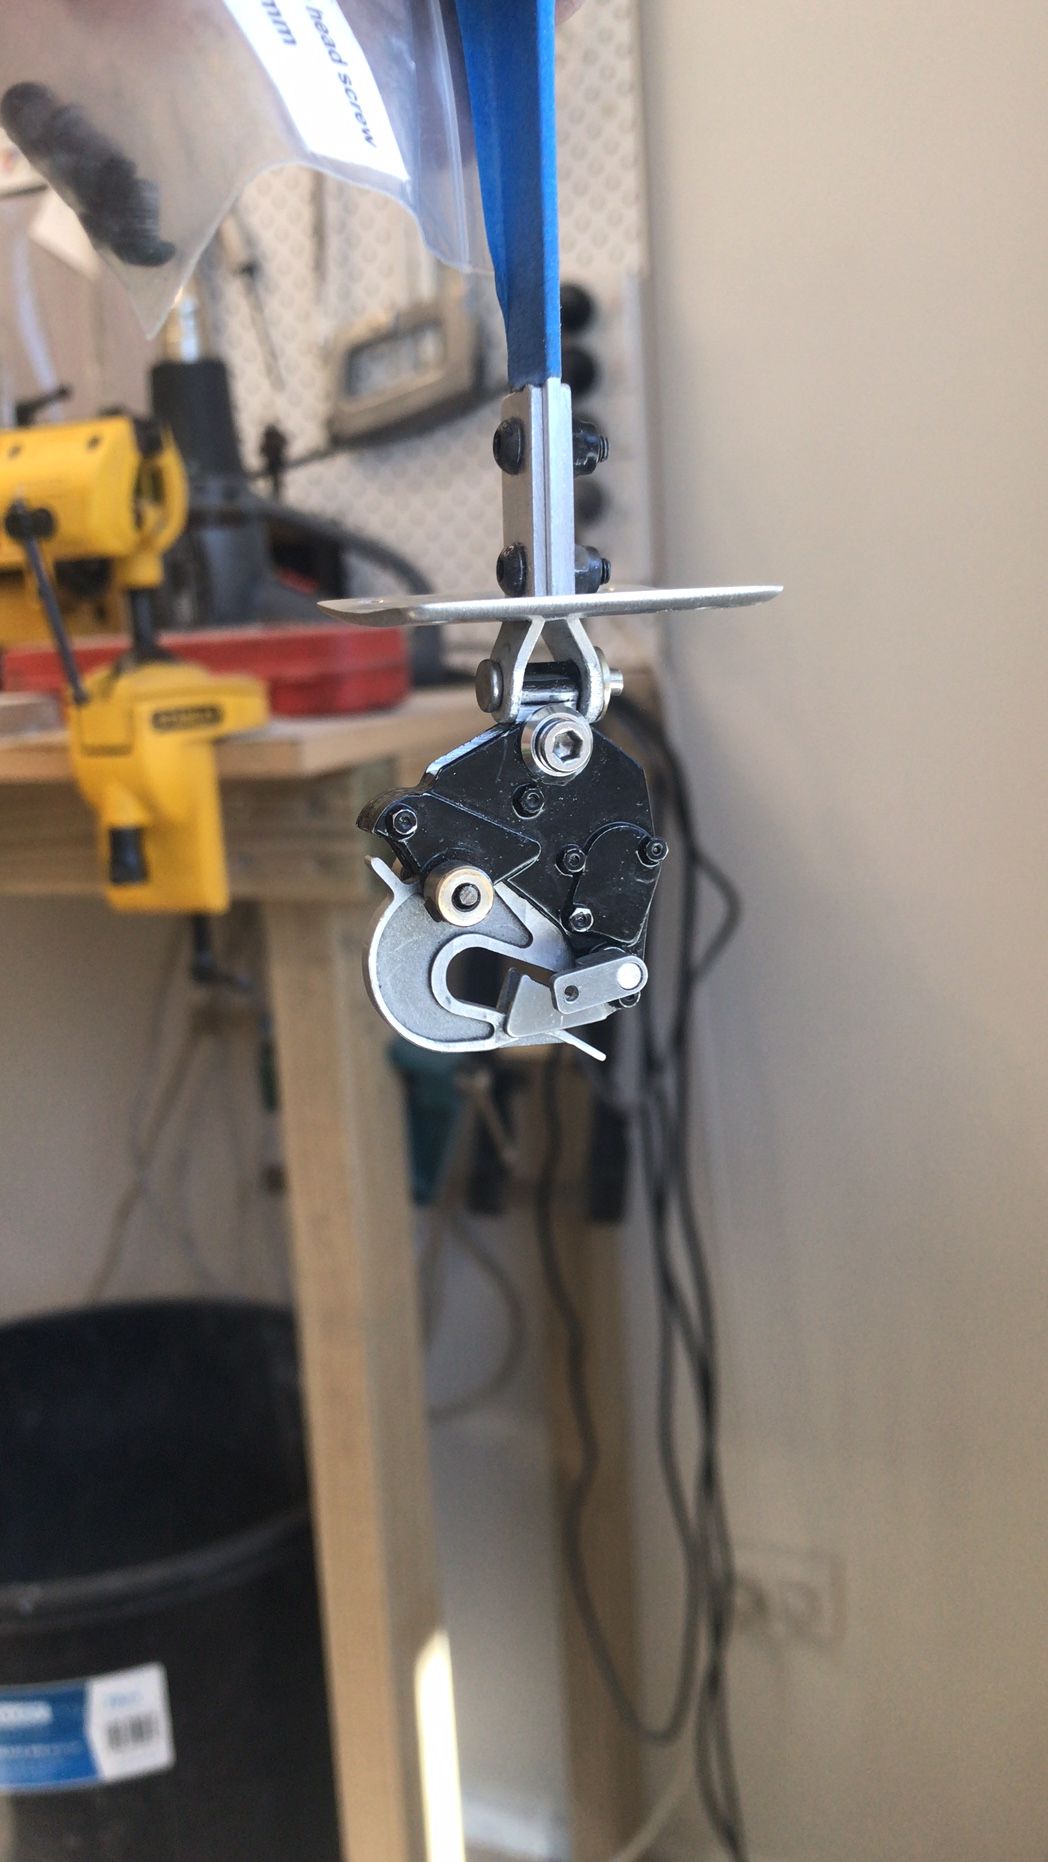
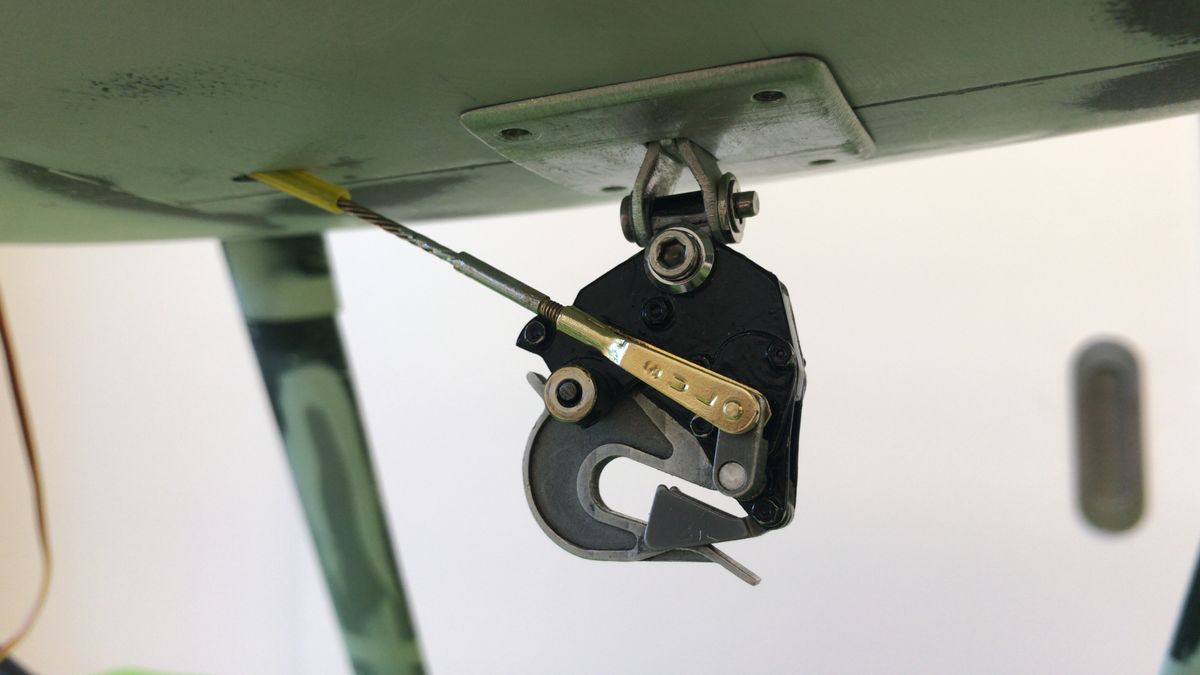
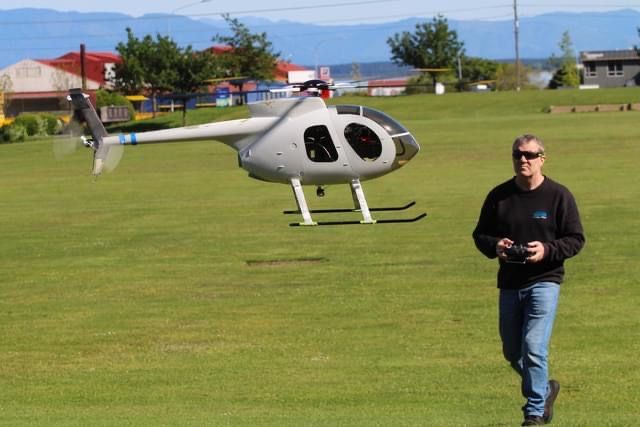
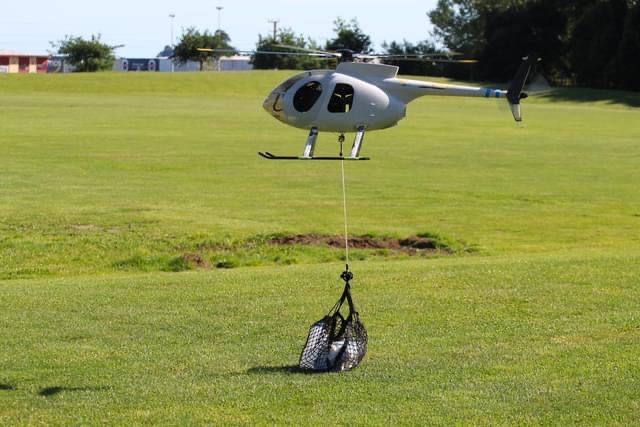
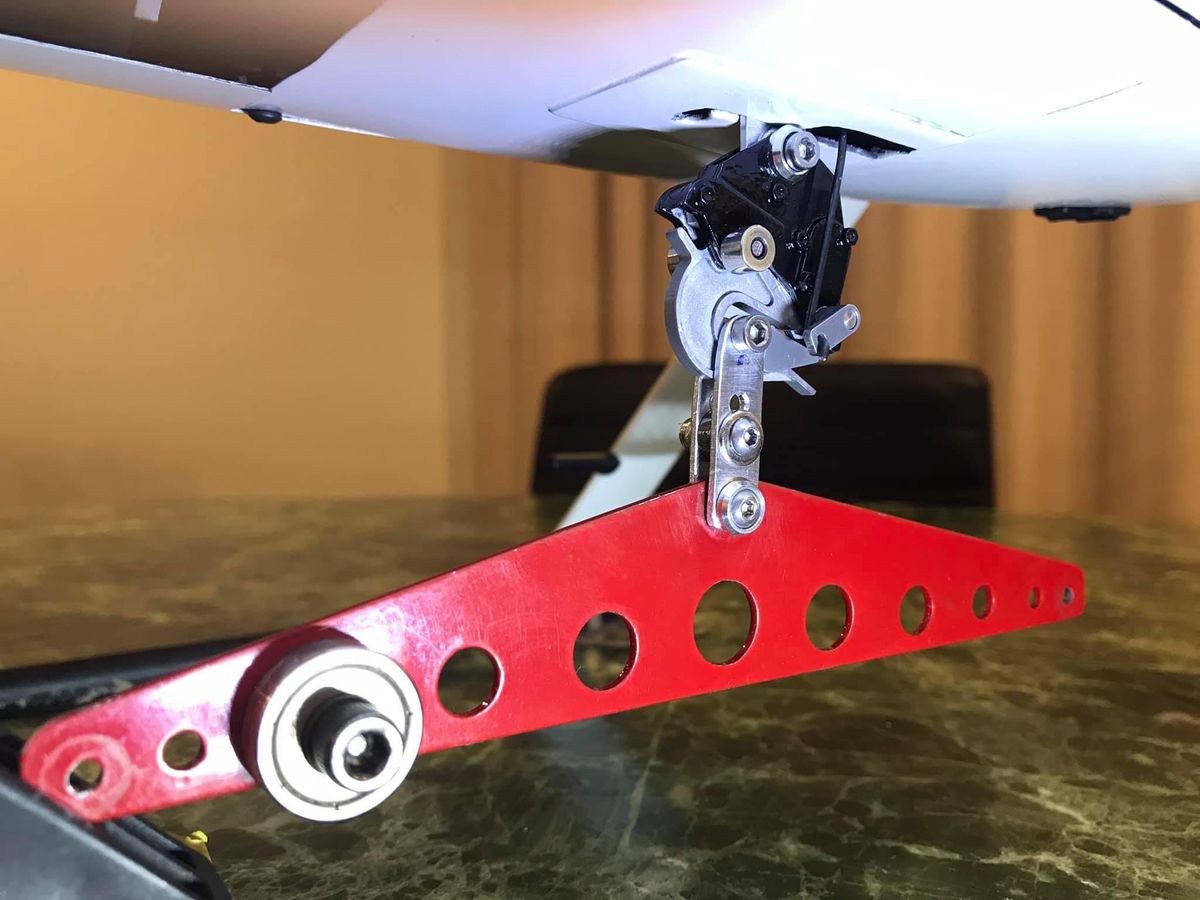
Prelim test/tuning flights and testing new hook configuration incorporating a lateral hinge to take the side pressure off the actual hook when spreader bucket lifting frame is on there.
Spreader Bucket
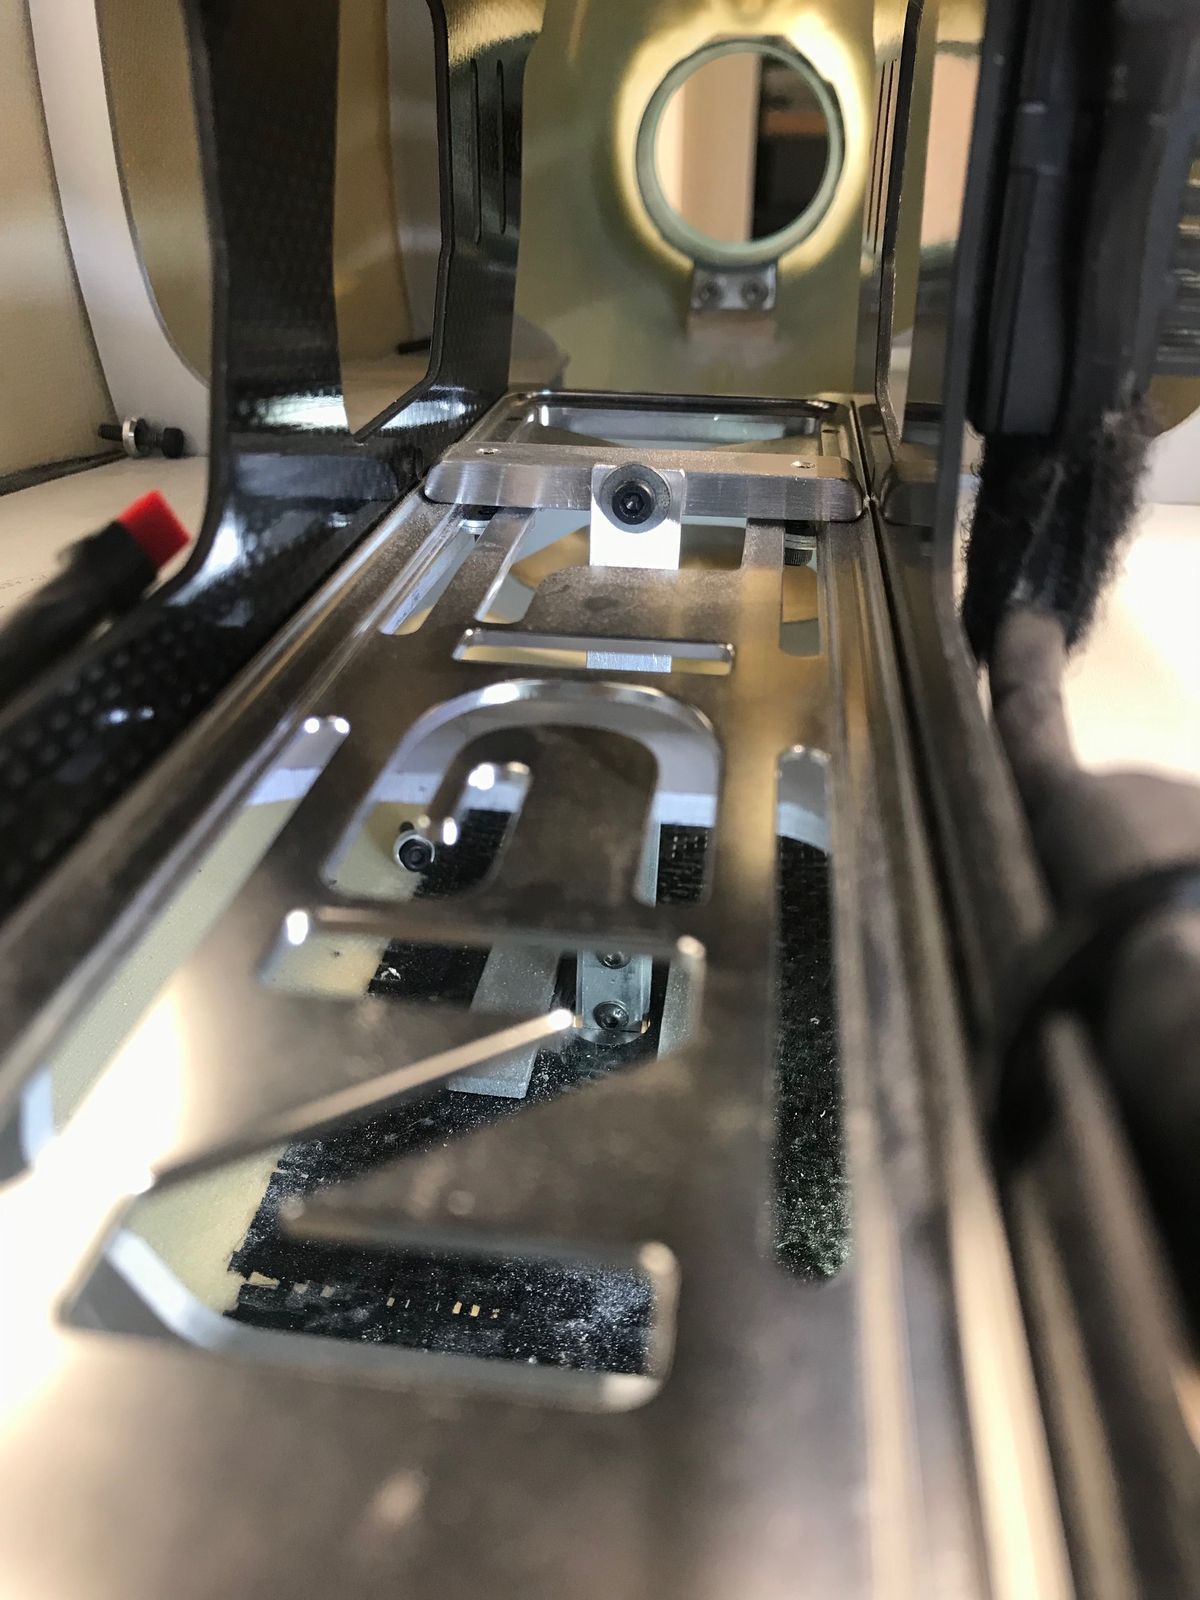
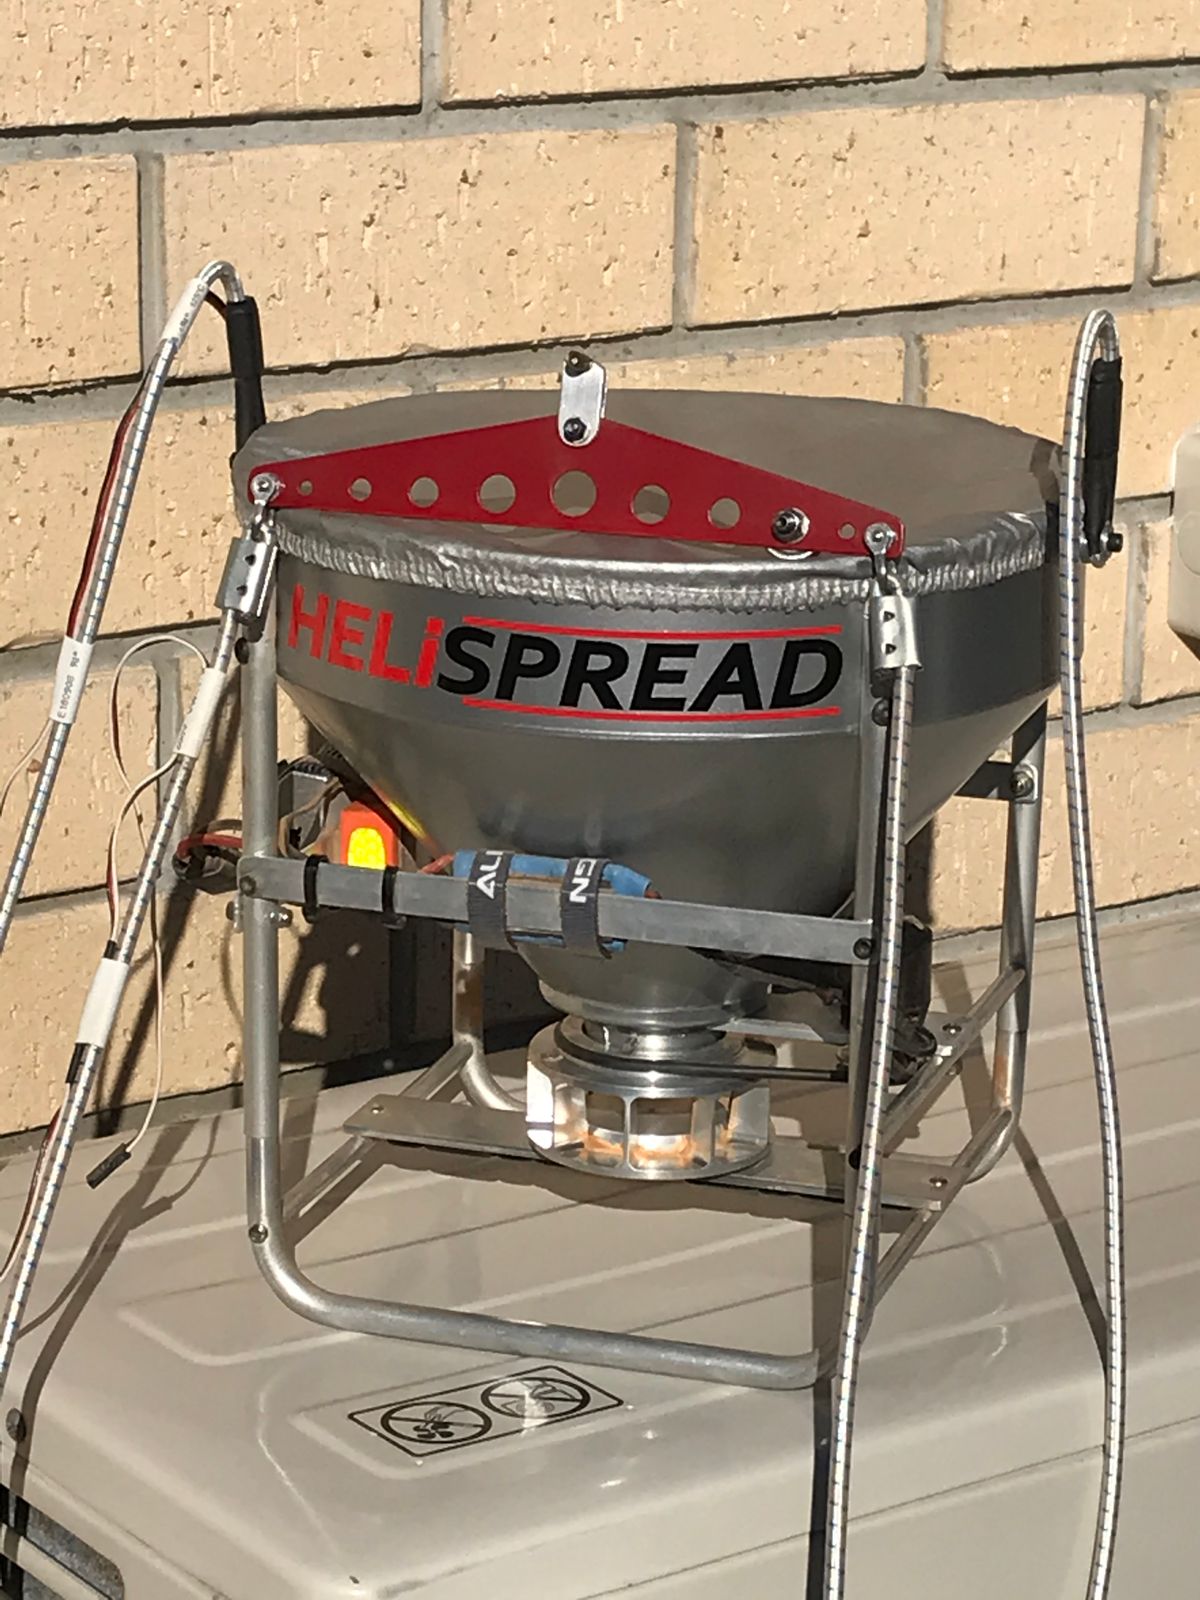
This was built some time ago but thought as it was mentioned in relation to cargo hook mod to display the bucket and its lifting frame, below close up of lifting frame on the same hook on previous 600 set up.
Full size gear is different in that they normally use a bungee set up to hold the frame "fore/aft" but I wanted to eliminate that so my method holds the frame in position while still being able to dump it all off the hook easily.
Spreader Bucket Video 1
Spreader Bucket Video 2
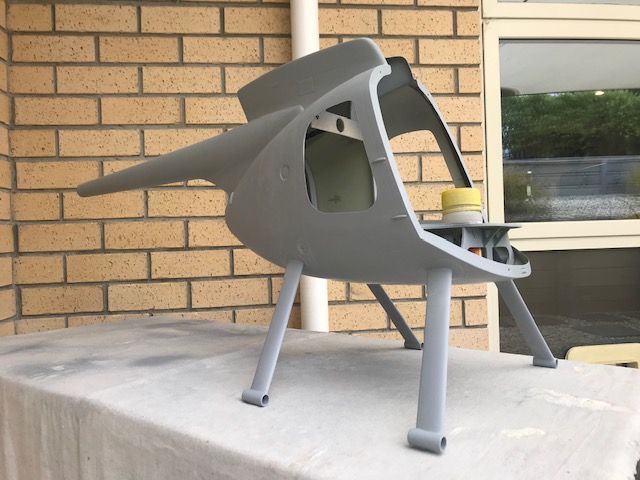
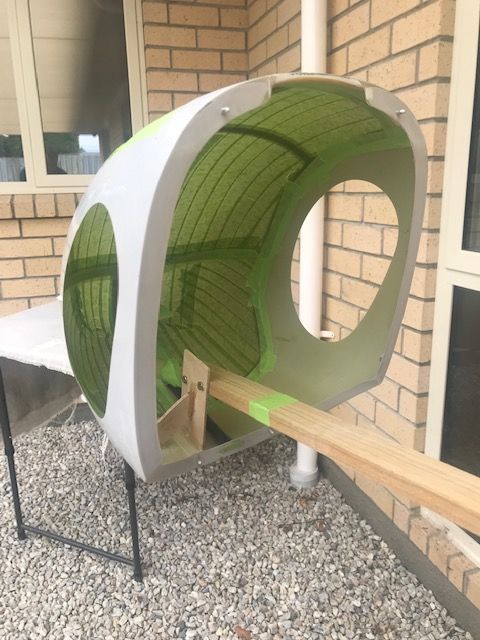
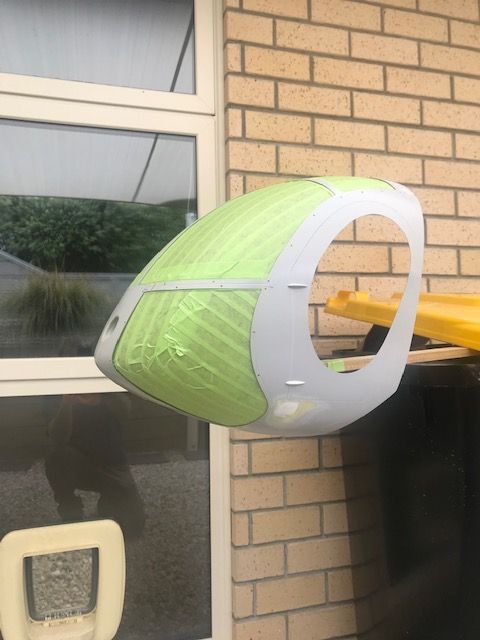
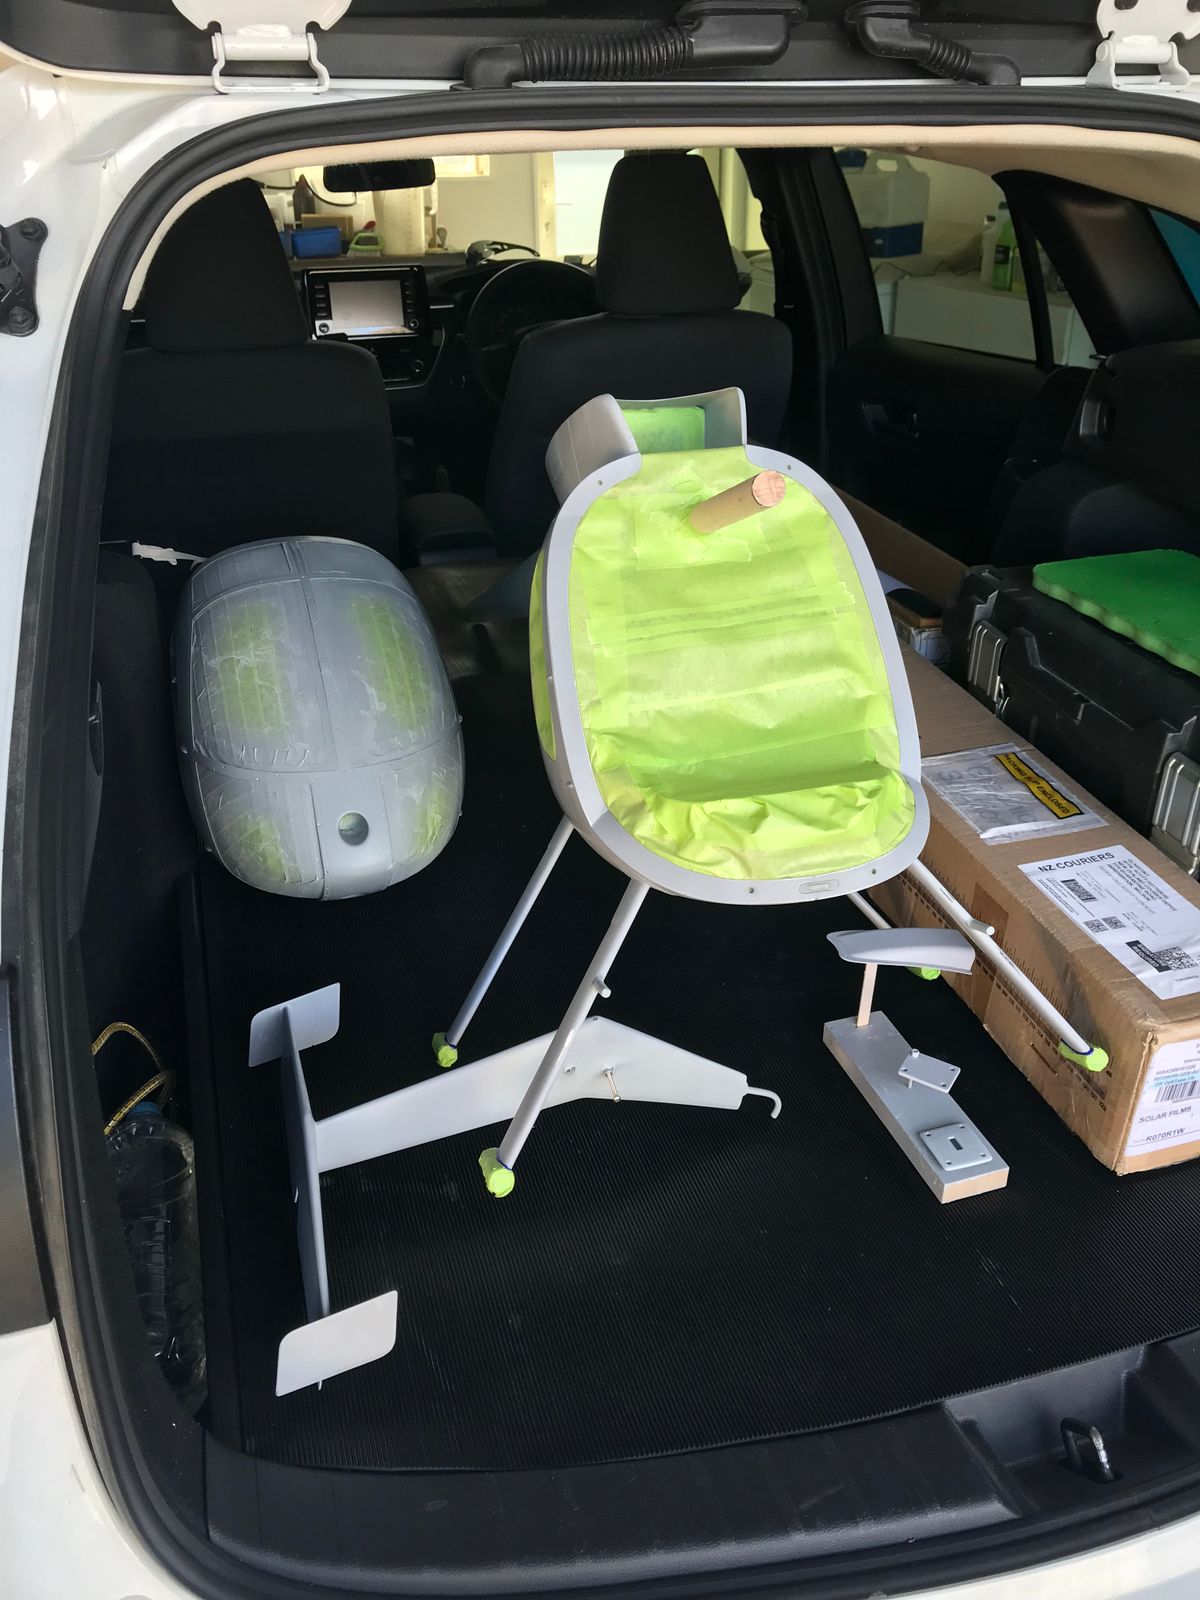
Surface prep
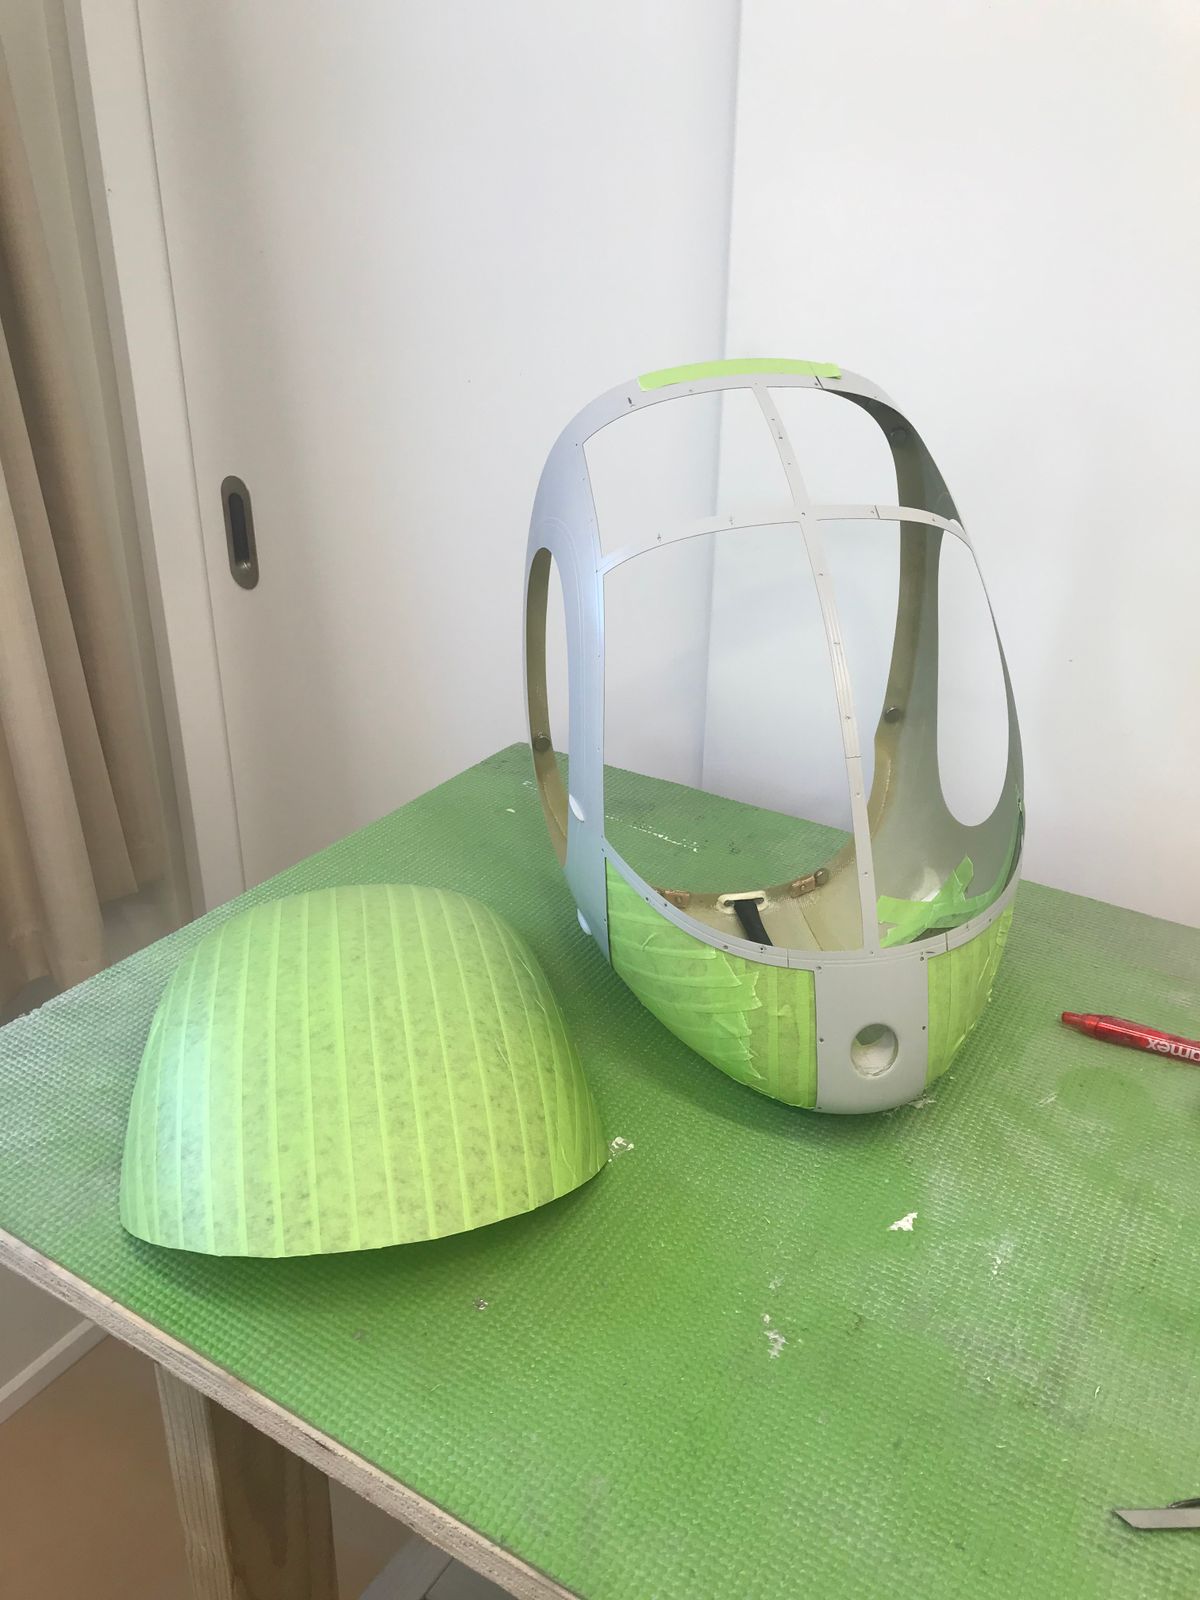
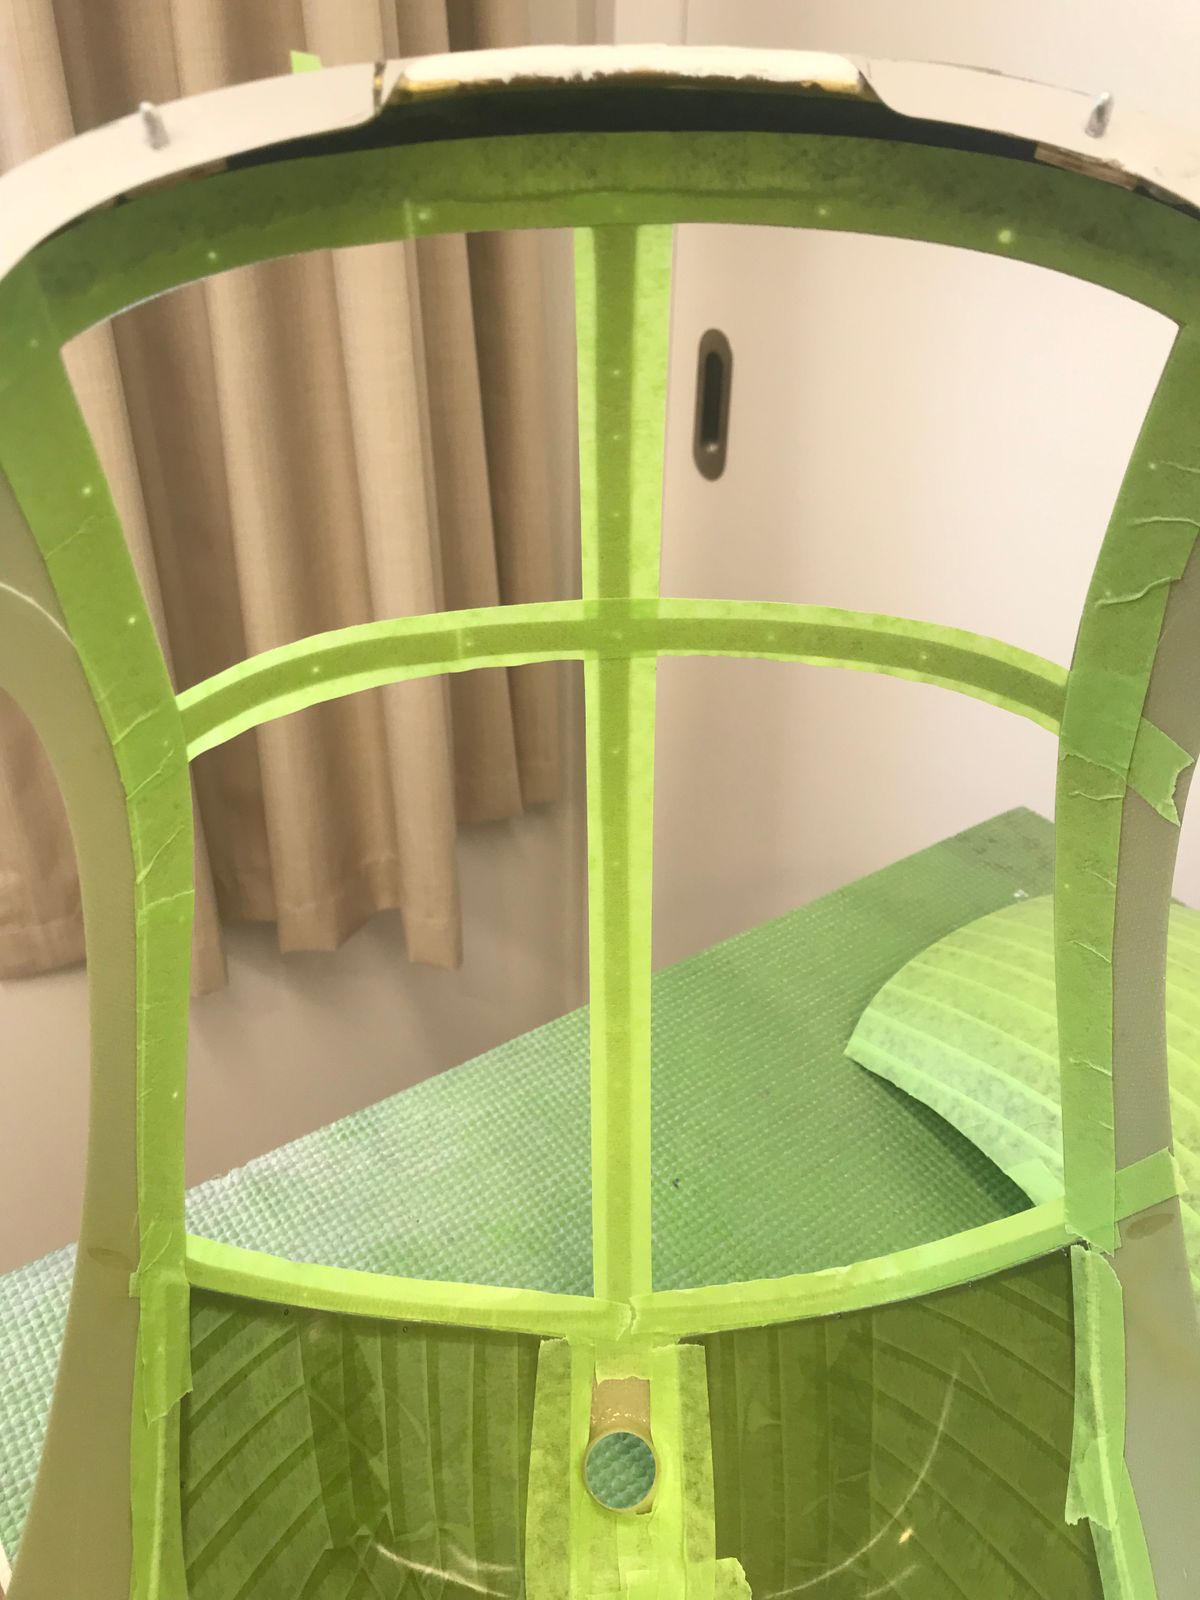
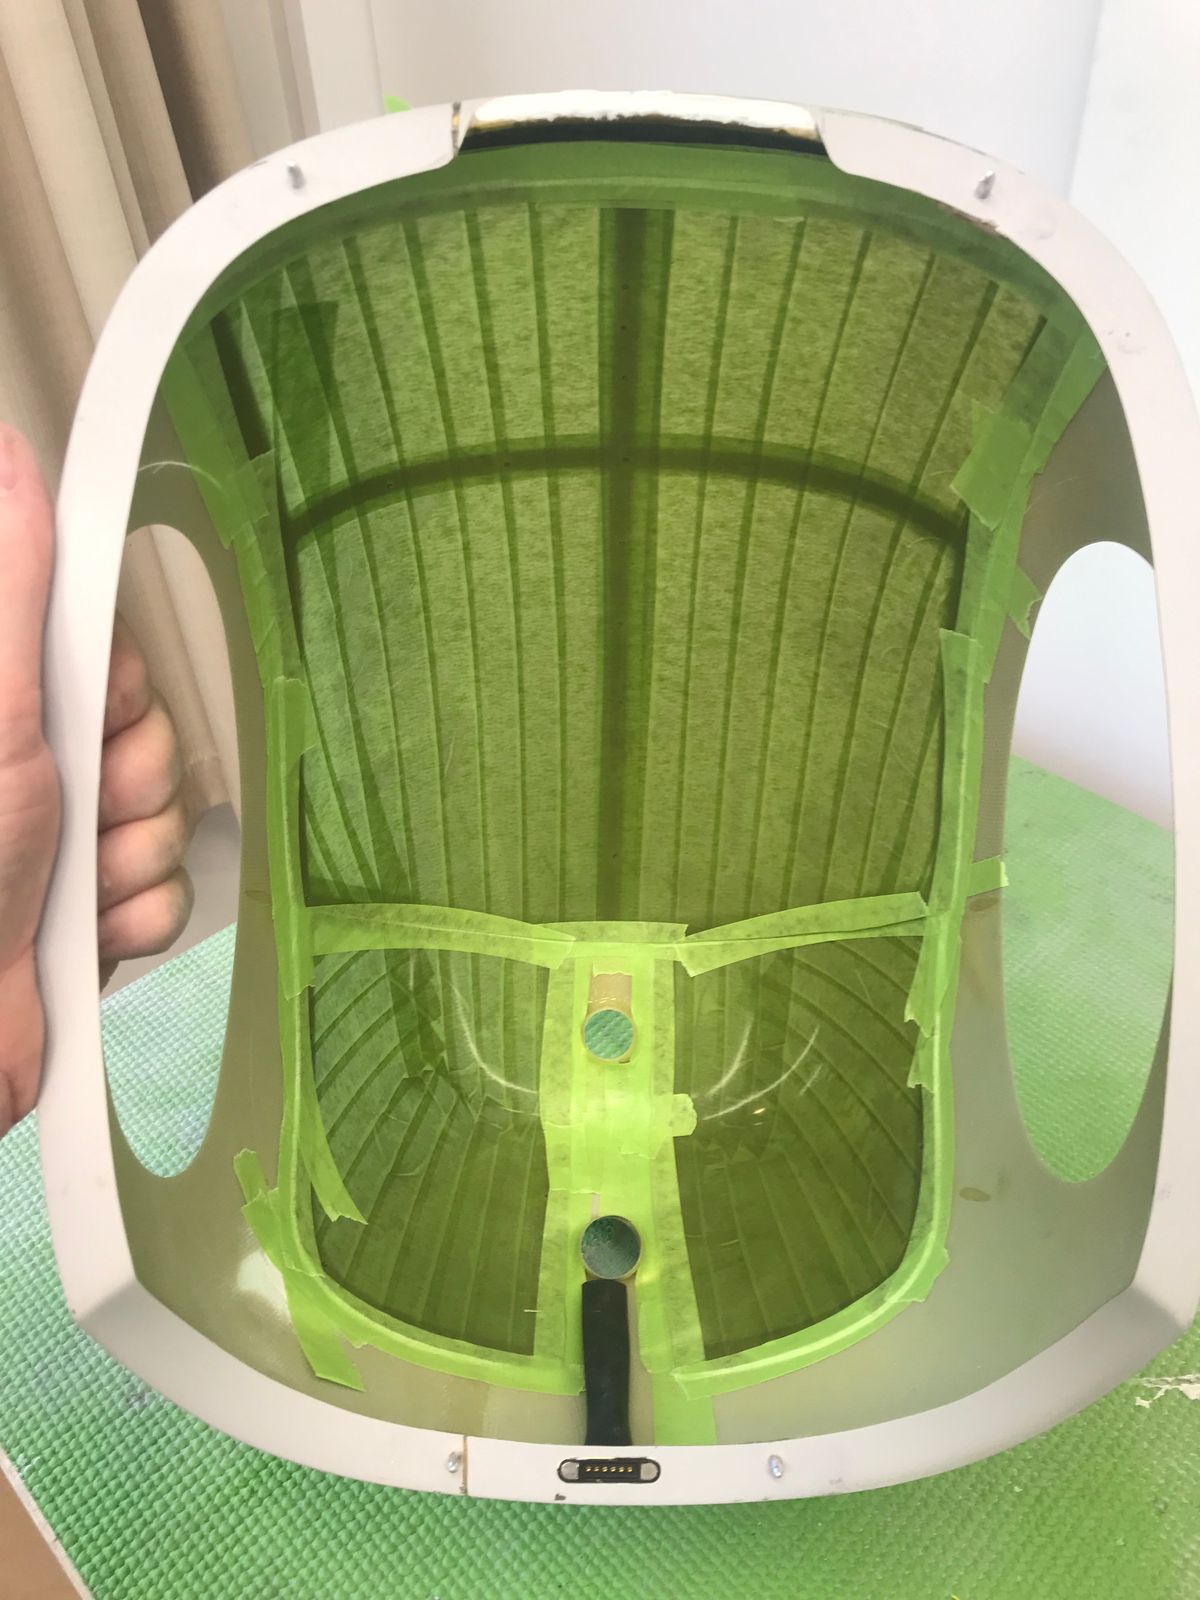
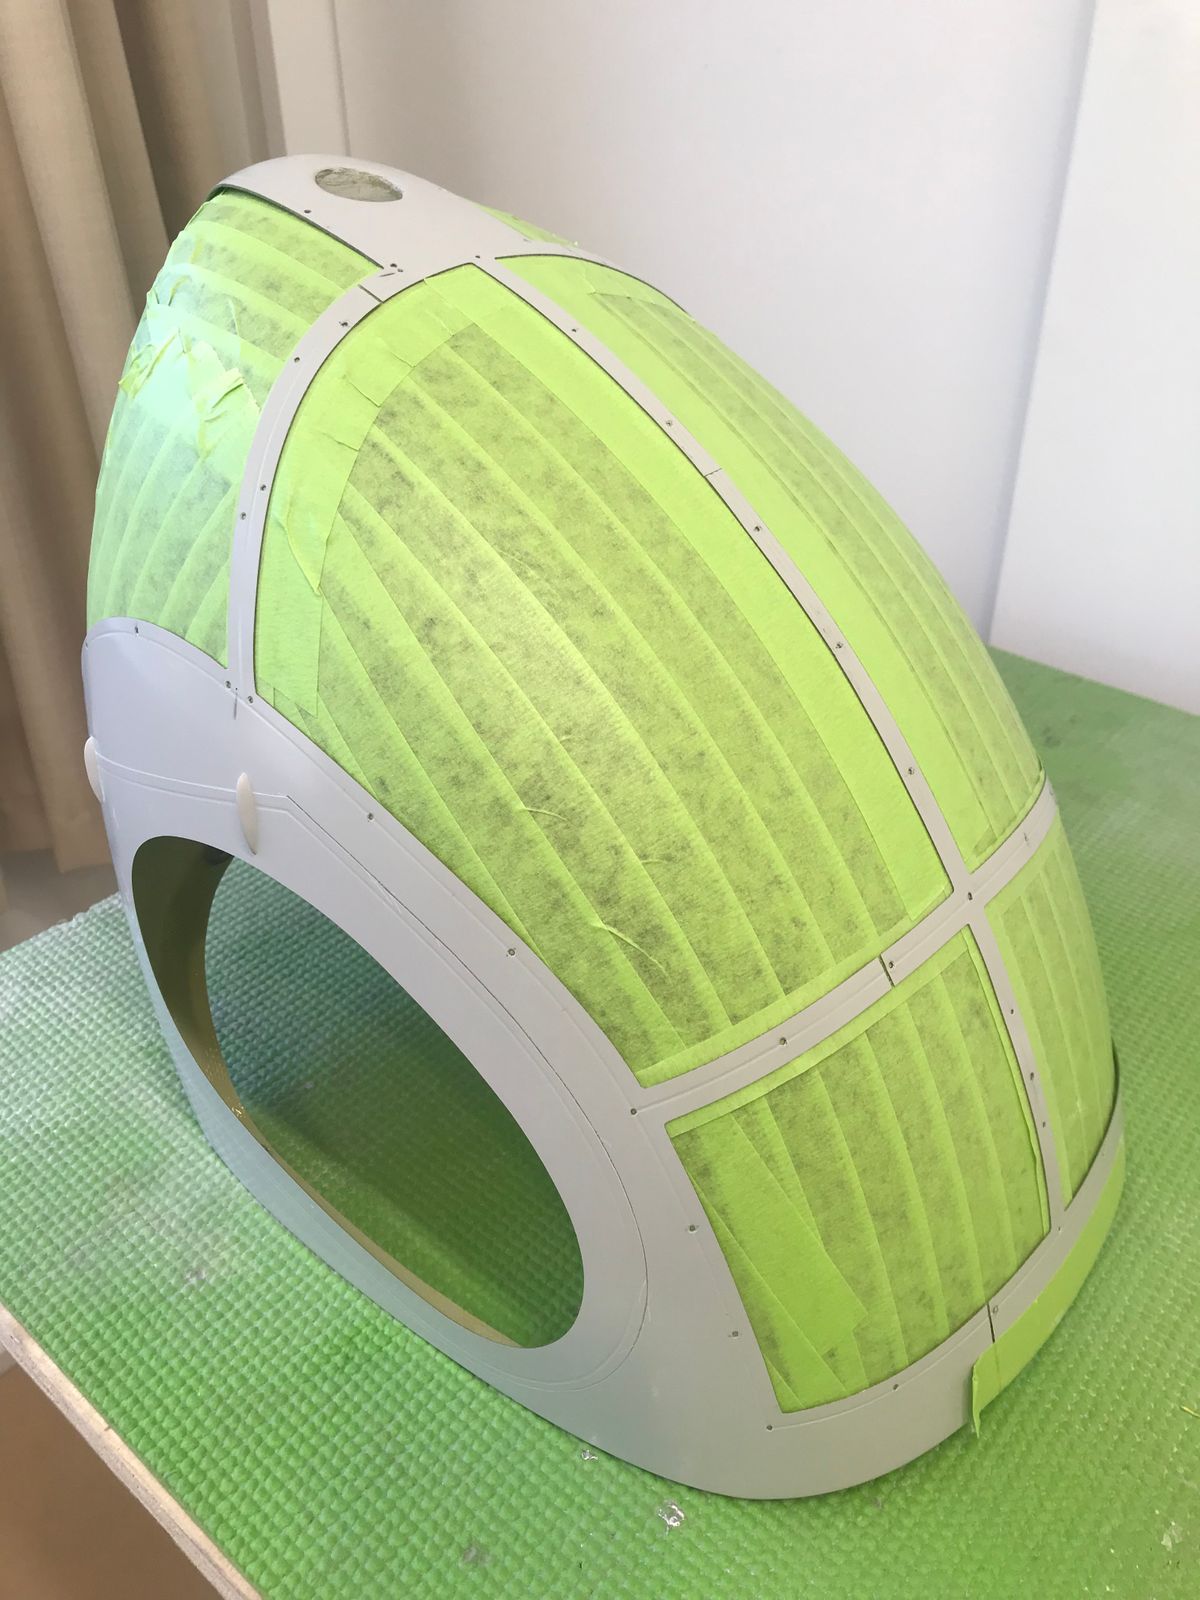
Taking the time to remove screens, mask to edges and refit after masking screen frame surfaces to protect from white overspray.
Screens are then taped in place which restores rigidity of entire canopy in order to carry out filling and sanding work on the otherwise delicate and easily damaged screen frames. Later after final base and clear, I can then brush in neatly a mid/dark grey acrylic on the inside before screens are finally refitted with the 1x3mm countersunk screws that can then be touched up finally with white acrylic that should finish it visually quite well without "filling" the tiny screw heads beyond "serviceability"
Paint and details
Finally off to the painter...
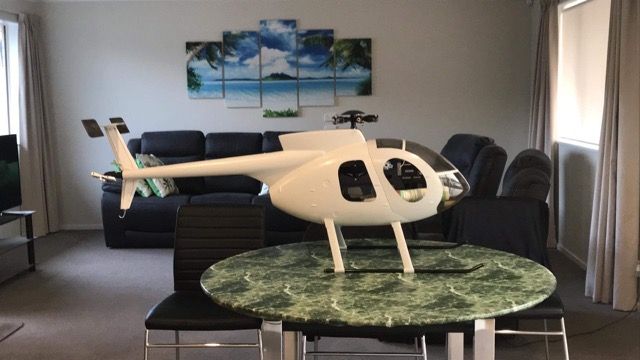
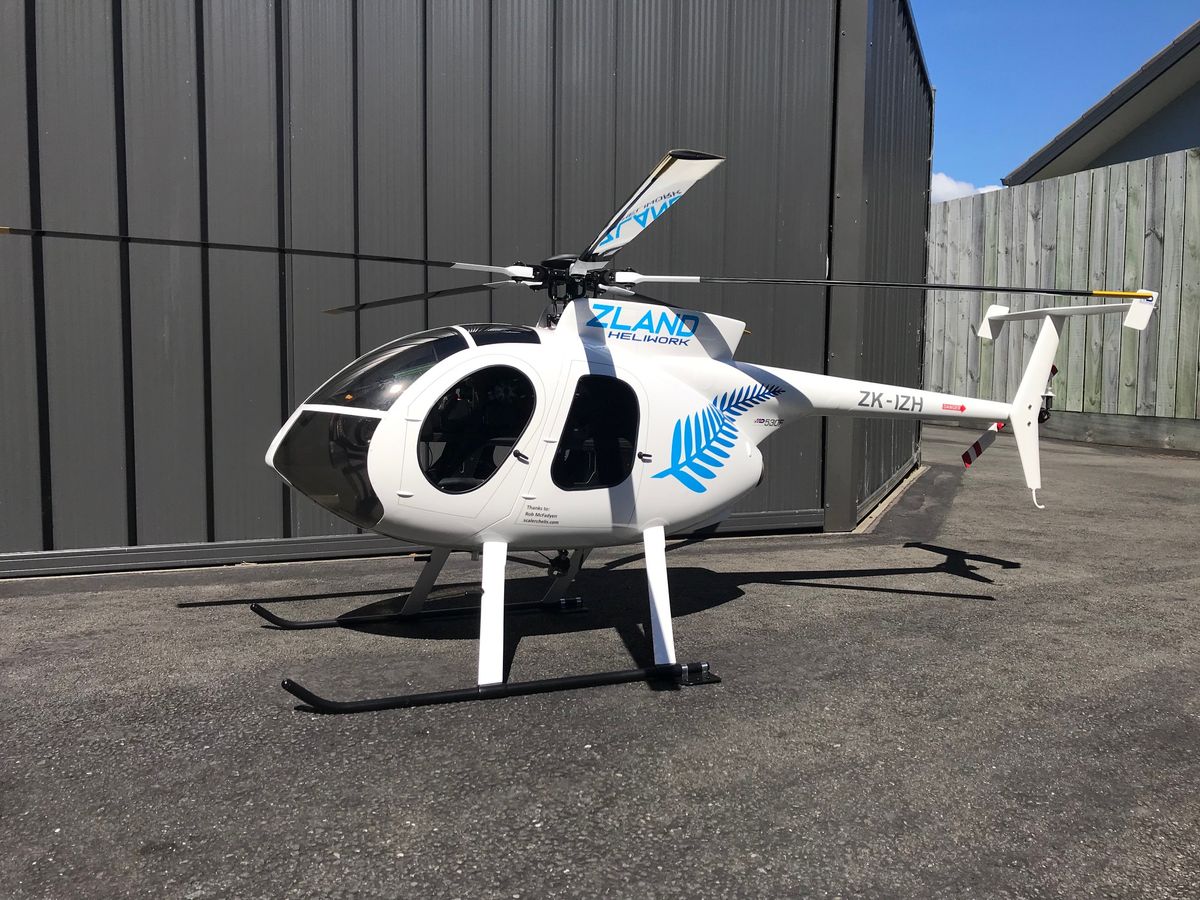
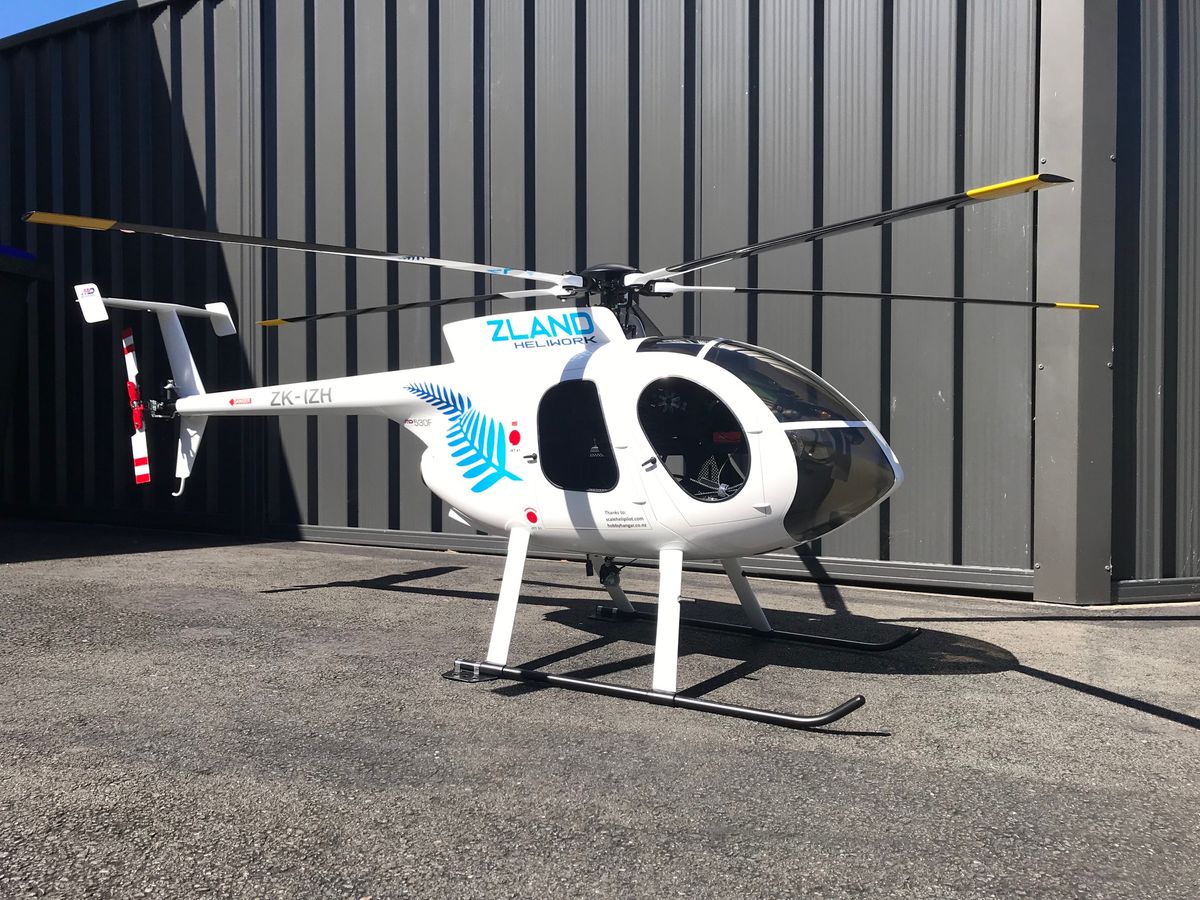
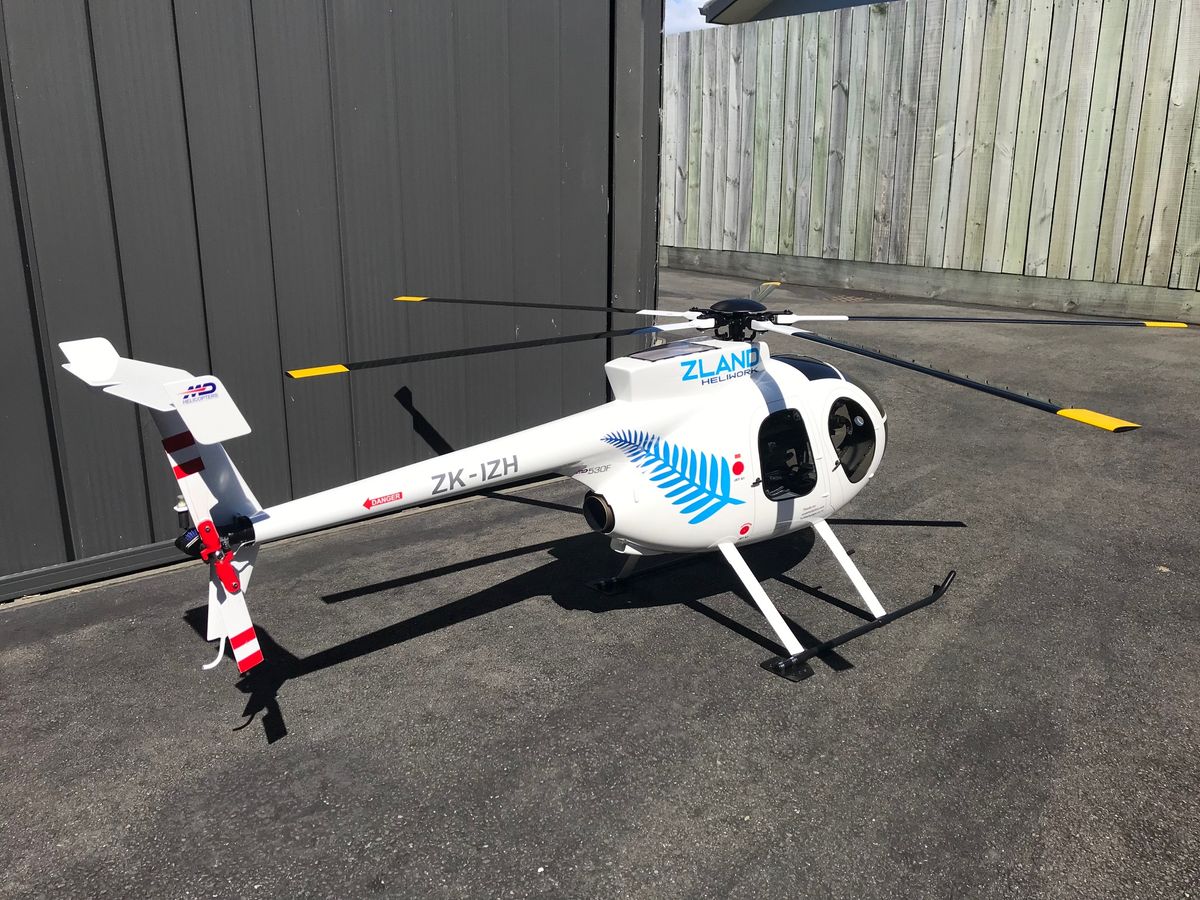
Completed project!
Well finally here it is done!
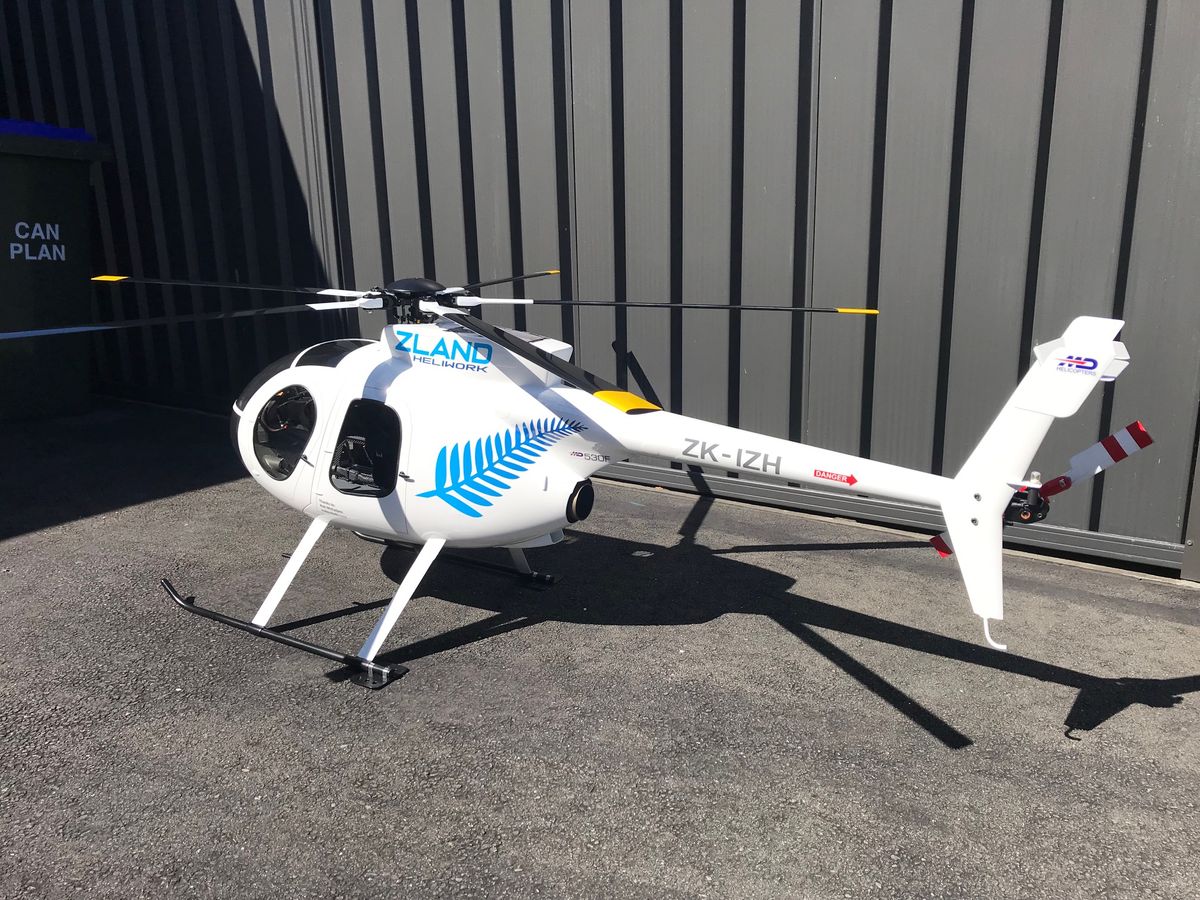
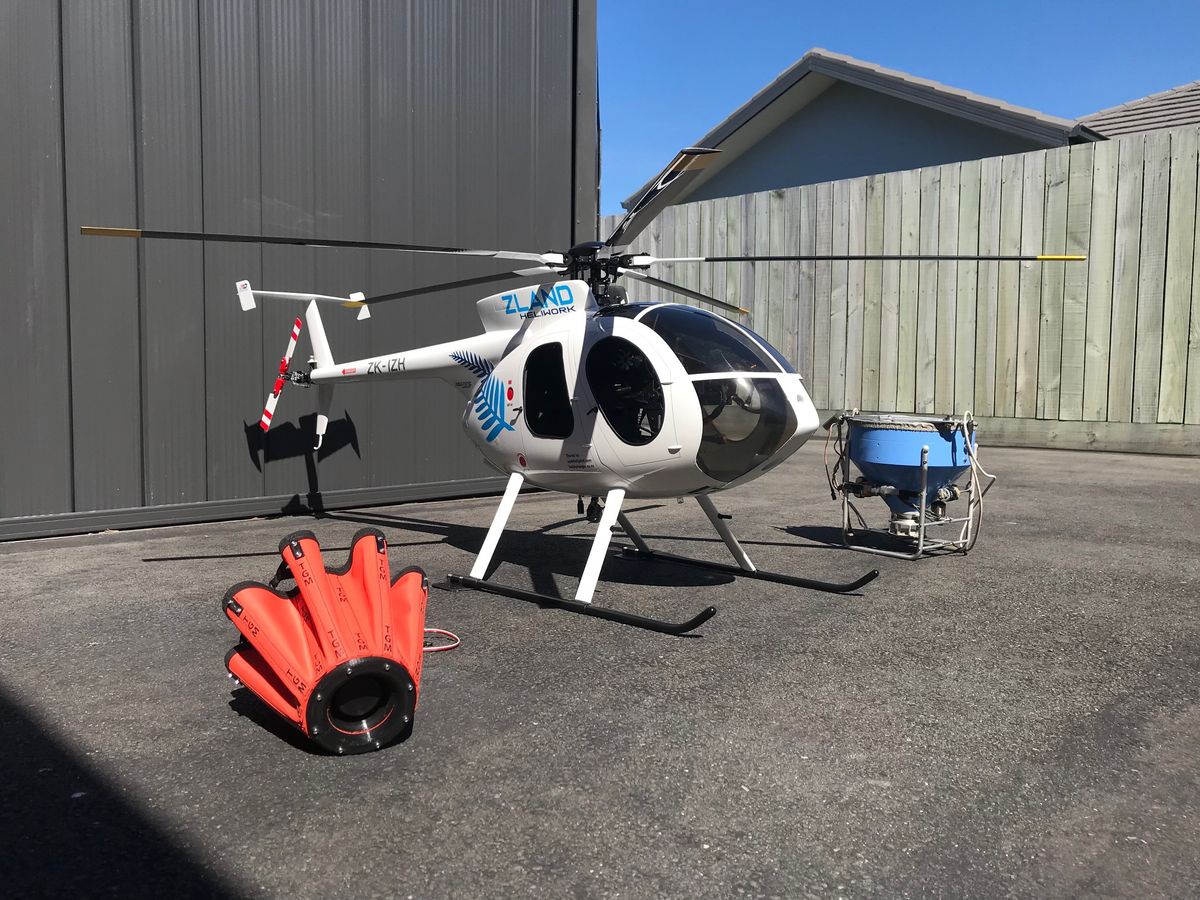
Specifications and Improvements
Align 700E frame set, with 700X main and A.R. transmission wheels, E1 M1.25 blue bevel gears front and back incorporating 5.25 tail drive ratio, 700X tail pitch slider and control lever set.
Rotor head: Roban
Rotor head cap: Self made
Secraft servo to swash turnbuckles fitted to front servos
Main Blades: Modified Spin blades @ 670mm square tipped fully repainted and balanced using clear coat only to balance (the results once flown were impressive!) Witte 680mm
Tail blades: Helitec 105mm asymmetrical.
ESC: Castle Edge 160HV
Motor: Egodrift Tengu 4525HS 370KV
Servos: Align DS610 and DS650, via 3S and Castle BEC PRO with Scorpion backup guard.
FCU: BD AXON
Lighting: UniLIGHT
Cargo hook: Baumann
Fuselage: Fun-Key 700 size MD500E
Improvements:
Front edges of dog house opened up and strengthened.
Top rear flange of canopy opened up and strengthened for better air flow to motor
Secondary Fuselage ring frame designed and fitted.
Roban landing struts altered and bonded in securely for the more common tall strut look.
Belly cooling hole closed off.
Front door window opening enlarged.
Pin and magnets fitted to canopy and fuselage for convenient access
"MD530F" exhaust pipe and opening created and fairing fitted.
Vertical fin reinforced with carbon, larger gauge stinger added.
Horizontal Stab trim tab extended, scale shaped and sized tip plates added.
Bear paws designed made and fitted.
Paint: Baslac with 2K clear coat after minor graphics.
Graphics: Callie Graphics USA
Spreader bucket: Self made
Bambi bucket: Tyler Gray Models "Medium"
43 Comments
Ahhh, the key to getting it right. Having the patience to tack, try and adjust makes for a properly aligned set of mechanics and is always worth the time!
Air = good! 🧐
I didn't know that about the Fun Key fuselages... too late now, but I'll keep it in mind for the next project. I'll be wait to see the finish product 😉
If its any help for those with ready painted models, I know someone who simply added carbon cloth in the shape of the indent in center of upper fin and reported an improvement. It also worth mentioning that there is an alloy upgrade part which keys into the tail box to which the fin is then mounted to, rather than the stock plastic part - I recommend this as the plastic is once again an area that can allow some movement. A small flex here leads to a larger flex at end of fin. Although all a worthwhile assurance against unwanted T tail shimmy, another little trap as I was educated on, is to ensure your governor gain and tail gyro gain settings are appropriate for your given set up. Typically T-Rex helis for example running Castle ESC benefit from a lower governor gain.
NICE !!!!!!!!!
May I ask where you purchased the hook? BTW, I’m enjoying reading your build steps.
Thank you Thomas, here is the hook-note that I have modified mine a little.
https://www.modellhubschrauber.ch/Scale-parts/Scale-parts-exterior/...
Email Thomas Baumann directly to enquire about shipping
Scott, thank you. I recall seeing that one and not being able to ship to the US. I have emailed them, hope they will.
Scott,
This is simply Bad Azz. Nice job on the mounting.
B
Thank you Butch 🙂
Scott,
That is a very impressive set up you have there. An actual functioning RC spreader. How friggen cool is that.
B
Thanks Butch - a scale helicopter "doing scale things" 🙂
Scott, this is so cool....love it
Thank you Mark 🙂
I glad you posted that….good info. Thank you, well done (again!)
Thank you Thomas 🙂
I love this!!
Thanks Michael, its something different!
So cool 😎
That is some fantastic flying. 👍👍👍👍
Cheers Butch 😎
Very nice. Professional Service 😄
I’m in the middle of a Bell 429 build and it seems to go on and on…..so it is good to see someone else spending all this time to perfect what we love to do.
Thanks for the support Thomas, yes I am prepared for the "on and on" as I am about to start the many small steps it takes to get it really good. Then I will take it out into better lighting and discover its still not there!
Scott,
Always a good feeling to see a project going to the paint shop.
I looked through your chapters looking for the paint scheme and did not notice it.
Any pics?
B
Hello Butch here is the planned "scheme" inspired by fellow modeller - missing is some small "thanks to" print also planned to acknowledge key help in the build 🙂
Looks great.
B
Base and clear done
Base and Clear in Baslac auto paint
I even unmasked without breaking anything!
I have always liked the 500 series helicopters. Maybe some day I will build another but bigger. Back in the day had a Raptor 50 with the Thunder Tiger 500 fuse. I used a Helitronic mixer with a couple of 401's, installed along with Century 5 blade head and it flew great.
Looking Great Scott,
B
Thank you Butch, yes things have a come a long way electronically, I was astonished how well the Axon works - never flown FBL or multi - popped it up into hover and within minutes felt a lot of confidence with it on the very first test flight. Thankful also of the Roban heads which seem to be very well machined, and not seen of any complaints with them....a real bonus for us 600/800 modellers...
Dammit Mann, That looks AMAZING. Love the photo with the working sling load equipment. Very Impressive.
Thanks for sharing,
B
Impressive work! Looks full scale alongside the building.
Awesome
Very nice congratulations
Thanks for all the kind comments guys!
SHARP!!!
Great flying! Making it look way too easy.
https://youtu.be/M5HeC_OG_3o
First few goes with the bucket on the 530F...still learning to fly the new multi blade heli and FBL as this is all new for me! bucket strops since lengthened some to stabilize a bit more...
https://youtu.be/_w2bxezZTA4?si=EYTVXk4GHhDkzBb9
a recent go at editing...
https://youtu.be/60Wewe7FiOg?si=rW3uB7ezqK6XKMbc
a recent go at editing some footage https://youtu.be/60Wewe7FiOg?si=xuZKFWFoi6Jiix-w