

Cobra Project
 Danny D.
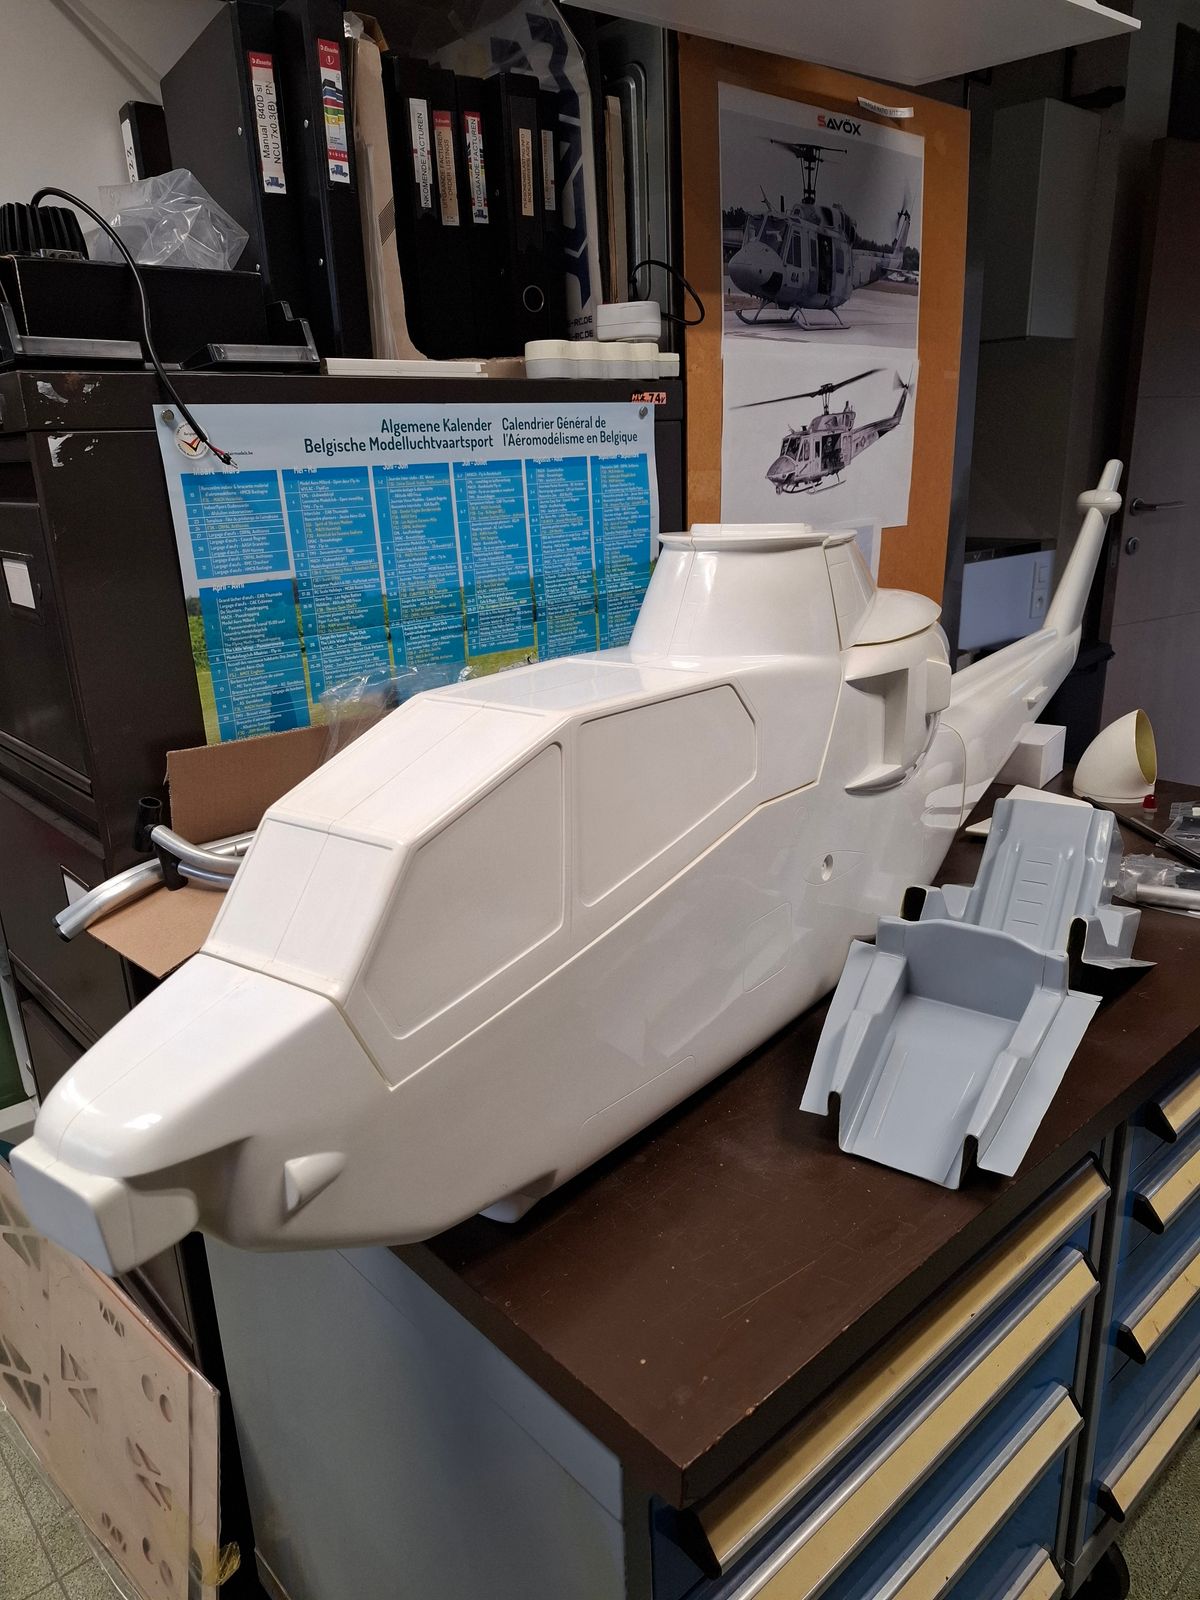
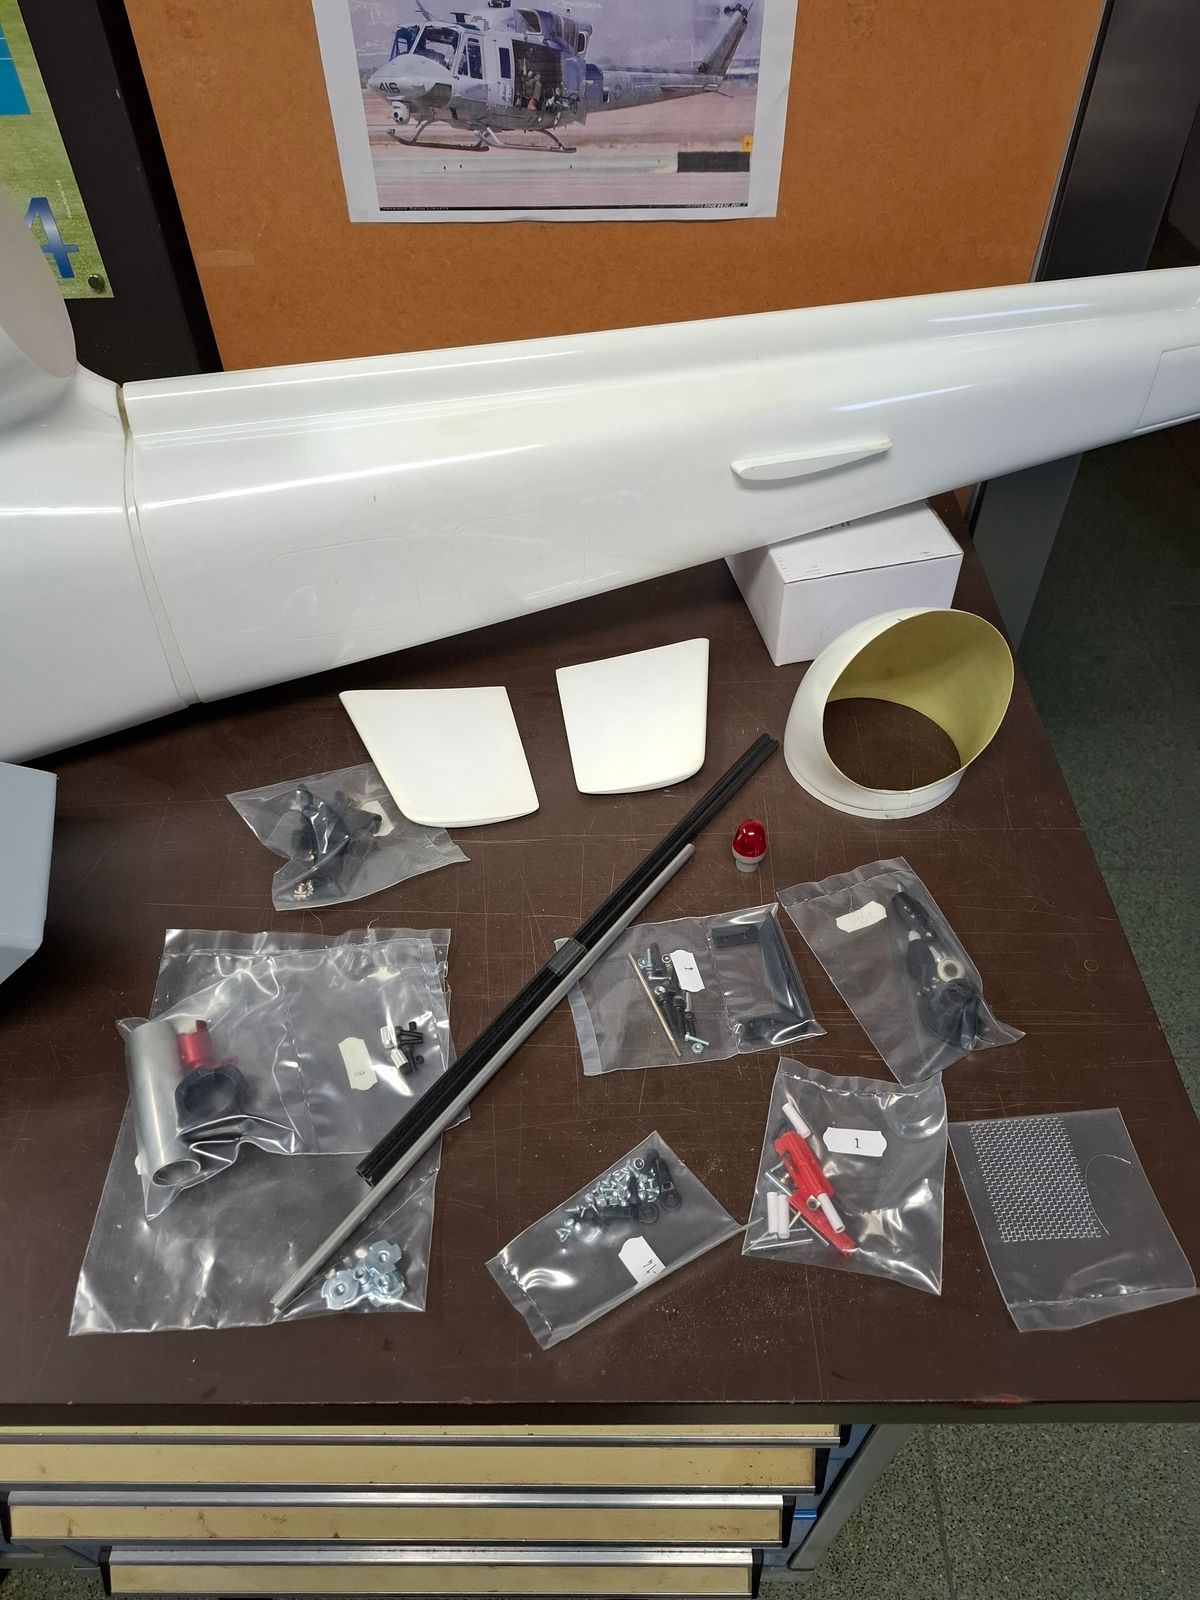
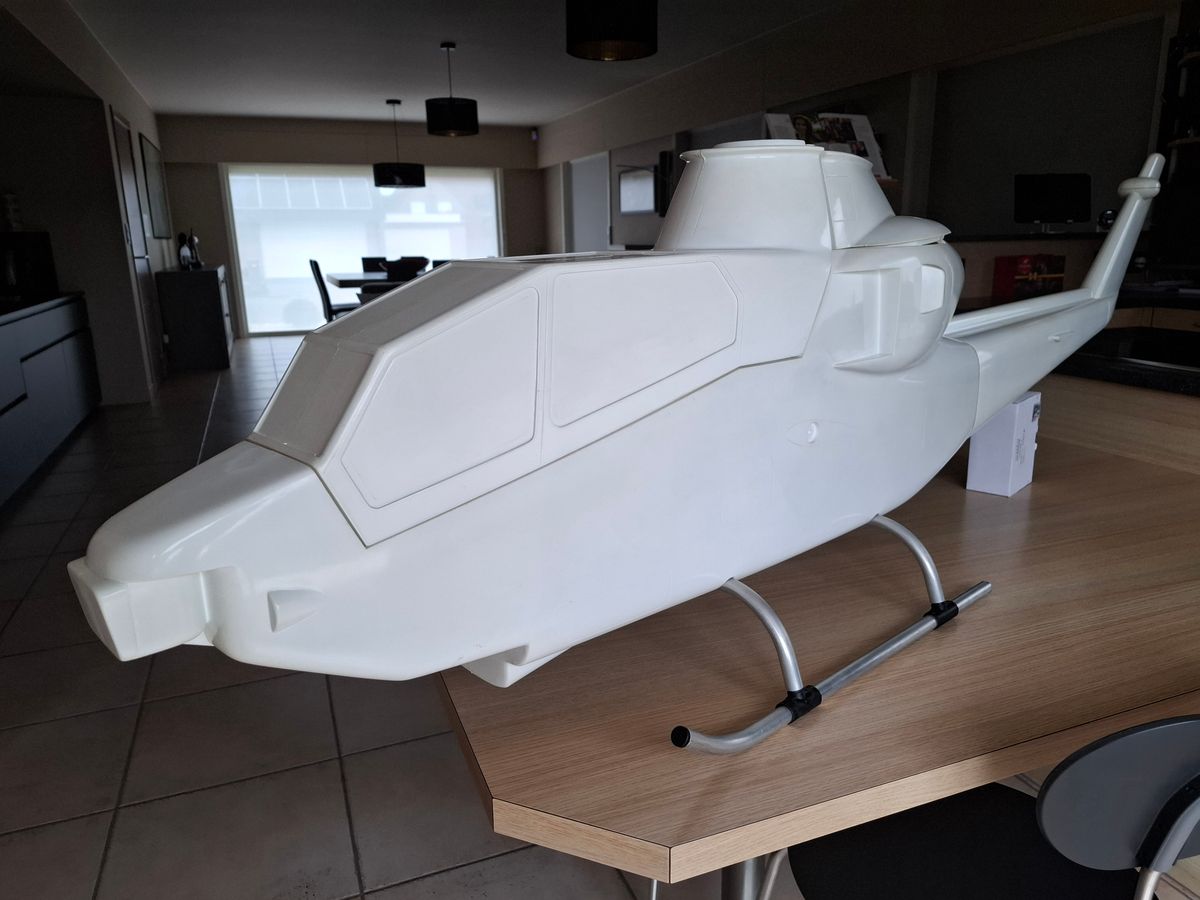
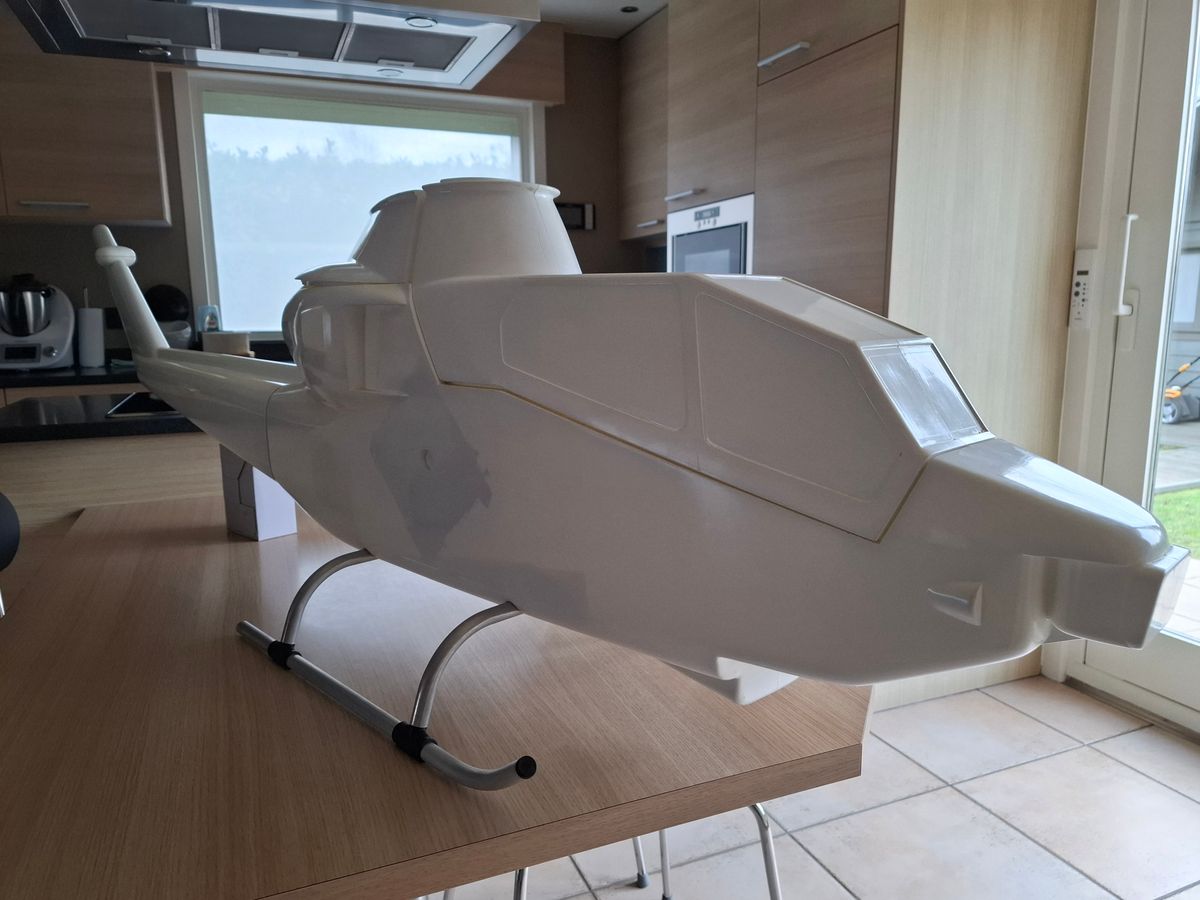
New Project AH 1 Vario Cobra
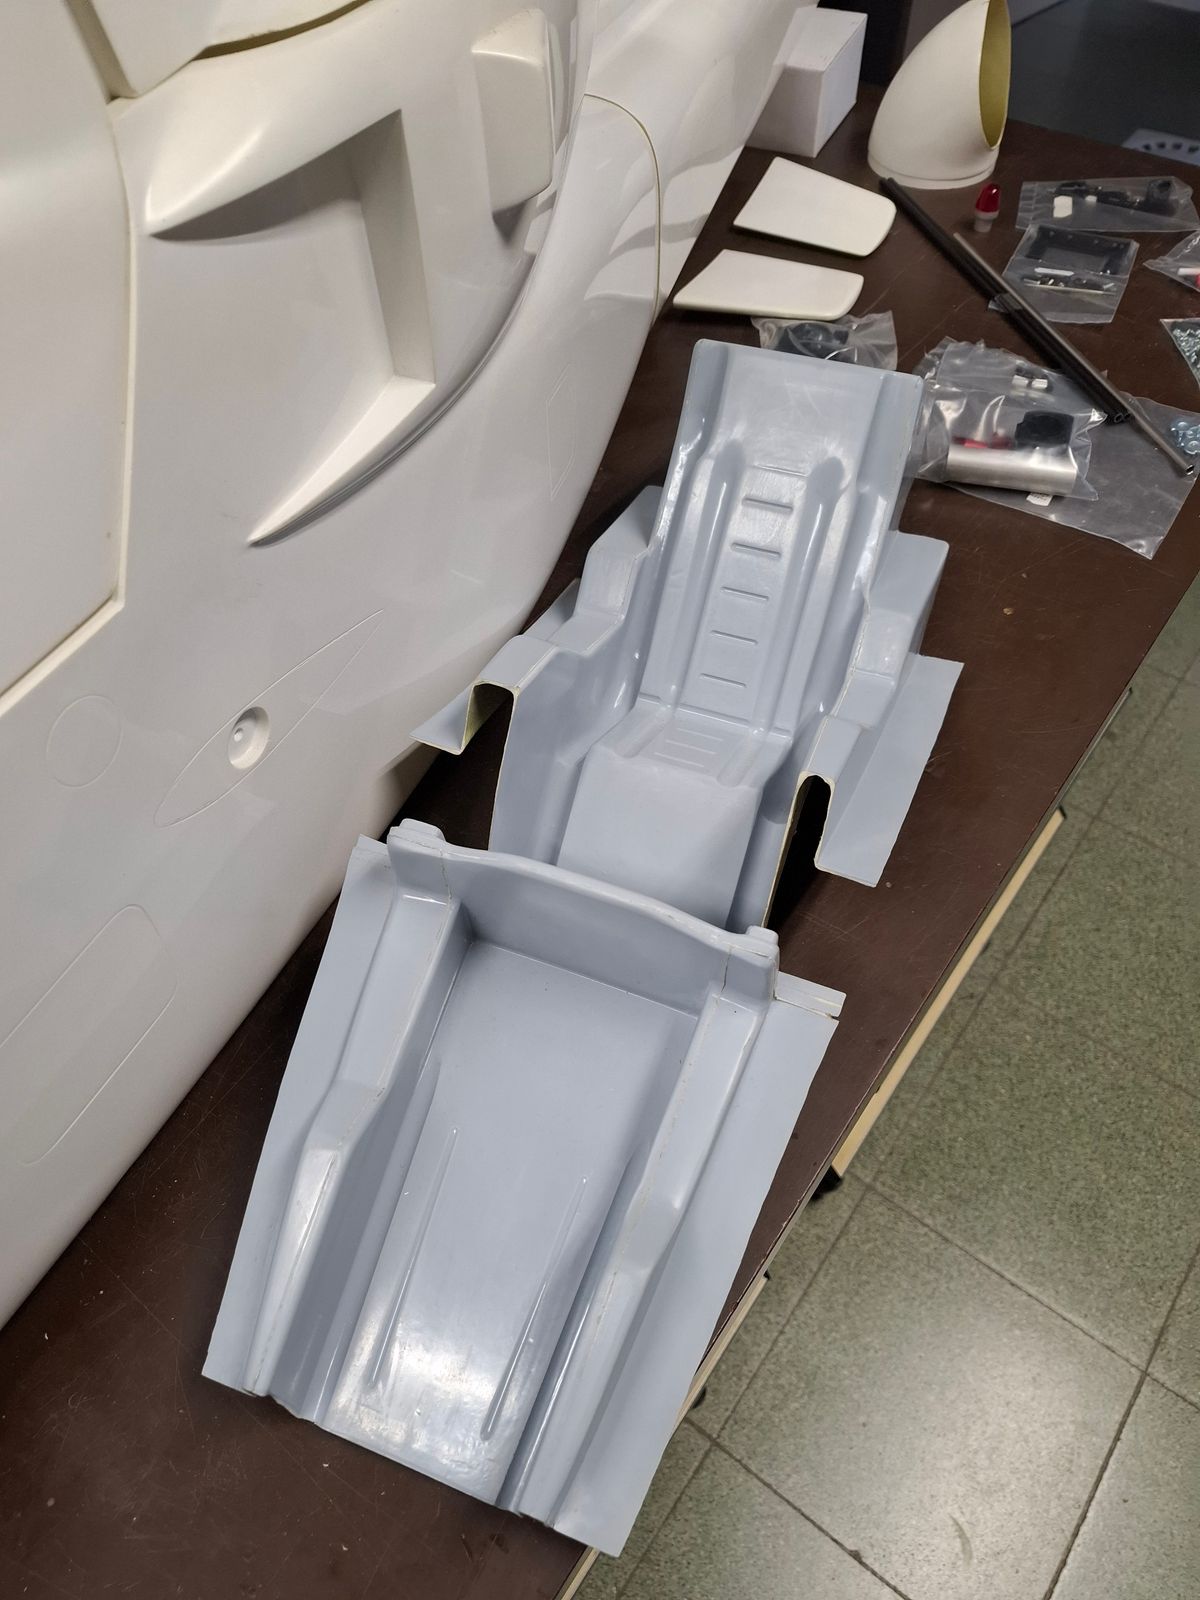
Box content, looks a lot of work.
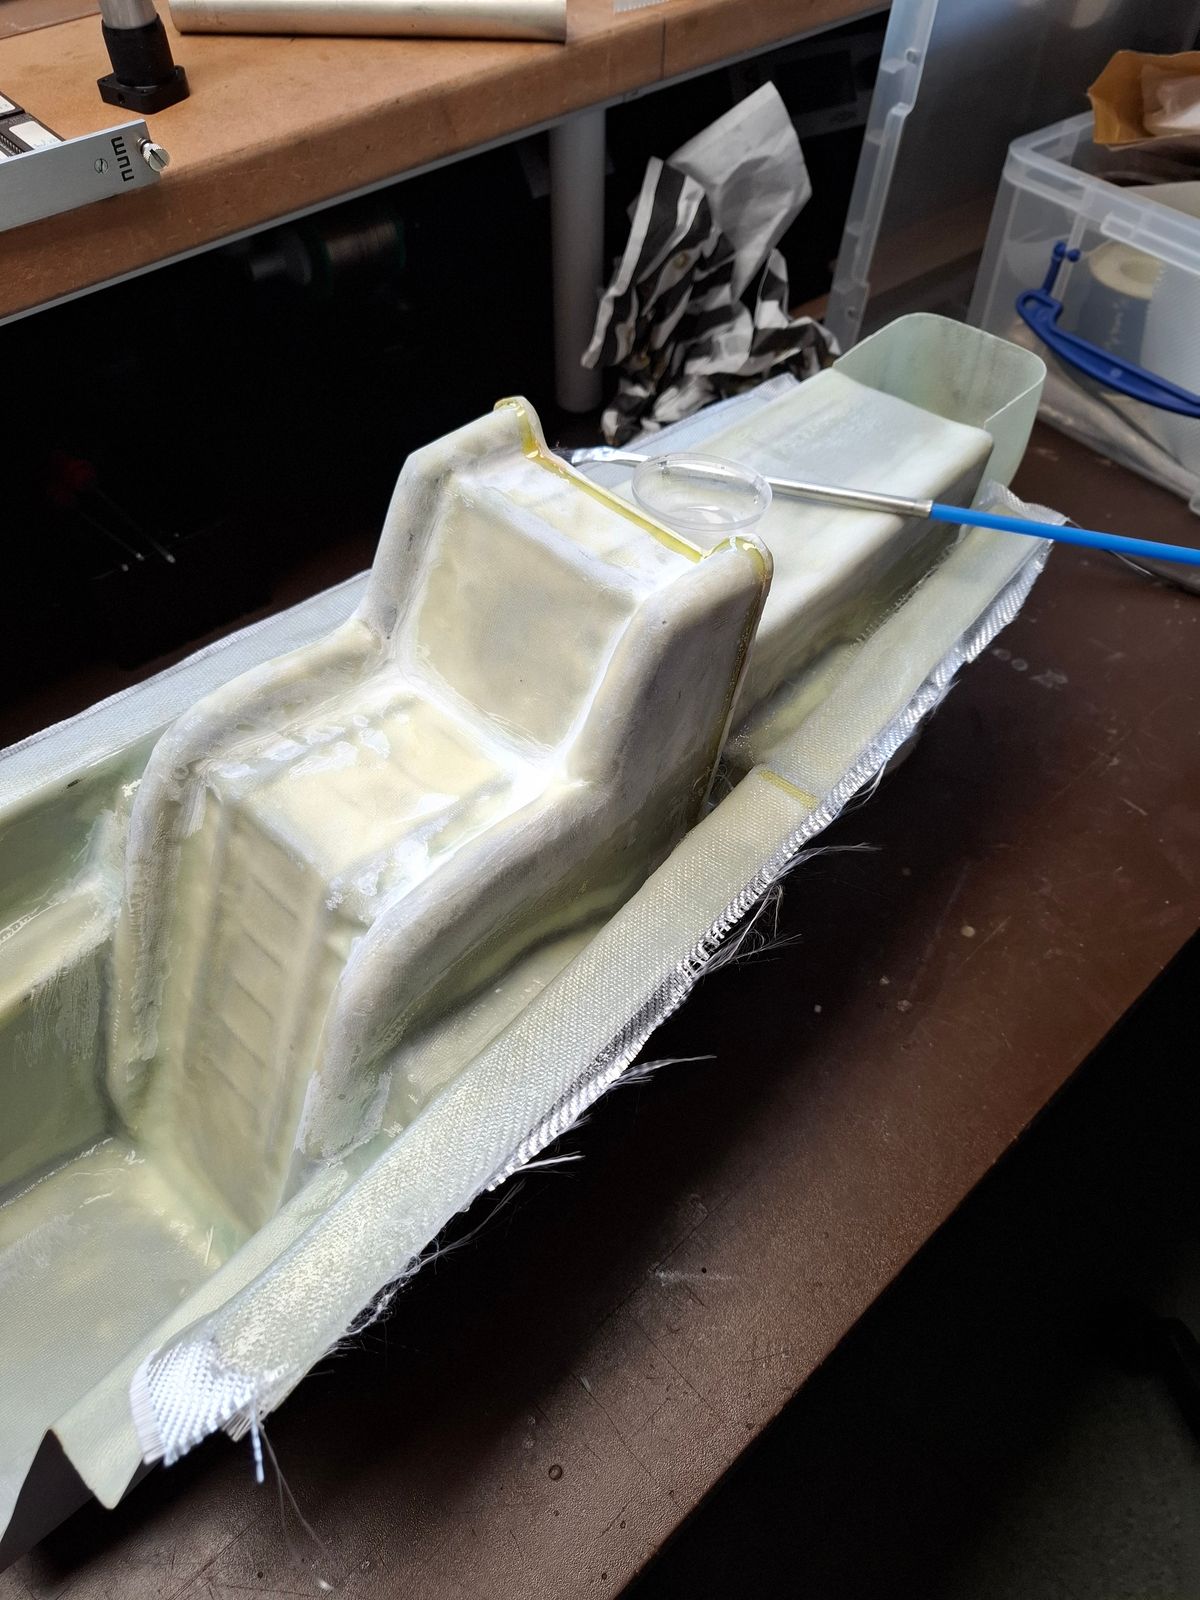
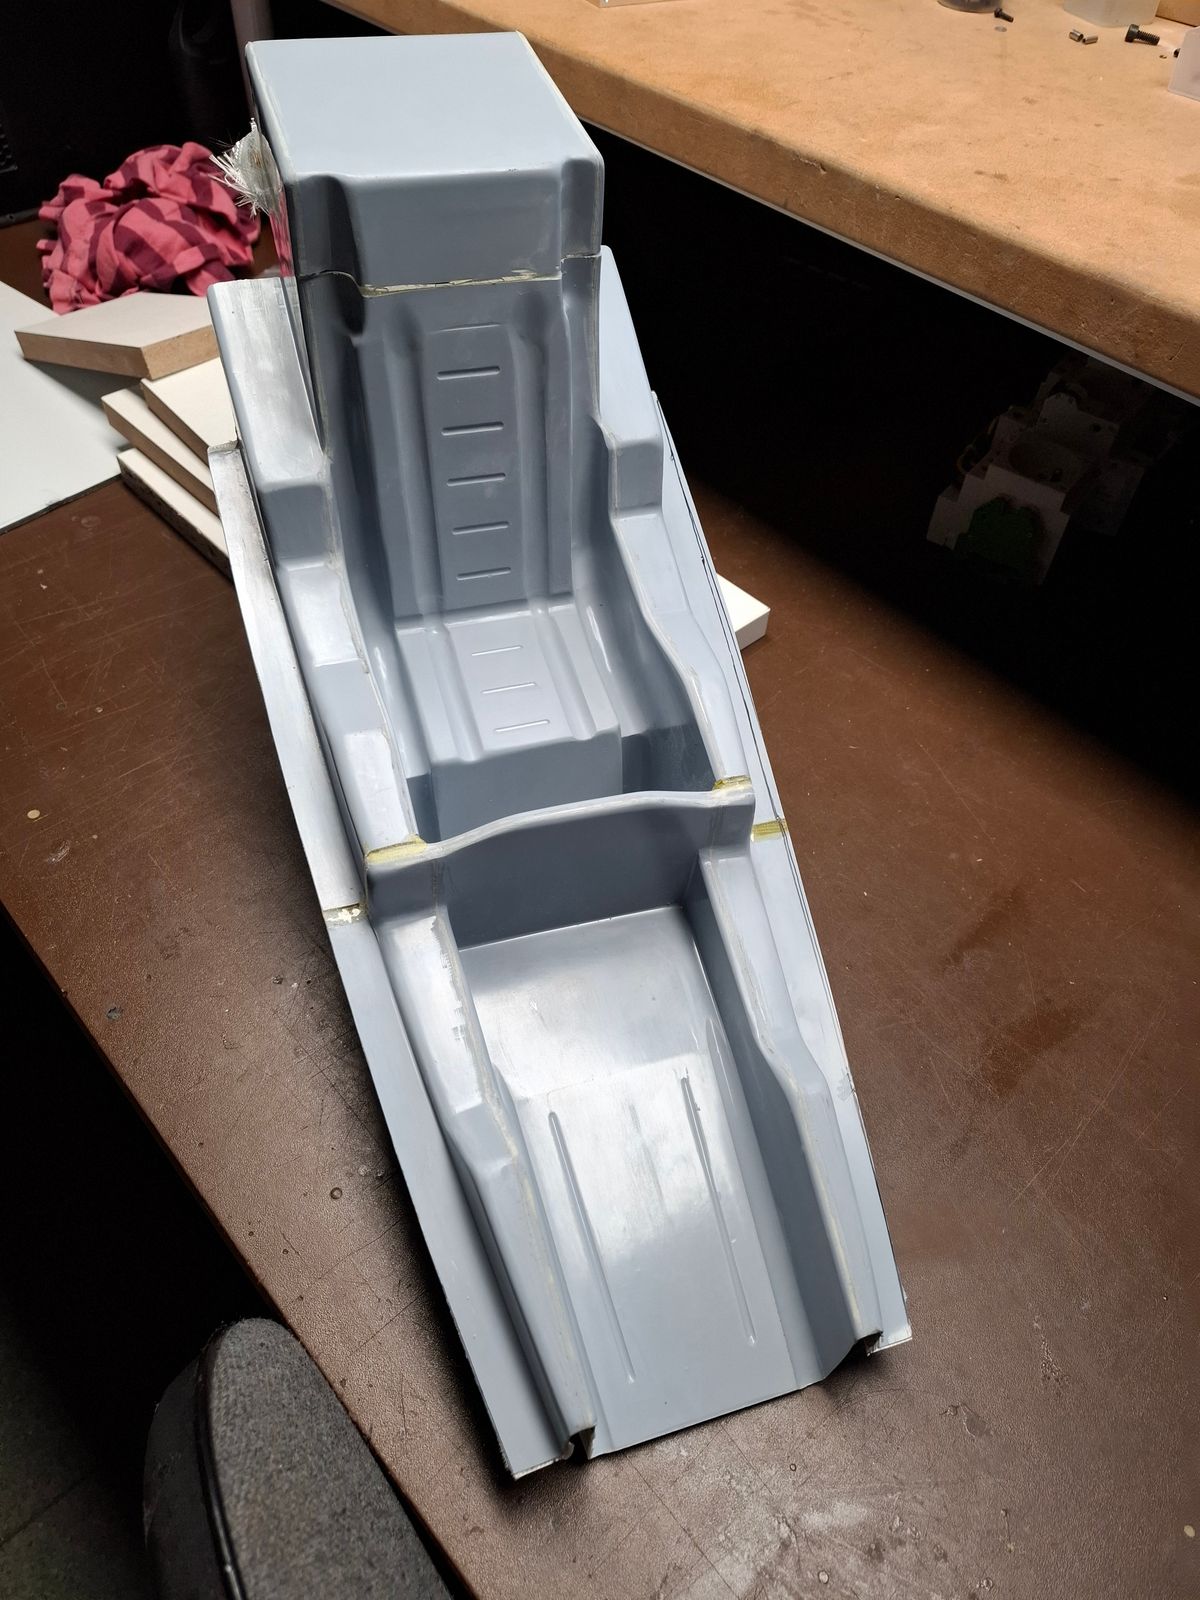
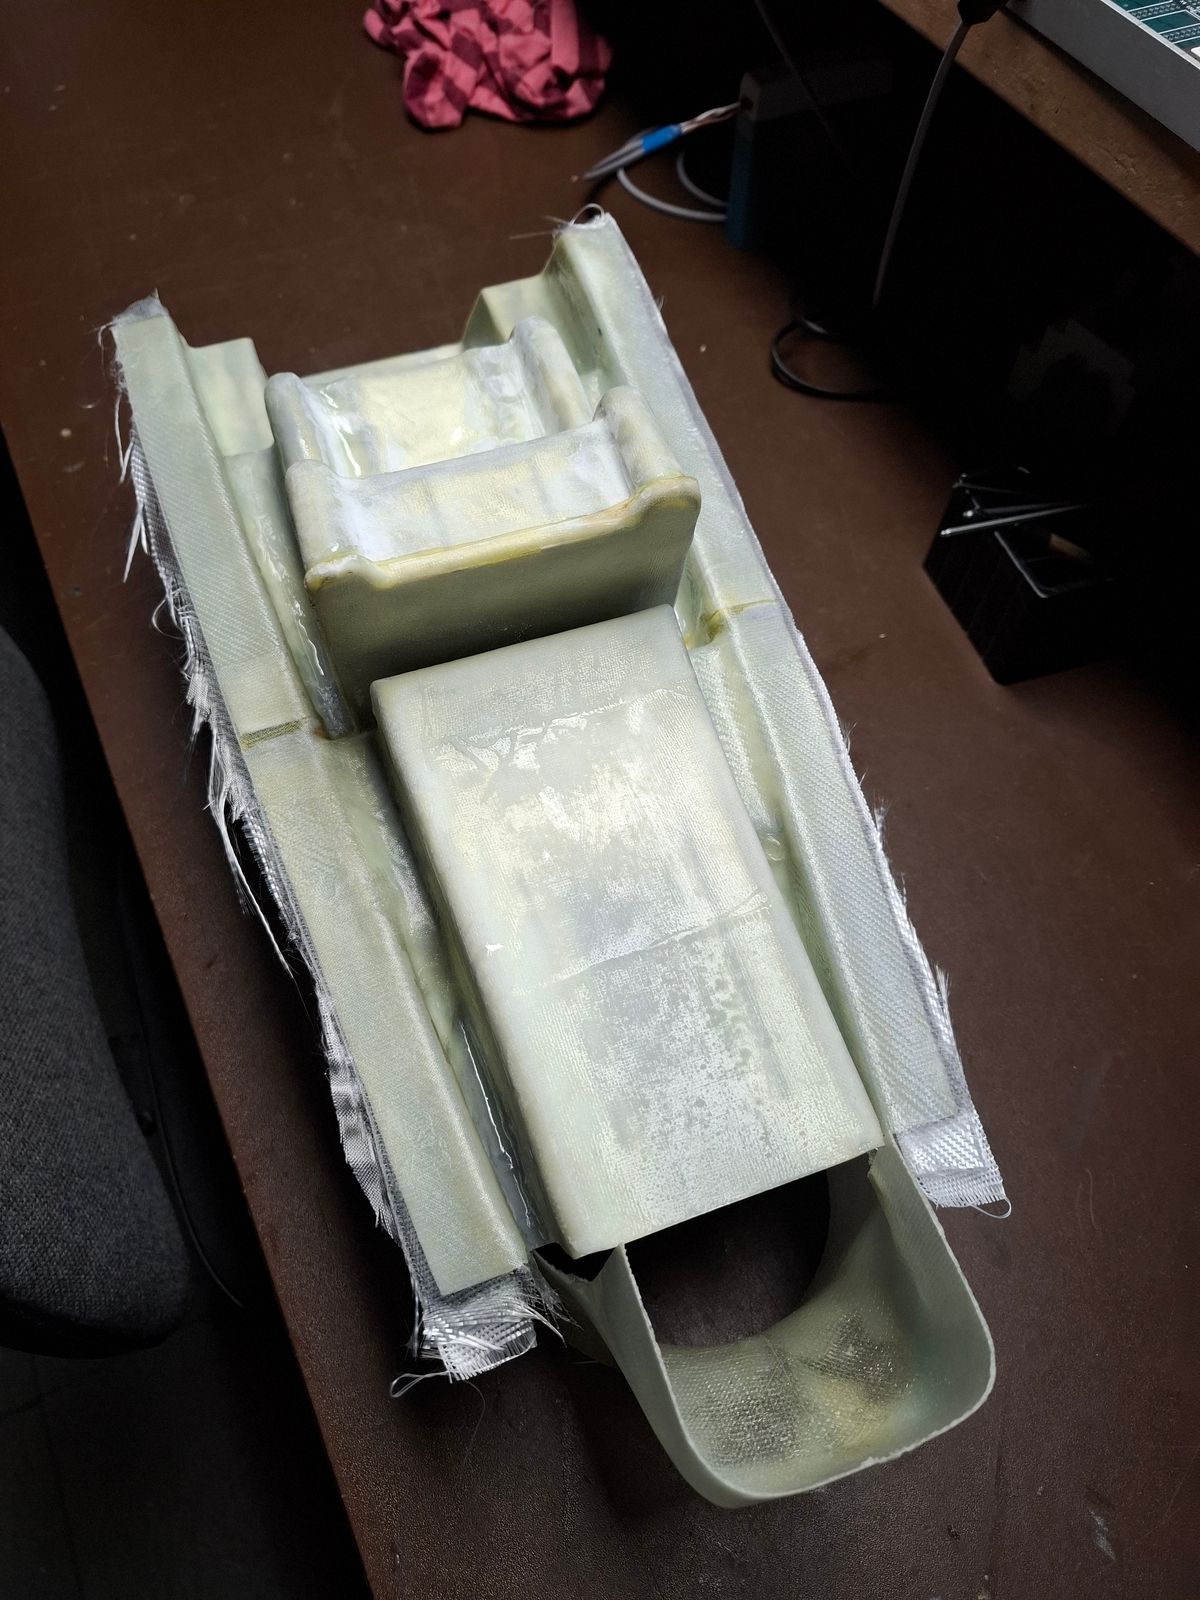
Cockpit assembly
Putting the two part cockpit together, adding a thin layer of glassfiber to align and reinforce the complete unit.
Mechanics for the Cobra
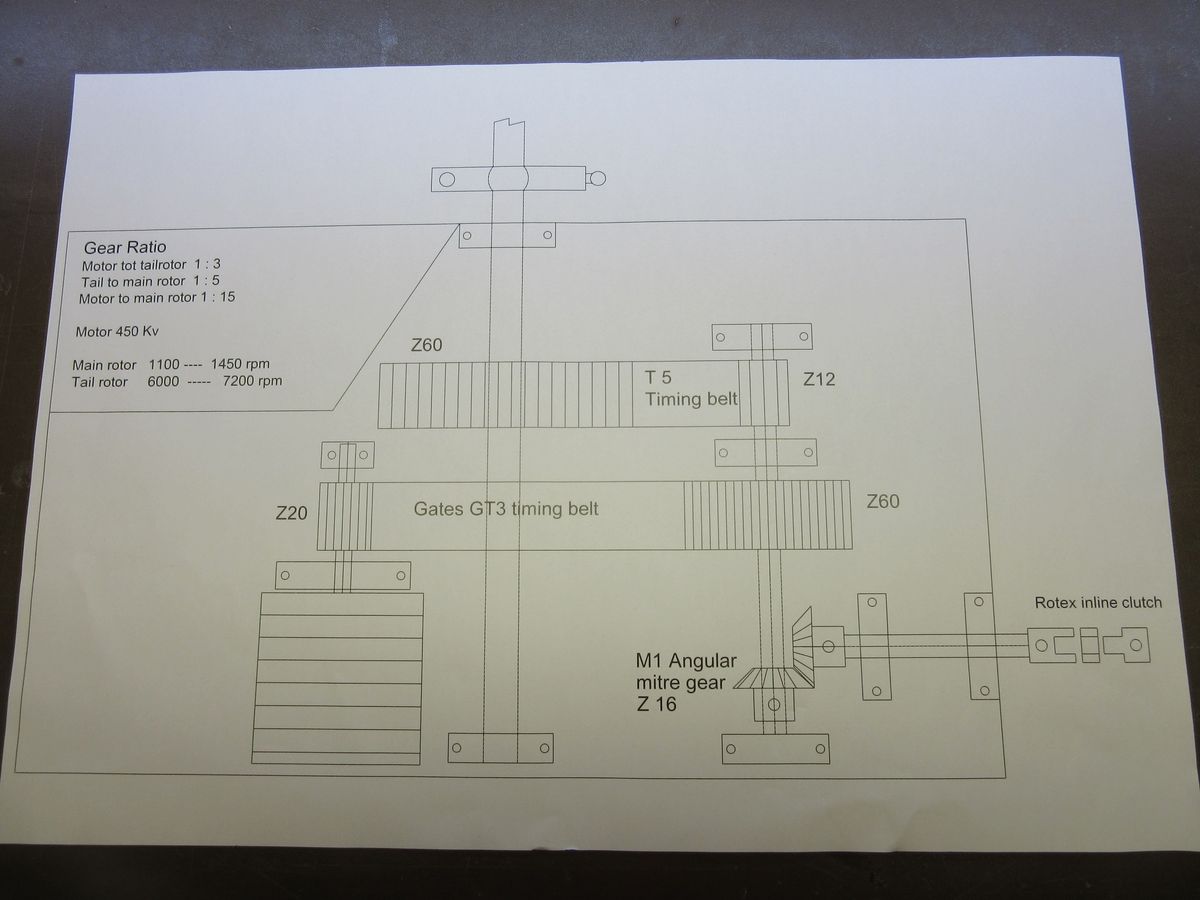
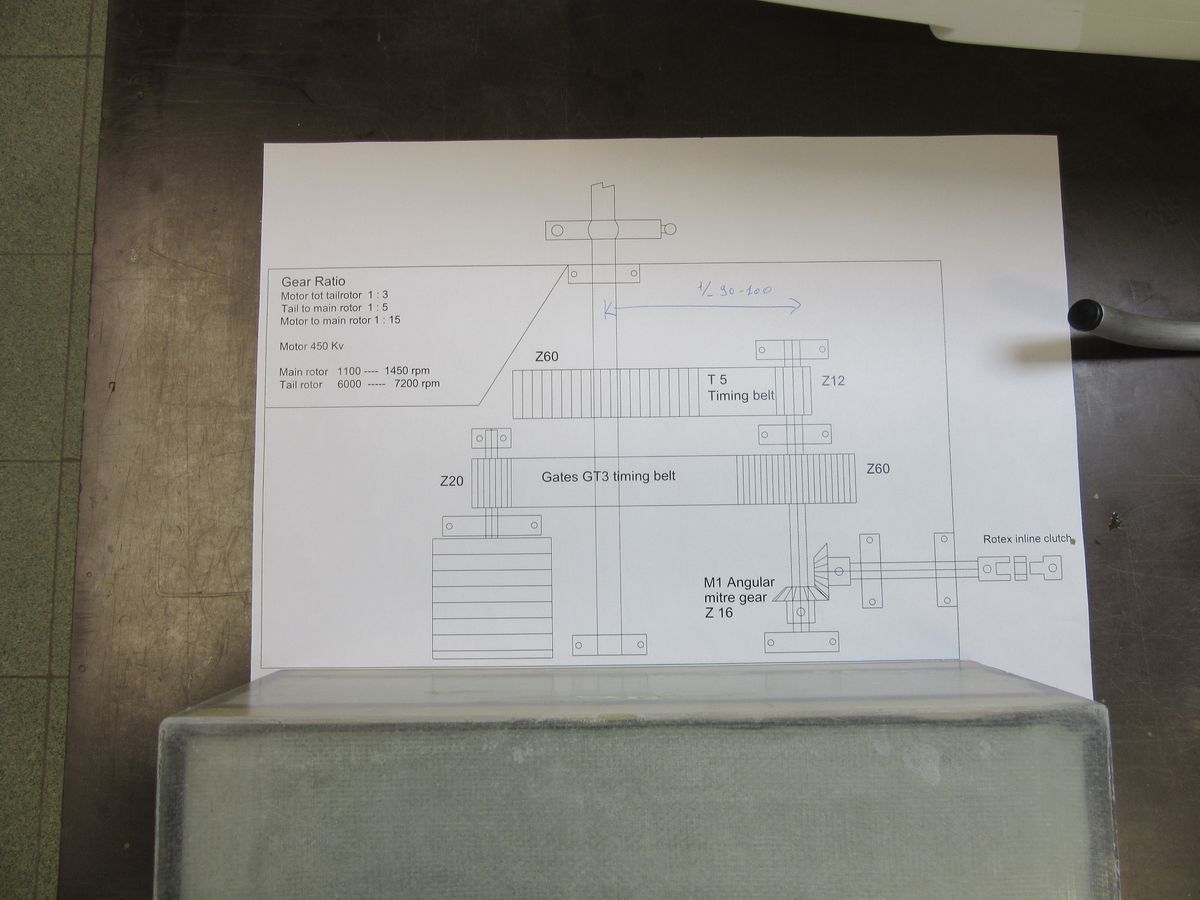
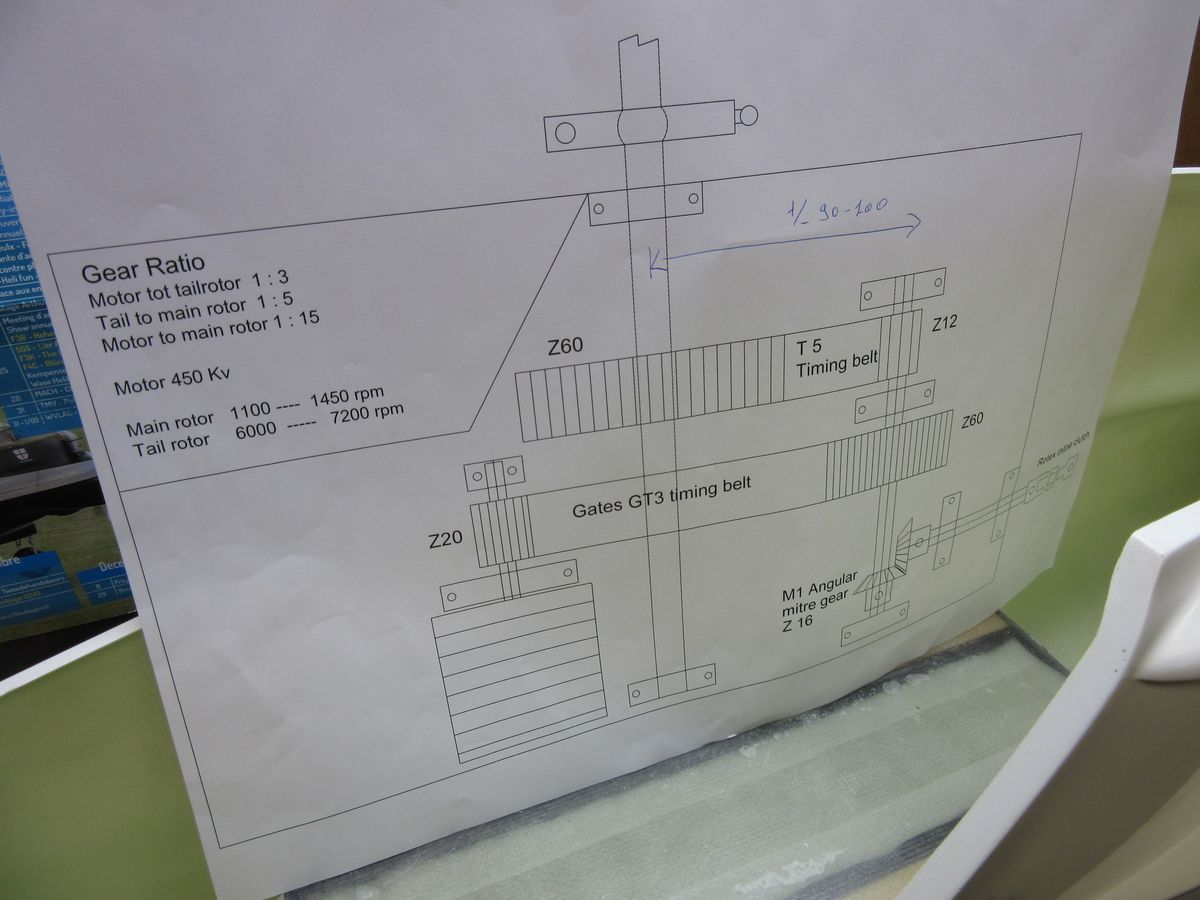
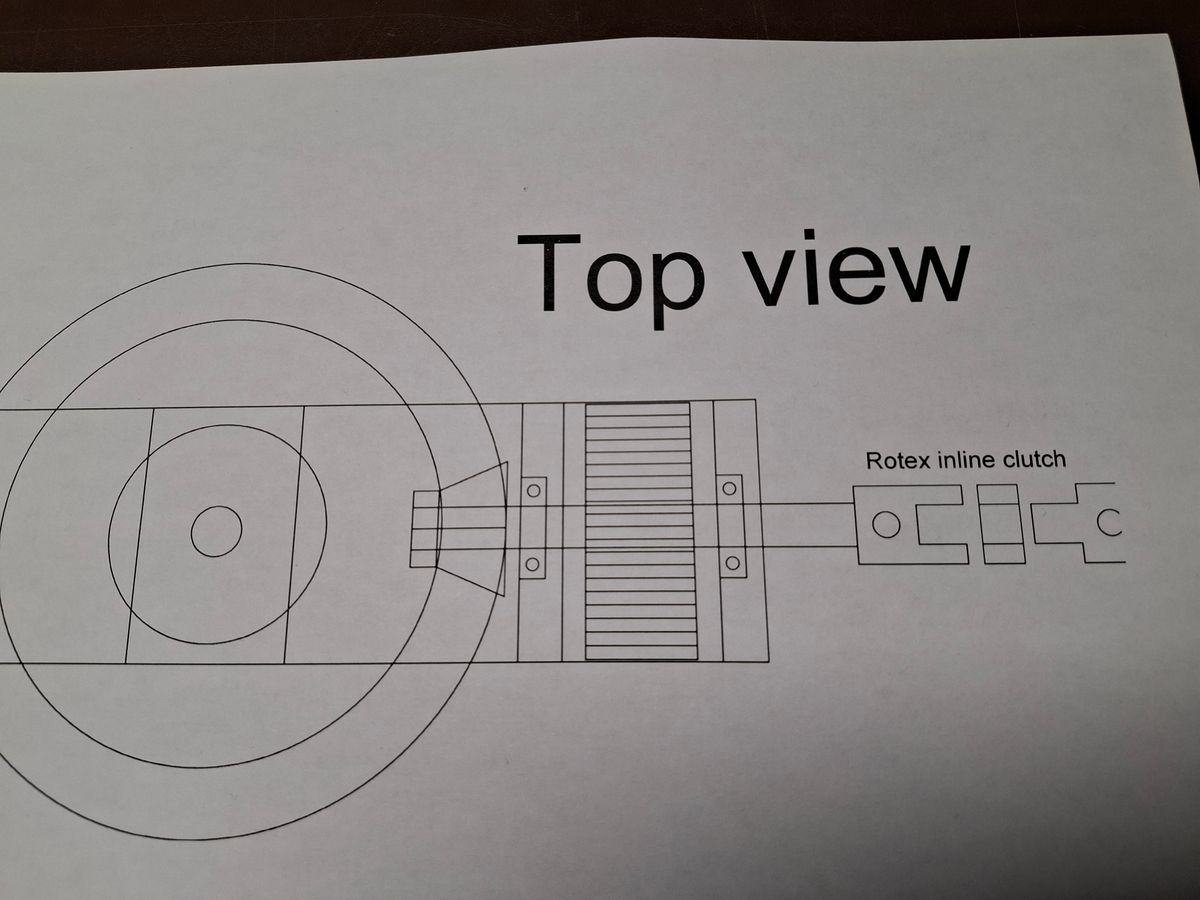
Initial mechanics design of the Cobra electro mechanics.
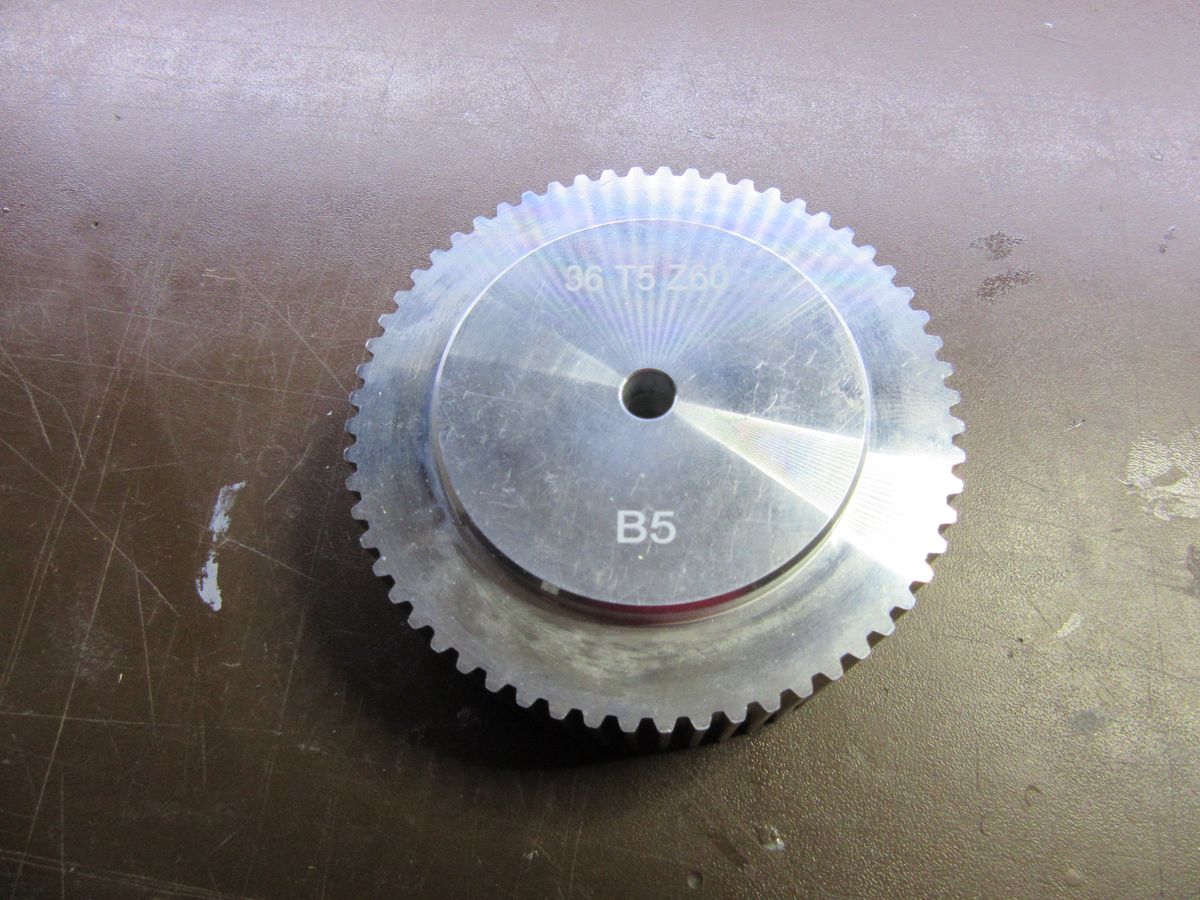
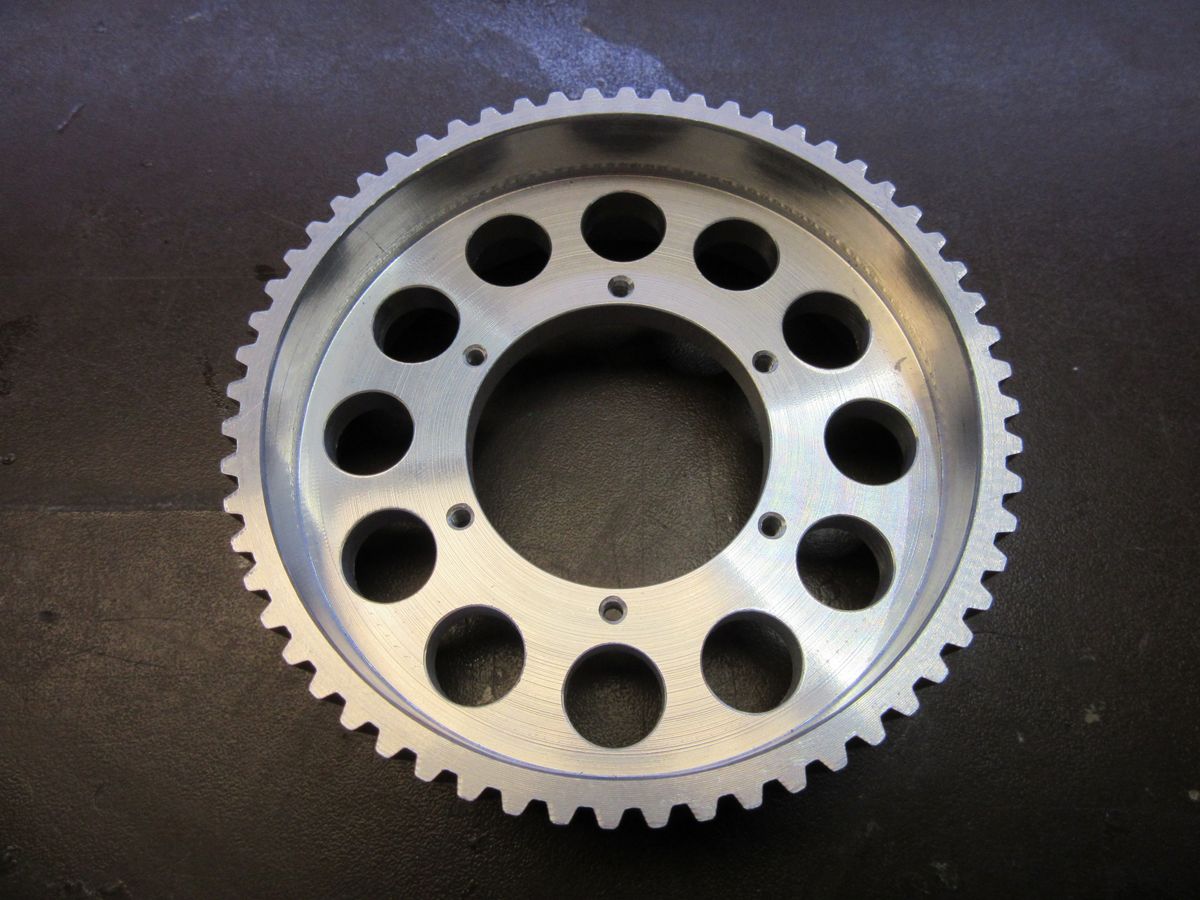
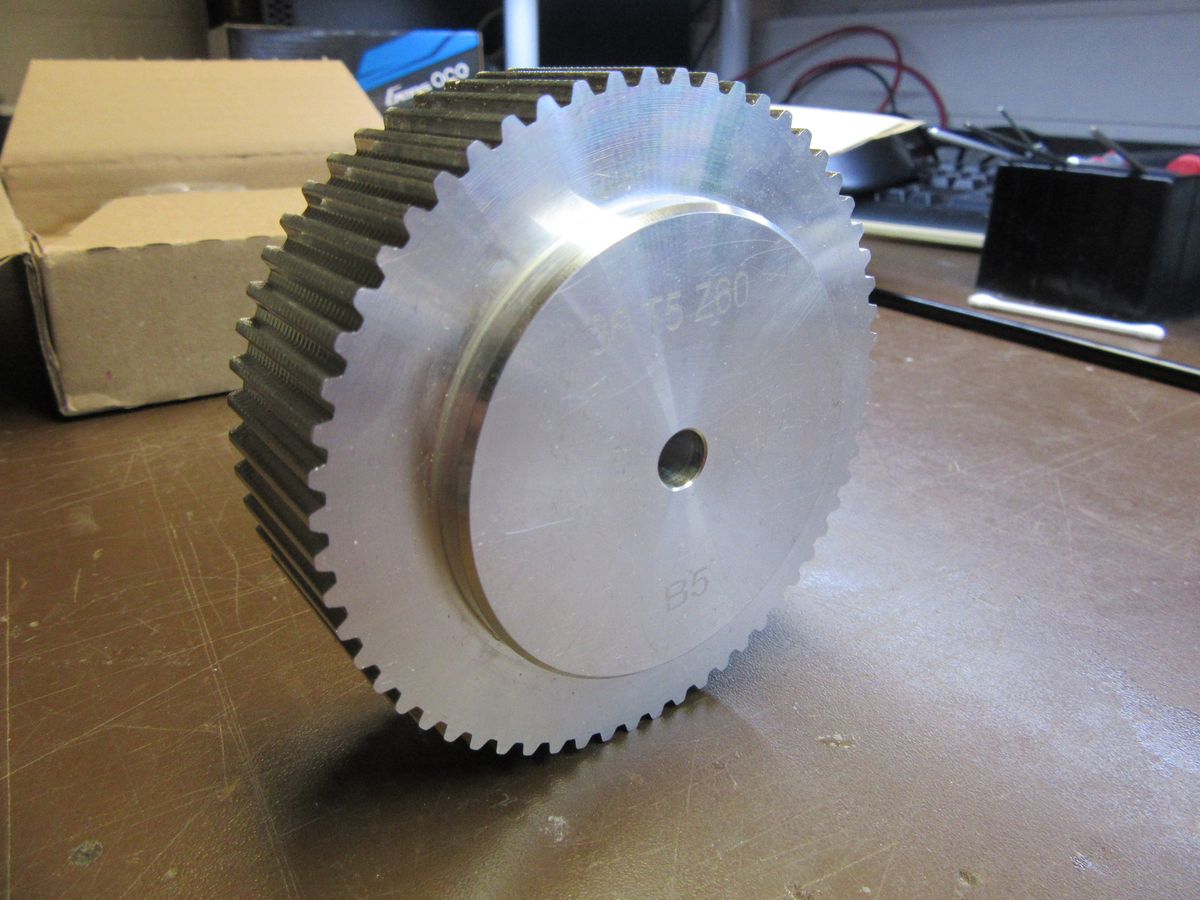
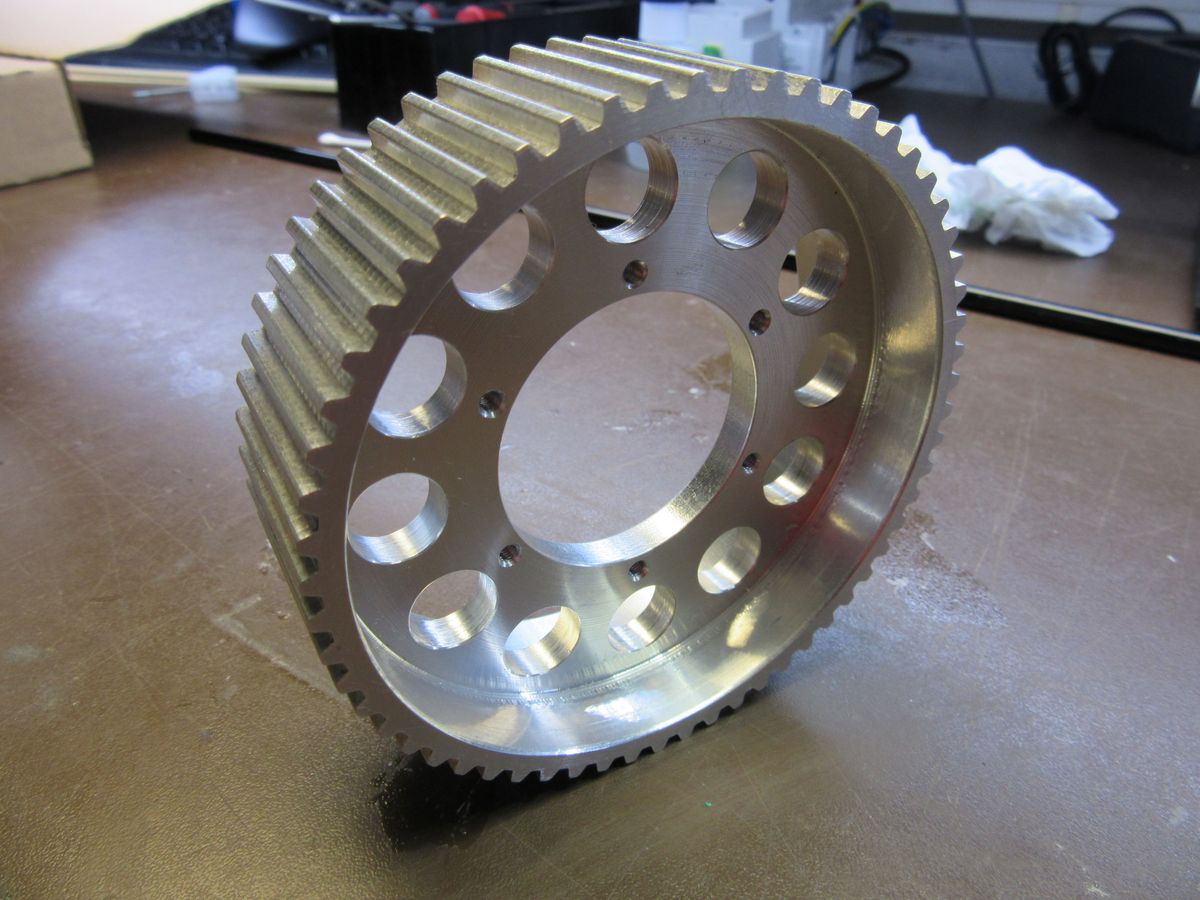
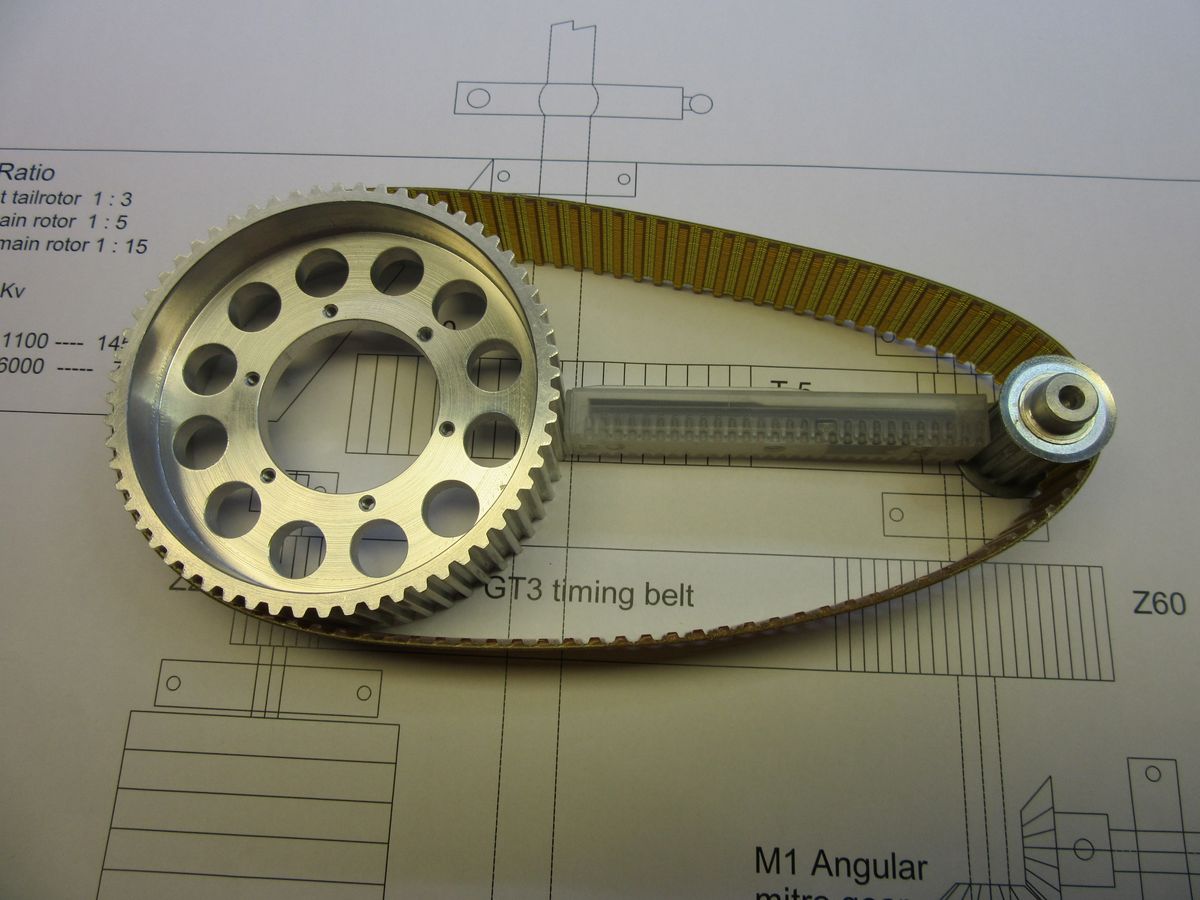
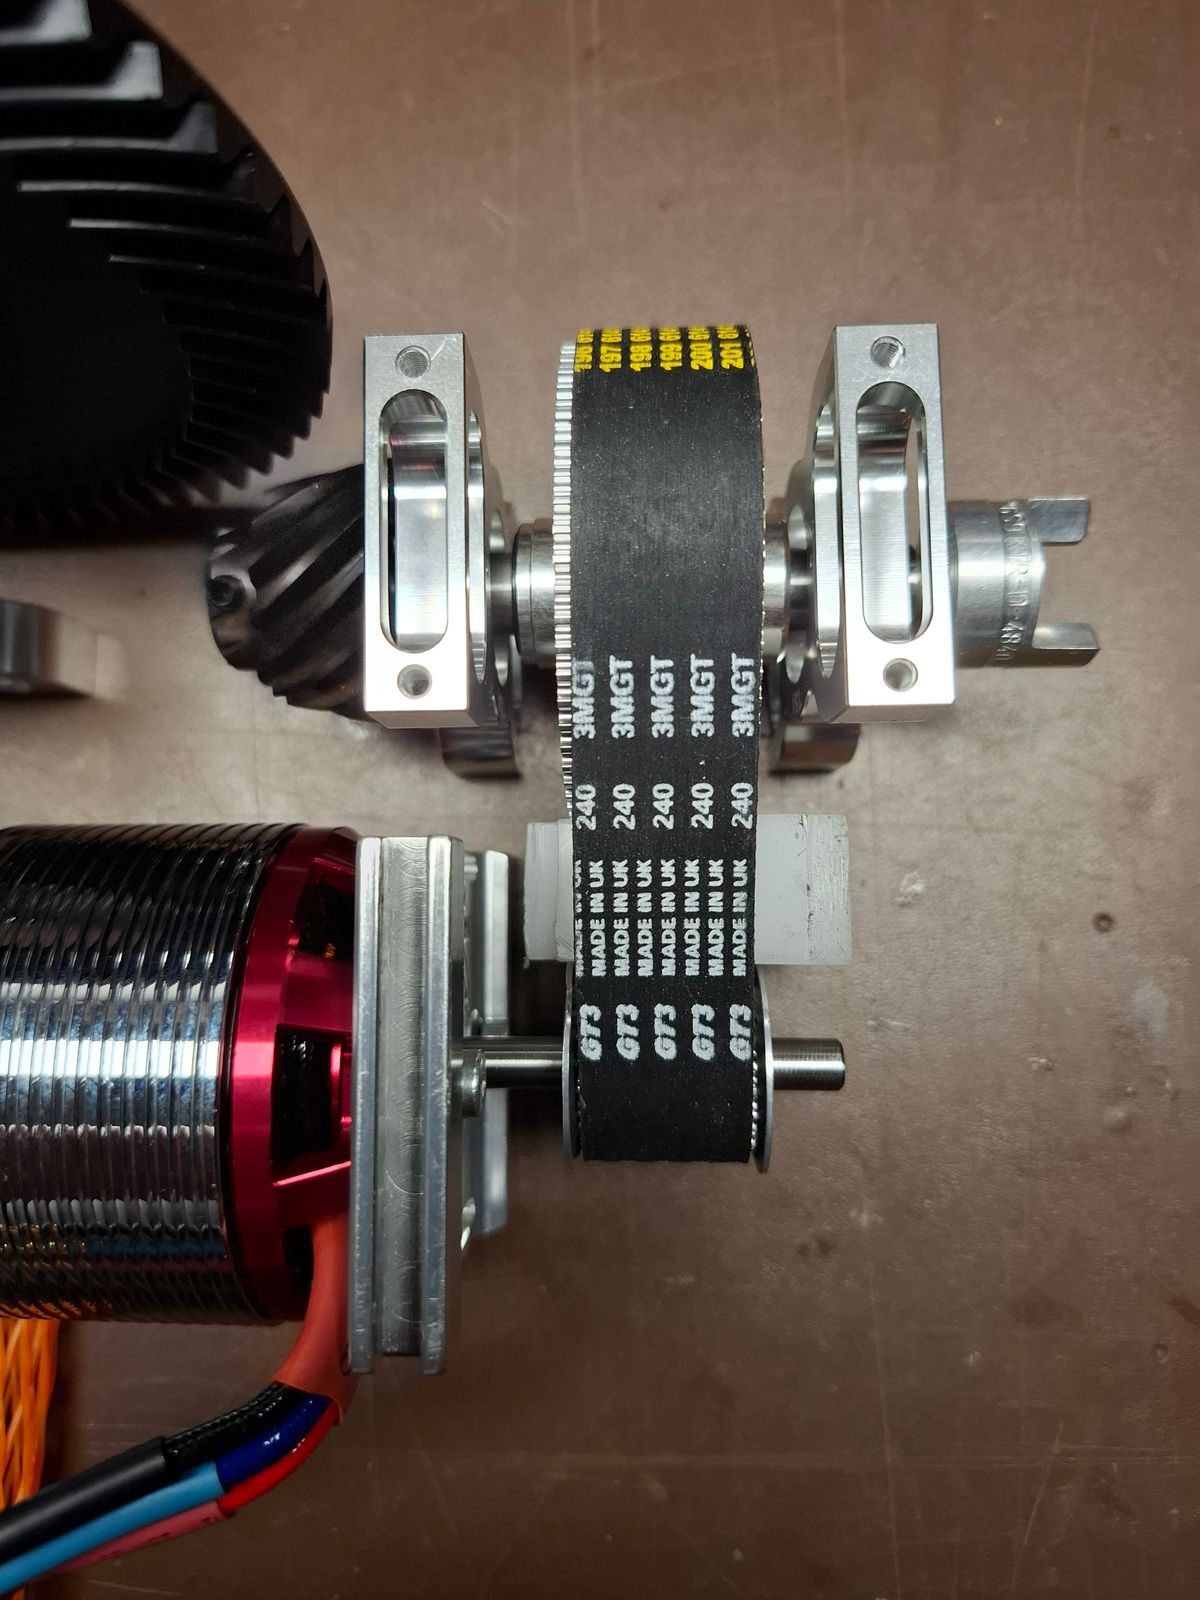
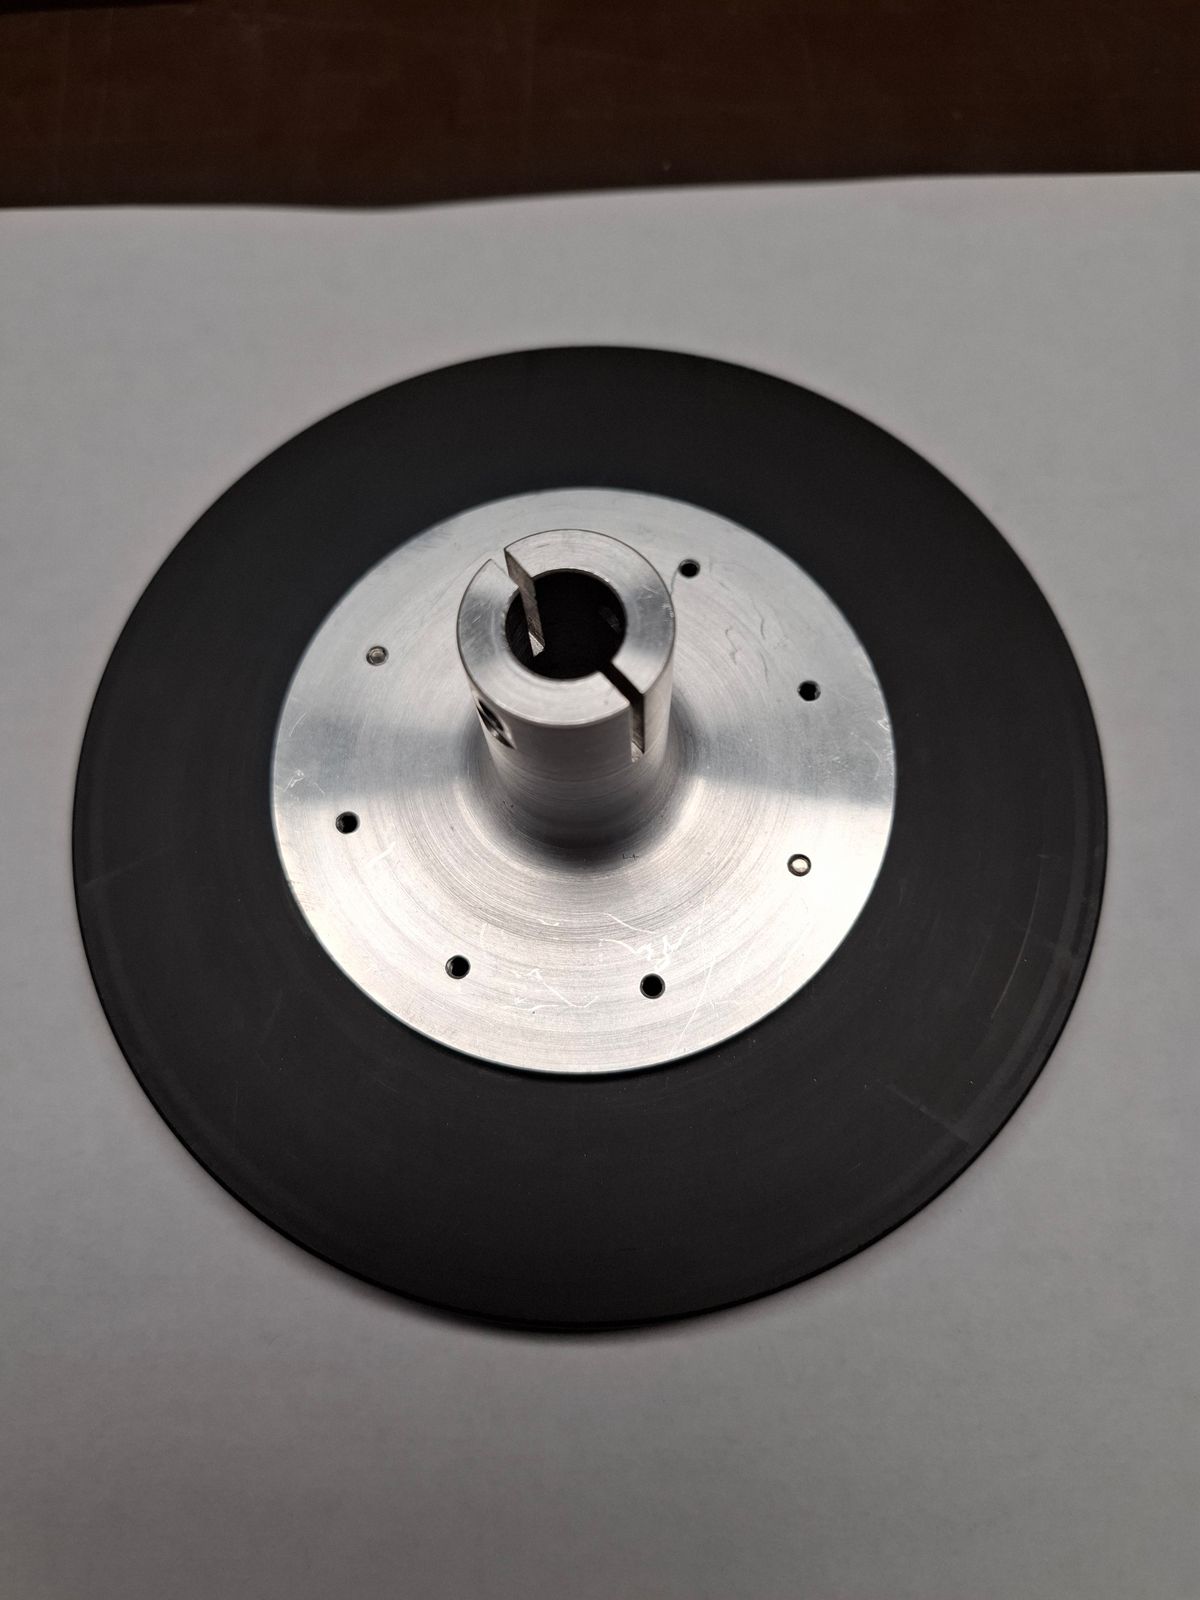
Modification of the industrial timing belt pulleys to the light weight RC version
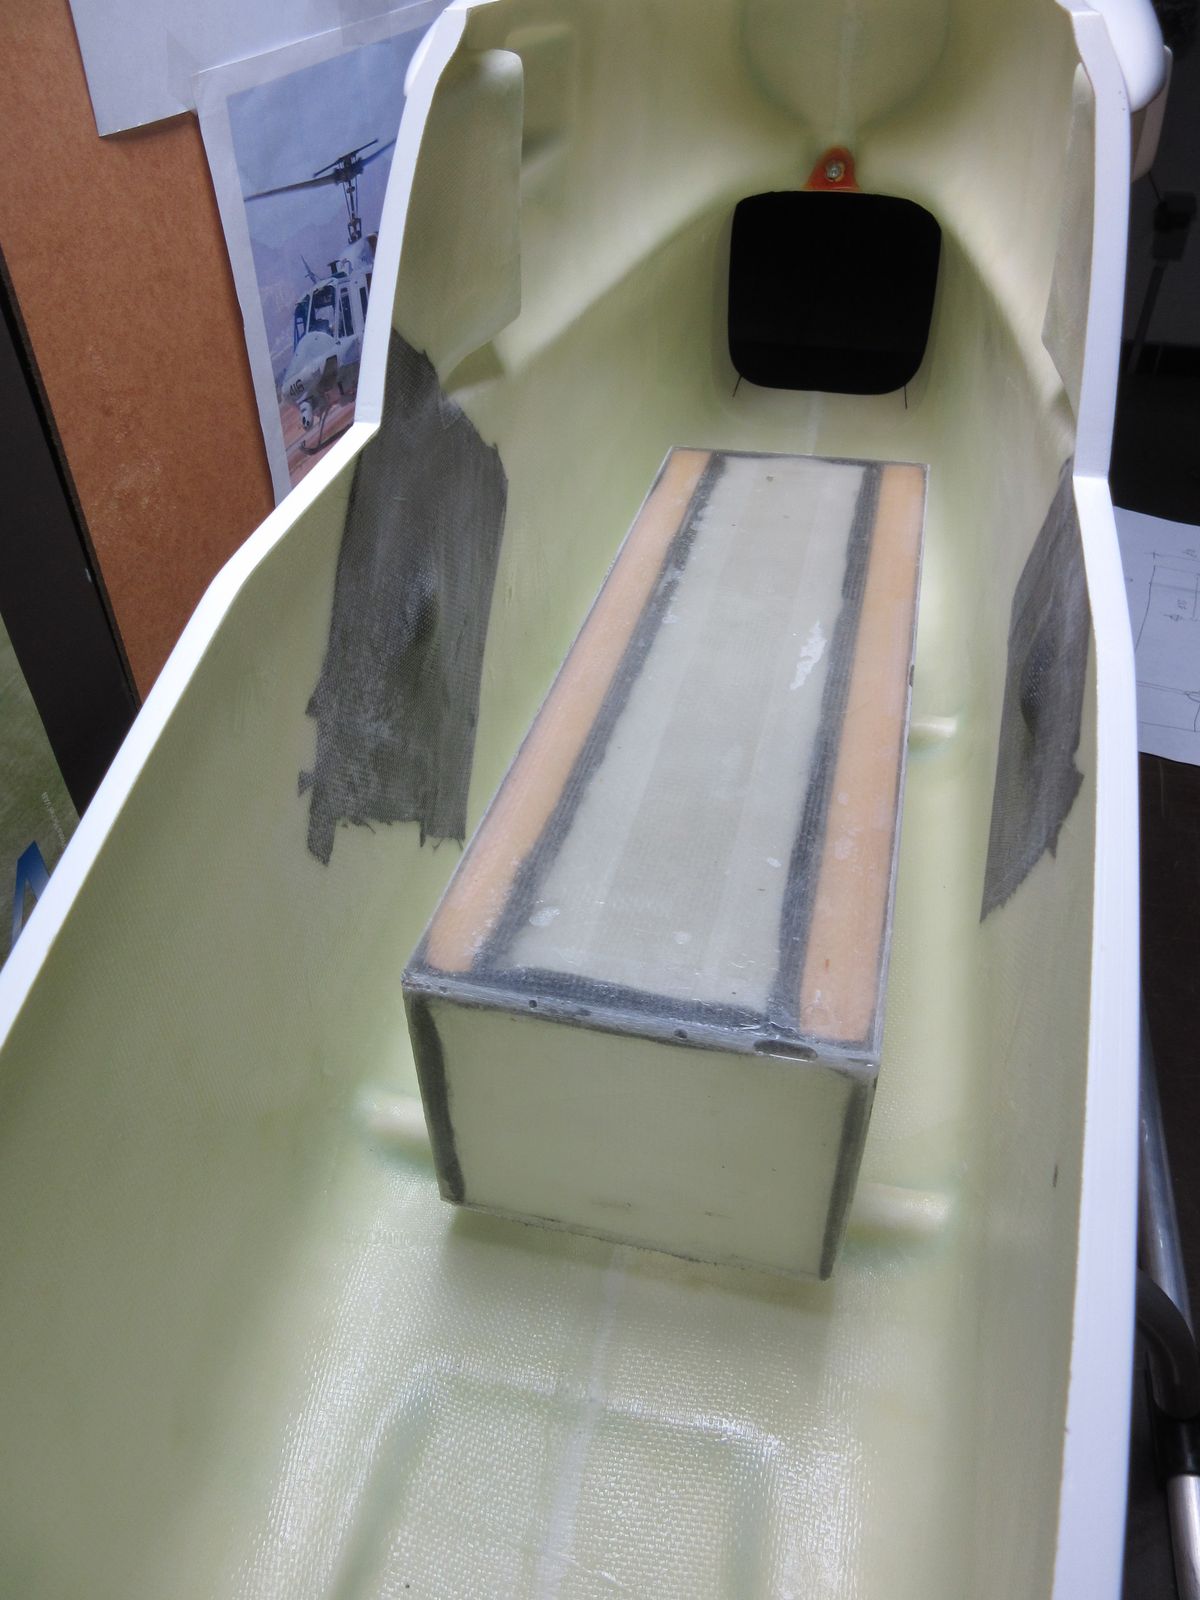
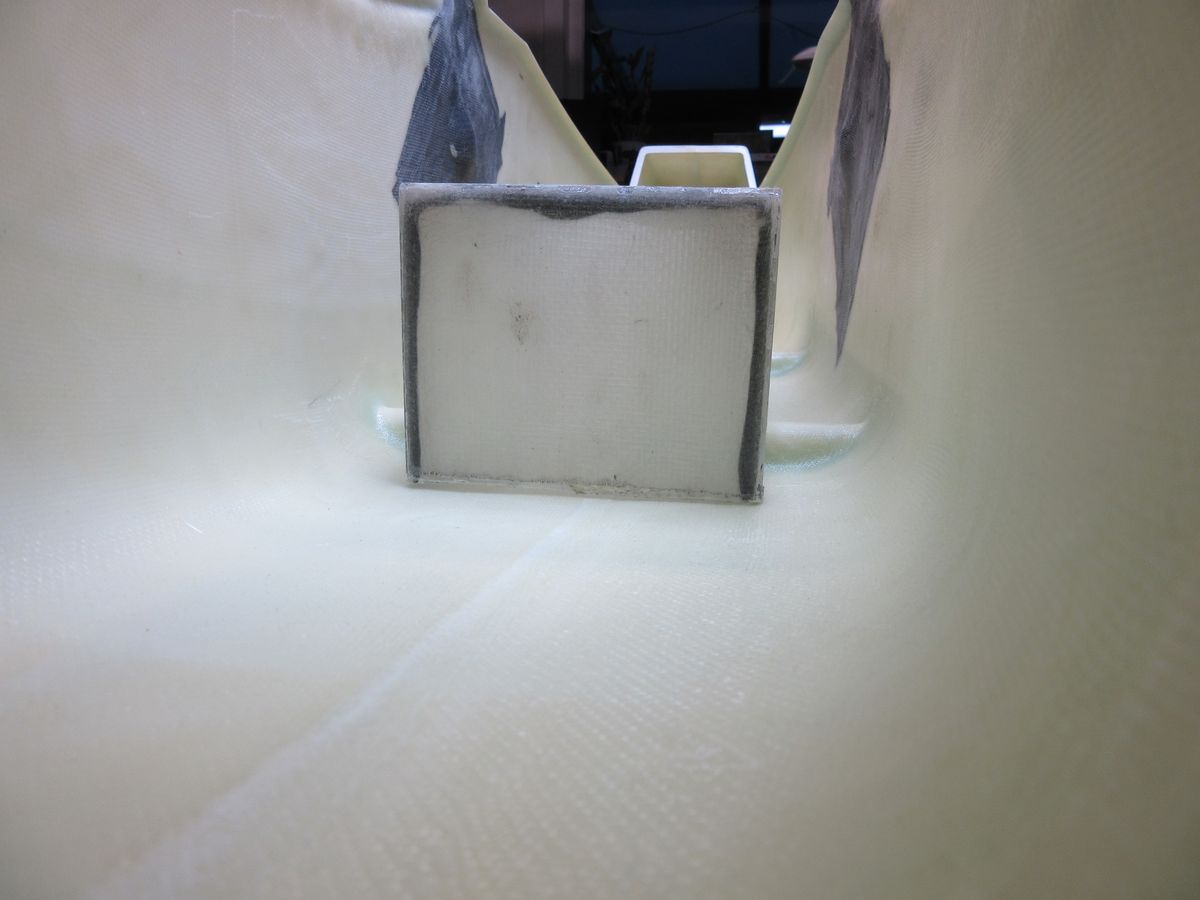
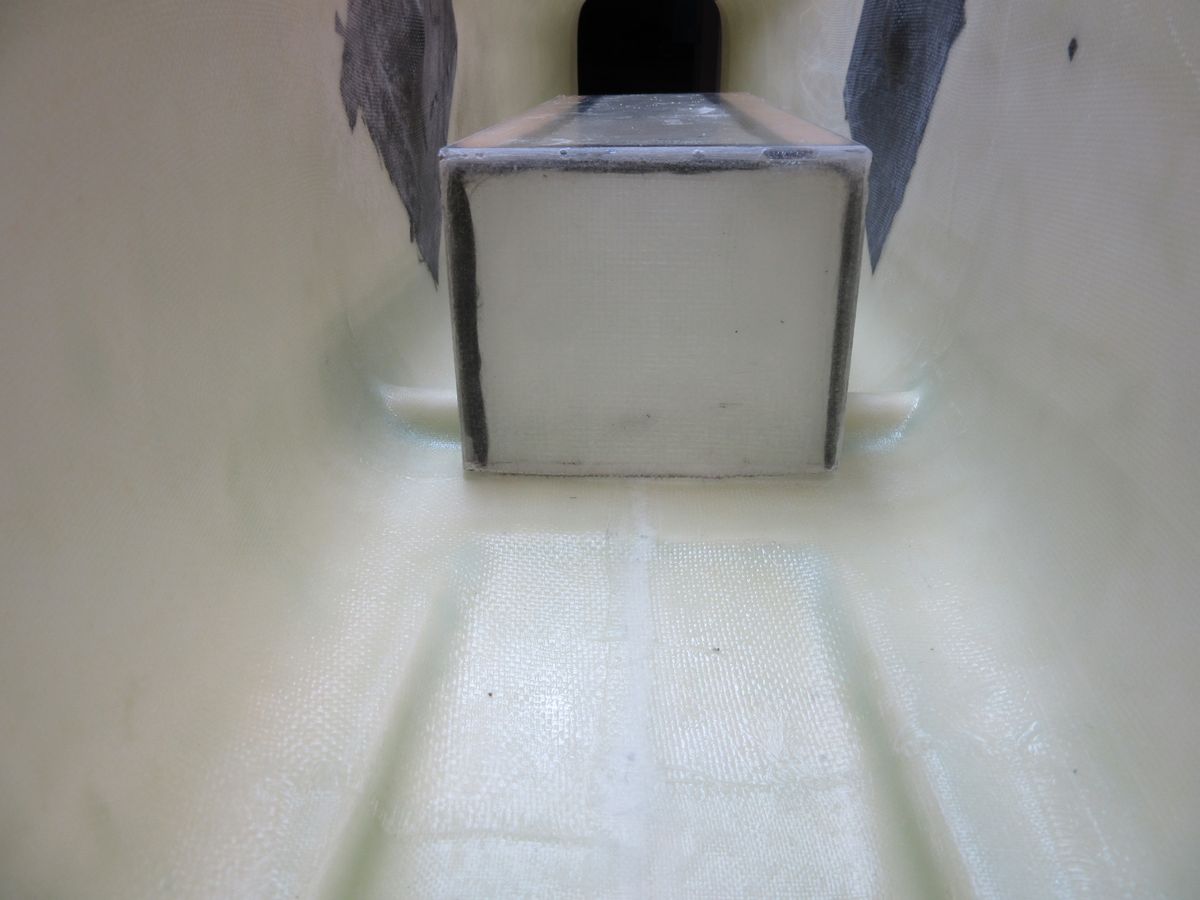
Glassfiber subframe for mechanics support
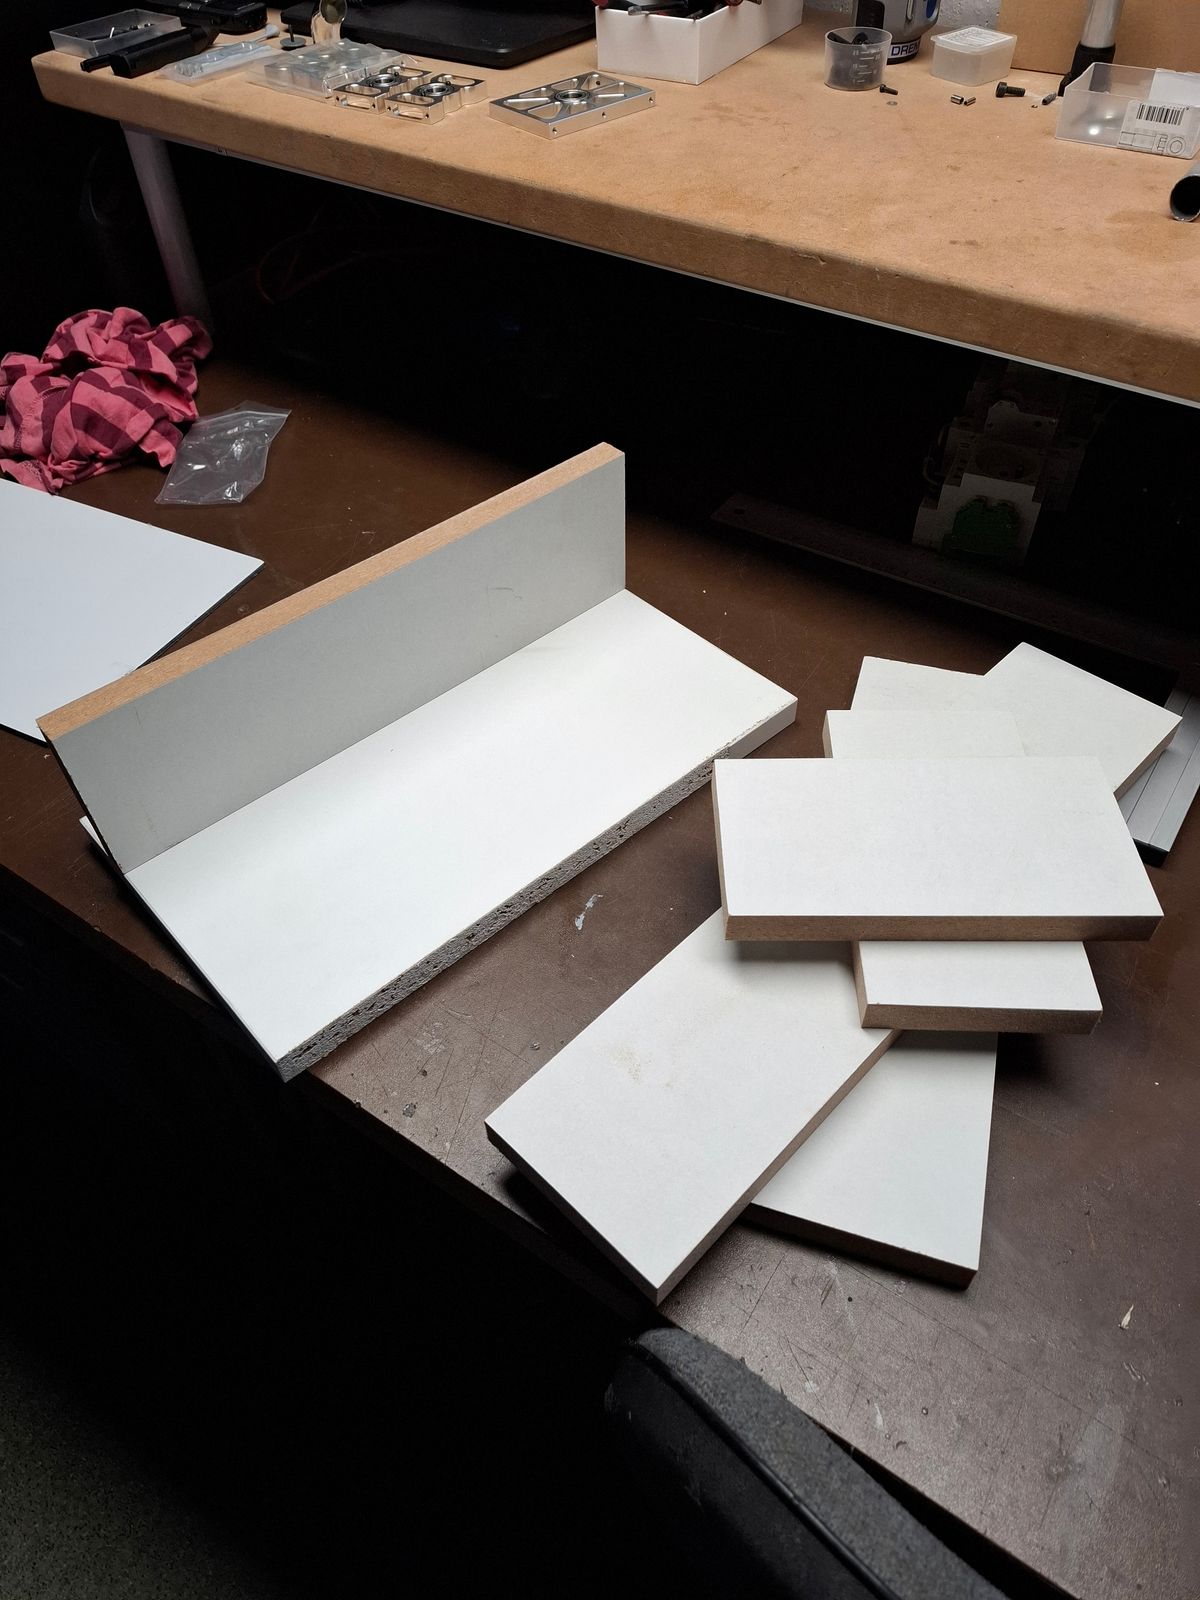
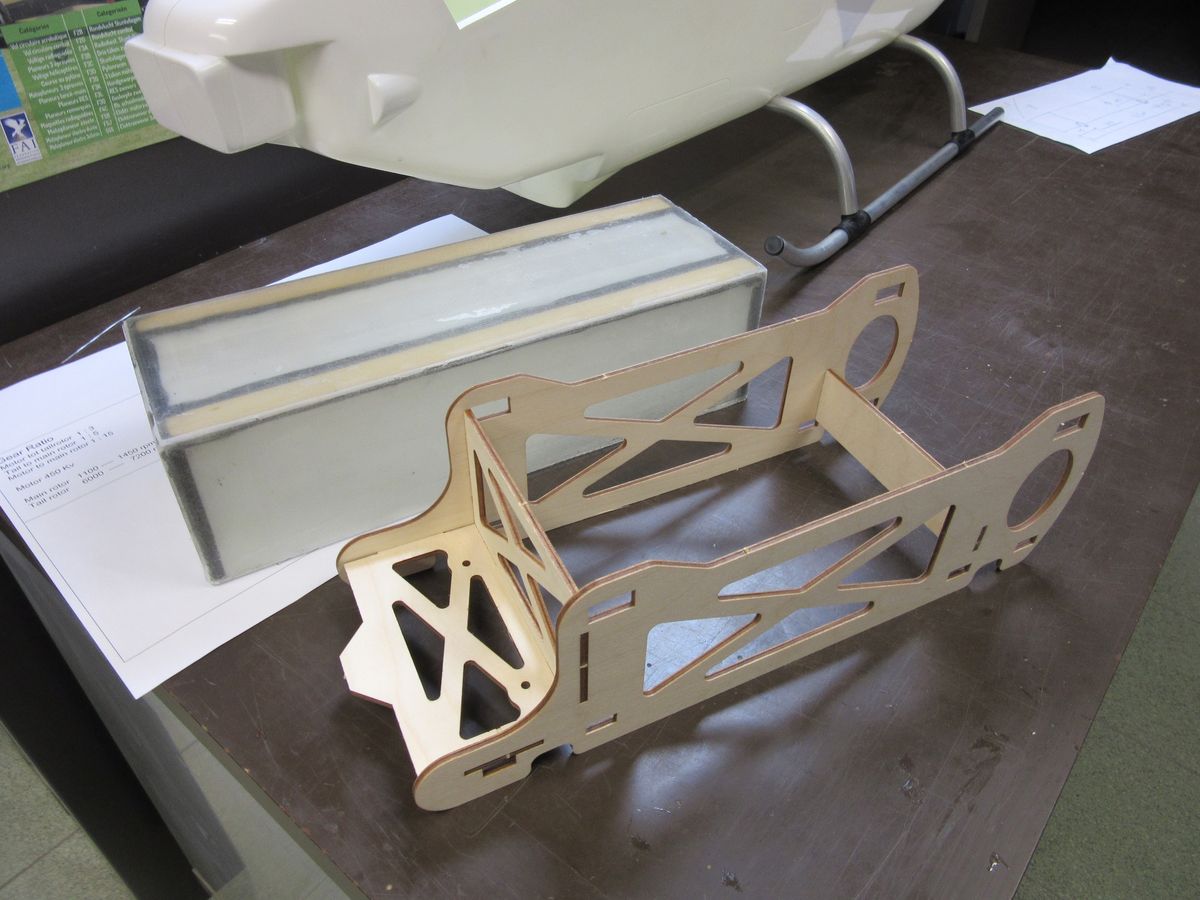
Wooden constuction of the outline base model for the subframe.
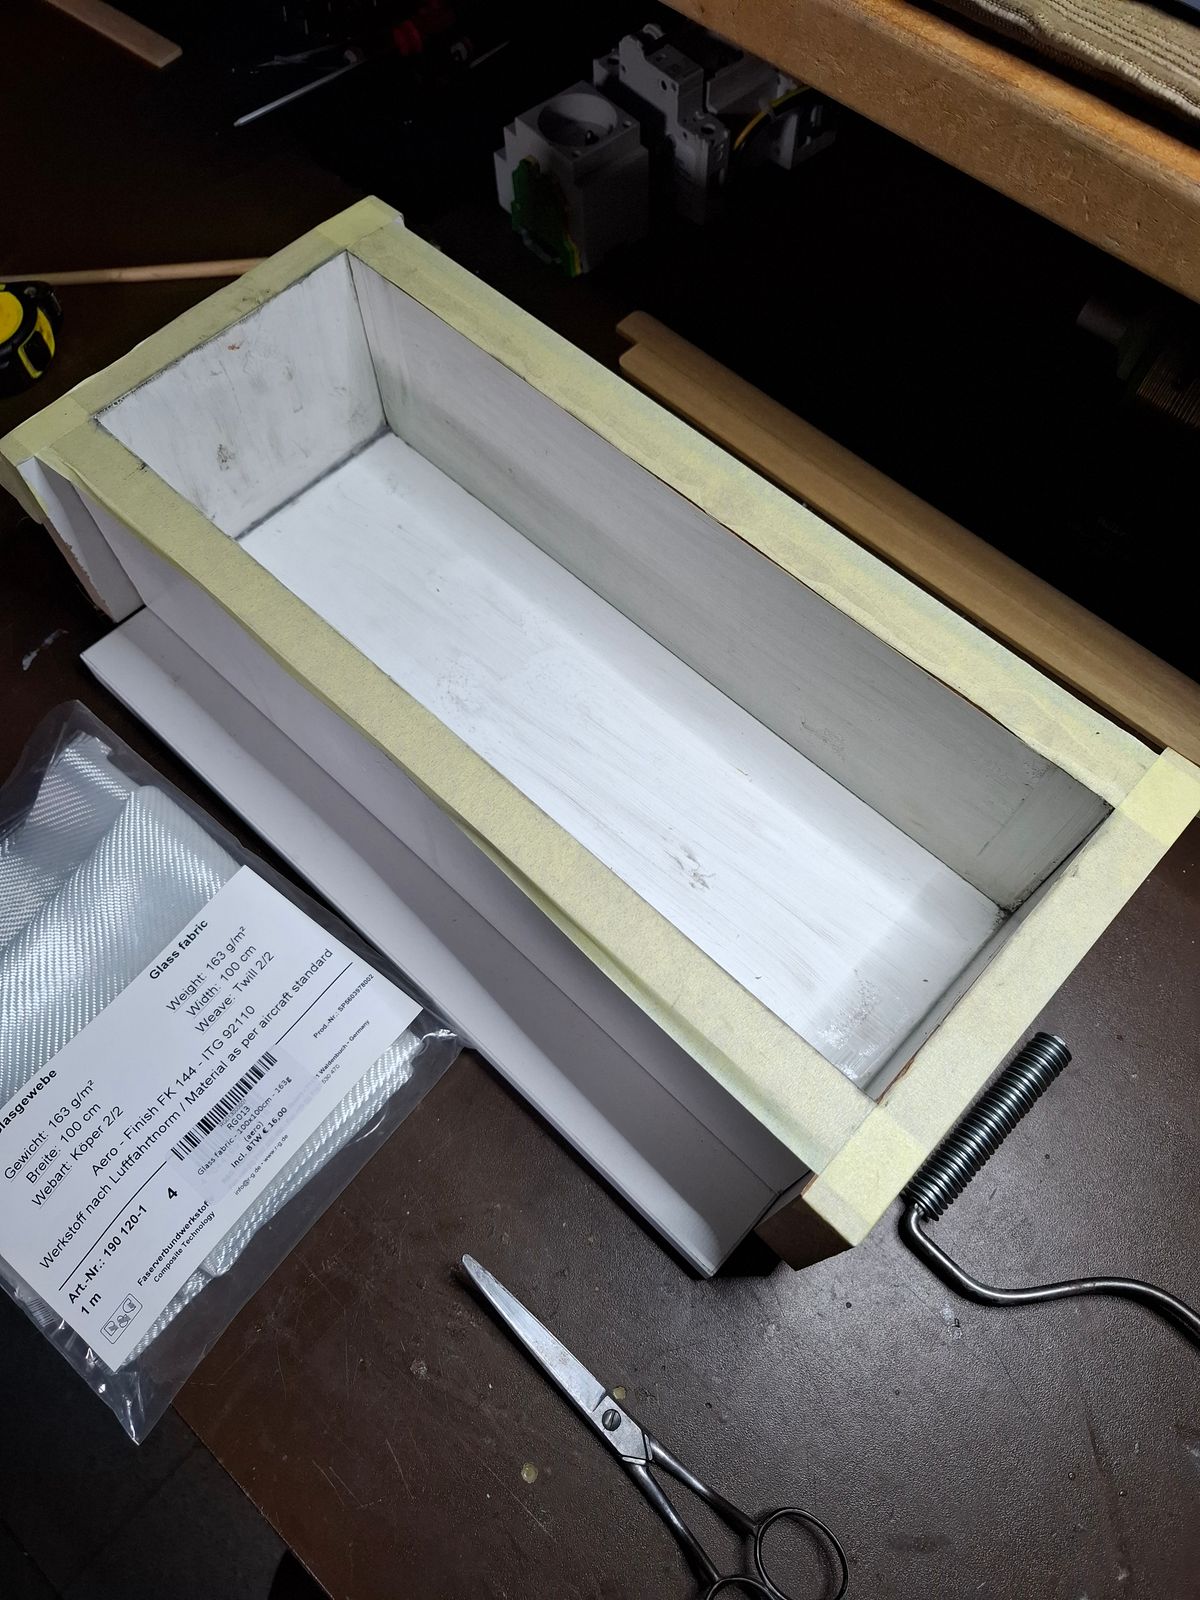
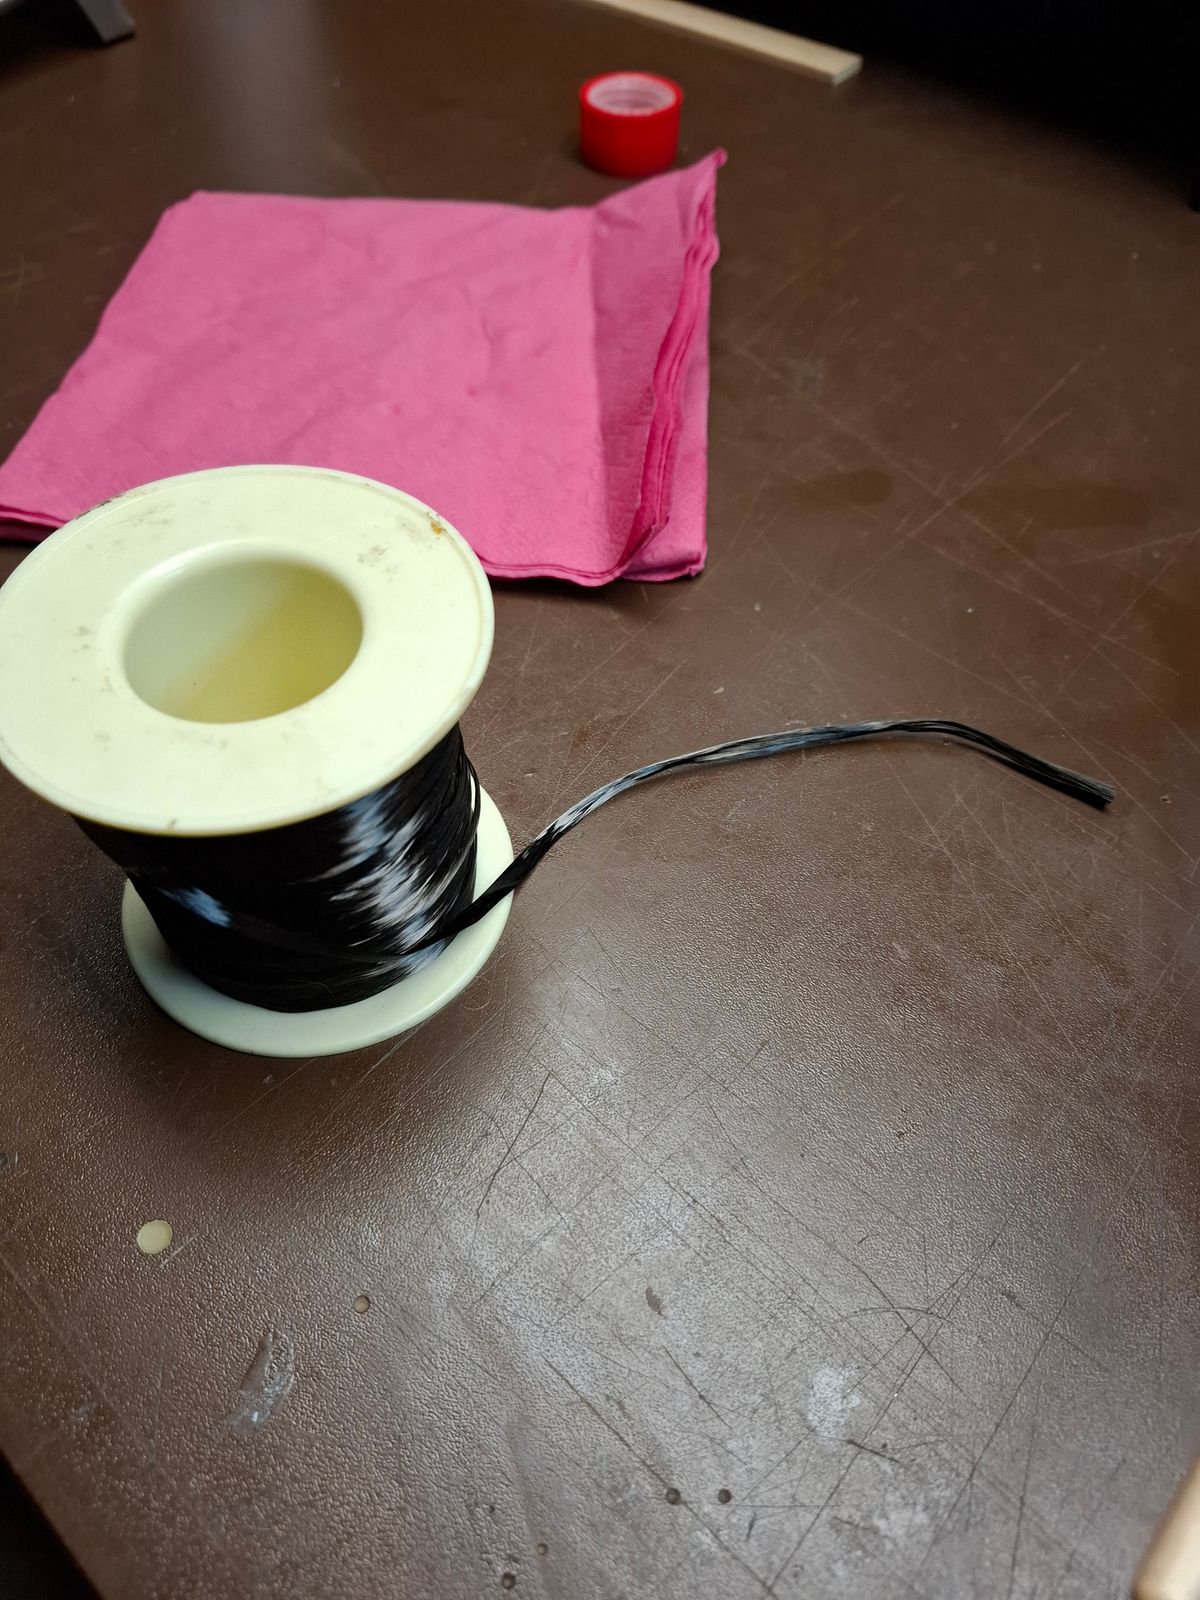
Laminating layer by layer and reinforce stuctural edges and corners with carbonfiber string.
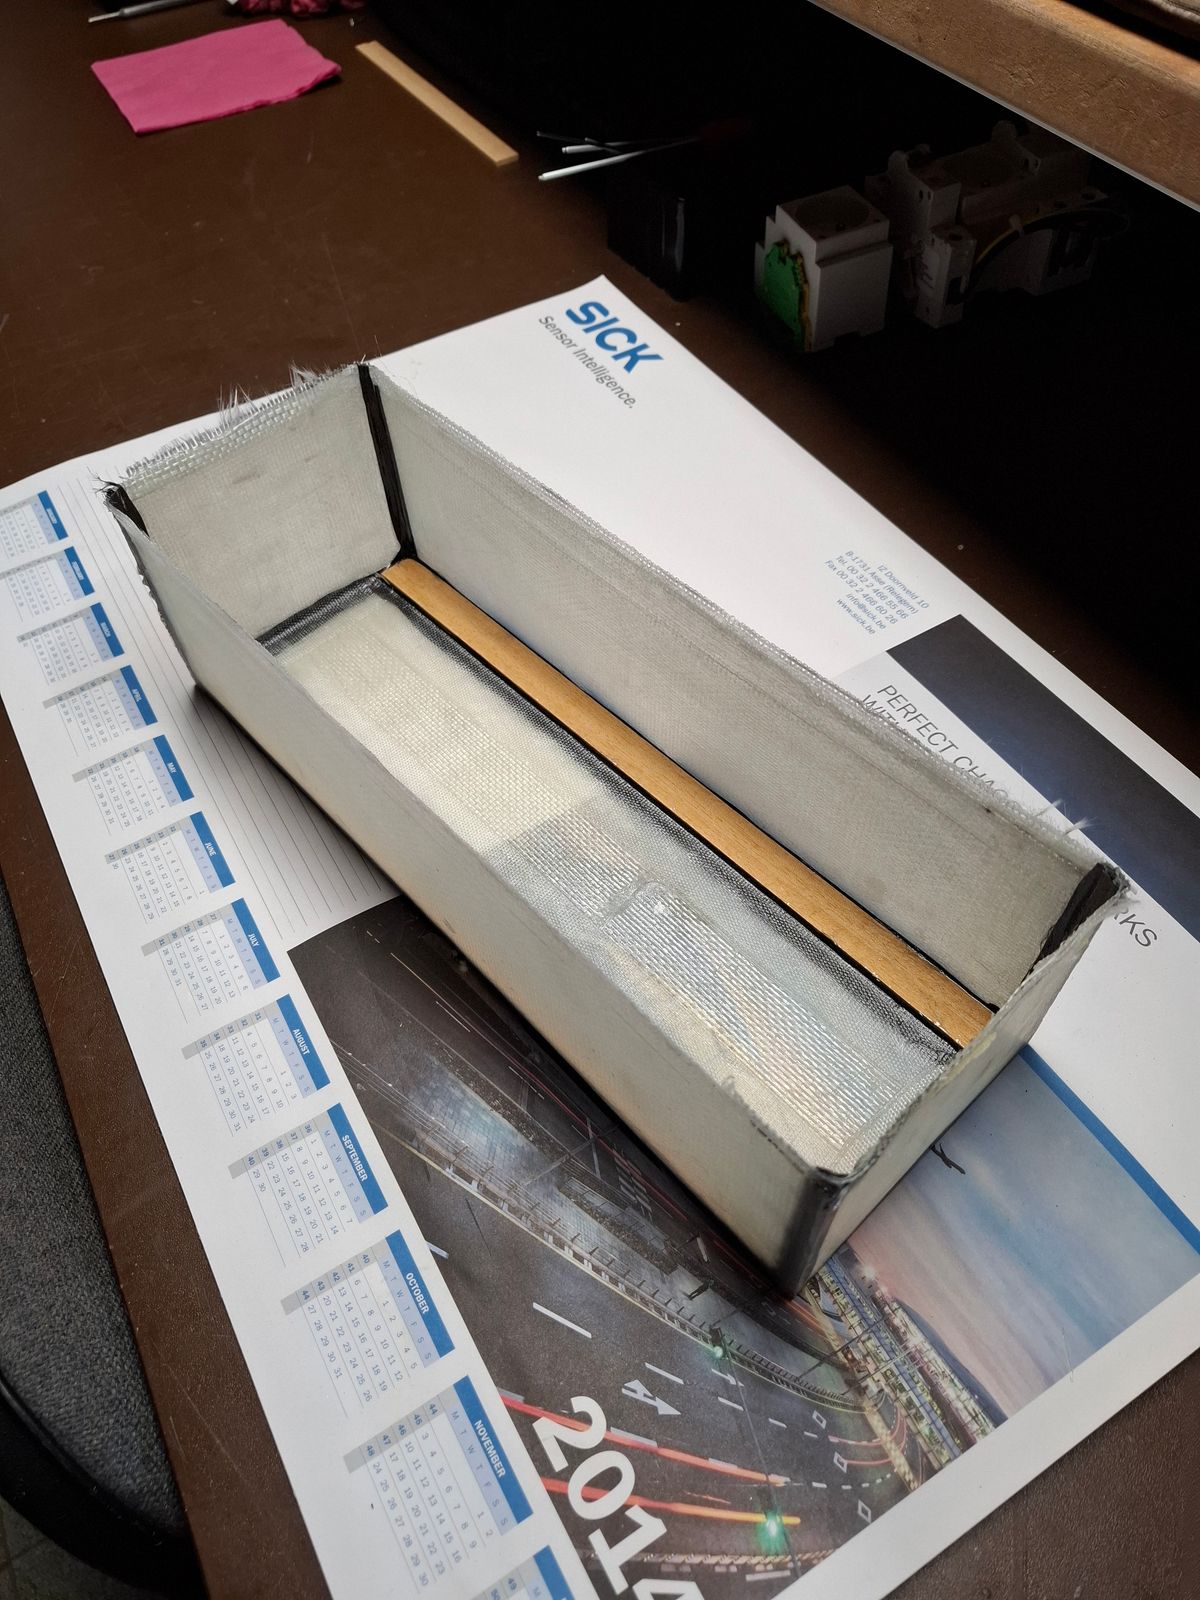
The glasfiber subframe is used instead of the wooden constuction original supplied in the kit.
Stronger, less weight and easy to laminate on to the fuselage body.
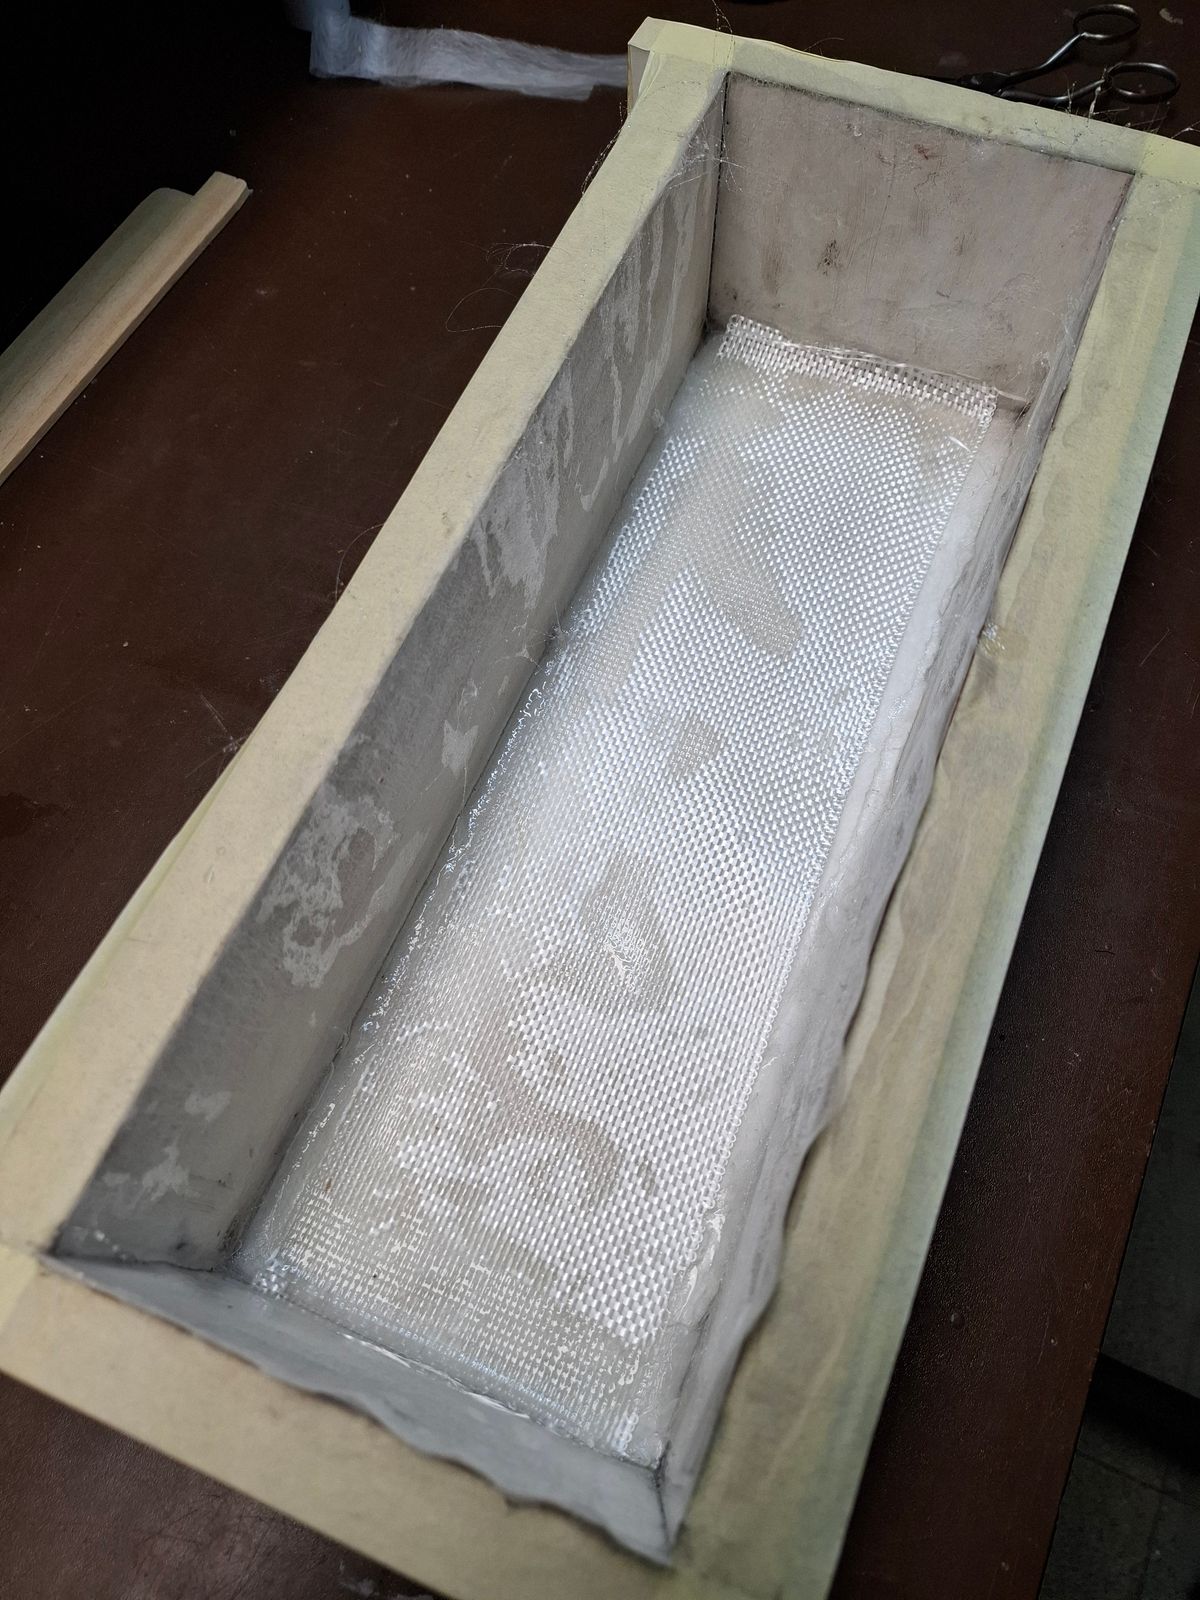
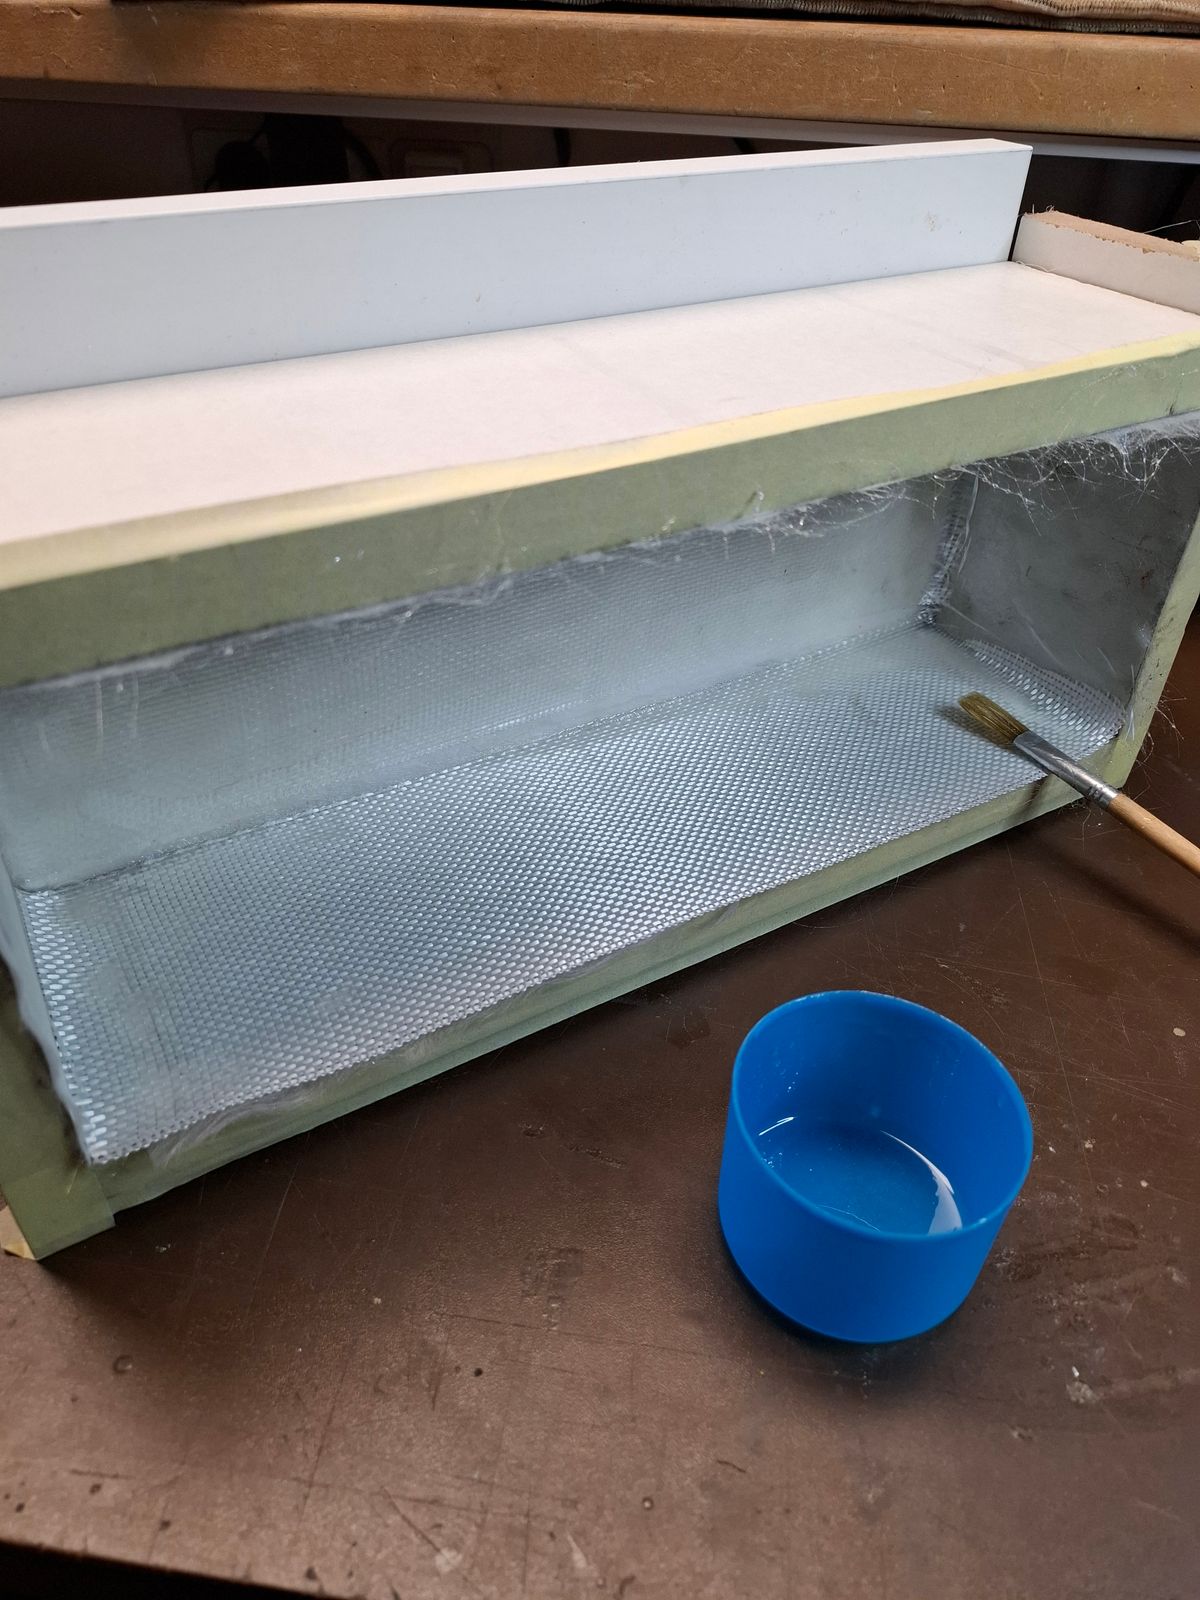
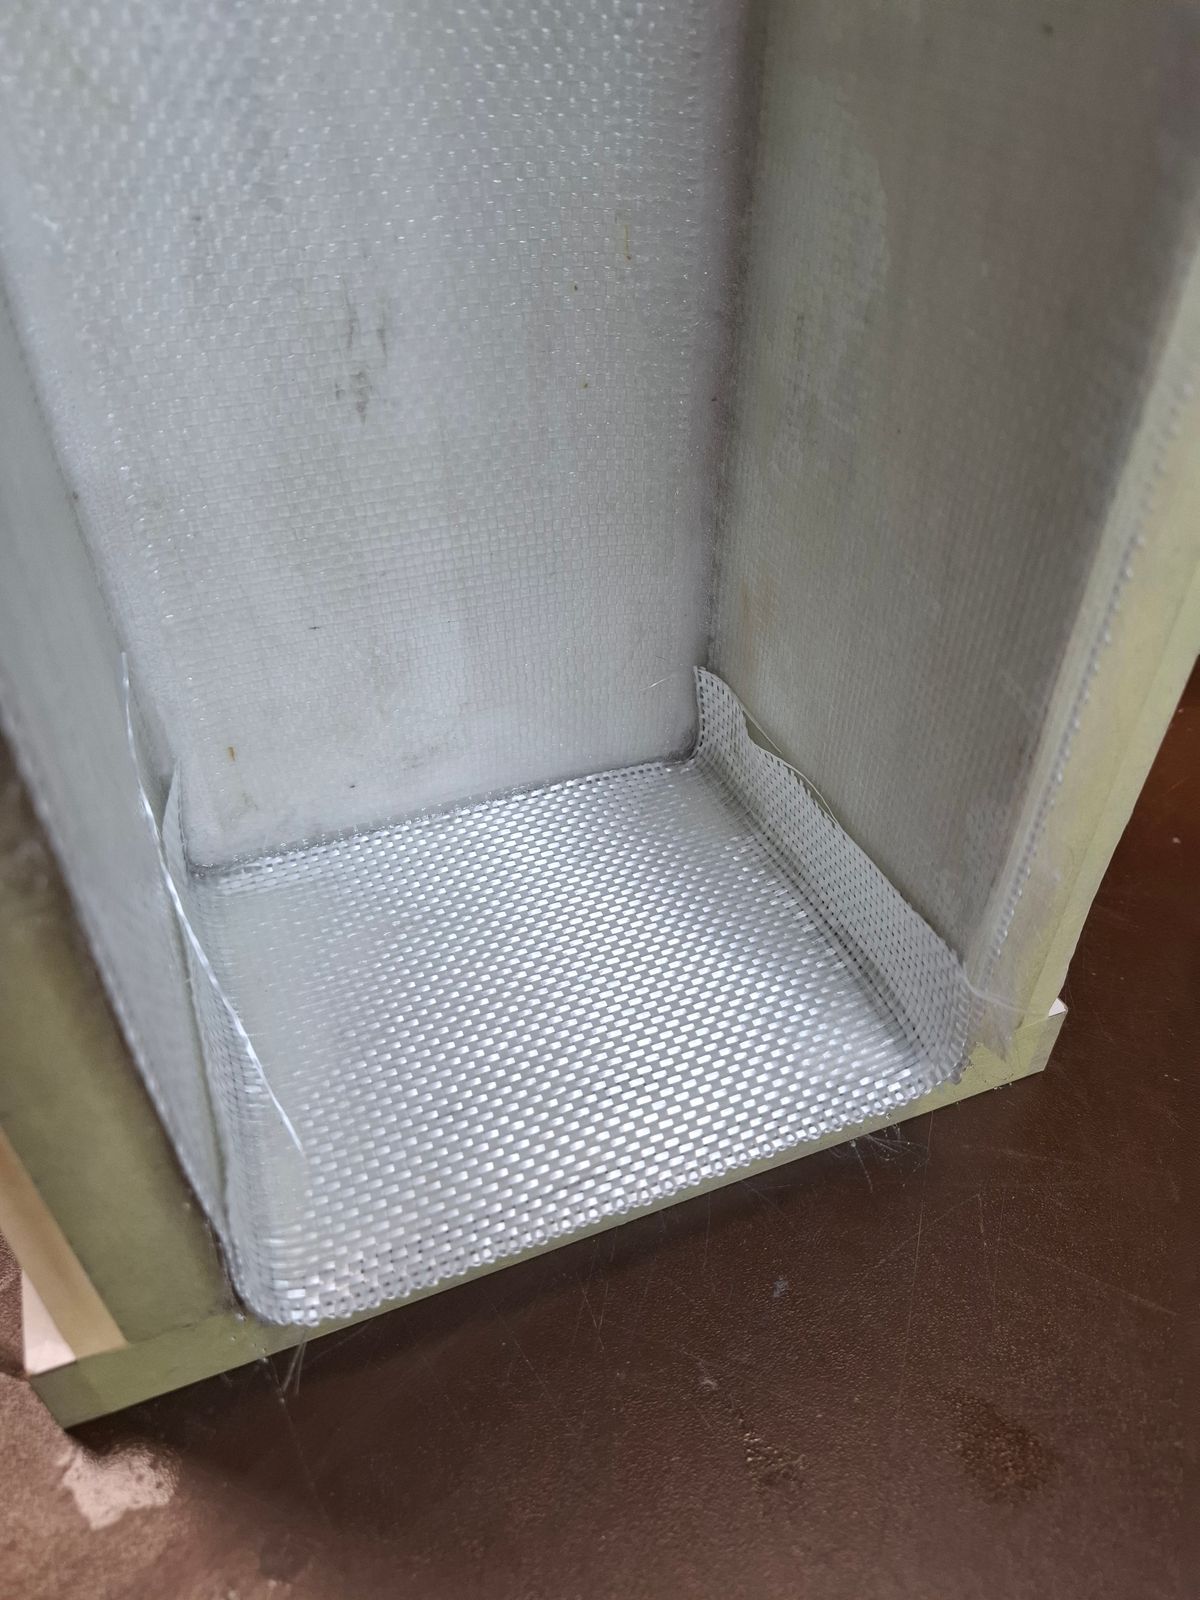
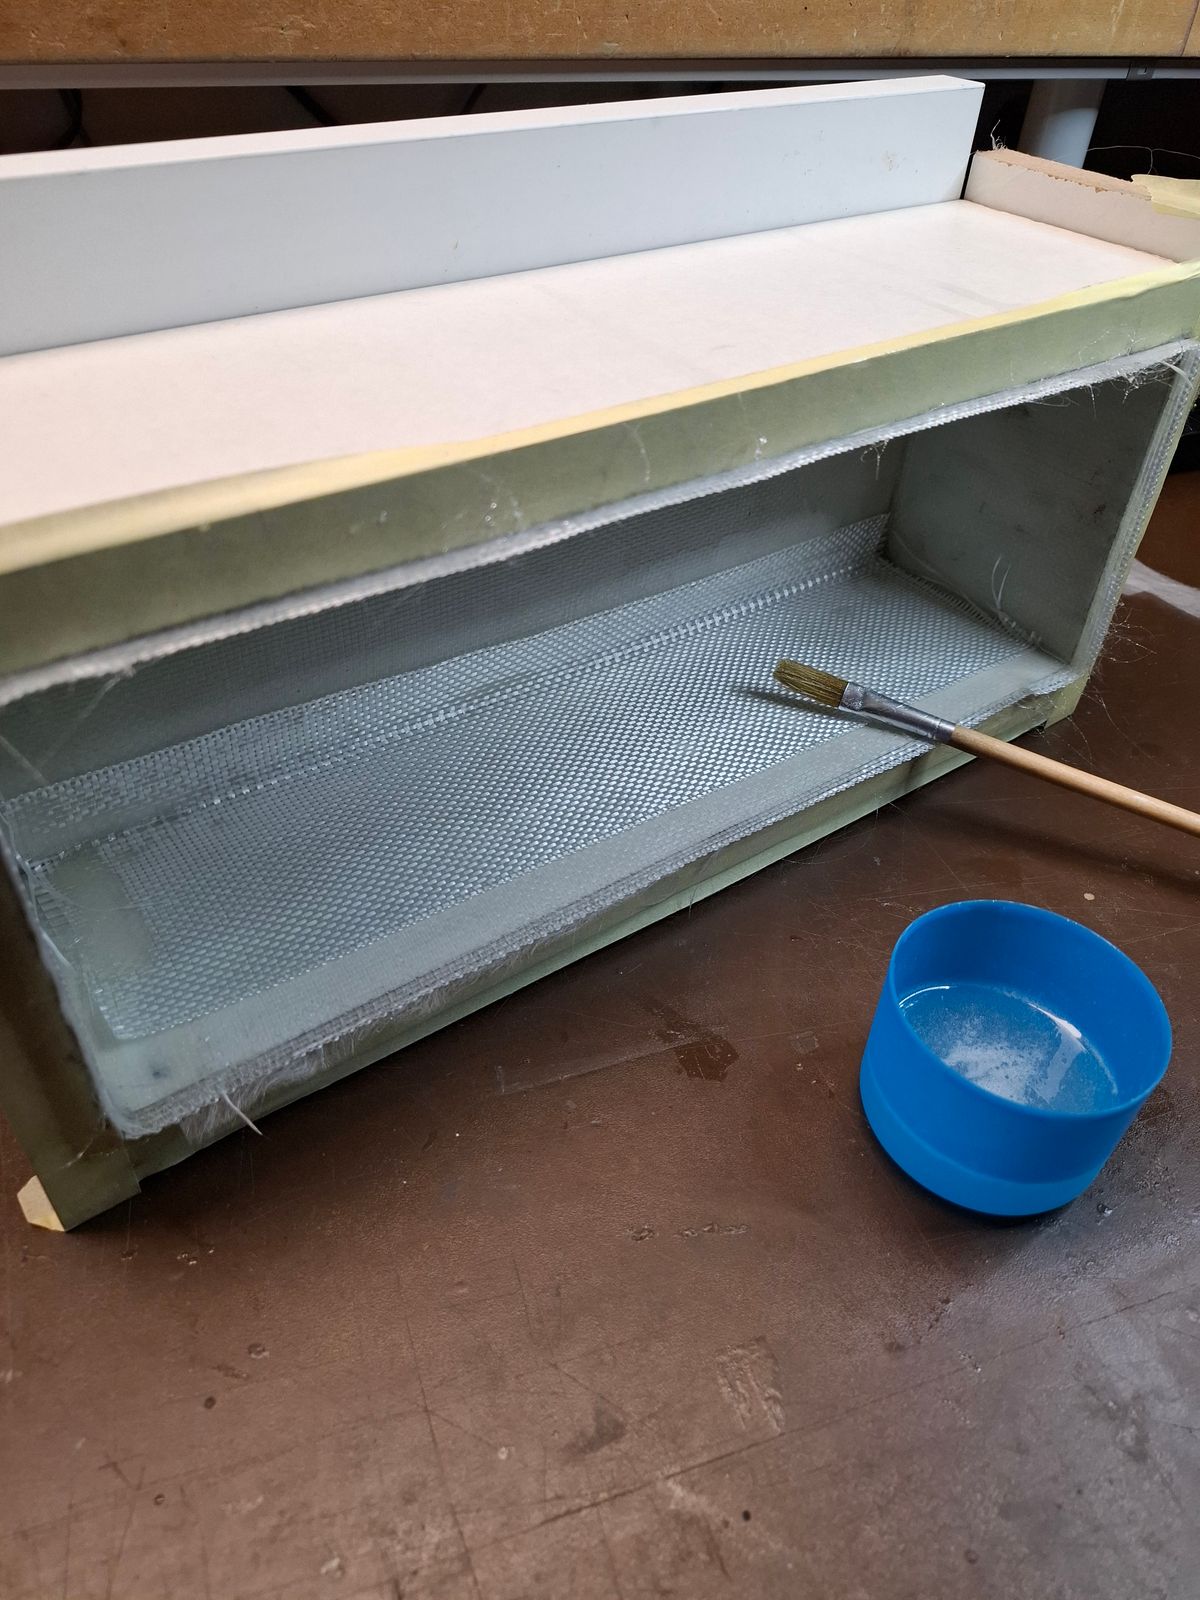
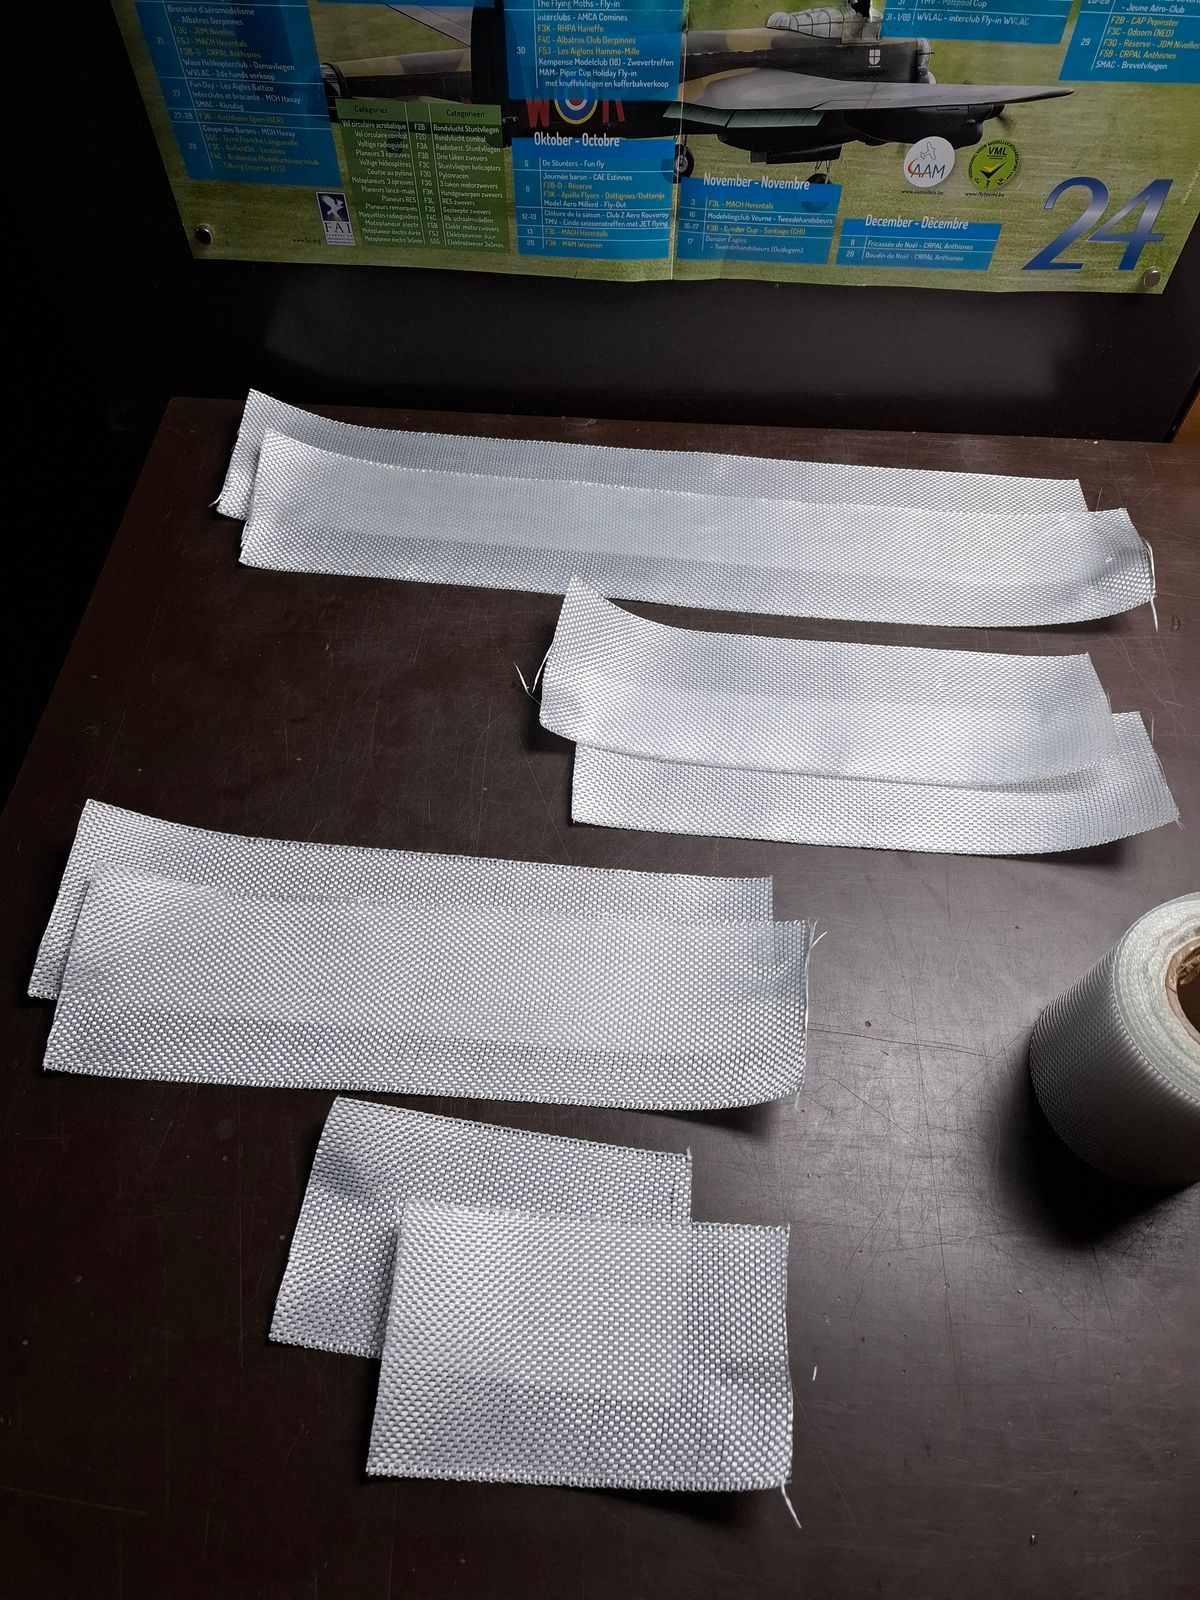
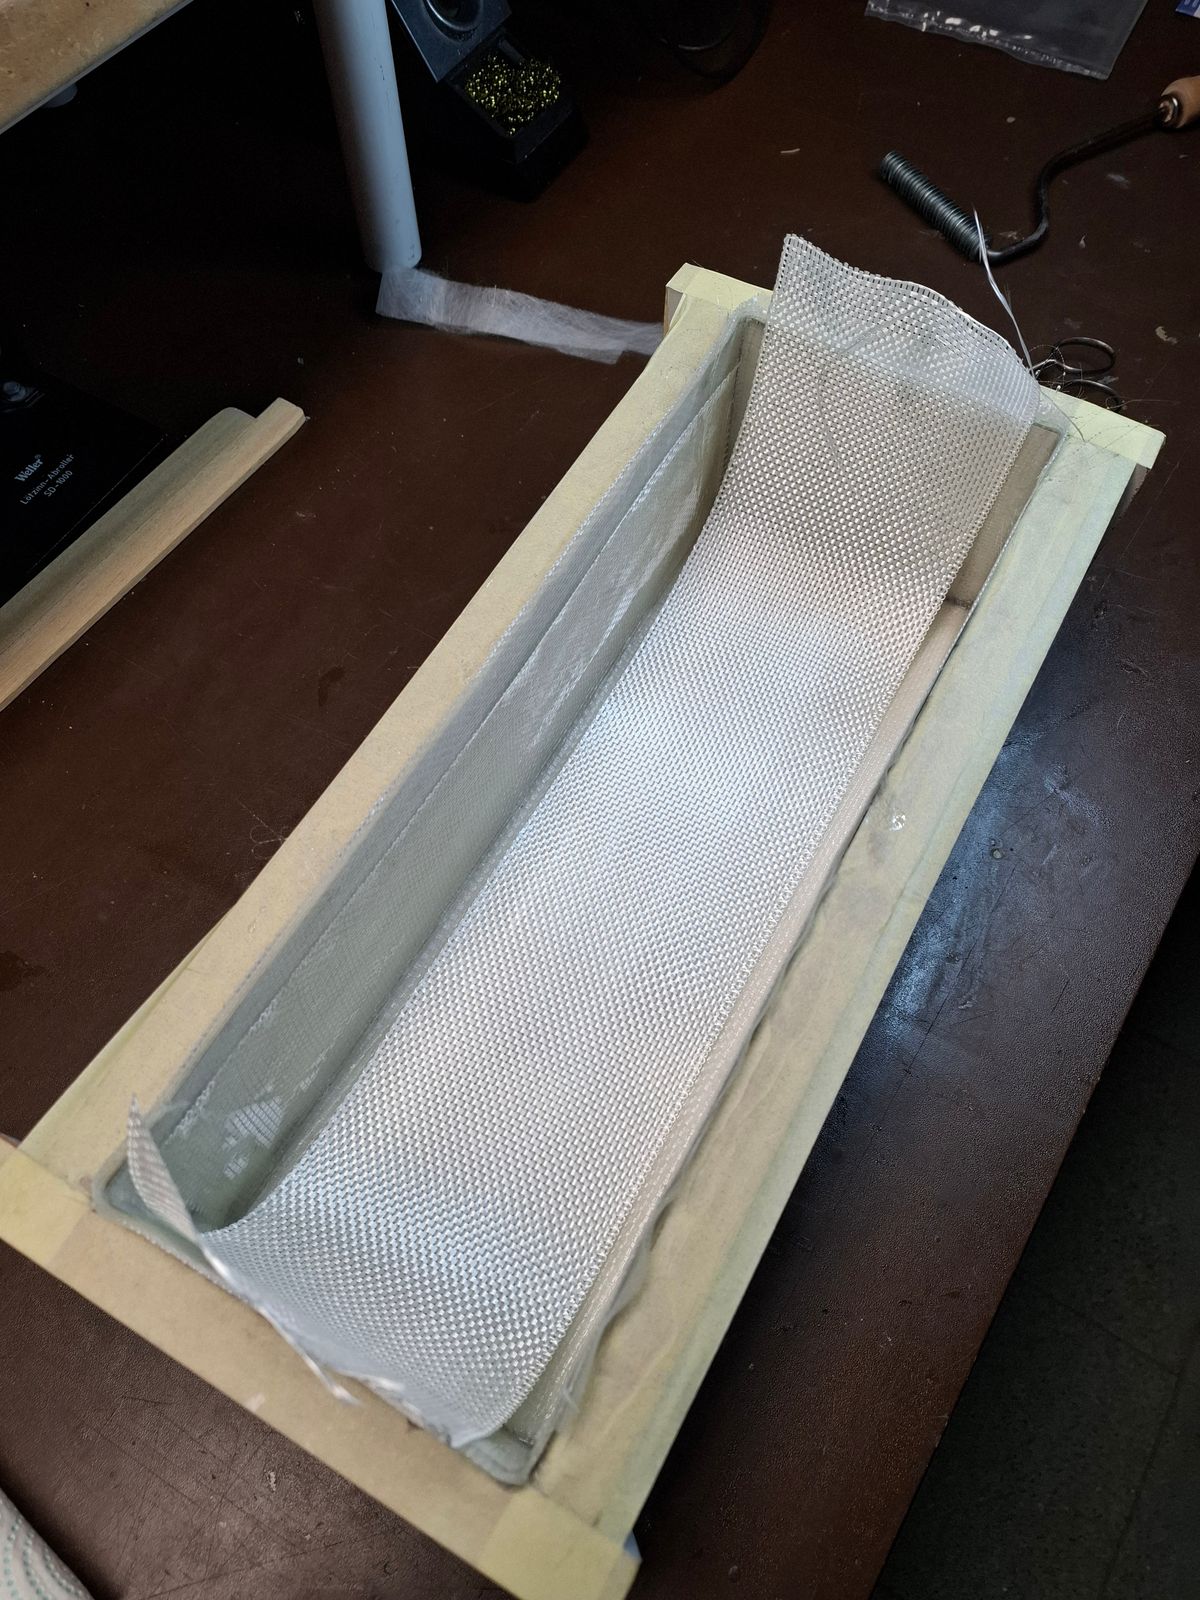
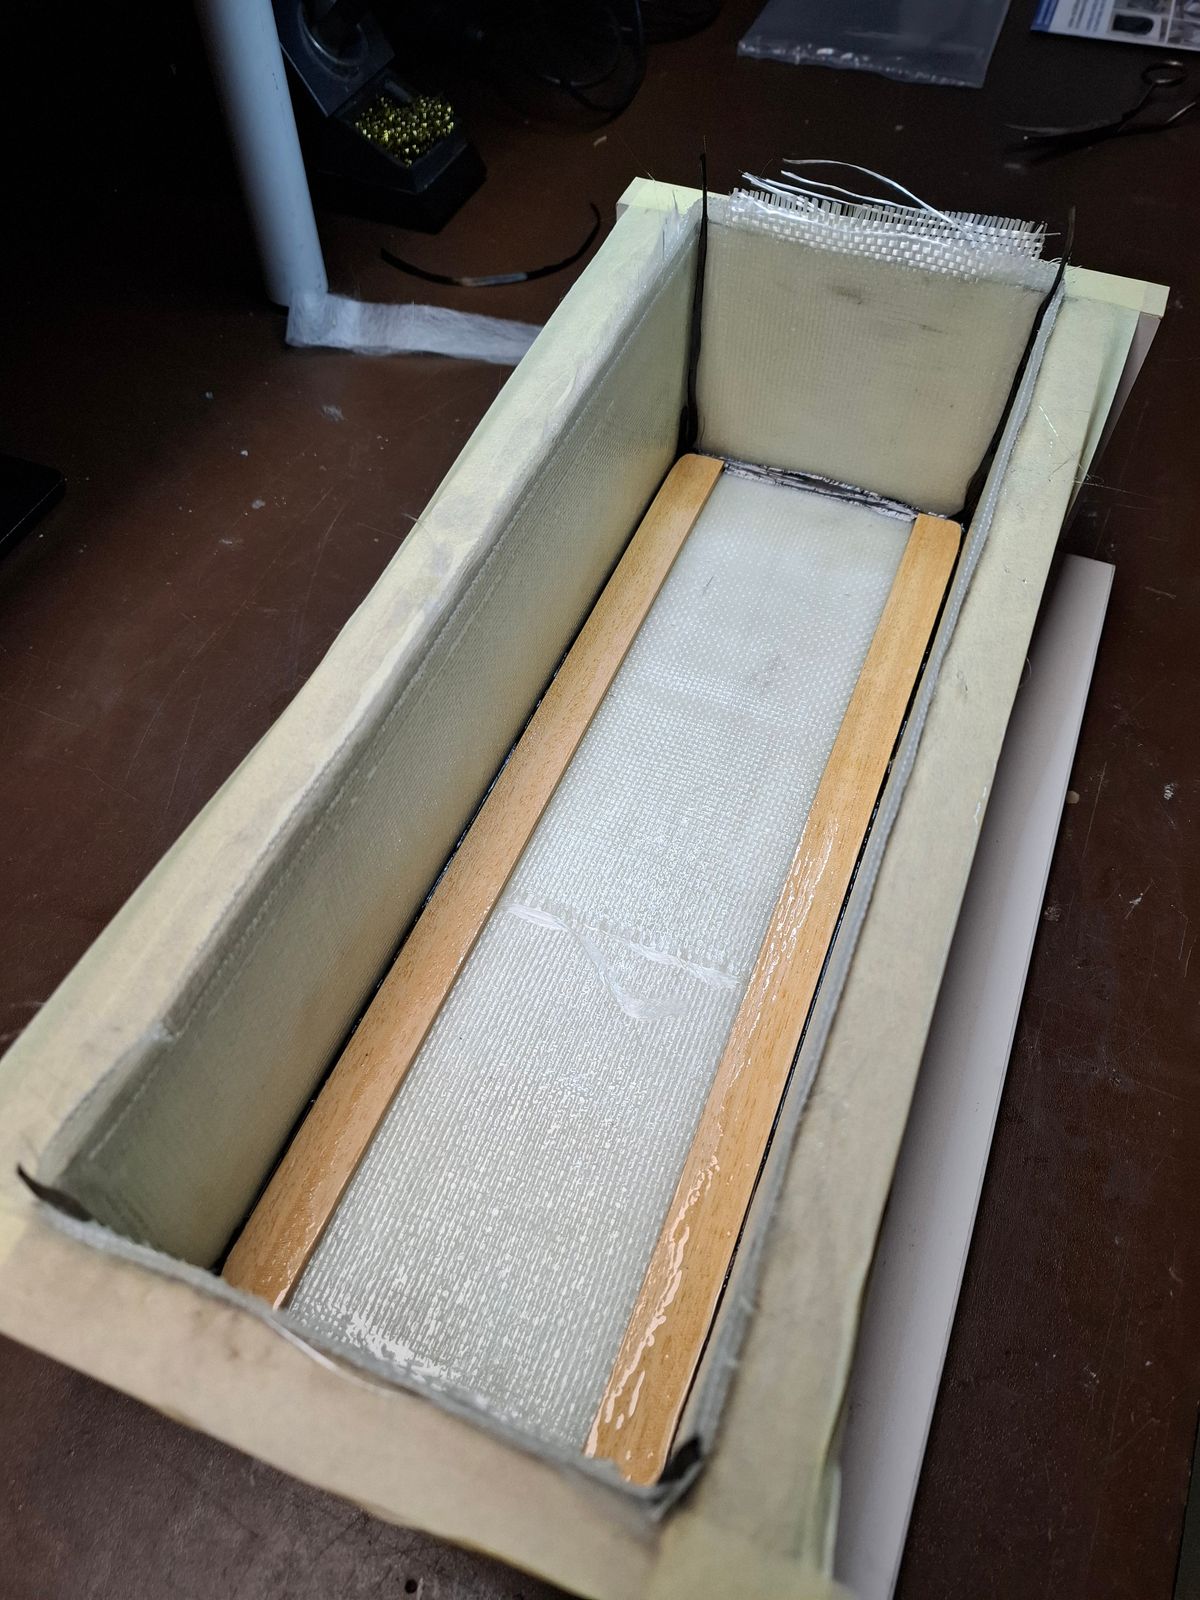
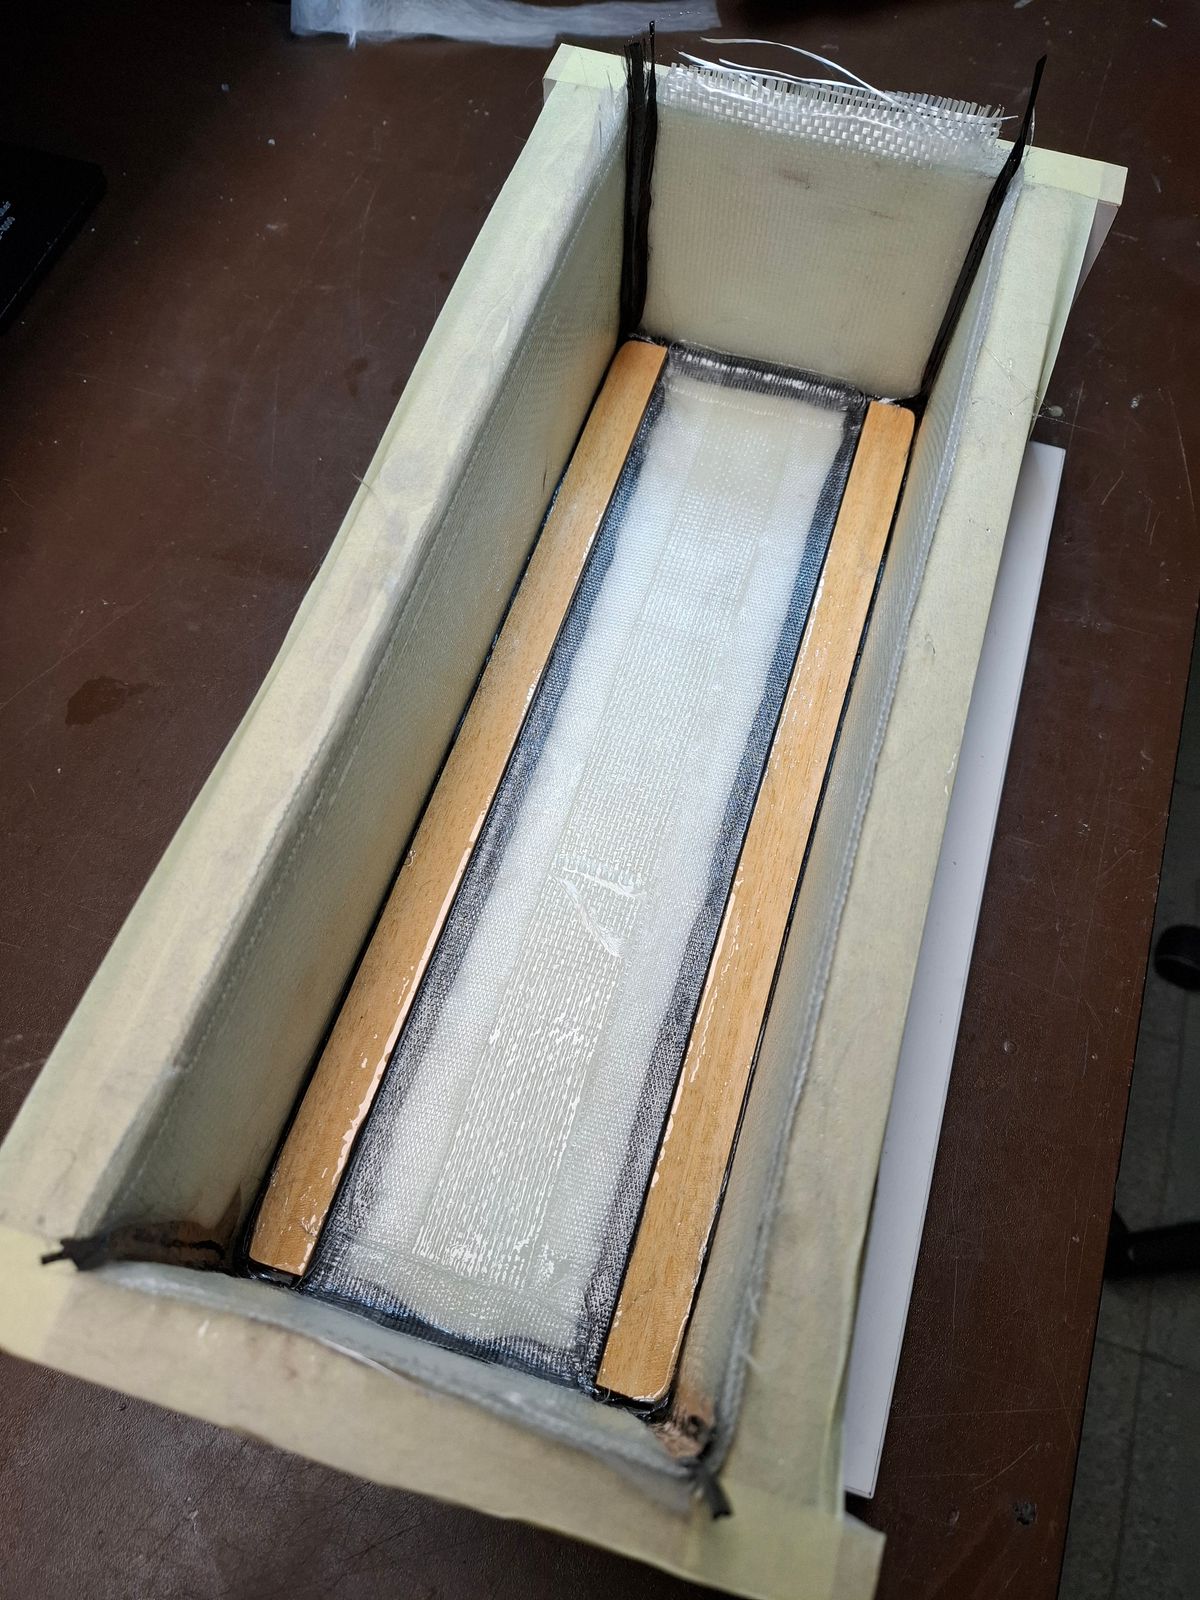
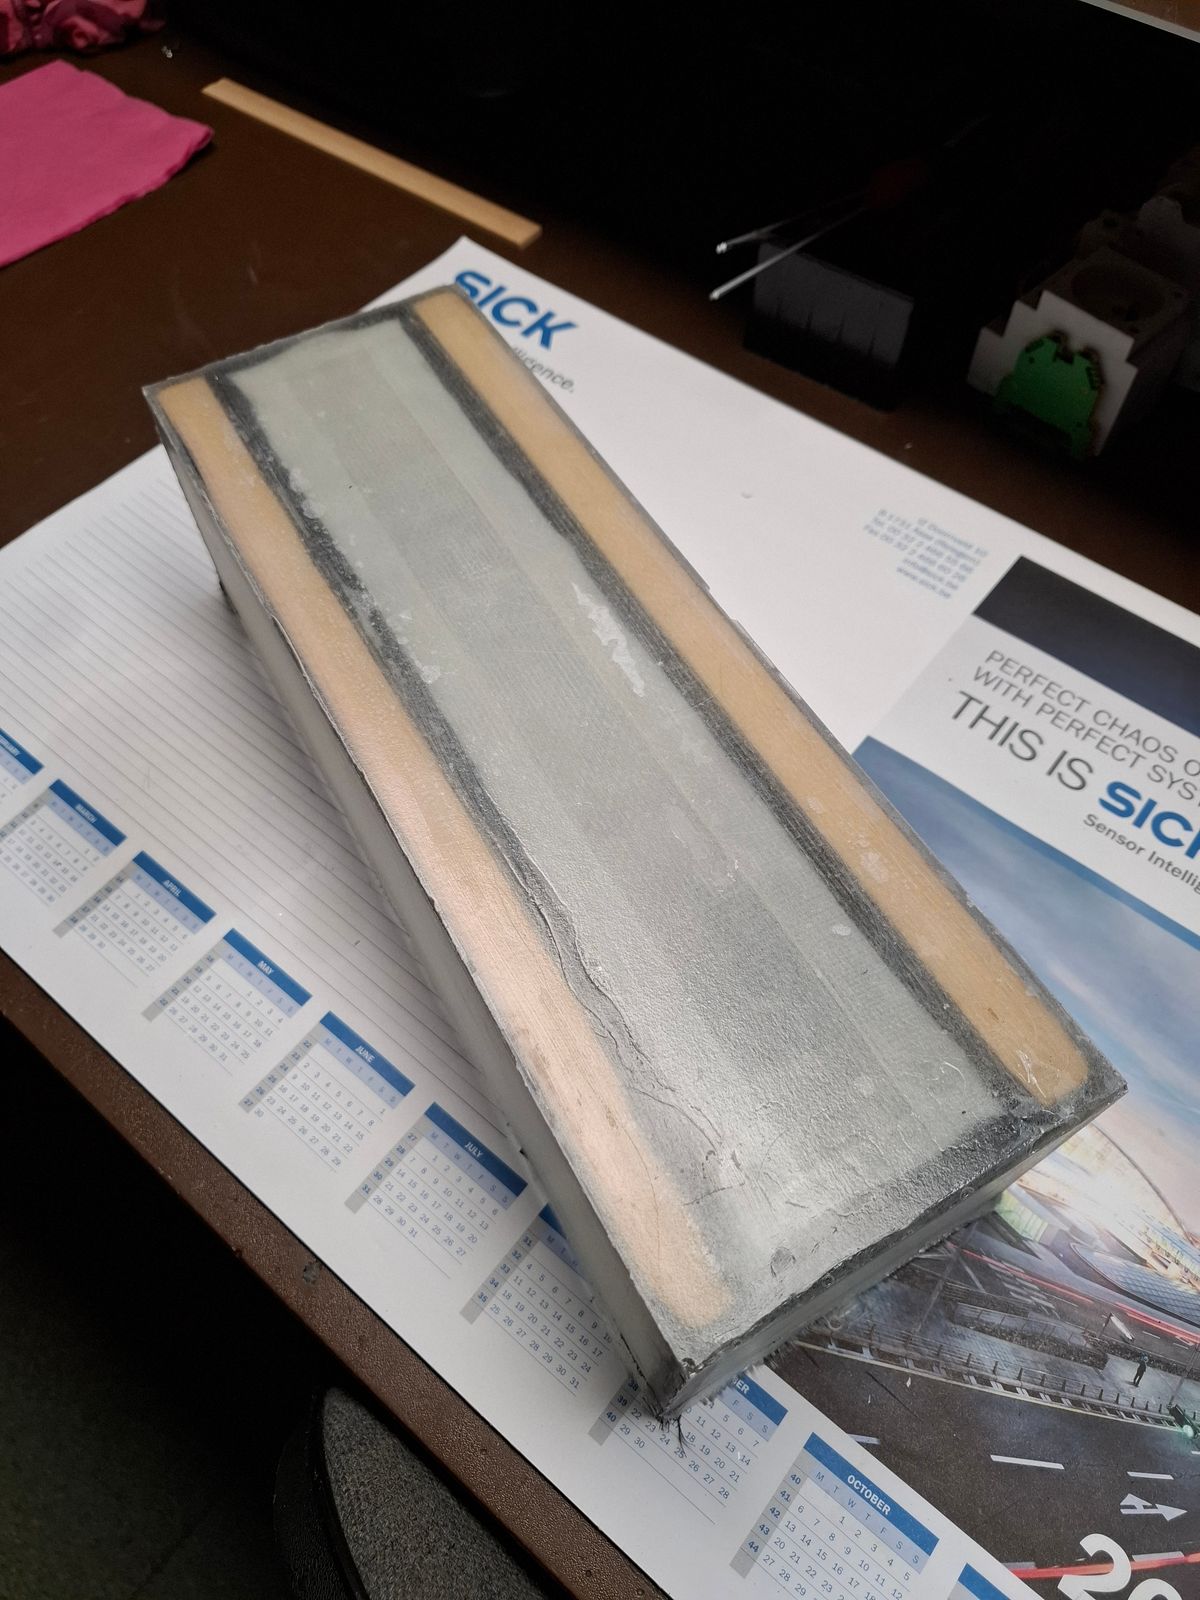
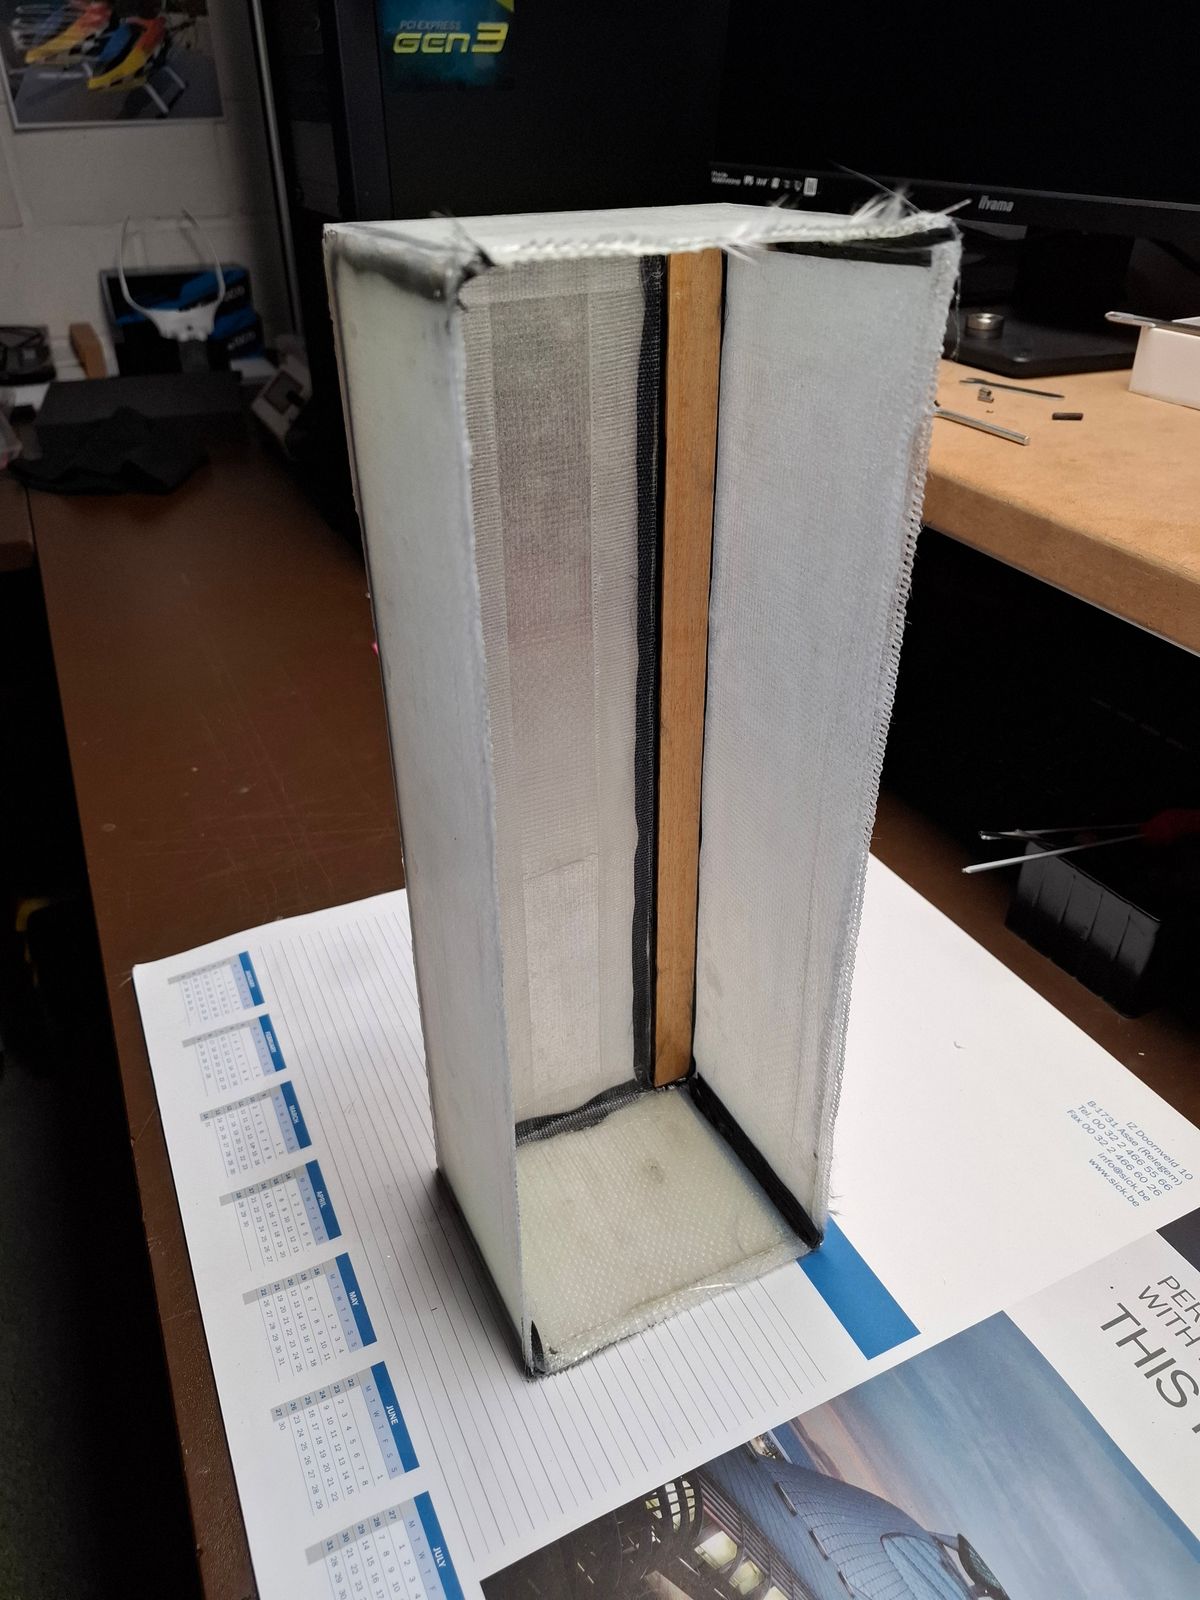
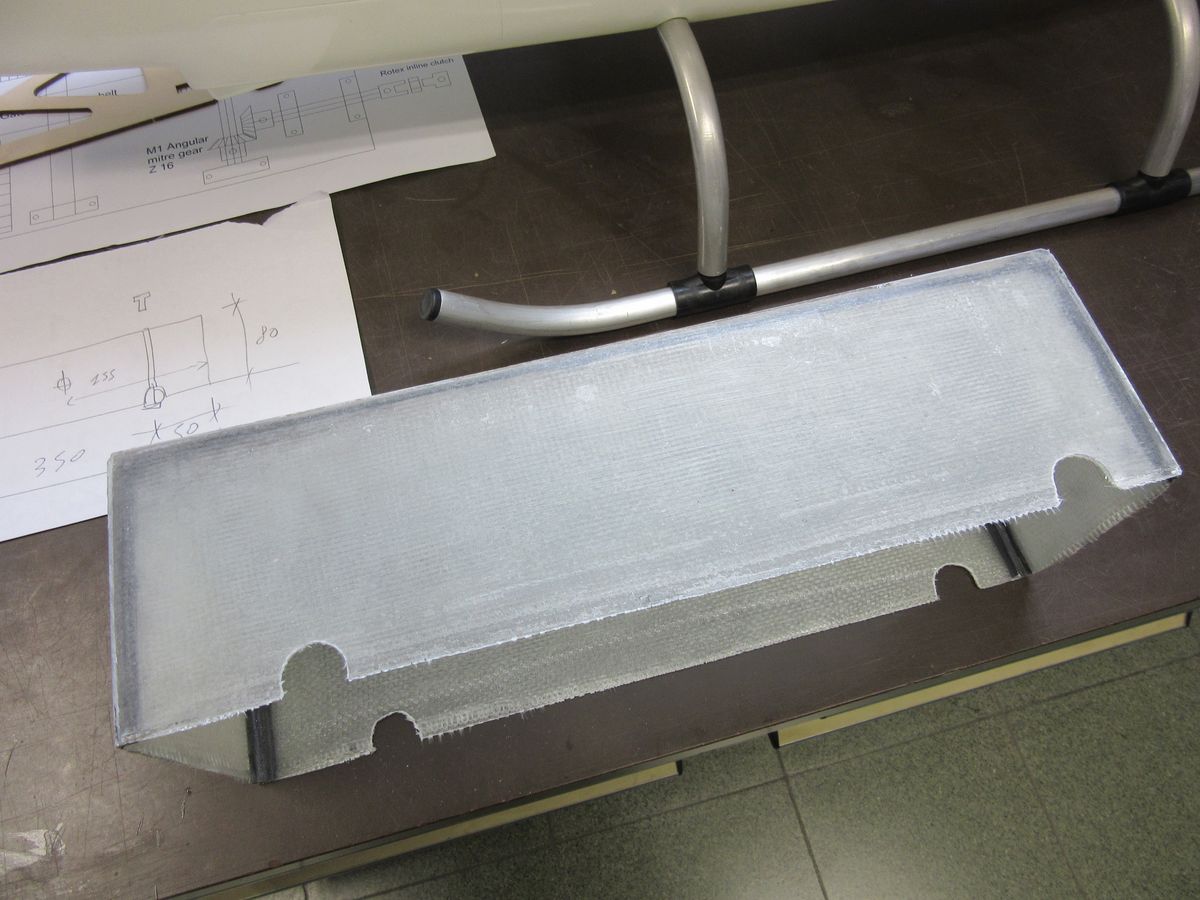
Subframe box adapting for fuselage fixture
Adapting the support box for the skid cutout.
Wooden construction vs fiberglass box,
One part glasfiber Box is structural strength is all directions.
The two wooden strips inside the box will have multiple Nut inserts for mechanic fixture.
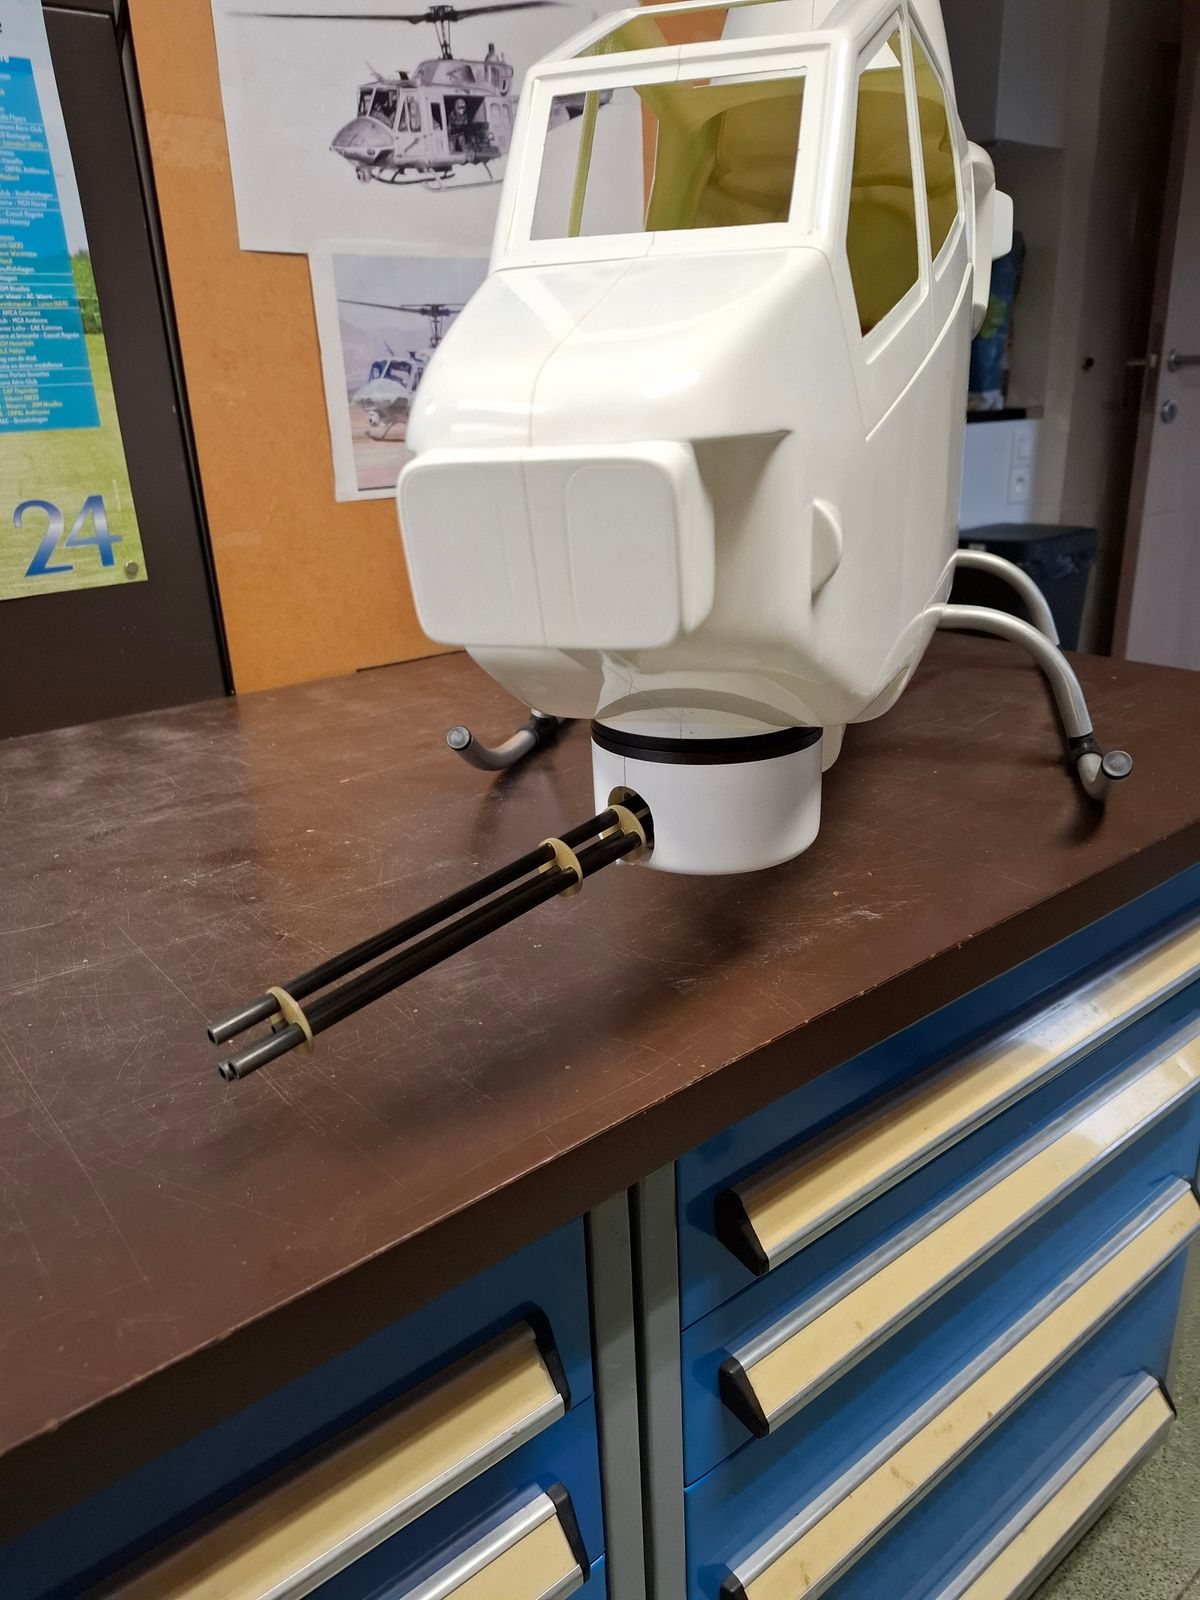
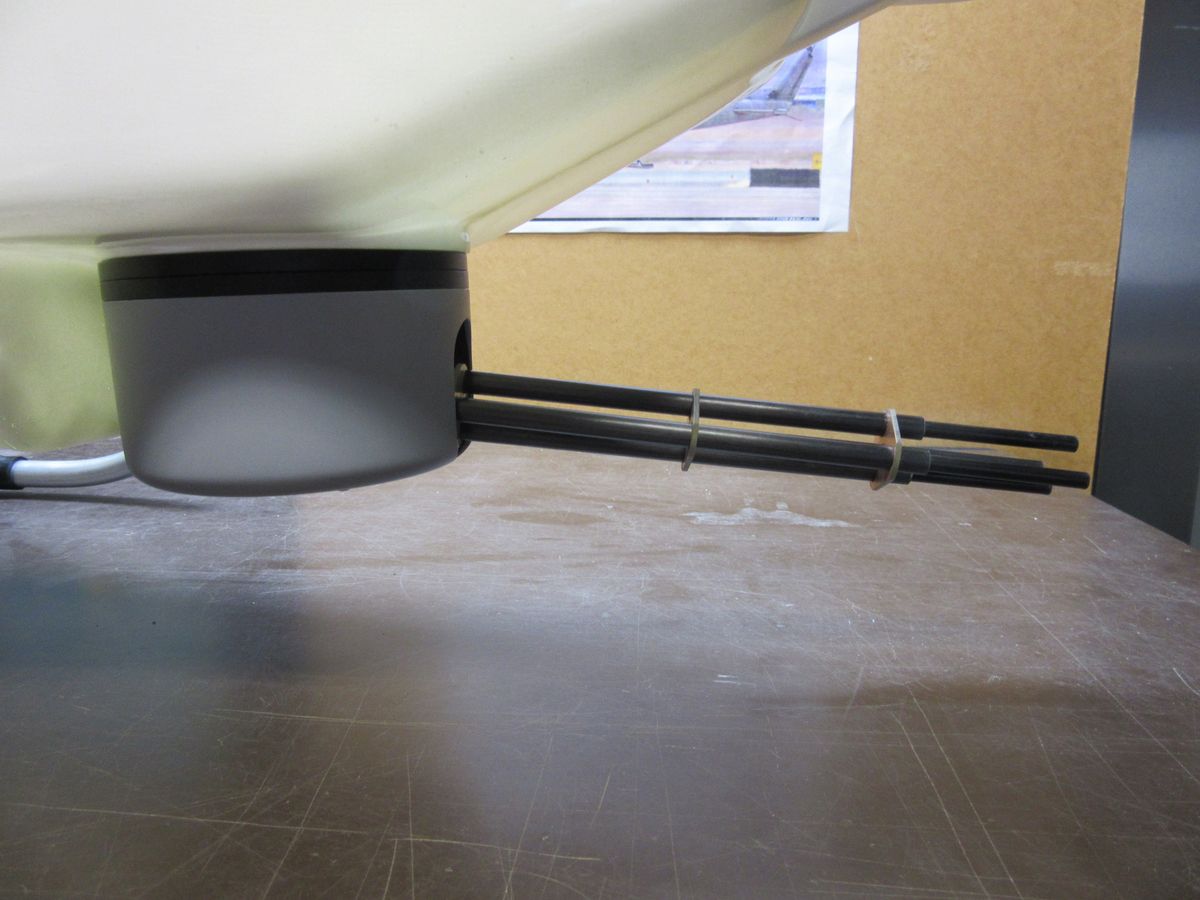
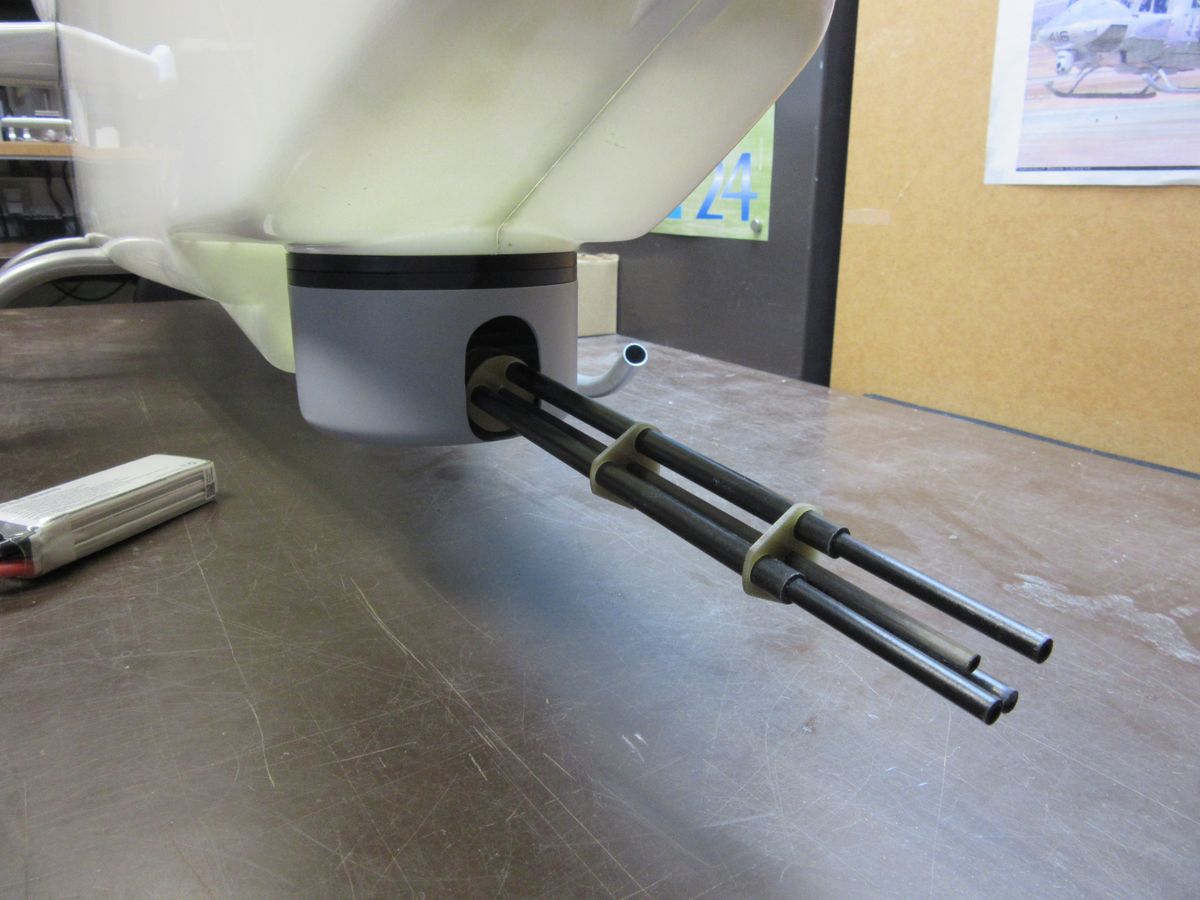
Front gun Cobra
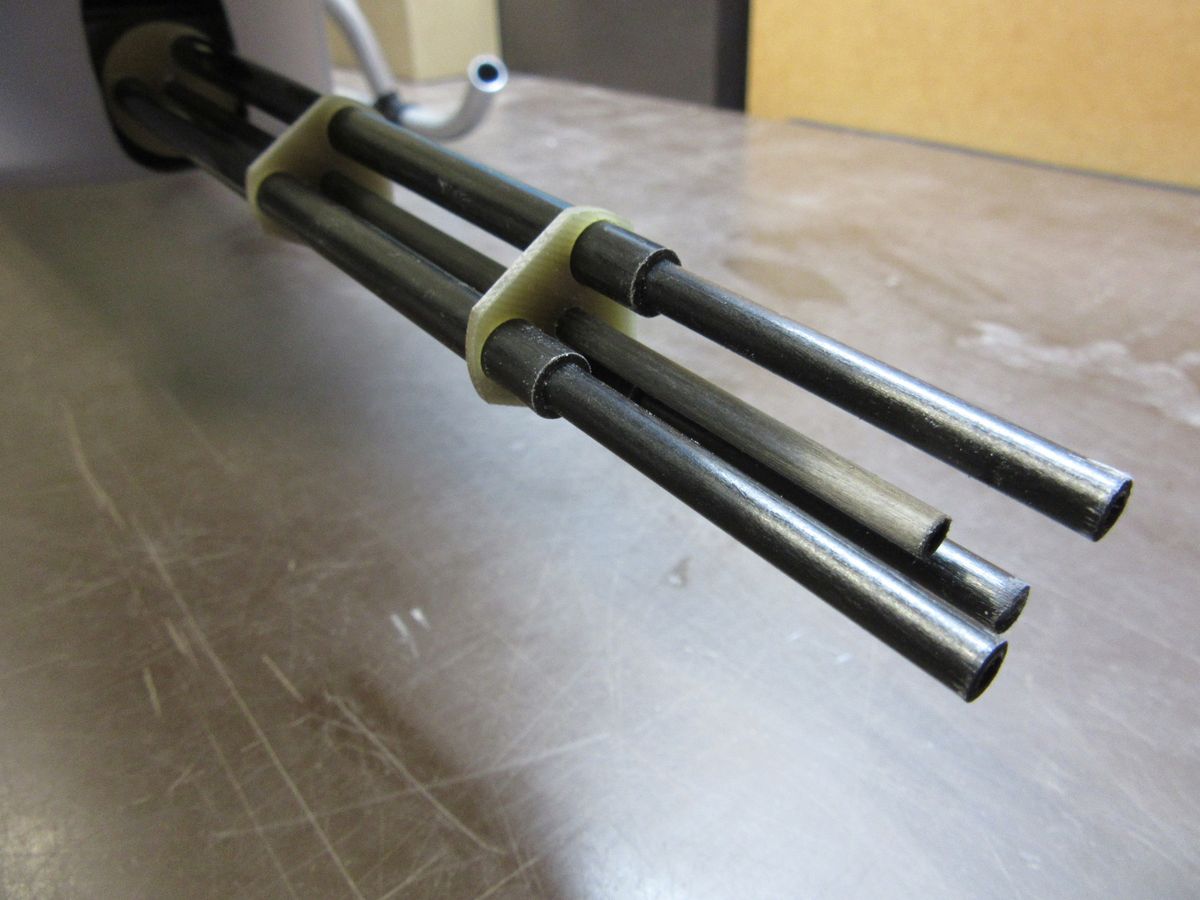
Making the front gun of the Cobra.
Full Alu - carbon construction.
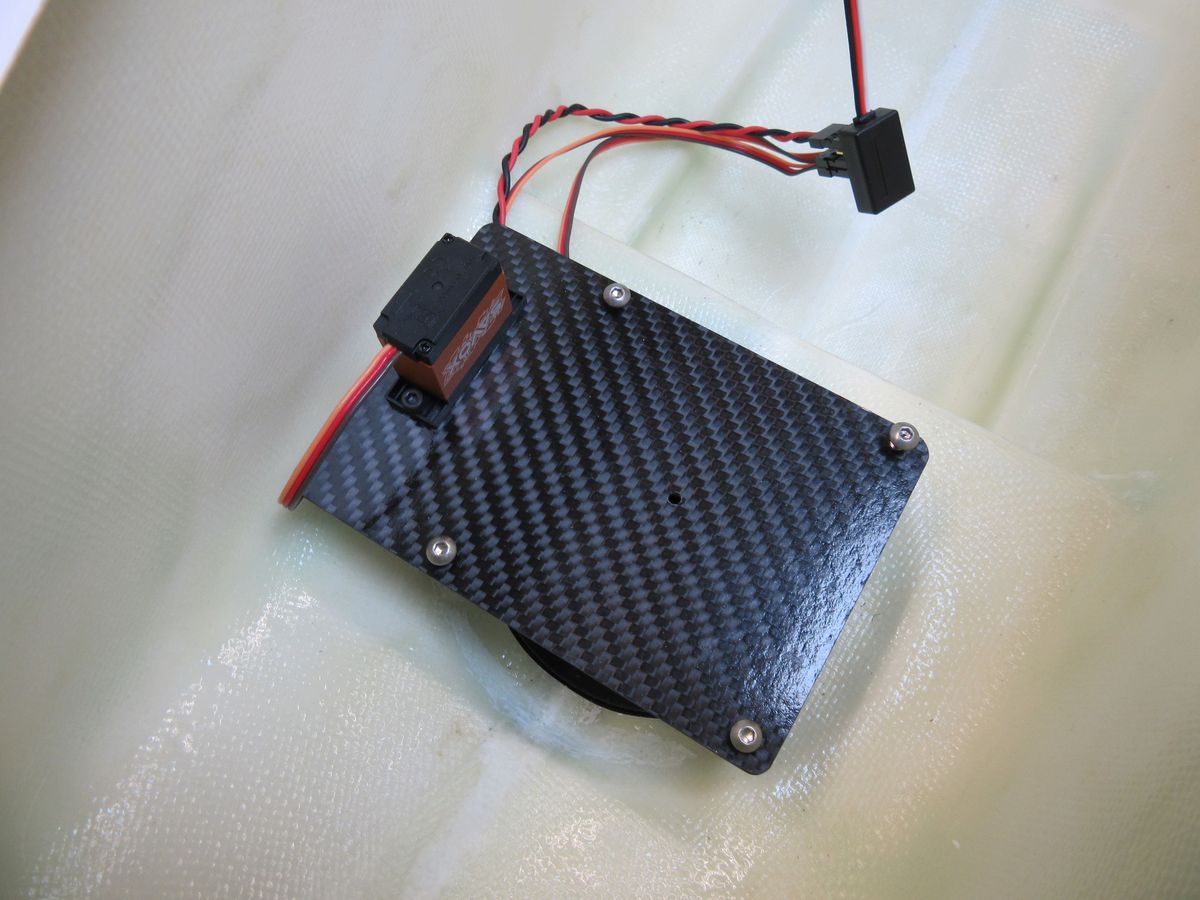
Servo driven motion on rotation of the barrel
Servo has to be adapted for continu rotation.
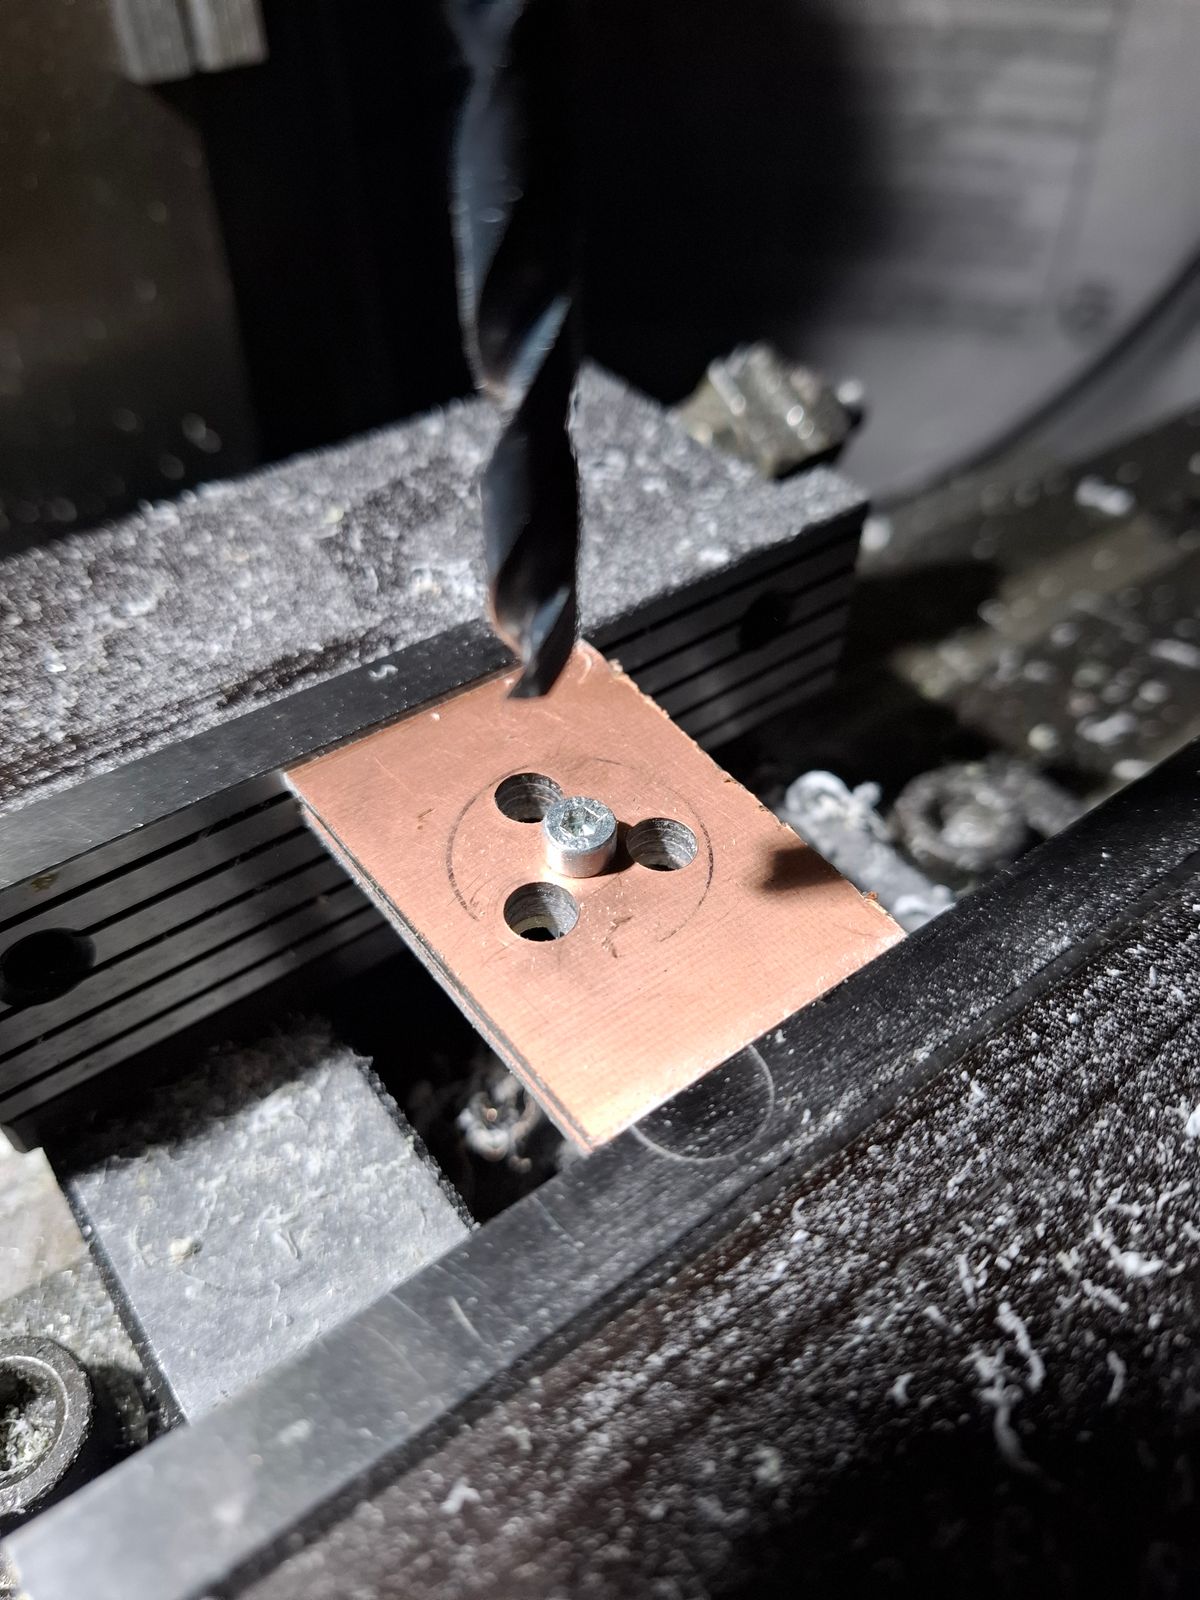
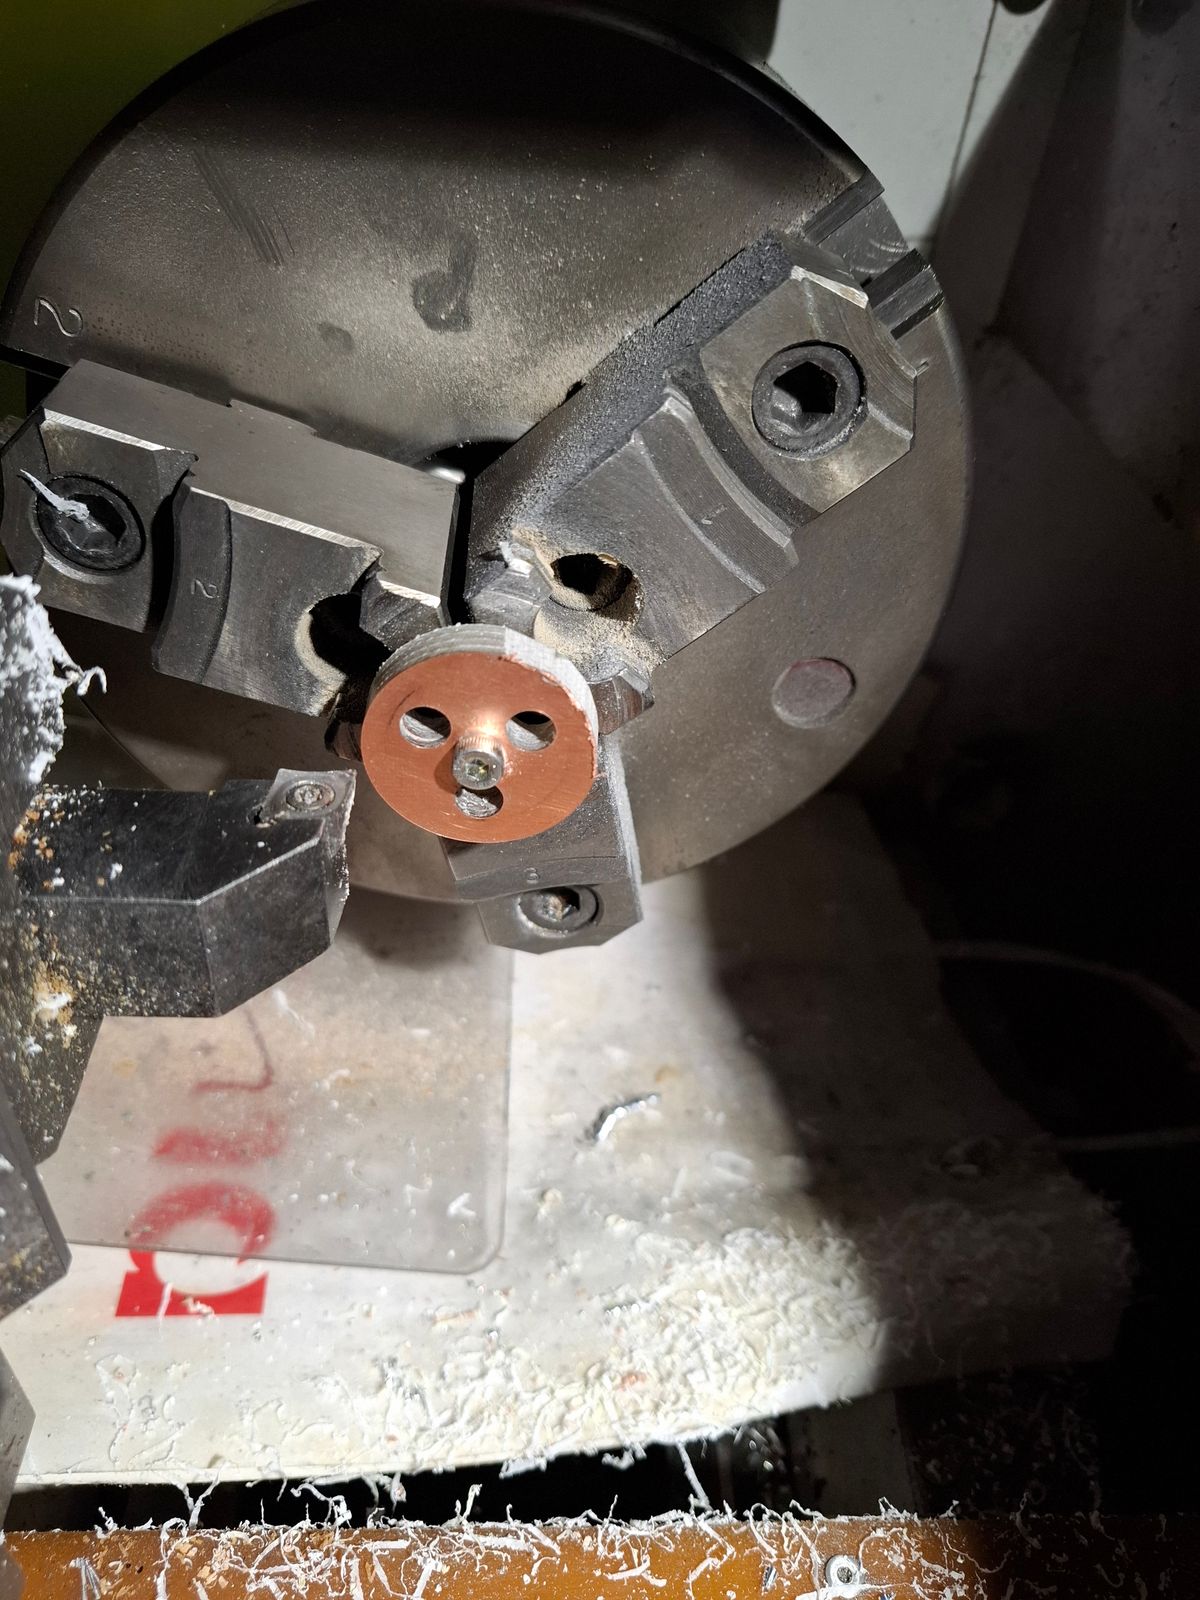
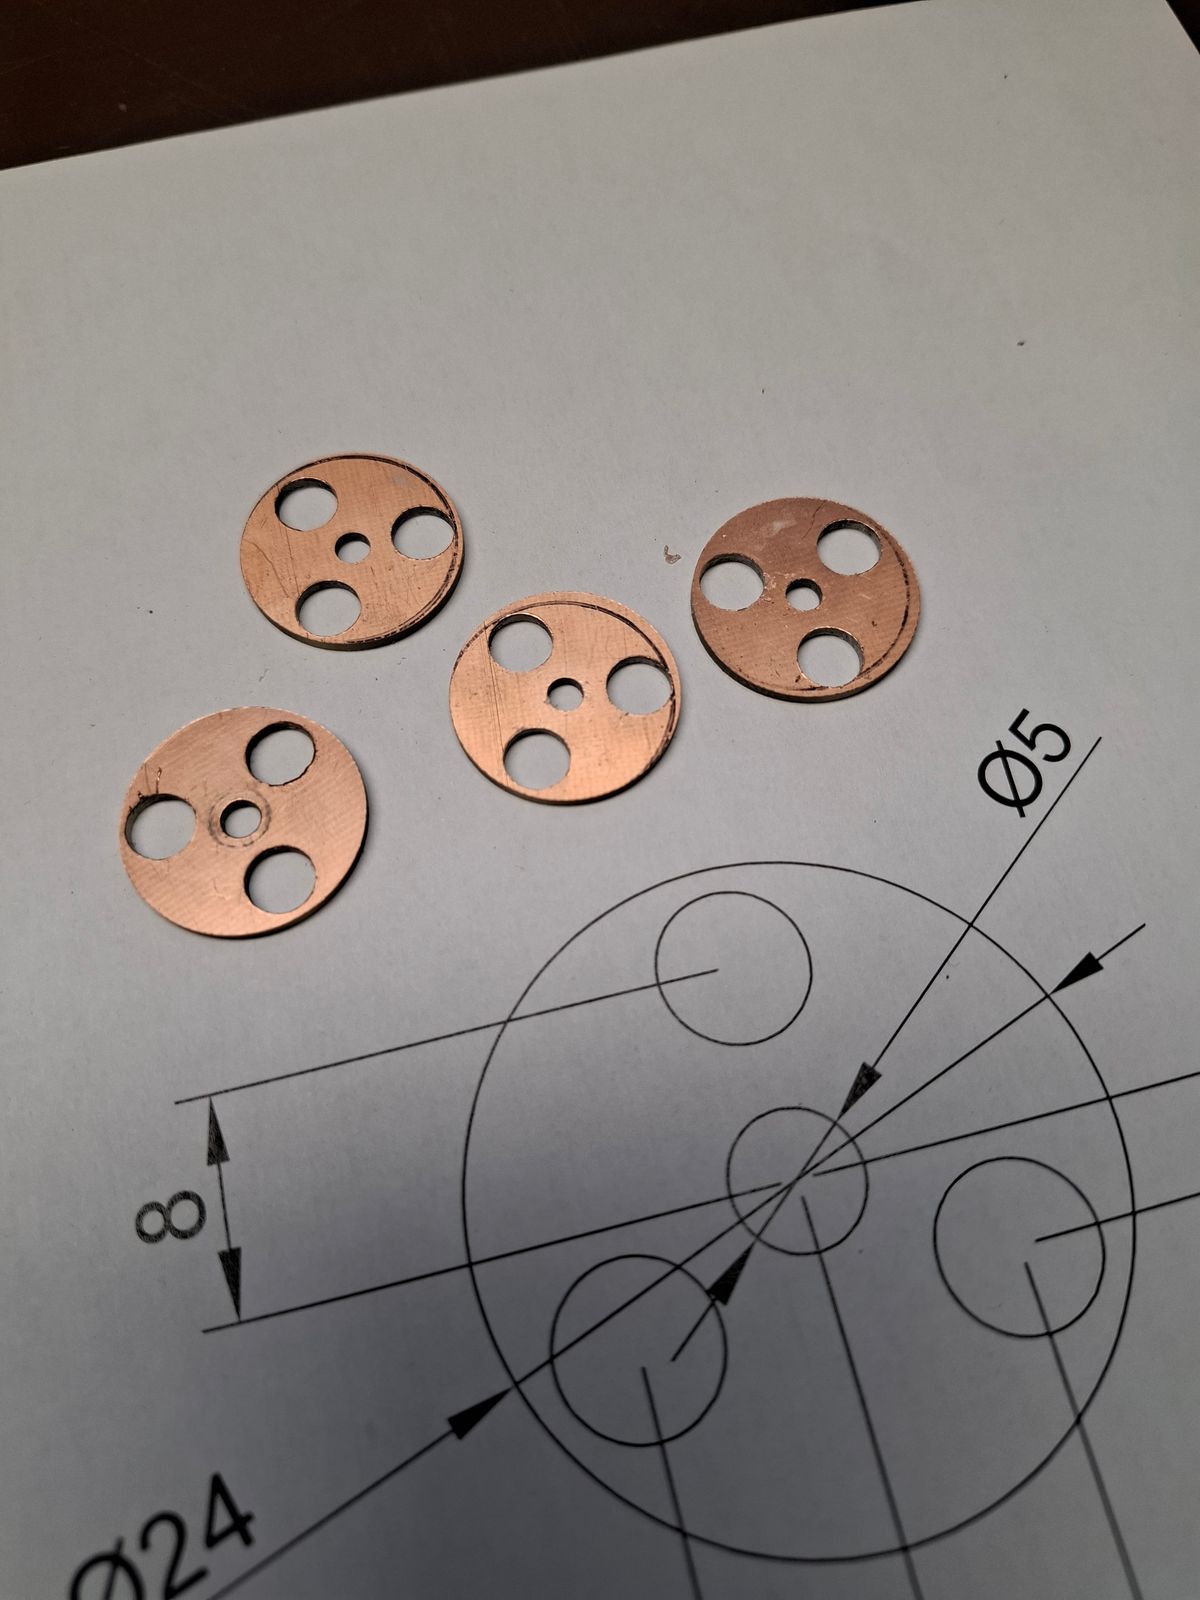
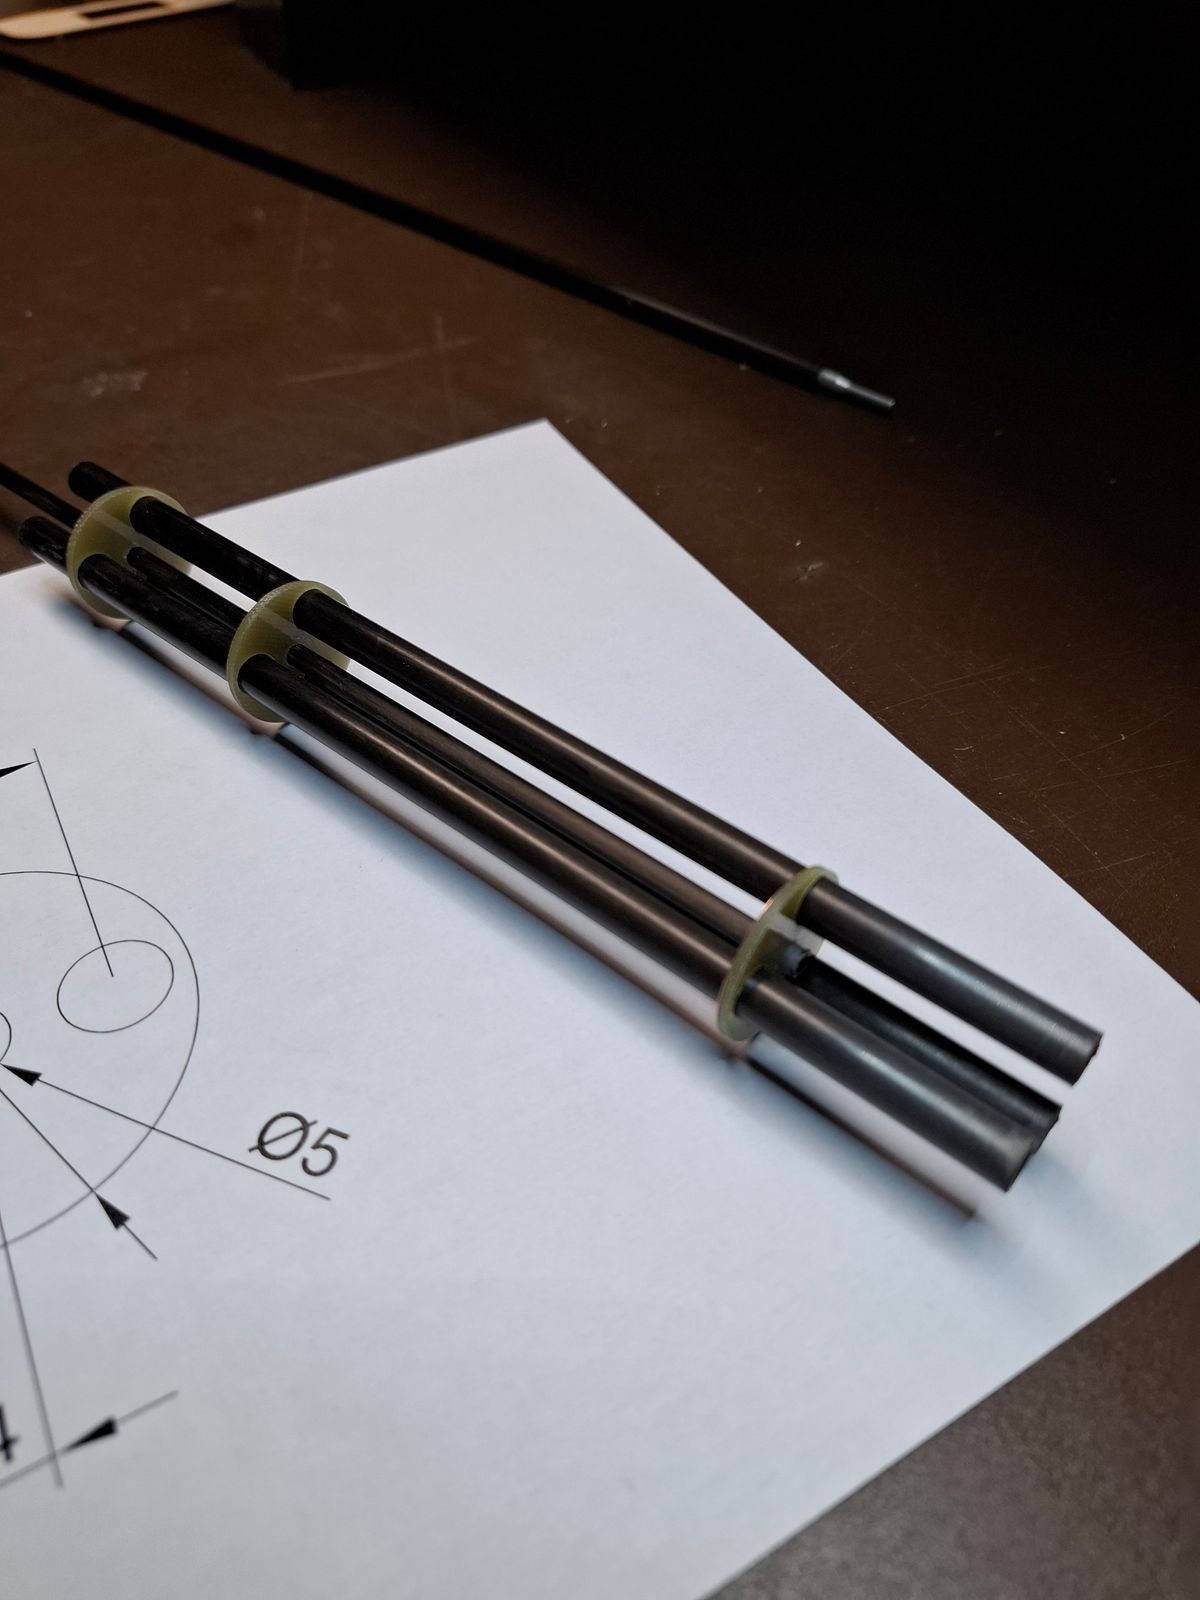
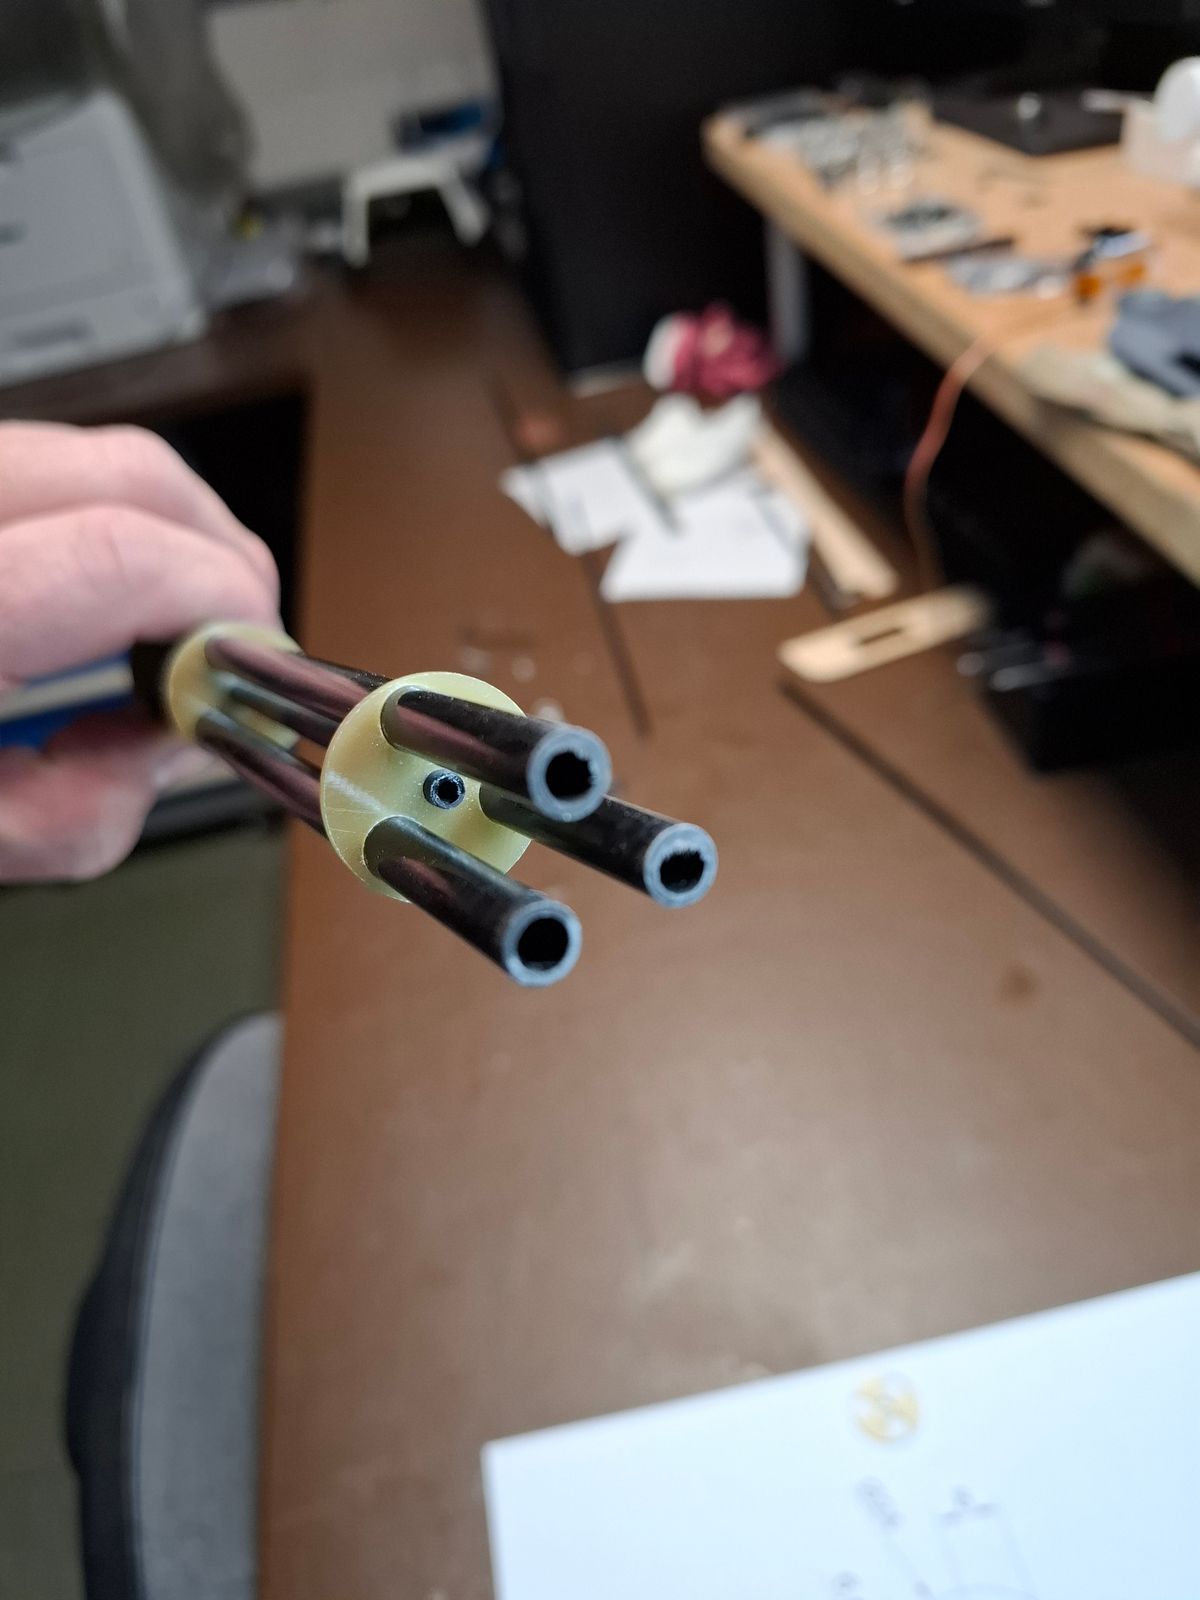
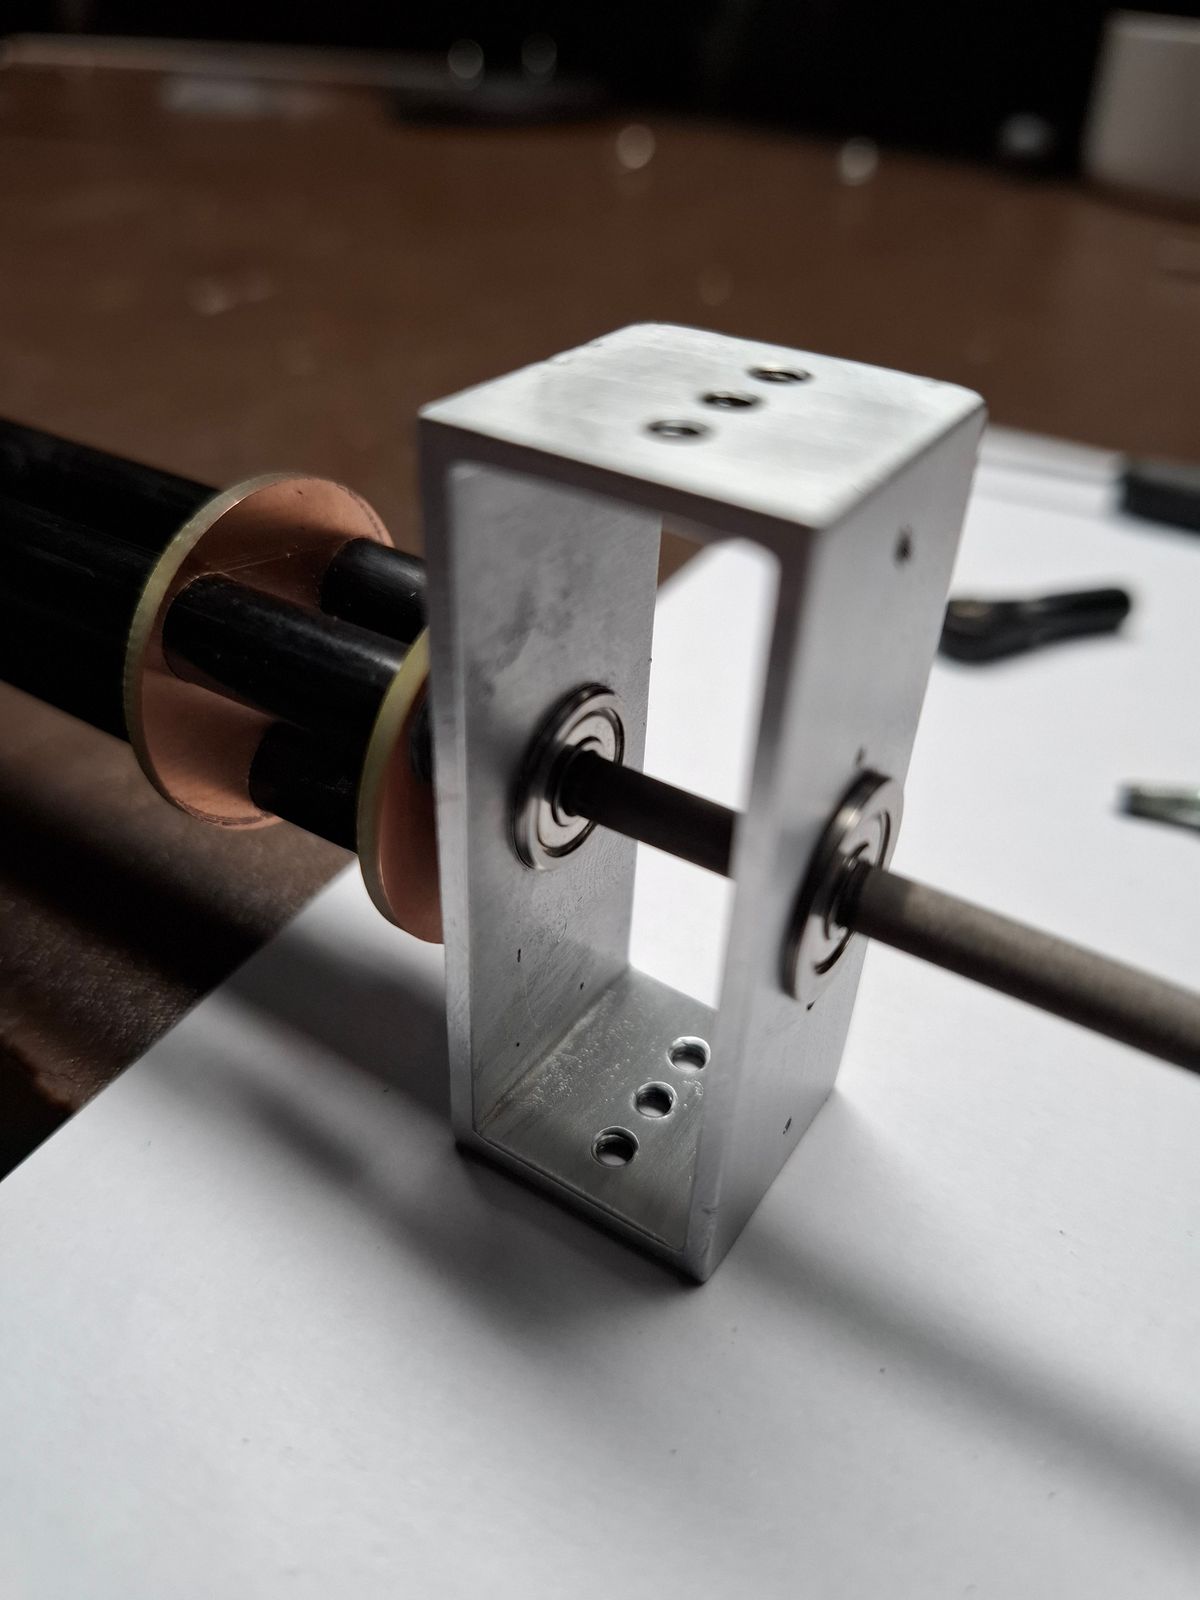
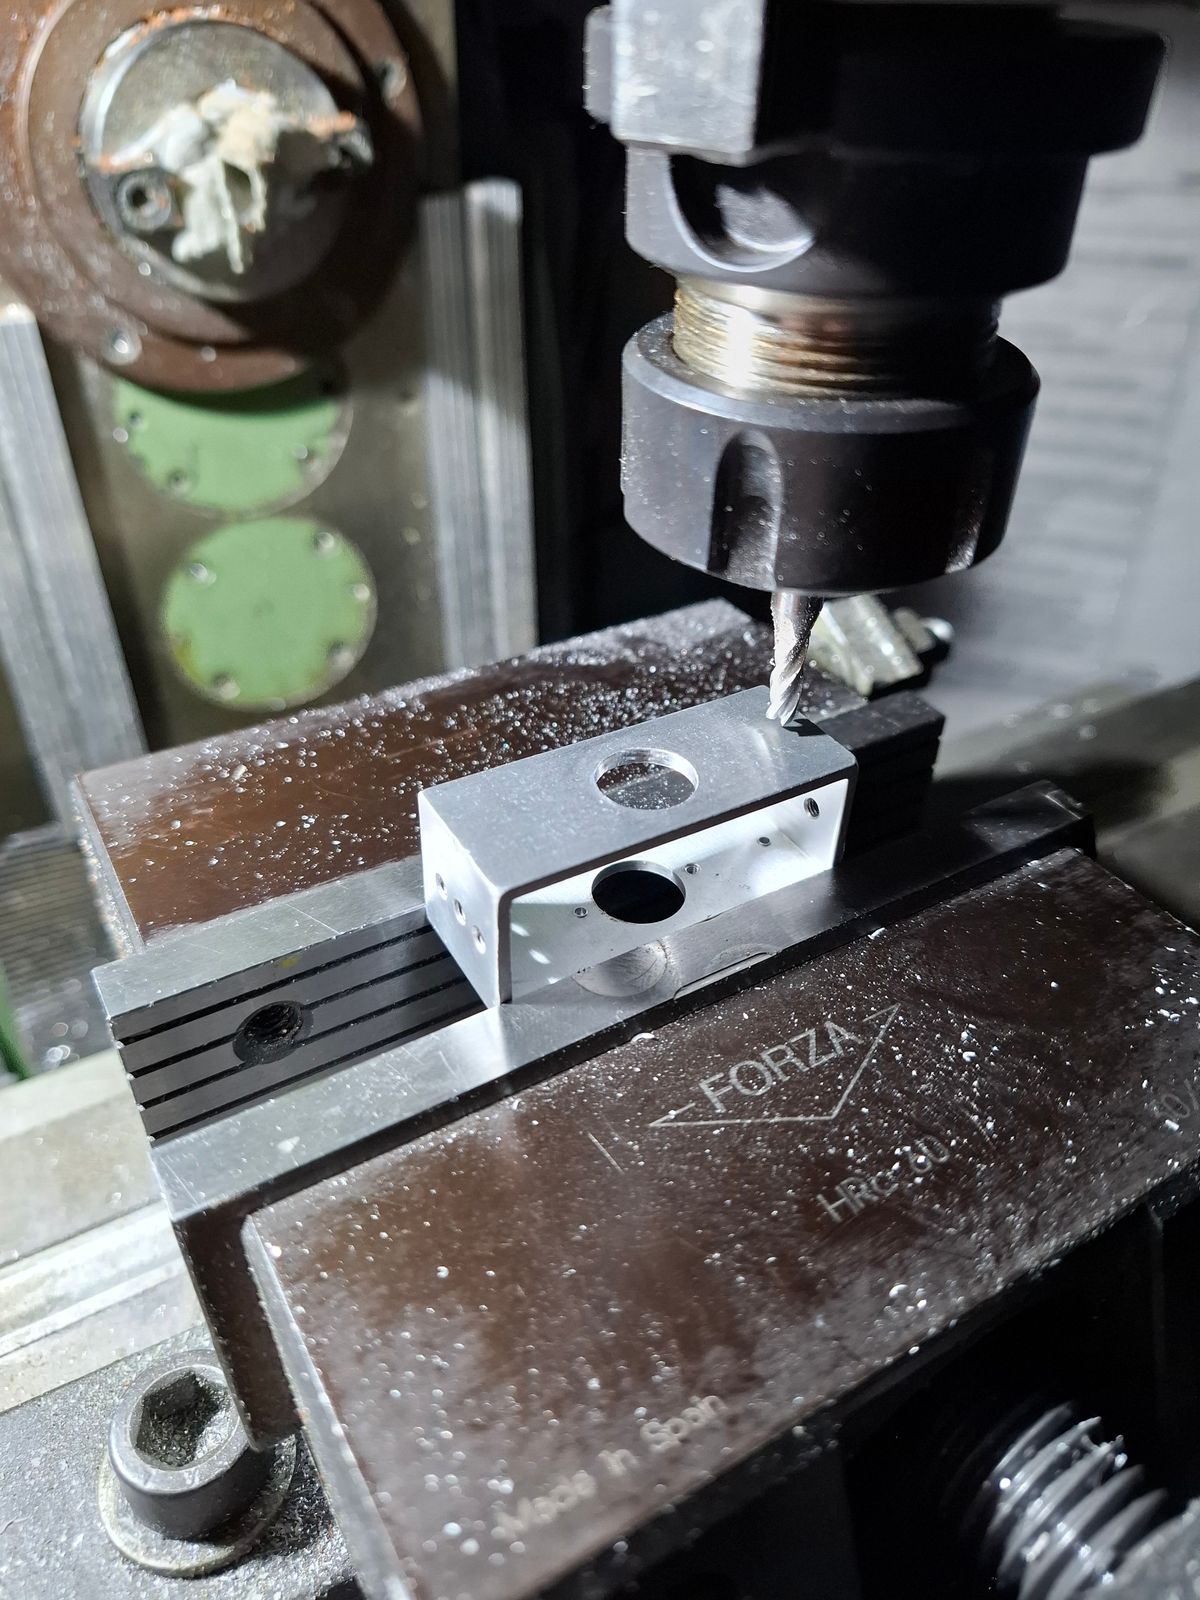
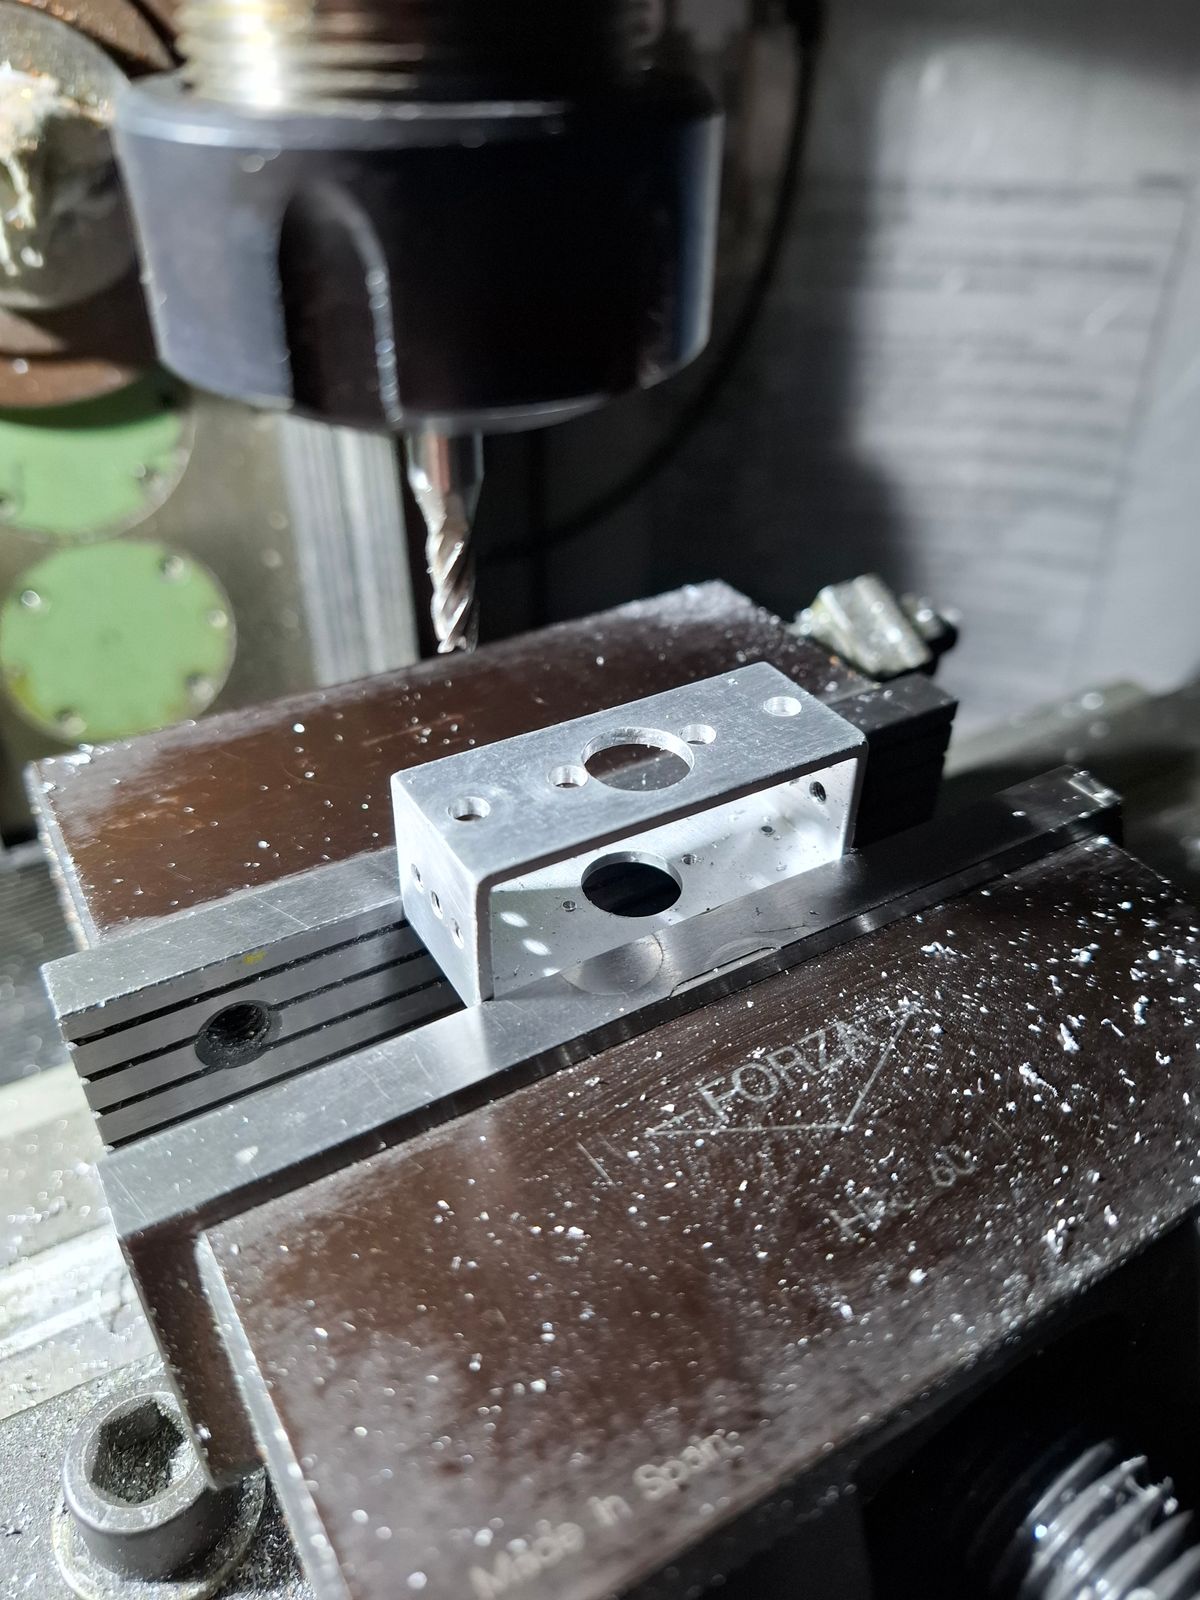
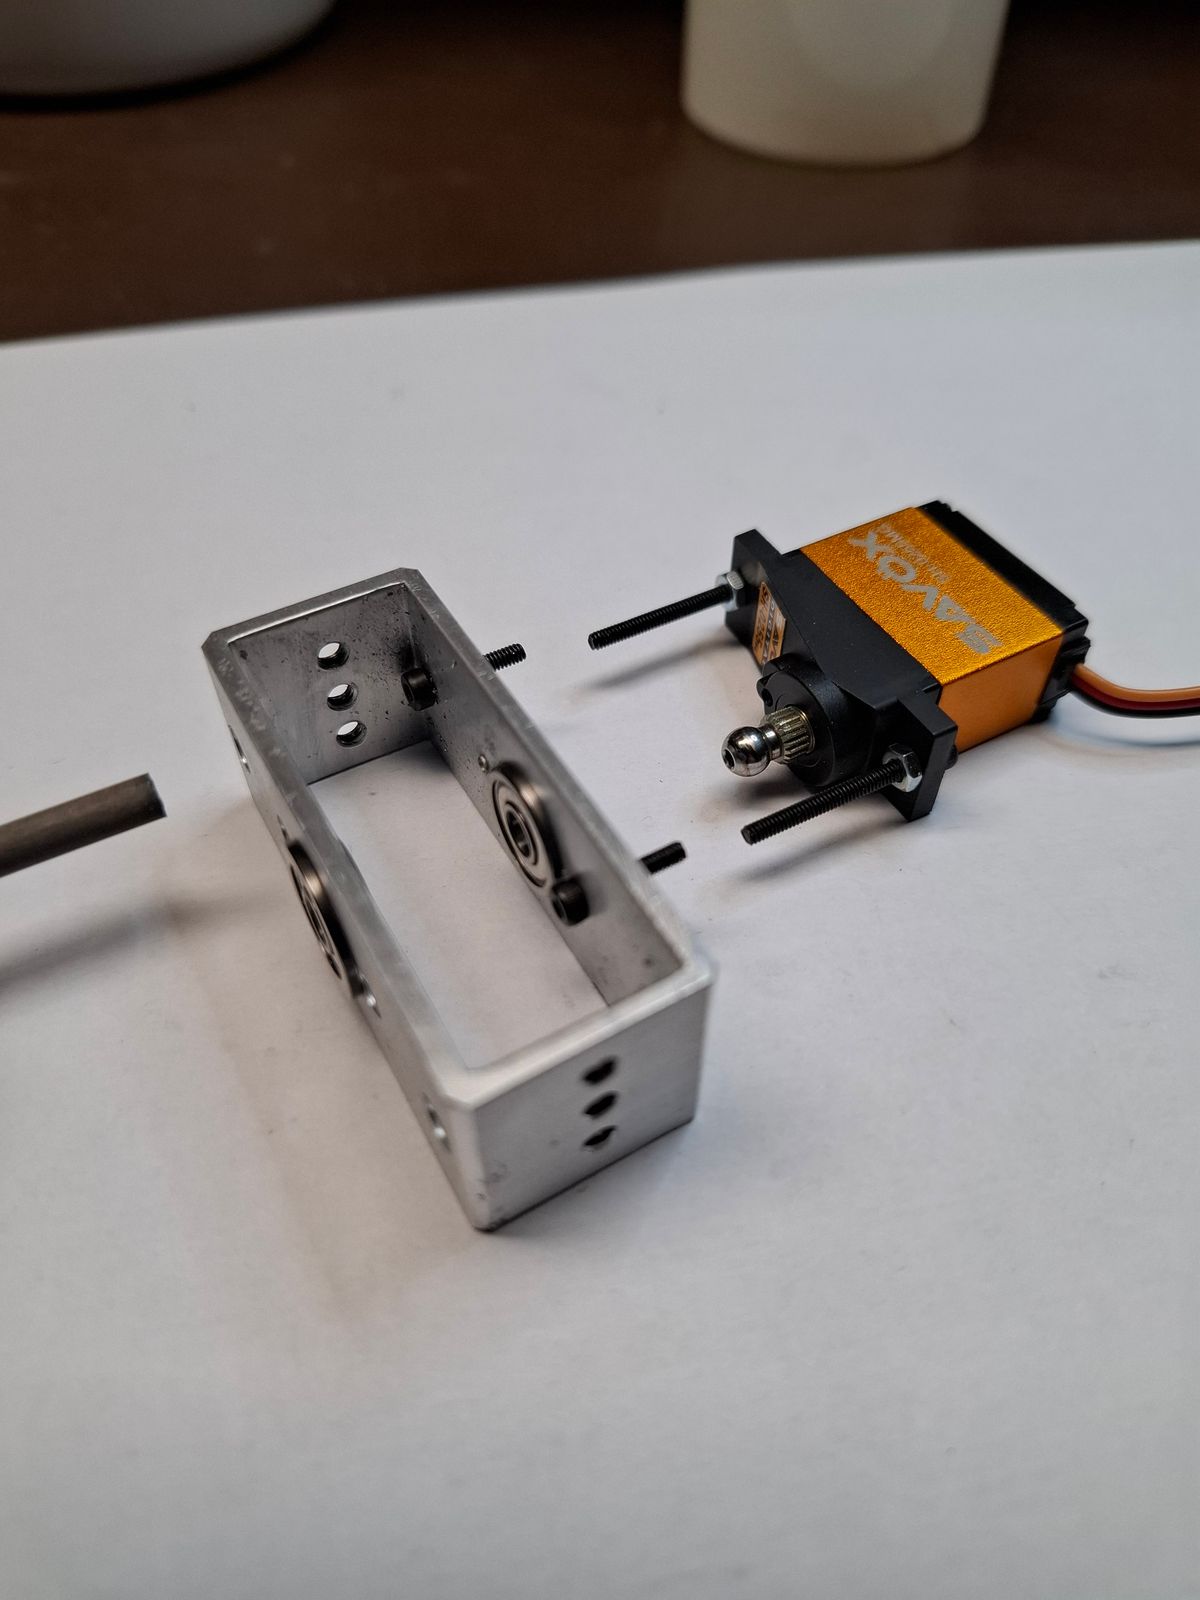
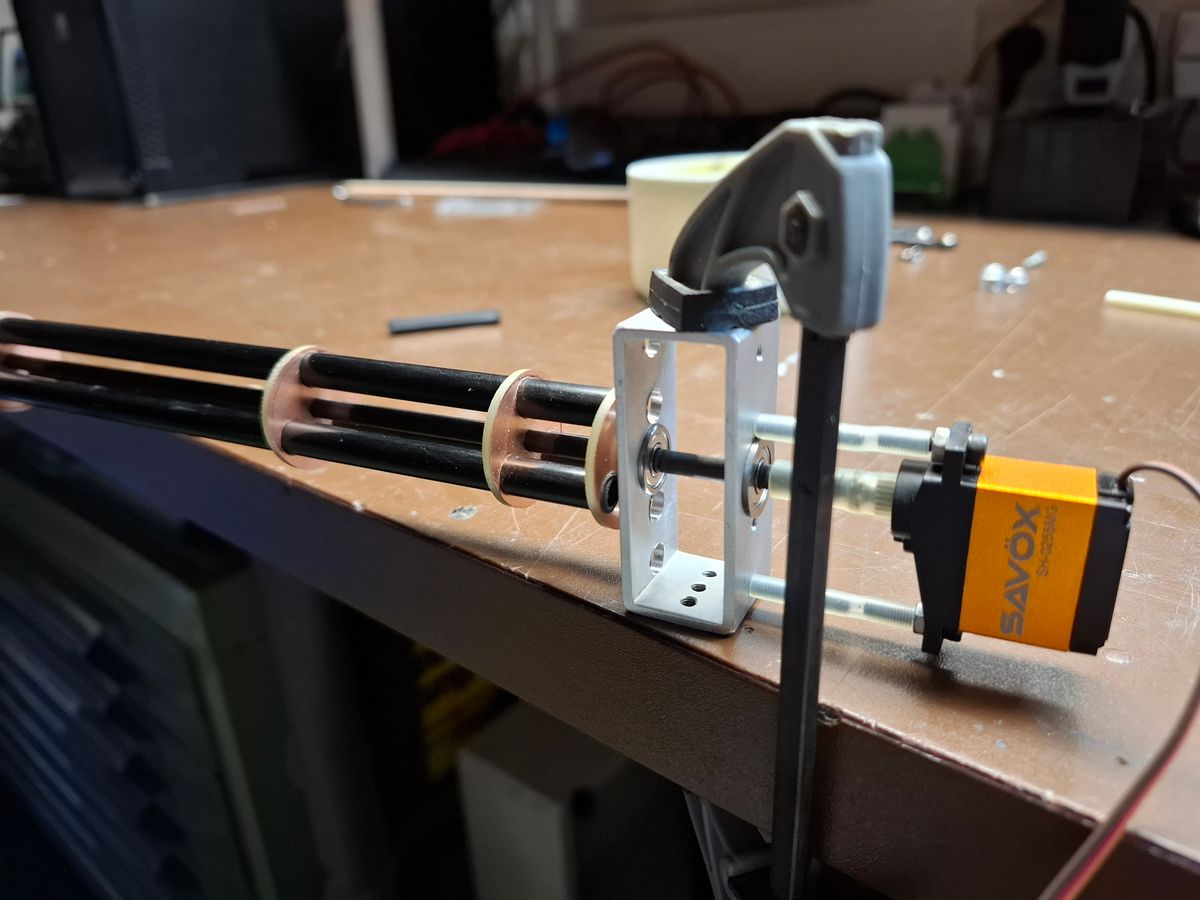
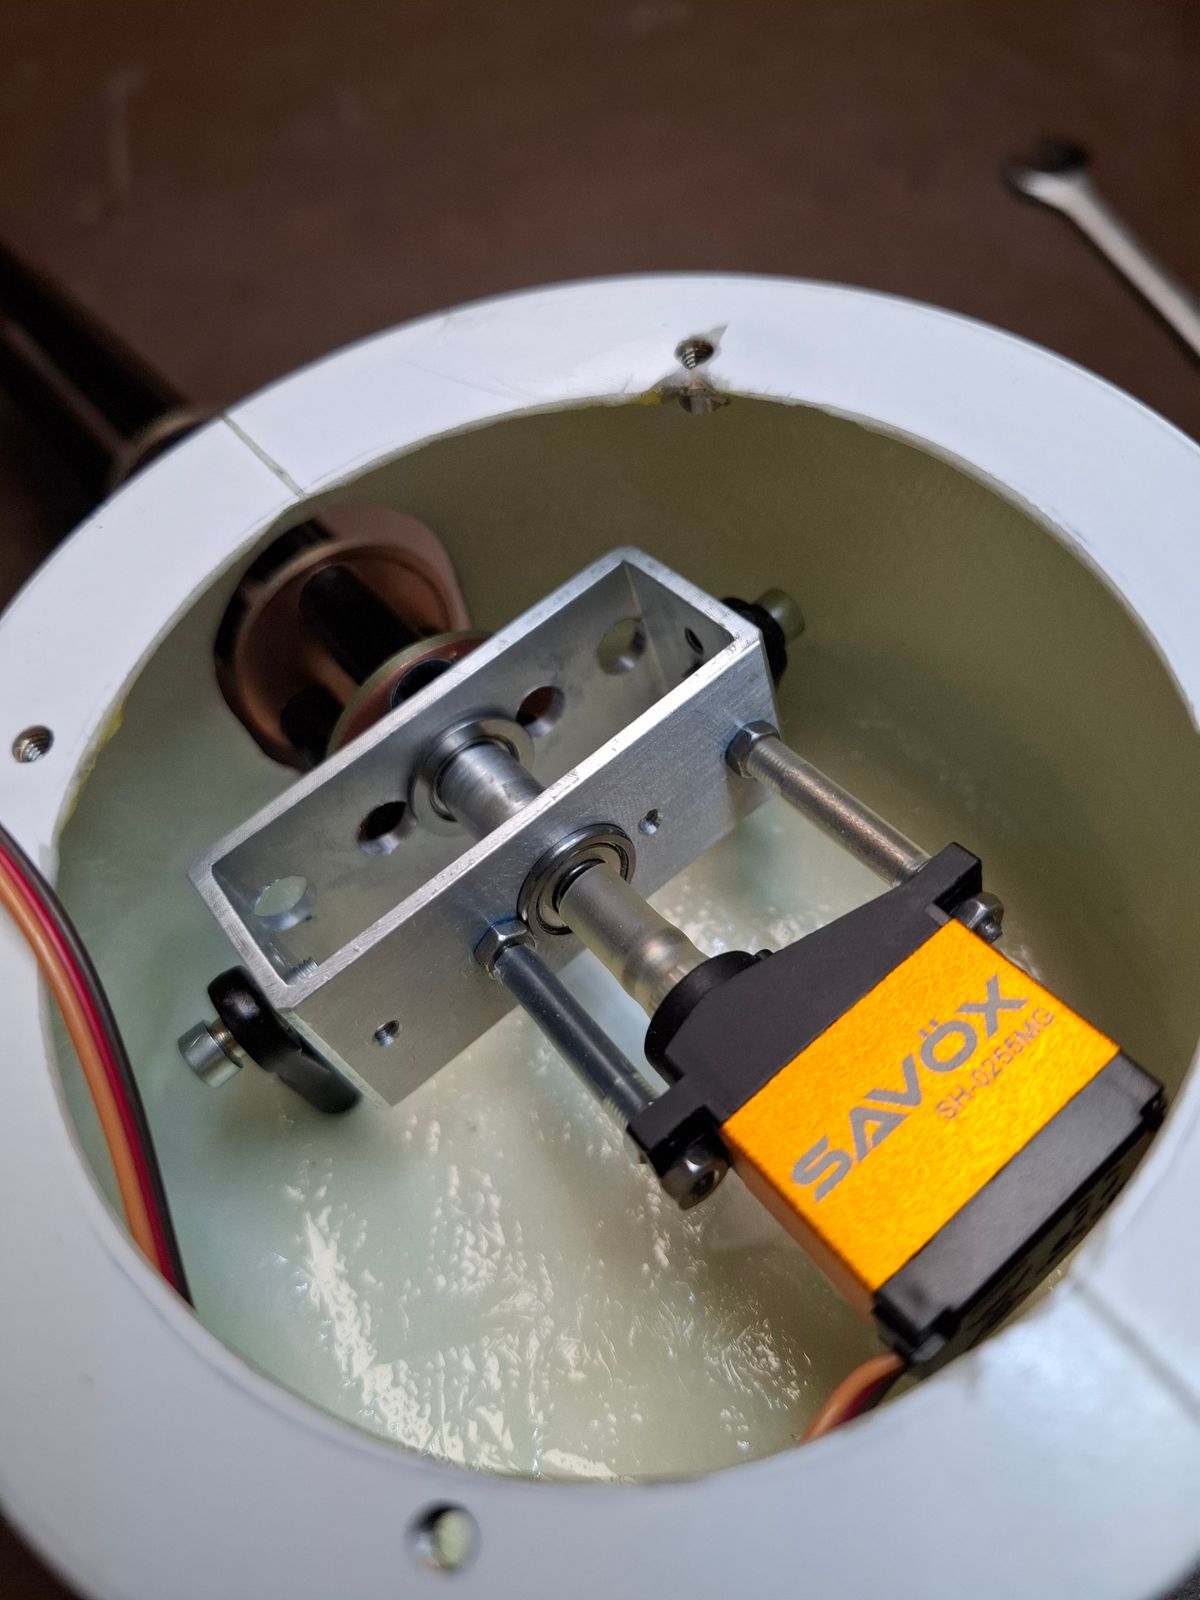
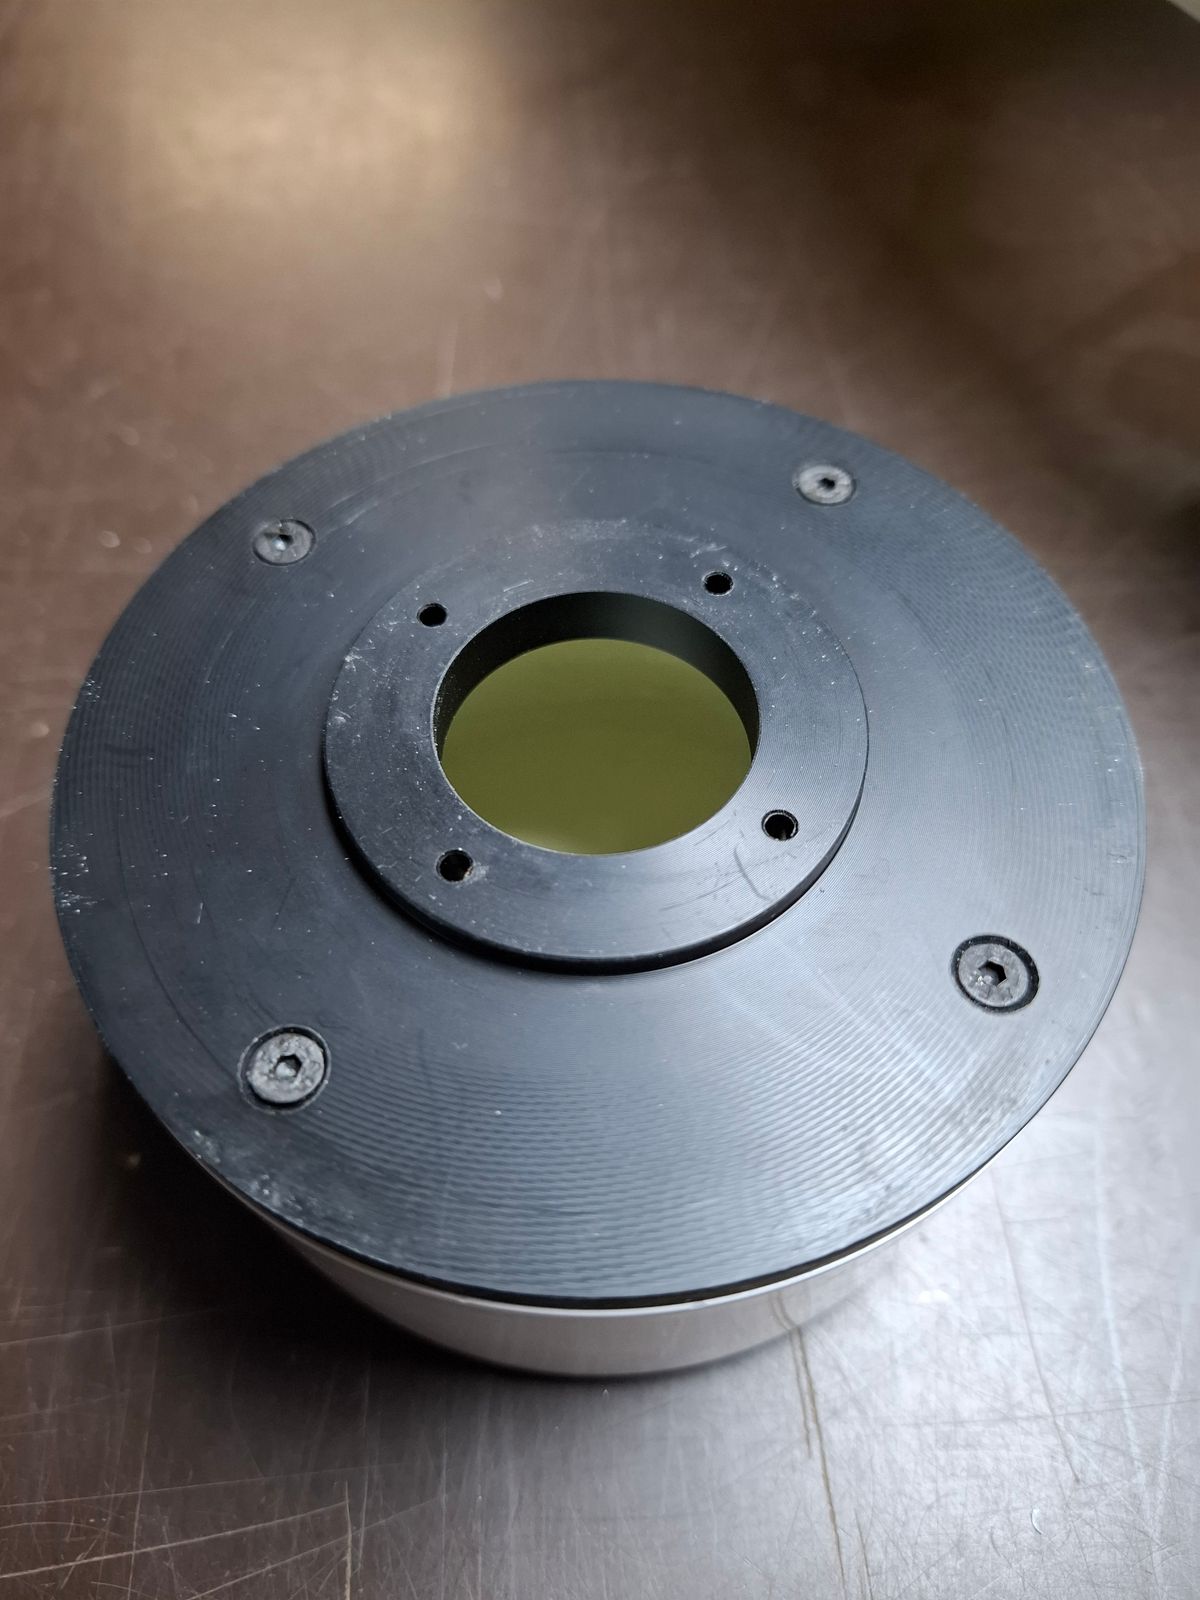
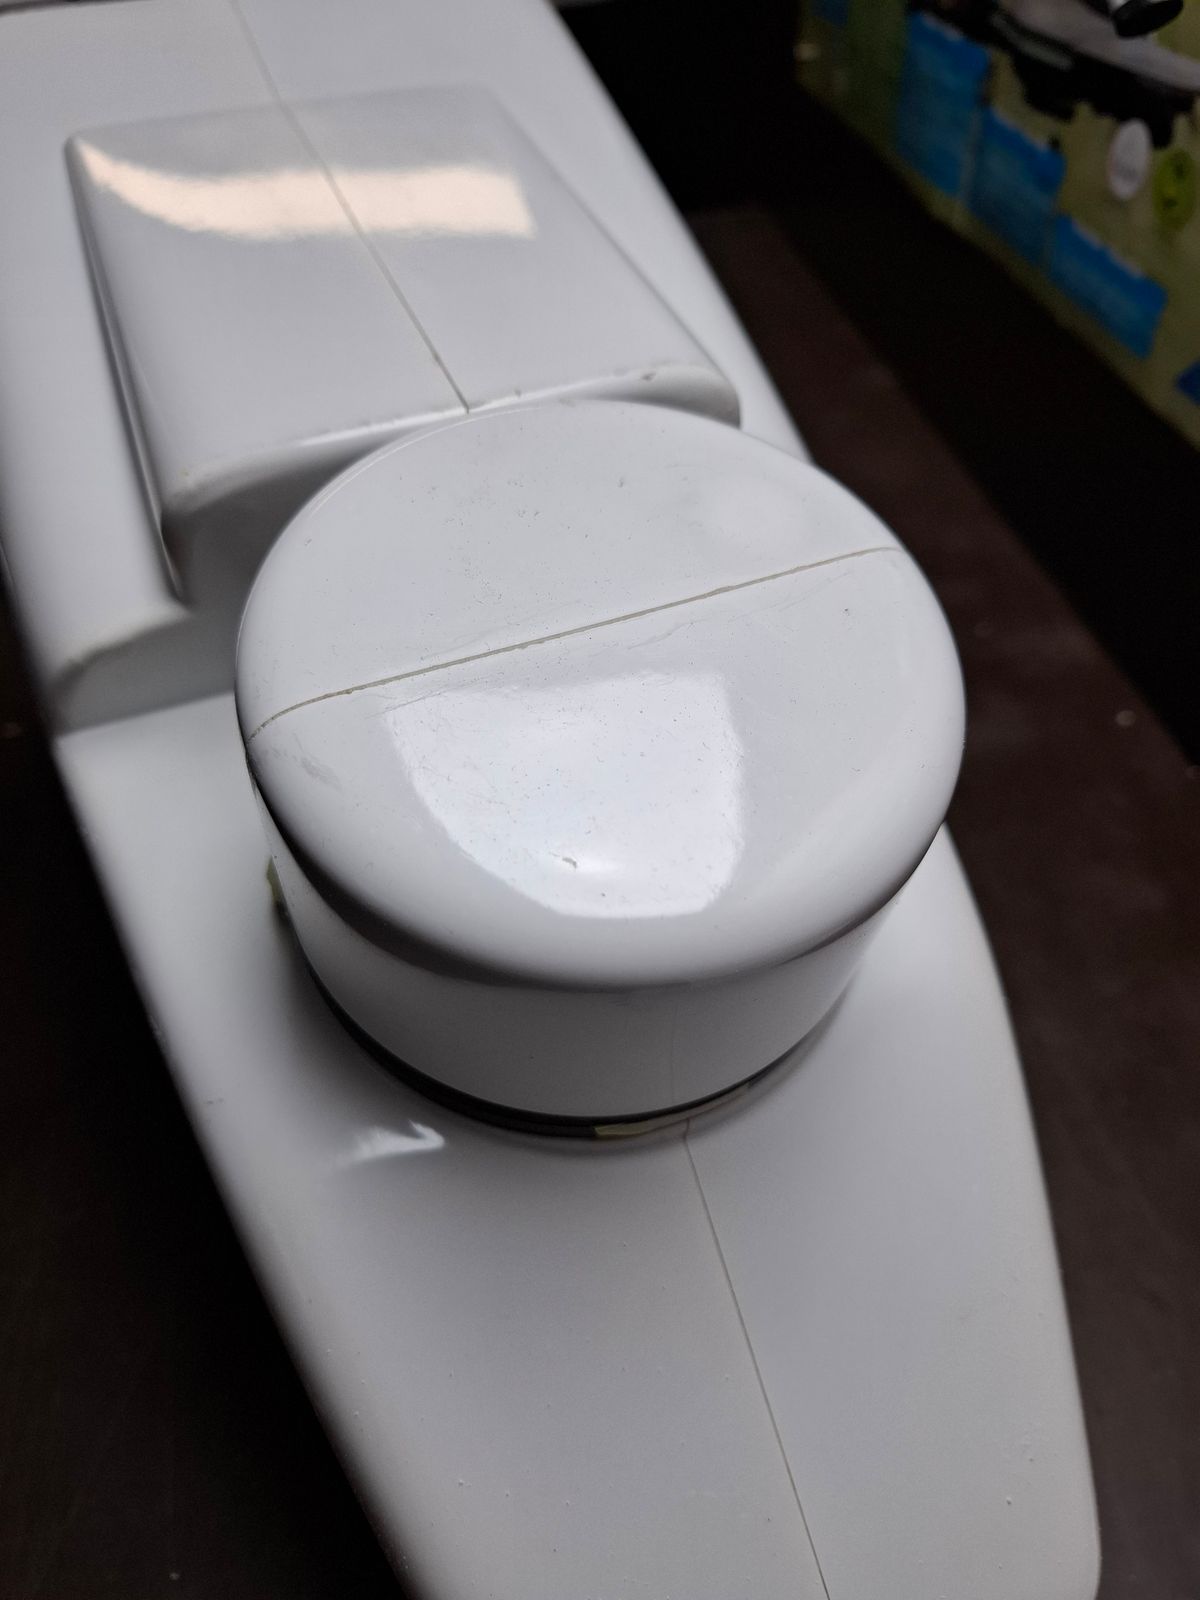
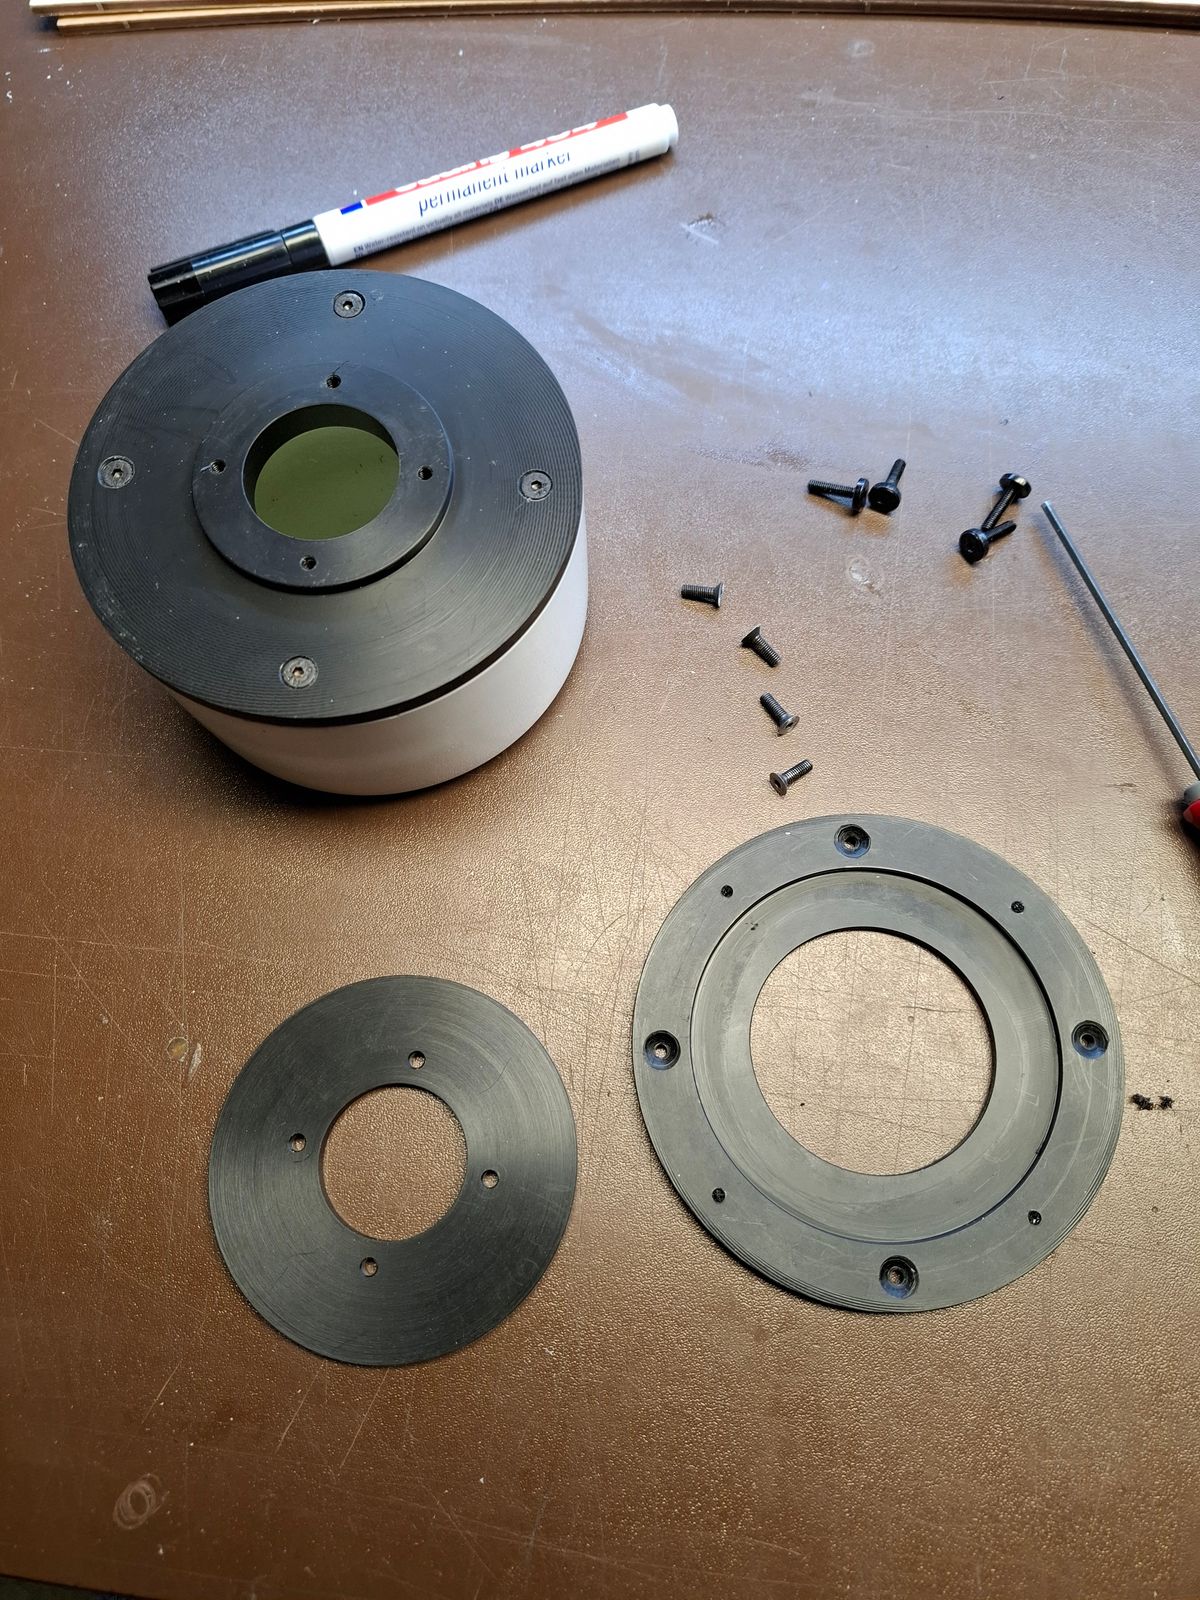
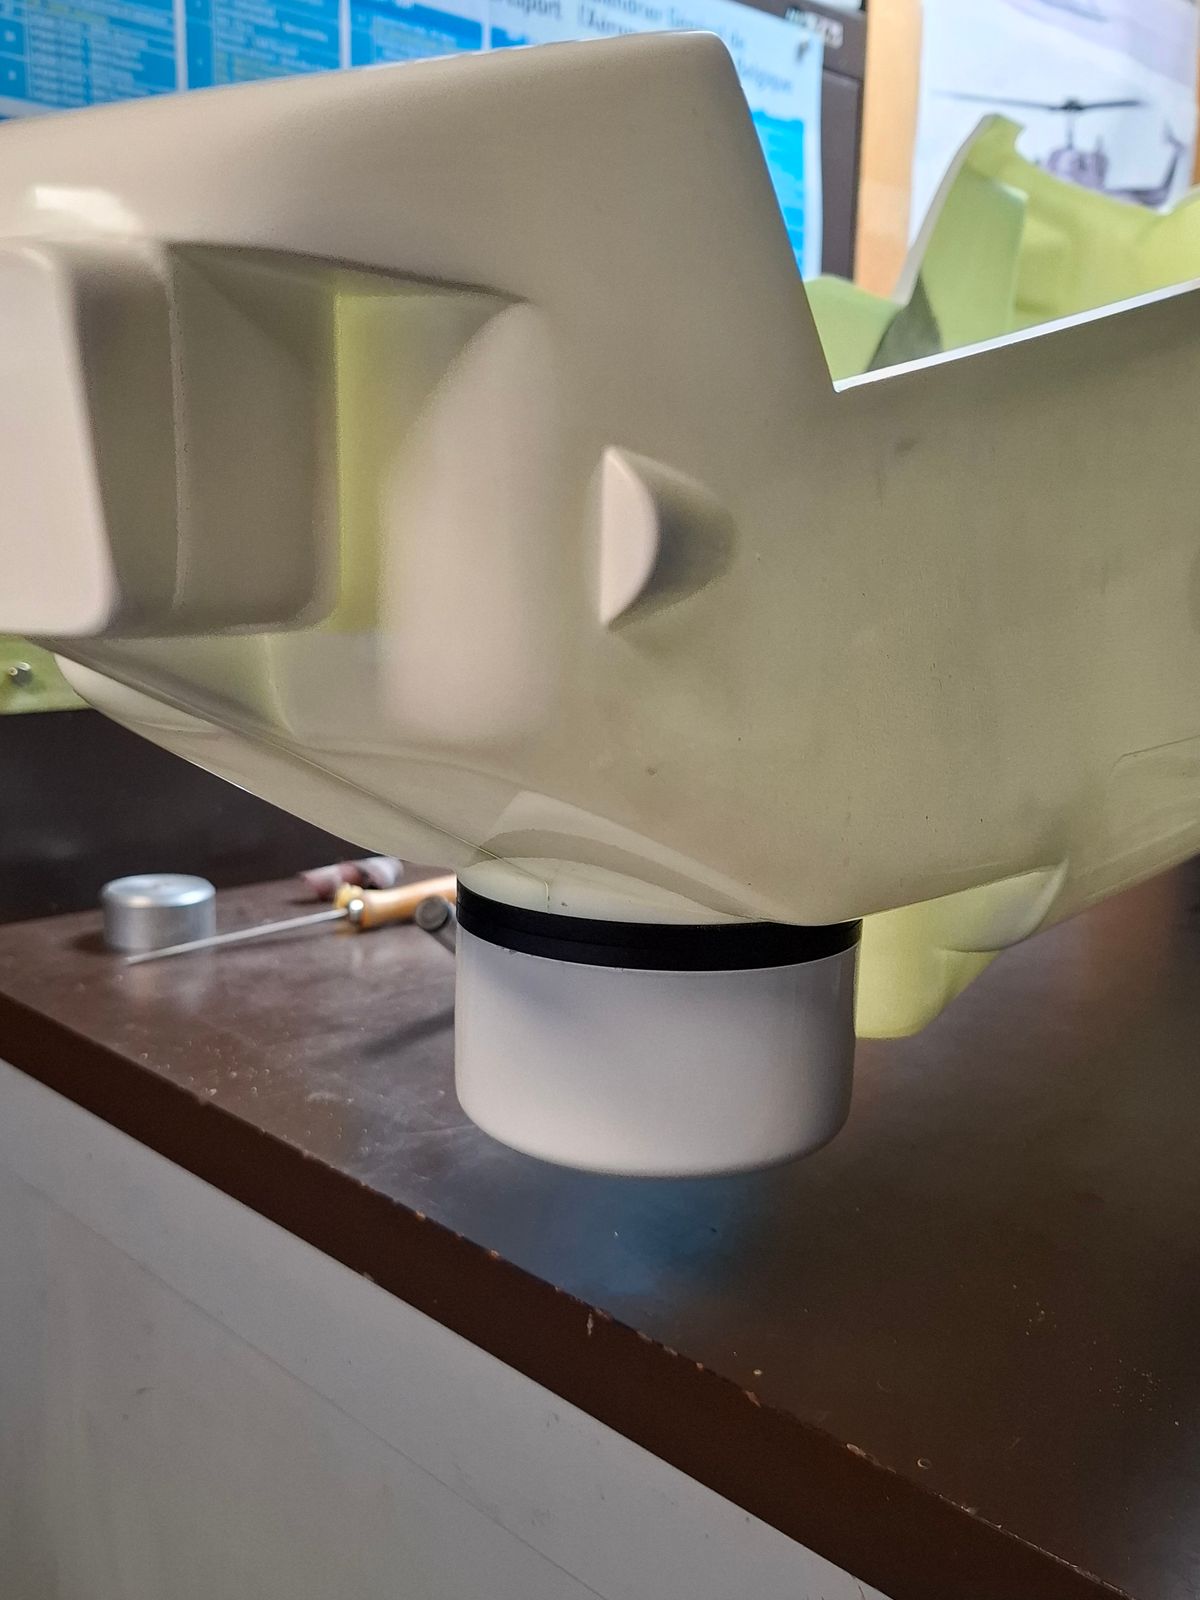
Front gun turret
Servo driven front turret rotation
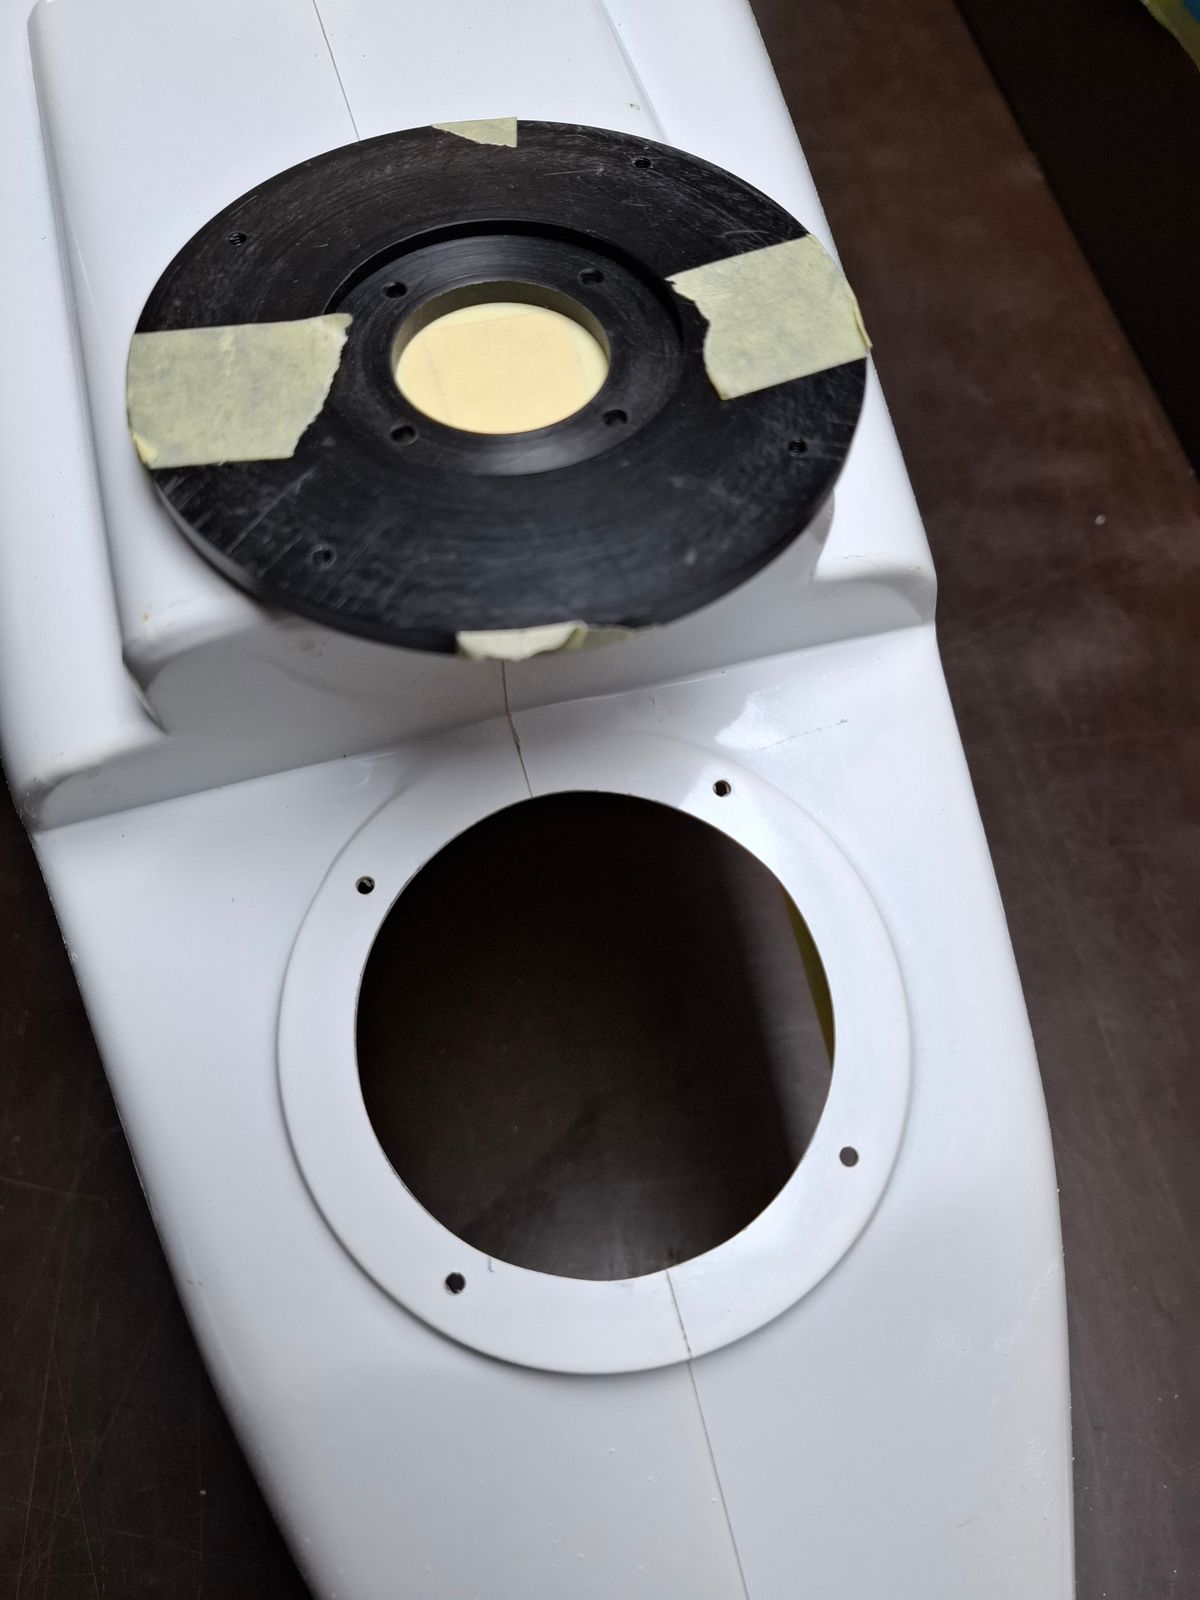
Second design for the Cobra mechanics
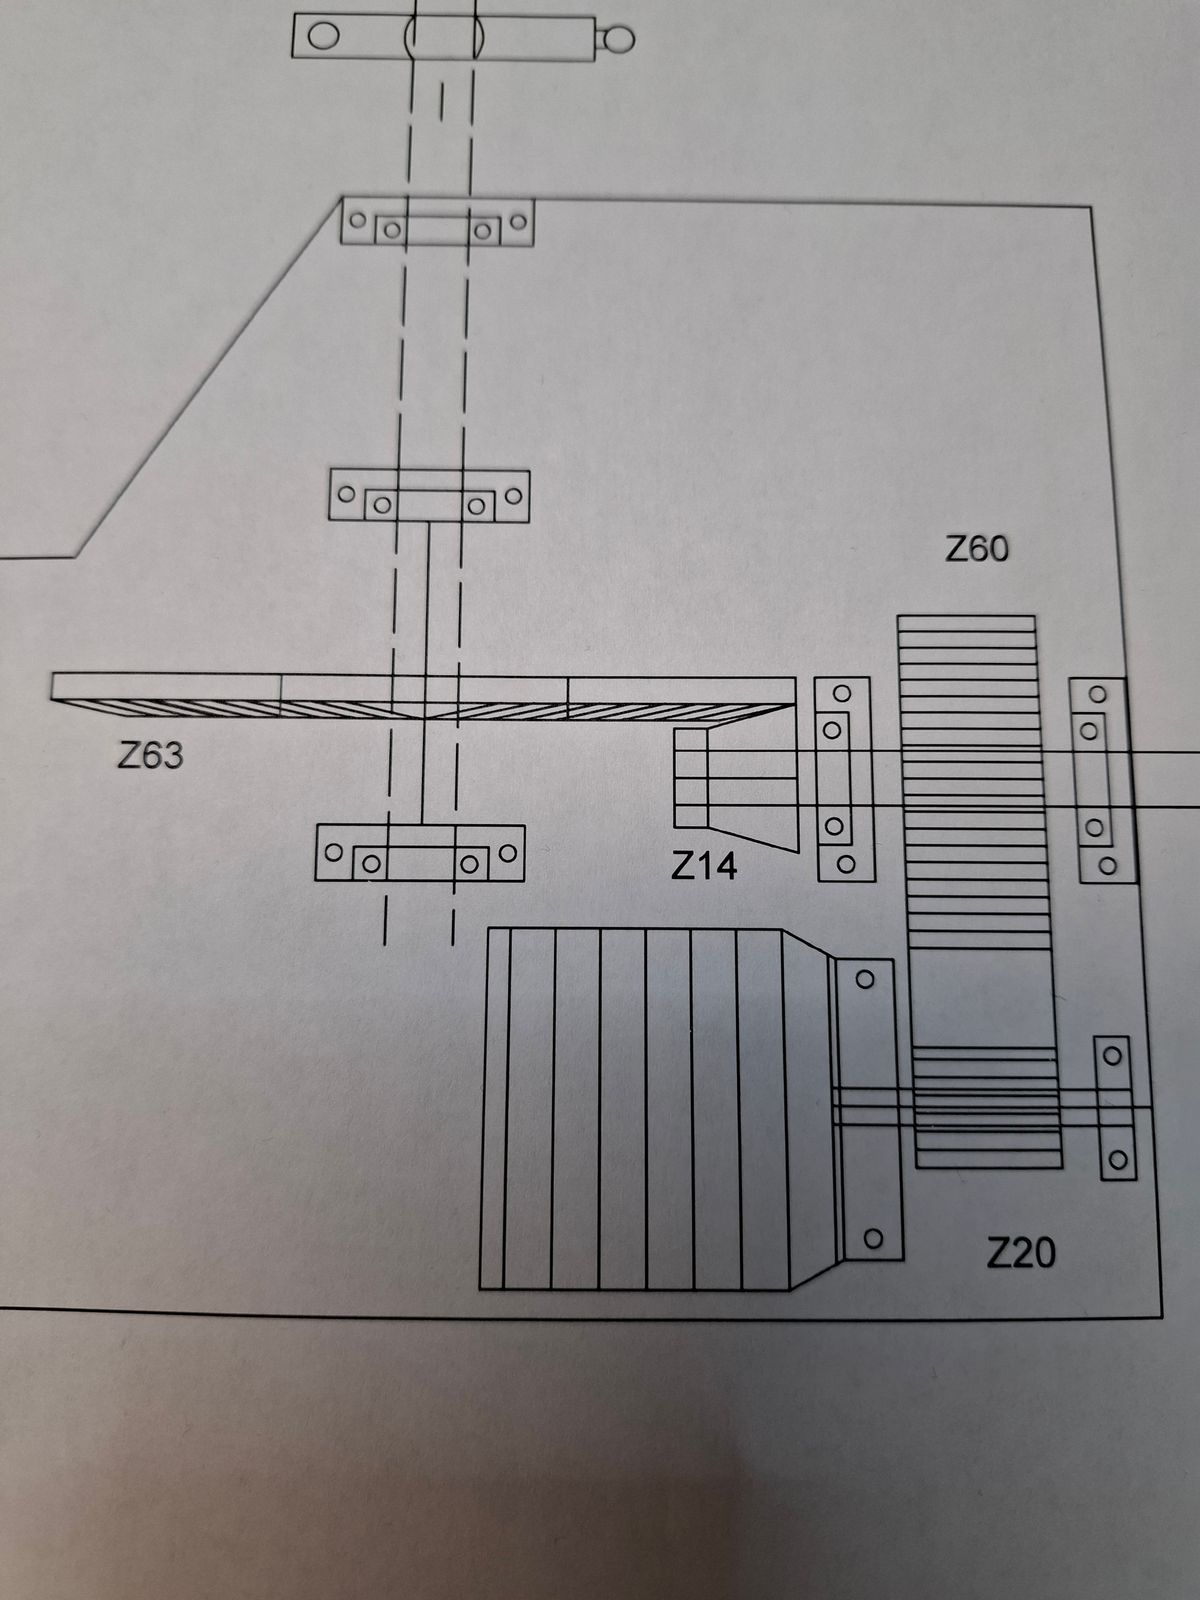
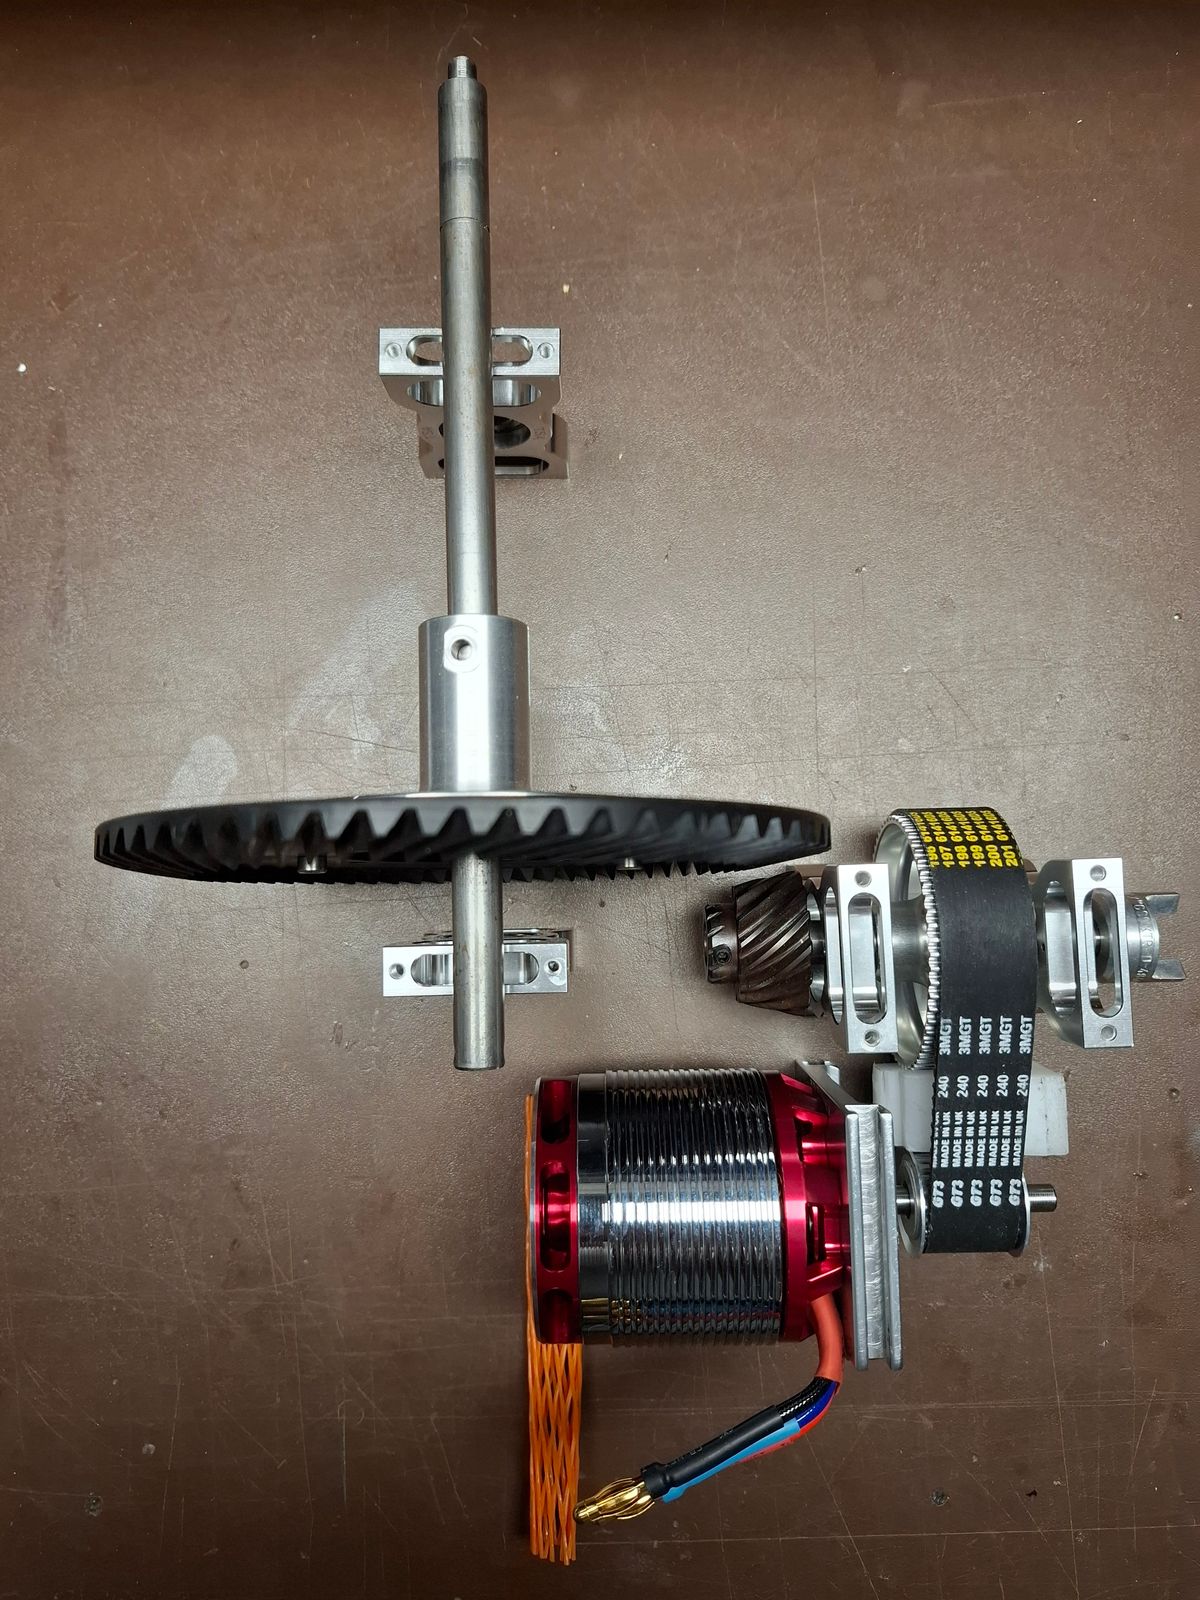
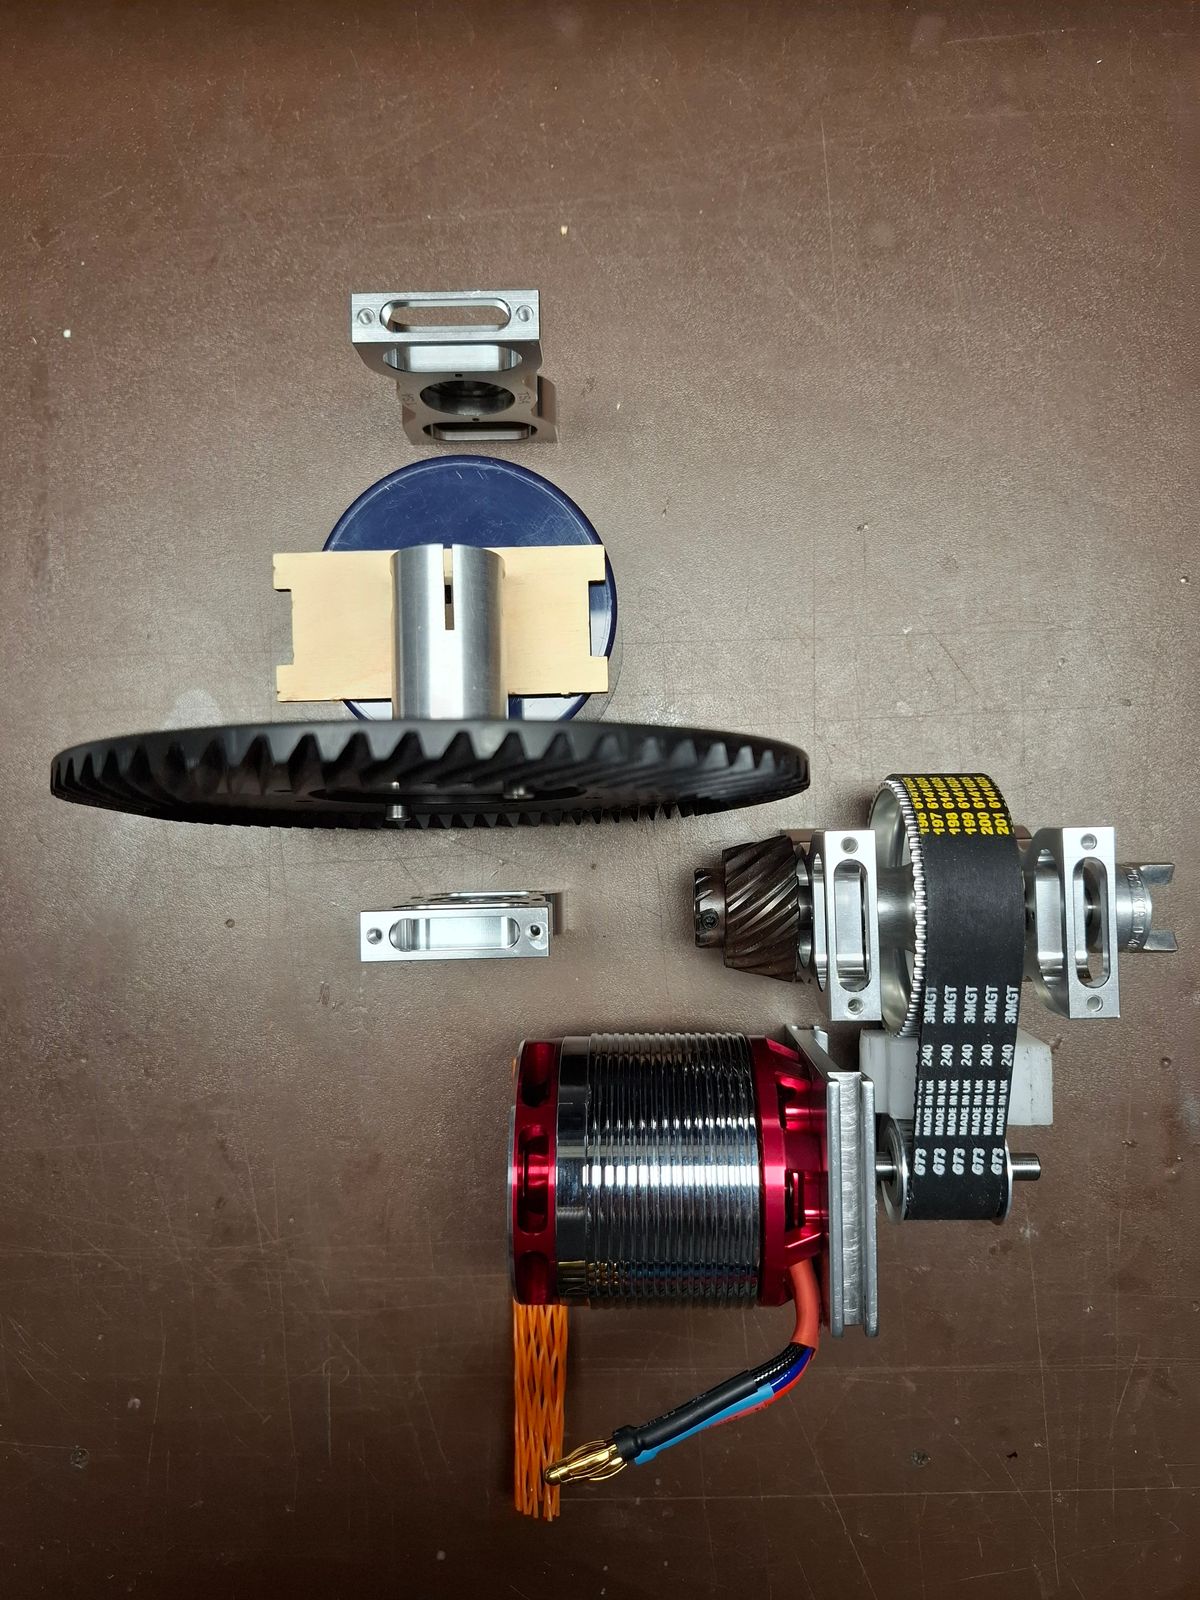
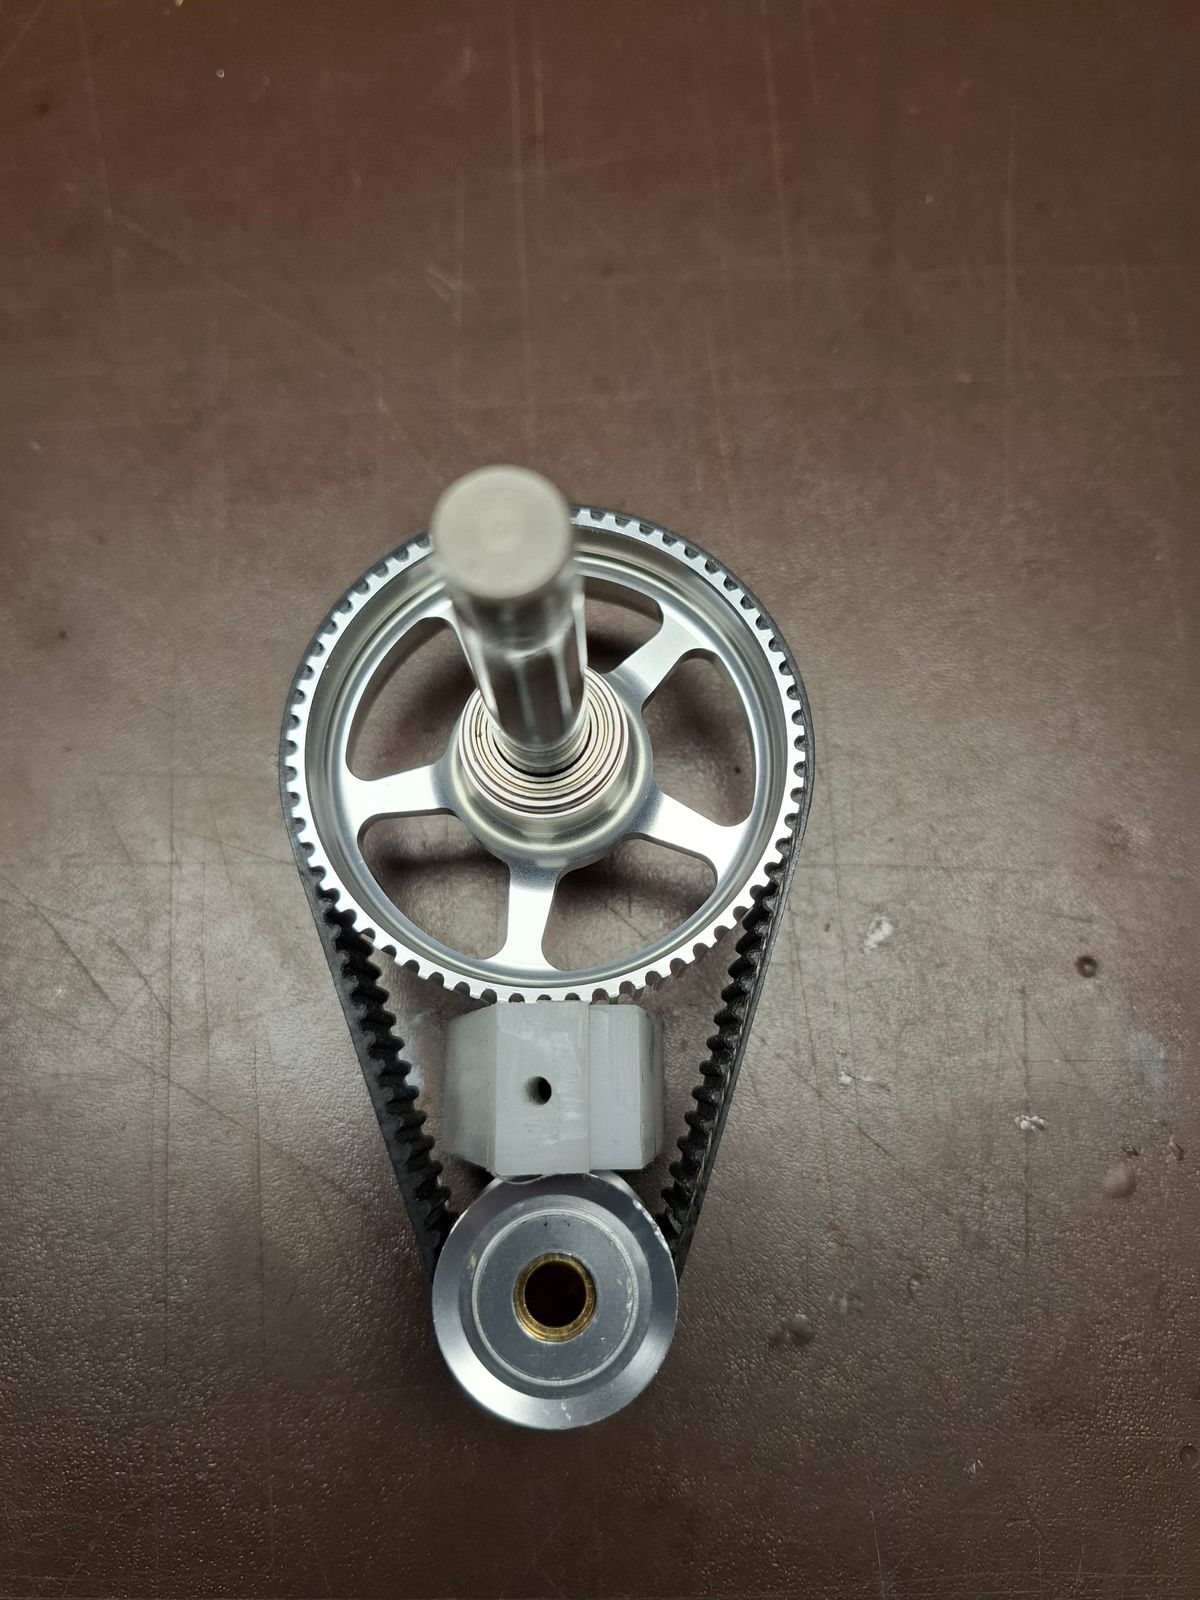
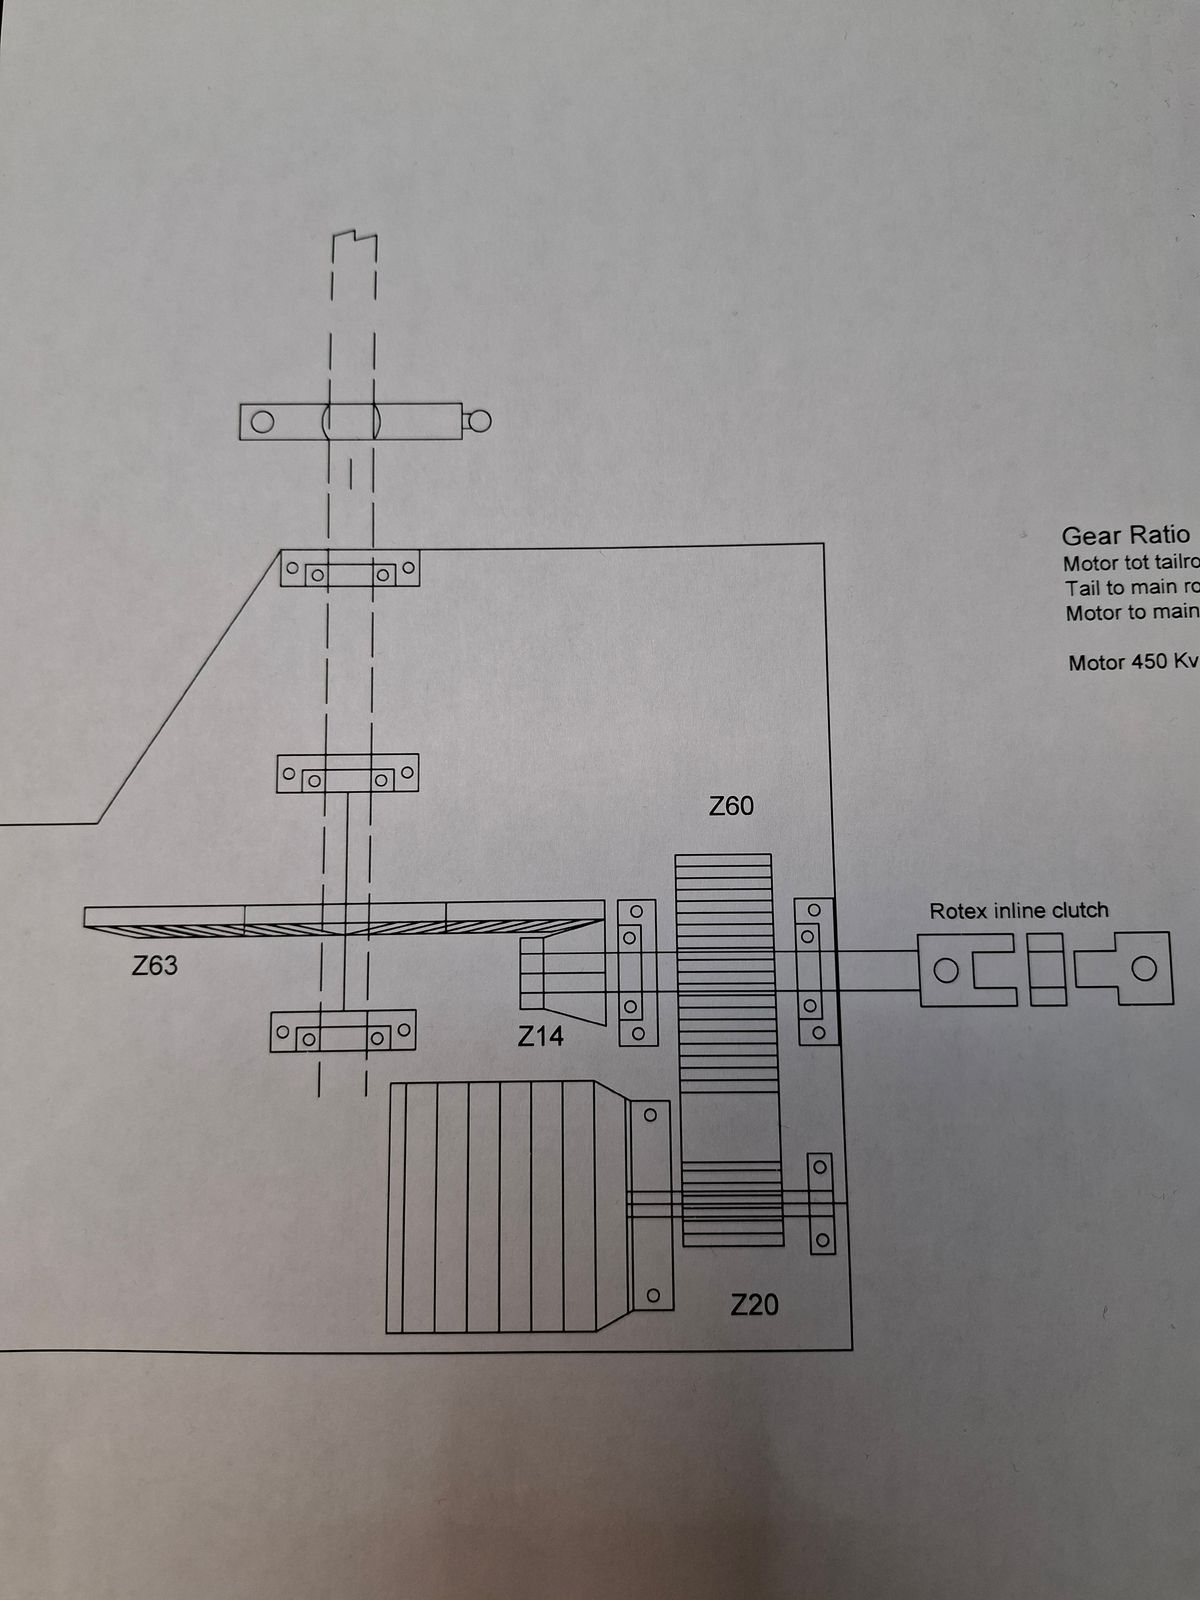
Alternative mechanics design.
Compact and light, autorotation driven tailrotor output.
Gear ratio 3 : 1 motor >>> Tailrotor
Gear ratio 13.5 : 1 motor >>> Mainrotor
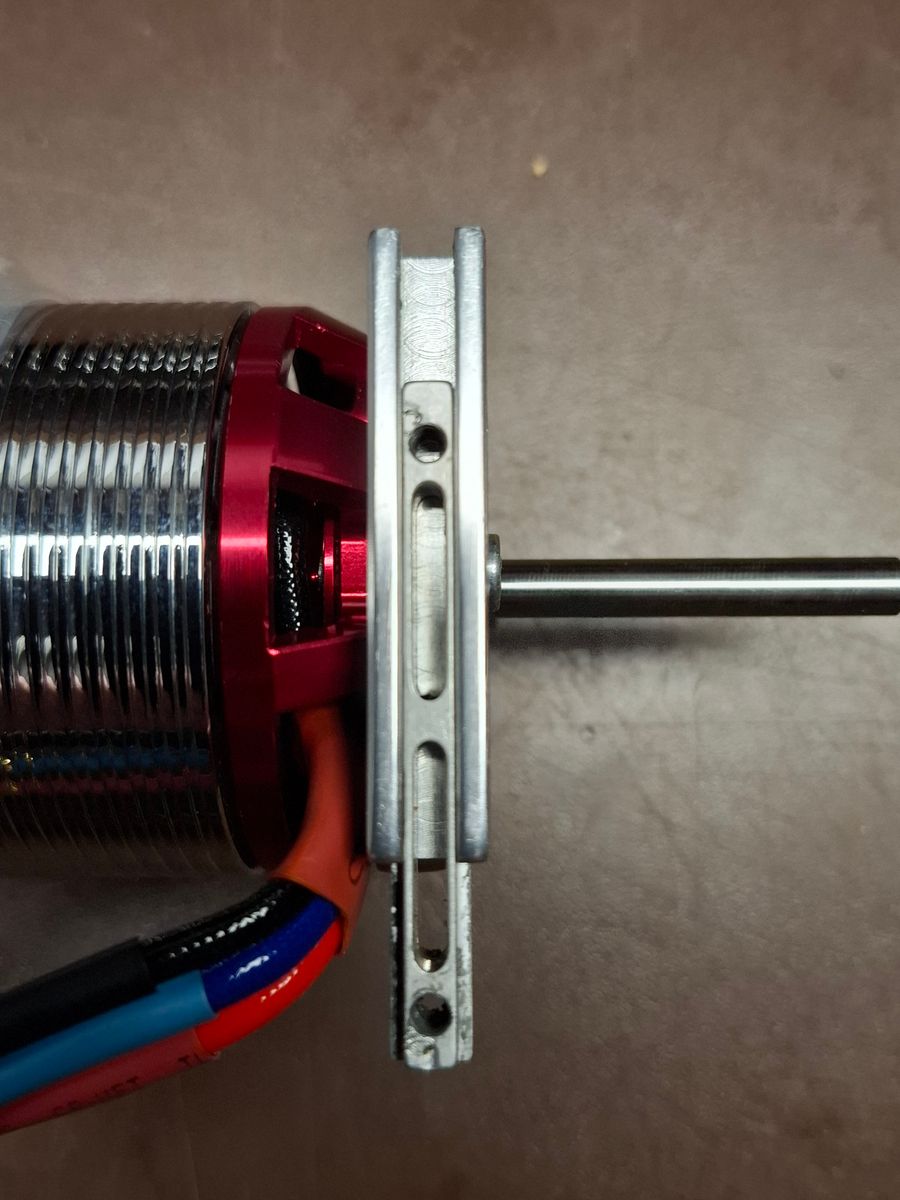
Adjustable sliding motor mount plate
Front Turret gun fully operational.
Front Turret gun fully operational.
Modified barrels with multi size tip, modified barreldisks.
Up/Down and left right are fully servo position controllable.
On - off barrel rotation.
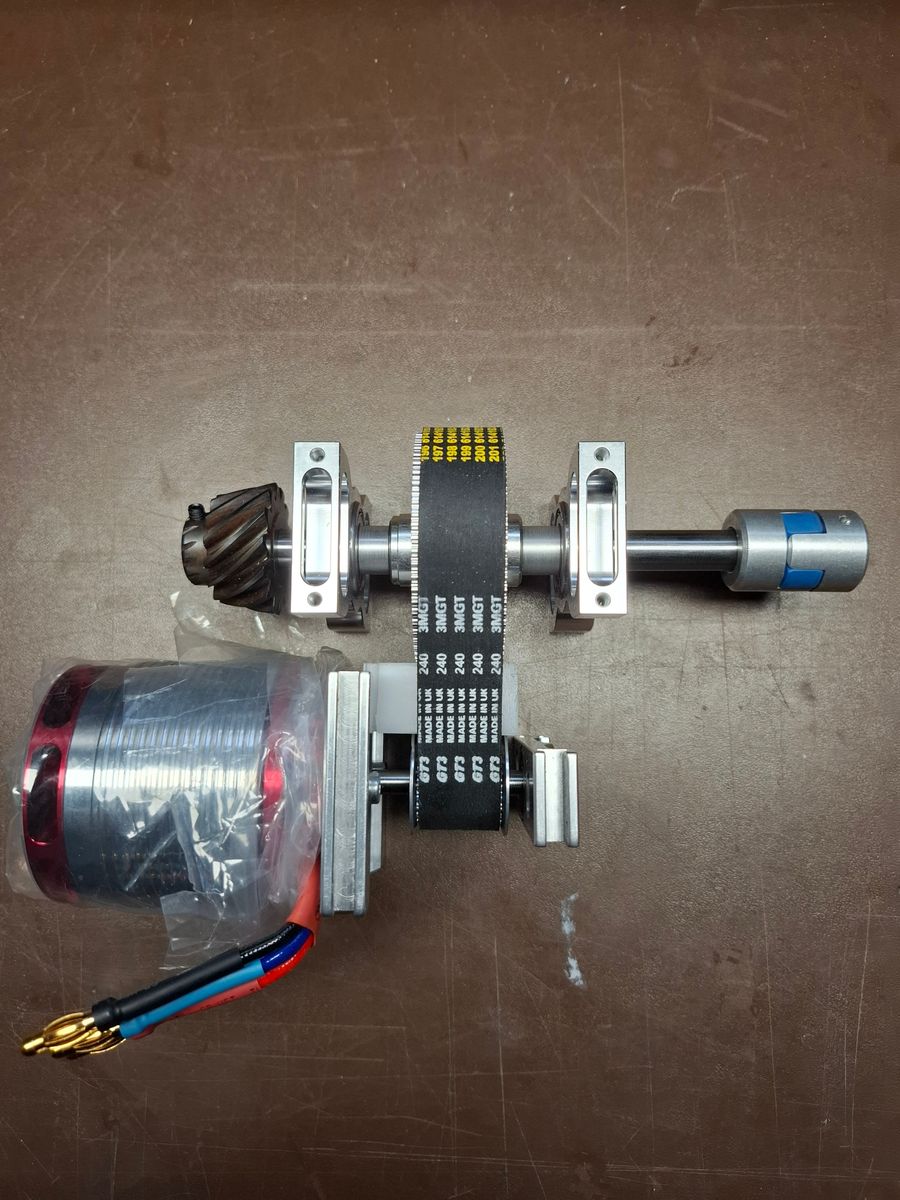
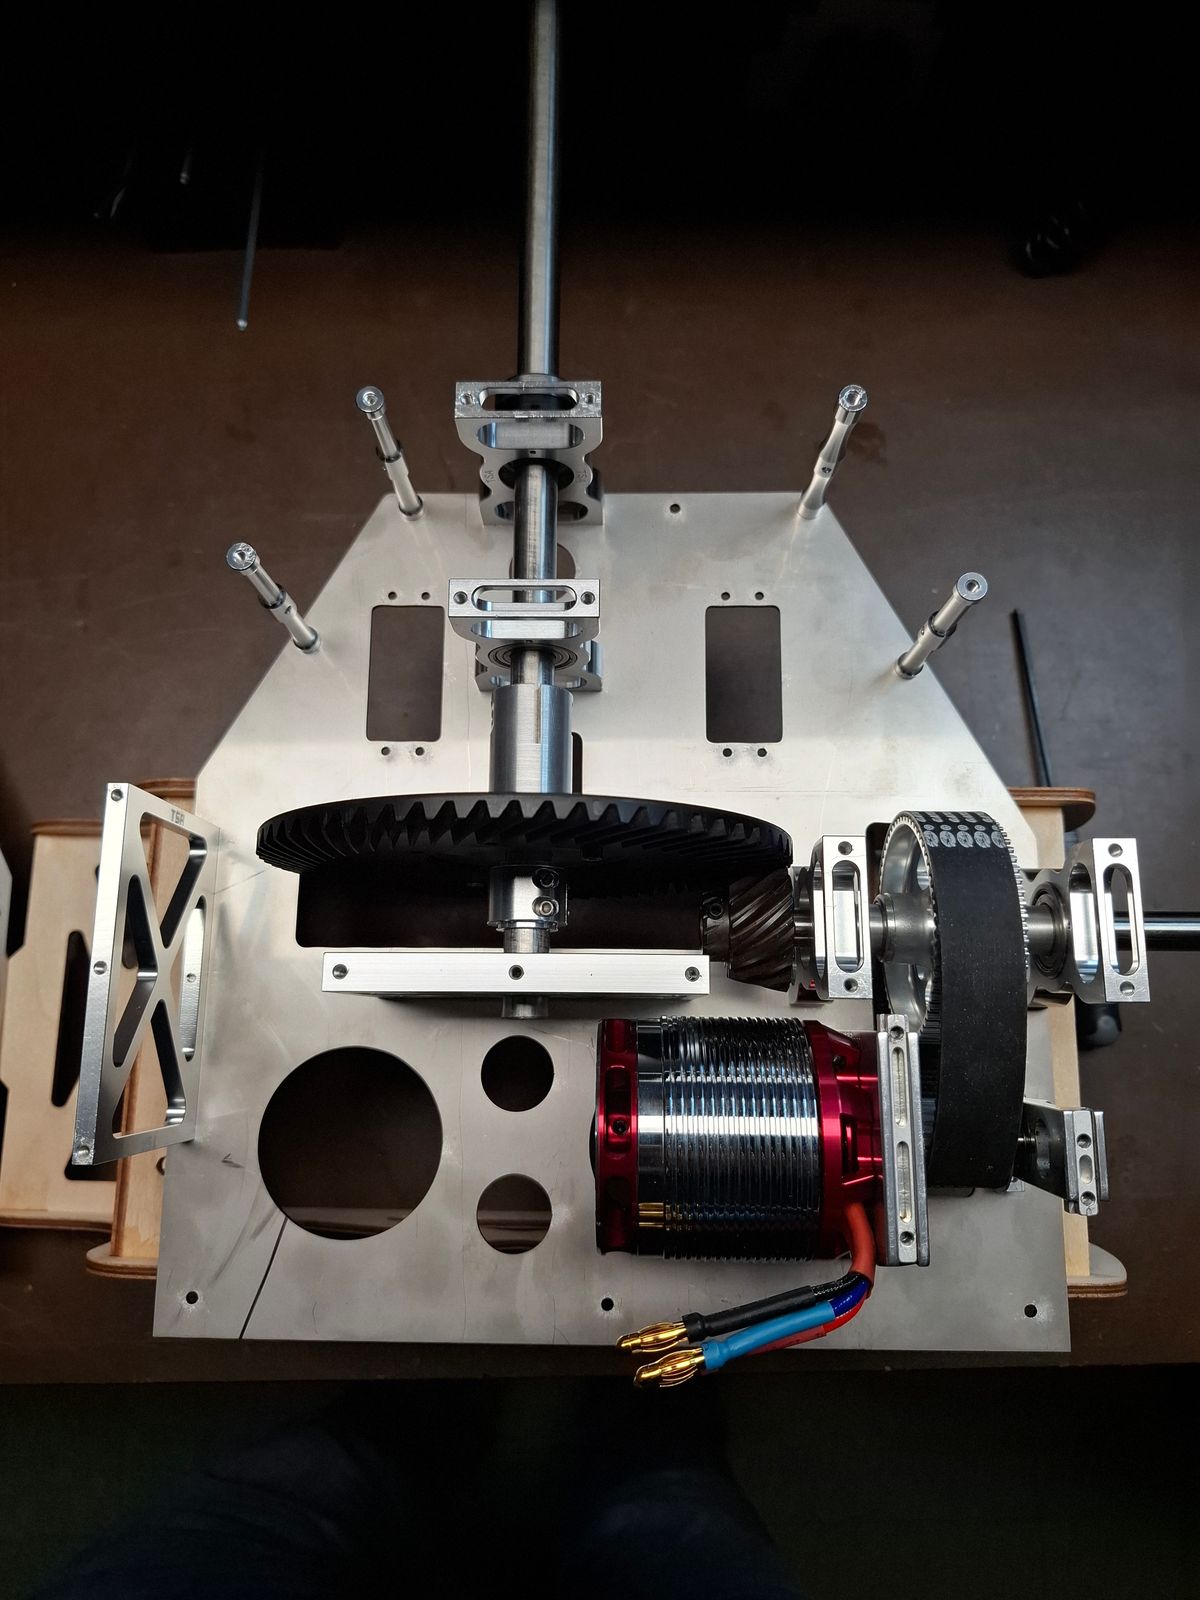
Assembly prototype mechanics for the Cobra
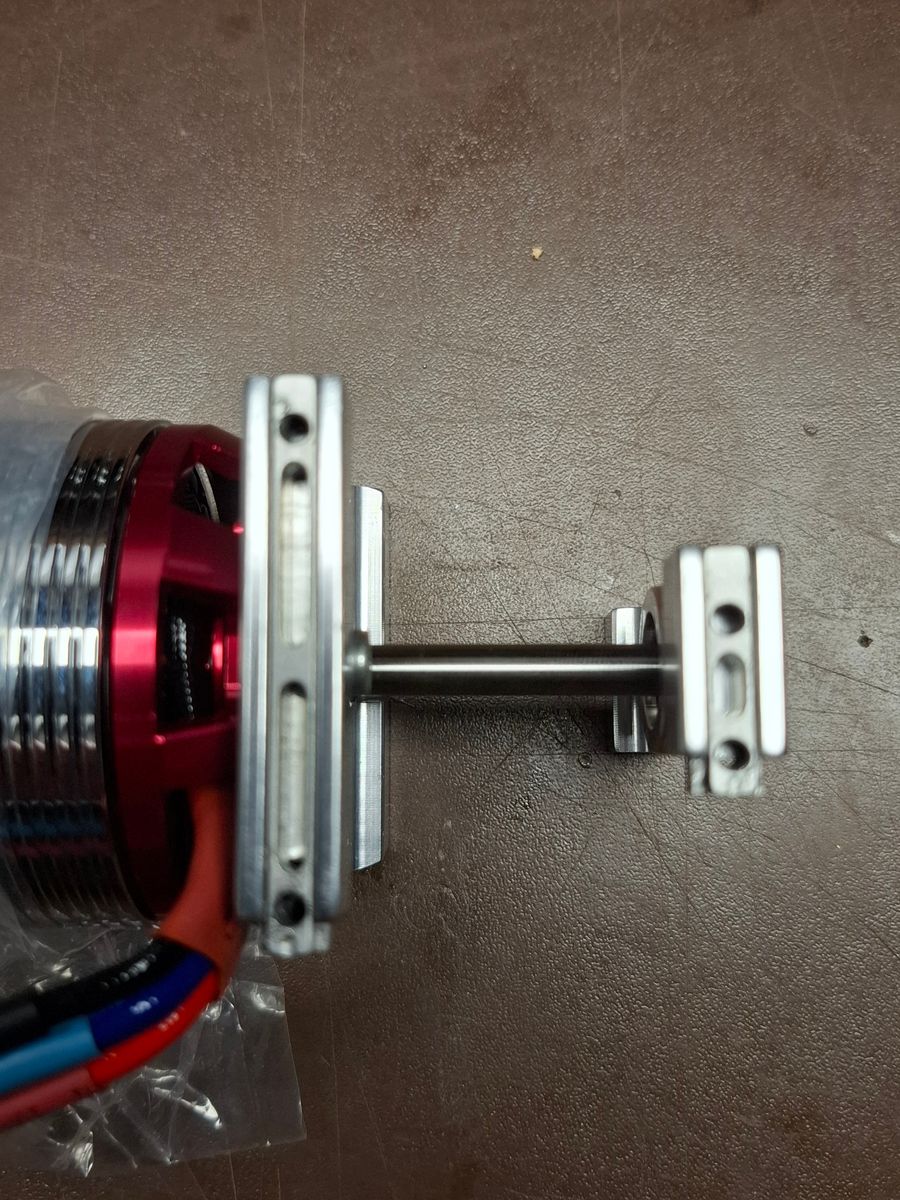
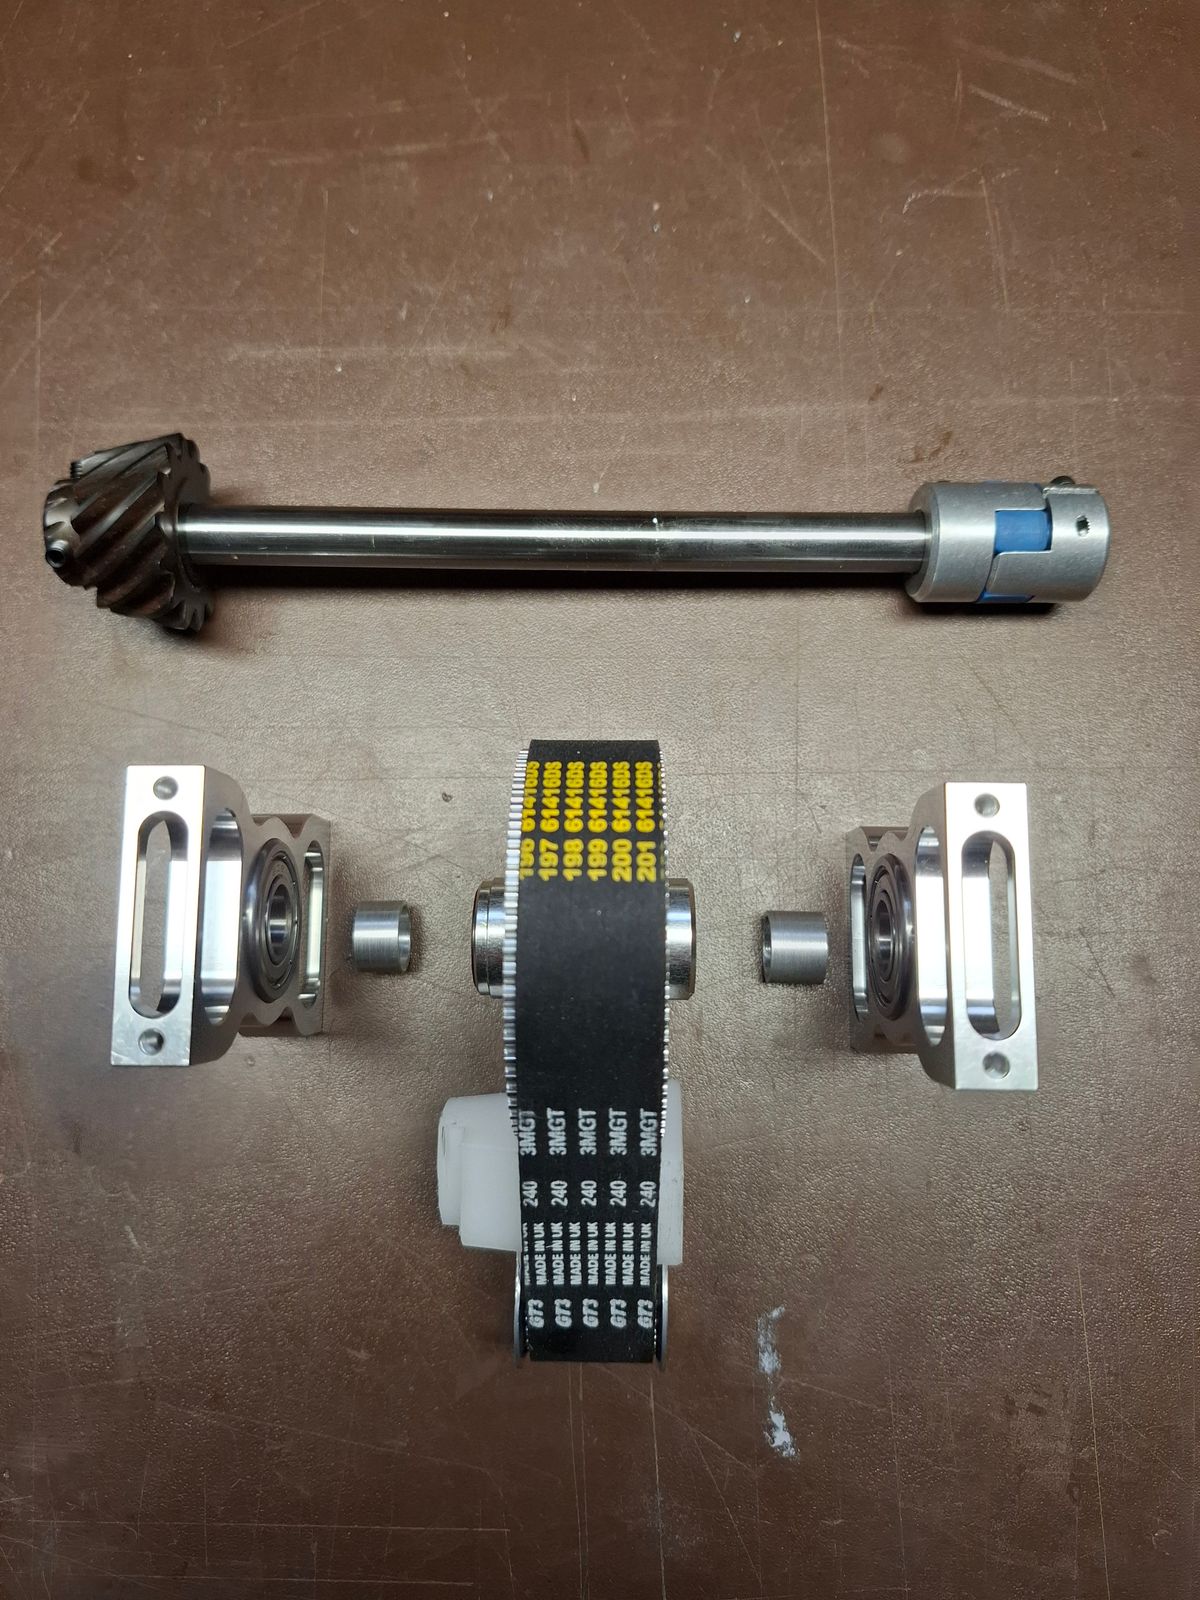
Machining drive shaft for tail/main drive
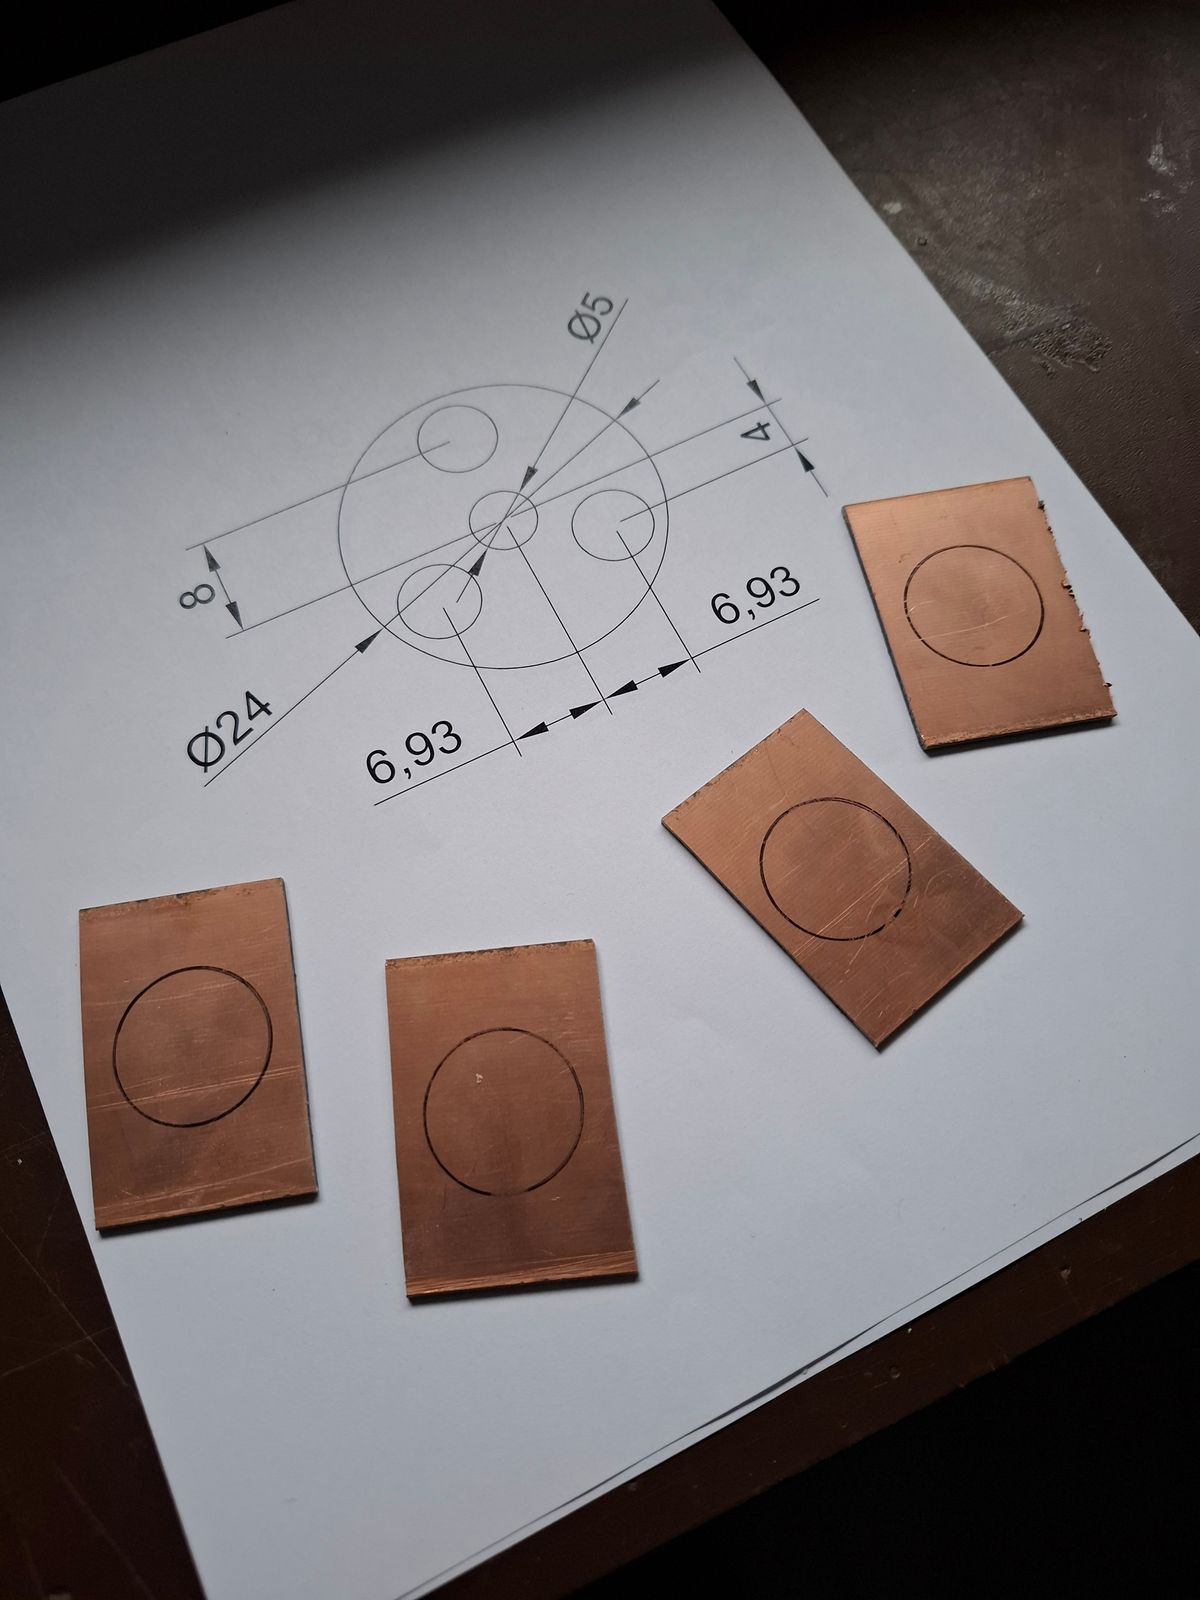
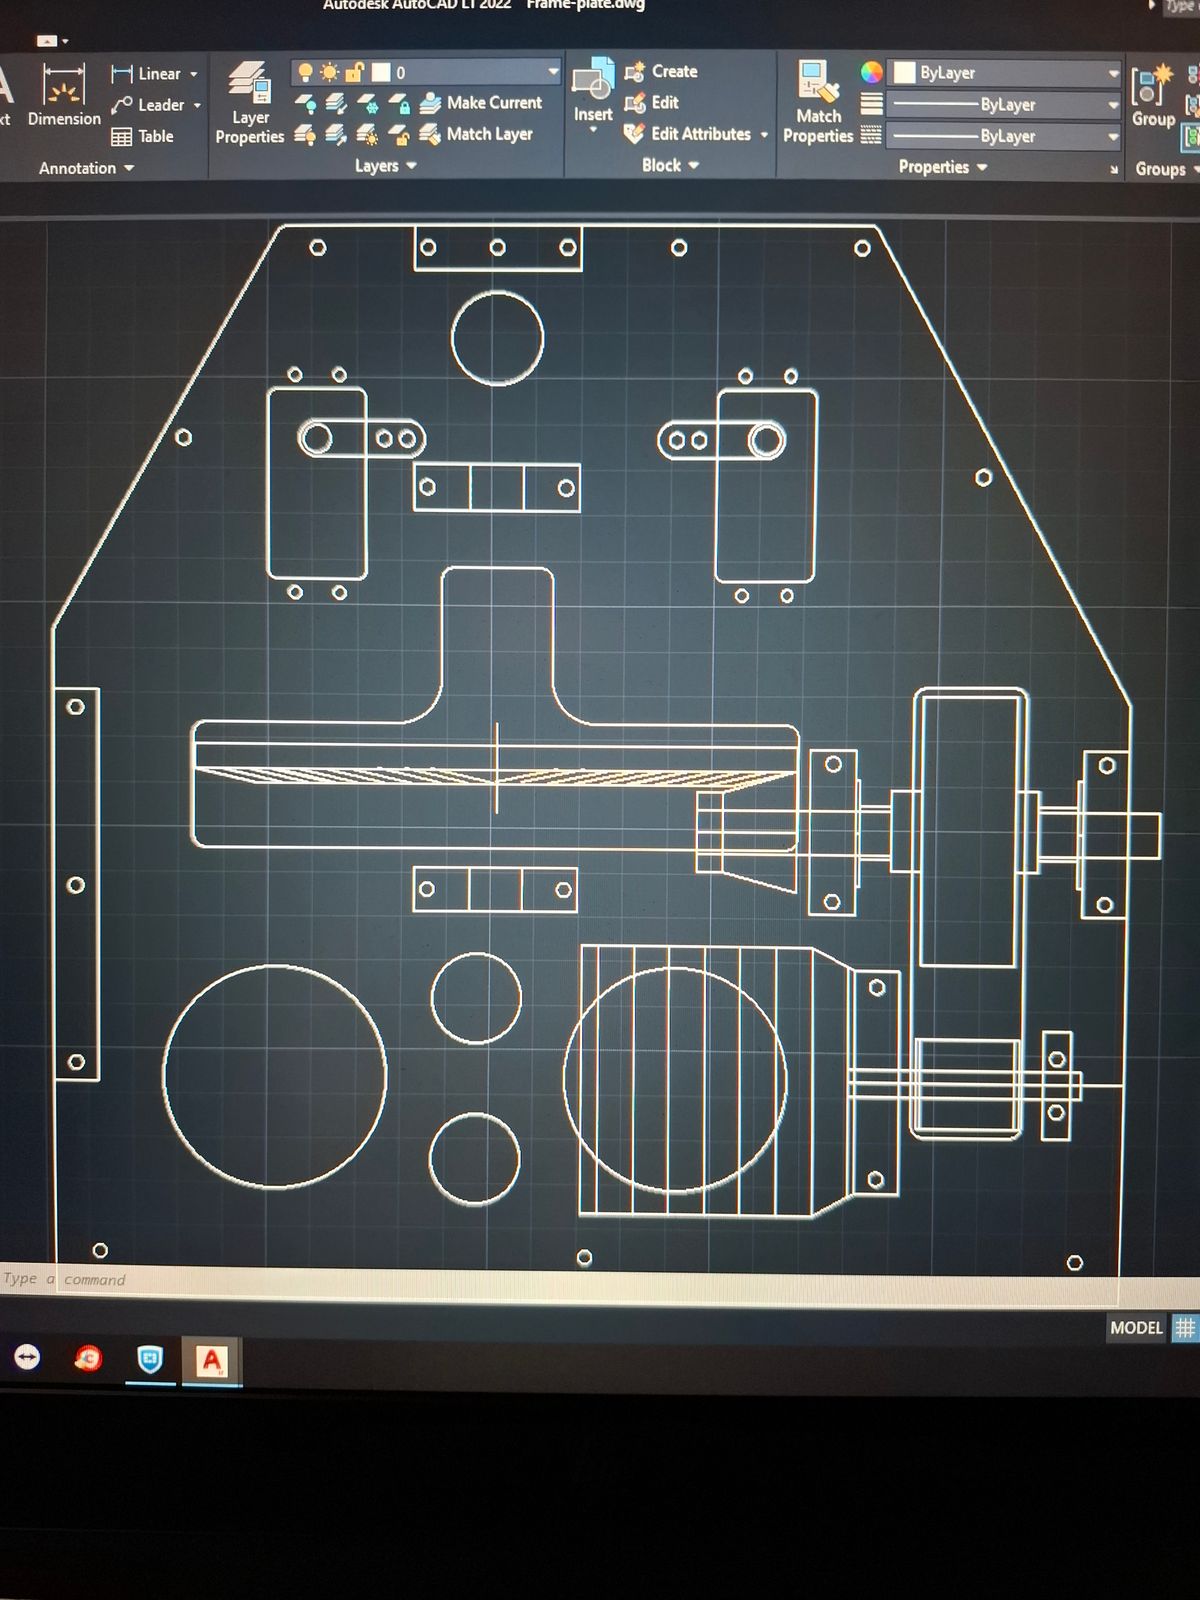
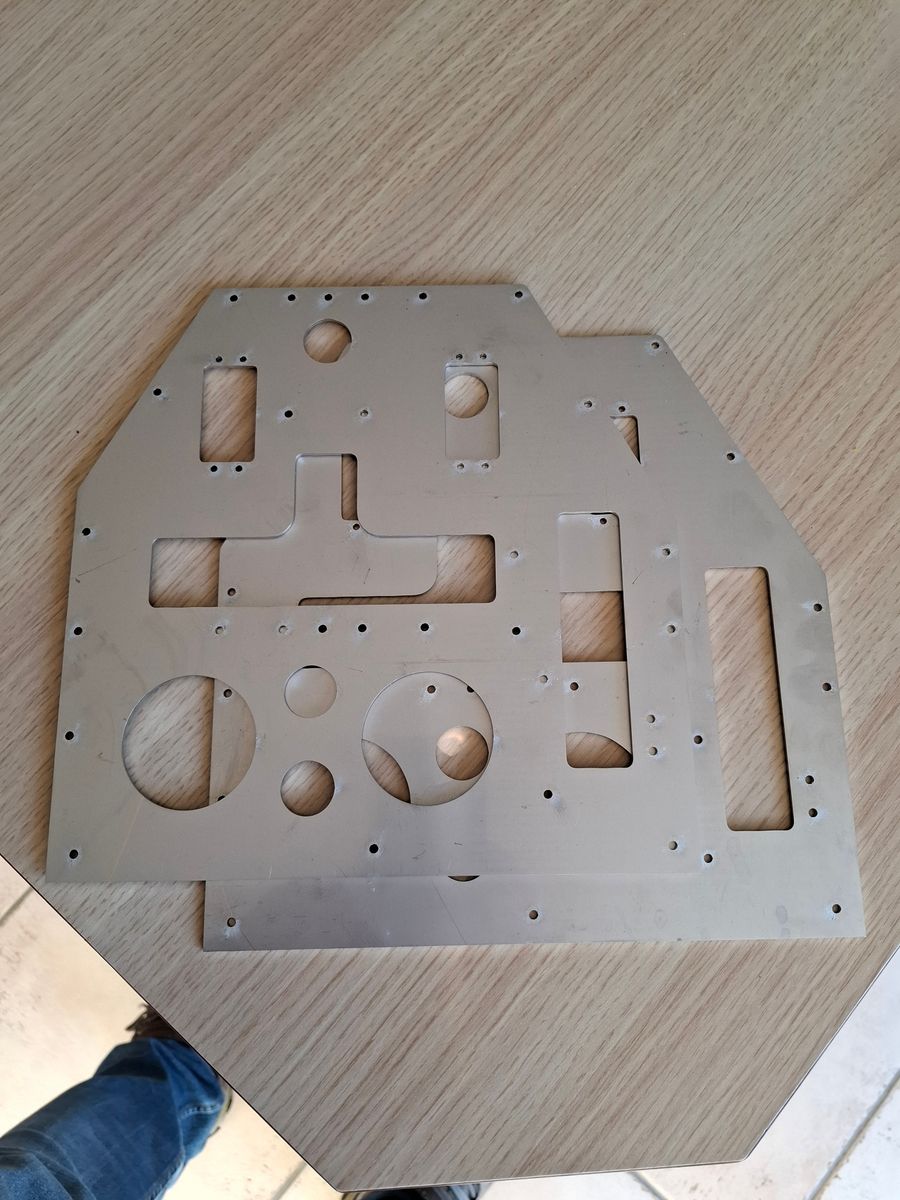
Cad designed side plates.
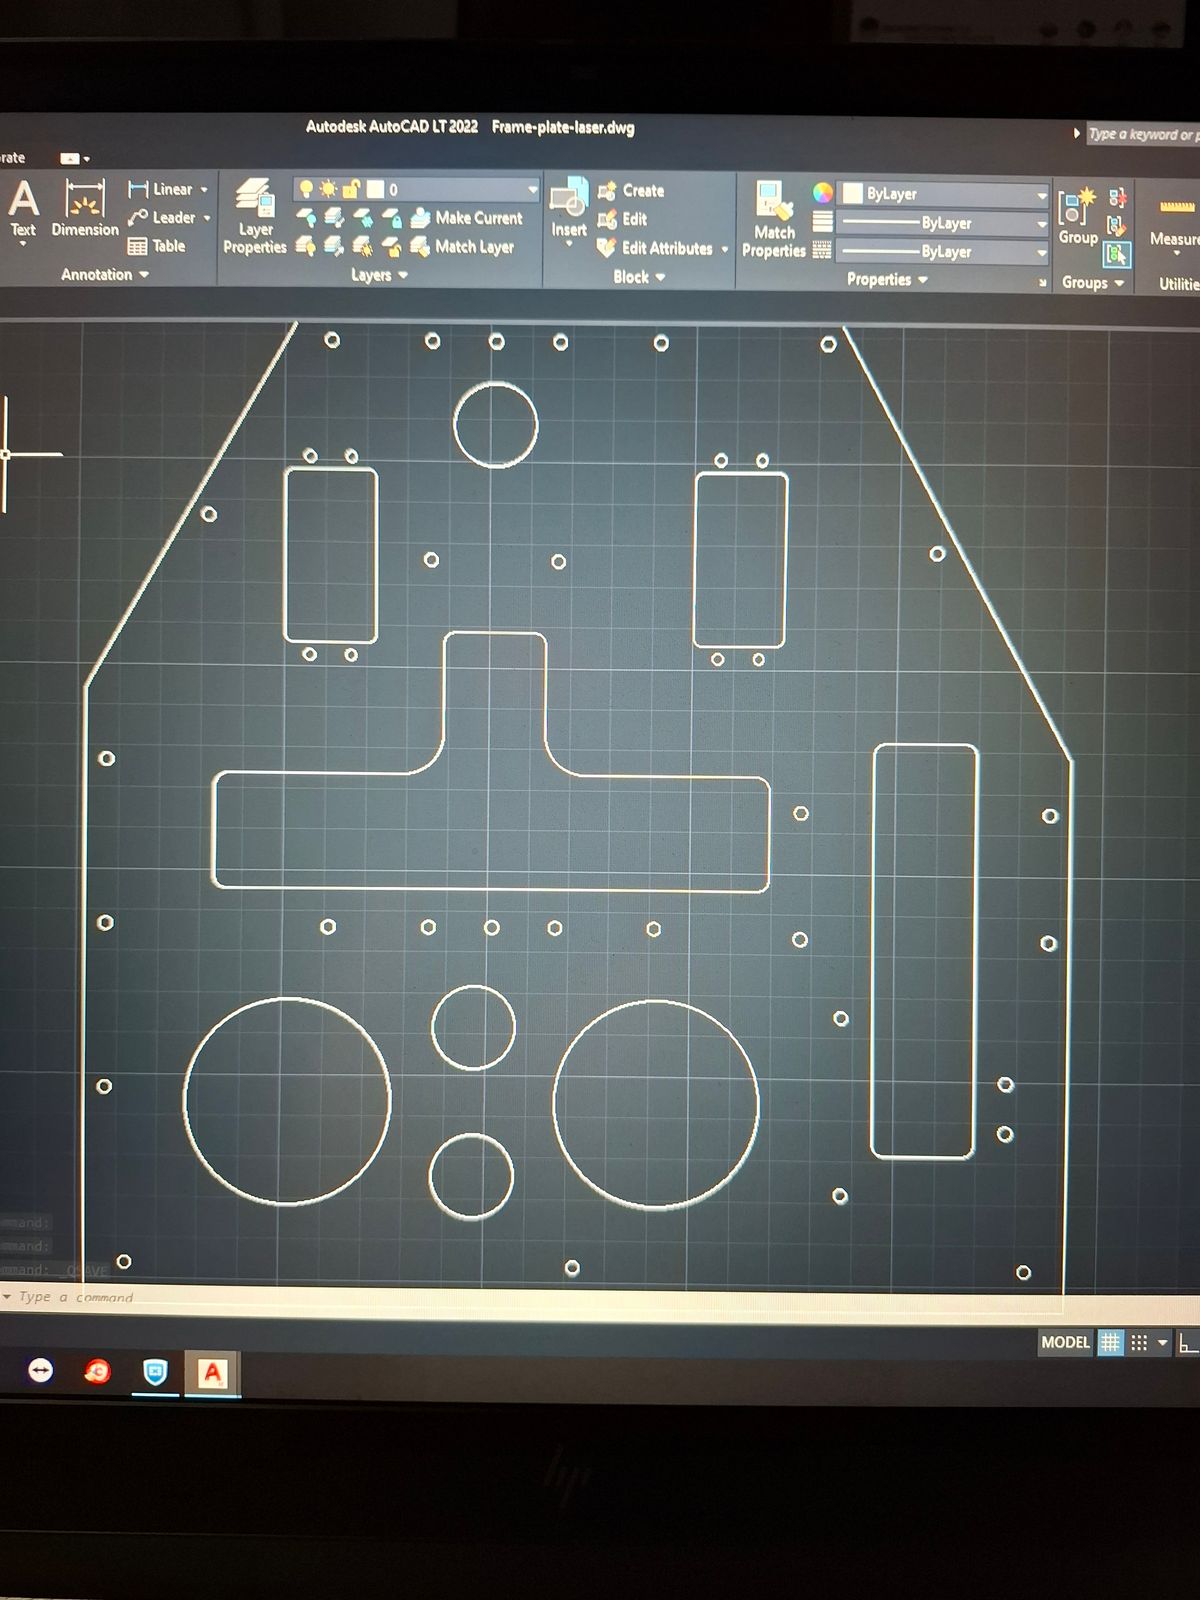
Laser cut side plates.
Triple main shaft ball bearing
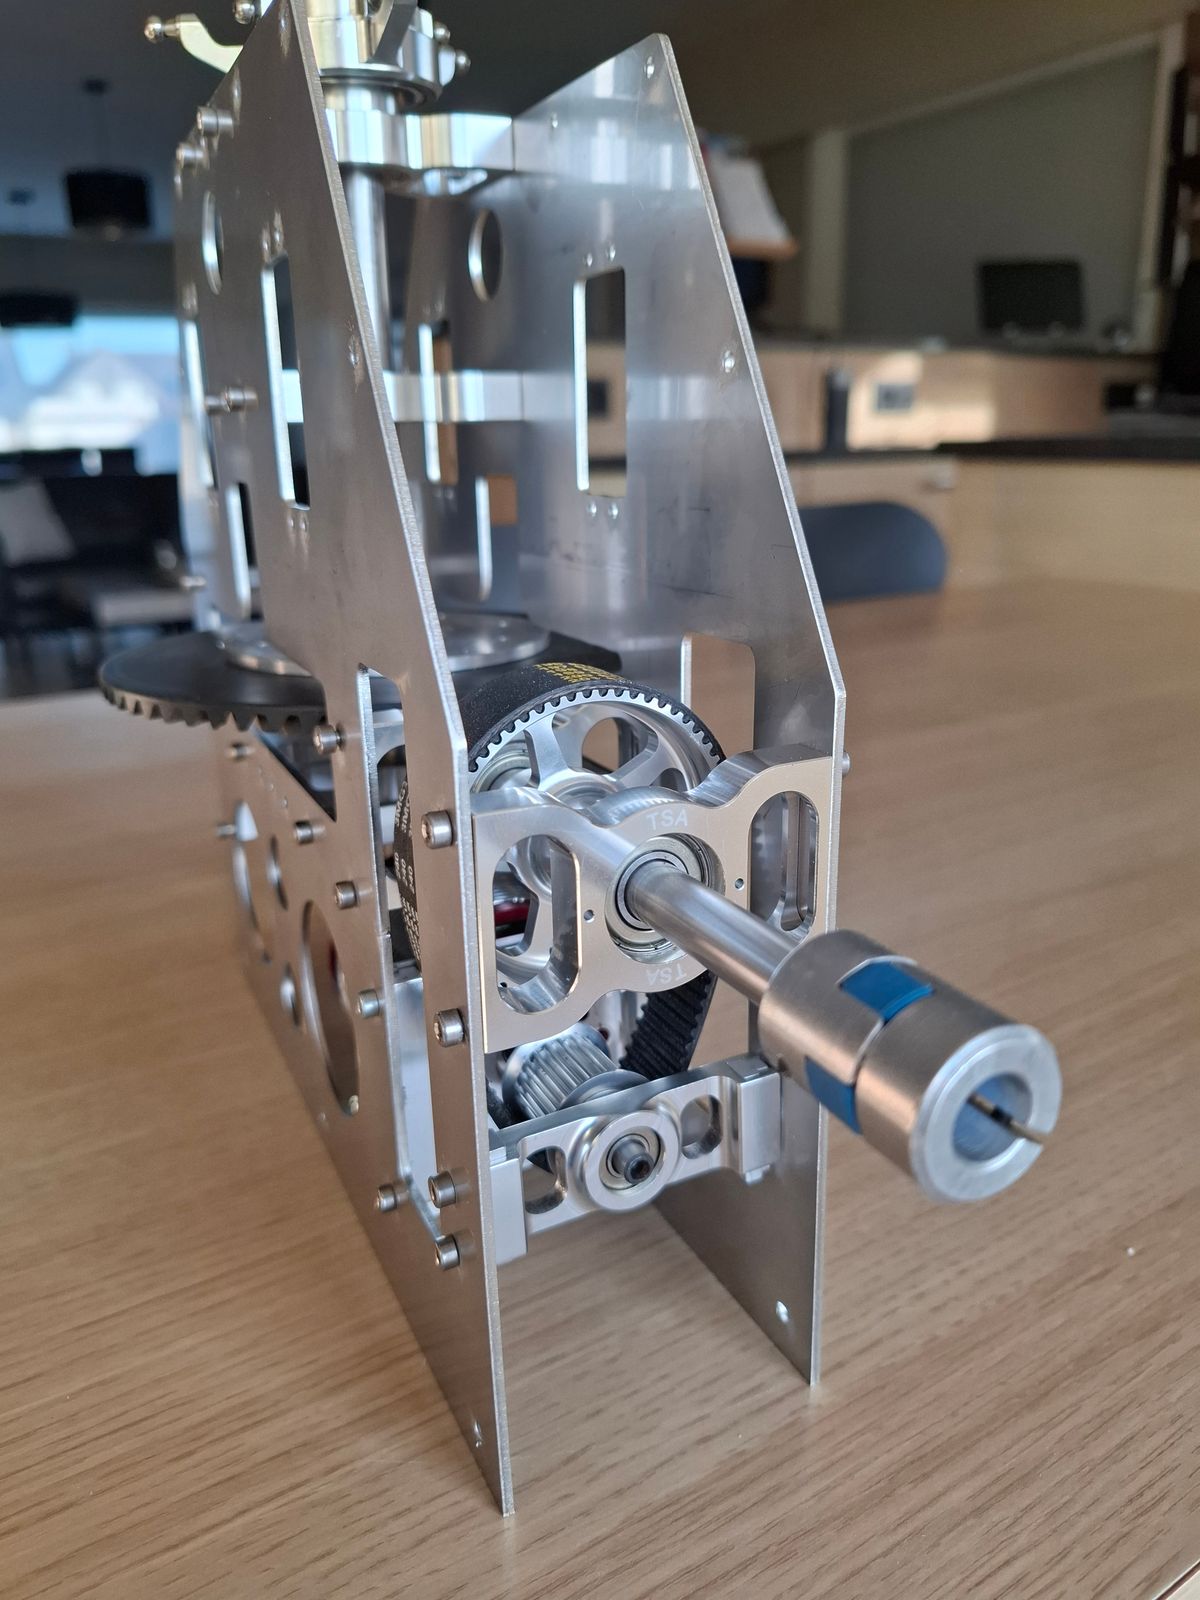
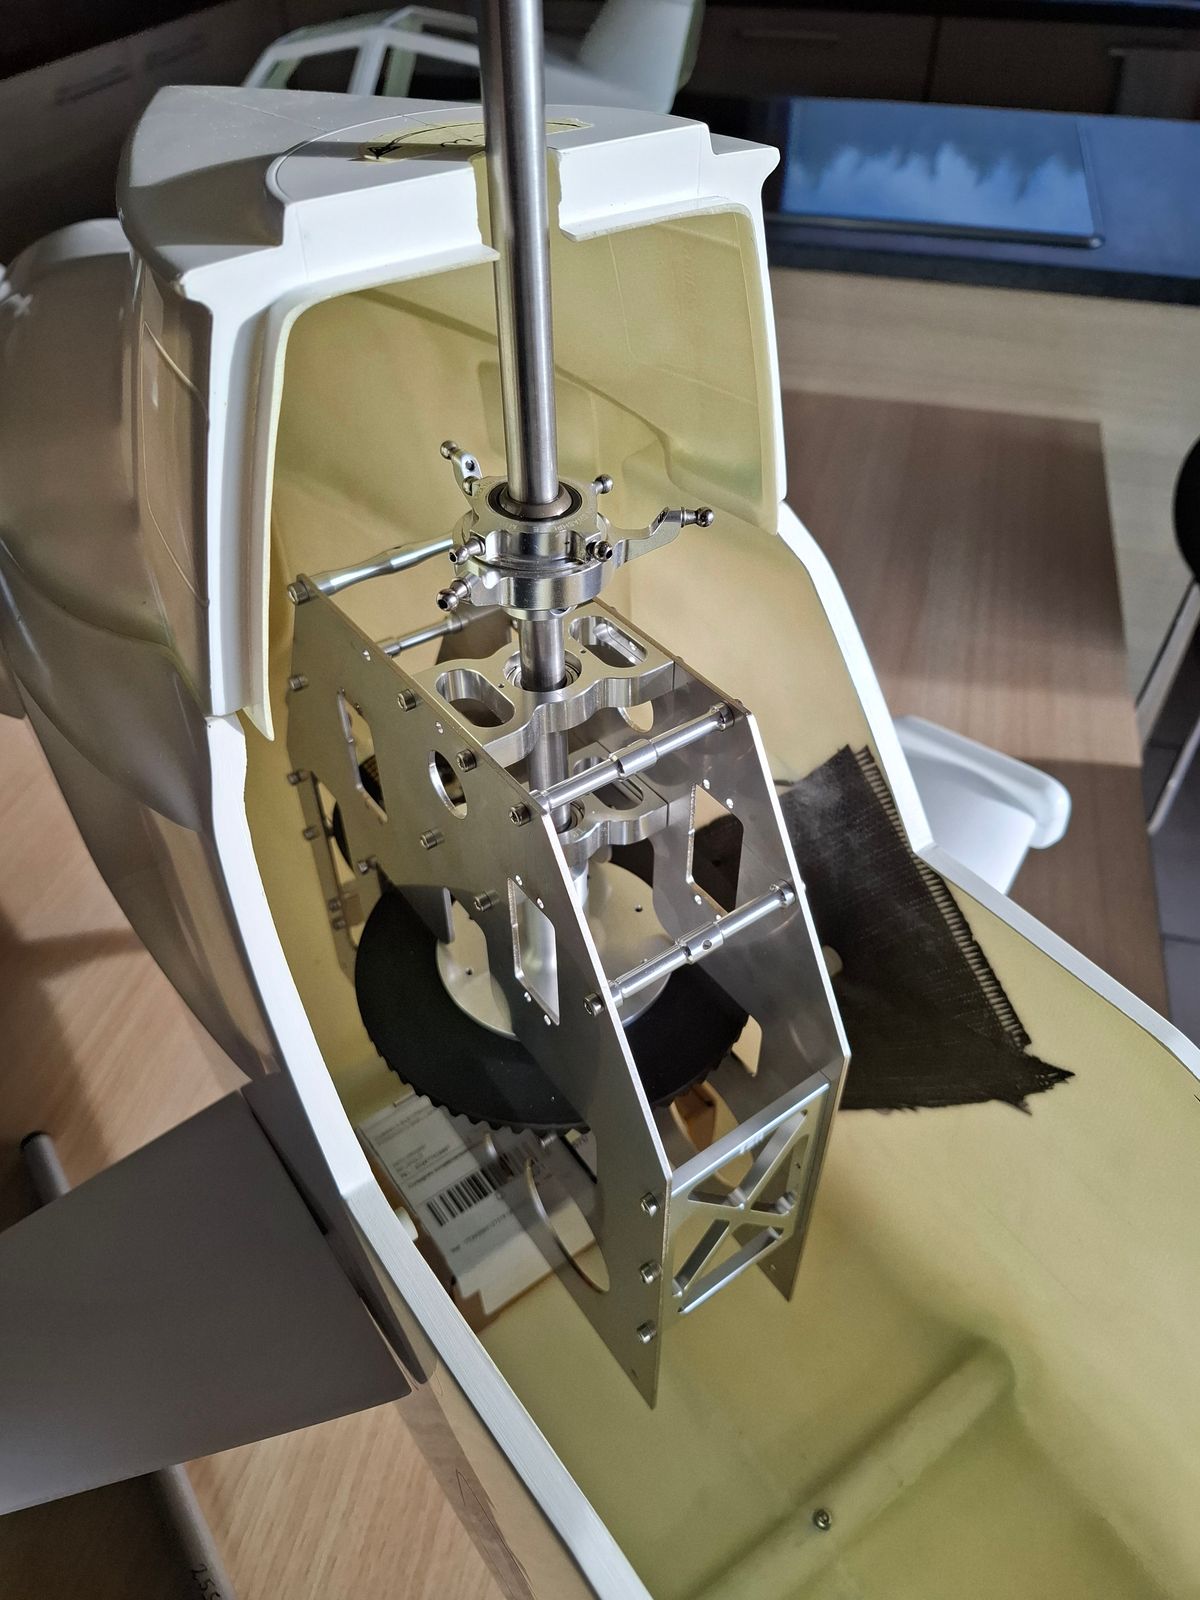
Test setup inside the fuselage.
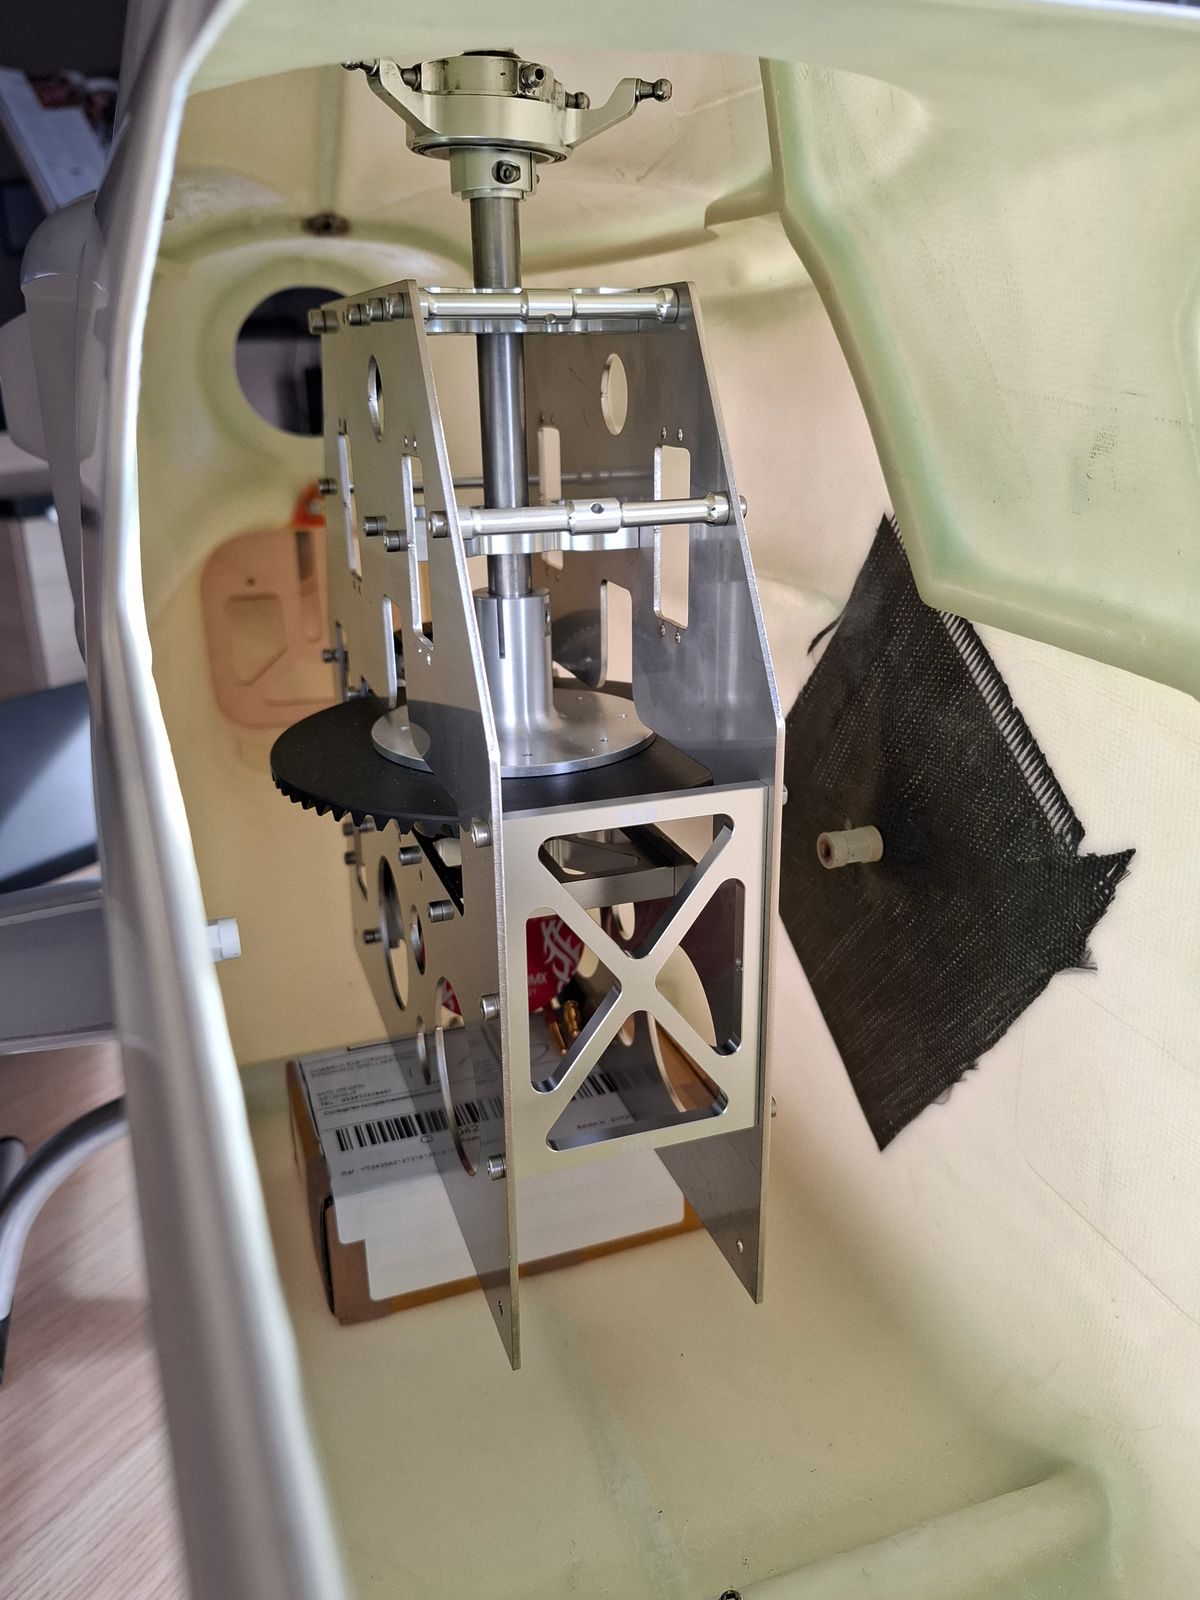
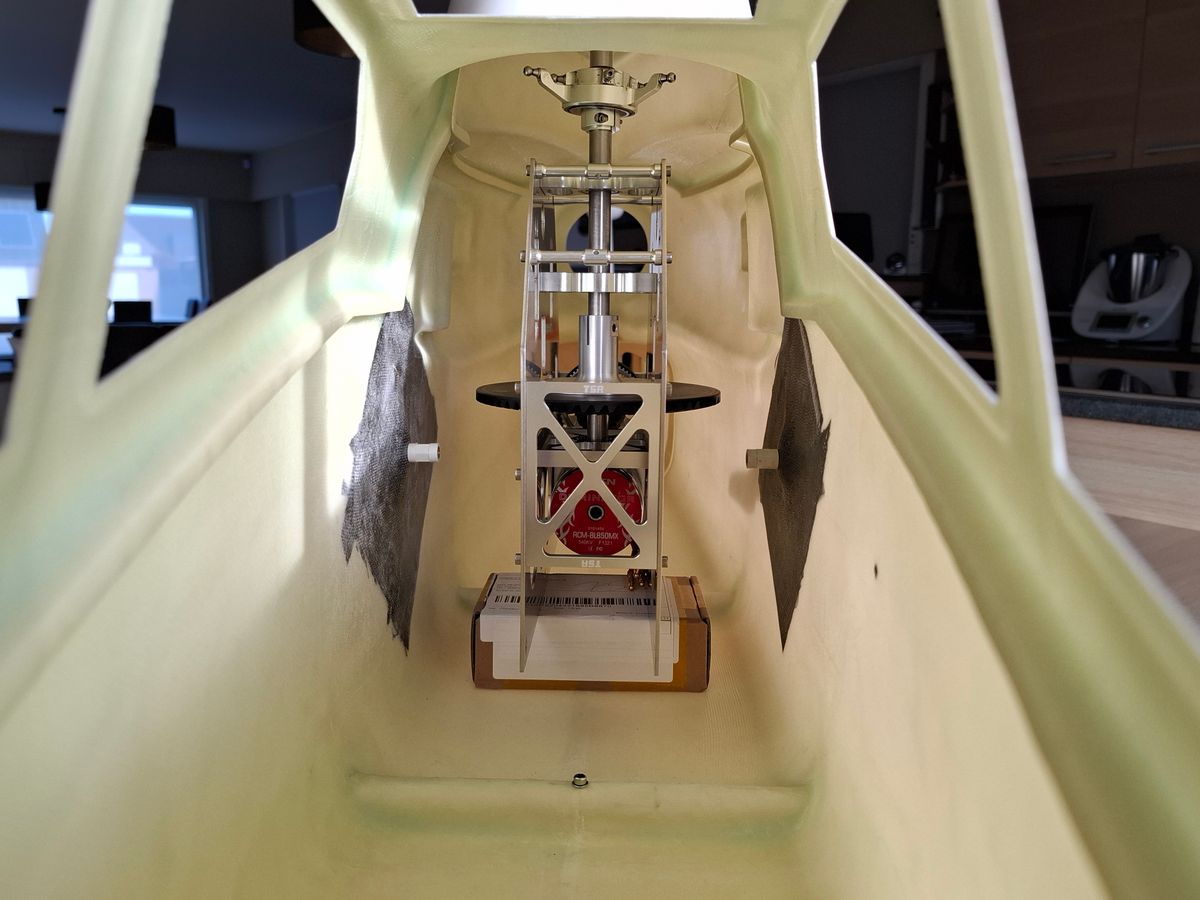
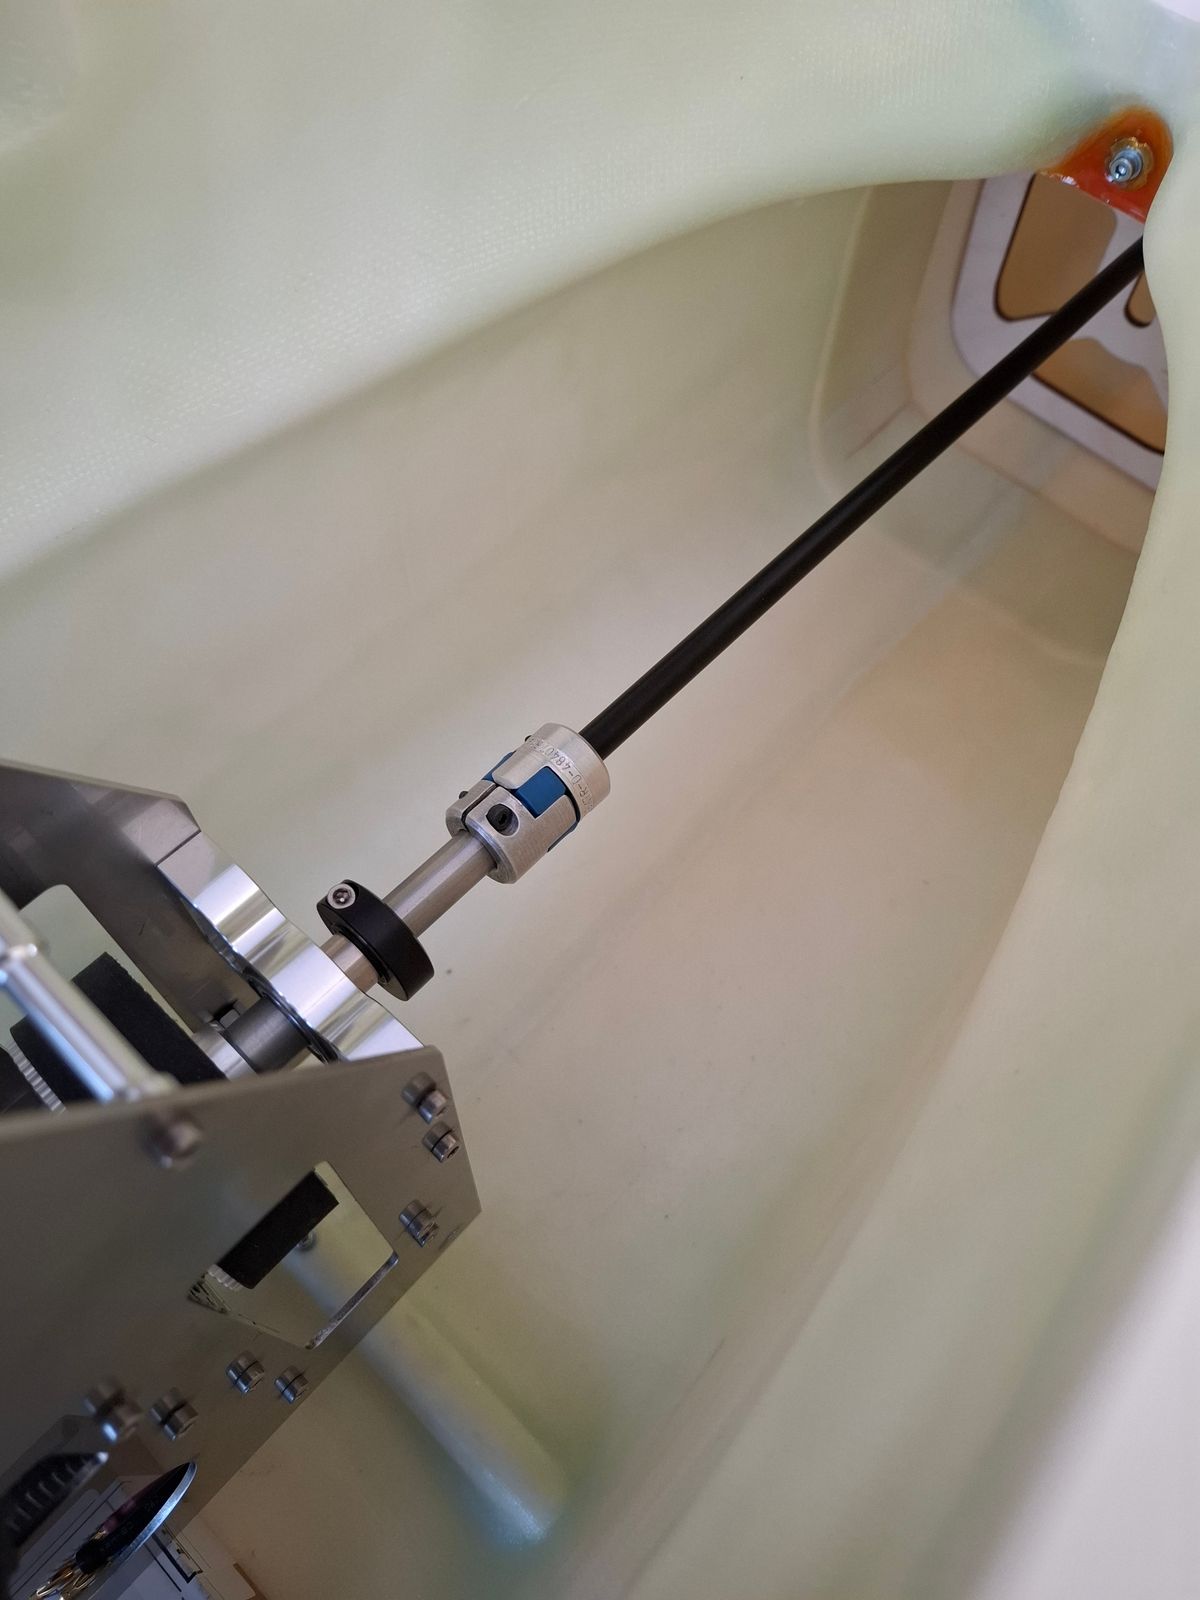
Tailrotor for the Cobra
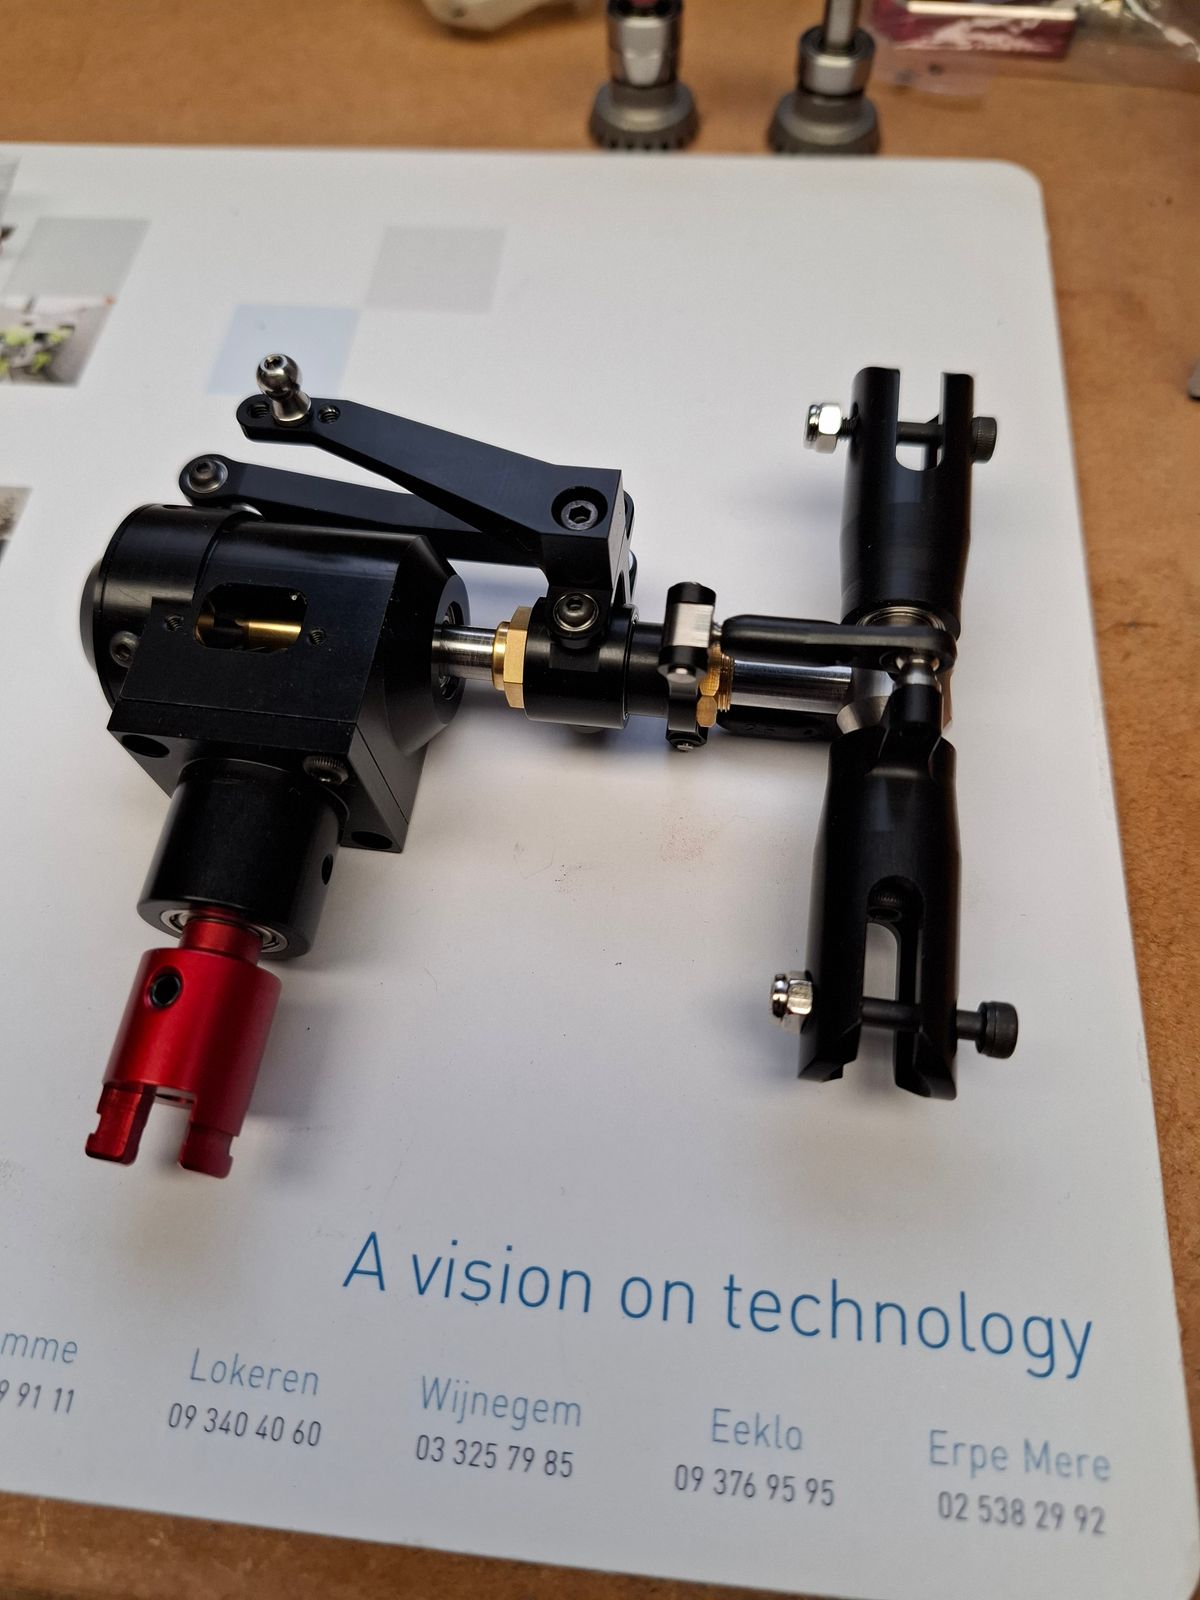
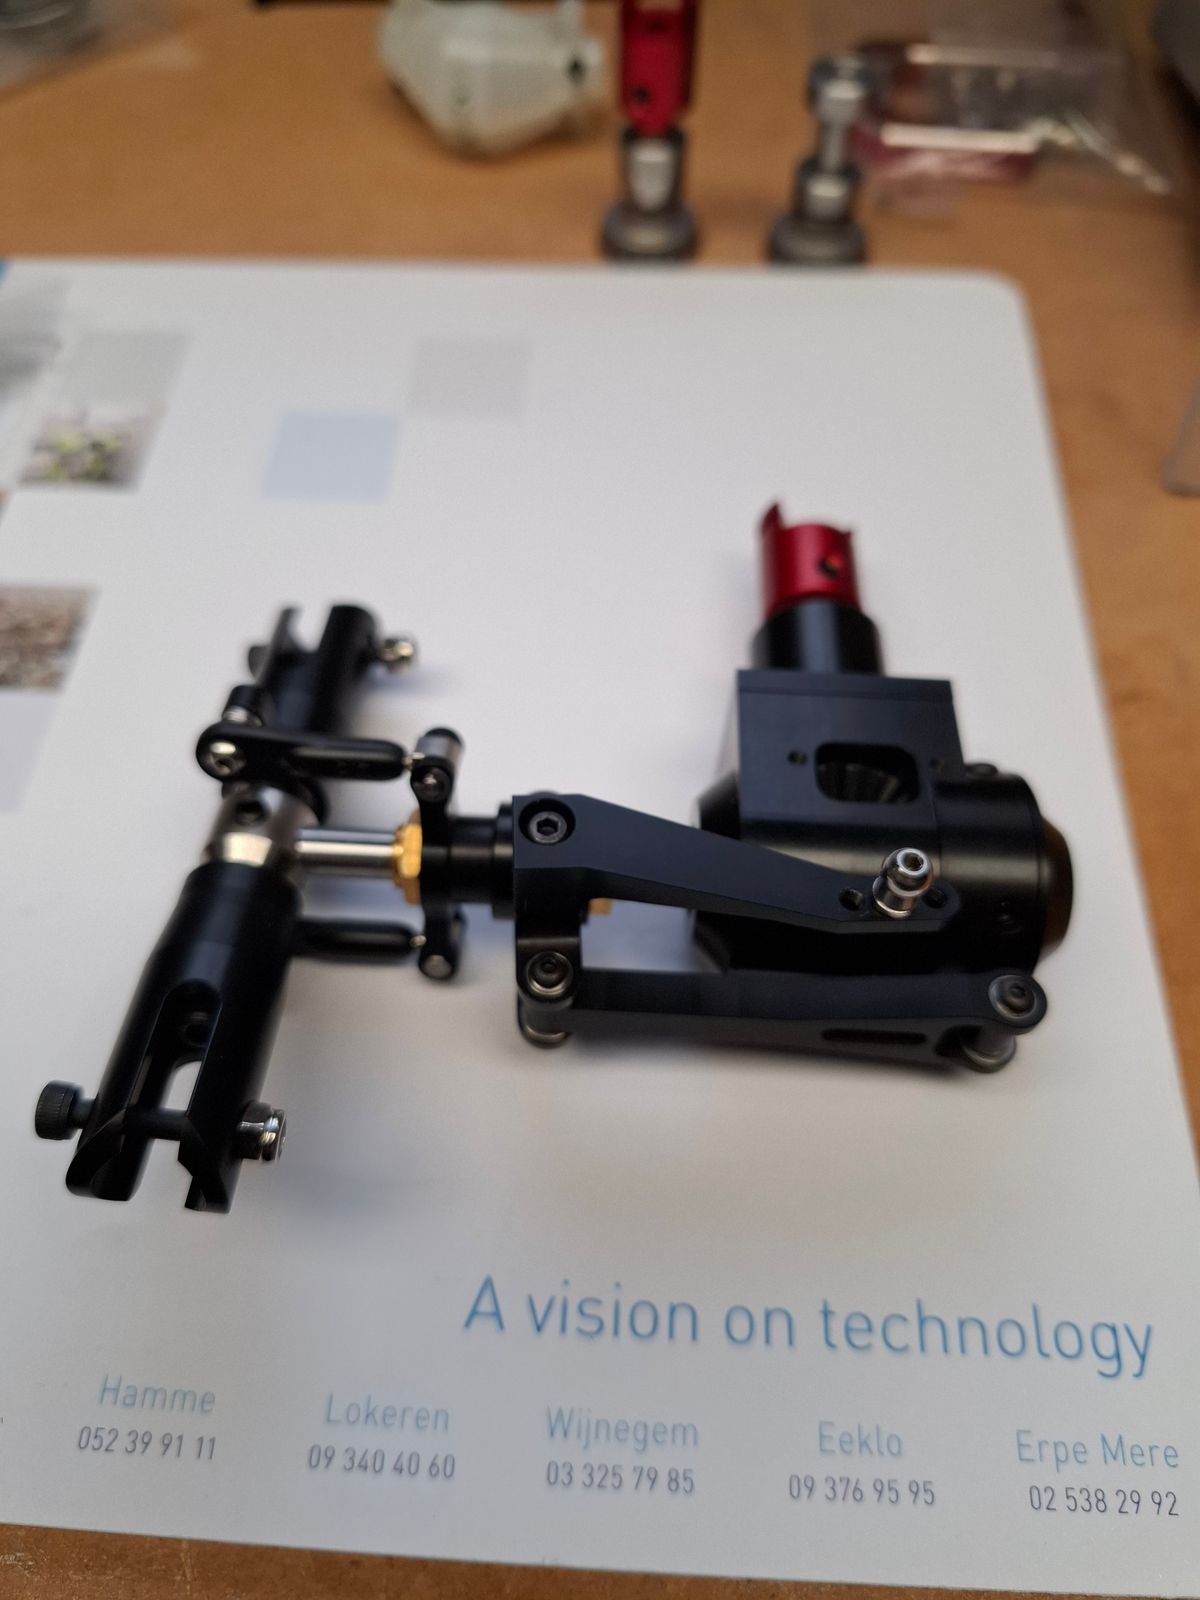
Assembly of the tailrotor, 6mm shaft, module 1 gears.
18 Ball bearings.
Made by Baumann Helikopter Switserland
Rotation direction and rudder side control fully configurable.
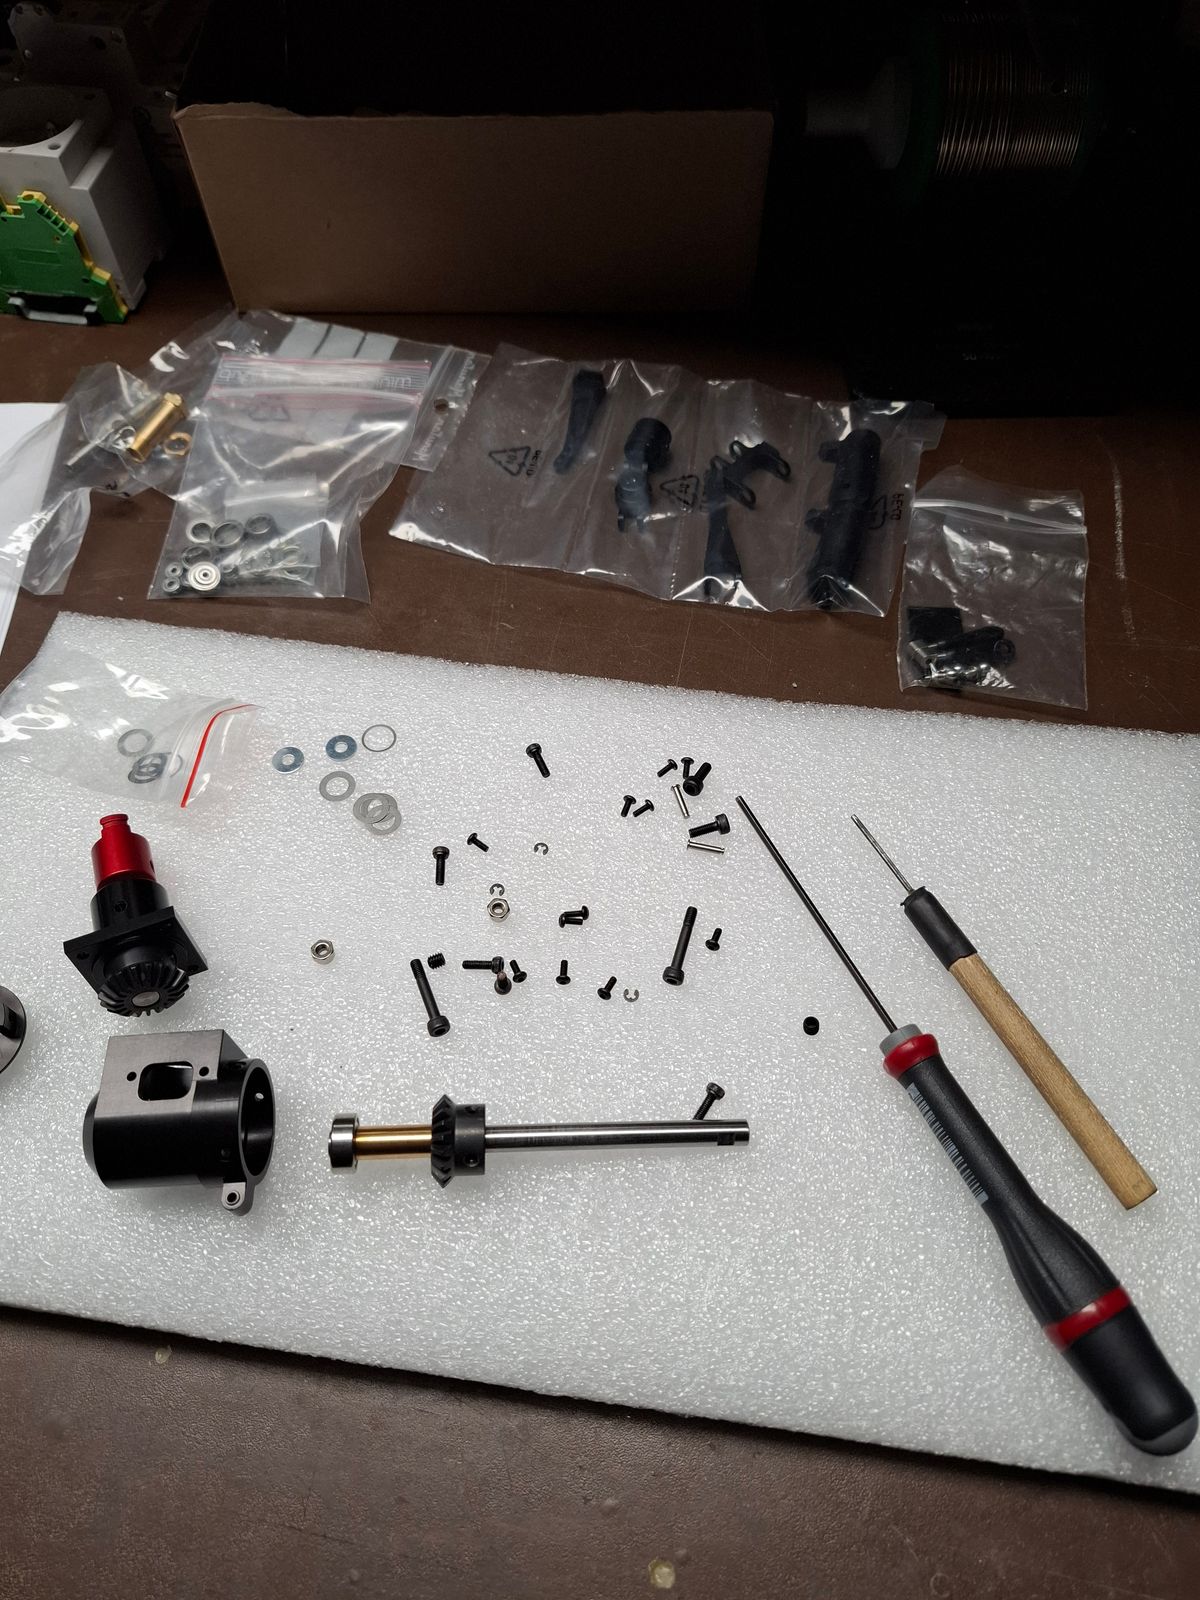
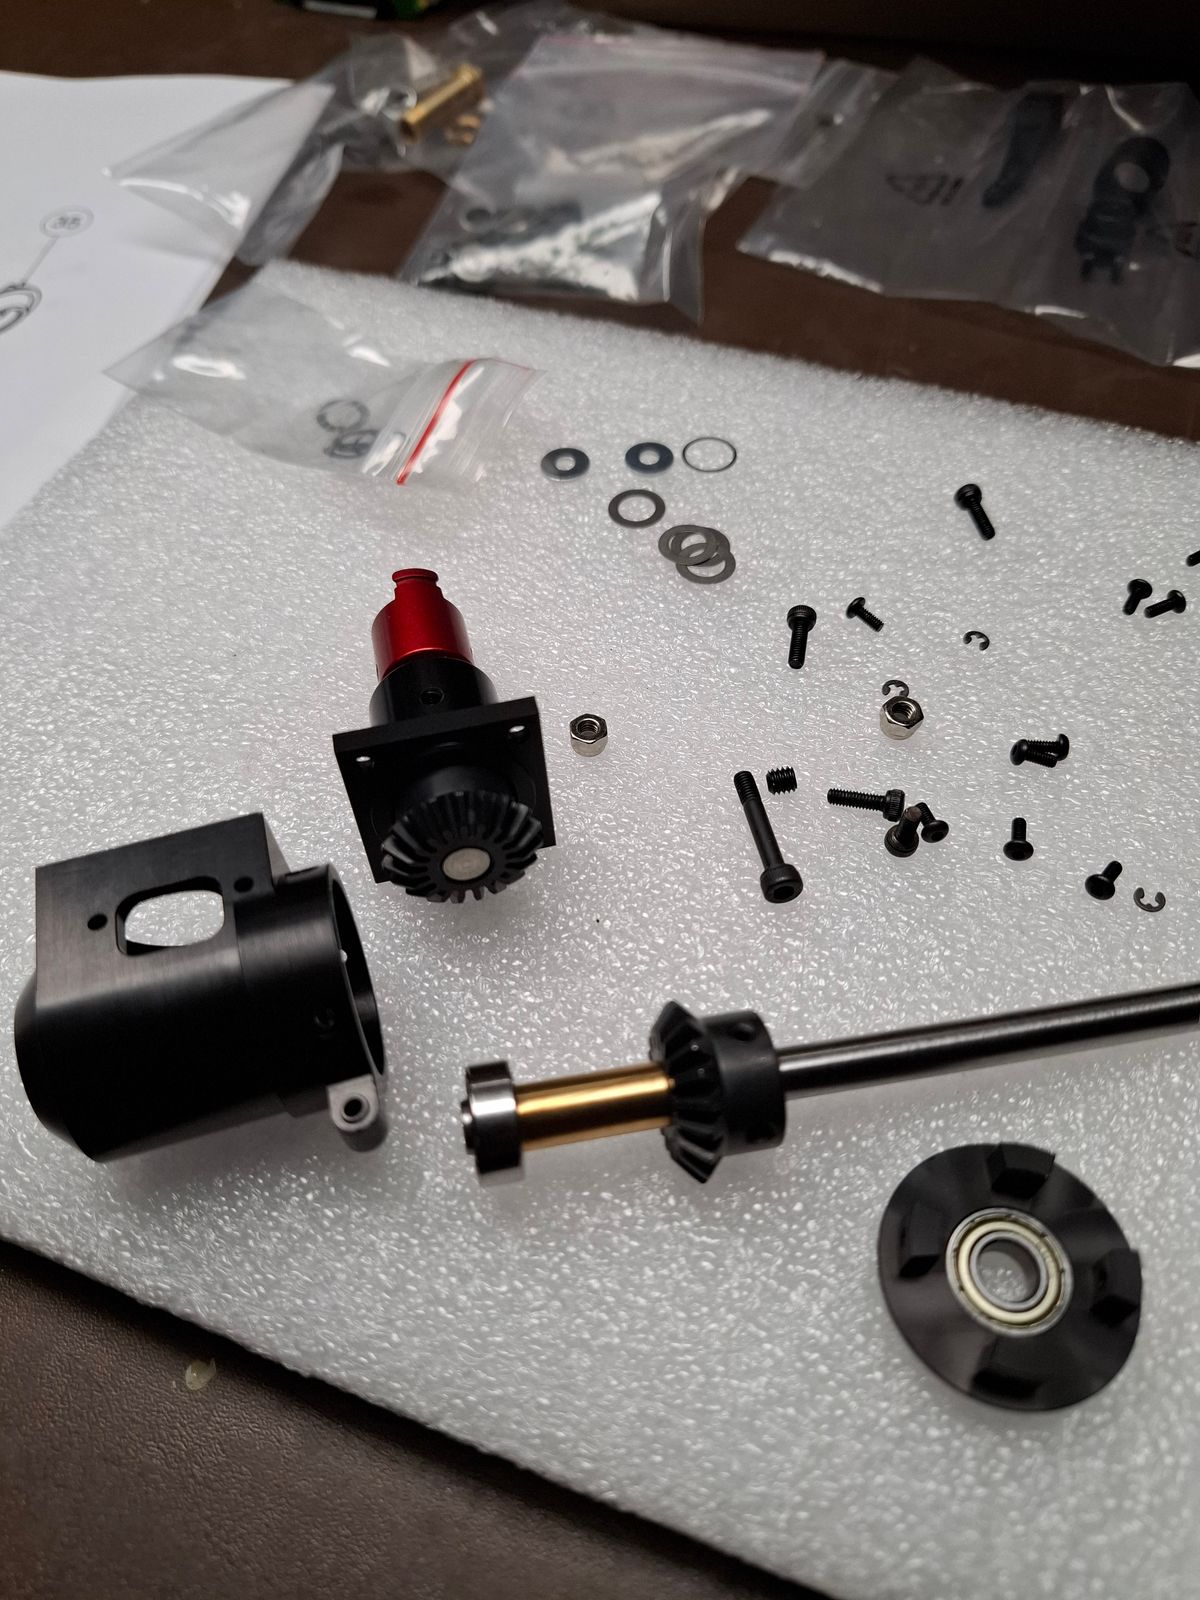
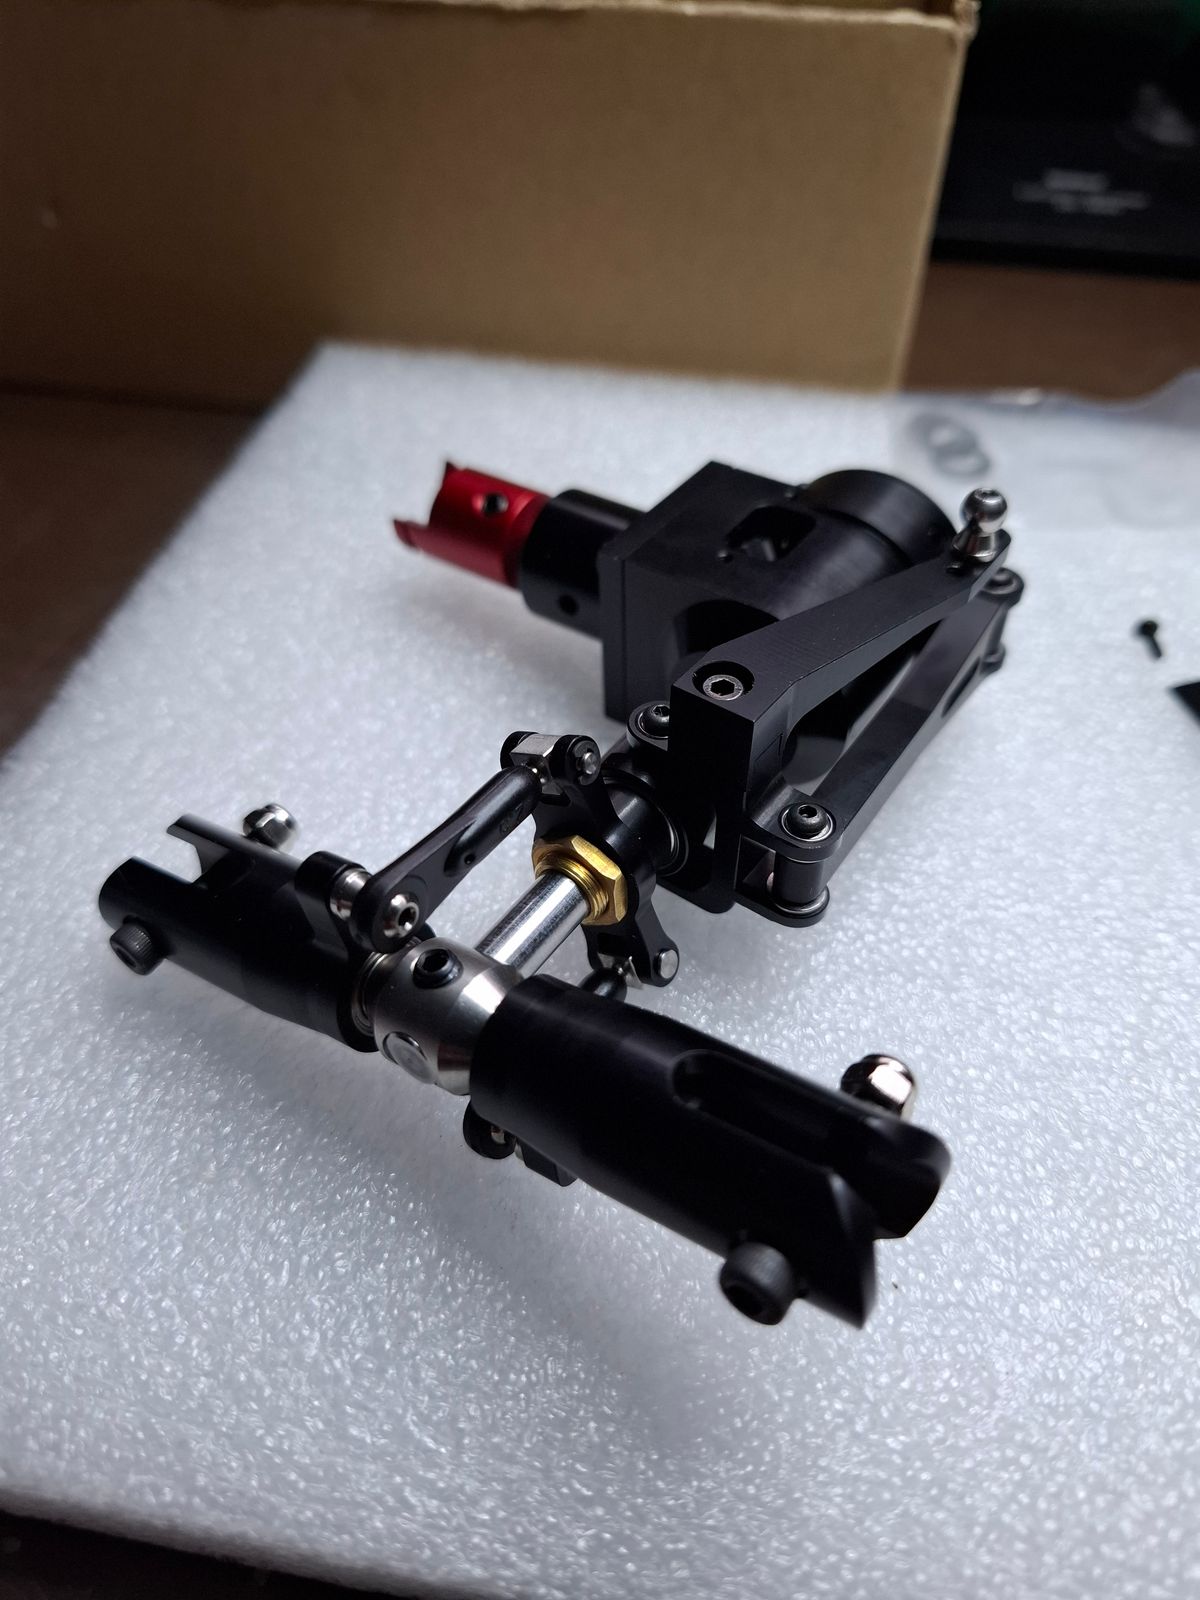
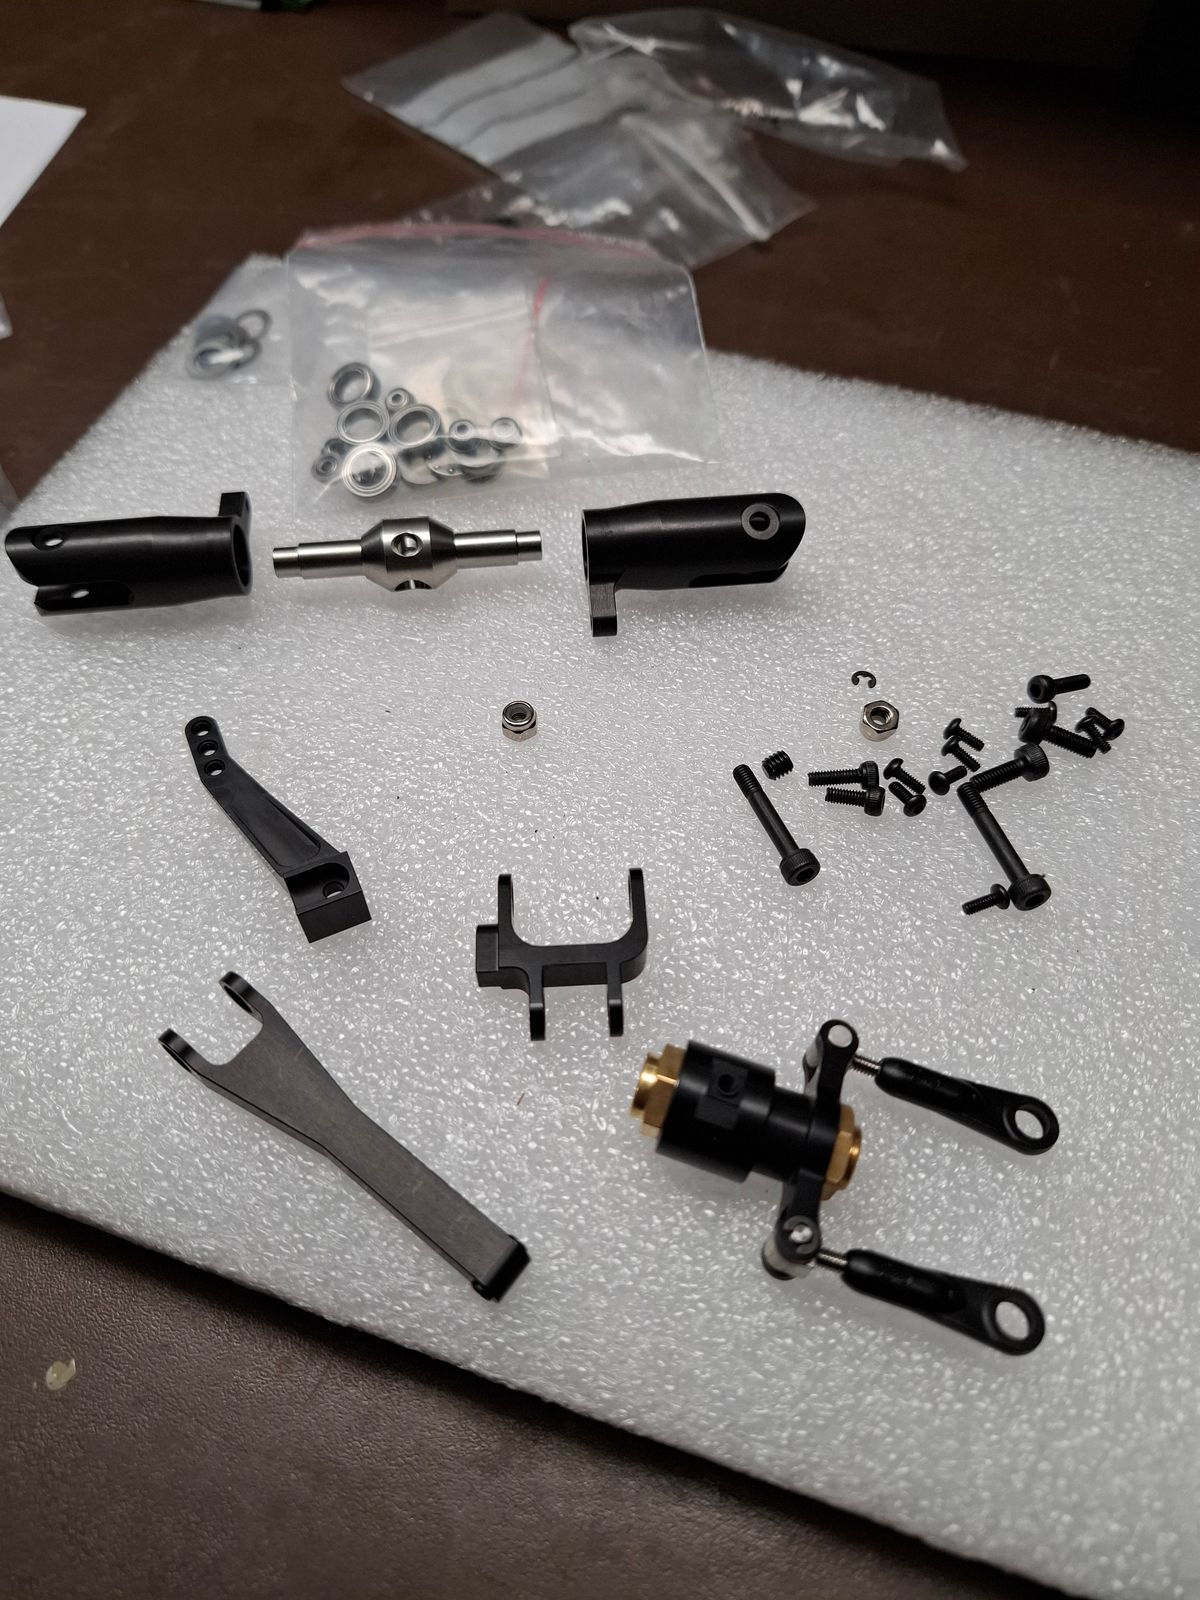
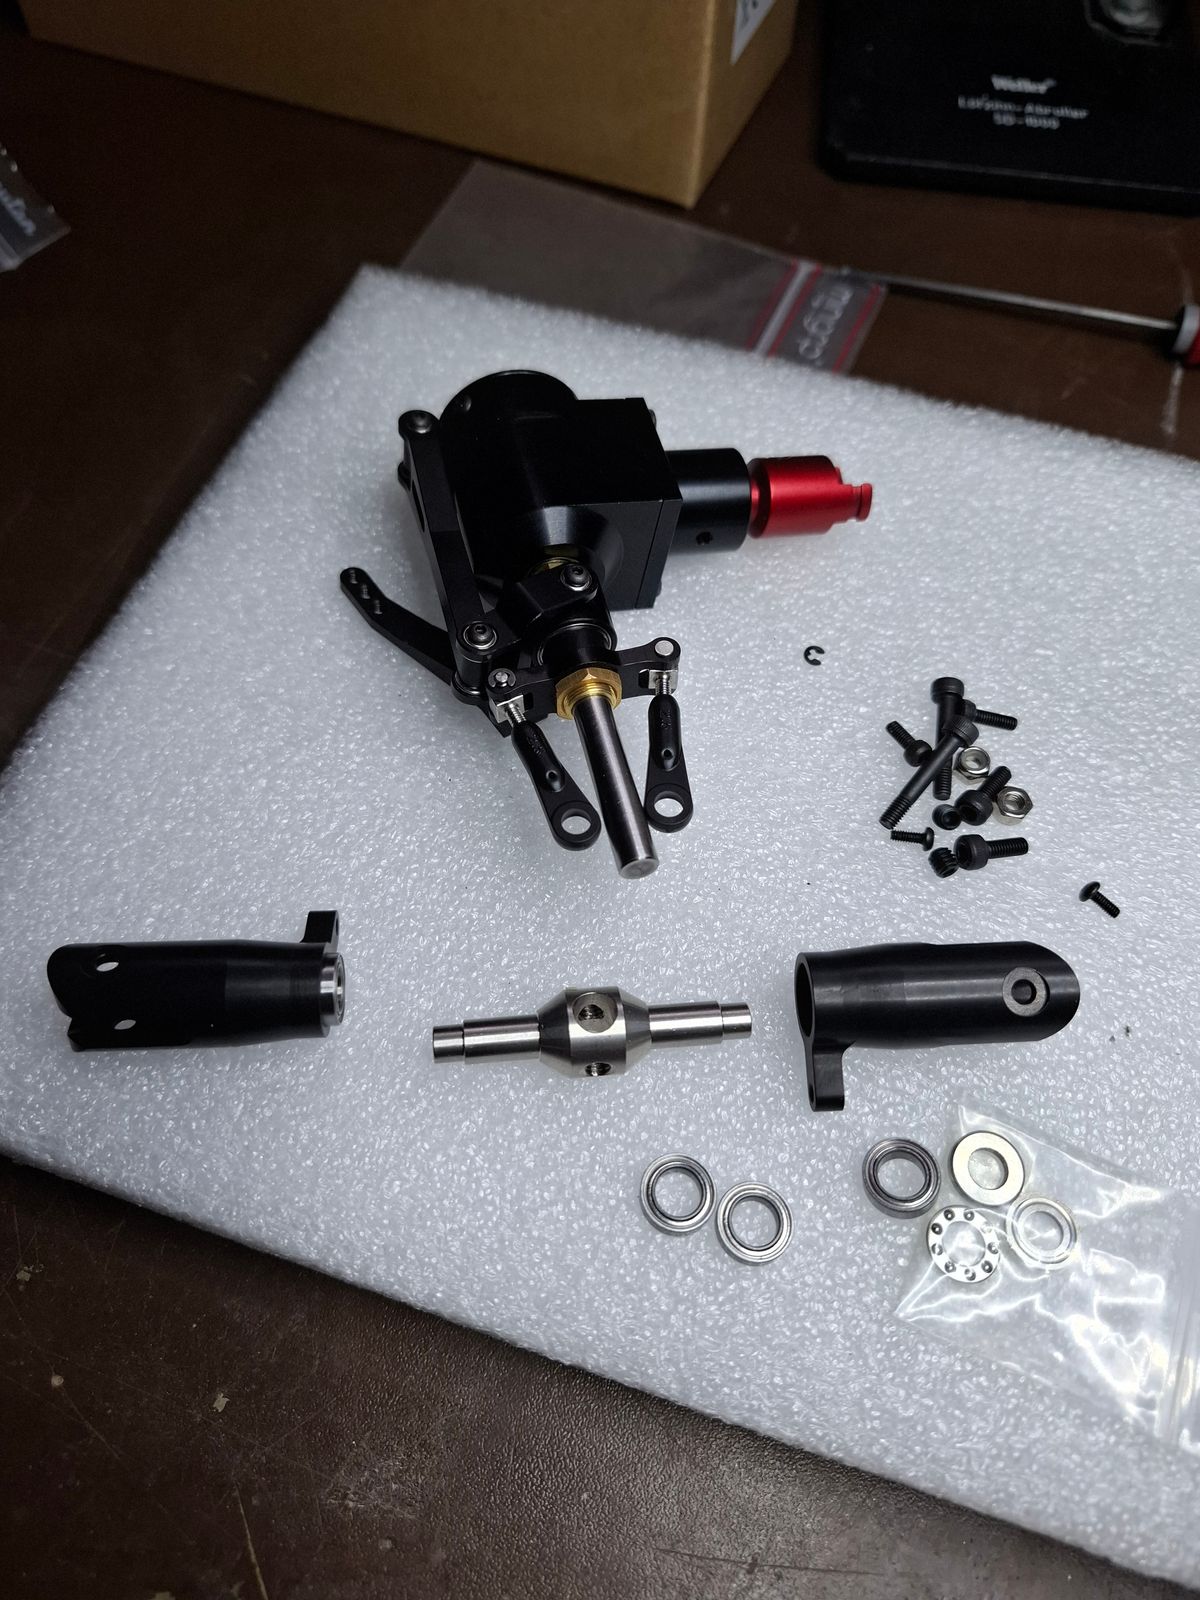
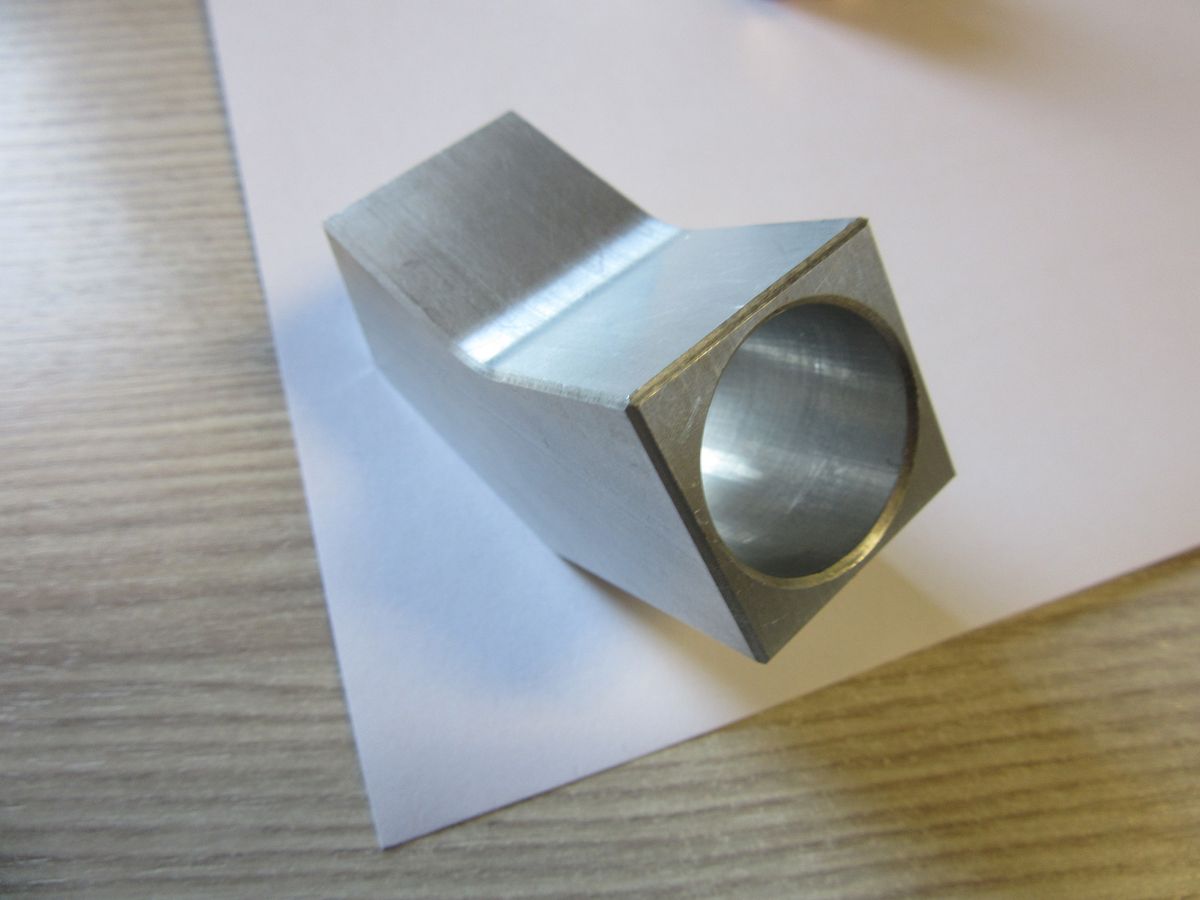
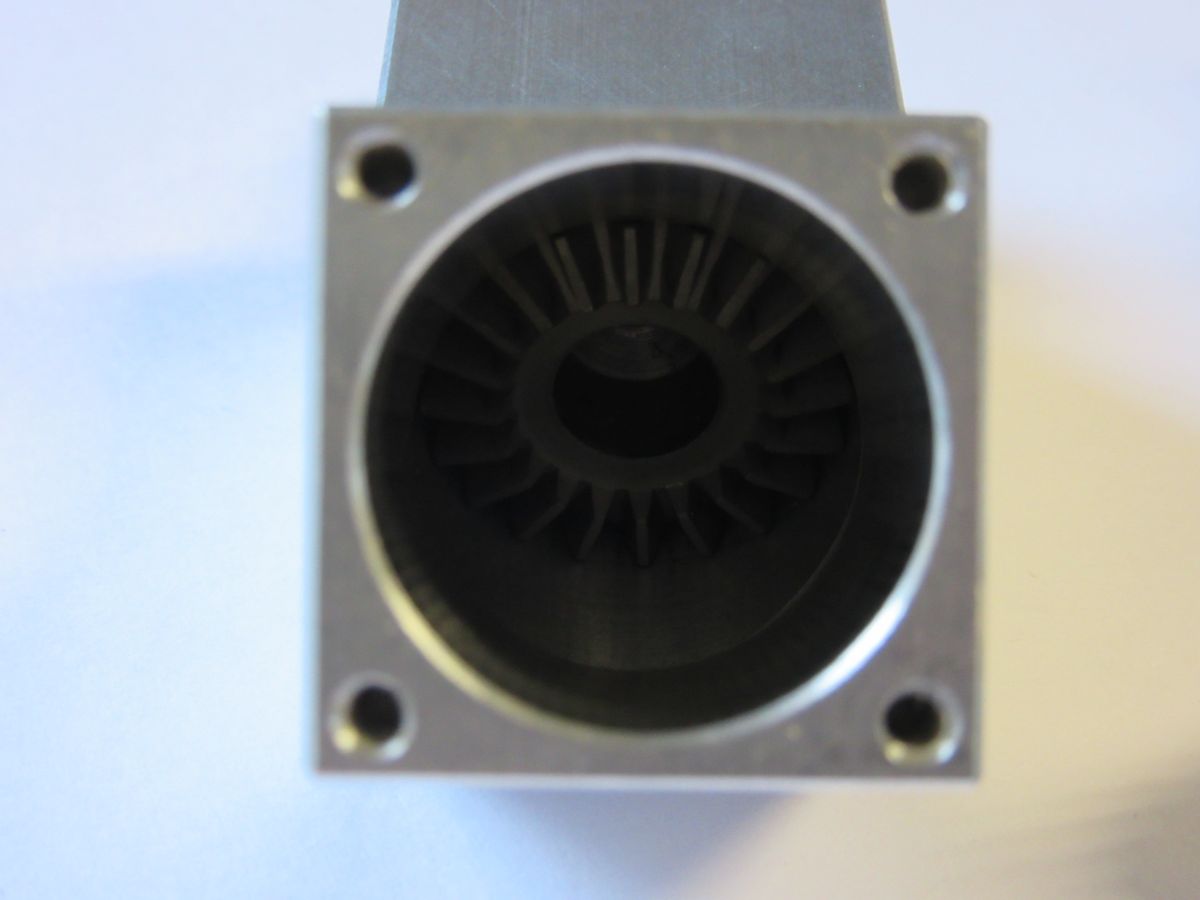
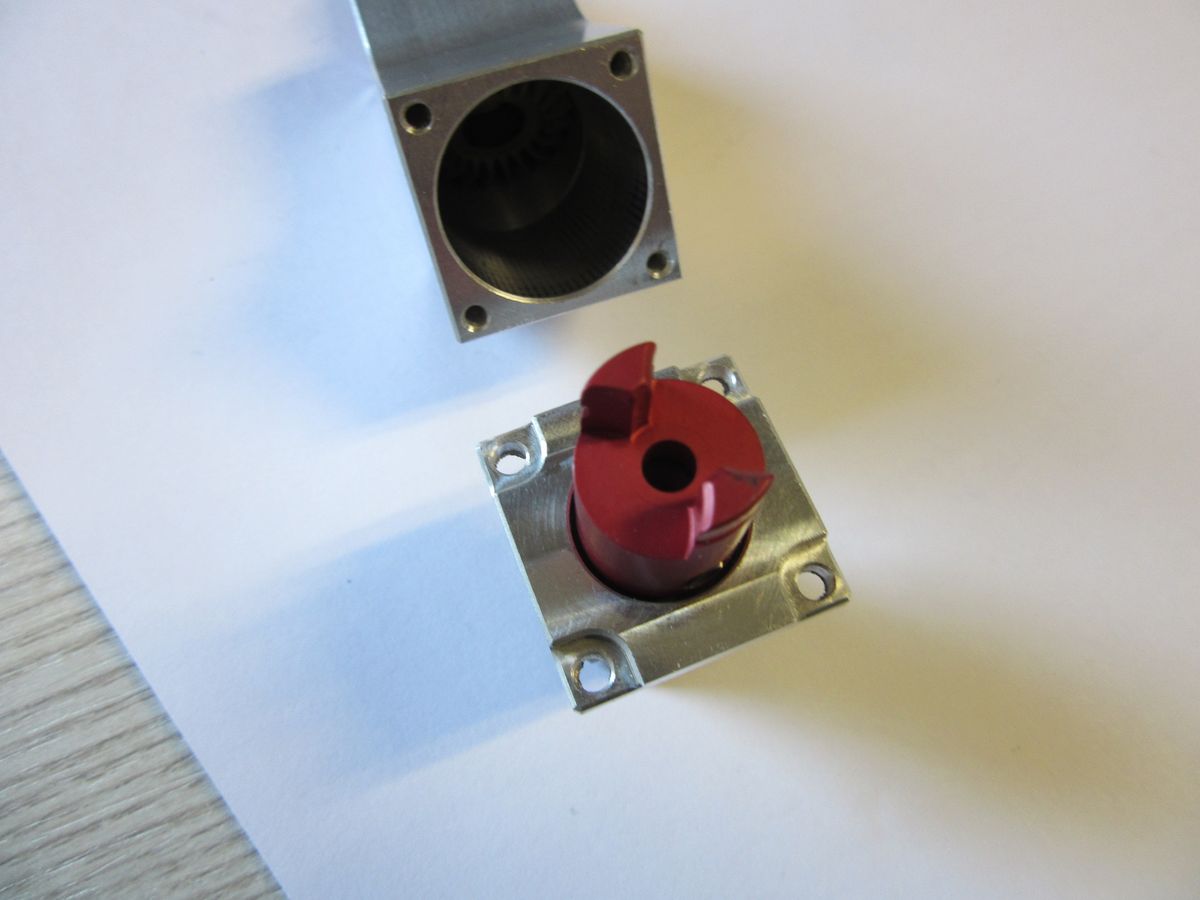
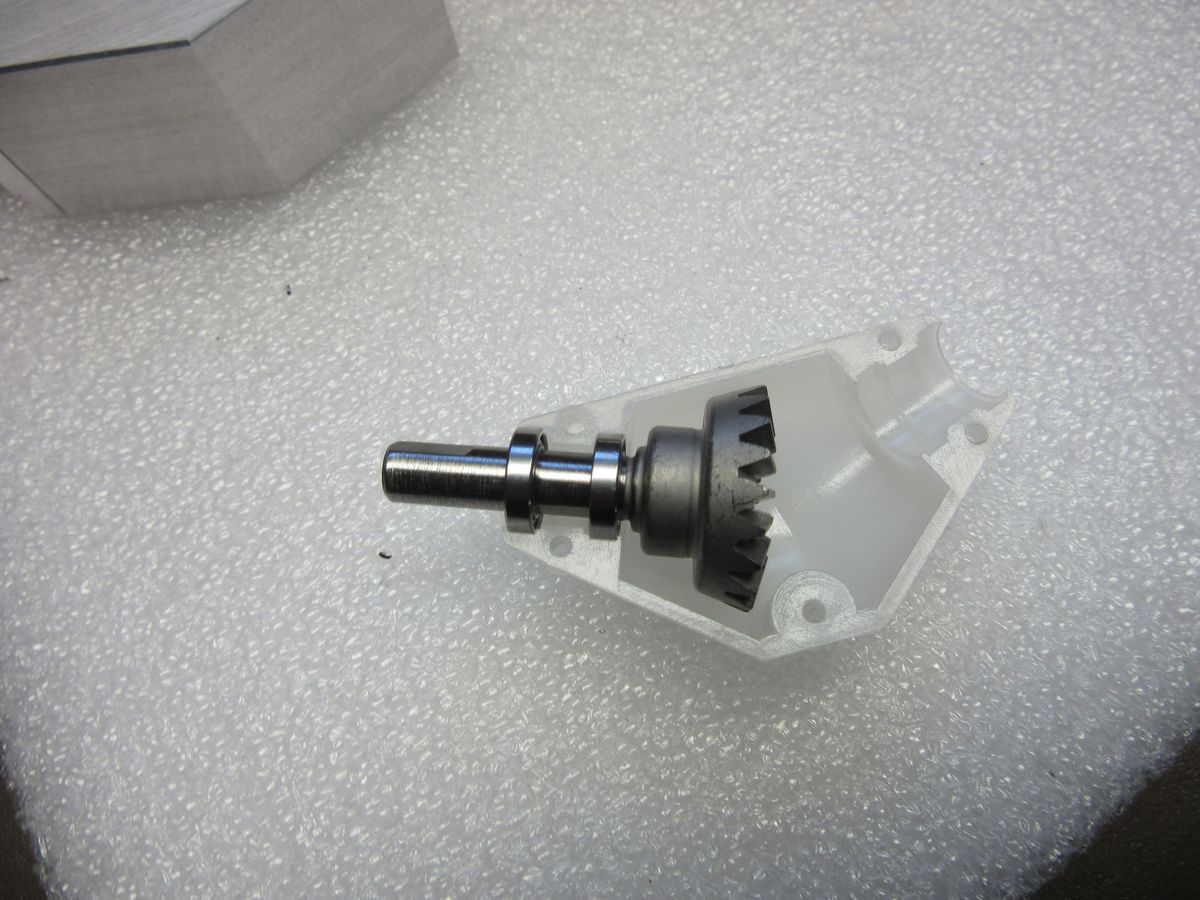
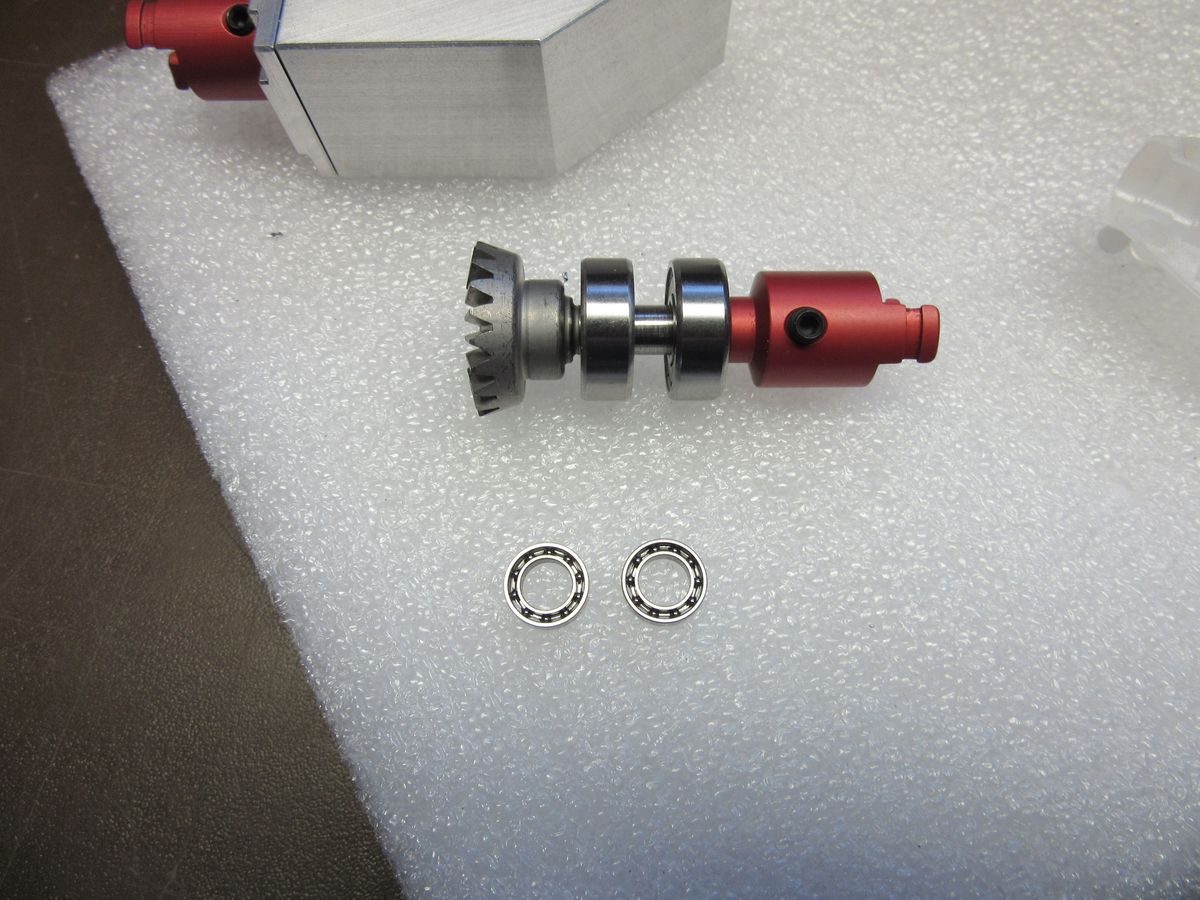
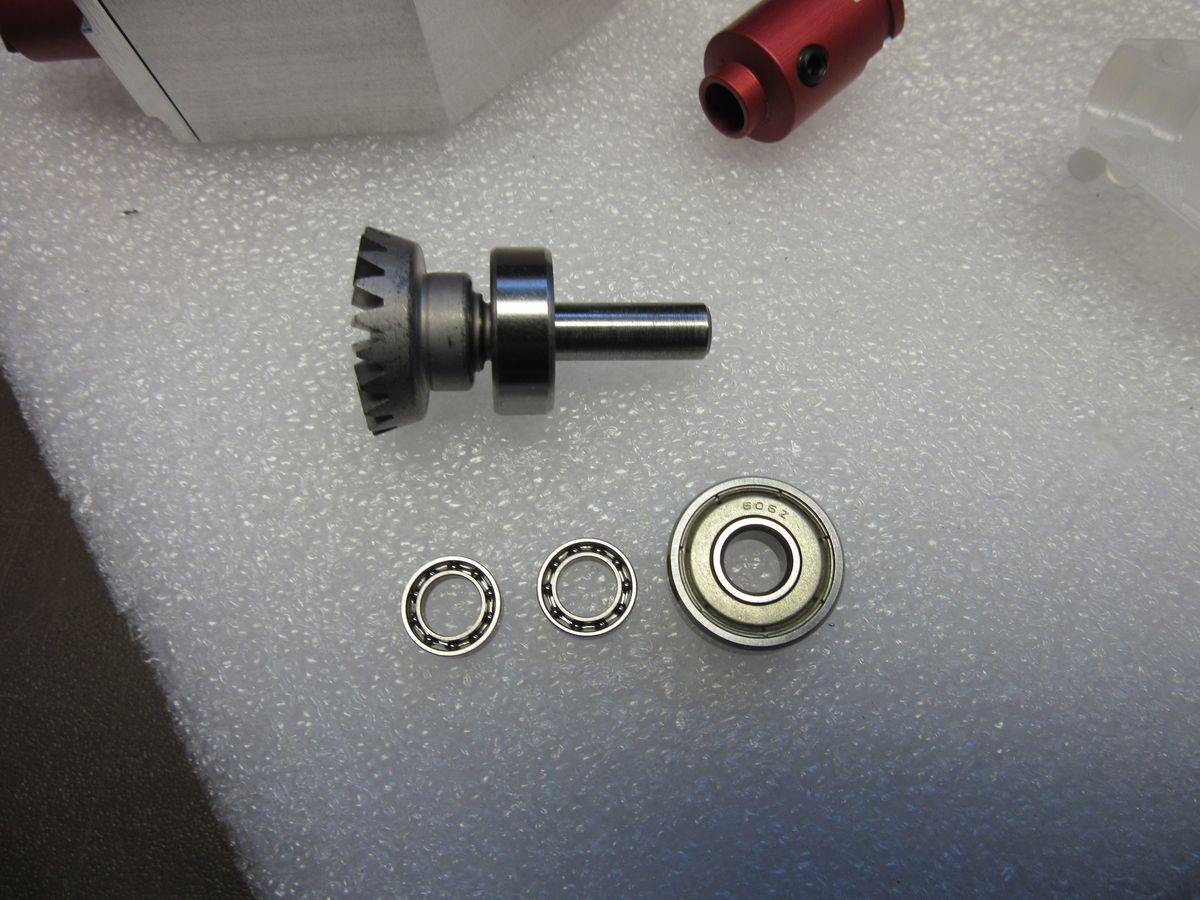
New 40° angular gearbox for the Cobra tailrotor drive
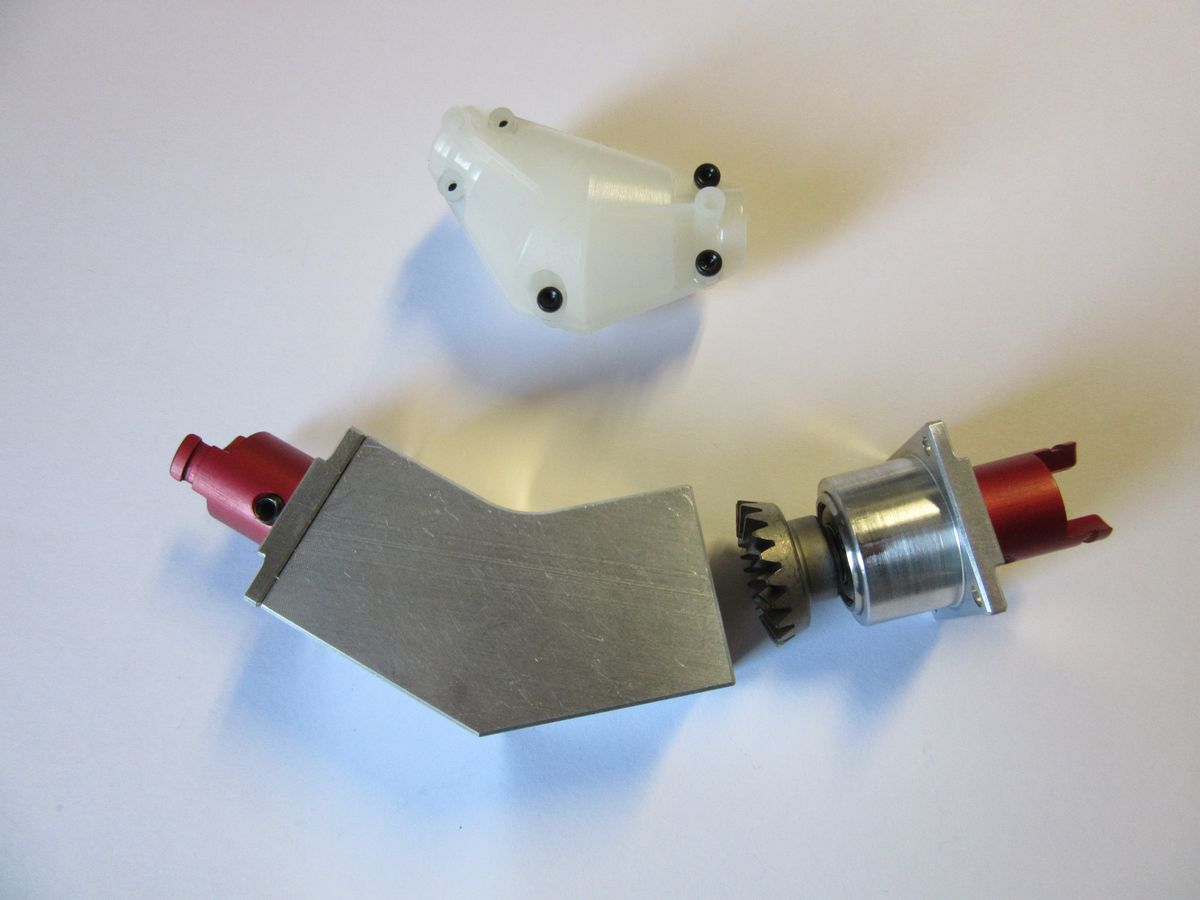
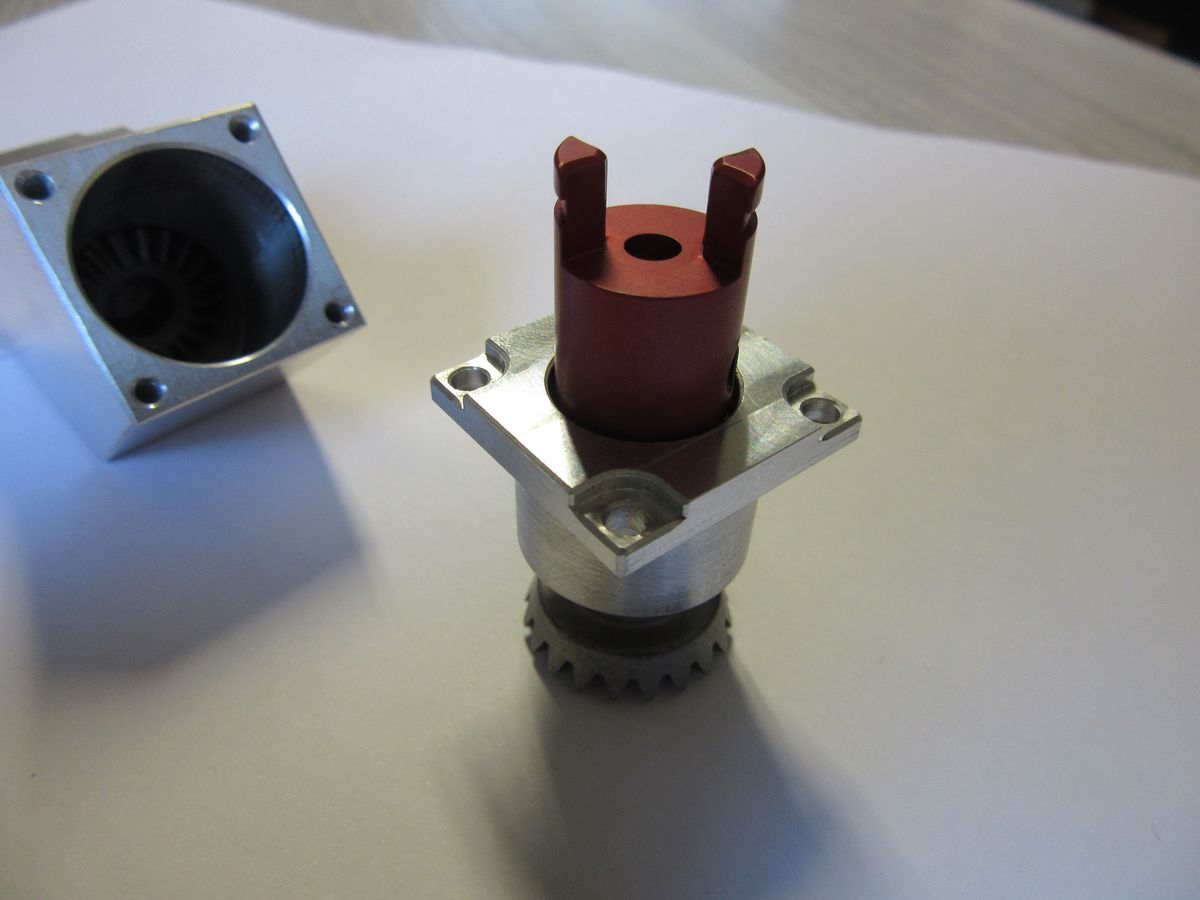
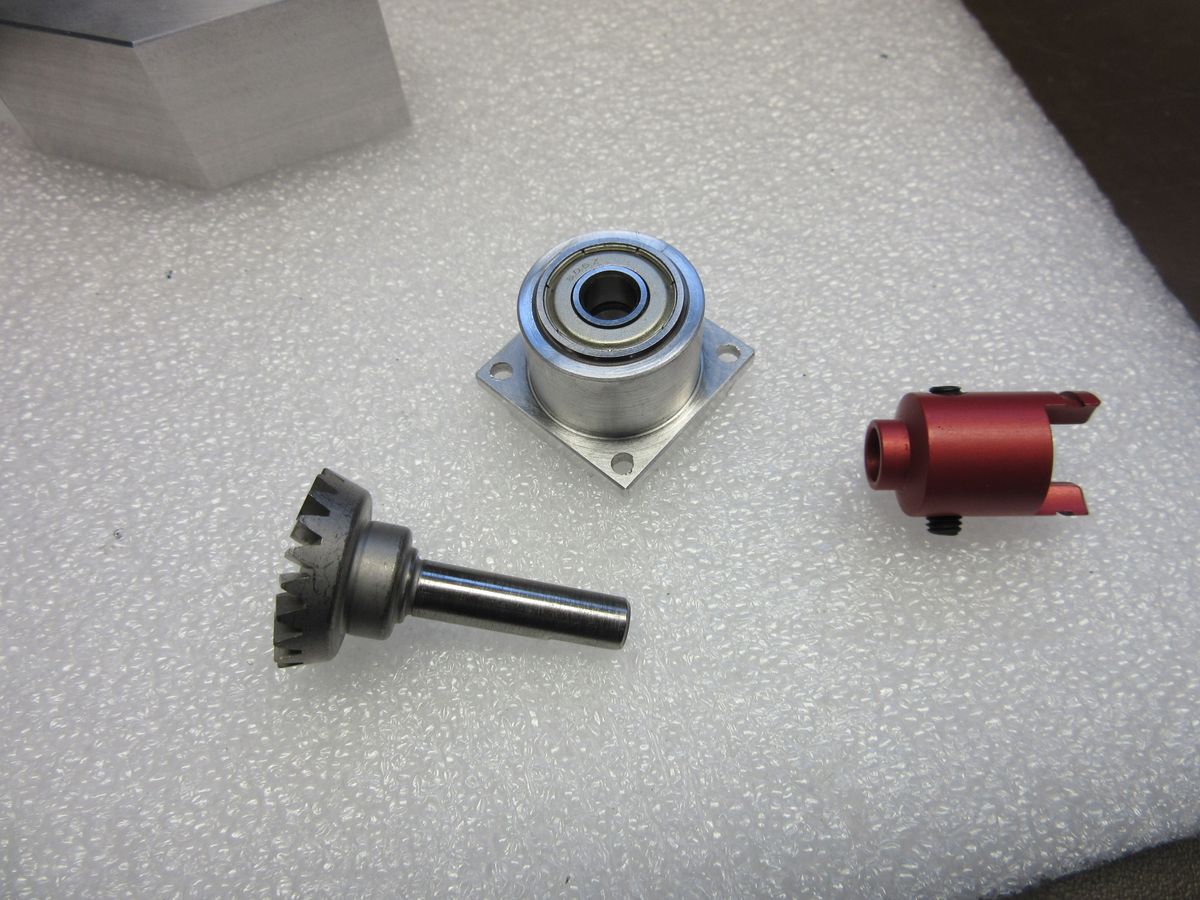
Machined full Alu 40° gearbox with full size ball bearings.
Comparison between the original Vario plastic gearbox with miniature BB vs new full Alu version.
No comment needed....
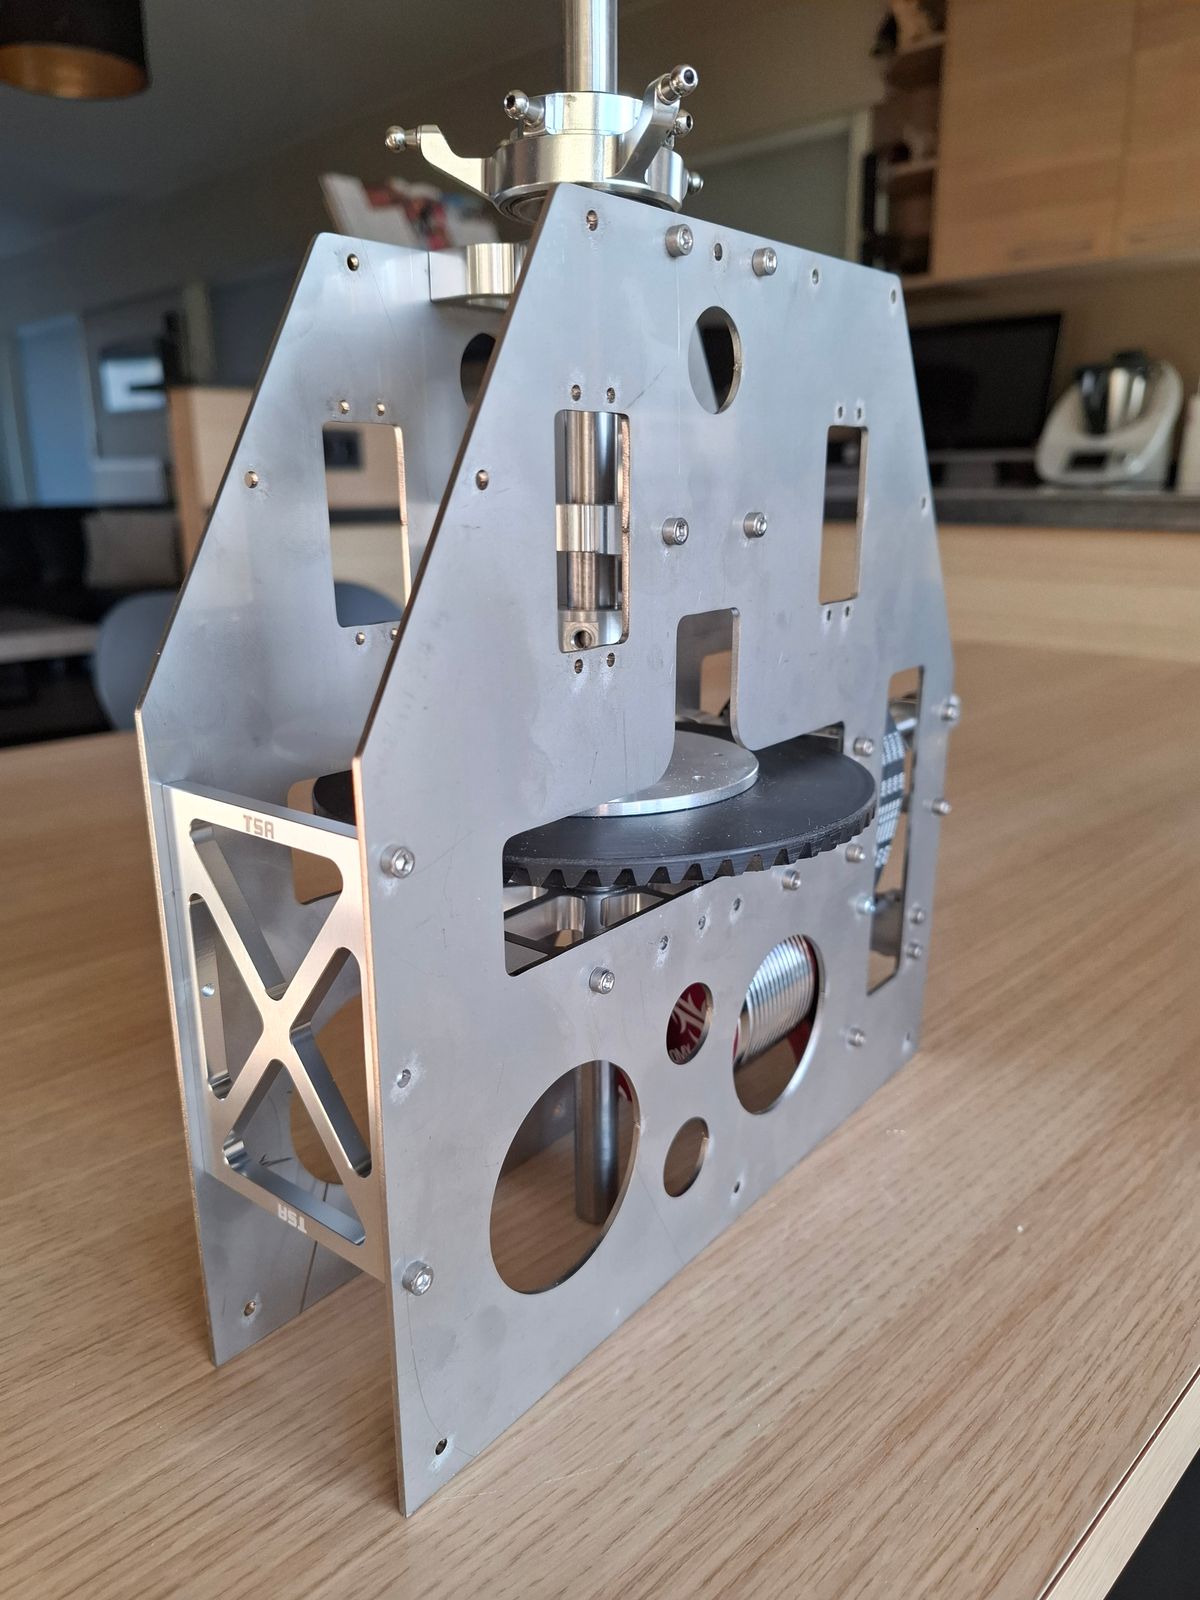
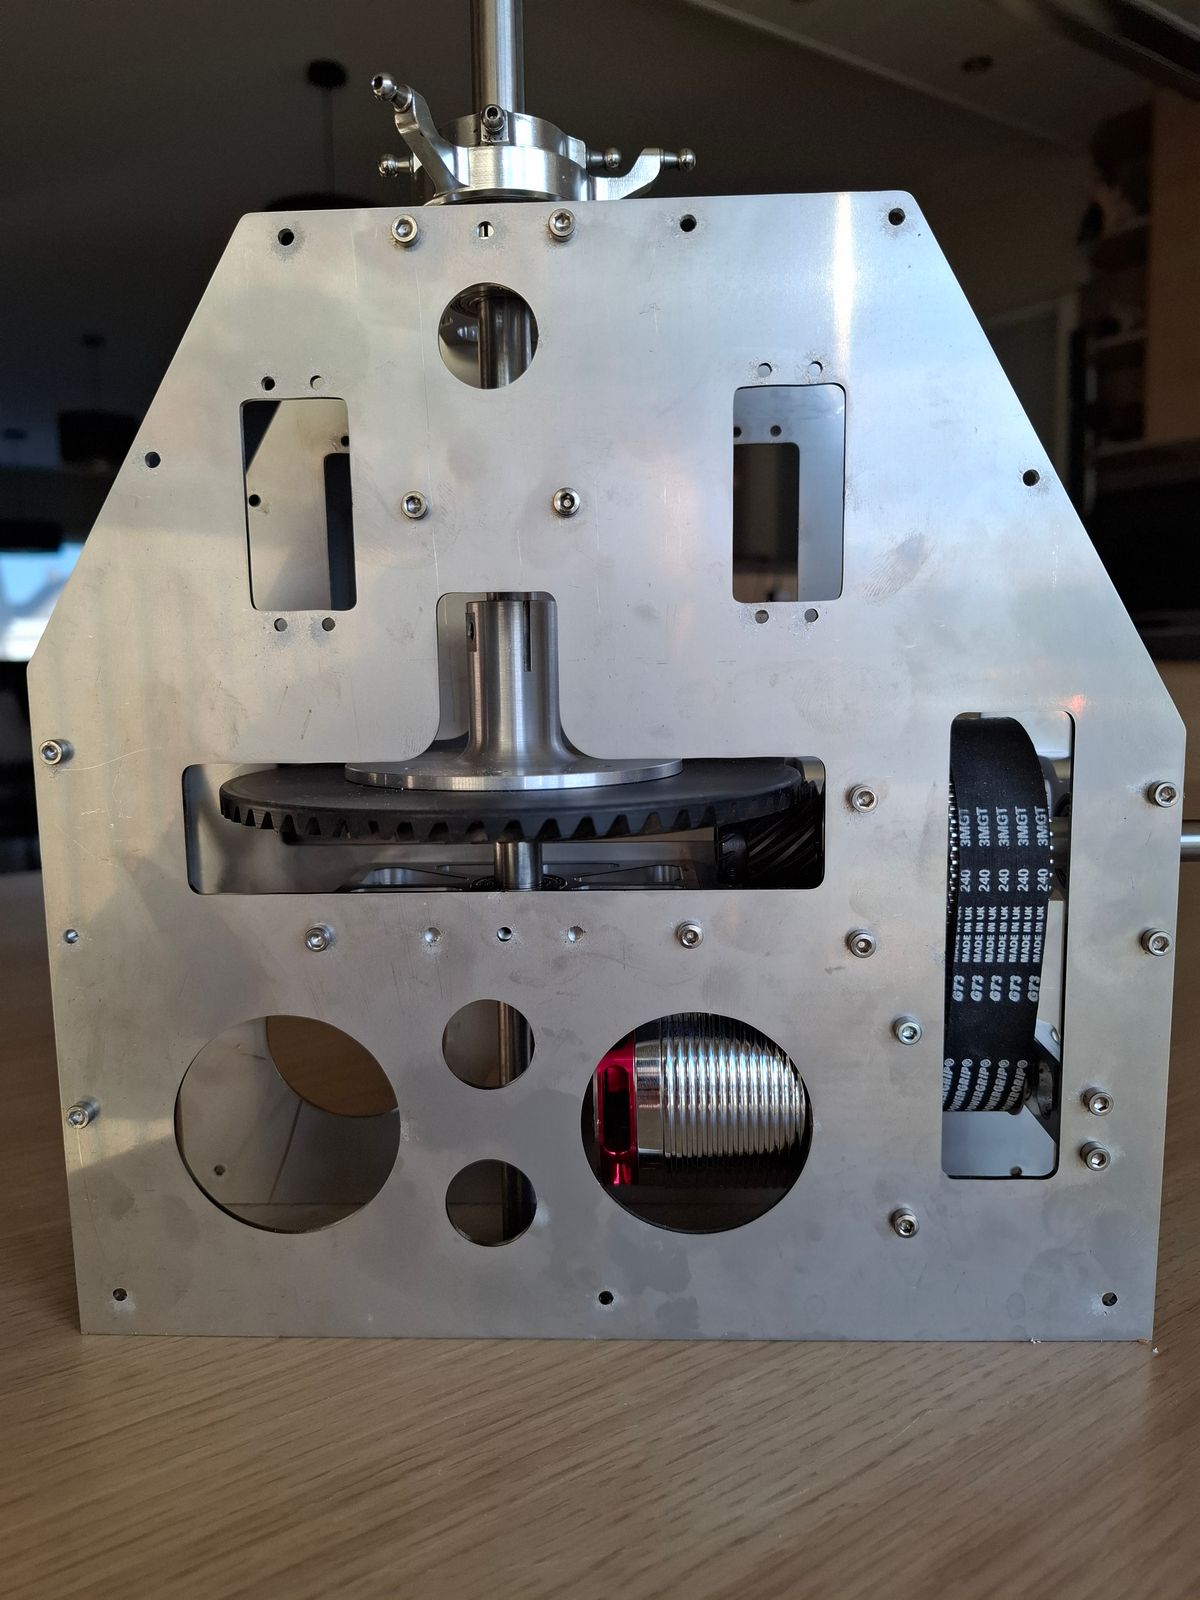
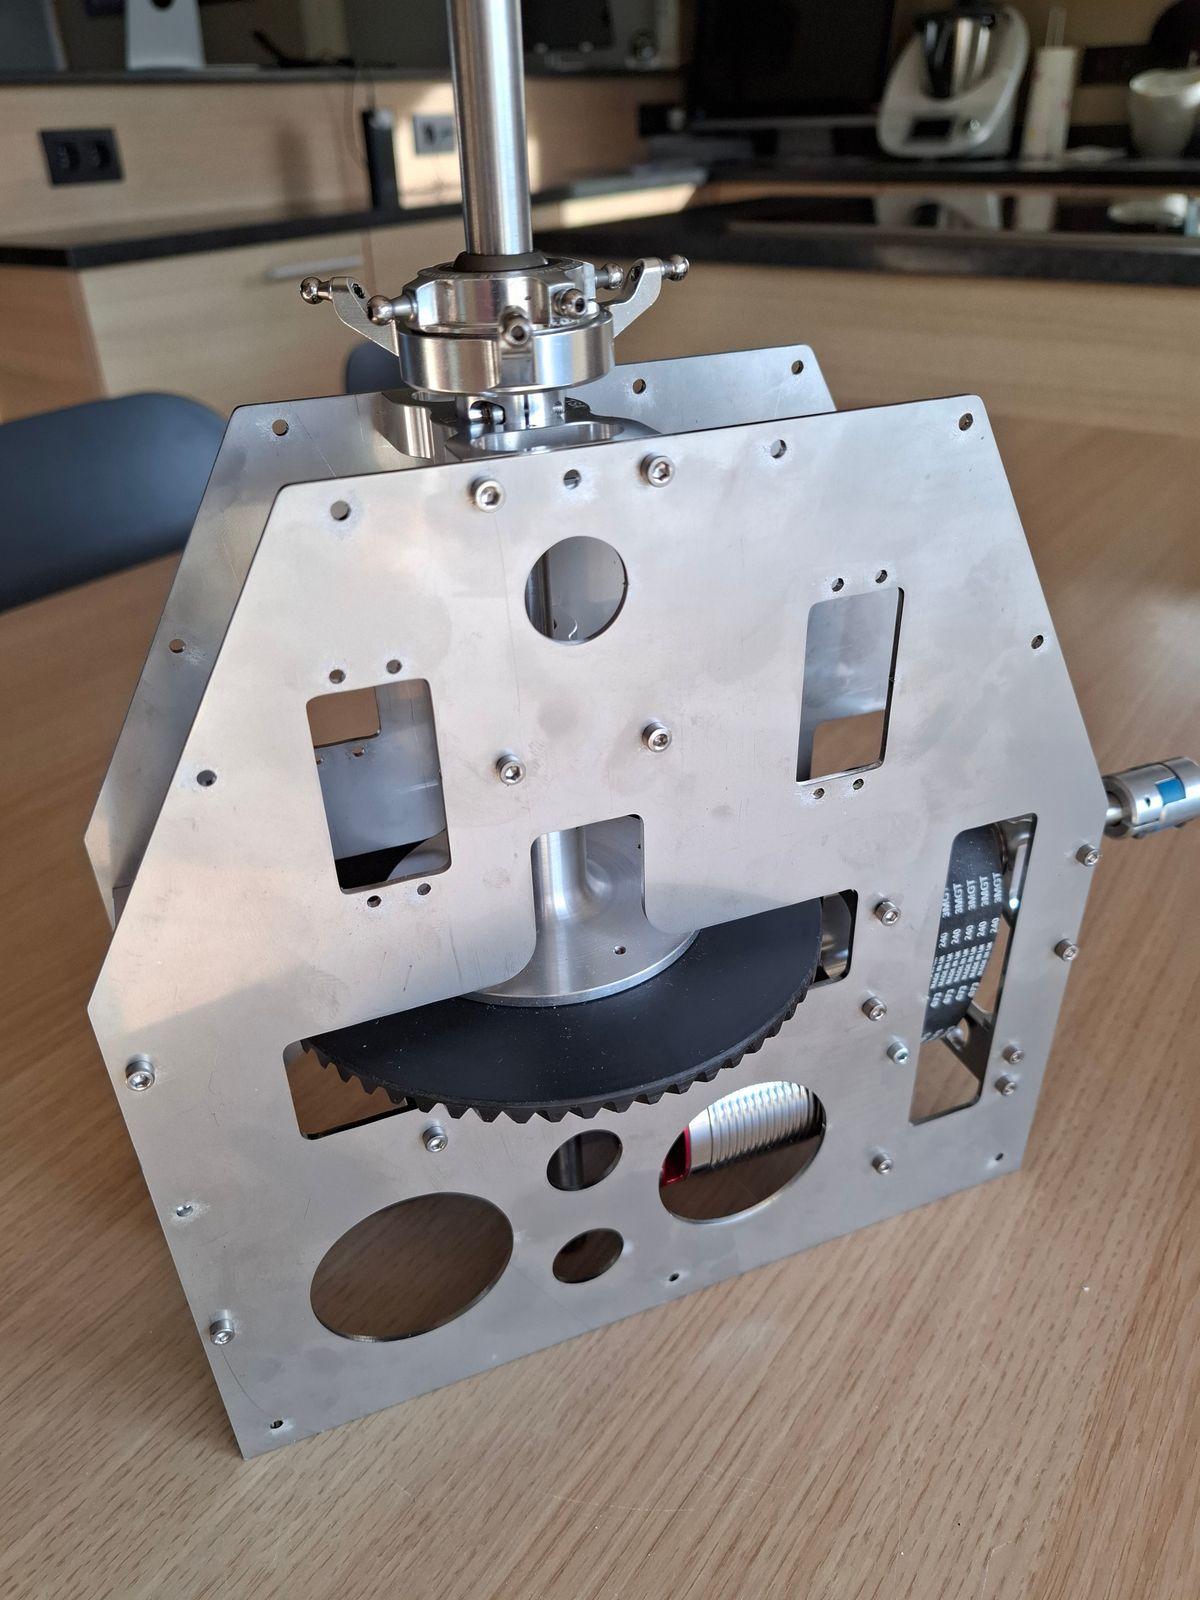
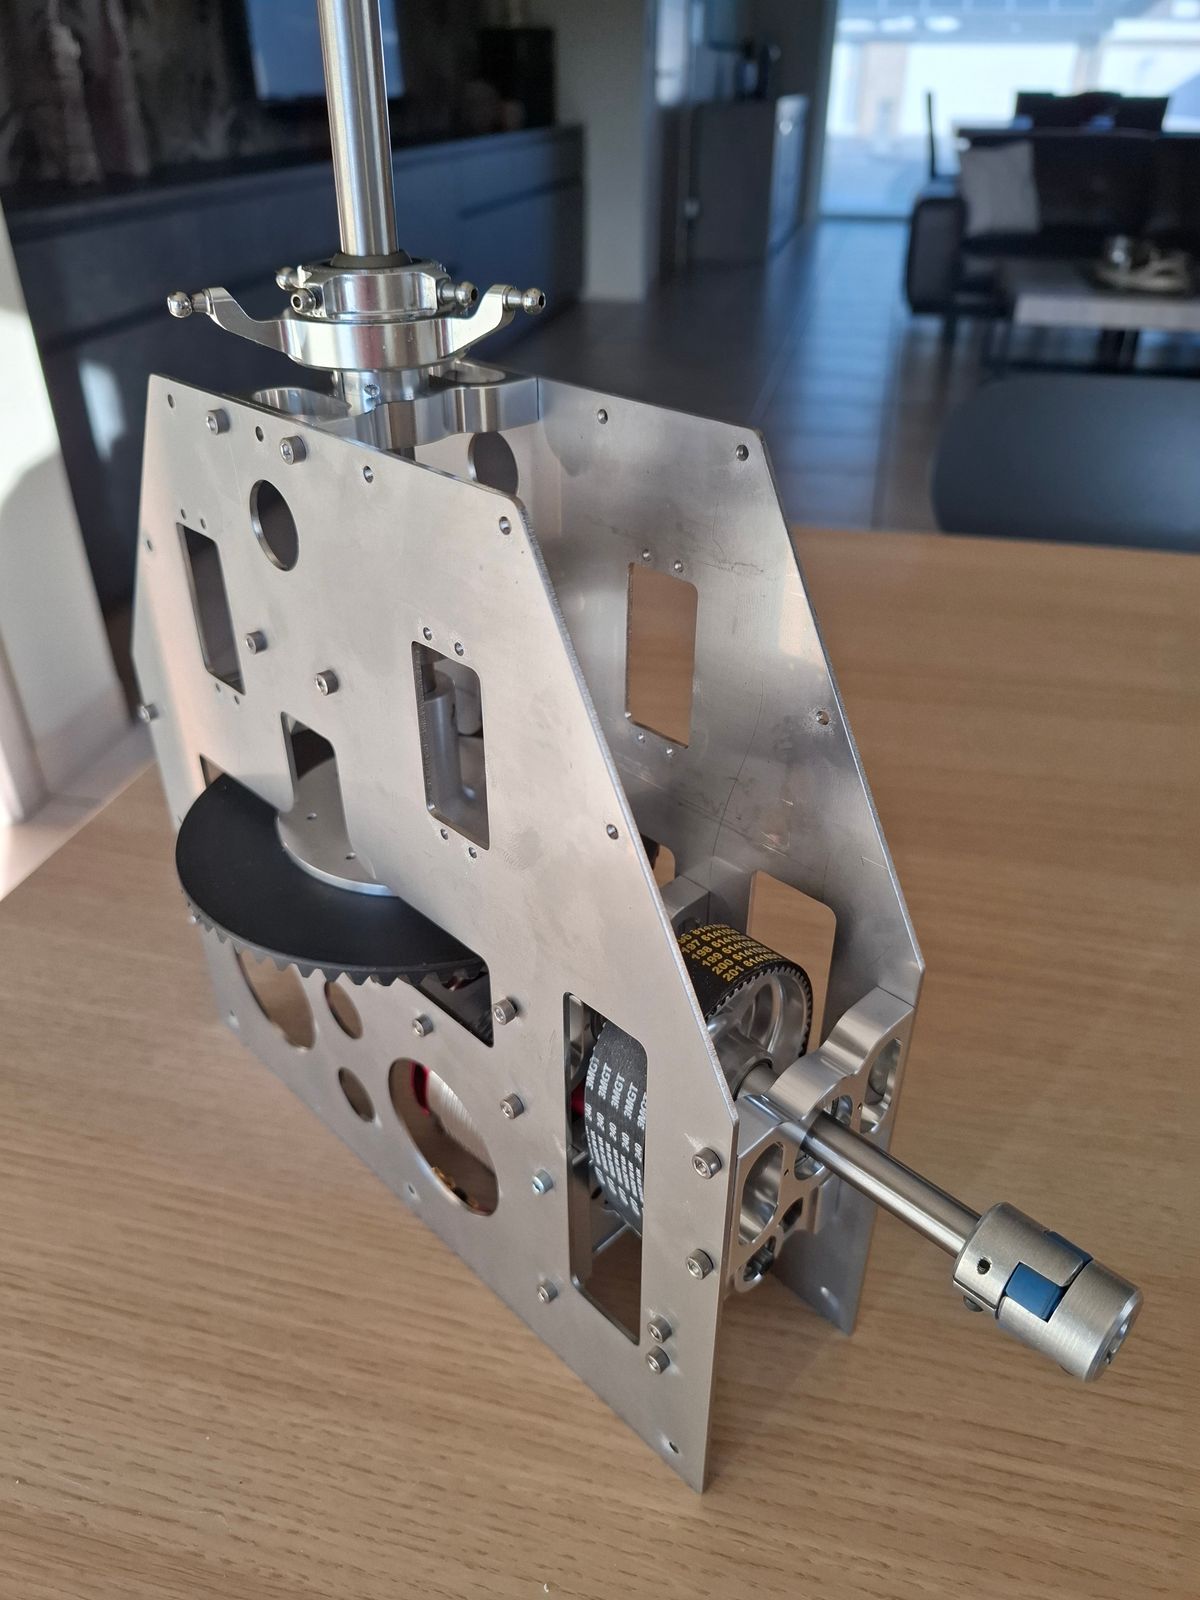
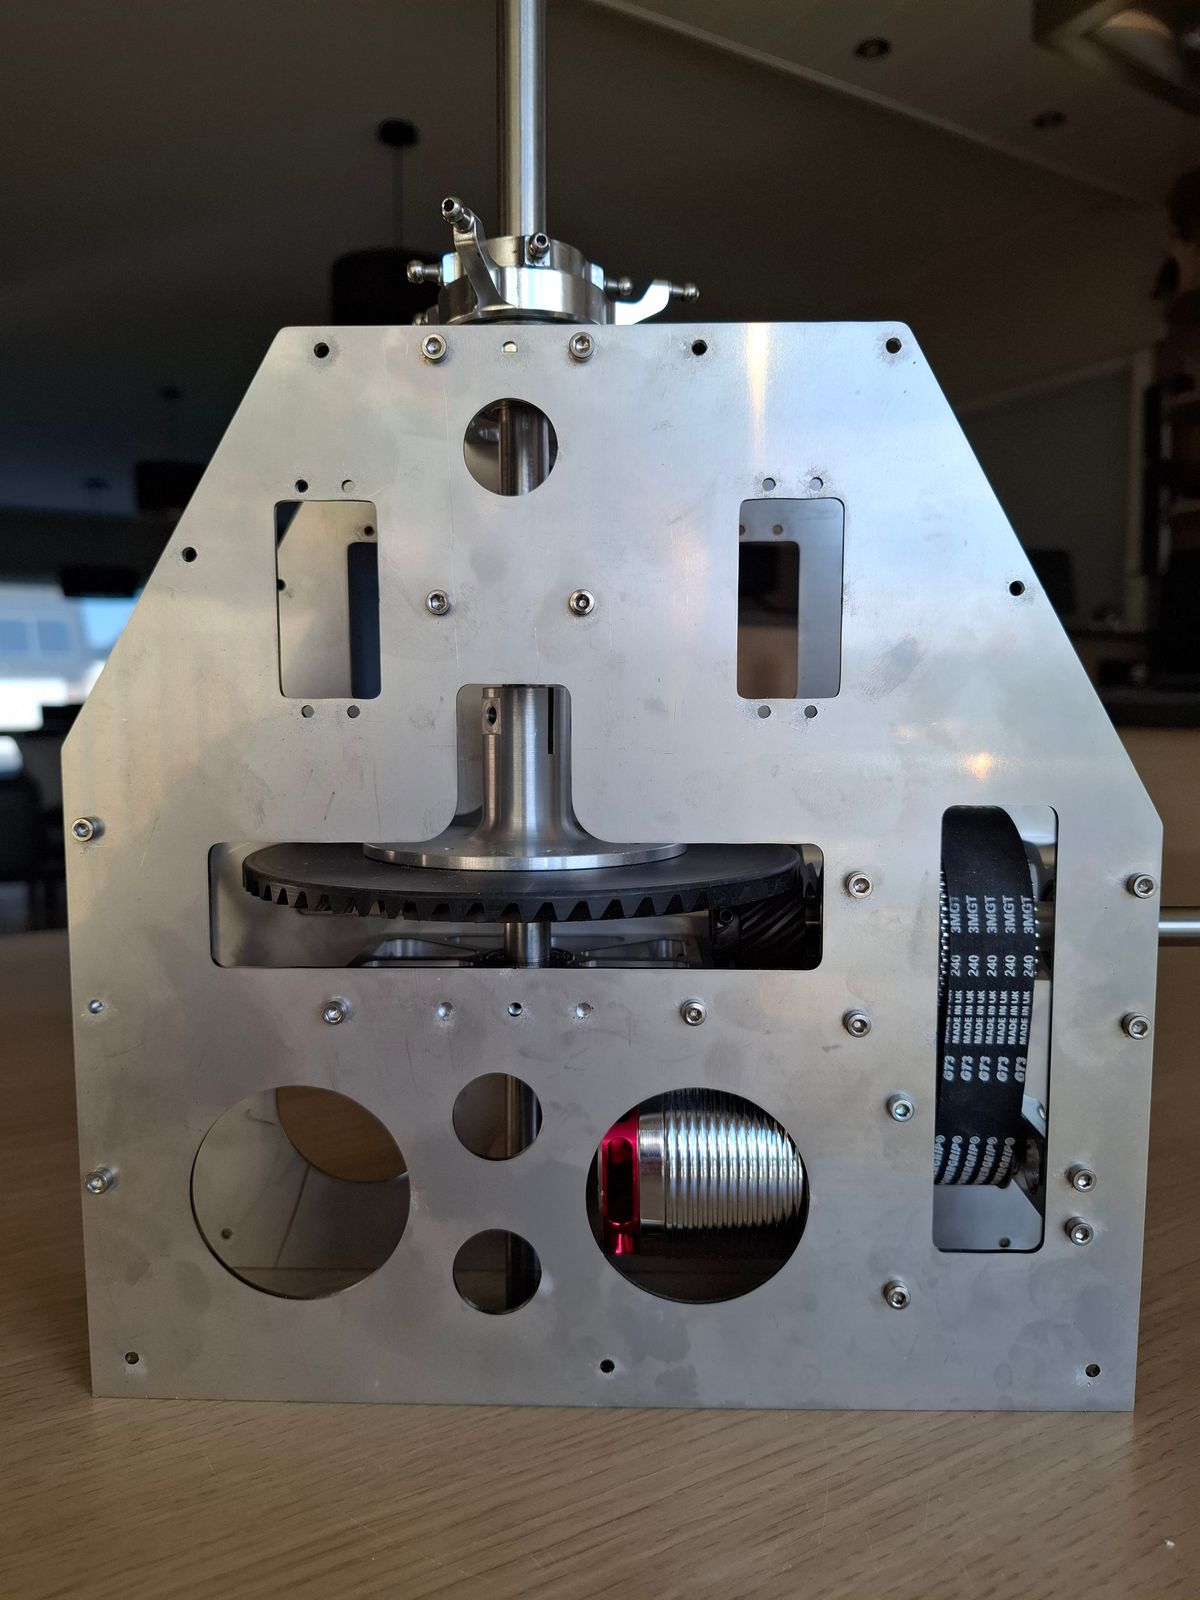
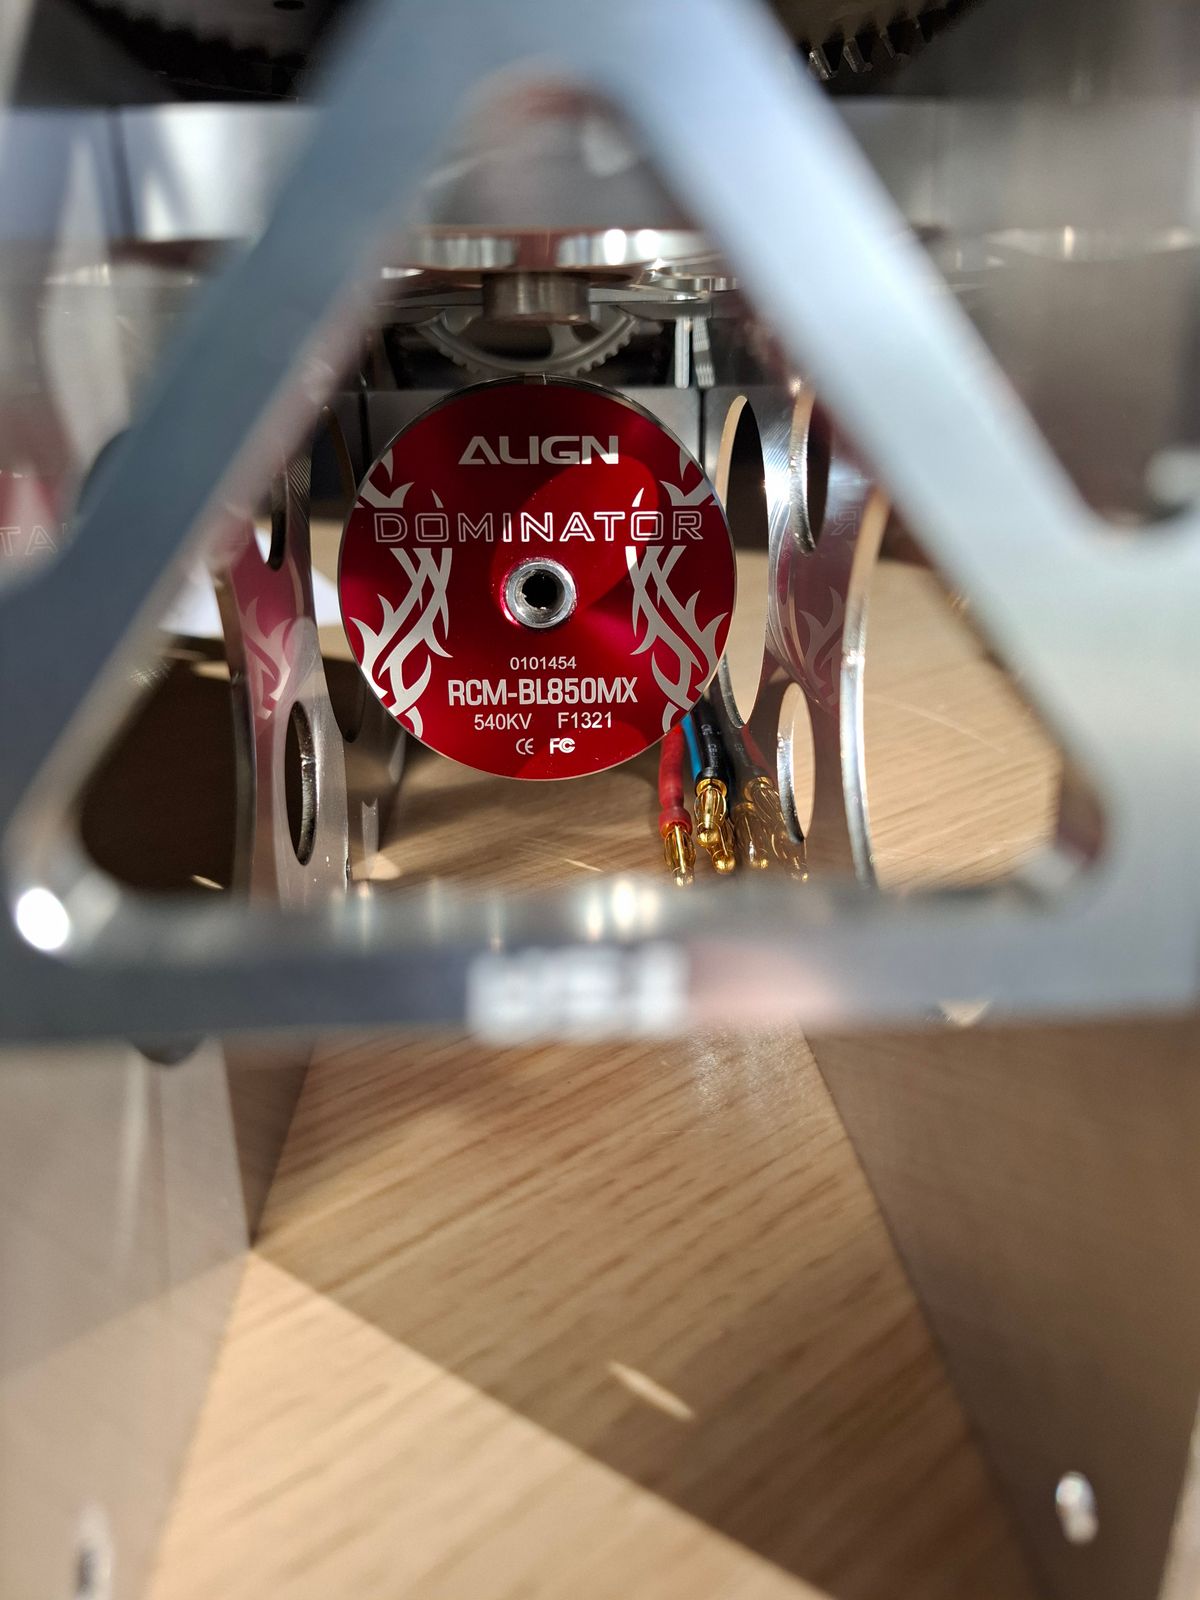
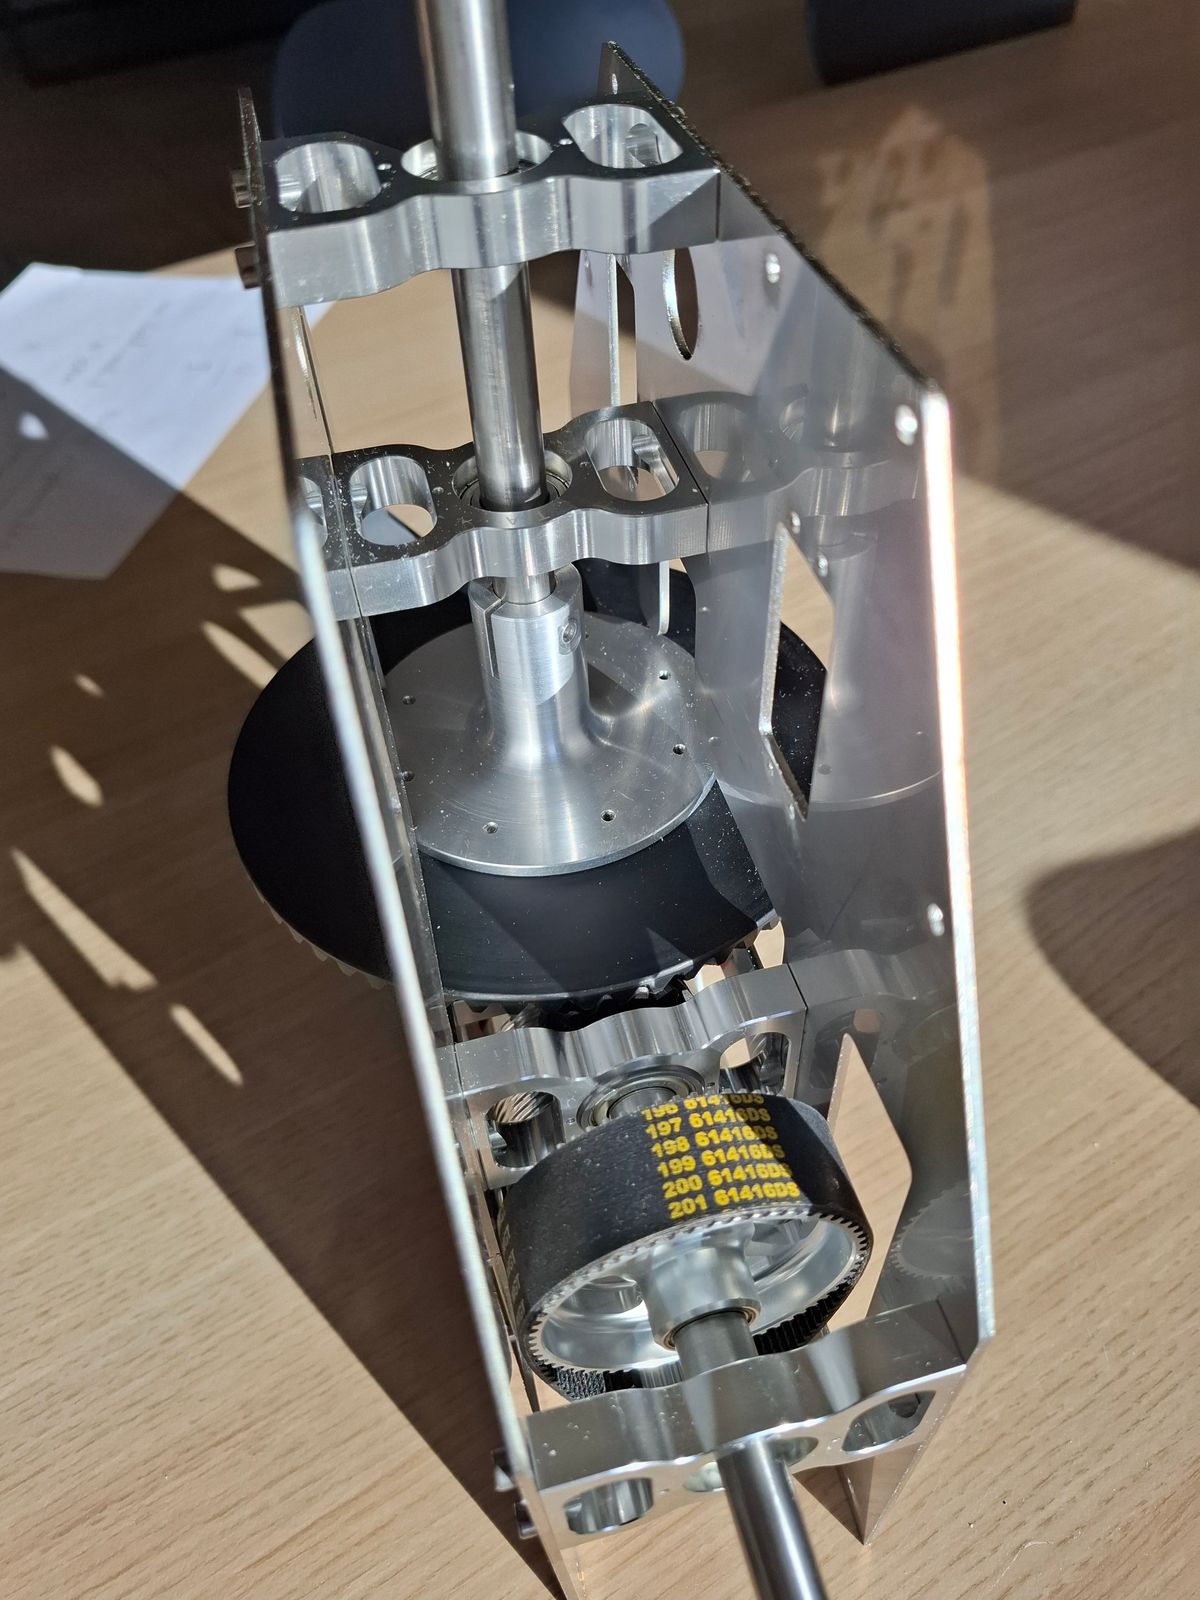
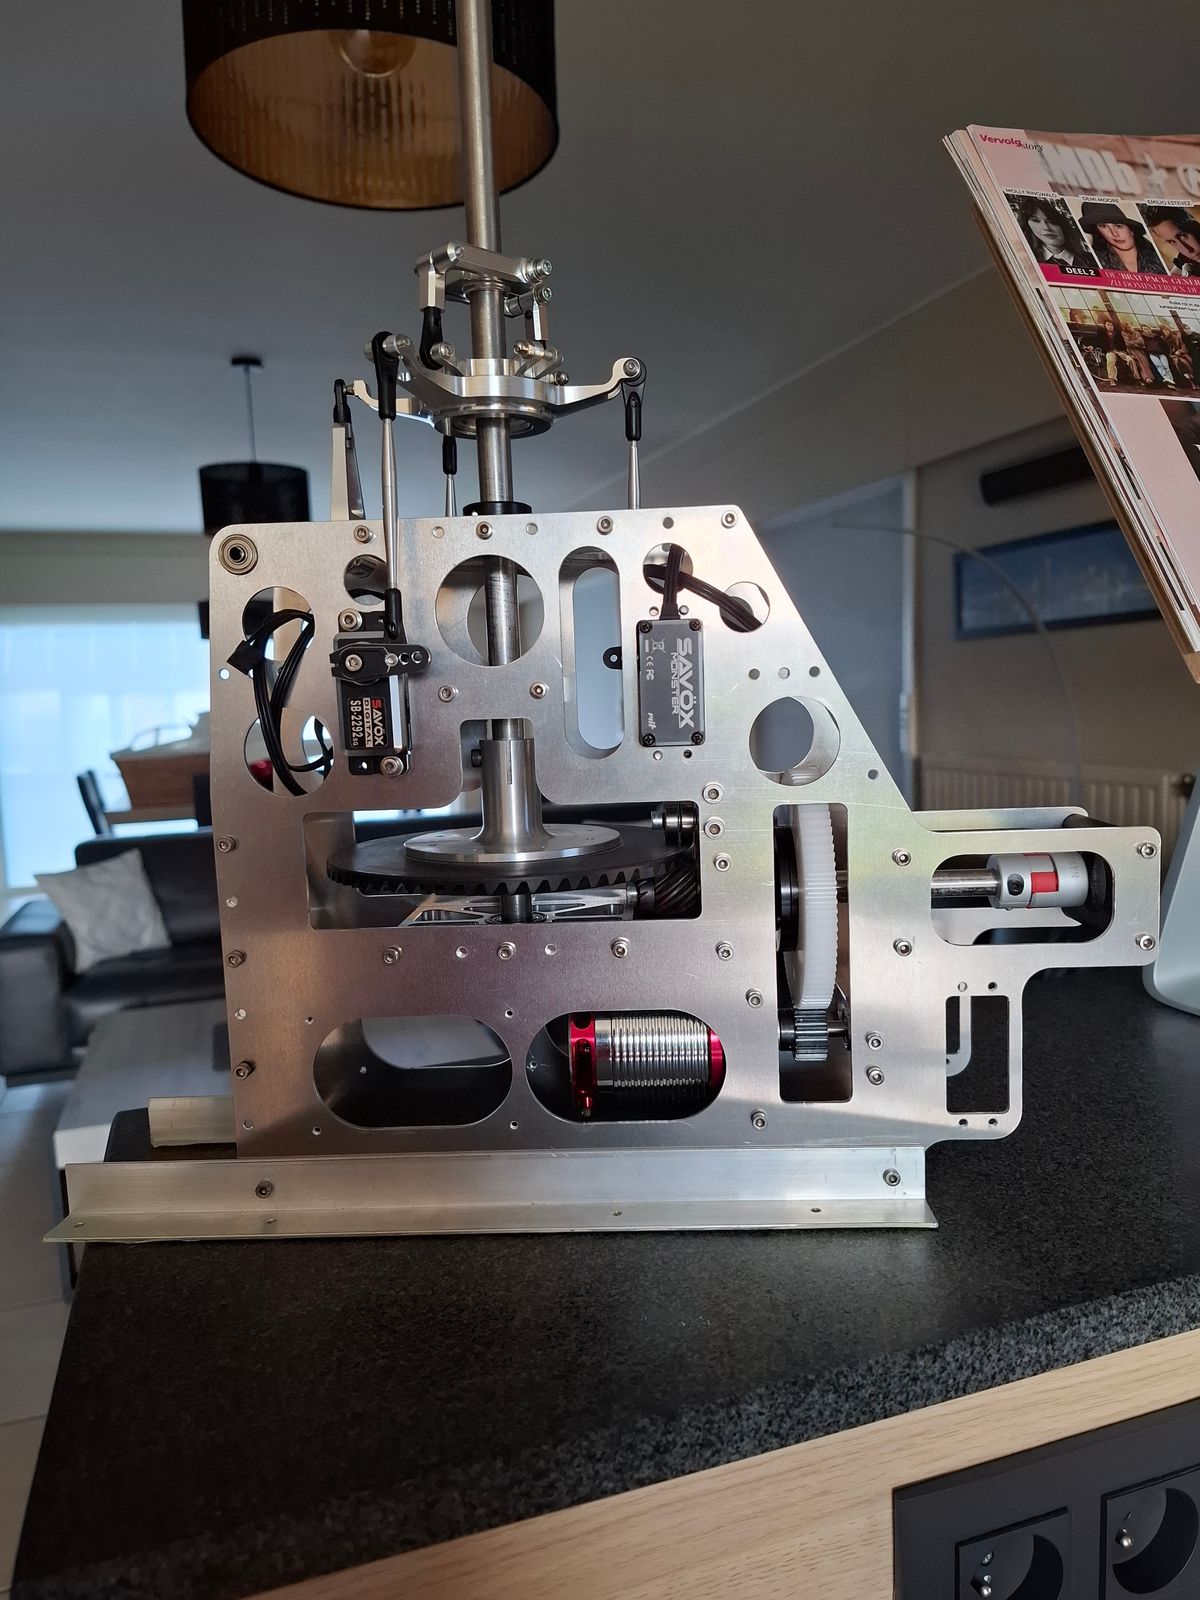
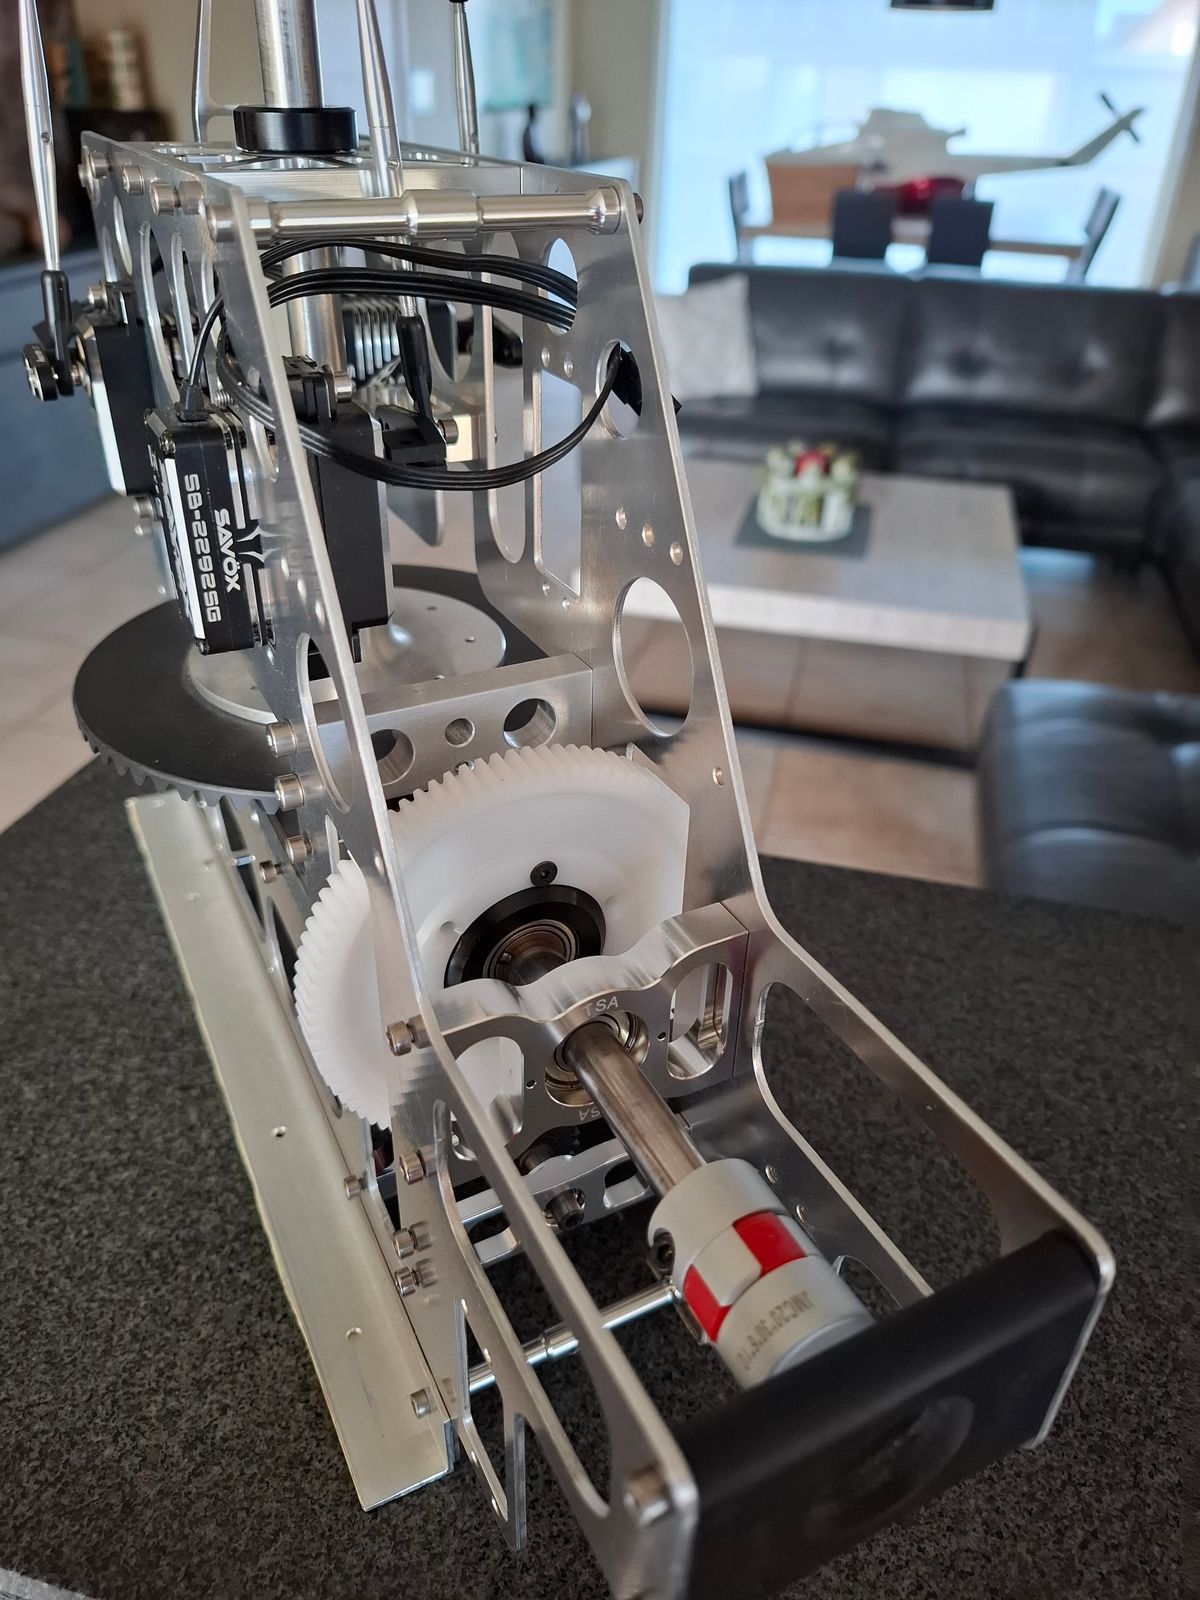
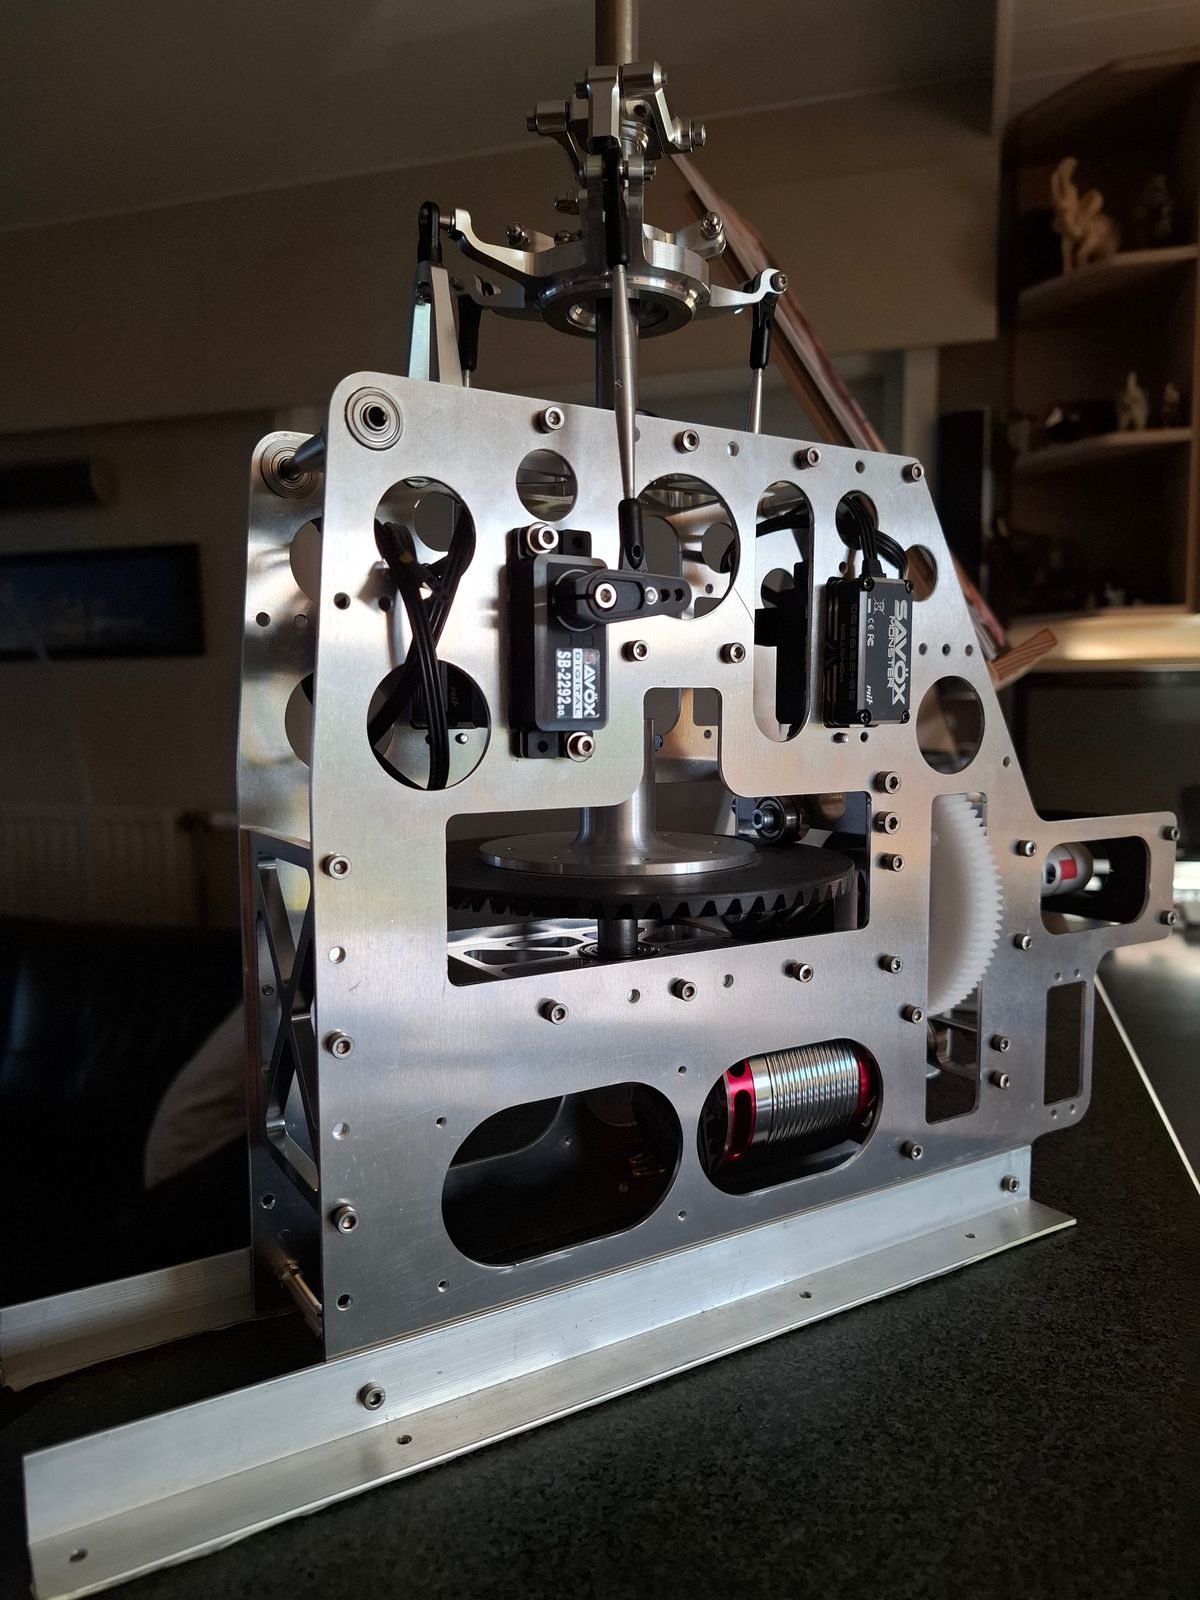
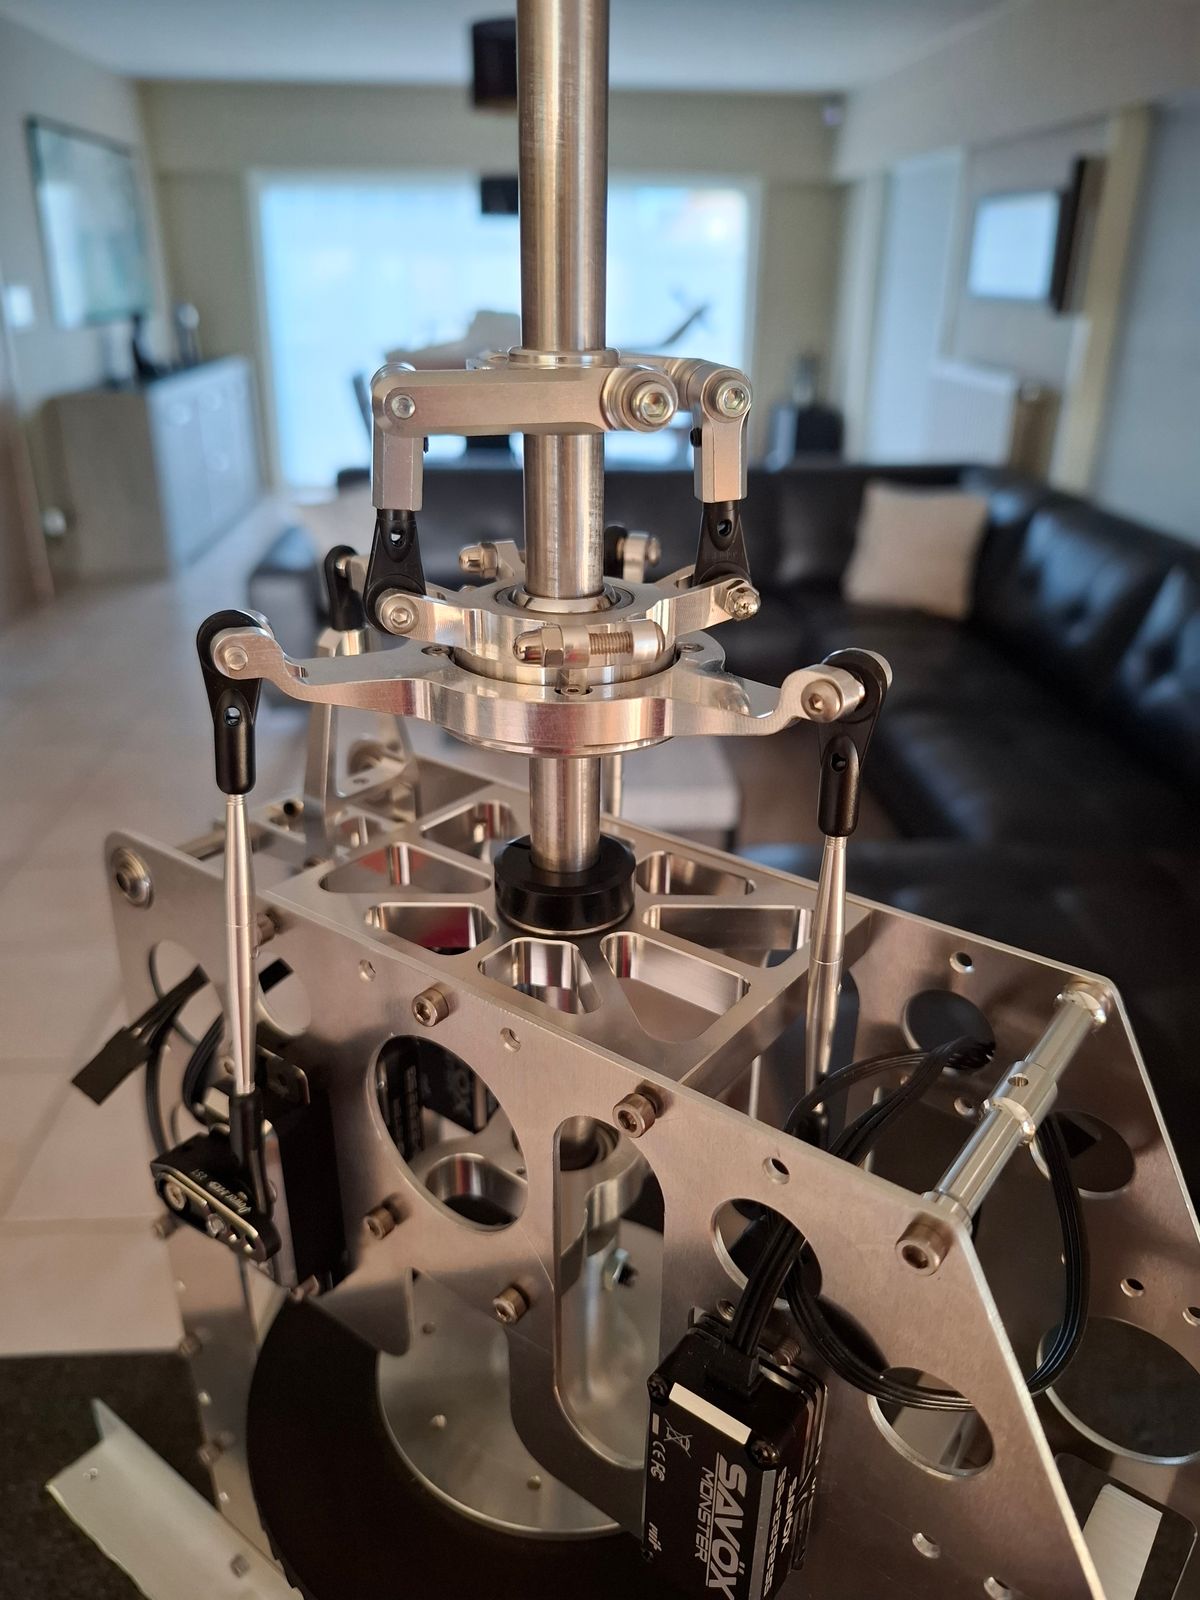
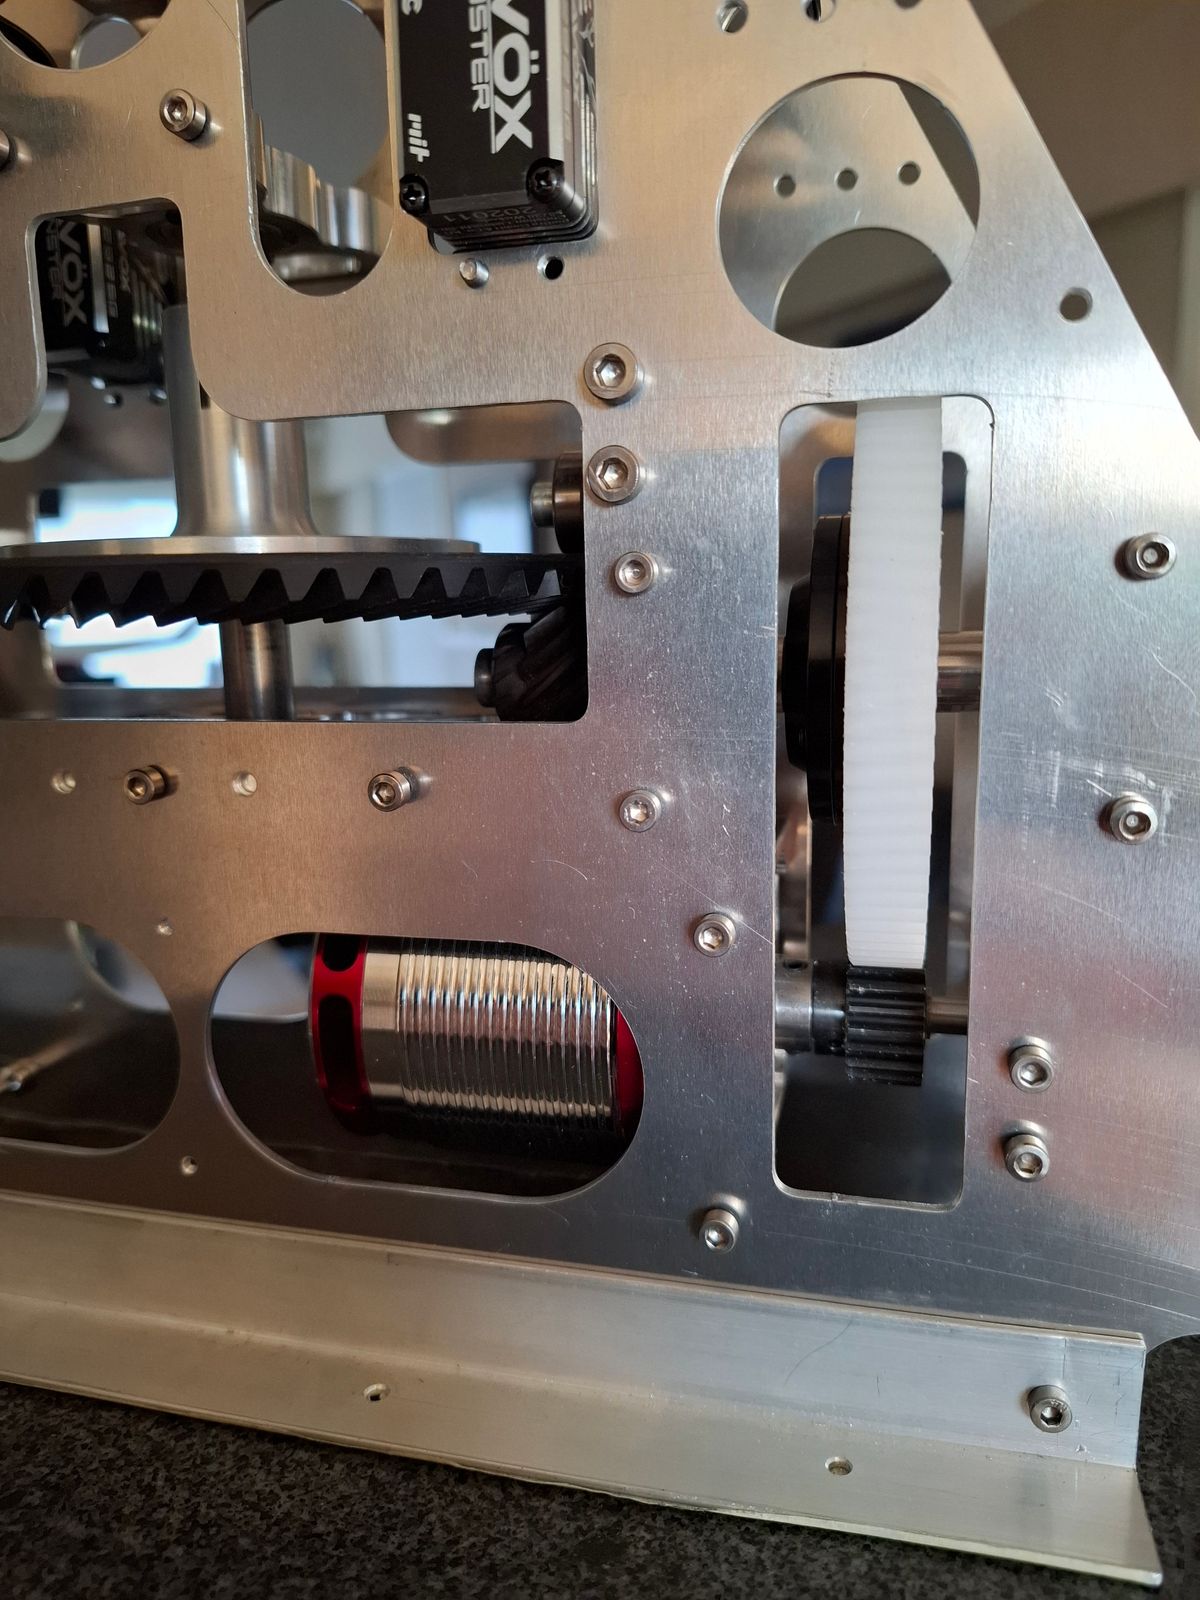
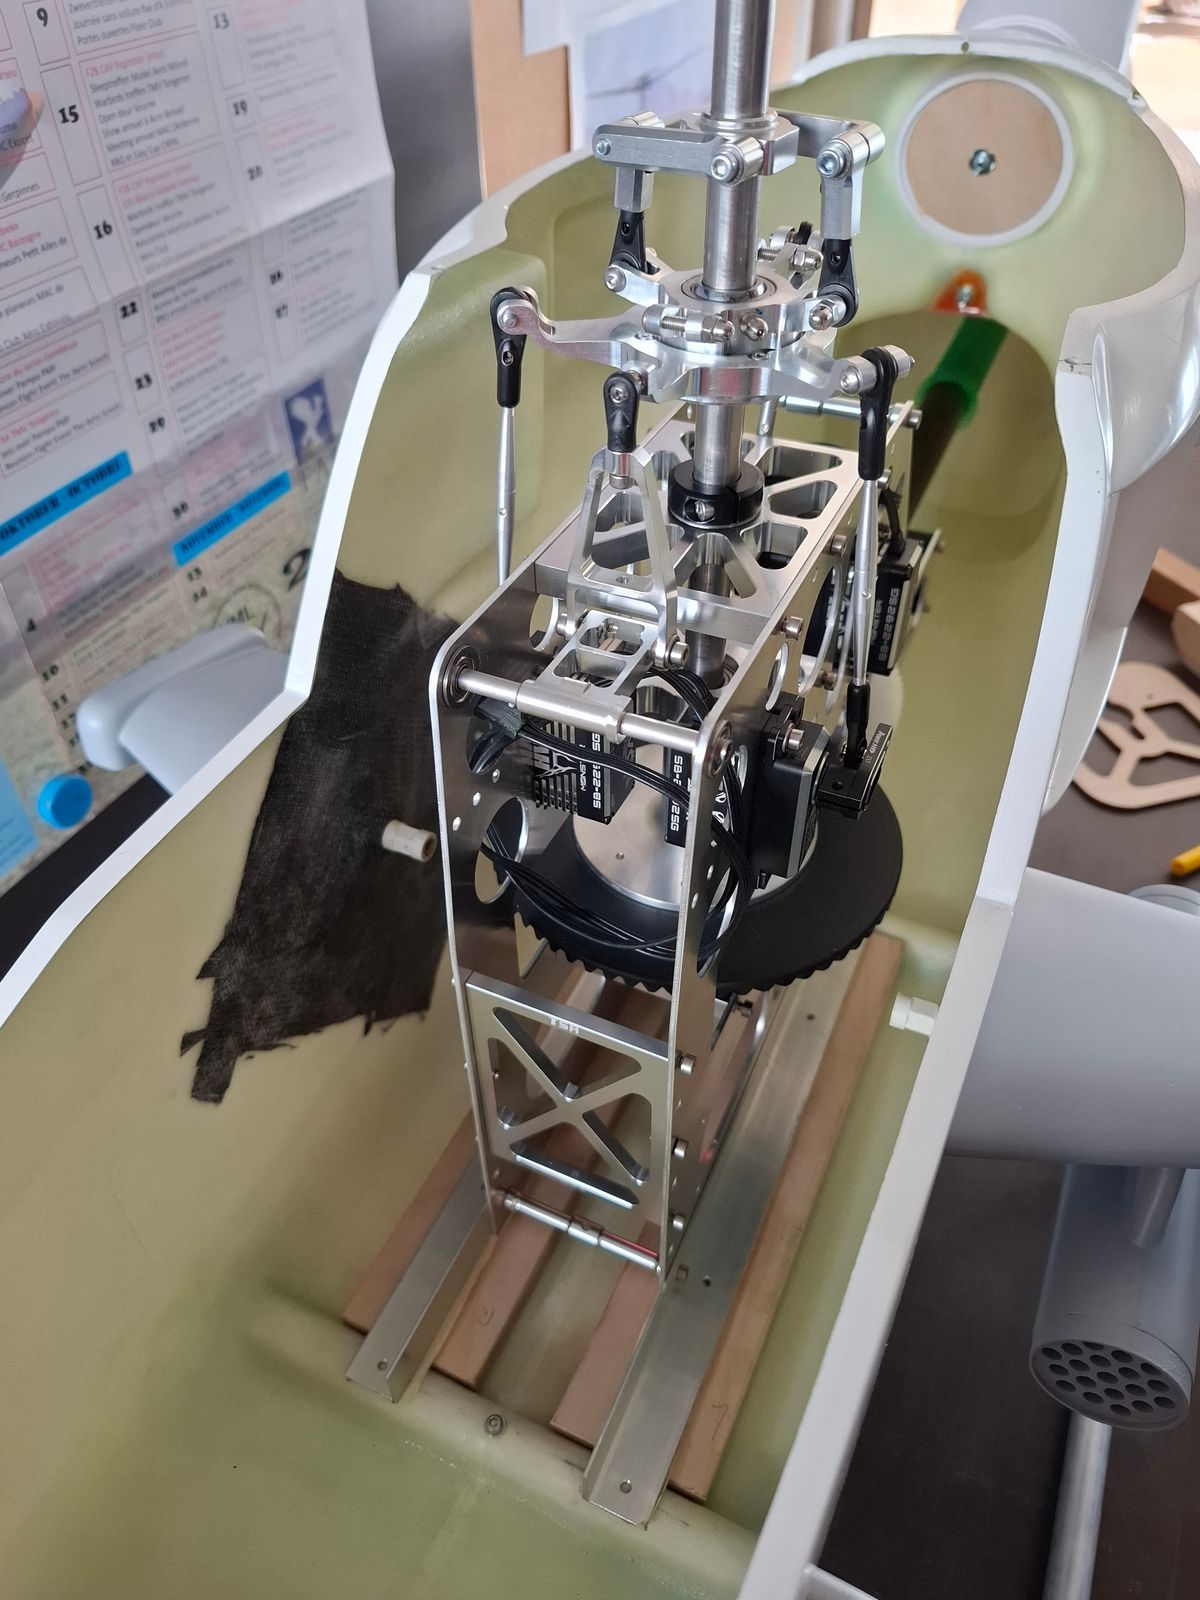
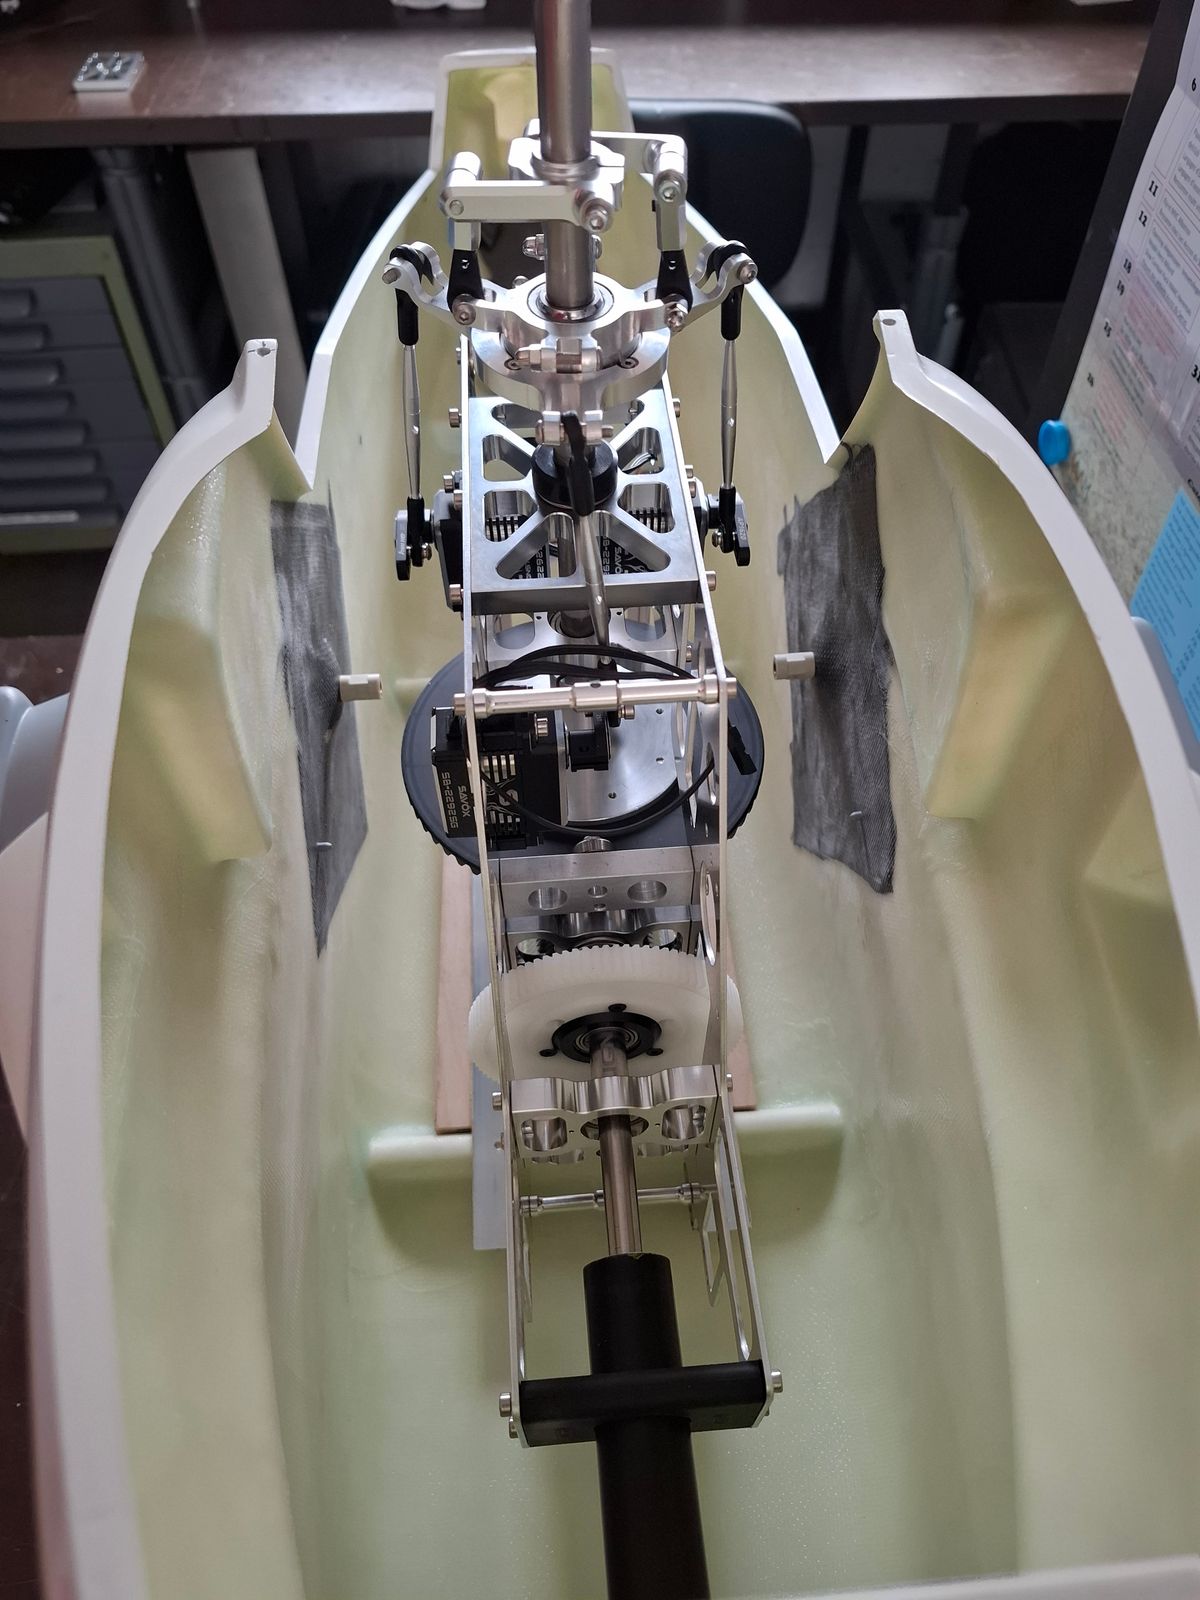
Final version of the Cobra mechanics
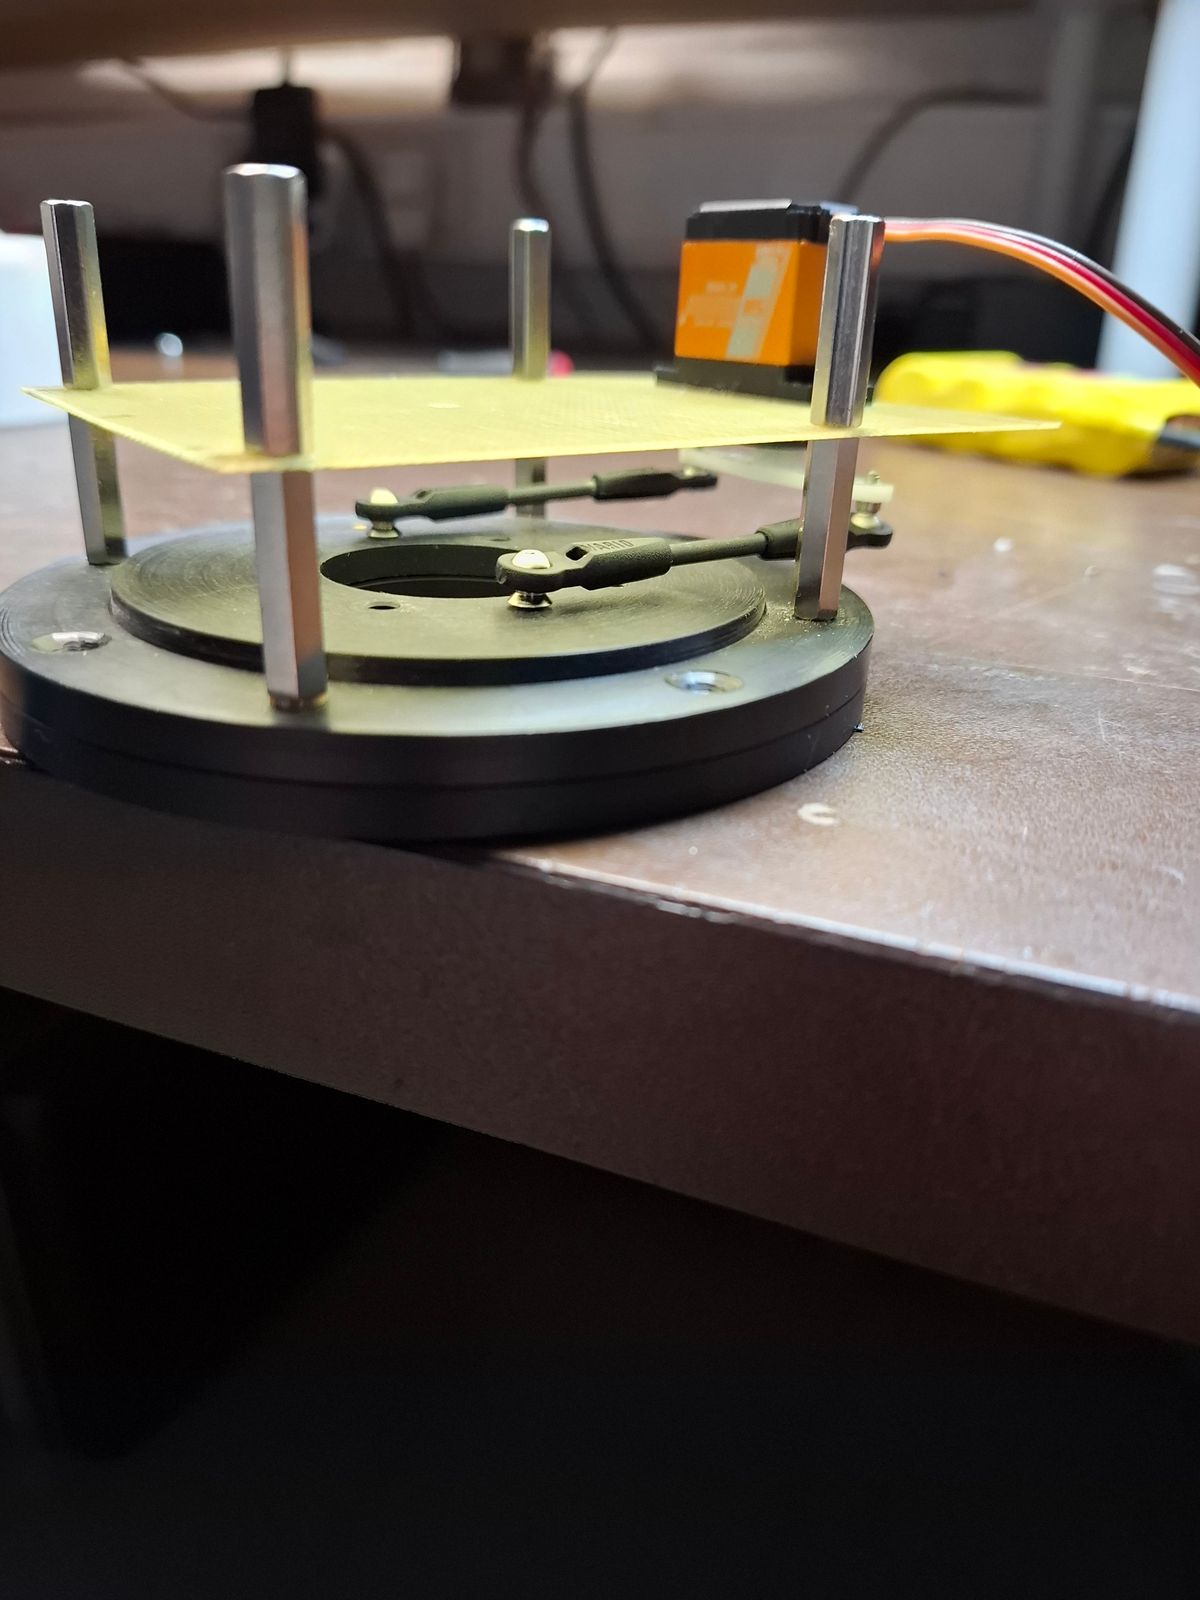
Redesigned the side plates , added a ball raced swash plate guider system.
Alu side plates cut with a fiberlaser machine.
Swashplate wil be controlled by 120° servo linkage setup.
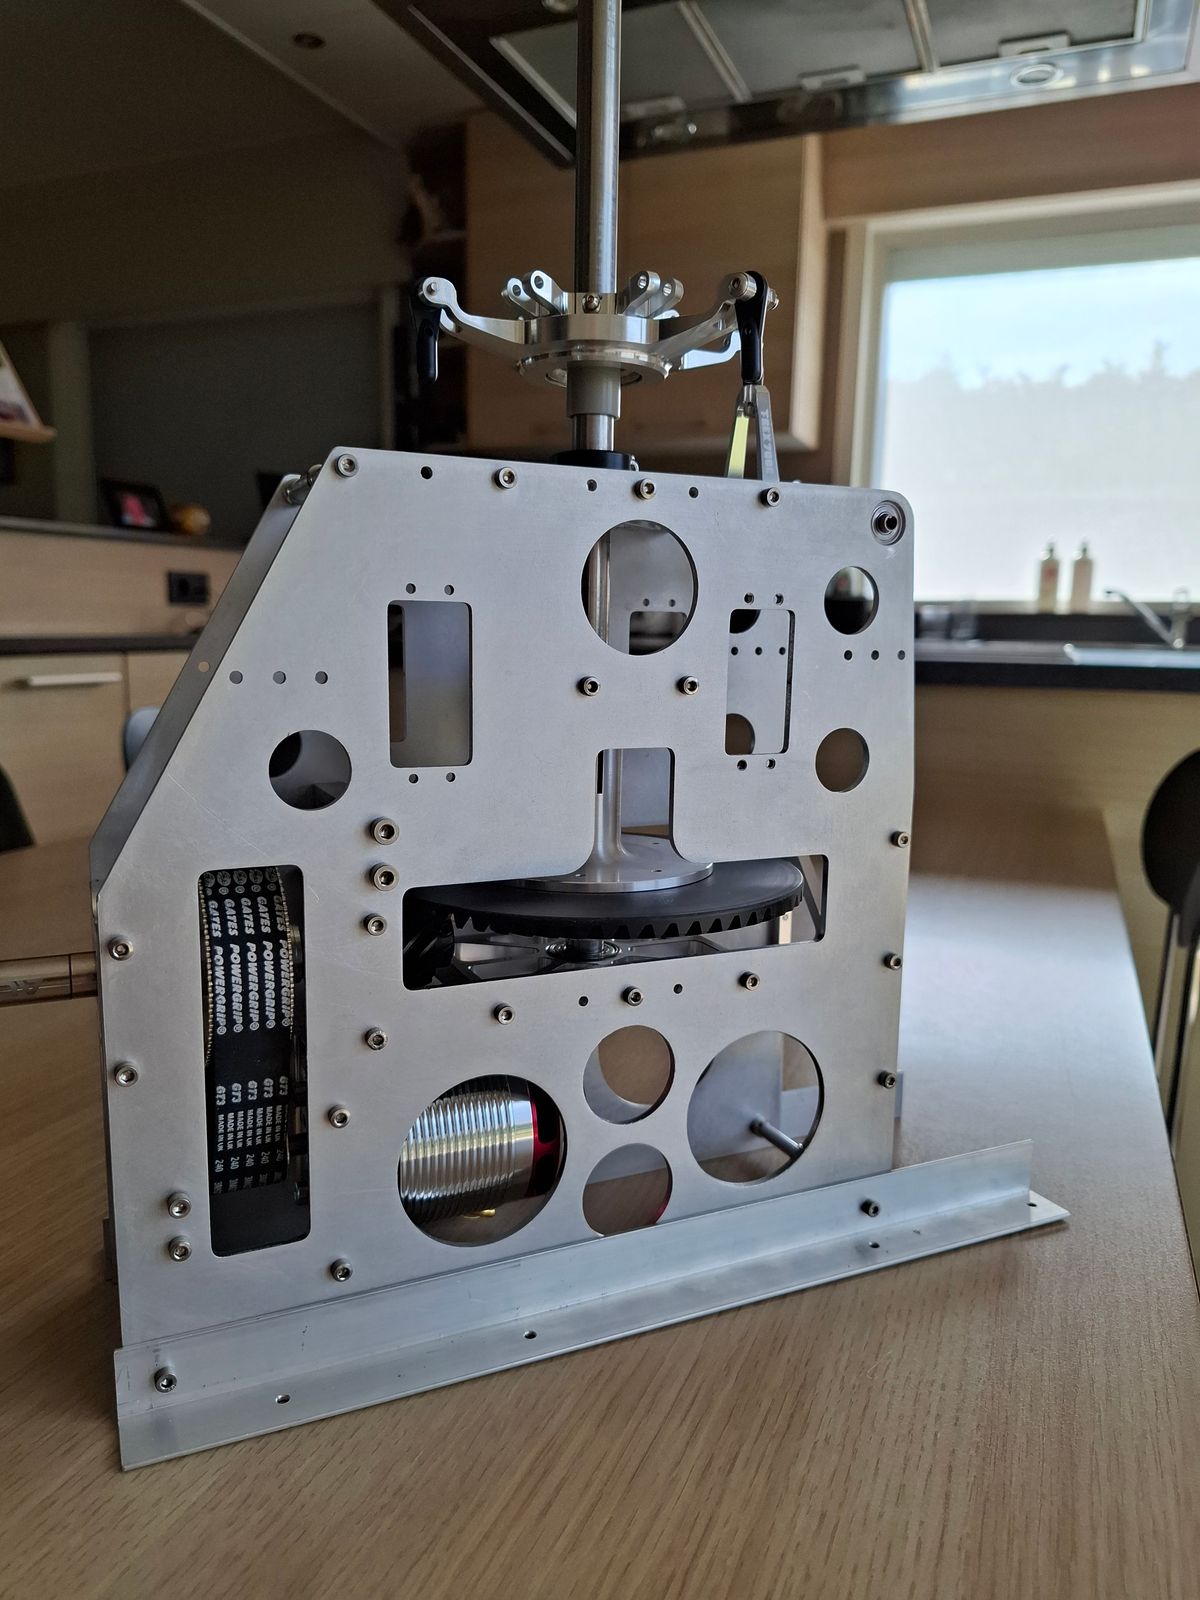
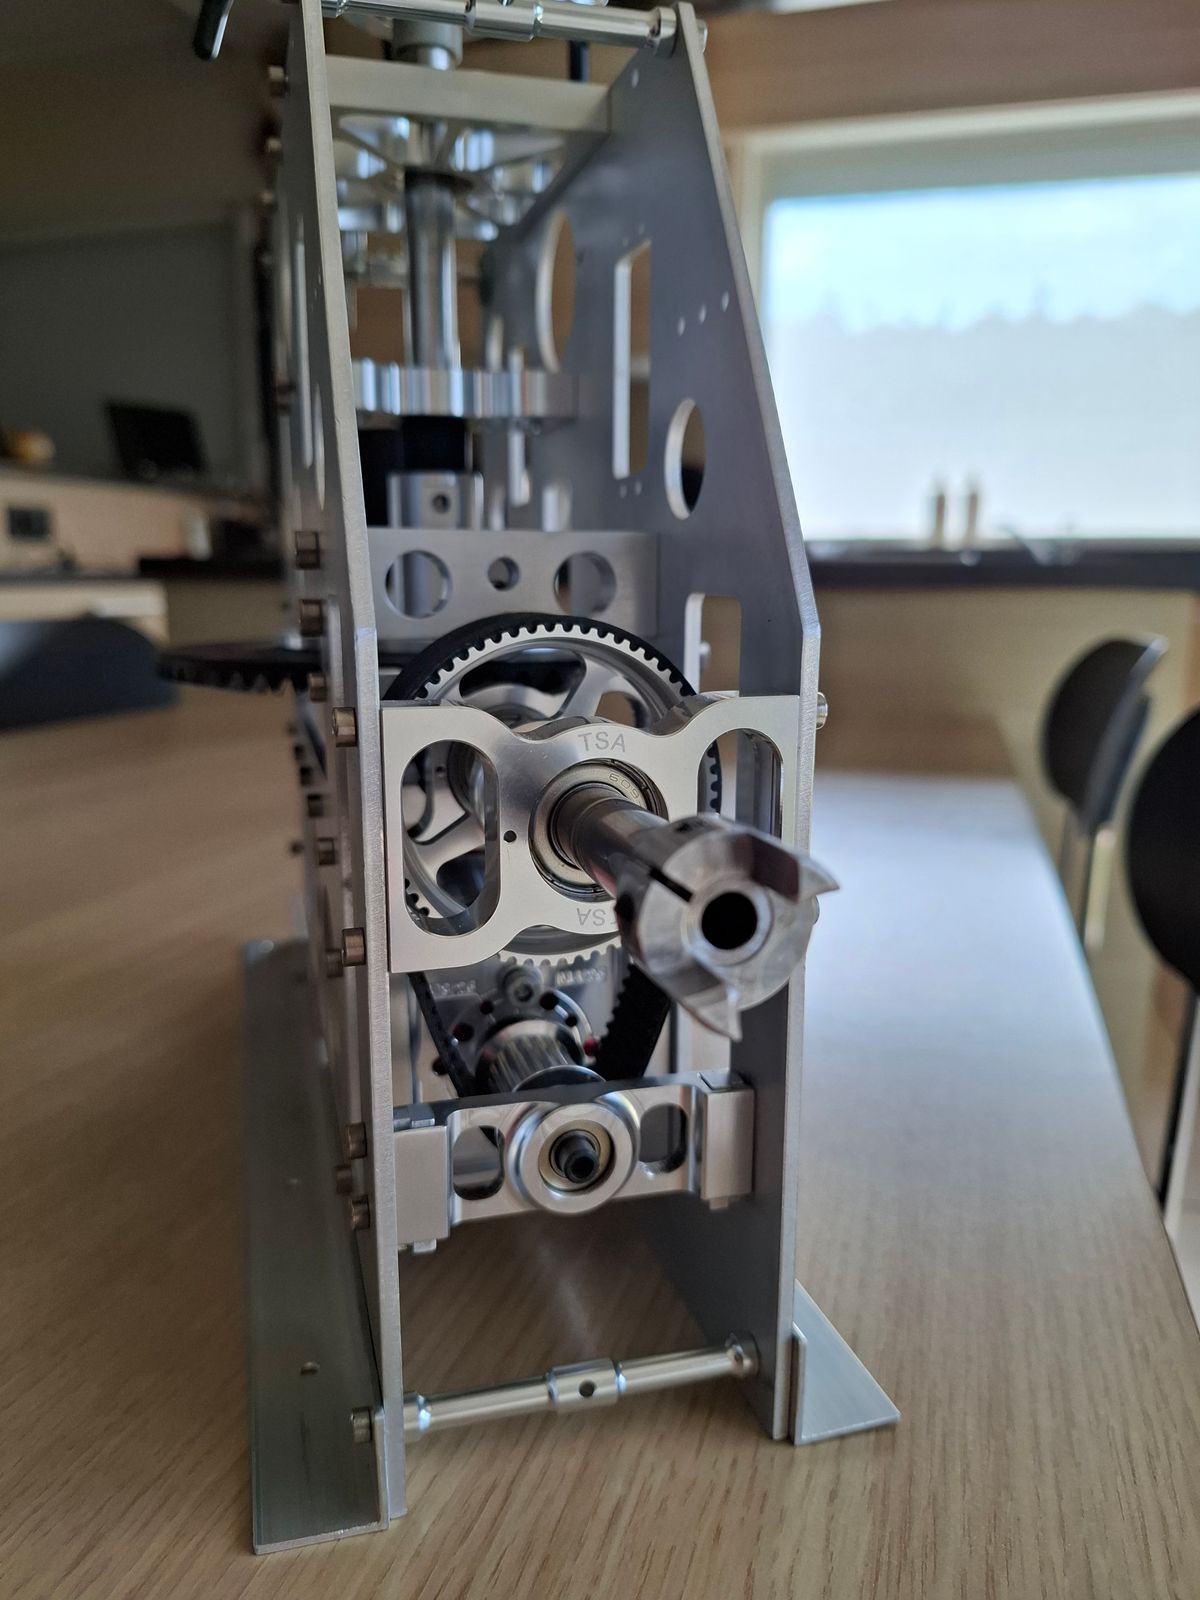
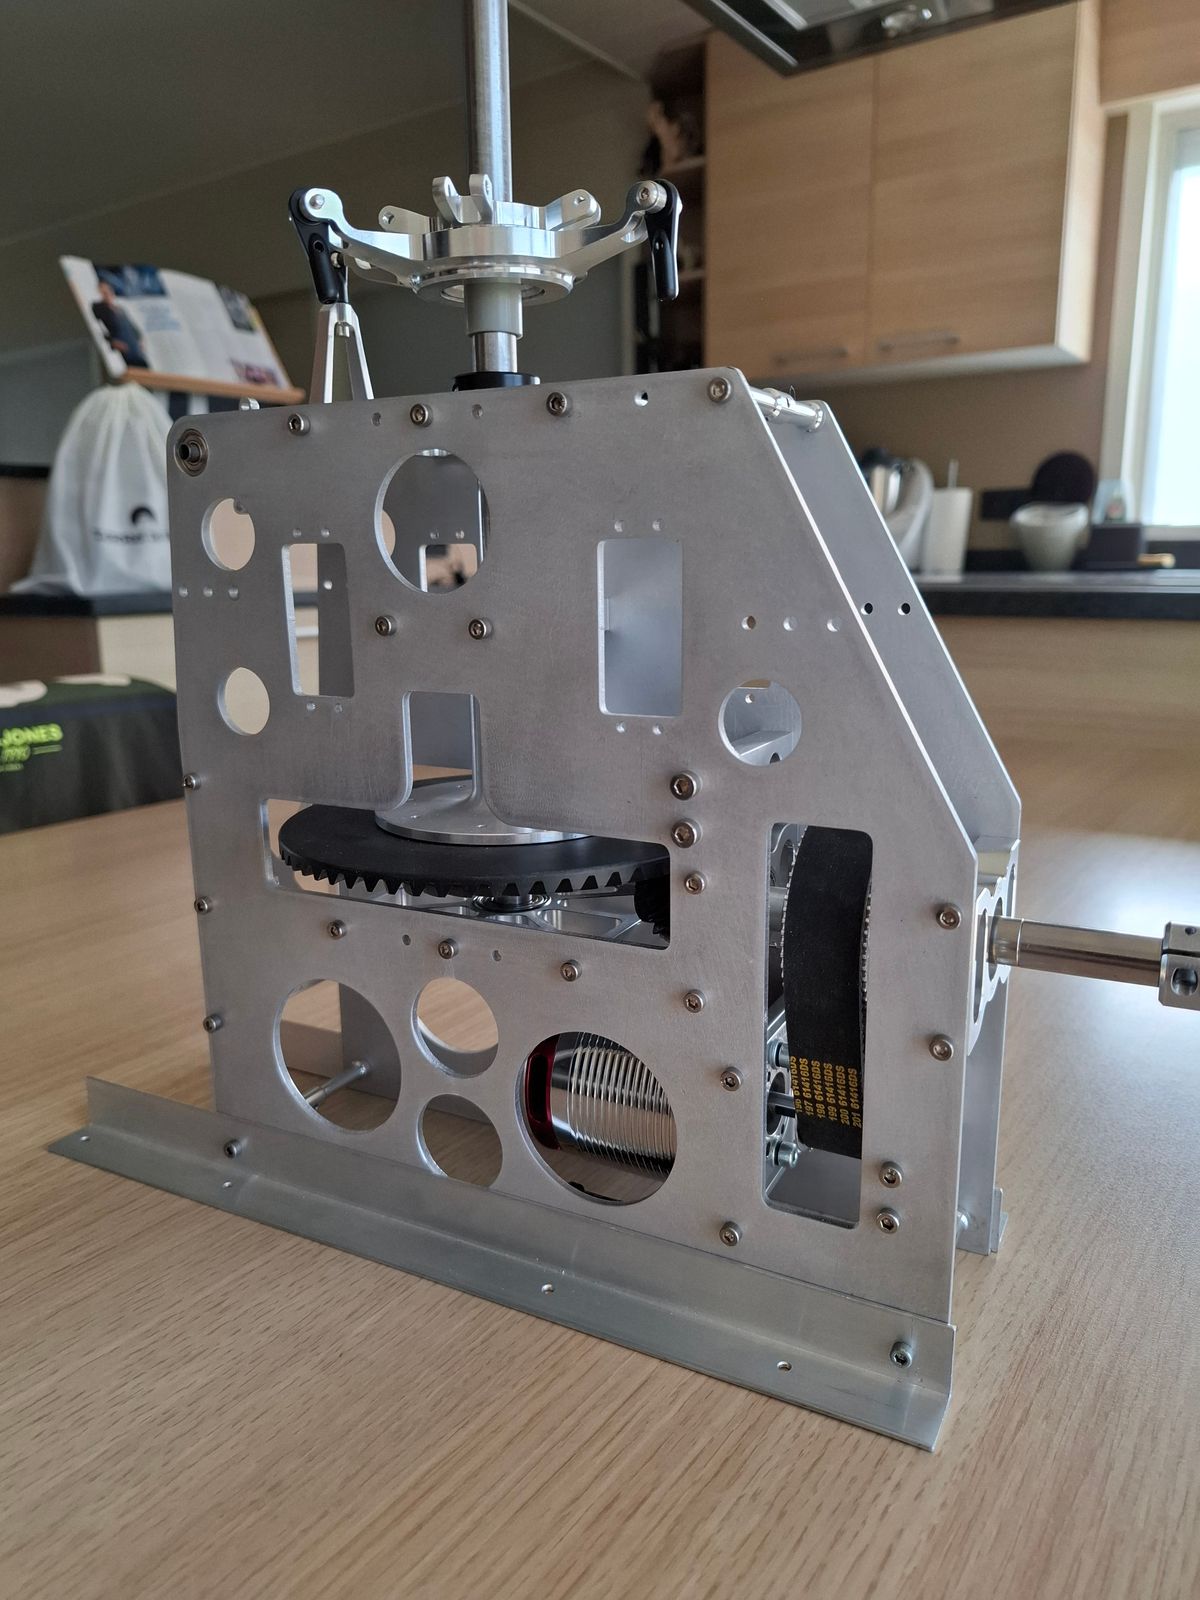
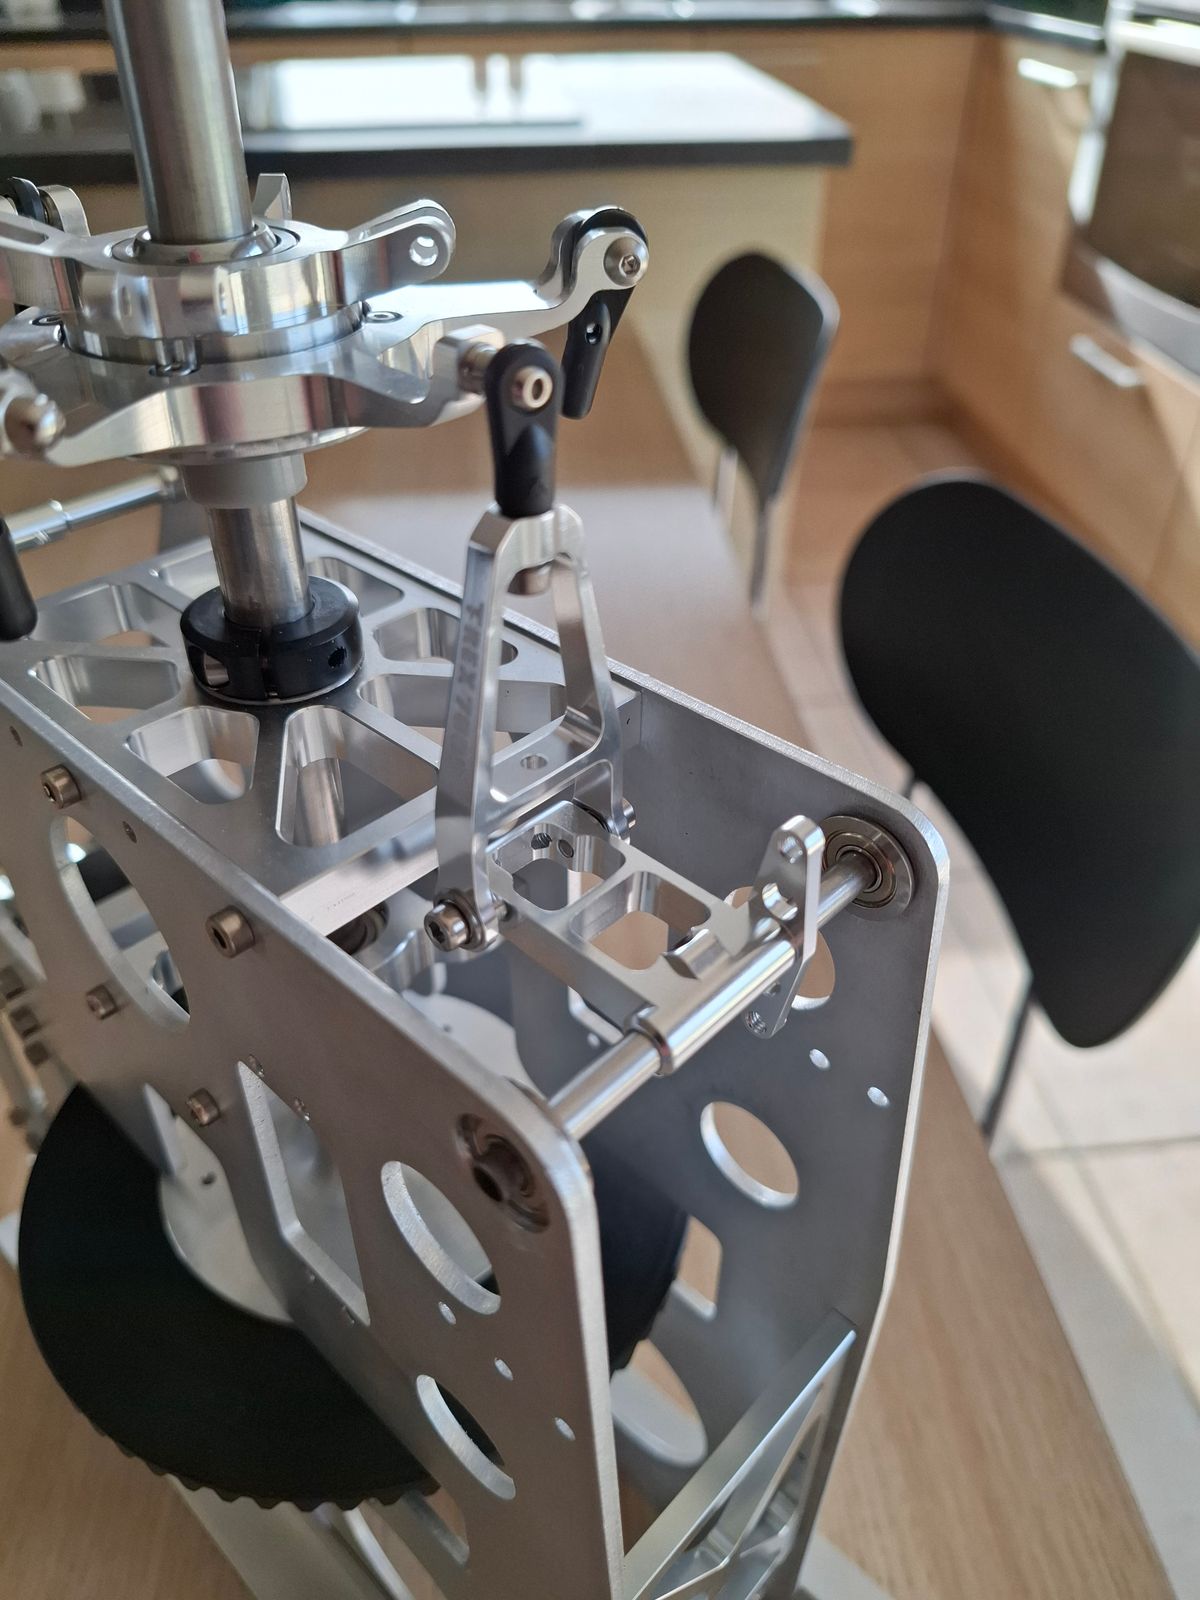
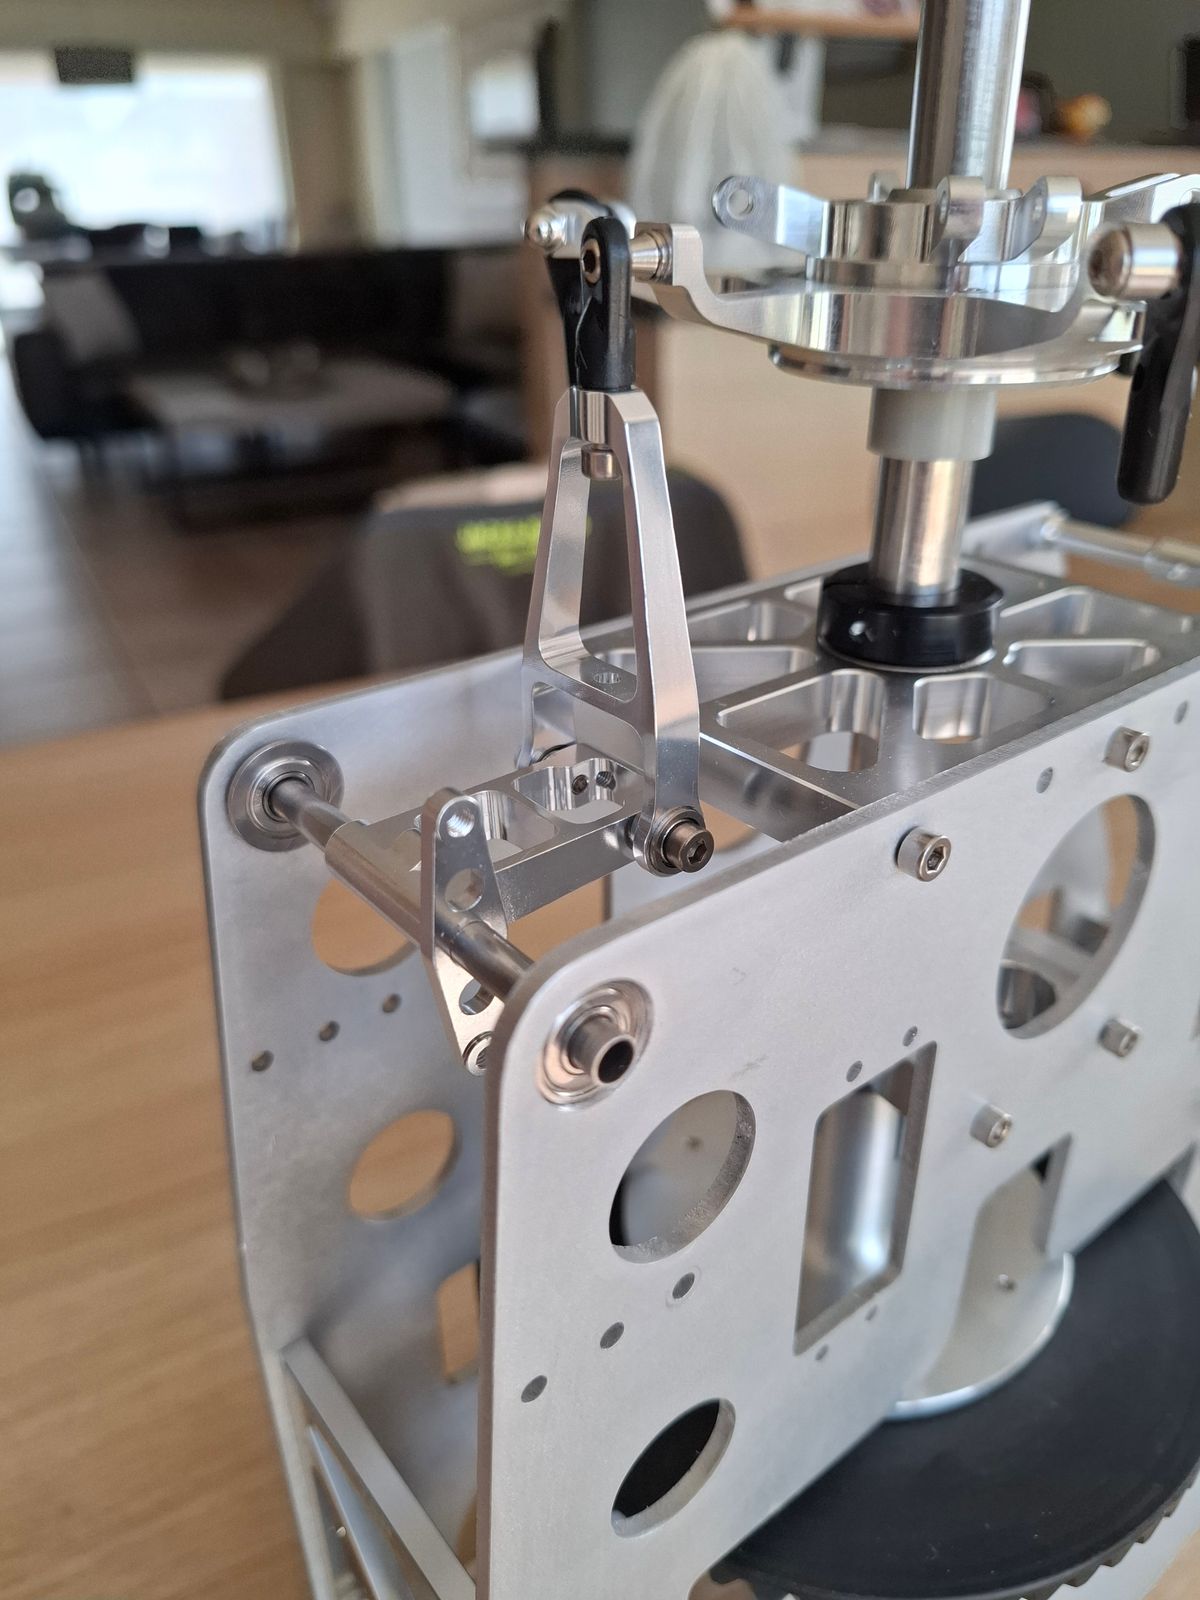
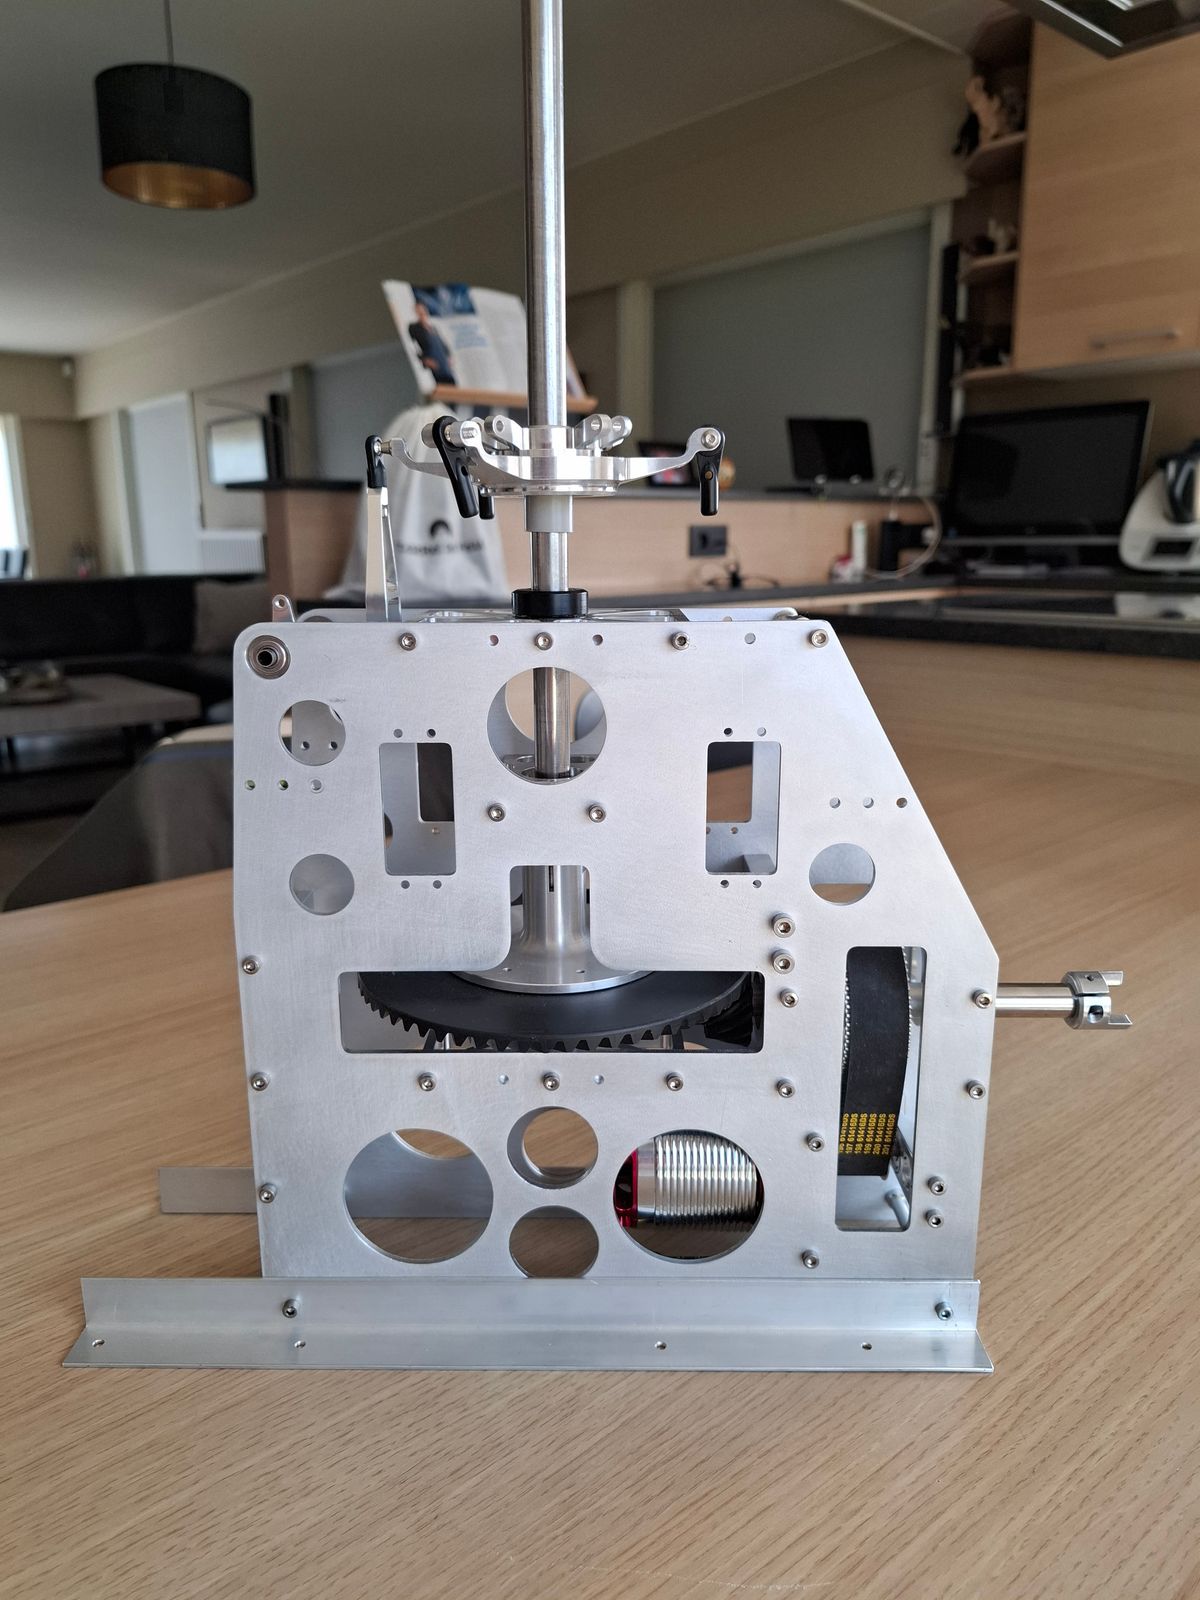
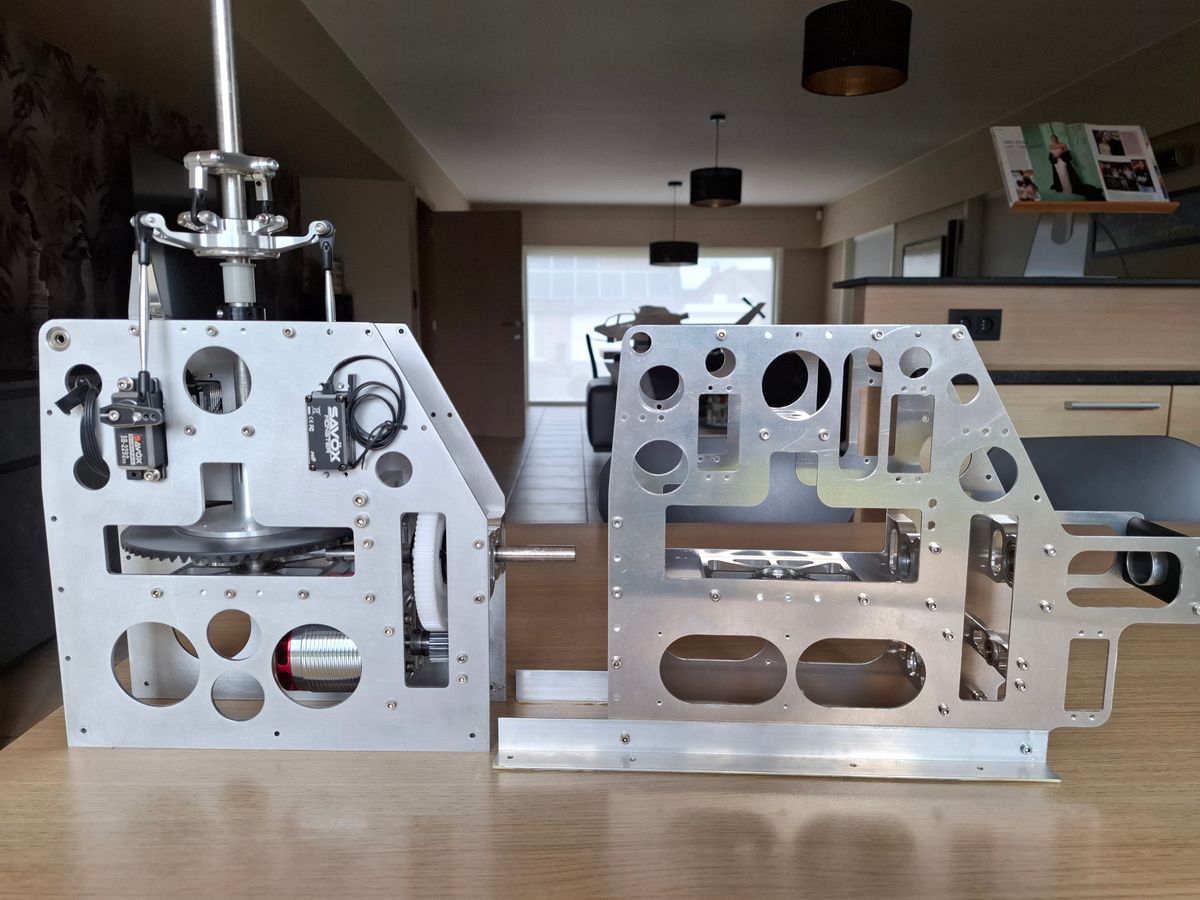
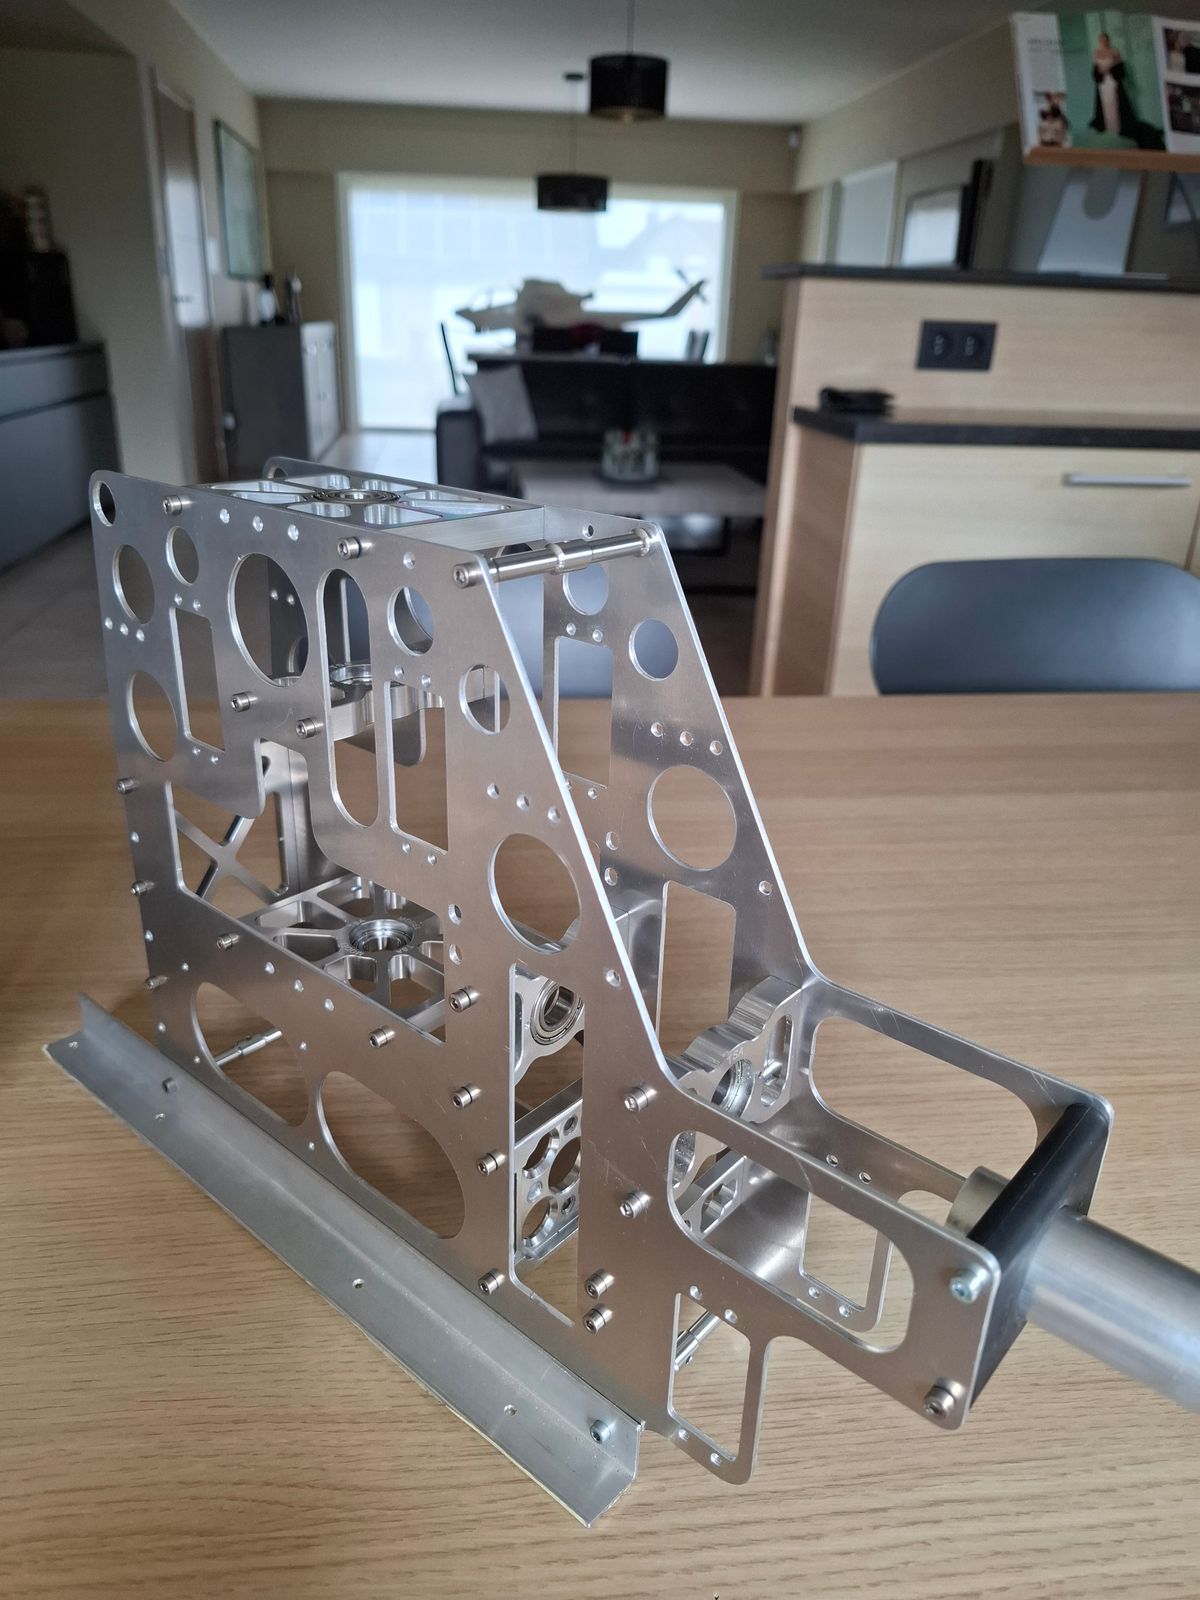
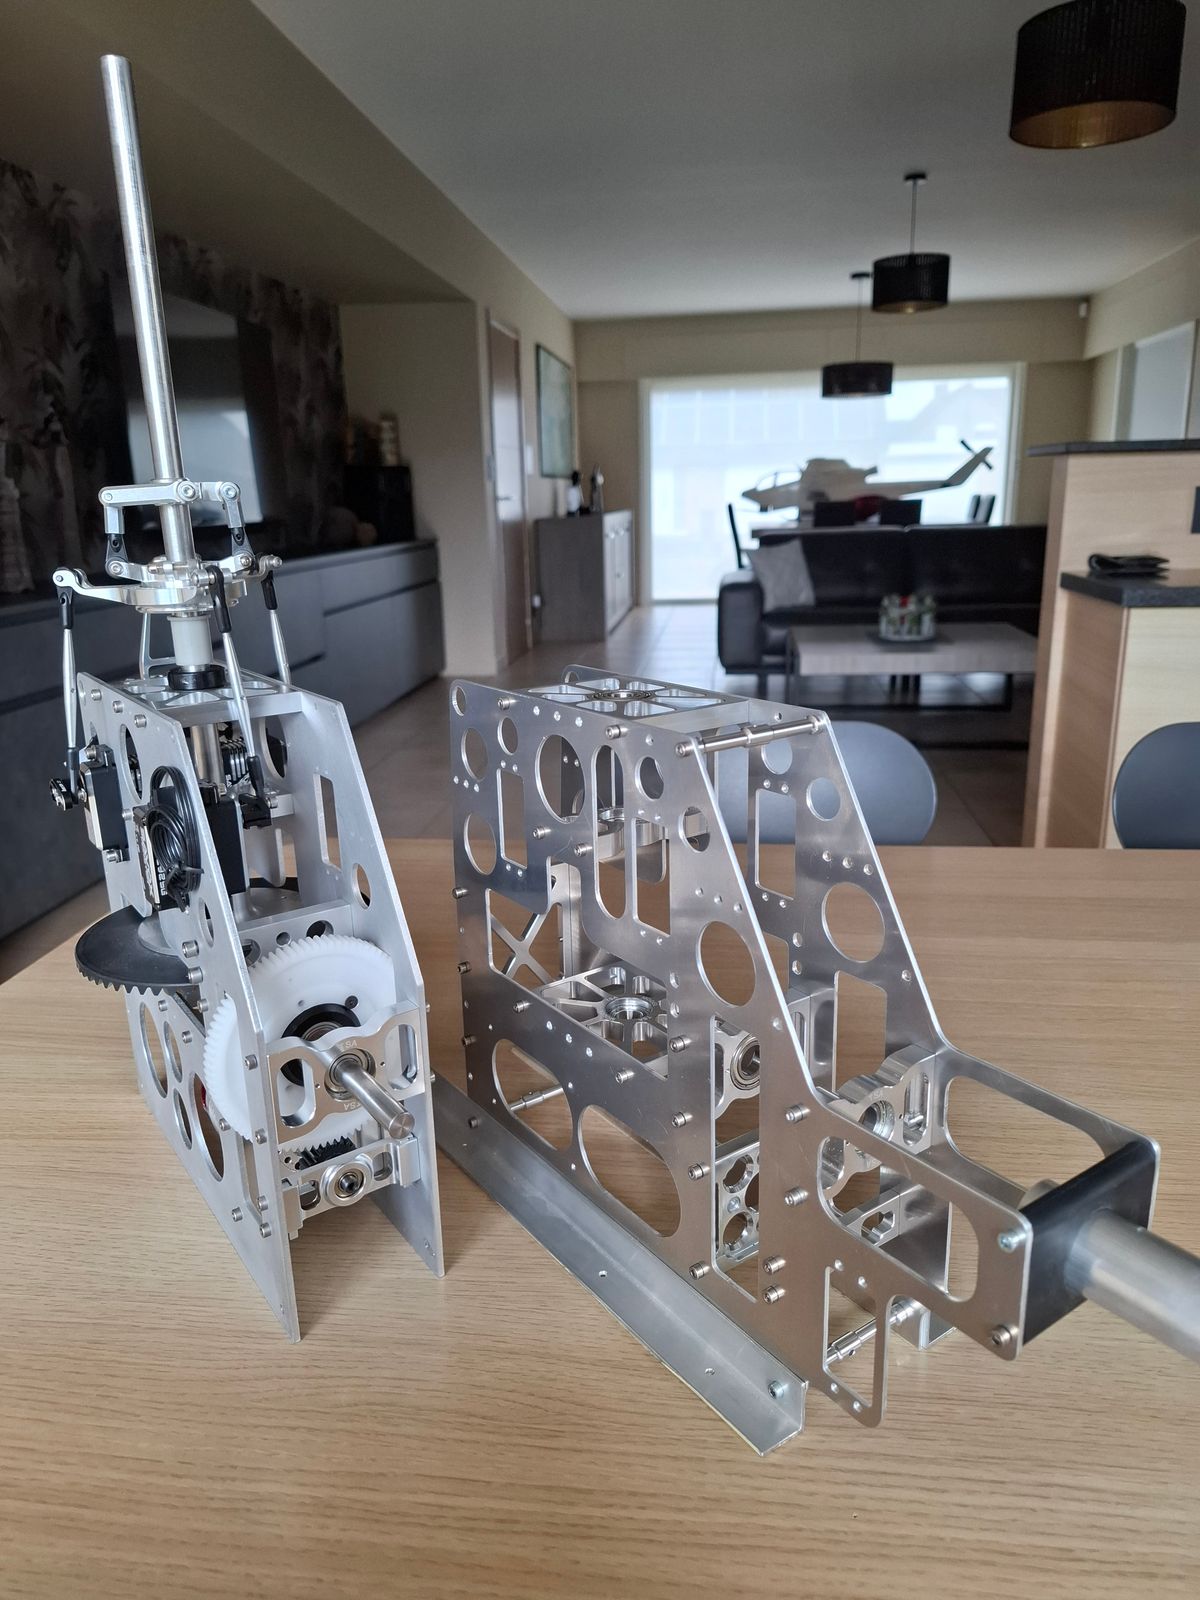
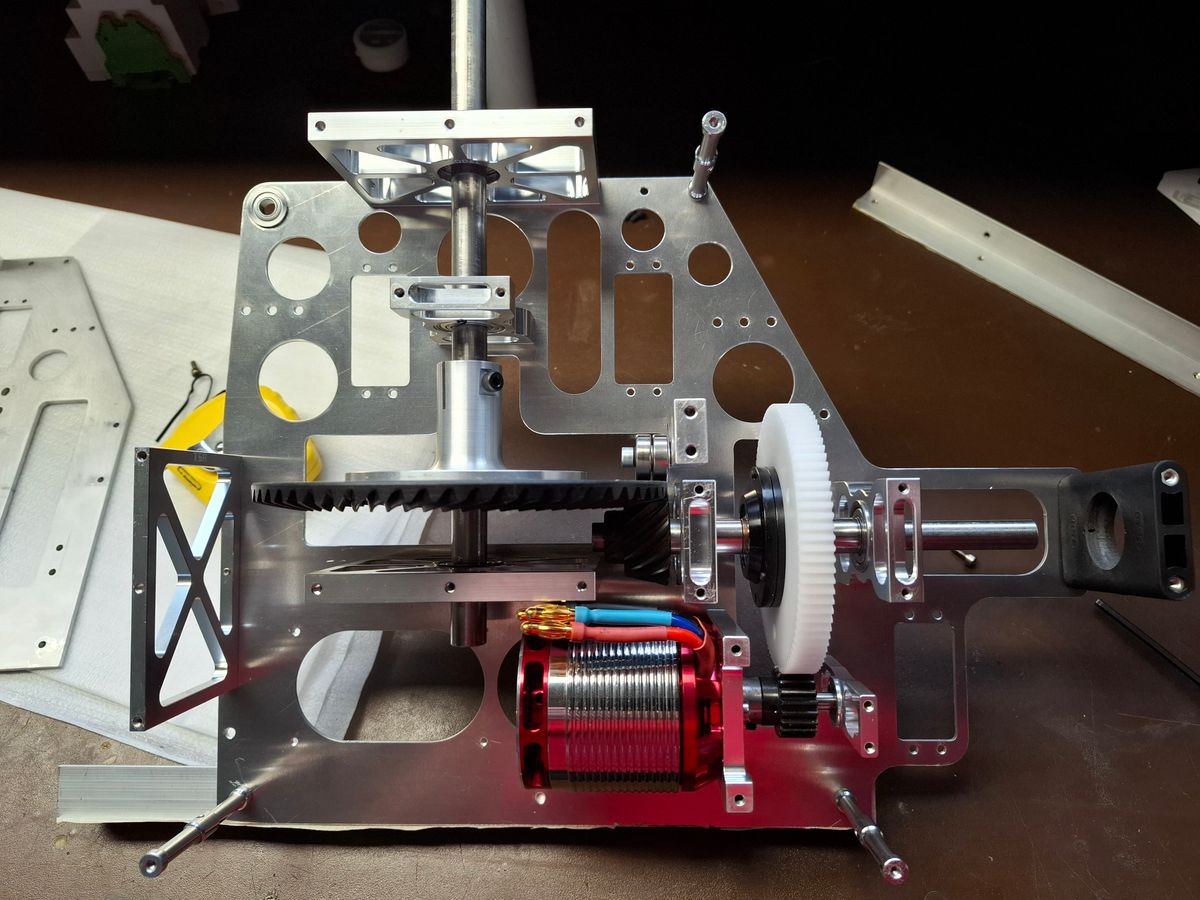
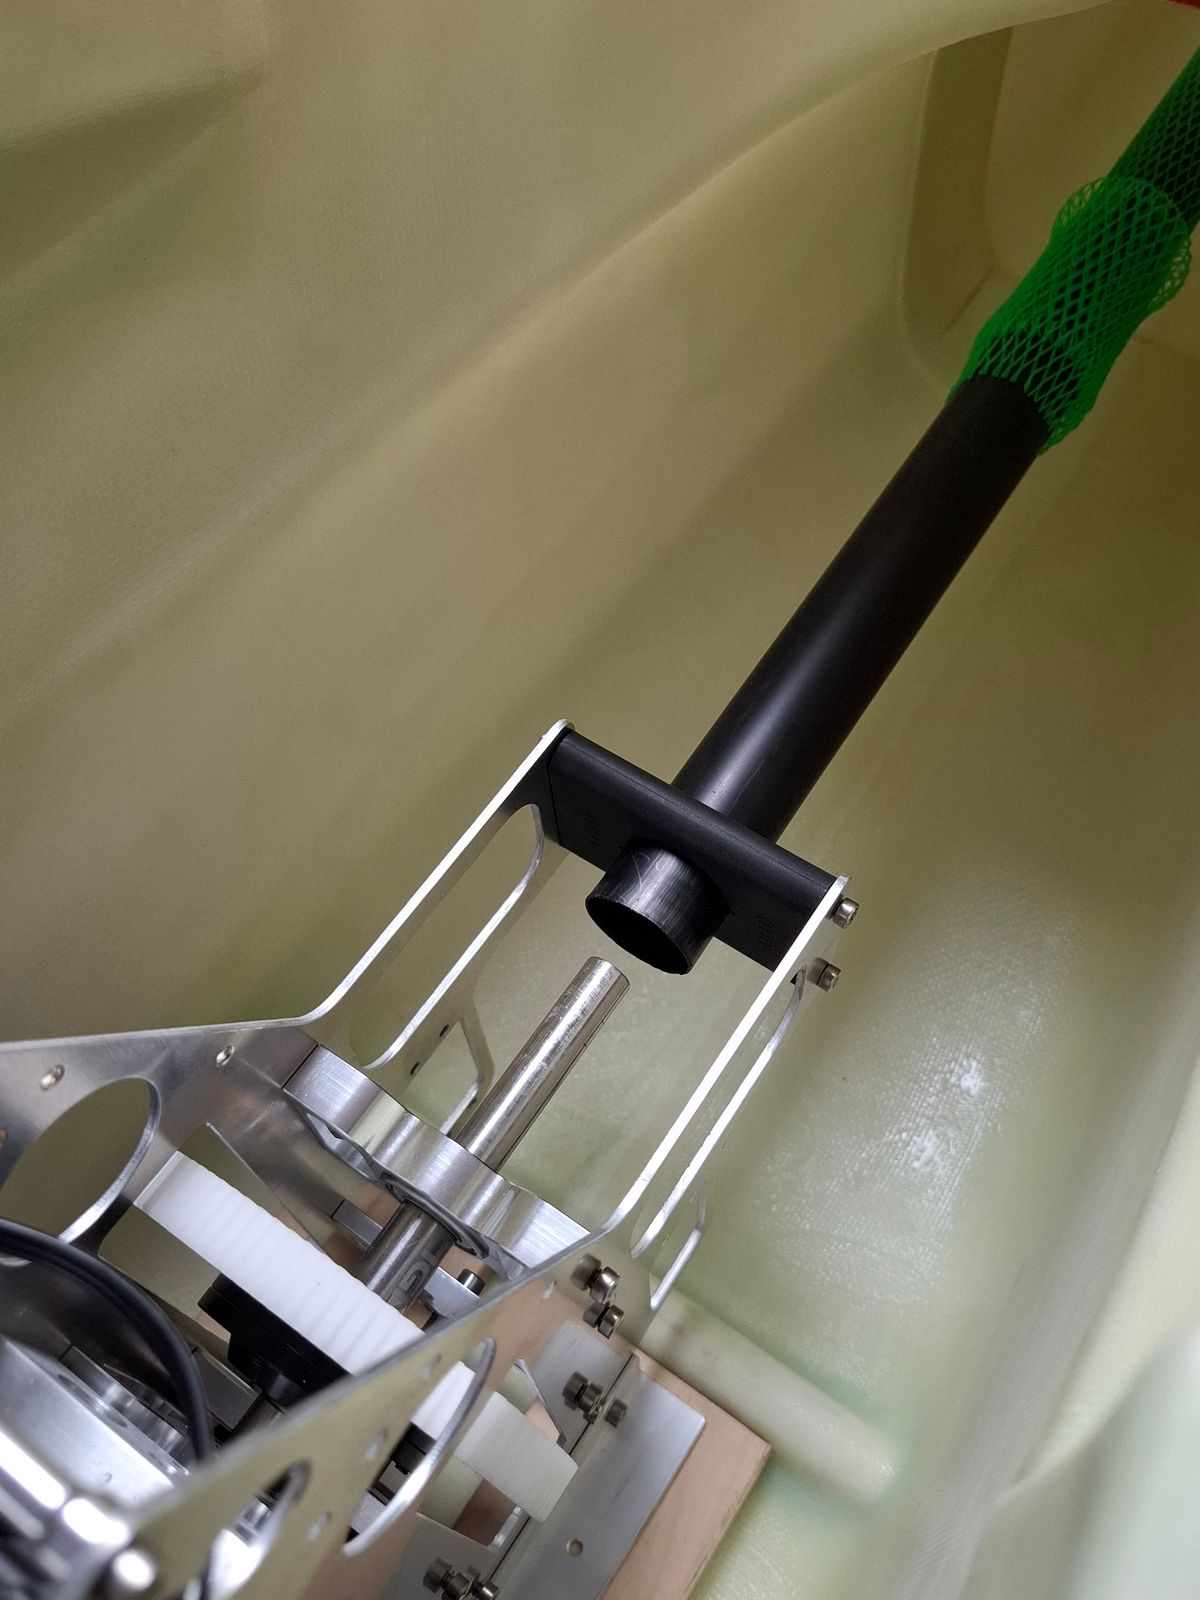
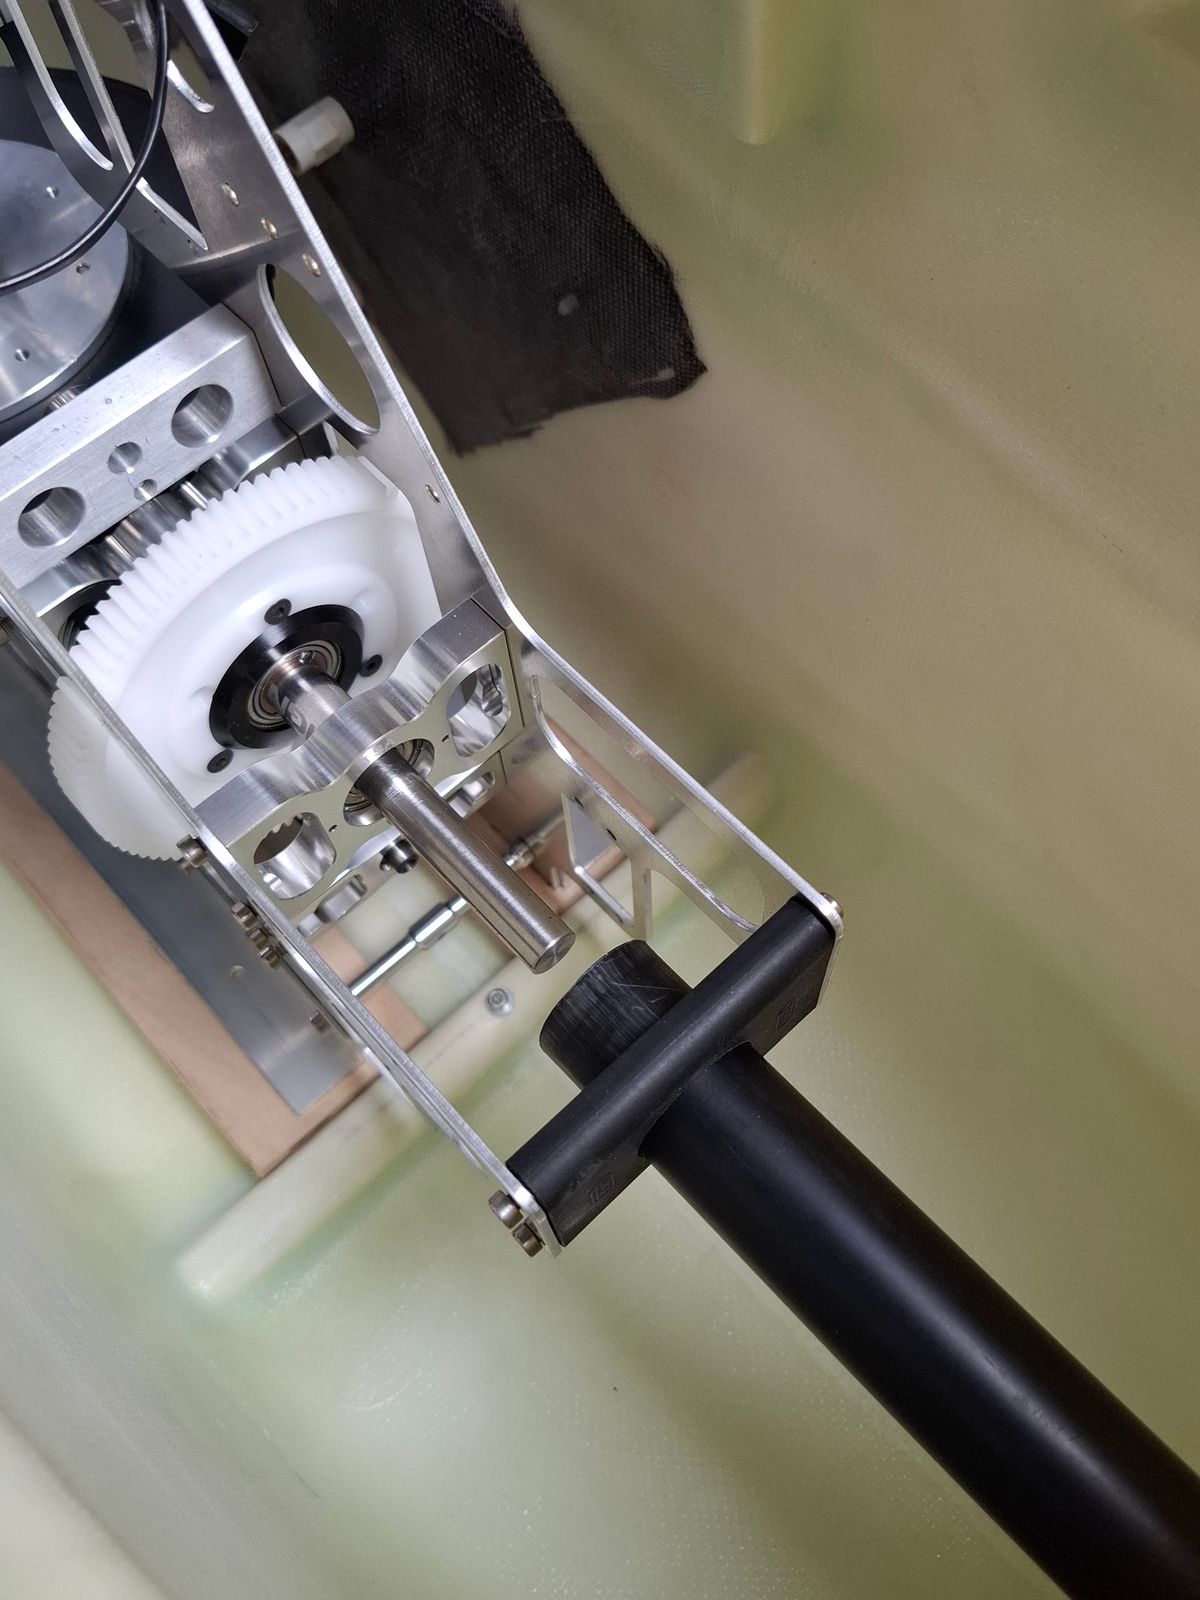
Update frame final mechanics
Update frame layout.
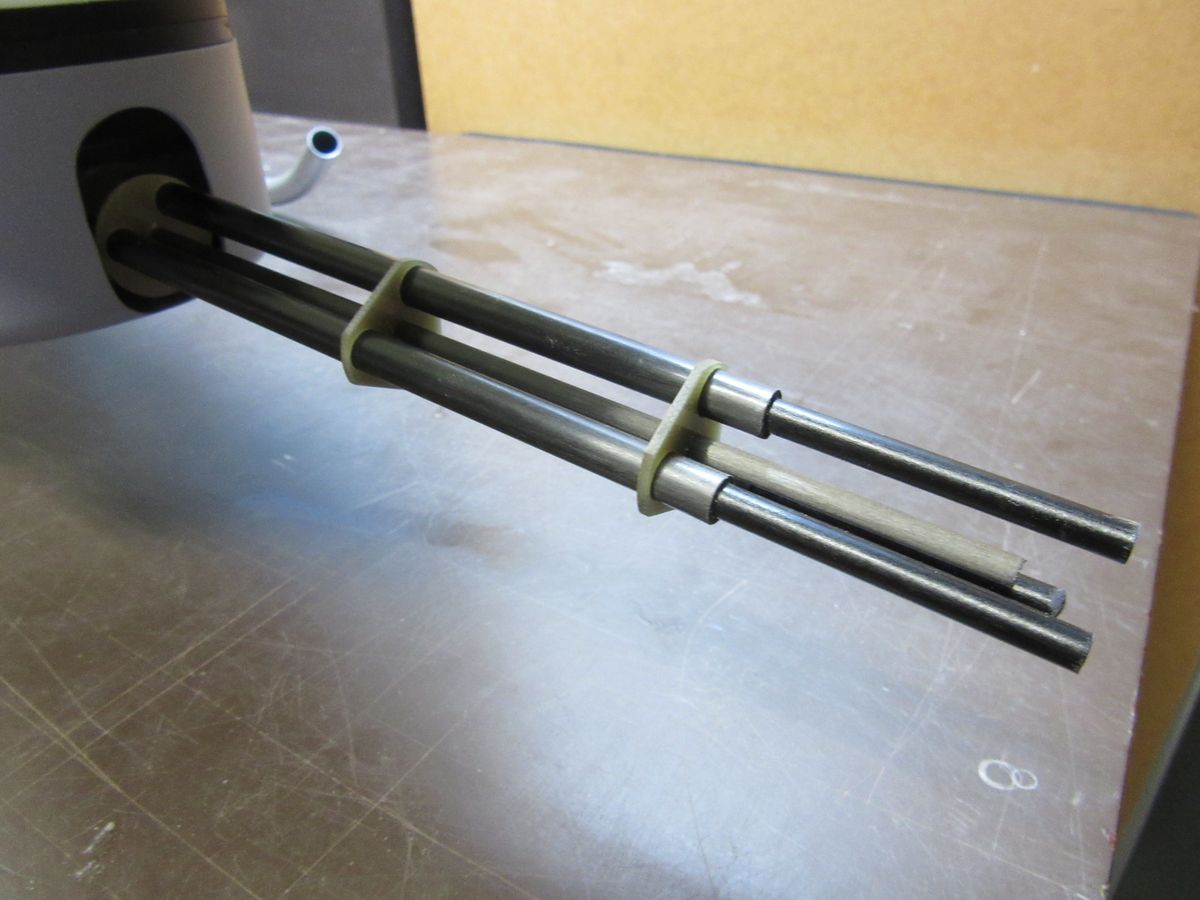
Additional inline tailboom support.
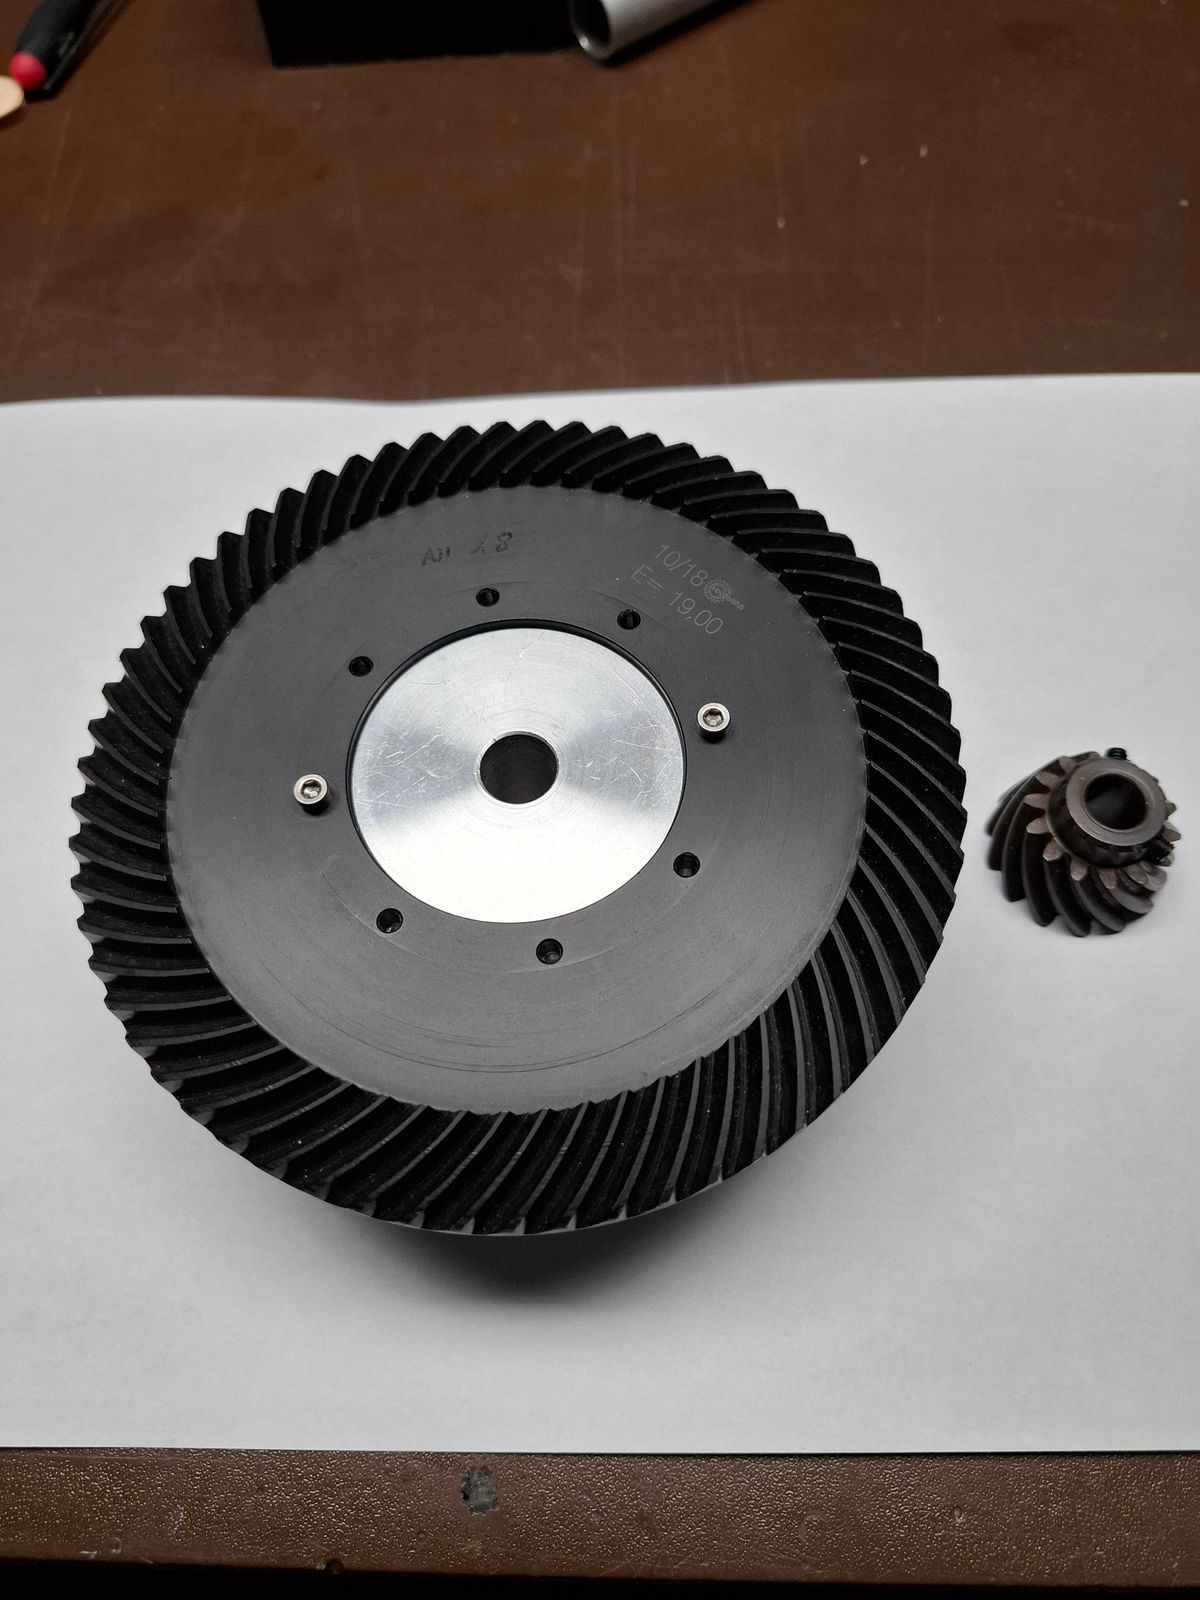
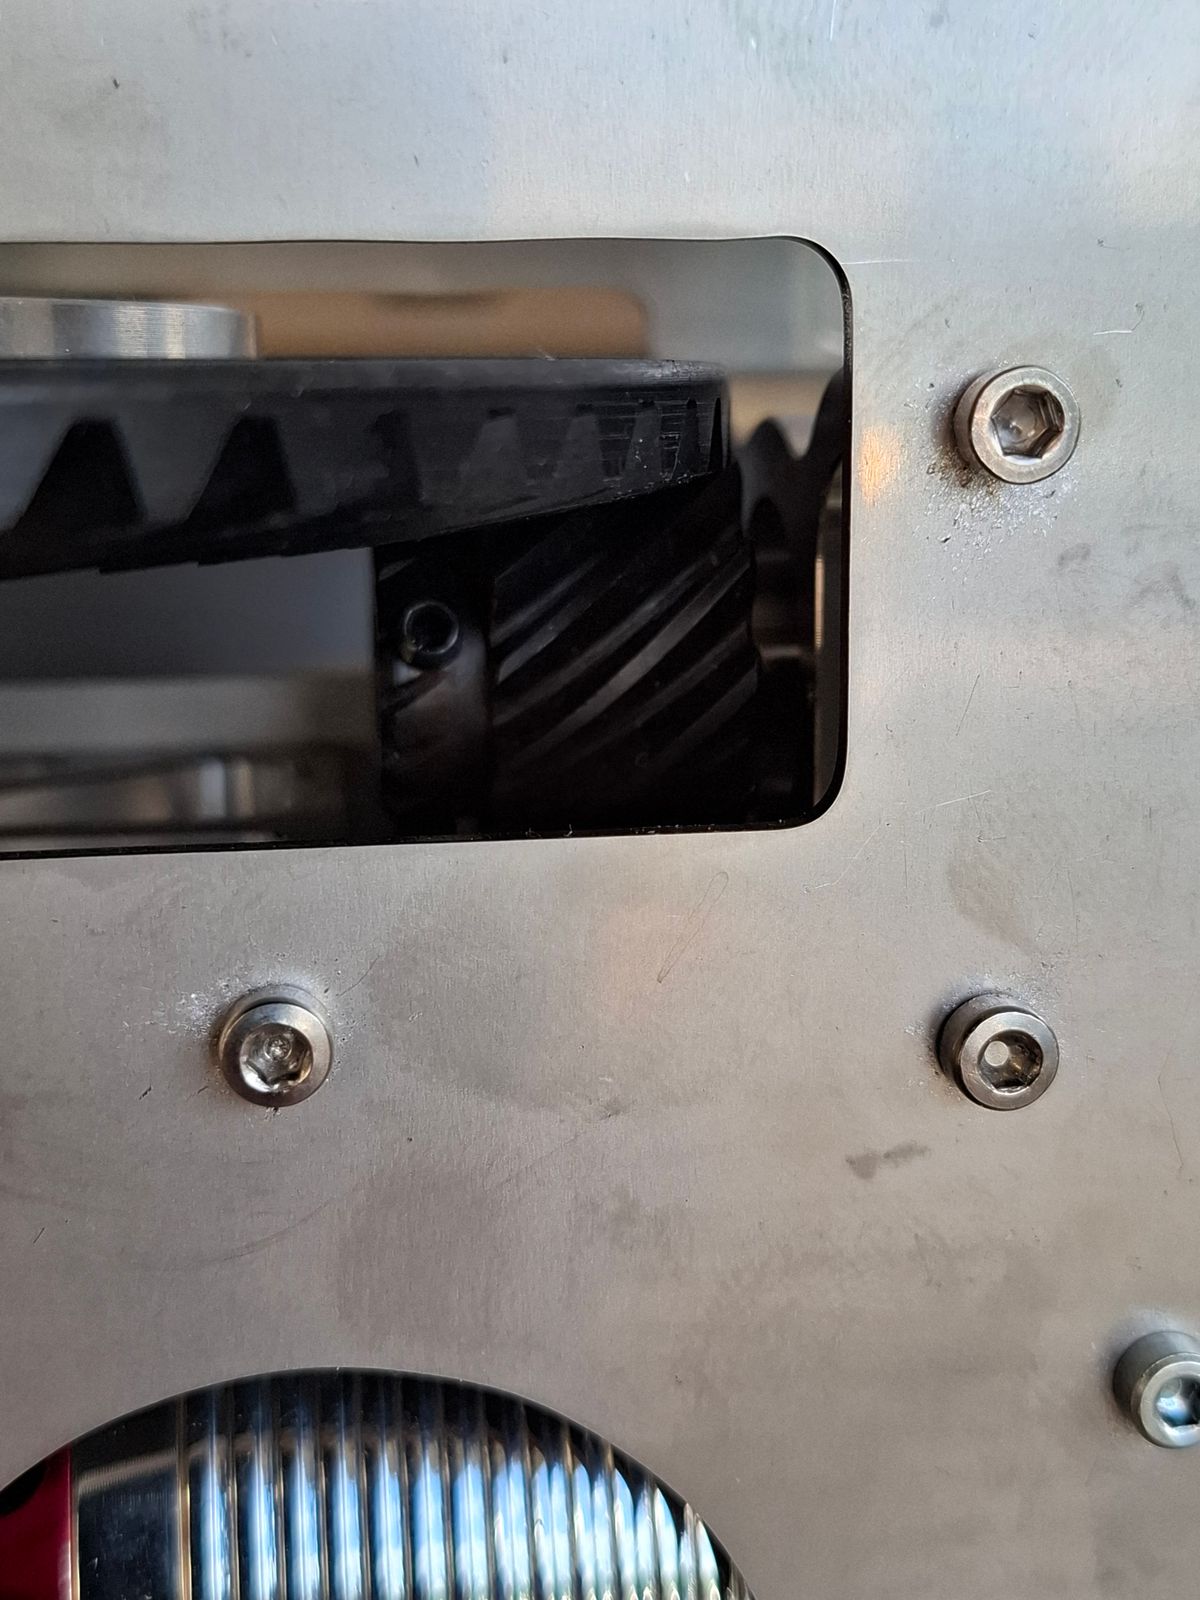
Replaced timing belt gear by pinion gear due to higher first stage gear ratio.
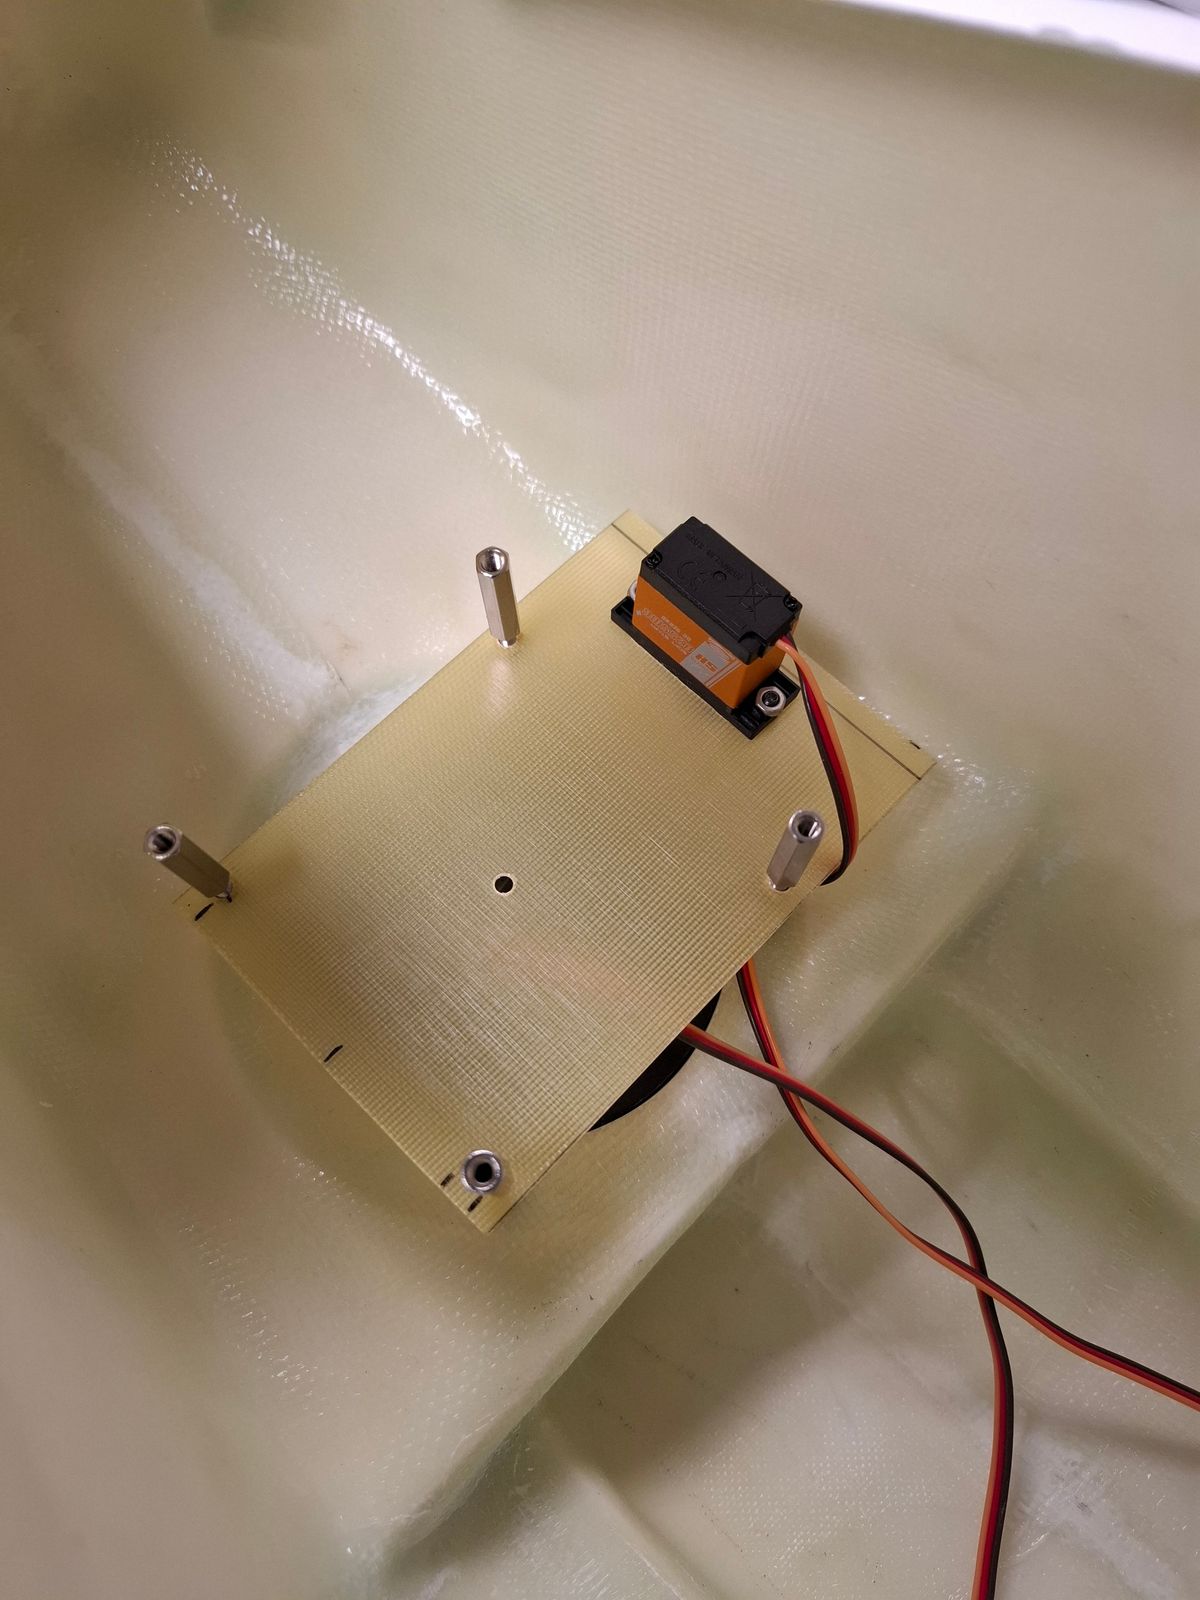
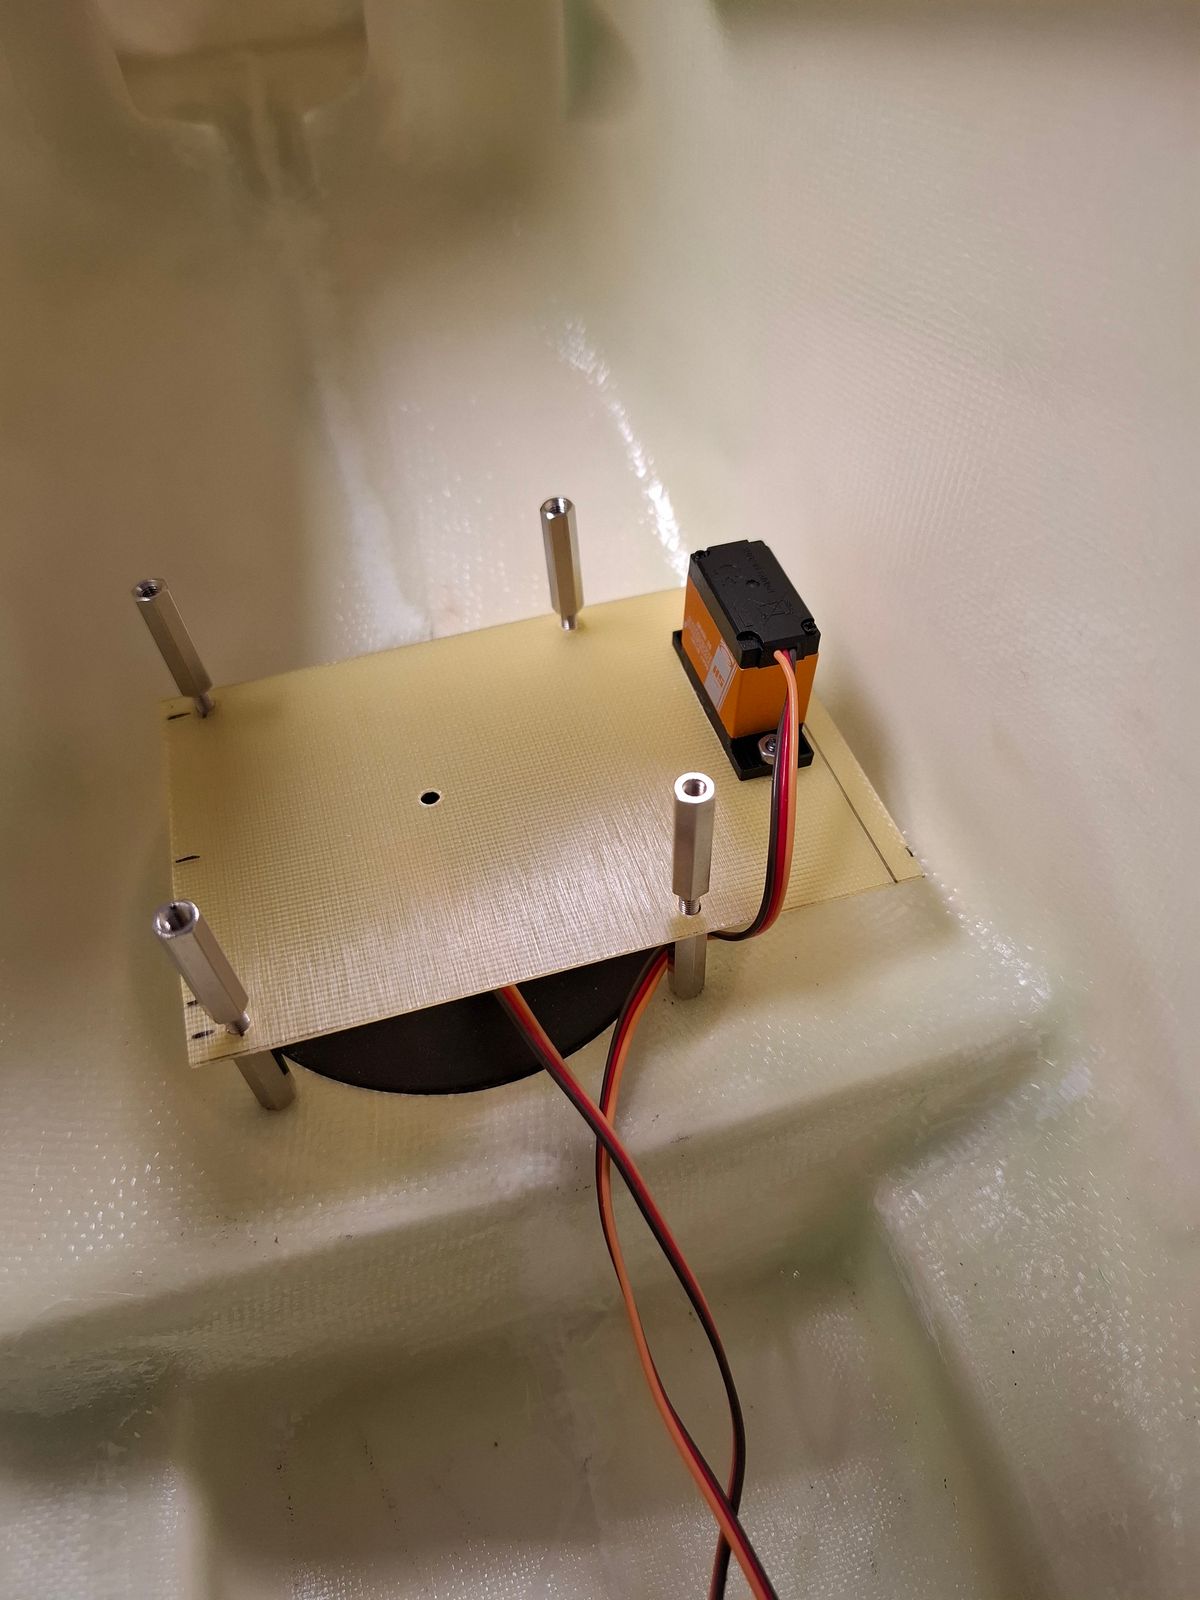
Rudder servo installed in frame.
Laser cut 2mm Alu frames
53 Comments
That will be beautiful!
Great Project Danny,
I will be following your build and processes as I am sure there will be something for me to learn.
Years ago I had the Hirobo AH-1W Cobra. That was my first scale heli model I cut my teeth on. I flew it for several years making detail and finish upgrades to finally win the 2006 IRCHA scale event. After that it was like...
..."FISH ON"
B
It will be a multi year project i think, but that is what i like to do, invent and build from zero, not because it is easy, but because its hard. 😄
This is inspirational. I have a 1:4 Vario EC120 that I’ve been contemplating on making my own mechanics. I just haven’t had the courage to do it. Where do you resource your parts like gears? do you make any of the parts from scratch? I’m also looking into getting a small metal hobby lathe.
Hello,
Considering the price of a serious mechanic (1500 USD) , we can do some efforts. The clean not edited timing belt pulleys can be found in any specialised shop where they sell transmission related parts.
You only have to choose the type of timing belt XL, T, GM.
The timing belts are available in different size, and length.
If you have a lathe and milling machine you can modify the parts according to your design.
The bearing blocks can you find as a spare part of existing heli kits, i used TSA or Align, they are both 61mm wide.
Kind regards
Danny
Oh, now I’m liking this!!
Nicely done as always Danny.
Well Done!!!
Thanks guys !
Beautiful!
Danny,
Nice simply lay out. Love it. Your drawing shows a third main shaft bearing however your stack only has two. Will you add the third or do you believe two will be sufficient?
The pictures are only a visual setup example.
The third main shaft bearing wil be installed due to the relative long main shaft. I believe it will support the main shaft better, and avoid shaft bending.
Good call.
Very realistic! Nice job!
Amazing Work Danny! 👍
Those mechanics are beautiful!!! Wowza!
Thanks, i like to design it so that it fits perfectly the fuselage.
How do you get the servo to work continuously?
The servo was connected to a servotester, running in auto mode.
In the final design, the servo was modified, electronics, and limit cam removed, and motor connected directly to de servo leads, so it turns continiously in the same direction.
Dammit Mang.
Amazing. The mechanical stack, Wonderful. Some carbon fiber would be a nice touch.
UIH,
B
Thanks, that would certainly be an option.
Is this Vario fuselage?
Yes sir.
Great TGB, I use the same TGB on my S-92 projects.
Nicely dome Danny,
B
Same here. Further changed hub + blade holders to Vario for bigger ball bearings. My choice, Baumann products are fine and professional service.
Notes:
- don't fill full of grease, not necessary (surplus will exit between shaft and bearing anyway).
- grease V10/360 here.
- open the little window after some run to replace the grease if you find it dirty - little initial wearing is expected at the beginning
- I check the same on yearly basis and using a flat wood toothpick (with gentle rotation), to remove the grease prior injecting new one
- ball links are Mikado #01560 (Gabriel manufacturer), whole setup is smooth and zero play
Vario pinion vs Baumann TGB pinion...... No comment needed. 🤔
The good thing with this hobby is that we got some flexibility on choices and there are options on solutions!
That is right Rémy, it is not always plug and fly, sometimes we have to do some improvements to make the machine more reliable and longer lasting.
You just need to mechanically decouple the potentiometer. Then the motor will run continuously. You can then adjust the speed using the potentiometer.
I tried building my Cobra gun using a similar method years ago. This requires highly precise machining skills because a 1 mm deviation on the gun end will result in a visible rotational wobble on the nozzle end as the barrels spin. Sadly, I lacked this skills. I have since gone to 3d modeling and printing. While I achieved greater gun details, at first I struggled with warping resin which also resulted in wobbles. I've since solved it with a different material and resin curing method.
Very nice!
Excellent. That is a nice piece of work.
Thanks.
Danny another work of fine art by your hands. Can you share what is the weight difference between the two pieces?
Original plastic case without the 4 small ball bearings is 6 grams.
Full Alu housing and the four large ball bearings is total 77 grams. So a difference of approx 70 grams.
What a difference in bearing size you were able to see, beautiful work
Thanks, that is part of the improved sustainability regarding the RPM of the tail drive torque tube.
An idea would be to have a window for inspection/service, similar to Baumann (carbon cap). Per exemple on below side so we can access without removing it from the tail.
Would love to have if not too heavy and same dimensions so replacement of plastic one is possible.
That was my intention, make a small window in the Alu gearbox housing so that i can see, check and lubricate the gears.
Inspection window on the side is foreseen in the Cobra fuselage.
I believe the 70 grams extra weight on the tail gearbox will be easily compensated by the Lipo's in front of the nose.
Very nice!
Amazing work Danny. Love the swash stay assembly.
B
Thanks, it's simple and wearfree.
Yea. I use a similar setup from Kasama on all my mechanic sets however using a 90° 4 servo set up the stay does not provide control input.
B
Nice piece, looks very solid and stable too.
However Kasama is not so well known here in Europe.
Thanks for the picture, that way we learn about different solutions.
Danny
Your machining is inspiring. What brand of fiberlaser do you recommend?
The plates where cut on a 4 Kw industrial HSG GX fiber laser machine owed by a costumer ( I am a service engineer on CNC machines )
Nice, looks indestructable like a tank! Plates look very thick, what thickness is it?
3 mm alu plates. Very stable and still light.
Very nice! So professional!
Thanks.
Very nice job !
Are gears from Vario ?
All gears are Vario stock products.