

Fusuno 700 AS-350 w/Align 700E DFC Three-Blade Head Assembly
 Jason S.
Mechanics Part 3 (ESC Mounting, RX Battery, and RX)
I have got a couple more items checked off the list for the mechanics.
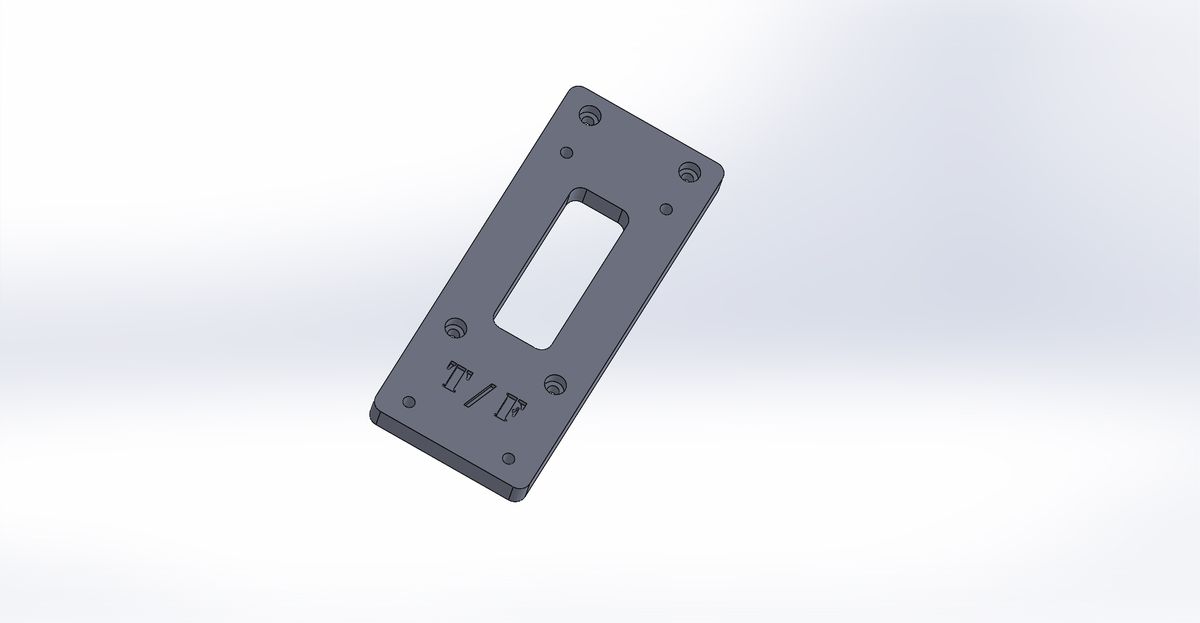
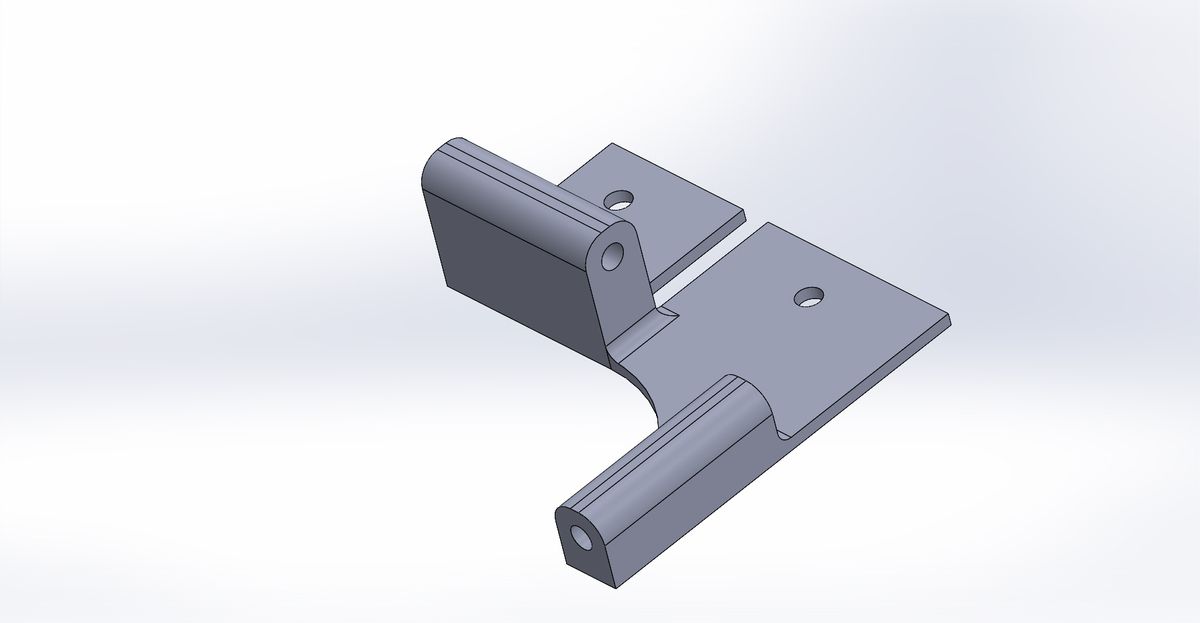
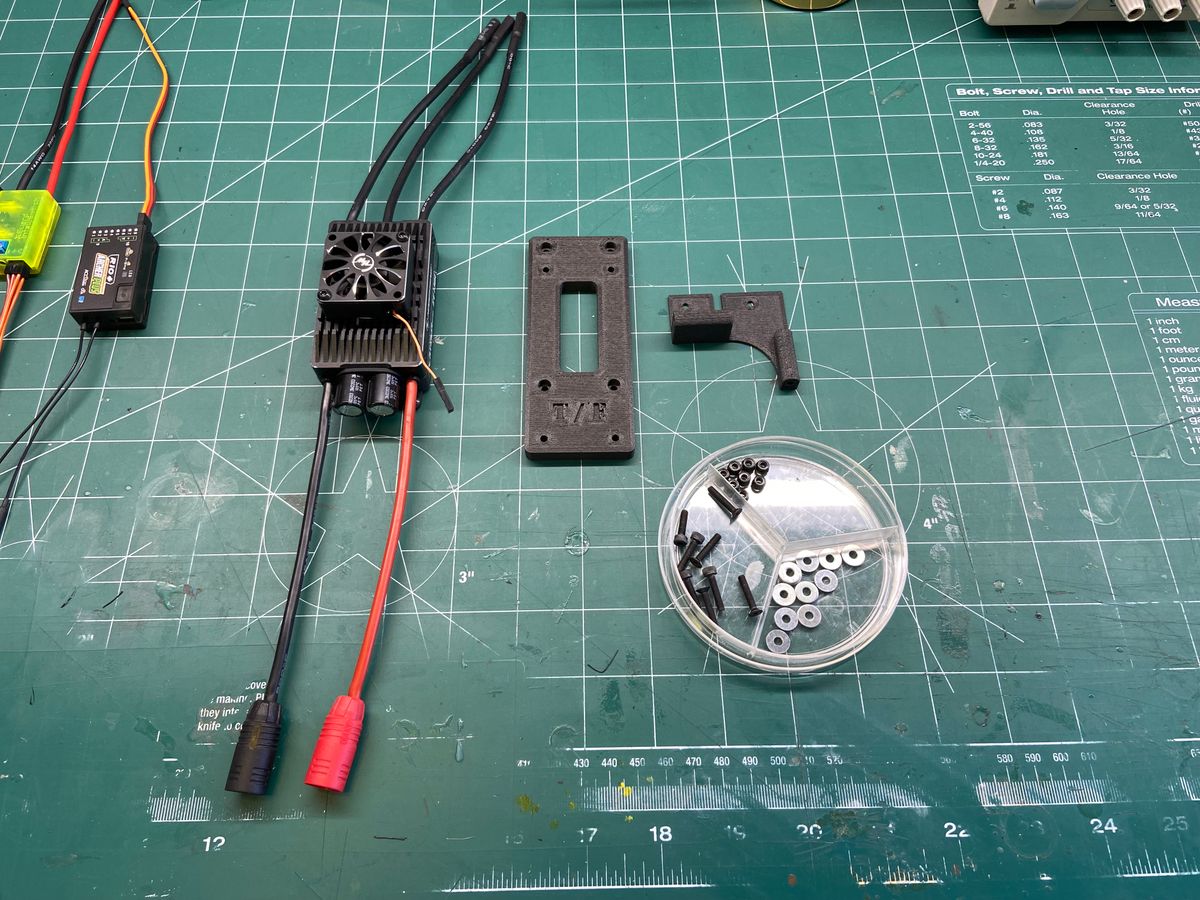
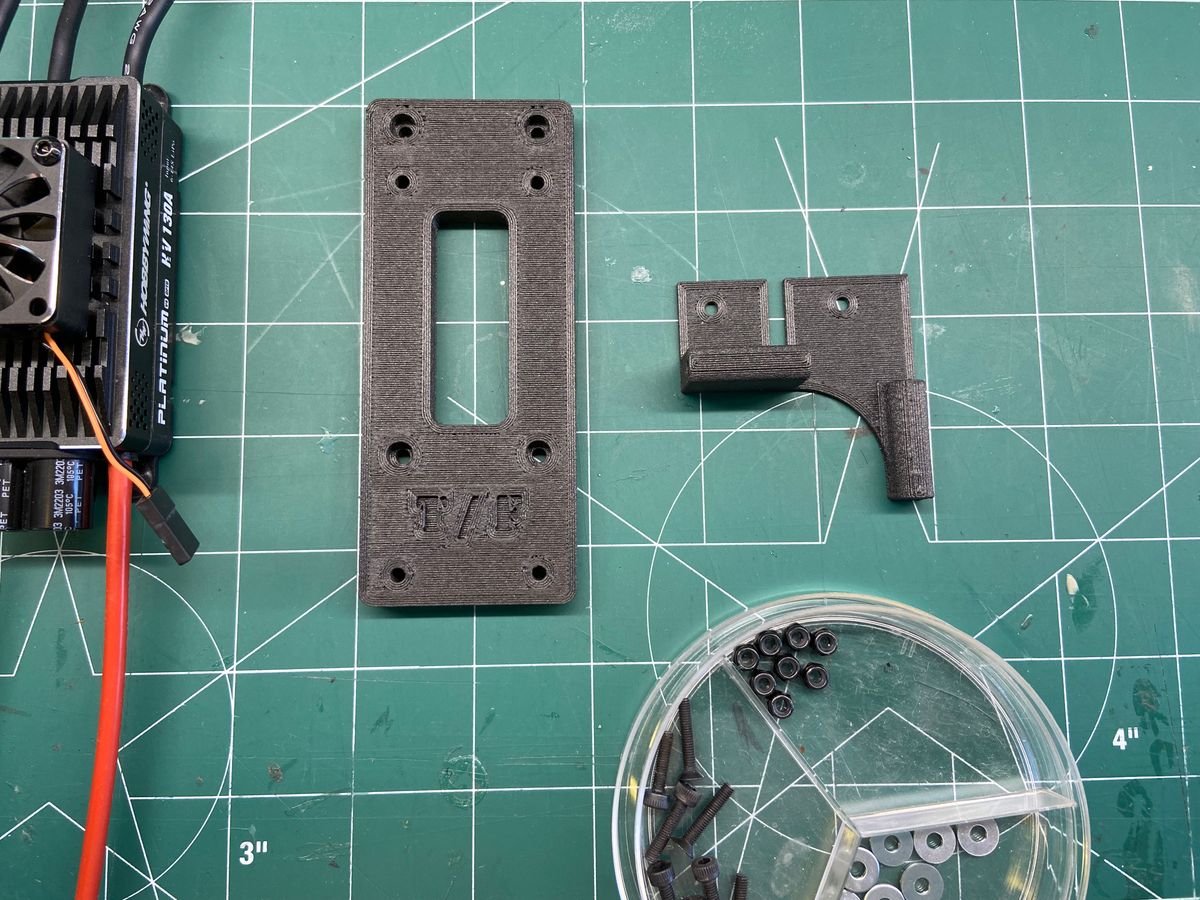
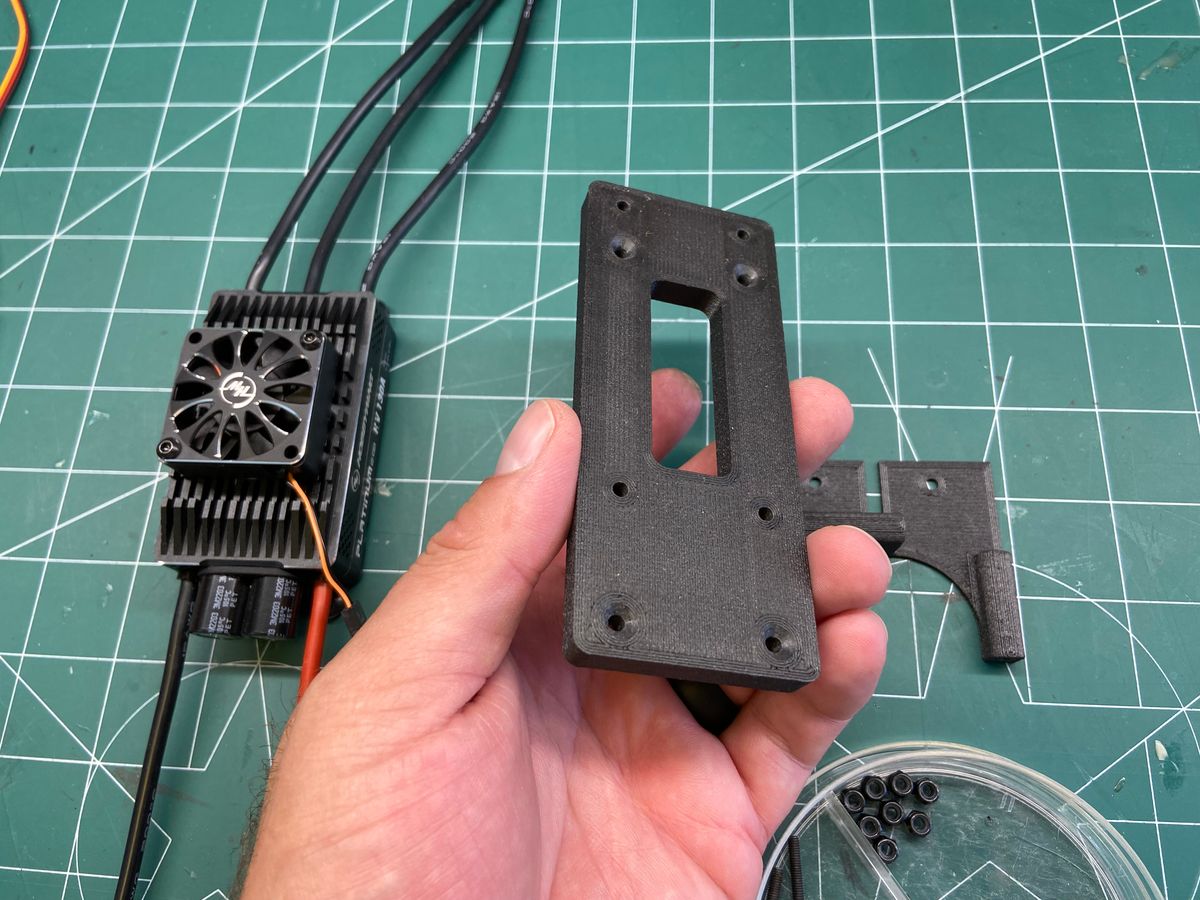
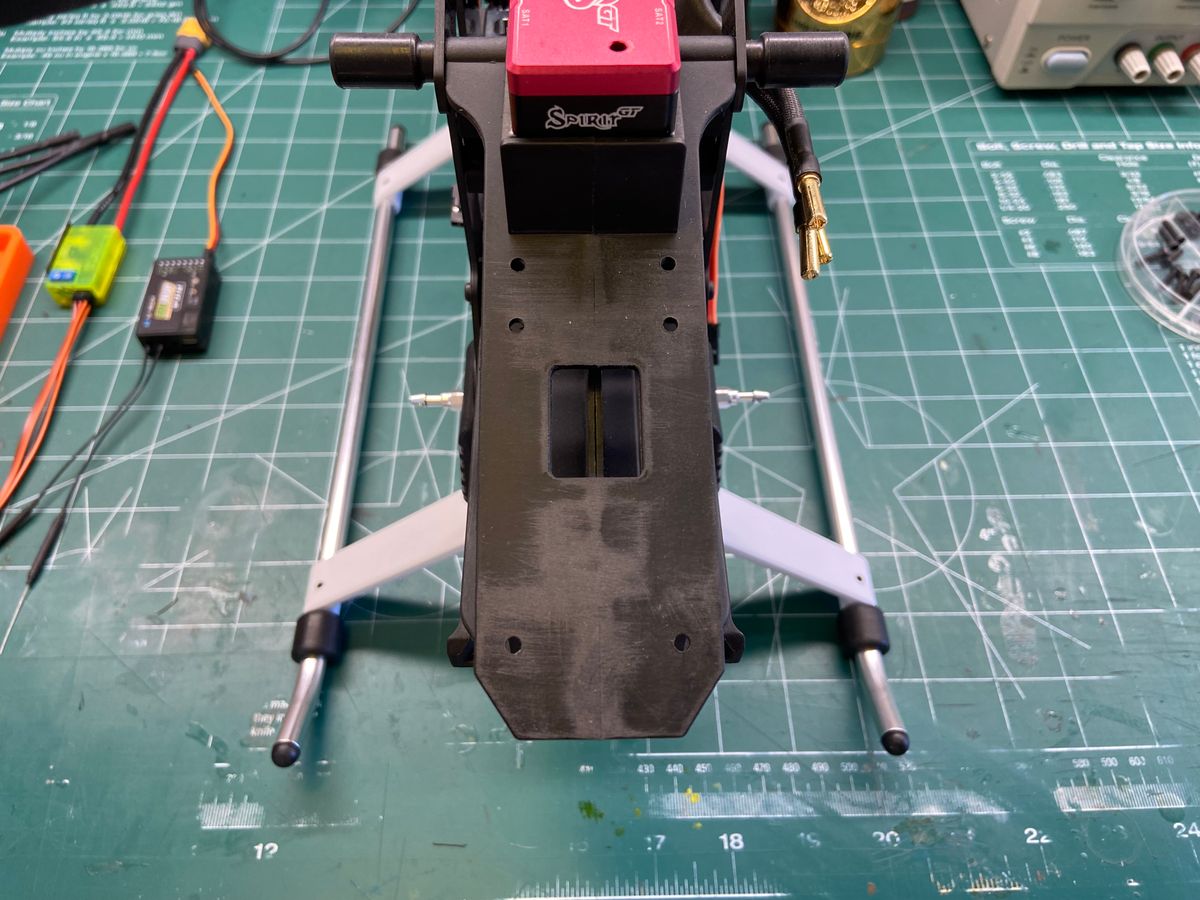
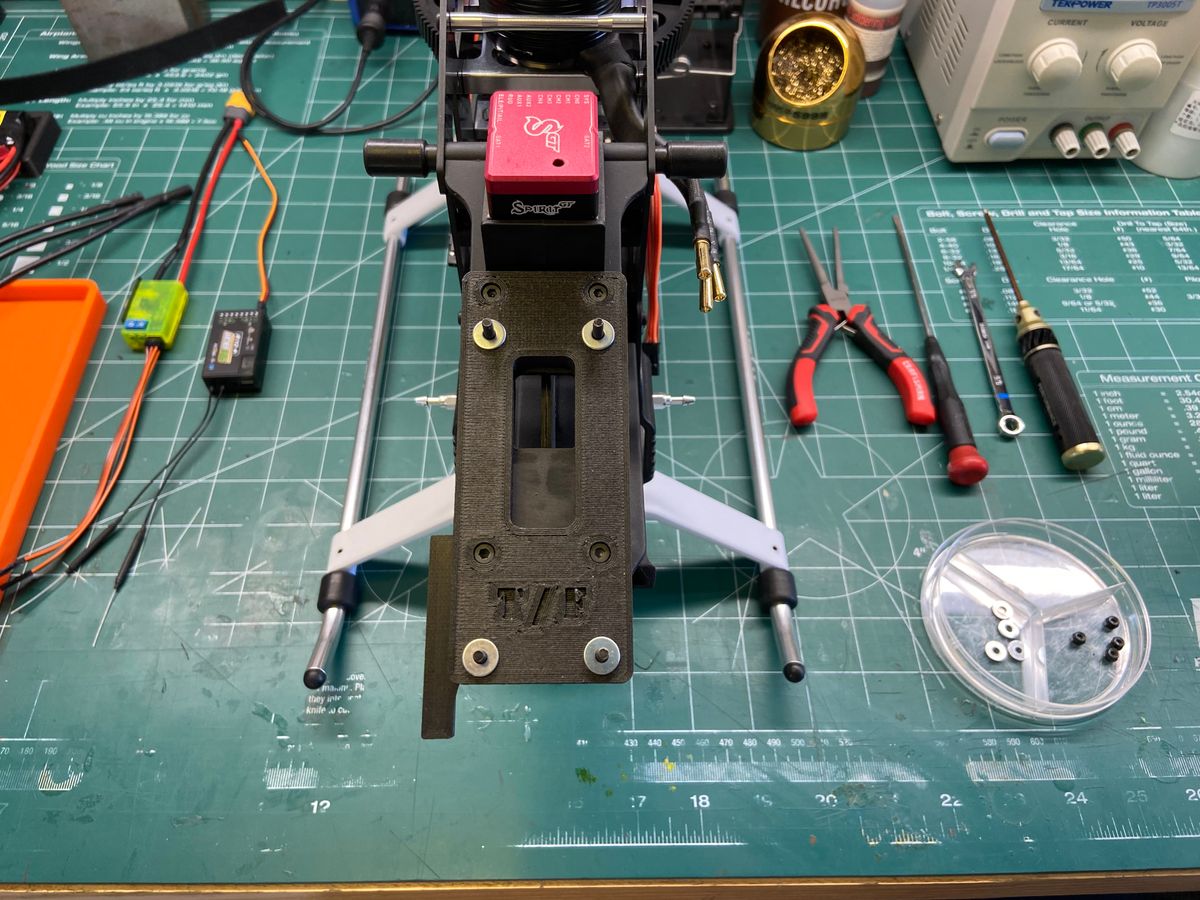
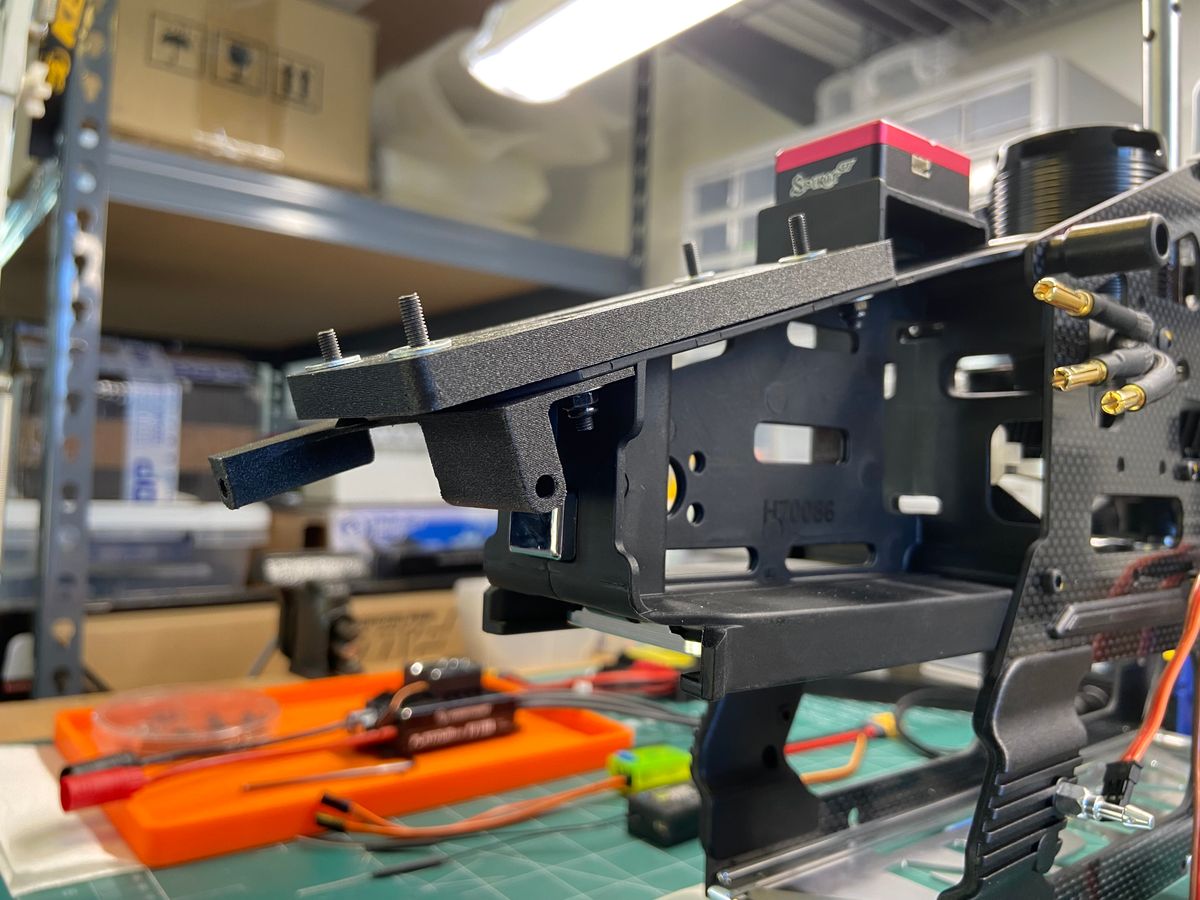
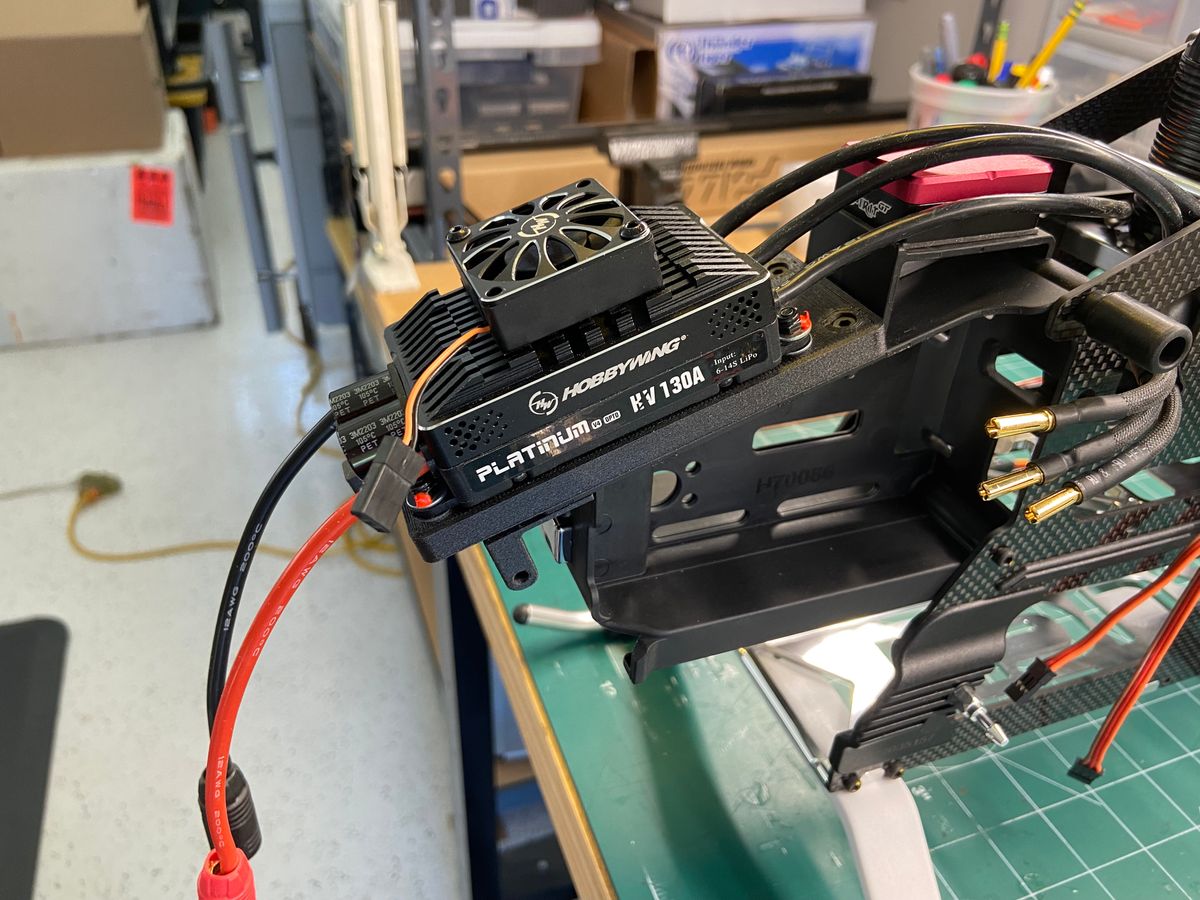
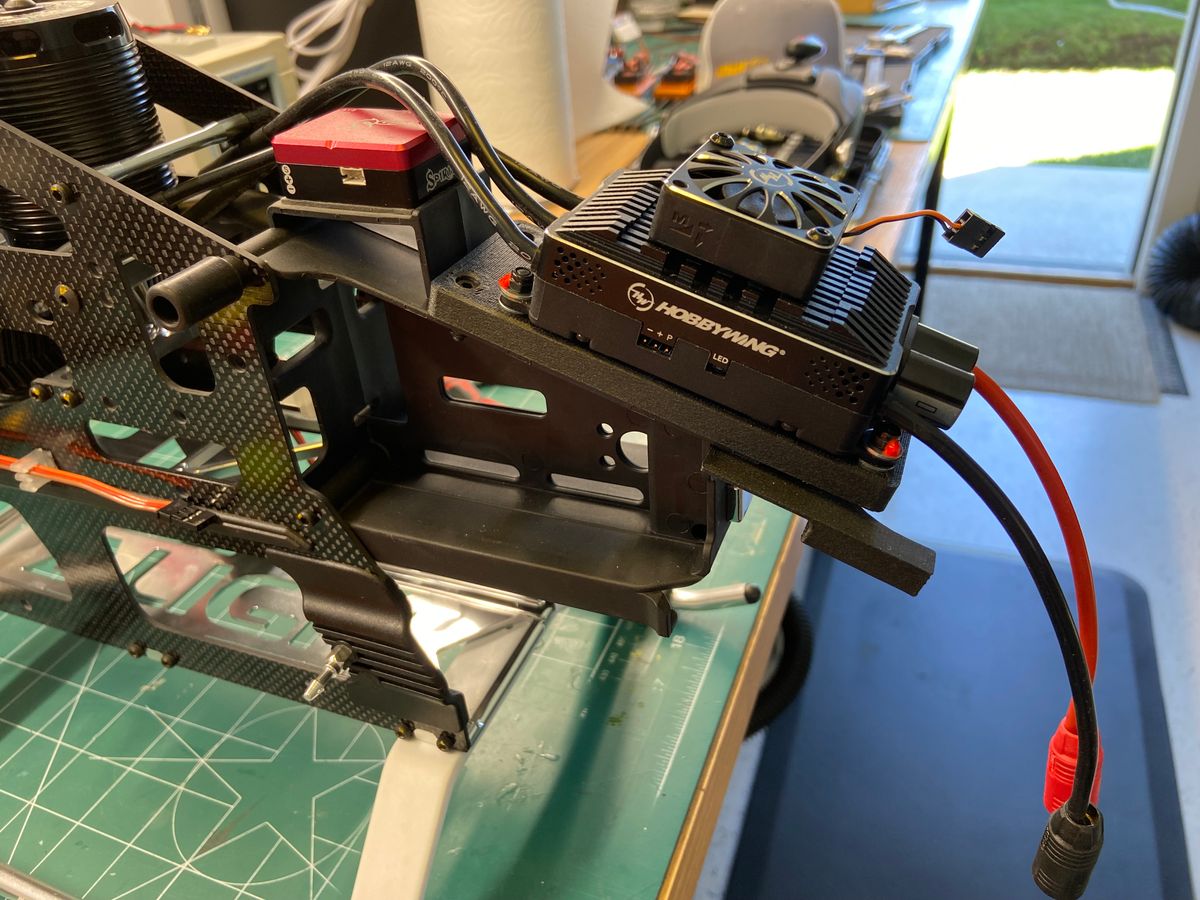
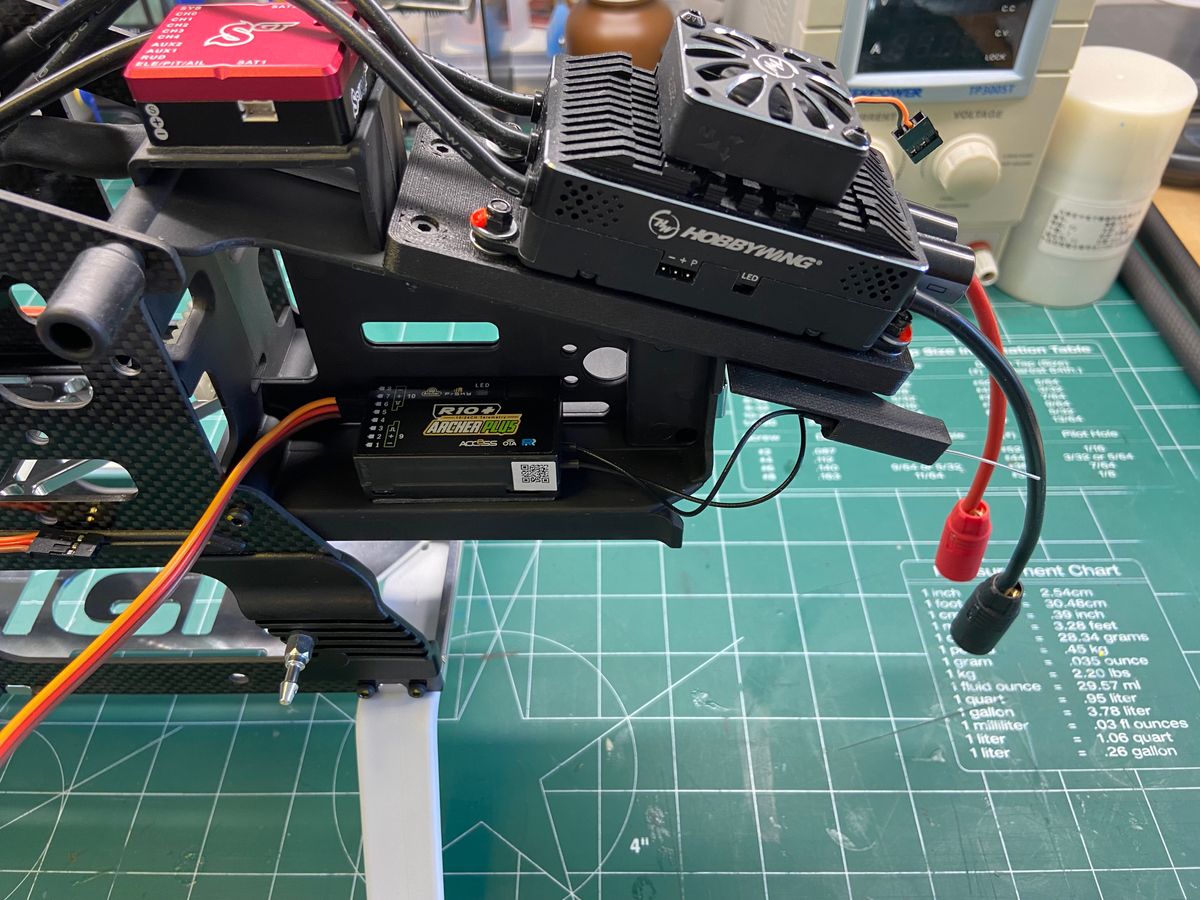
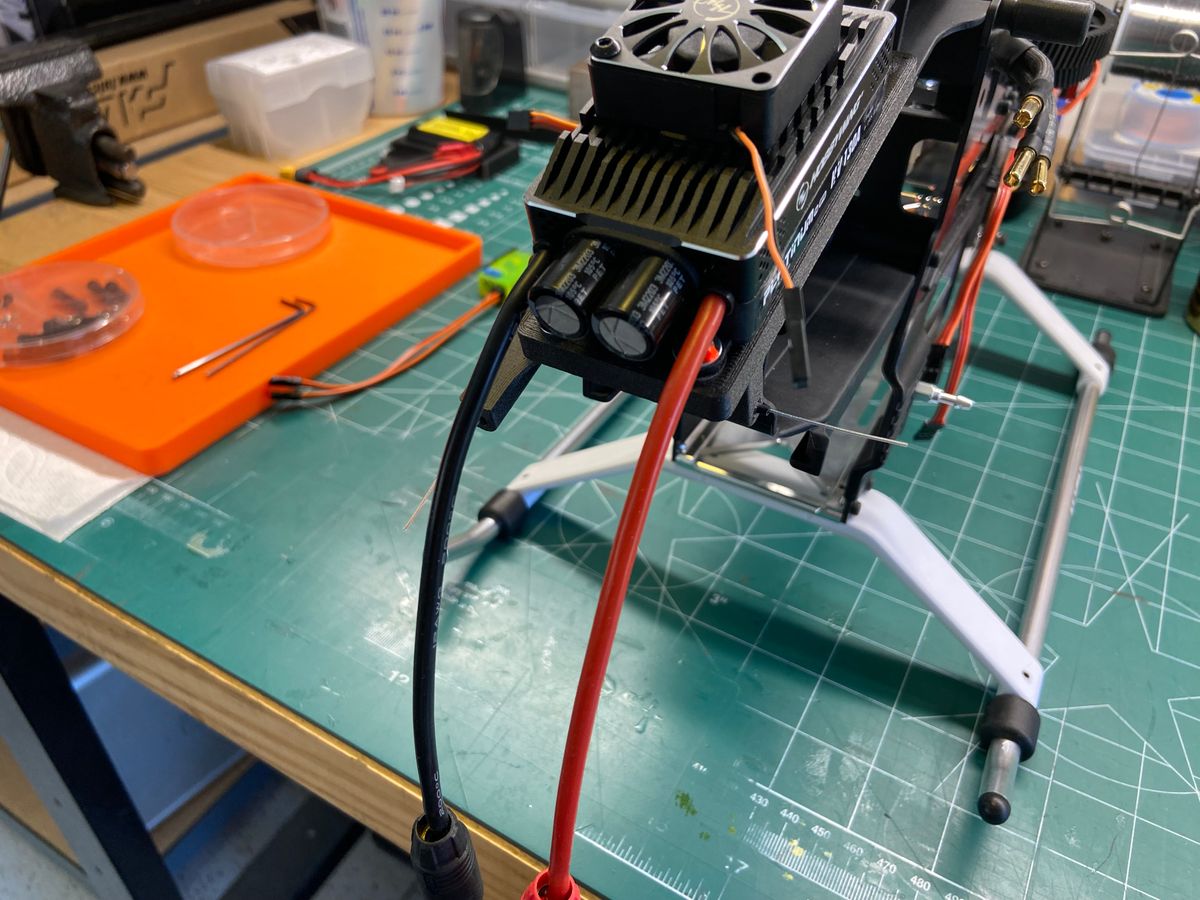
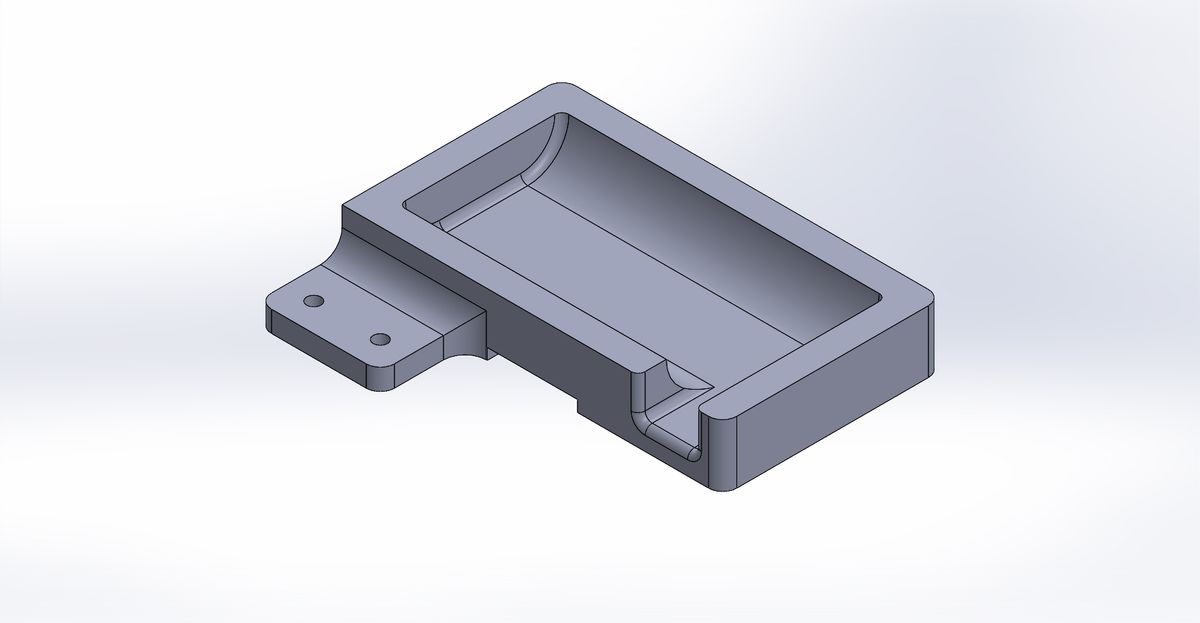
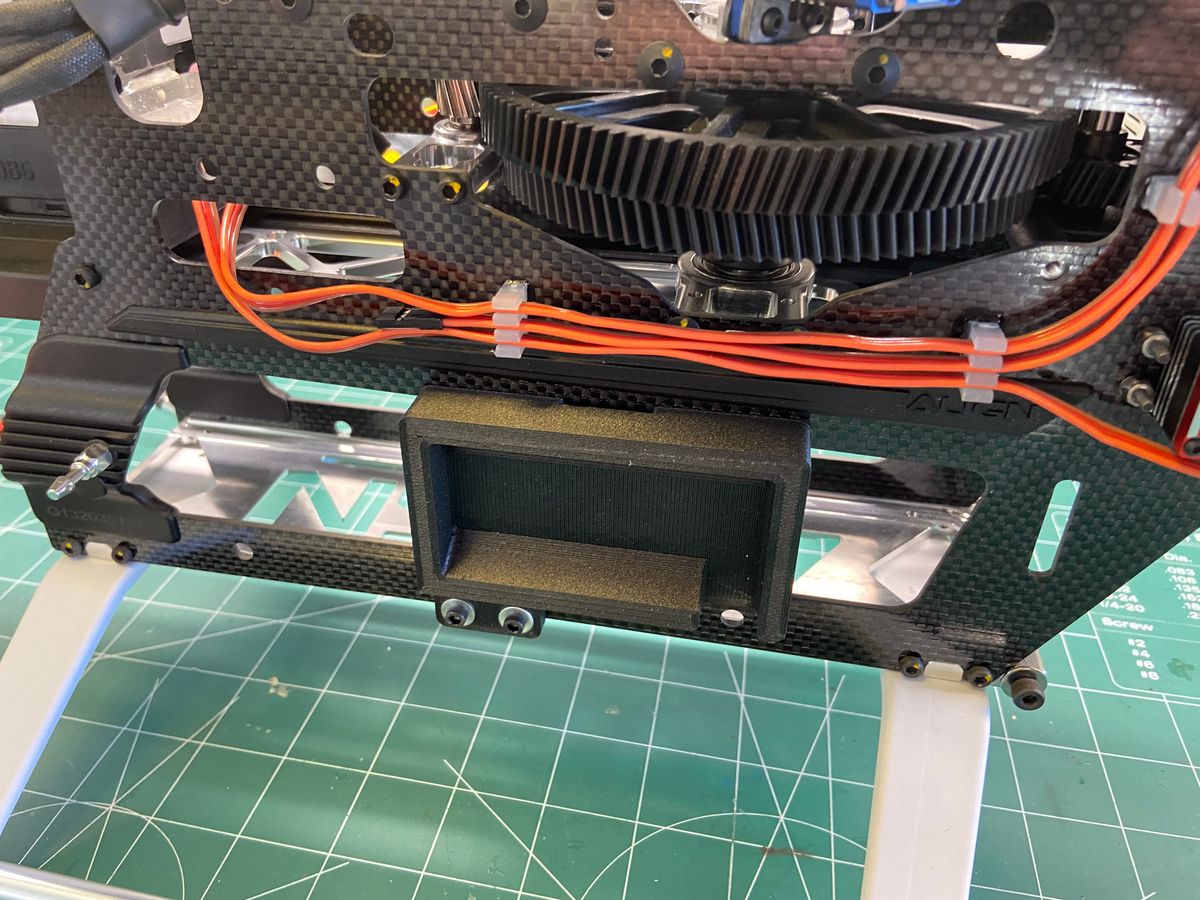
First, I am not a fan of just using zip ties or Velcro to mount the ESC, nothing wrong with it, its just my preference. So, I wanted to design something that looked a little bit more refined and functional, so a little time in Solidworks and about five hours on the 3D printer, I have a mount that I happy with and I was able to incorporate a bottom plate that orients the antennas 90 degrees from each other.
I know the antennas are close to the ESC power leads, but I have done this before with zero issues using FrSKY, but if there is, I will add another satellite antenna in another location or relocate the RX entirely.
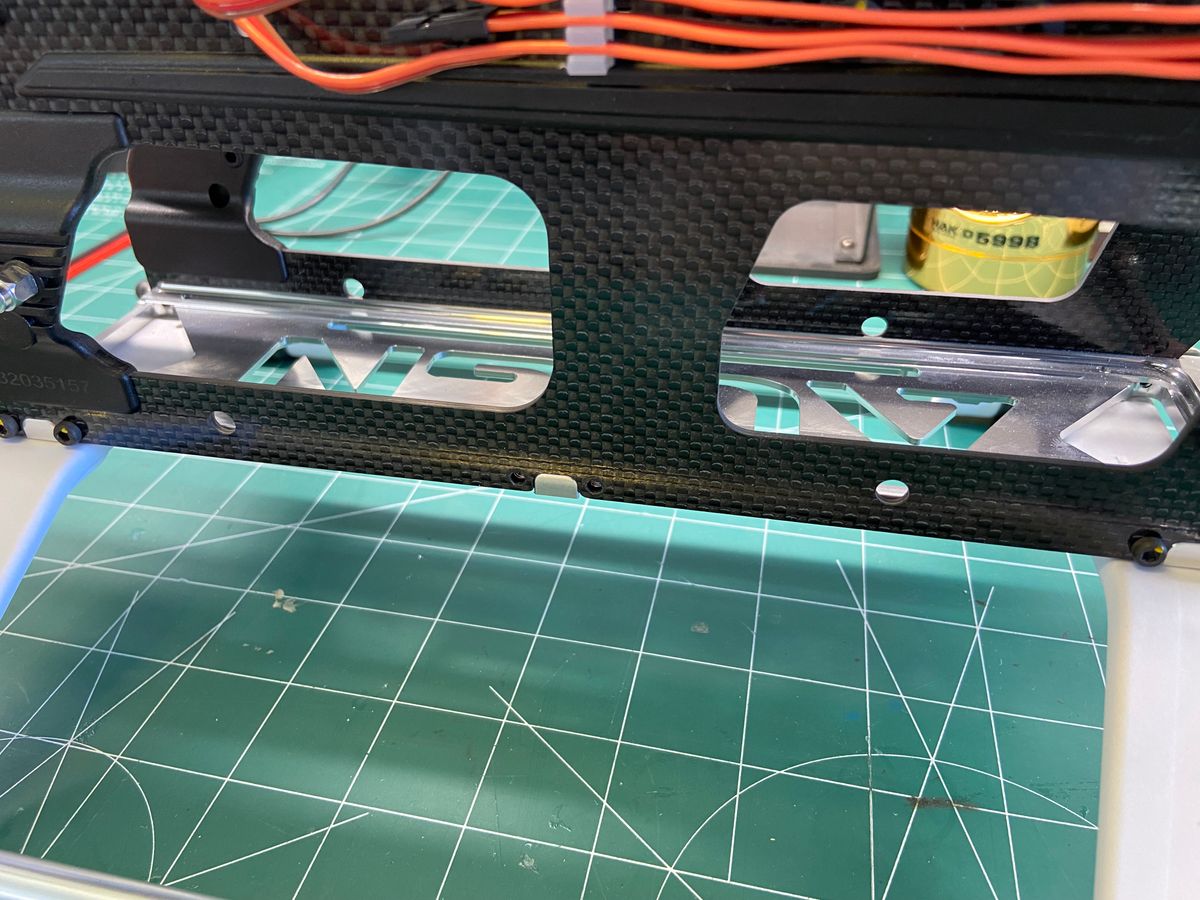
Hopefully, the pictures explain it well, but if there are any question, please do not hesitate to ask. The extra set of holes below the upper mounting holes in the stock Align tray is to allow access to the countersink screws to attach the ESC mounting screws.
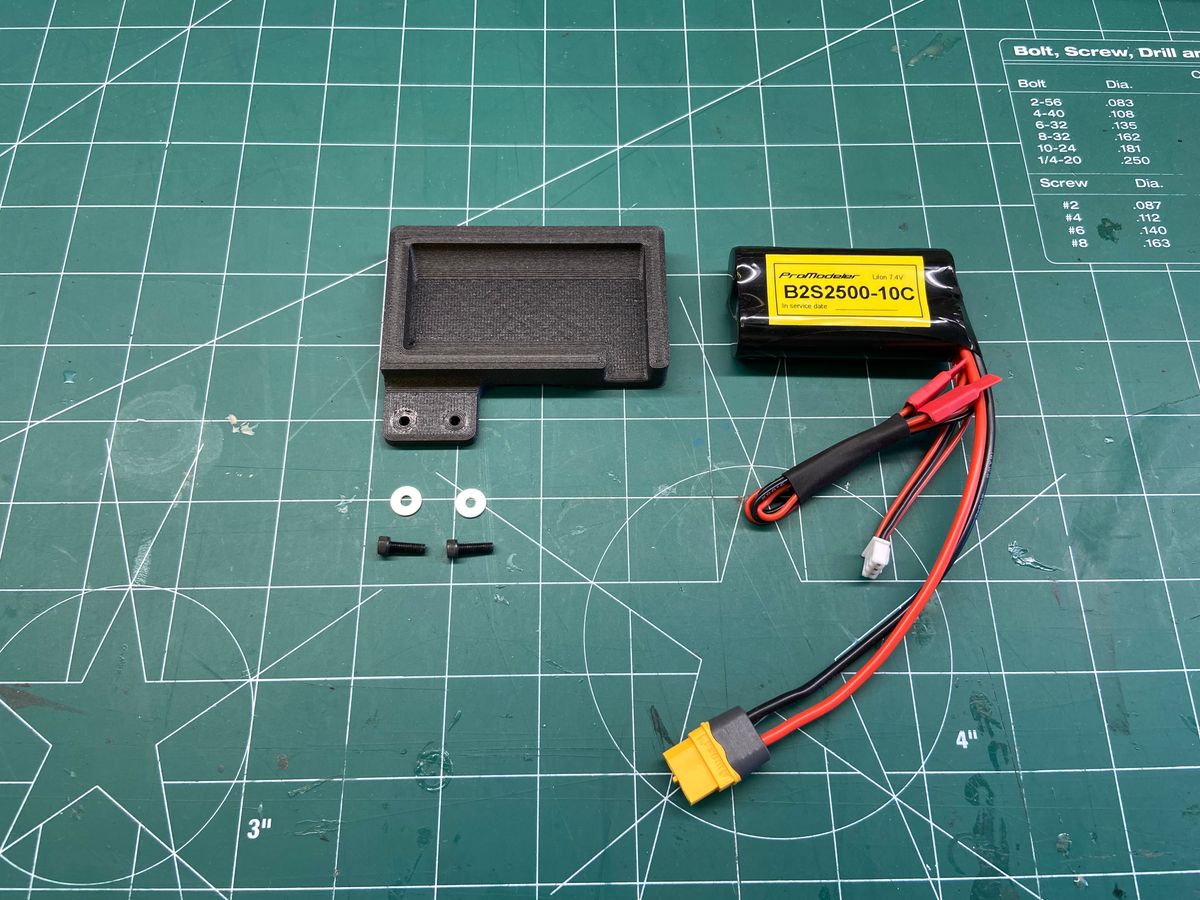
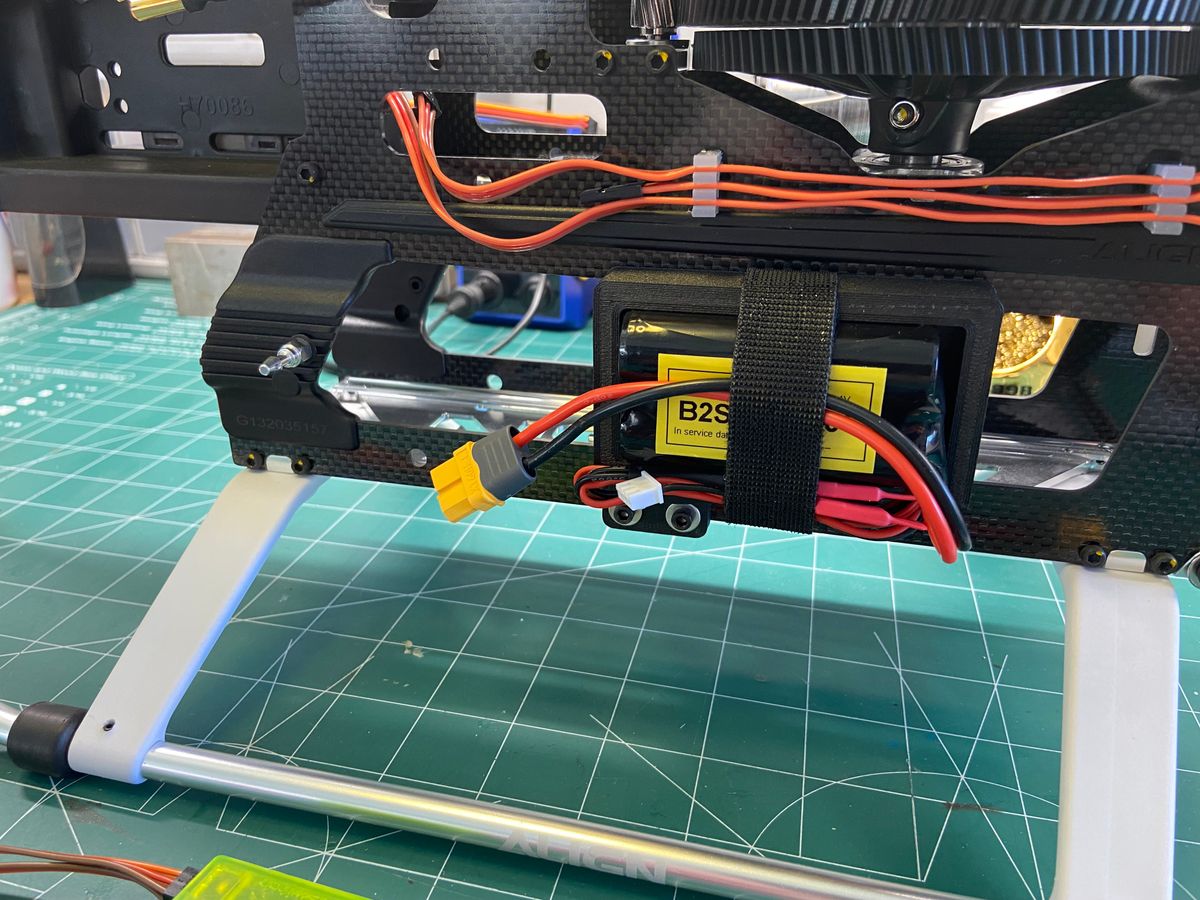
Second, I typically design mounts to hold my batteries think this works out well. I have been using the Promodeler LiIon batteries for awhile now and they are awesome. I don't use the extra dupont connectors, and use some heat shrink on the plugs and also use some heat shrink to clean up the wires. The XT60 connector will go into XGuard Intelliswitch, which is another item I do not go without. Its a great product and I use it in all my helicopters, since I never use a BEC and prefer to keep the power systems separate. If there is an issue with access to the battery once in the fuselage, I will redesign the mount or relocate the current one to another spot in the fuselage.
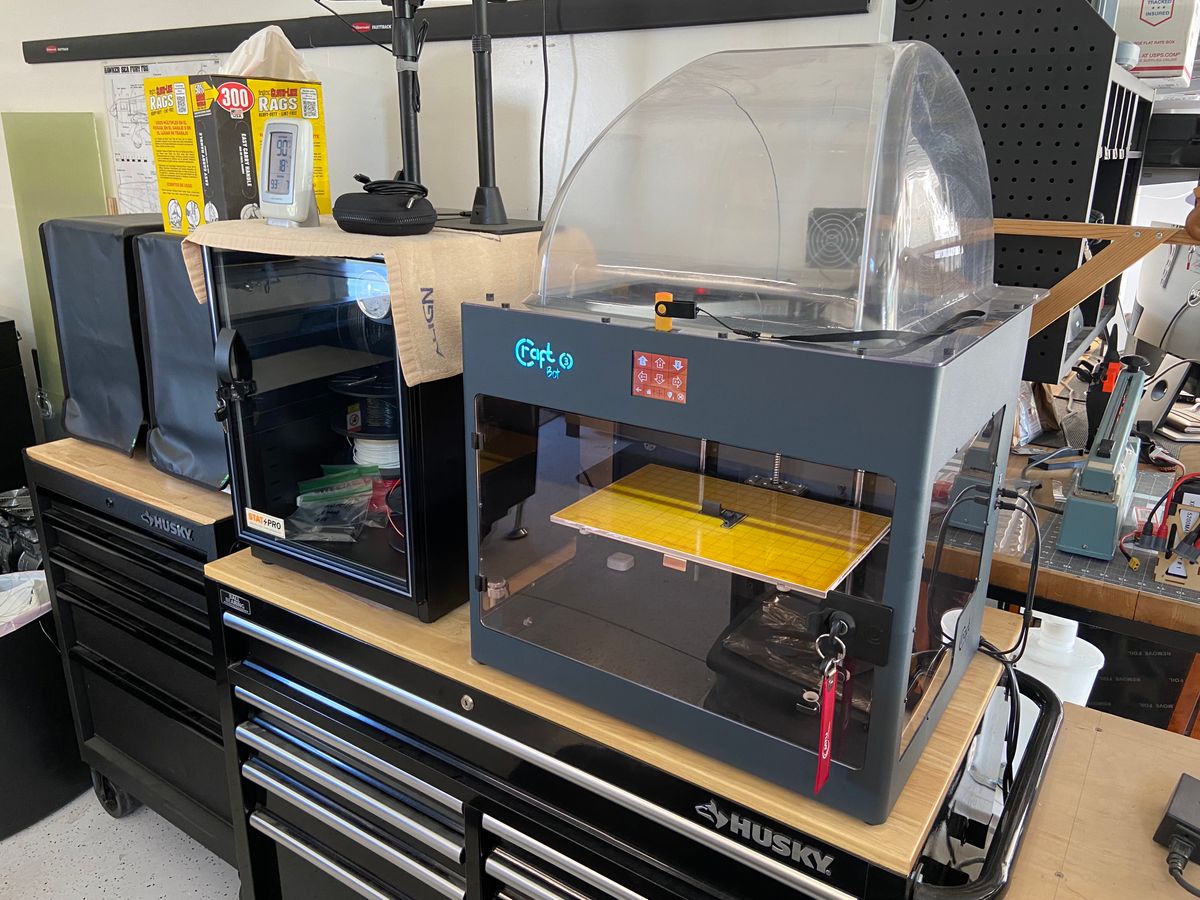
Finally, if anybody is curious, this is my old 3D printer that is still going strong. It is a Craftbot 3 with the cantilever bed. With the cantilever bed, I can not print as fast as I would like, but I get good results if I keep the speed lower and not induce any shaking in the bed. I only use one material and that is always PETG, but I have really started to like the 3DXTech PETG+CF filament. While its not as strong as regular PETG, its still plenty strong for what we are doing and the Carbon Fiber help to keep dimensional accuracy within a couple .001" and I really like the textured and matt finish. I also run all my filament from a StatPro drying cabinet direct into the 3D to ensure it has the lowest moisture content.
Anyways, that was a dissertation for just a few items. But I hope there is some interest. Thanks.
Also, I am not sure why Michael, but my posts never make it back into the discussion, I would hope that more people would see the new posts to spark some interest and engagement with the community, but unless you filter or specially search for Fusuno, this information is not being seen? Maybe as the author I can't see the new posts in the discussion area? That's unfortunate.
65 Comments
This will be a fun build to follow! The head is sweeeet!
Thanks Michael, it should be a fun build and the head is really nice!
Following. Love the AS350!
Thanks Joe!
Good to see some progress. Very clean work.
Thanks Joe. Not as fast as I would like. But Baseball is busy and family comes first. Talk soon.
Thanks for sharing your experience and talent!
Thanks Michael. I am glad to have some time in the shop to get back to it. More progress today! Talk soon.
Hello Michael, quick question. When a new post/chapter of a chaptered story is posted, does it show back up on top in the main discussion area? I do not see my posts show back up in the discussion area? I think it would be nice to reach more people that may not of been searching for that specific model, but it might peak their interest to look more into it? Thanks.
It’s supposed to! Let me check.
Jason, well done. The small details of marking bolts to witness movement shows your attention to detail. Question: would you recommend CraftBot if you were buying a new one? https://us.craftbot.com/. I use Fusion360 on a Tormach 700MX for metal and might research using the 3D printing on parts that just don’t need to be metal.
Hello Thomas,
Thanks for the kind words, I appreciate it. I love designing and building, still tons to learn though!
I would love to add CNC mill and lathe in the future and how do you like you Tormach?
I really like my Craftbot 3 and have had it for over five years now and have only changed the brass nozzle out a couple times and just upgraded to the Hardened Steel Nozzle so I could print the Carbon Fiber PETG filament. I also added printbite+ to my build plates and that is a must in my humble opinion. No need to sauce or messy products to help the print stick. Just have to dial in the first layer setting to get it to stick without too much squish and elephant toe. In my case I print the first layer at 110% and its near perfect. But the 3DXTech PETG+CF sticks so well, its hard to get the print off sometimes! I do also have the top shell to keep the heat in, when I was trying out ABS, but since I switched to PETG or PETG-CF, I see no need to print in any other material.
If I were to shop for a new unit today, I would really take a hard look into Rasie 3D printers https://www.raise3d.com They have a great lineup all the way to industrial metal printers. But I really like the Pro 3 or Pro 3 plus and have almost pulled the trigger a couple times. The build surface is supported by two linear screws on each side, so the build plate is more stable and you can print much faster. Plus there is a lot of quality and nice features in their unit, that I would like to try one day.
I have been looking to add another printer, but I have my Craftbot 3 dialed in and it just performs, I just need to print slower with the cantilever bed. The new Idex printers from CraftUnique/Craftbot look to very nice too and I am sure there have been more upgrades over my old unit. I love how Craftbots are all metal too!
So I guess to finally answer the question, as long as you are good with the cantilever bed and printing a little bit slower, as compared to other printers, I 100% recommend a Craftbot, mine has served me well and parts support out of Texas in the US!
Sorry for the lengthy answer, I am super passionate about this stuff, design and manufacturing, and can talk all day. Thanks for the reply and talk soon and I promise to me more brief!
The more detail the better. I have zero knowledge on 3D printing. Thank you for the information. I love my Tormach and enjoy the technical support the team gave me during the learning curve. Set up properly and accurately calibrated, it can give 0.005 precision or more, plenty for my needs. Machining is a huge learning curve, as is any profession you can make a living at. I am thinking their 15L slant mill will be next. But a 3D printer is needed also! I don’t build that much, but it is sure nice to have the tools that help. Again, thank you.
These are the little details that make a huge difference. Looking fwd to your next chapter. 👍
Thanks Joe, I kinda obsess, maybe borderline OCD, about these details and wiring and well almost everything else! Thanks again!
I should have more later today once the laser cutter finishes the current job. Cut some G10! Talk soon!
This is good stuff. Applicable to any scale electric!
Thanks Michael. It looks like my chaptered story updates are showing up in the main discussion area under recent posts, thanks.
Yup! We just released an update that addressed the issue you noted! So thanks!
Awesome, thanks Michael. That is great for the community to increase engagement or spark interest with members that might not have been looking for a specific model using the topic filters. Thanks again!
Have you considered removing the front part of the Trex so that you could fit a scale cockpit in the Helicopter? In the 3D setup it is convenient as it puts the weight forward and makes it compact but for a scaler it can work without it...
Thanks for the comment. When I read the manual for the Fusuno AS350, it looks like the cockpit will still fit. However, if it does not I will remove the front section and build something to relocate all the components, thanks for the Idea! The current configuration is to get it test flown and I am sure I will have to move some things around. Thanks and talk soon.
Some nice wire lay out there. Nice and neat.
UIH
Thanks Butch. I appreciate it.
I fly FRSky and Ethos also. What kind of telemetry are you getting from the esc with that converter? Other than FBL controller integration with lua, I don't really use telemetry other than what's native from the recievers.
Hello Joe,
I am in Chicago right now, so I don’t have the manual in front of me. It pulls a lot of good data, Voltage, current, ESC temp, battery consumption, RPM, and a few others.
There is some setup for pole count and gear ratio, and a few other parameters that needs to be set, but I am figuring that all now.
I really like the unit. I will post some video on the setup if there is interest.
Here is the link to the ETC and the manual is located in the download section.
https://www.rclightsystems.com/product-page/esc-telemetry-converter
Talk soon!
Very neat wiring !
An idea is also to use a "hot glue gun" to secure the FBL device cables.
Quick to do and easy to remove for maintenance (note channel 6 not glued on purpose).
Thanks Rémy. That is a good tip. I may have to try that. I have used black cloth tape in the past.
Here's a good read about phasing . I do it over the tail but imagine over the nose would be the same results.
https://scalehelipilot.com/articles/520d5252-f62c-4a48-a3be-484fe39...
Thanks Joe. I forgot about that article, I appreciate you bringing it back up! I will be working on it tomorrow. I am trying to knock off all the rust! But this is the first time setting up a three bladed head. Thanks again!
While we are here, recommend you inspect the one-way bearing and it's shaft, clean and lube.
Here picture of replaced components during major overhaul.
Thanks for the comment and recommendation, much appreciated. This is a NOS kit. However, I did disassemble the main gear, inspected and lubed the one-way during assembly.
That is a great looking helicopter and what kit is that Lama? Thanks again!
Vario Lama with Align 700X. Features Benedini Sound and hook to drop candies 😄
Really nice, love the pilot!
It's glitching...
Thanks for the comment, I think the same thing and for peace of mind, I might do a complete servo swap tomorrow morning and go back through setting up the helicopter again! The current BK servos will be shipped back to have a inspect, test, and service (as required).
I never trust new servos and had one issue with old one, after very long storage in low humidity conditions.
New servo was having little play on its shaft, so the heli was slighlty moving around main shaft axis during hover. It's been a long journey to figure out the cause, found by a 3D pilot who put he´s fingers on it, when sharing the behavior at field. Replaced.
Old servo was randomly bouncing to one side and stuck until switching on again. Replaced.
Thanks. I was hoping the servos were not the problem when these were installed in the other helicopter, but it looks like they might have been the problem. I will be replacing them today.
Good call to get that servo out of there.
Thanks Butch, these will get replaced today and hopefully back up and ready to test this afternoon.
I like the angle meter holders.
I have always set up my pitch with a blade 90* to the heli. It looks like you do it parallel to the heli. Is there a difference in each way?
Thanks Joe,
I have not tried perpendicular to longitudinal axis yet, I have only setup over the front or tail. but its certainly worth a try and then take the reference off the top of the motor 90 degrees.
I was just wondering. You are not the only one I have seen do it that way. I was just taught 90* off the right side for collective setup.
I think it’s a good input Joe and thank you. I have never had any issues with tracking with any helicopter in the past, but for some reason, I am not doing something correct with this setup. I will give the 90 a try! Thanks!
Hey Jason,
Were the blades a set of 3 or did you use 2 sets of 2? Do all the grips have the same movement?
B
Hello Butch,
The blades did come as a set of three and all three grips have the same up and down and fore and aft movement. So, it's consistent. I have checked the blade weights and they are all within a tenth of a gram. I am going to check CG next just to double check and I am going to use a digital blade pitch gauge with the blades attached next time. Looks like the weather will be decent (warm) enough to take back out on Wednesday.
Every info that you share is gold for a rookie like me, ... Thanks for these tips 👌😁
Thanks, I would consider myself a rookie too, considering the pedigree of the other guys here. However, more than happy to share what I have learned over the years and always looking to improve and get more professional results. I also have no problem sharing my screw-ups too!
When it comes to the blade with the two weights, I could have consolidated that into one piece, but I tend to get the CG correct for all blades and then add any needed weight back to the CG of the other blades. But could have easily been done with one piece. There is room for improvement!
Hey Jason, one question. Understand you are going to install this beauty in some scale fuselage. Have you considered using assymetrical blades, generally more convenient for scale application. E.g., allows to run at lower RPM which is more realistic.
Hello Remy,
I actually did not consider that, thank you for the input! I was just using the combo that comes together with the blades and head. I am running at 1300-1400 head speed right now with the 690 blades.
I just need to find some blades with 14/5 690+/-. Spin blades look like they might work, but they have 600 or 700 with 4mm bolt and I would need two 1mm spacers, but I could make them here. Any recommendations? Thanks Remy!
A little paint and they will be pretty again.
+1 Remy.
B
They will Butch, but I think I will look into the asymmetrical blades that Remy recommended! But I would like to use these to test painting and rebalancing for future projects! Talk soon Butch!
Hi Jason,
I have Spinblades scale asymetrical 710 since many years and no issue (item 1882710). Great specs and tip already yellow which is nice.
Except last set having some unexplained deterioration, see picture, please zoom. Didn't fly over sand etc..
Under radar and got some more Helitec ready for replacement!
With tail blades 115 from Vario if remind correctly and added 2K spray on their tip (RAL1021).
Thanks Remy, I inquired on a set of 700 size RHR 3-blade set from SpinBlades, they show out of stock. I will continue to work with these Align blades until I can try a set of scale blades. I am trying to find the Helitec blades, but looks like they are harder to find! Thanks again.
Ready for replacement. Different specs so RPM and pitch curve might need some adjustments.
Very smooth! What I do is video shot in 4K and zoom around with the editing software to detect any vibration not visible from pilot point of view.
I also put some cameras inside if the model has a fuselage.
Thanks Remy, The gentleman taking the video used the HD 30 FPS, so that would explain a lot of the quality of the video. I am hoping to get back out on Friday and get some more video at 4K and 60 FPS. The video should be a lot better and clearer with those setting.
The work on the blades and checking pitch with the blades on and adjusting tracking has provided a nice improvement and its much smoother now. The more I watch the video the tail shake during spoolup appears to becoming from the ESC spoolup to the flat line curve? I have the spoolup time set for the longest the HW will allow, but there might be some balance to sort out in the tail too. The blades are equal weight and CG. But I have new blades coming this way, so I will be rechecking everything again! Thanks
Tail shaking during spoolup can denote some chassis resonnance at intermediate regime nor main blades self-aligning. Don't tight them too much!
Nothing to worry and something to review once in the fuselage. Go fly!
Thanks Remy!
Looks good Mang,
B
Thanks Butch! Slowly getting there, but I am only changing a few things at a time, then test again! Talk soon!
Jason I’m no expert, I saw all 3 clips, and I have you say - you got yourself pretty swell tracking.
if and when you have the time to ... please could you share your throttle & pitch curves. I like how gently your heli responds!!
thanks for sharing 😊
Thanks, tracking is getting better, was going to test more today, but the weather did not cooperate!
For my throttle and pitch curve.
Throttle:
Flat line throttle curve 60%. Head Speed with 9.33 gear ratio and 460kV motor at a nominal voltage of 4.0V per cell. I am calculating 1400. I have run as low as 50% throttle, the tail holds better at 60% though. I will fine tune this as I fly it more.
Pitch:
I set up mechanically with -11, 0, +11 with linear pitch curve from -100, 0, +100. I then set up my pitch curve in the radio to -1 low, +5 hover (half stick), +10 high for hover and forward flight modes. During the last flights, I verified, for these blades, I am hovering exactly at half stick. I will have to make some adjustments with the new scale blades when they show up.
Additionally, I am running 20% and 40% expo on a separate switch in the FrSKY X20 Pro and all flights have been with 20% so far. It's a little touchy, so I may try 40%. I try to fly as low expo as I can and still fly smooth. But I am not as proficient as I would like and with more stick time, I will reduce the expo more and more as I get the "Feel", back. Typically this will settle down at around 10% +/-.
I hope this helps and thanks for the question.
Hi Jason,
Added weight with fuselage might involve increasing little bit RPM to help sustain regime during pitch pump (also right pinion gears ratio needed, as you know already). ESC will compensate but more demand/amperage peak if RPM too low.
If not already done, capture now the in-flight ESC logs (amp, temp, peaks) for further reference. Then compare values once in the fuselage and fine tune RPM to stay closest as possible of your reference values.
There should be not a big difference but with this approach you will be able to keep an eye on it.
Thanks Remy, I do have the .log files for all the flights so far and will compare once we get the fuselage on. Right now the amps are around 20-25 amps average with peaks in the 50 amp range during a couple of the collective pushes.
It is not just US, Kai is not shipping outside Germany. The only option to get Helitech blades is if you have a shipping address in Germany. Sometimes it is nice to have friends...