

Sikorsky S-92
 Butch W.
Wheels on the Bus…
Good morning folks,
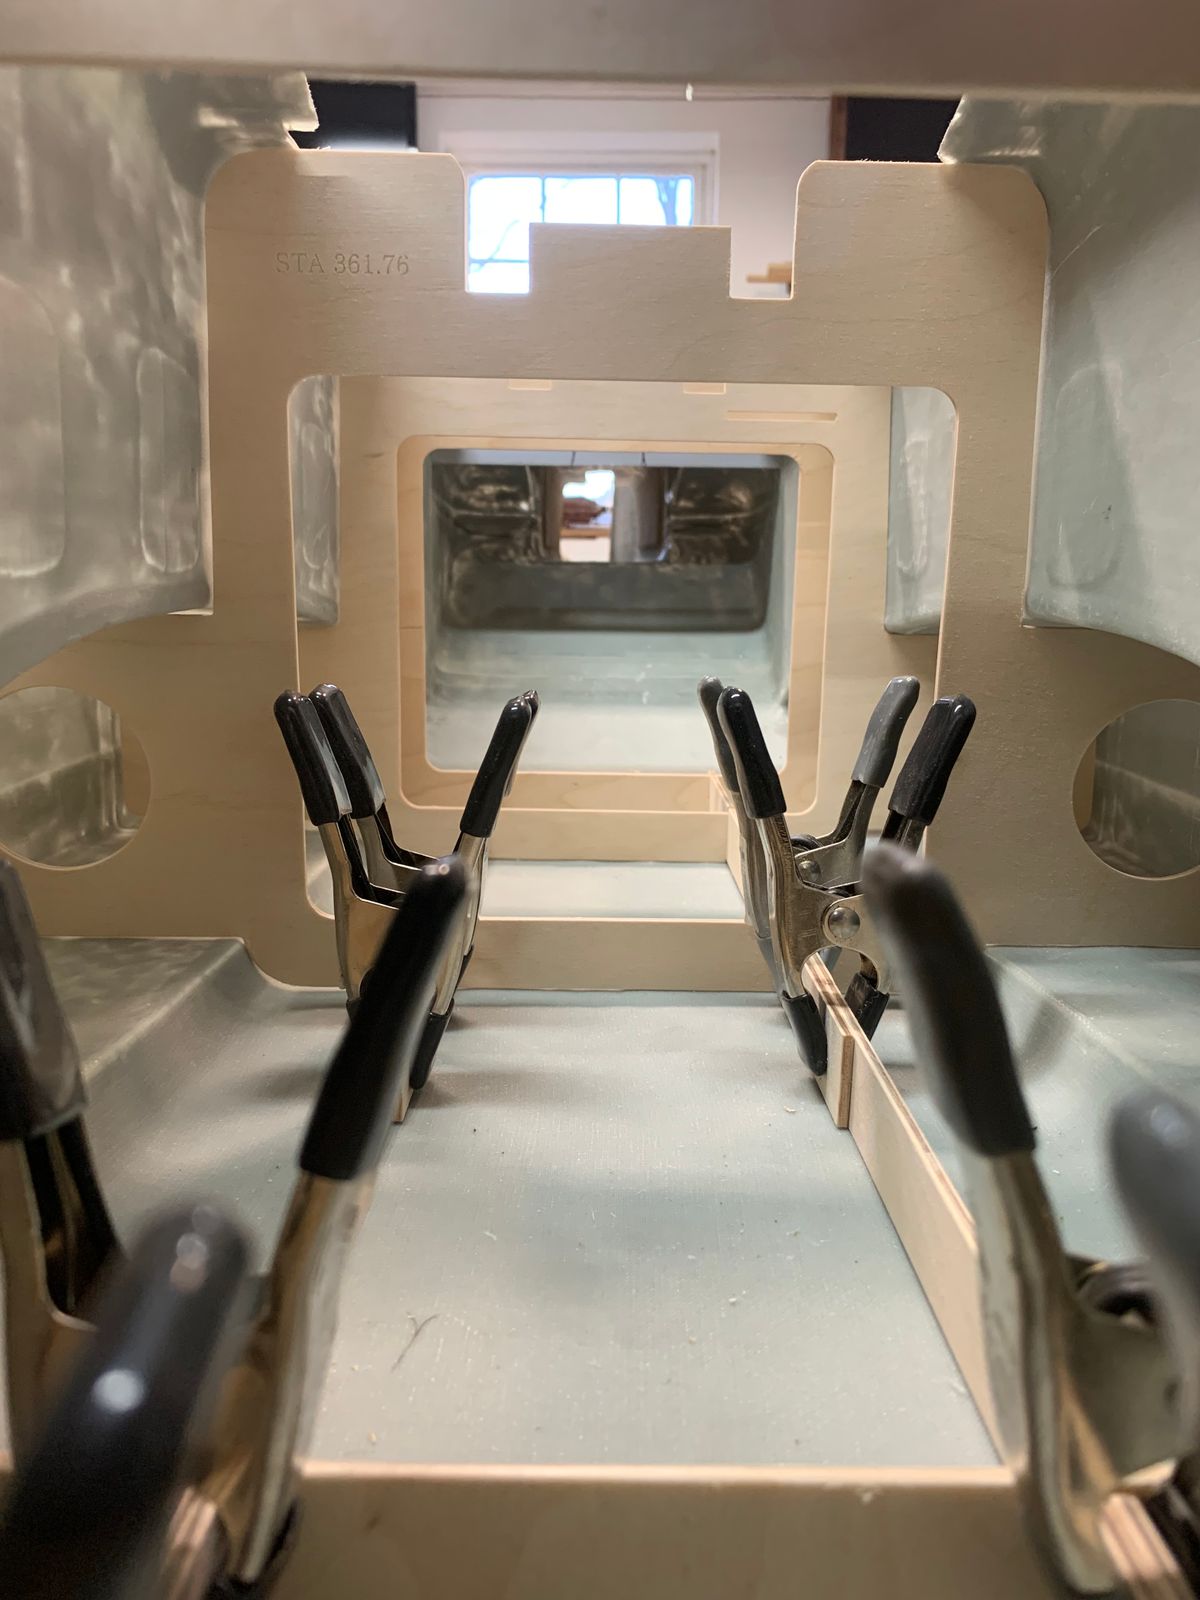
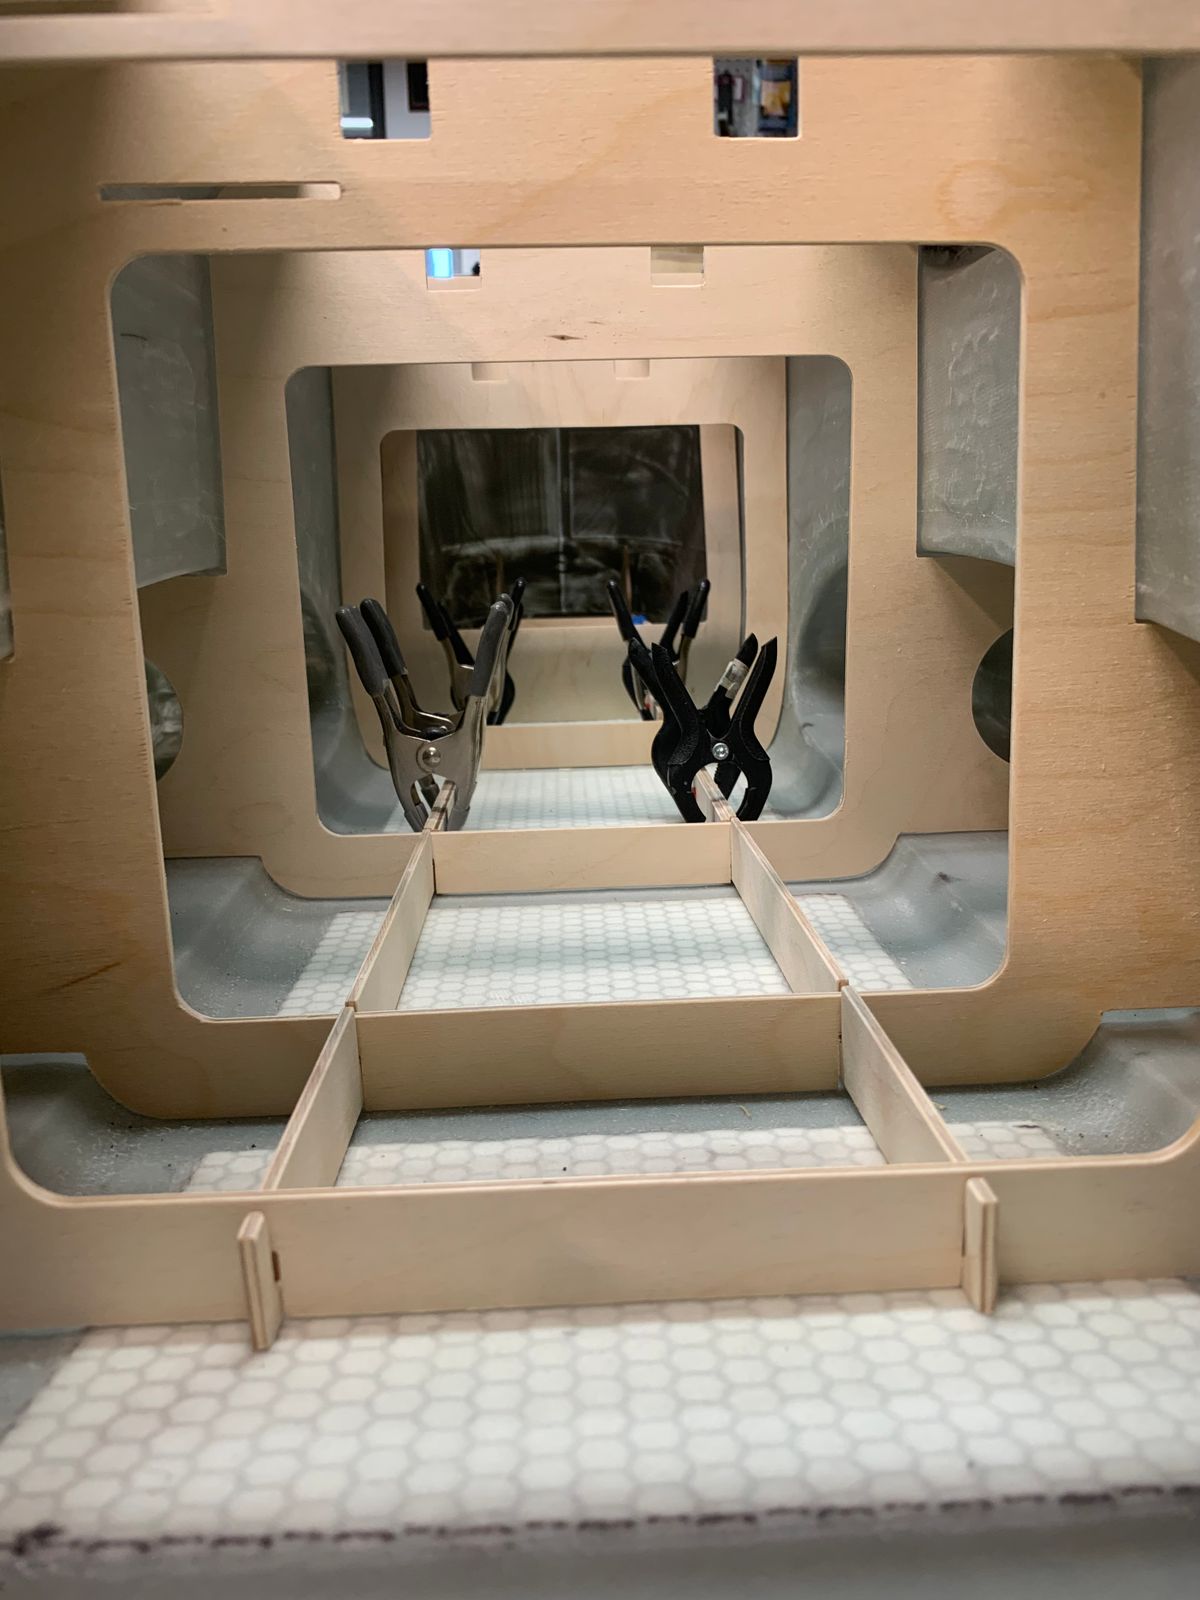
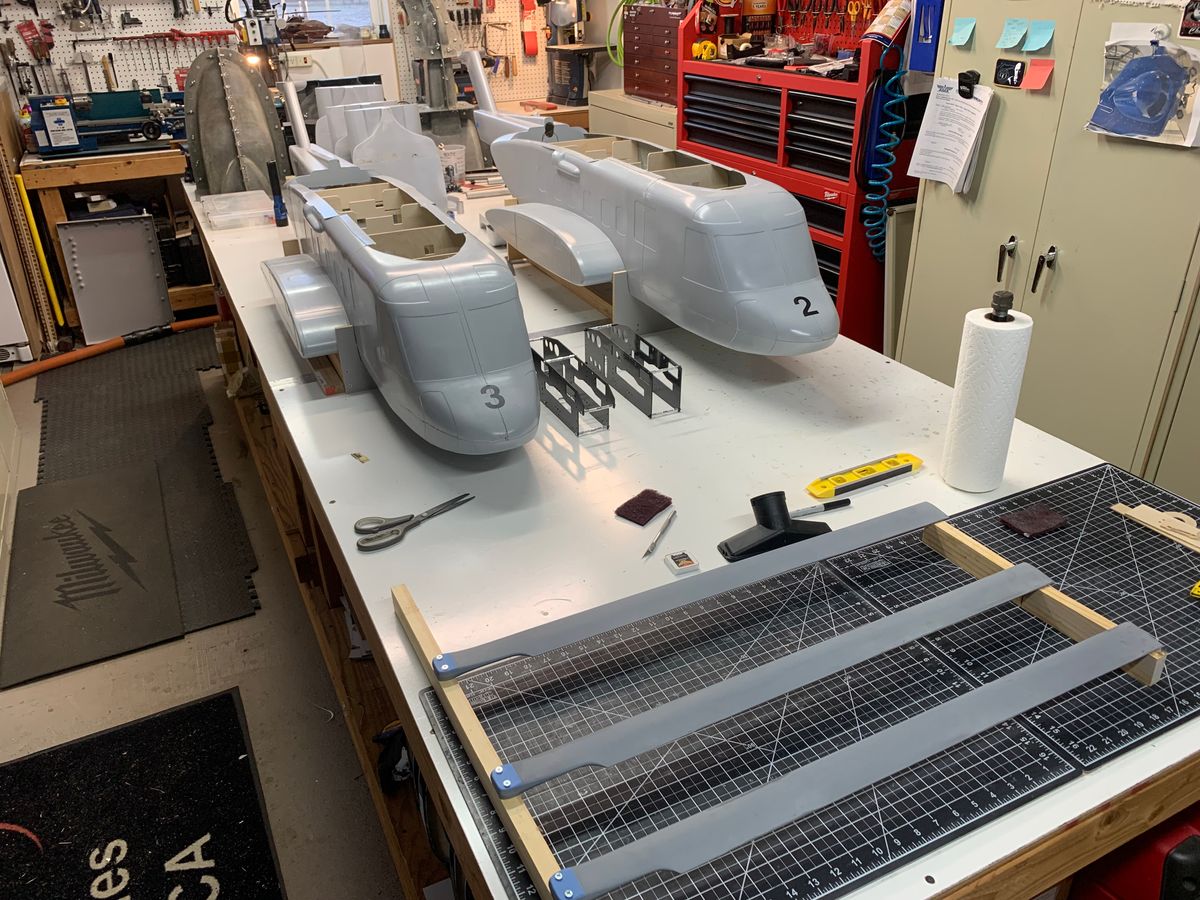
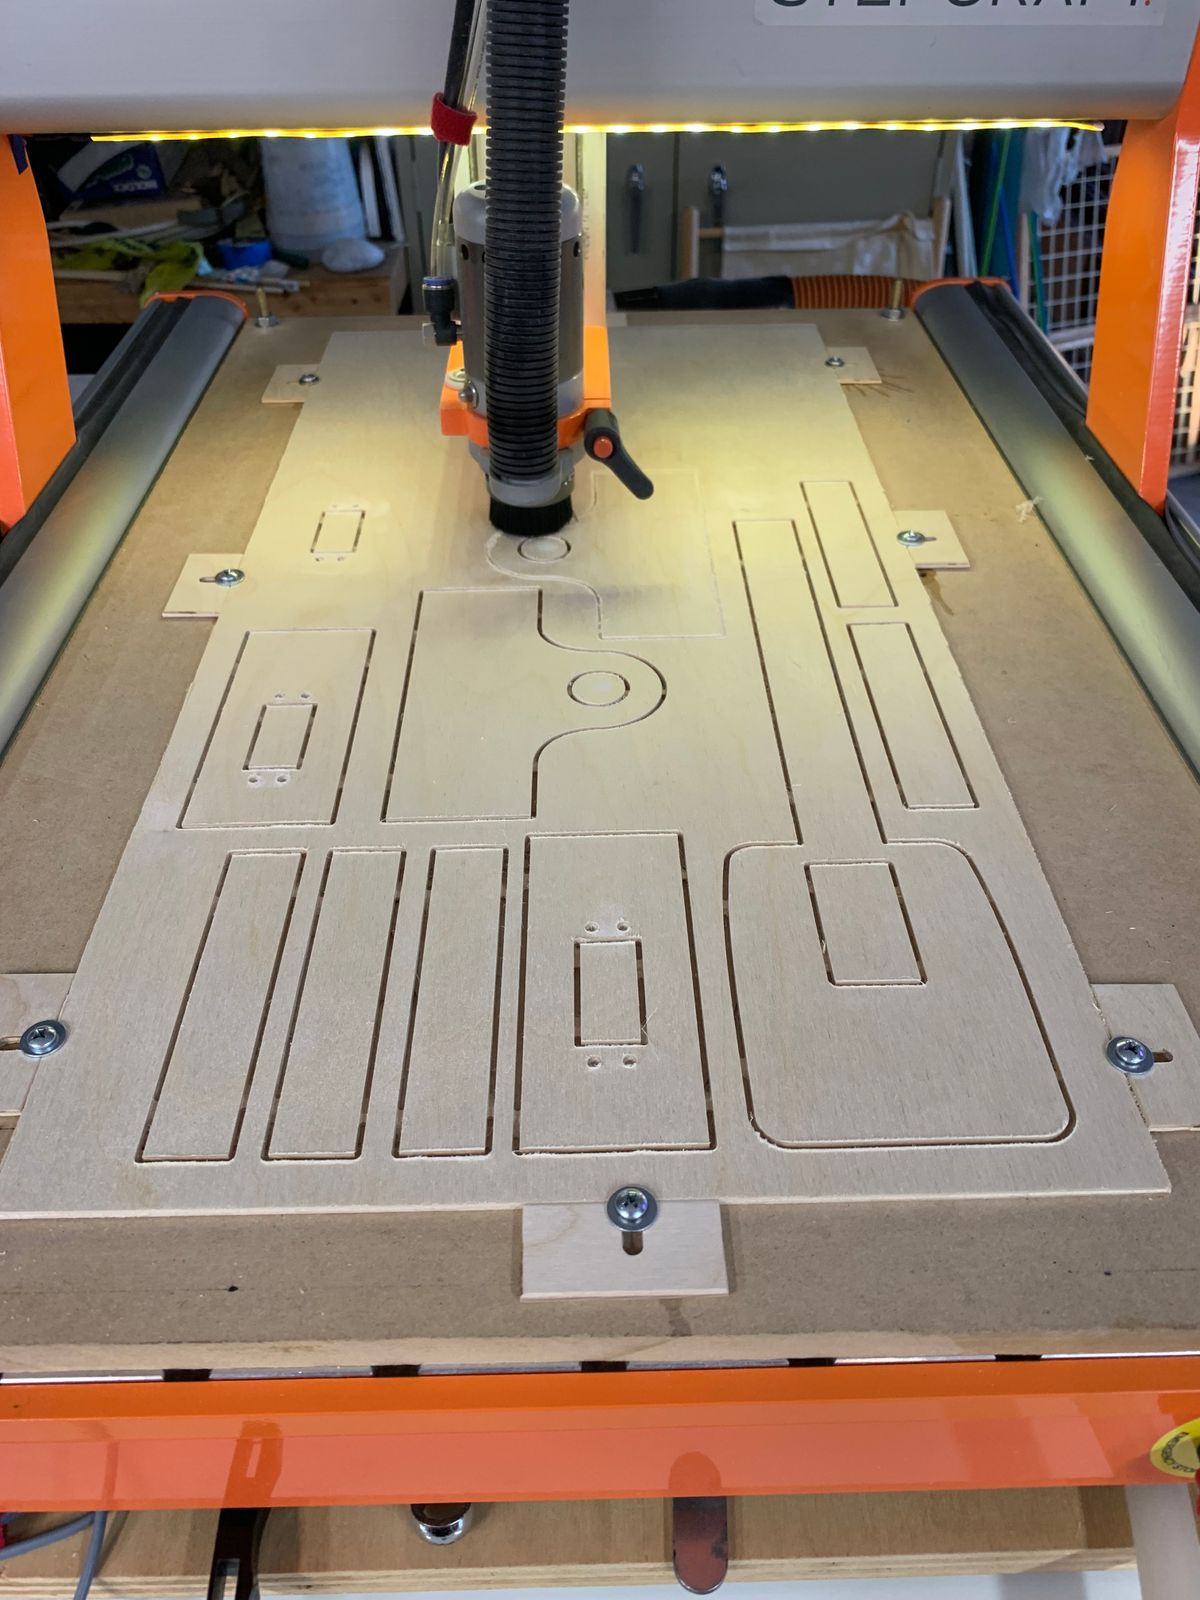
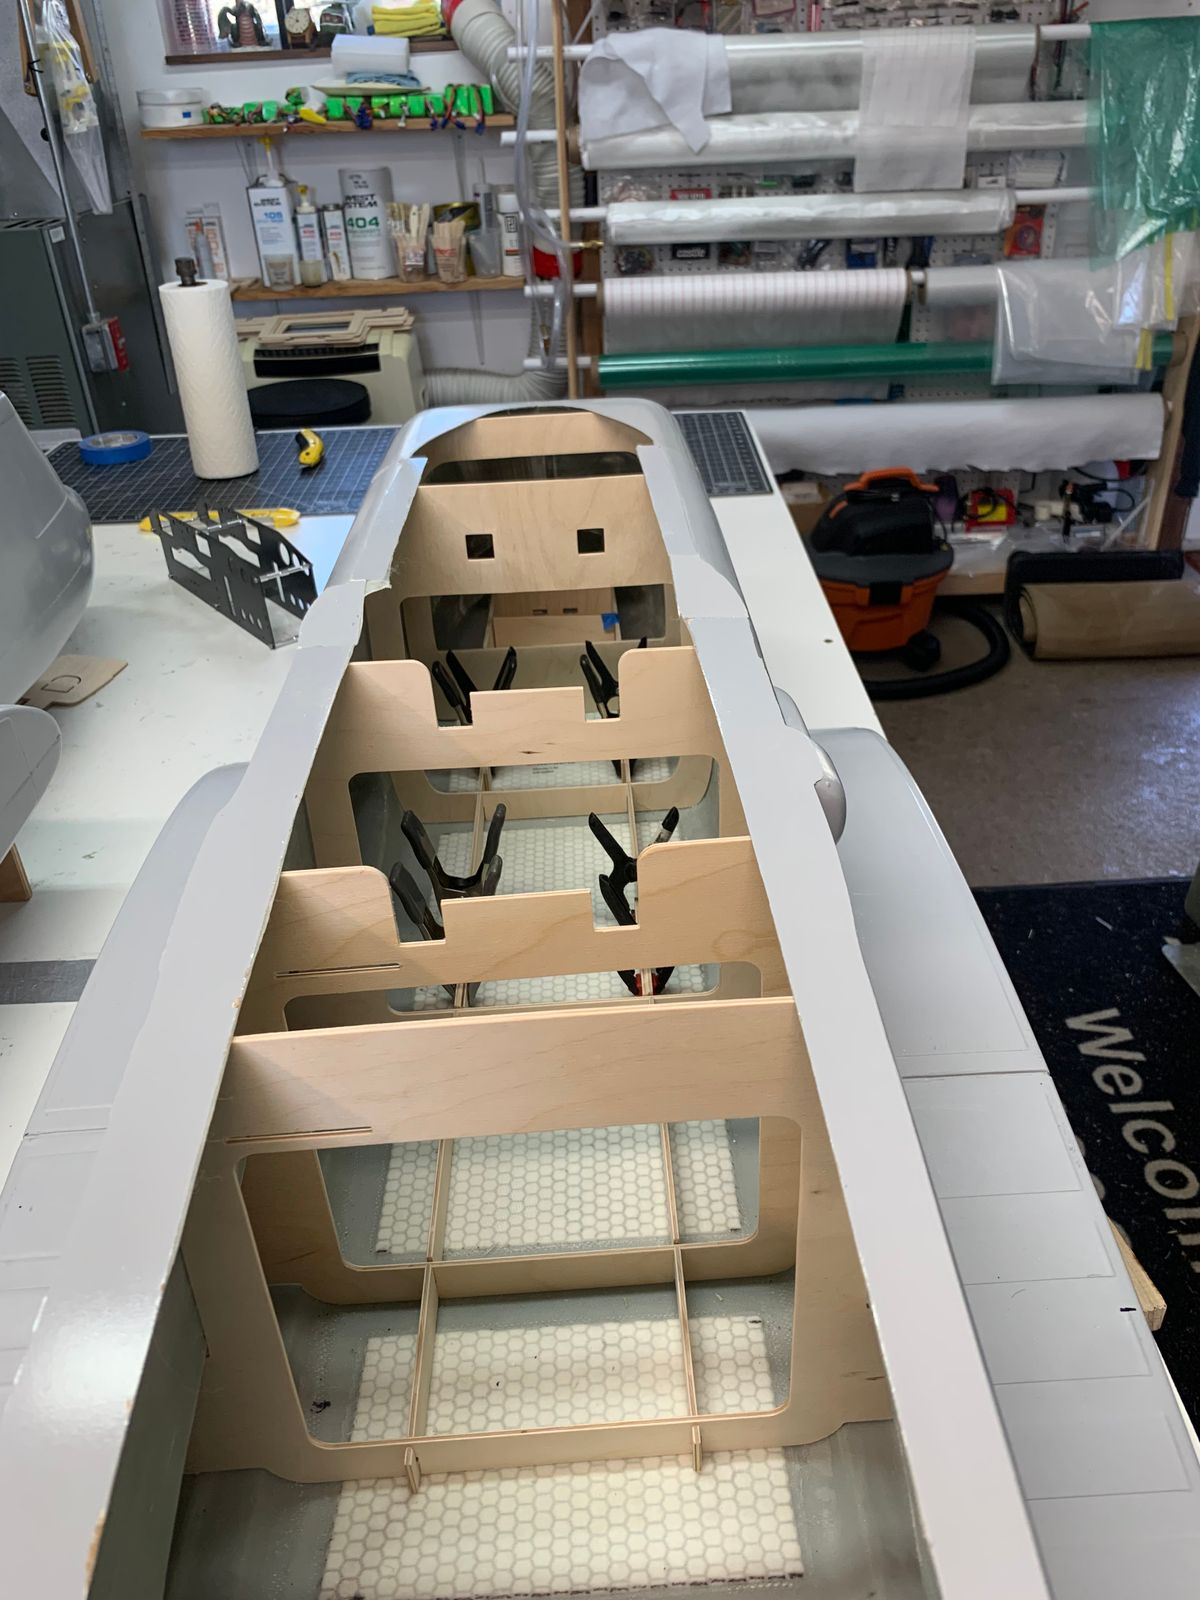
I have been moving along on my S-92 project. The structure is roughly 95% complete and fits into the fuse very well. It’s nice having S/N 002 and 003 next to each other to verify structure fit between each fuse with little to no differences. The end user may have some minor sanding for proper fit of structure to fuse.
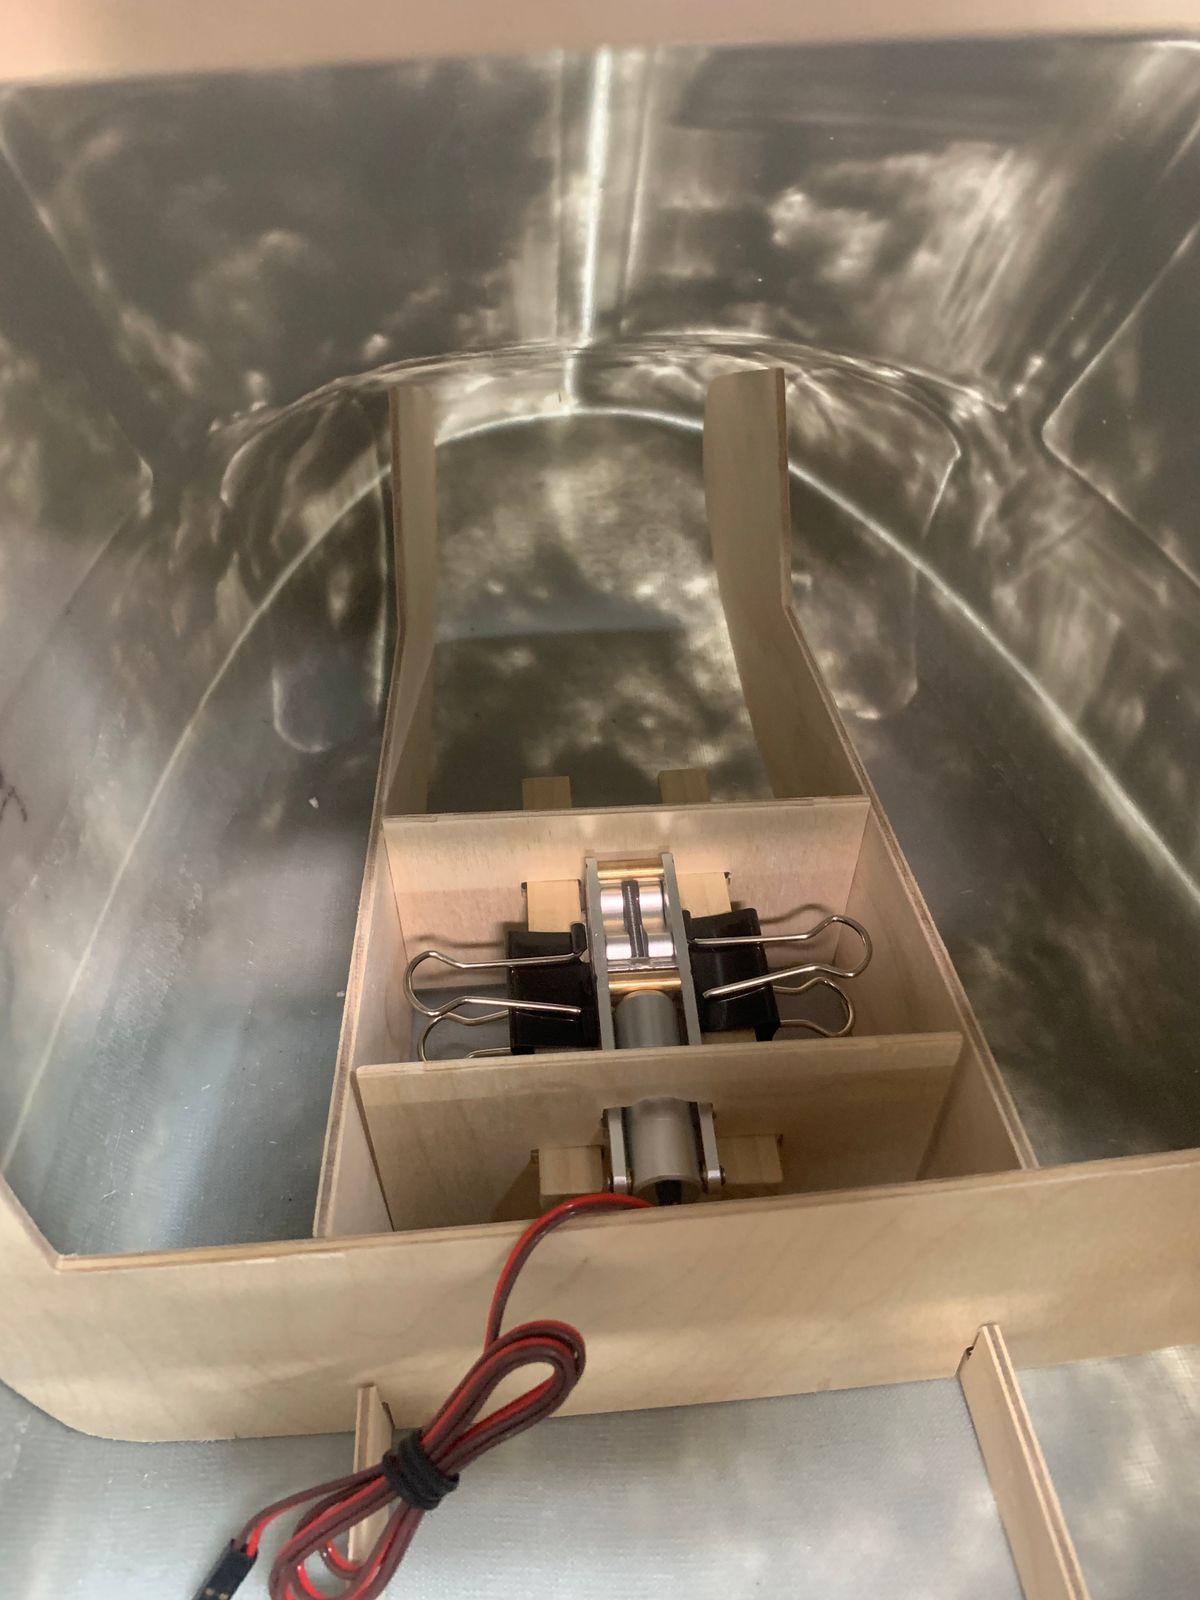
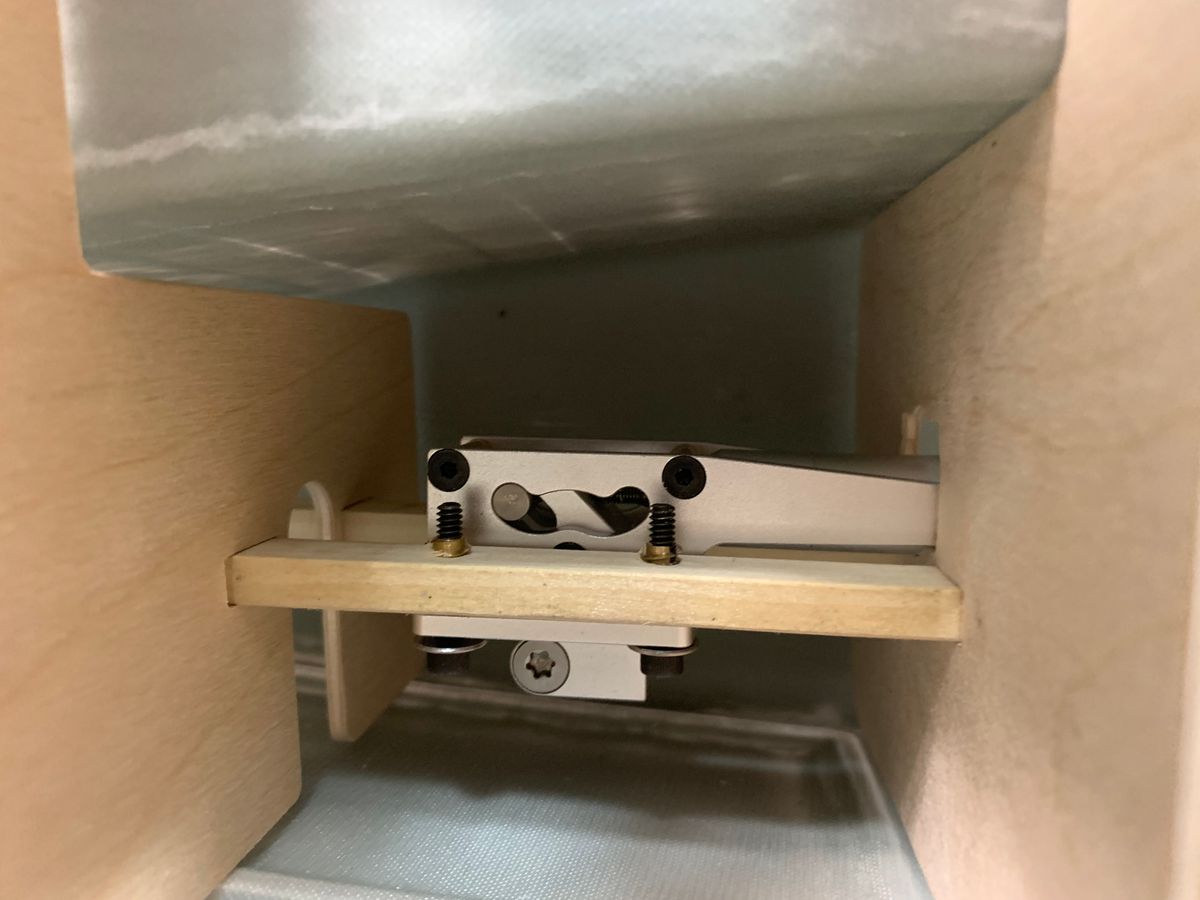
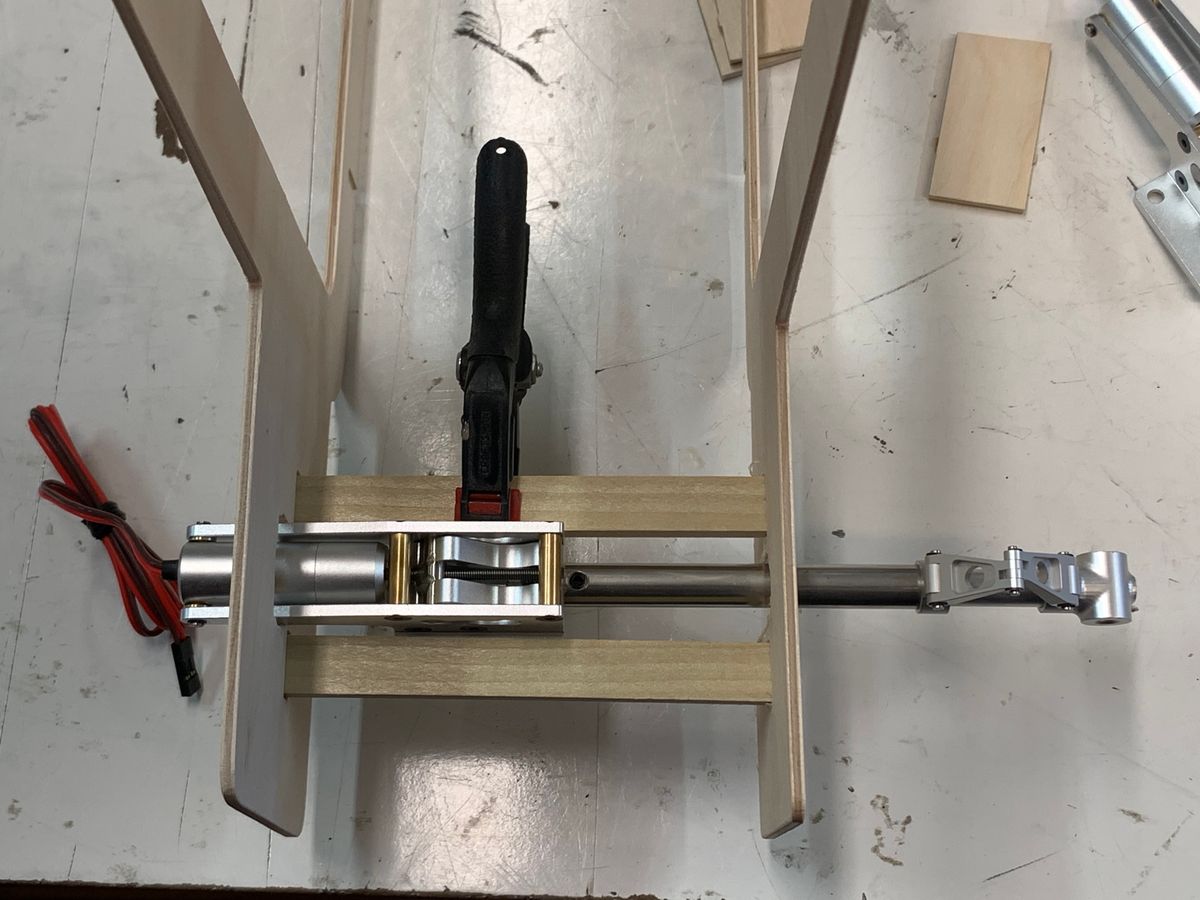
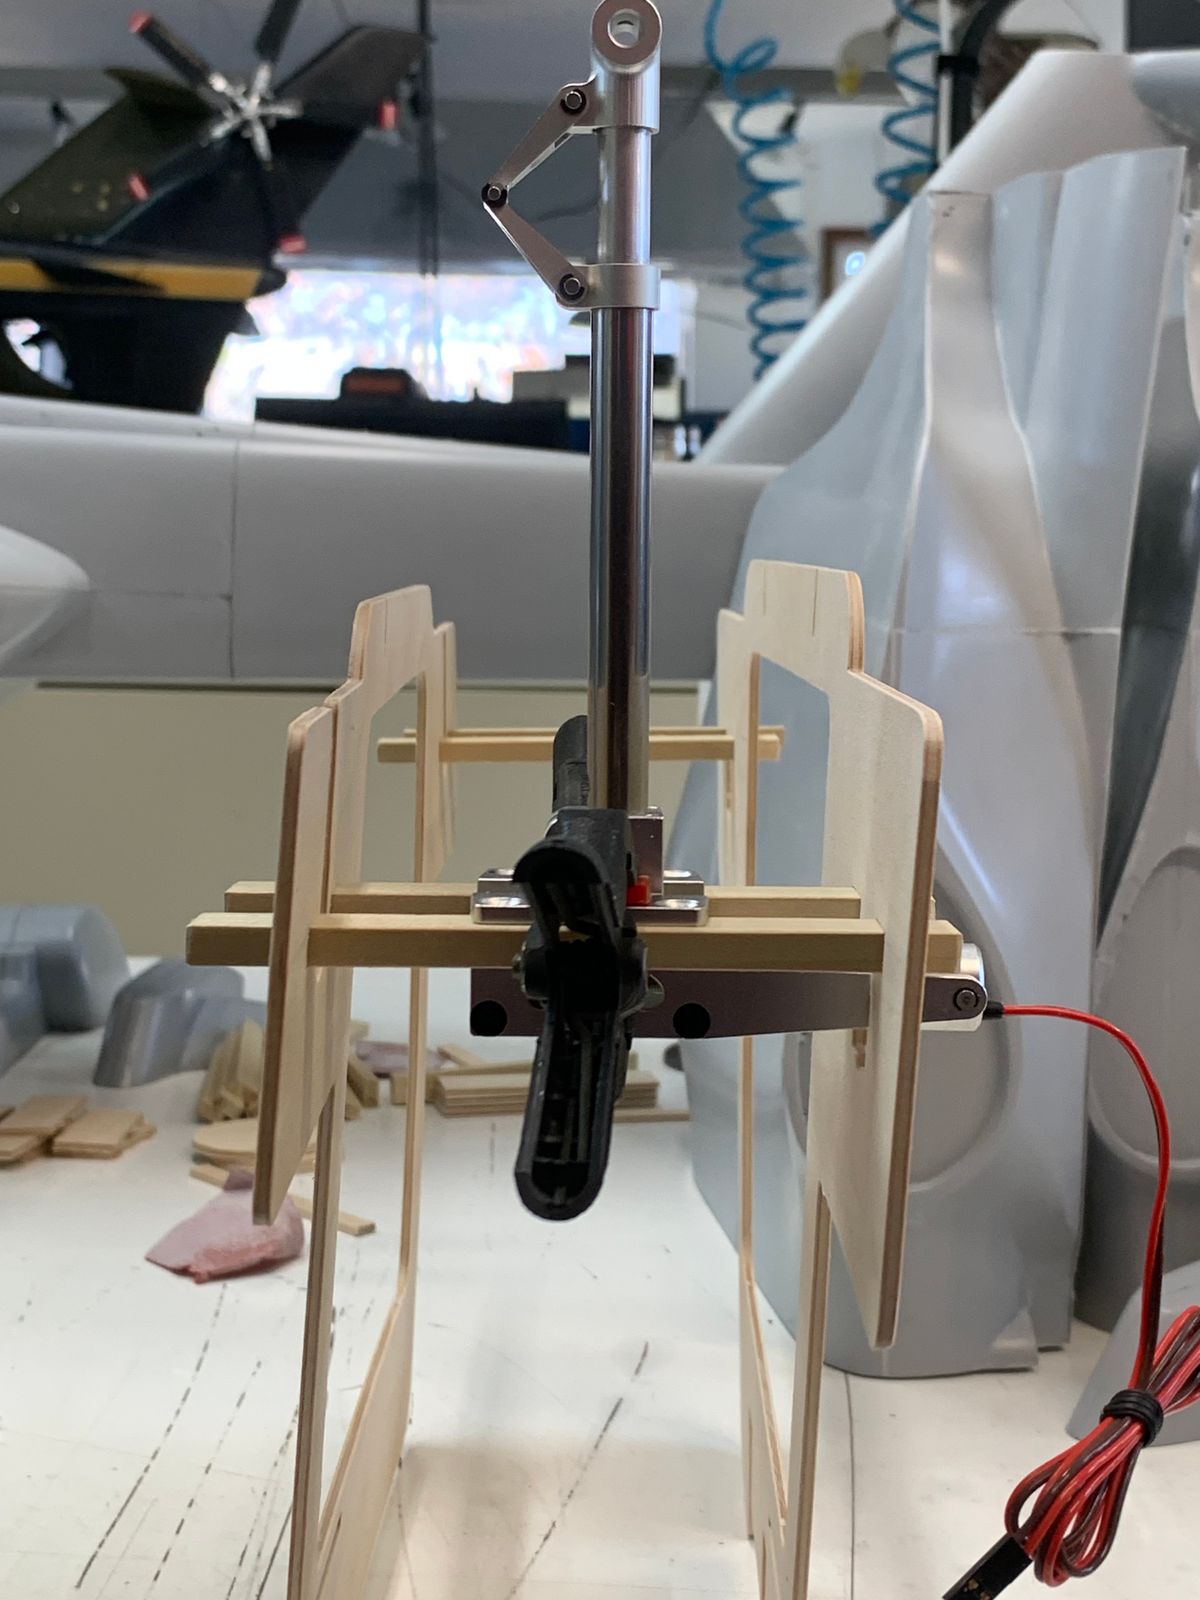
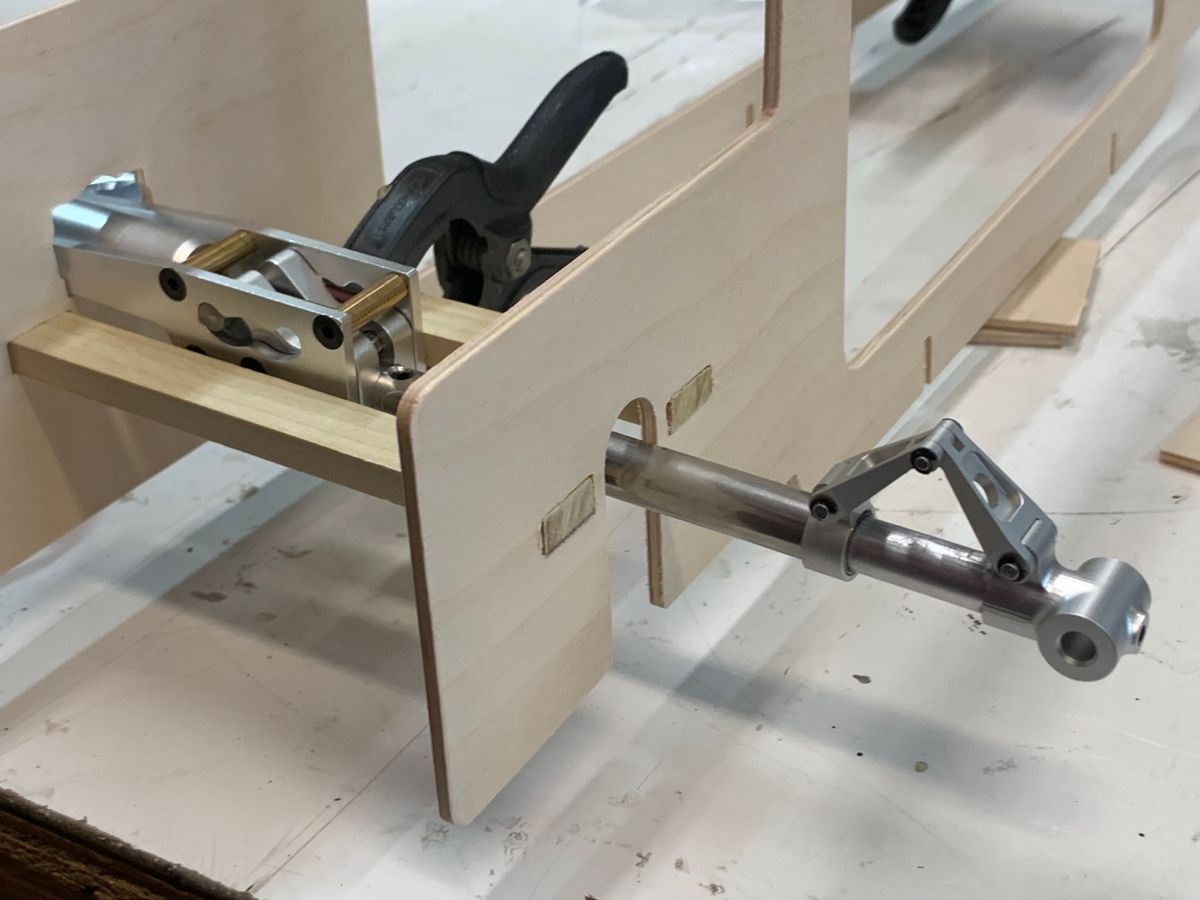
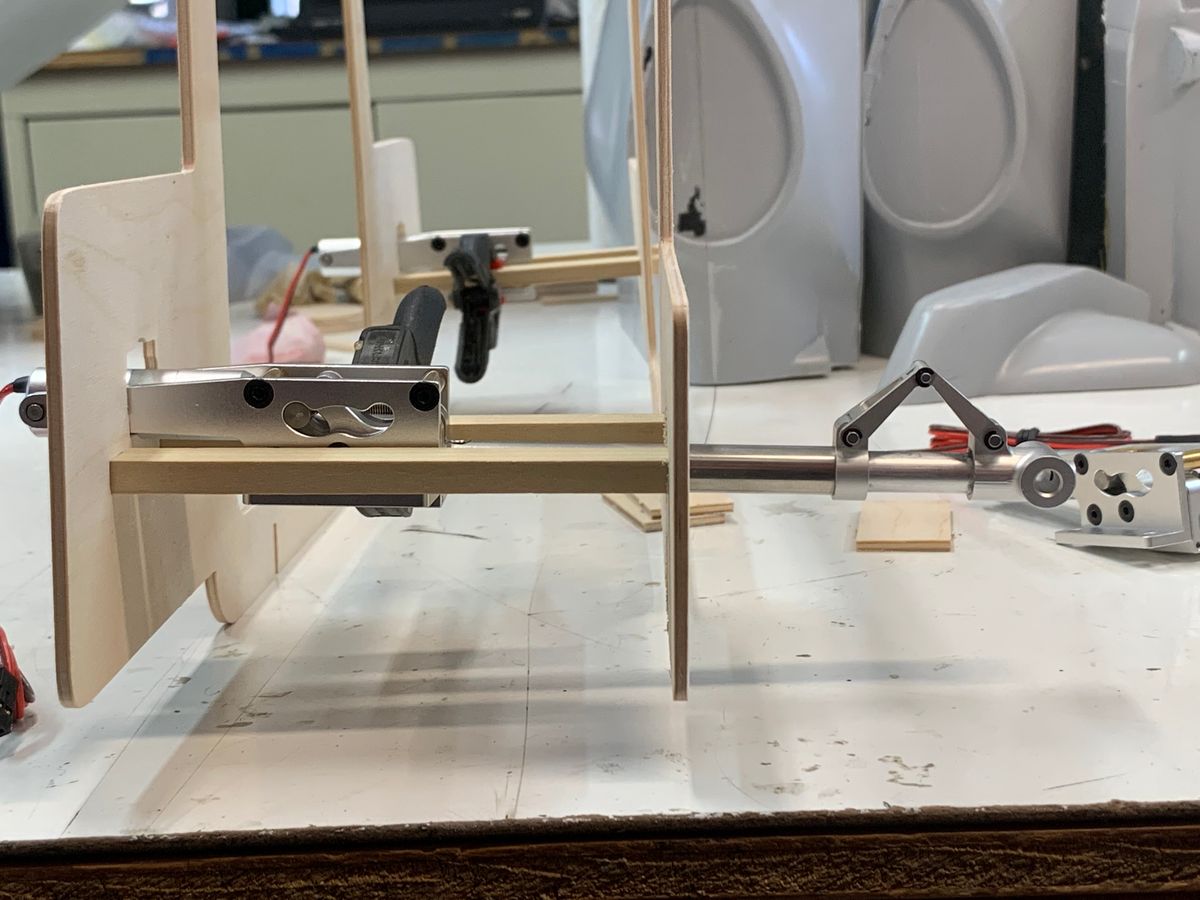
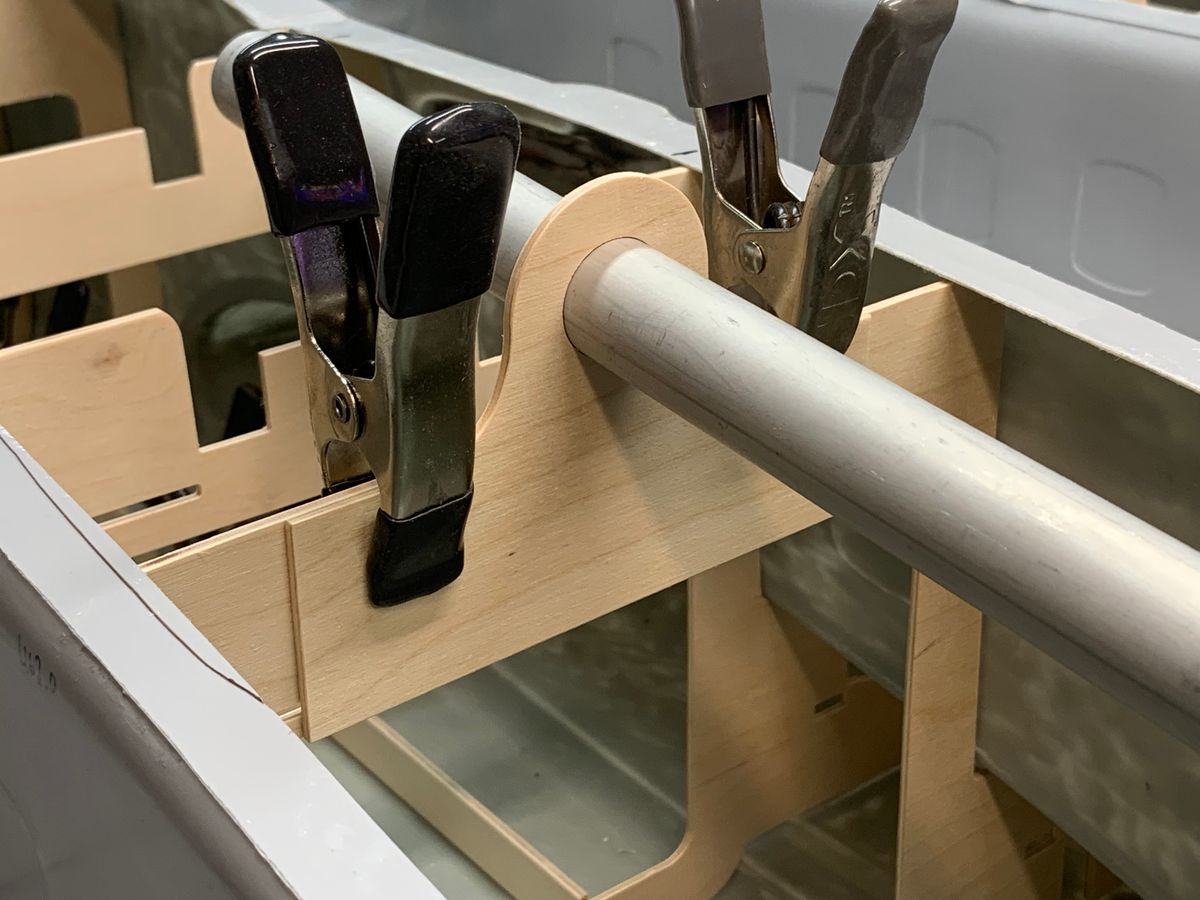
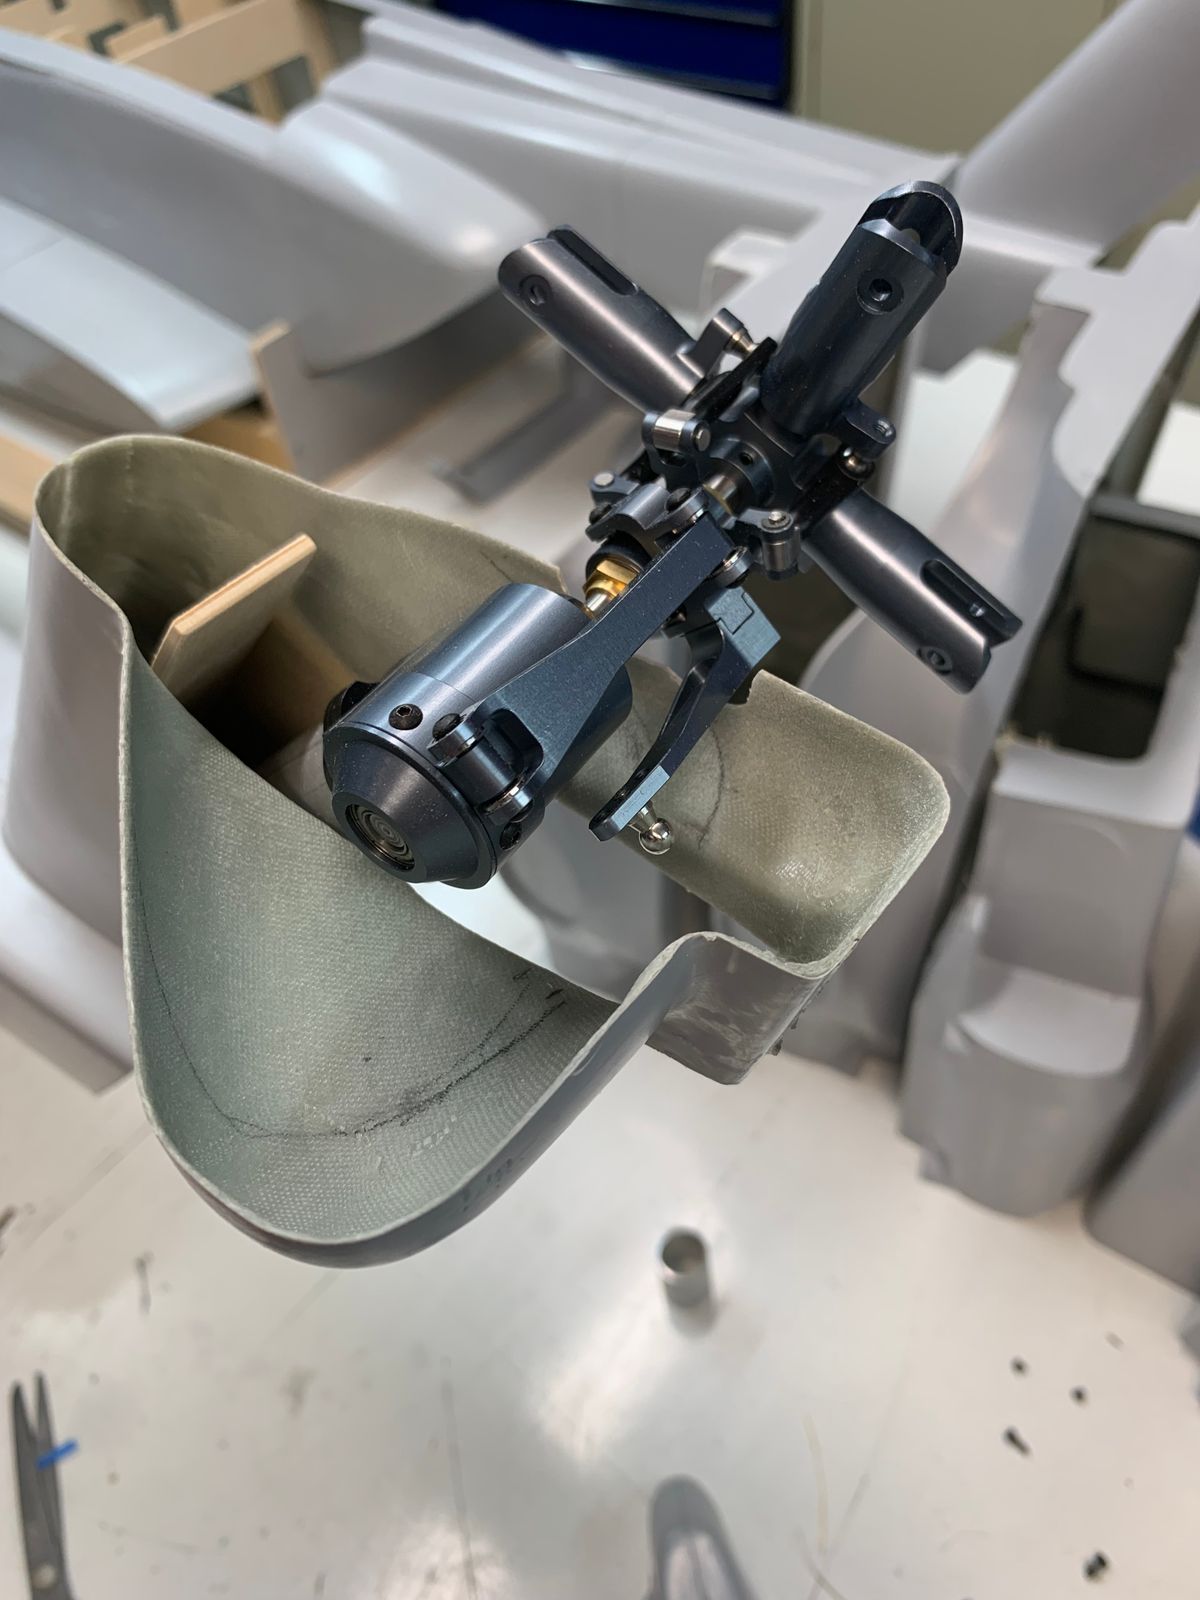
We have chosen JP Hobby retract assemblies, wheels, and possible brakes on the main outer wheels. It will use Horizon Hobby struts which will require modification in length for this install. The retract assemblies have been mounted to the mount rails with 6-32 inserts and hardware.
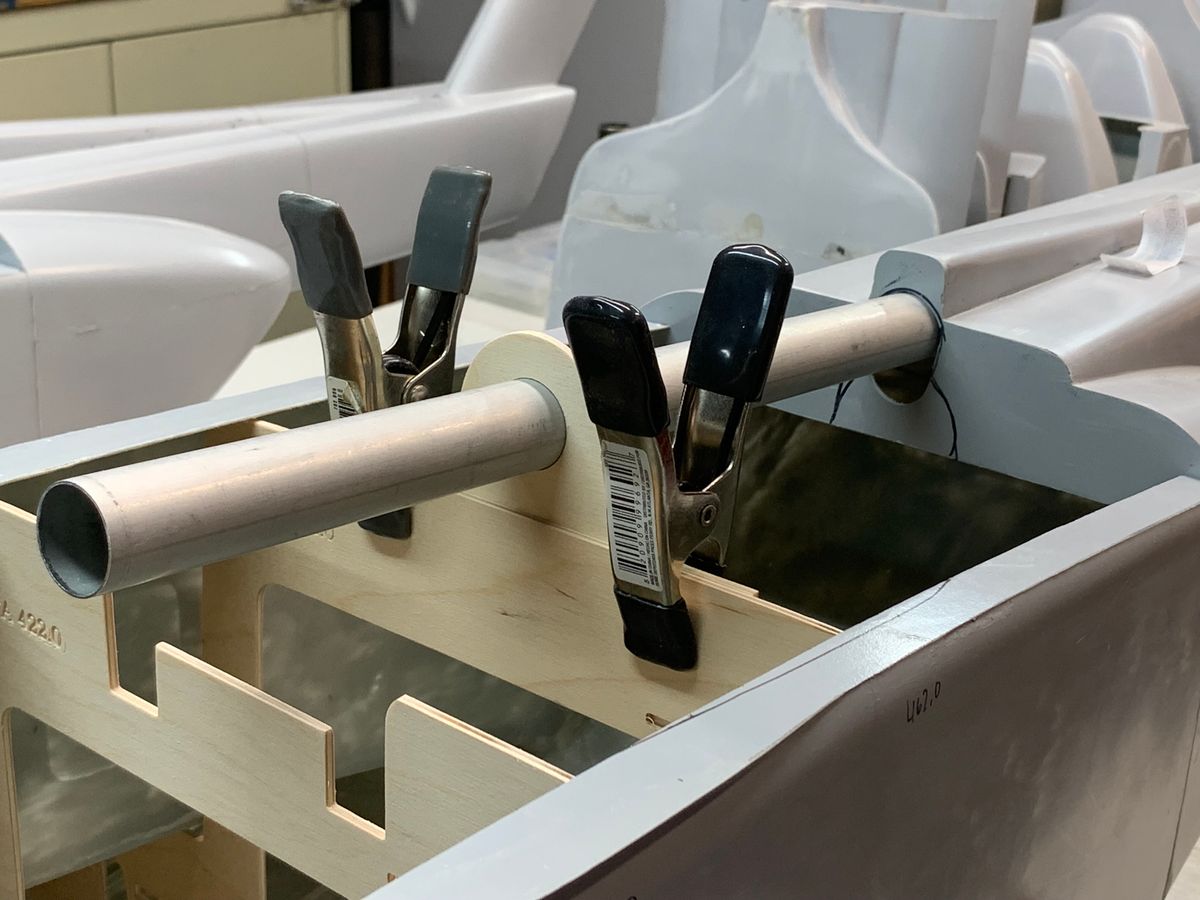
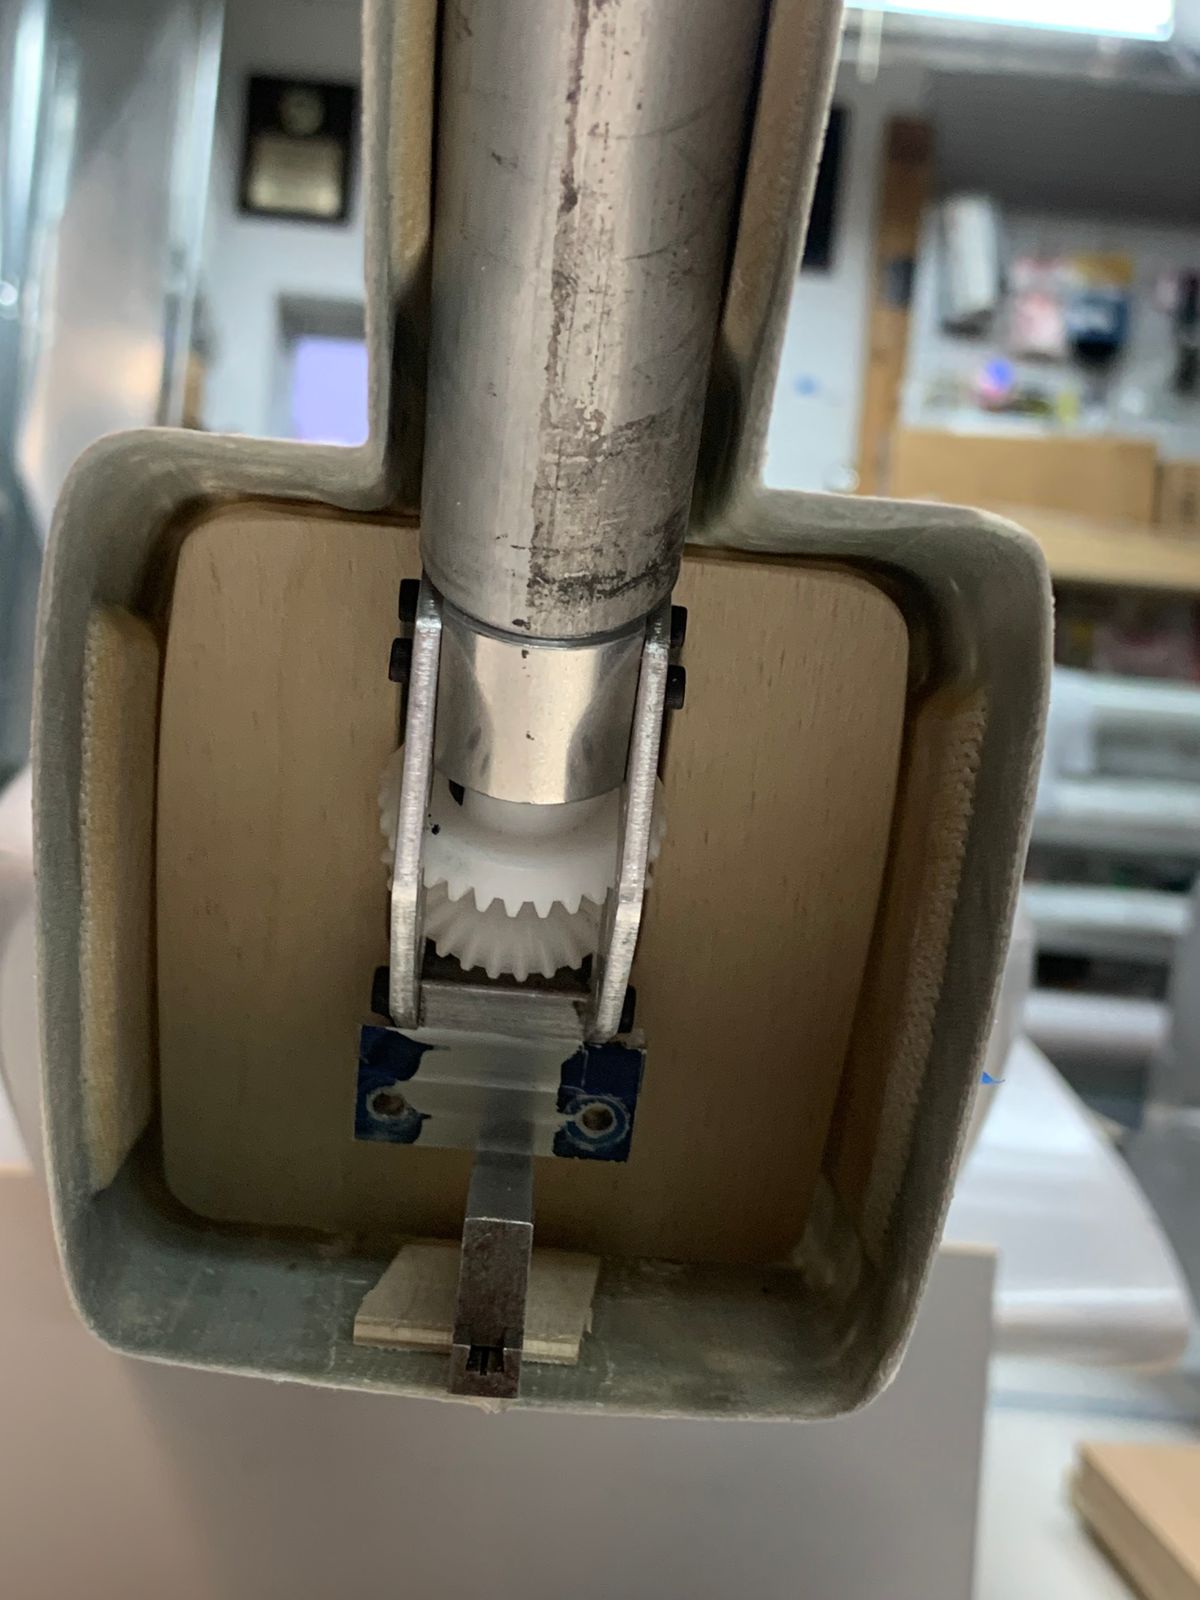
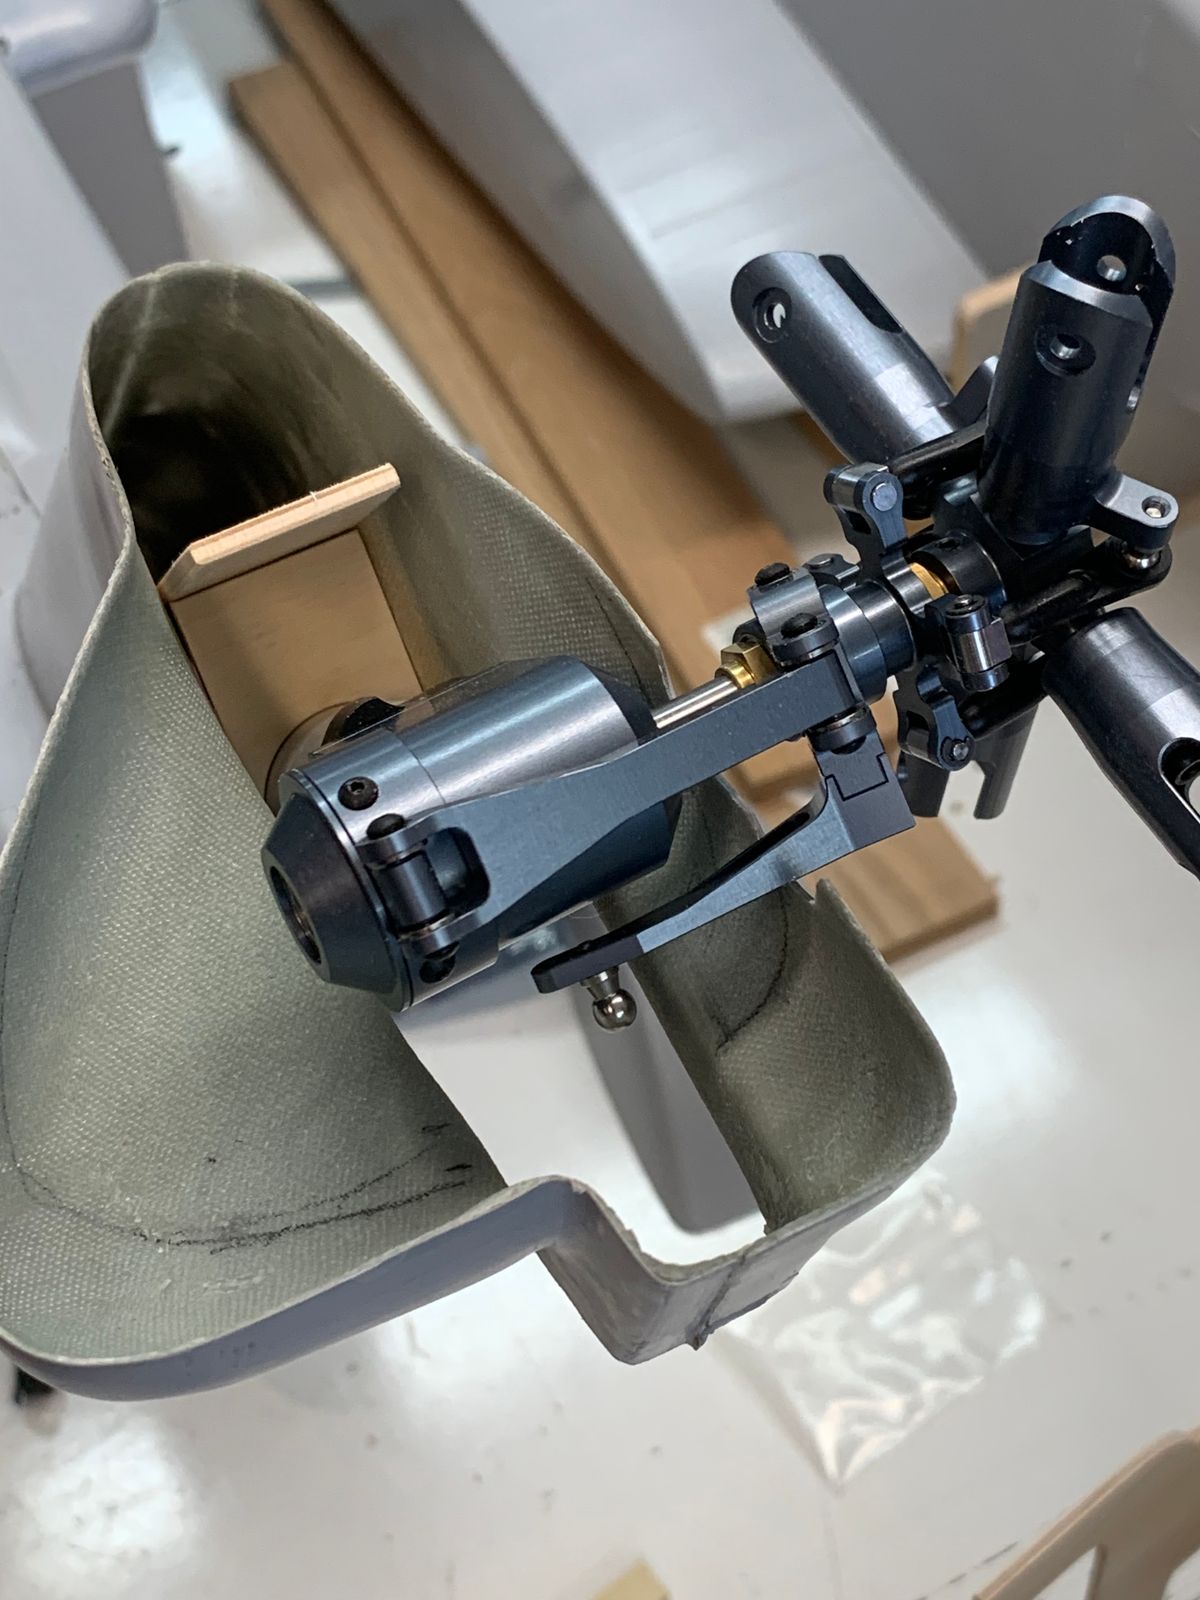
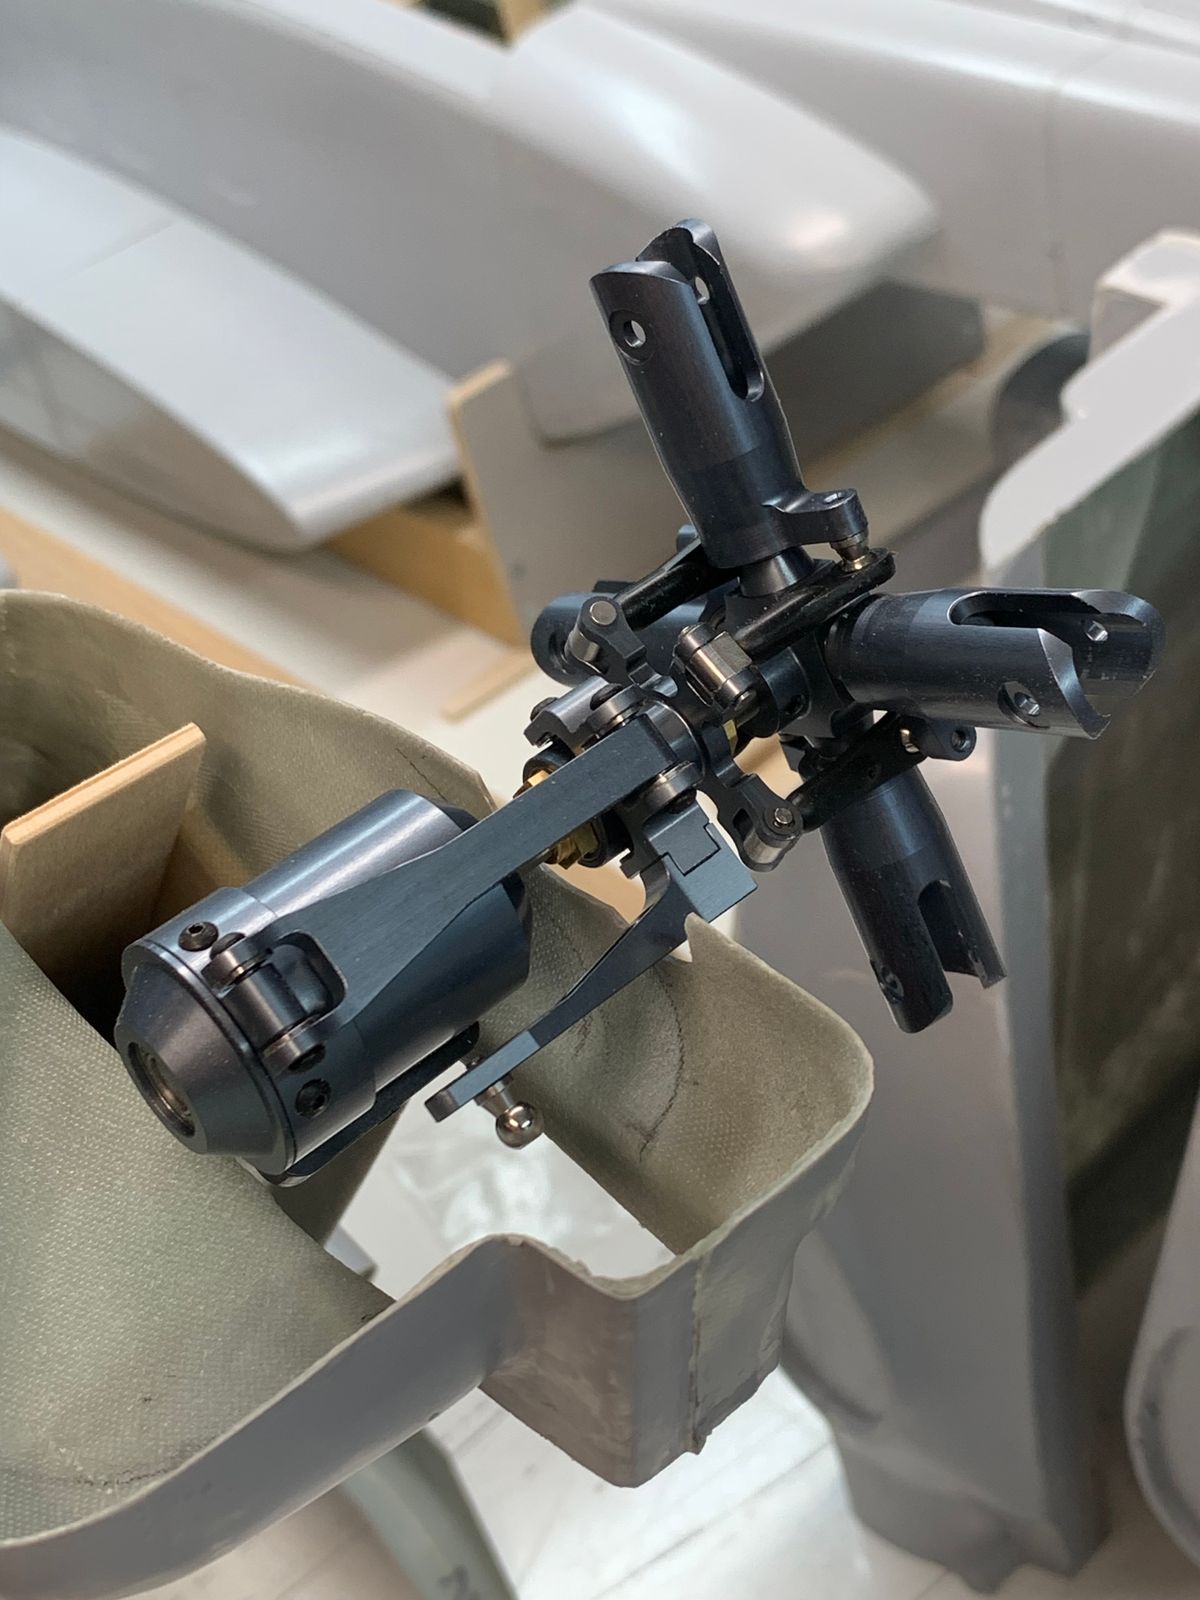
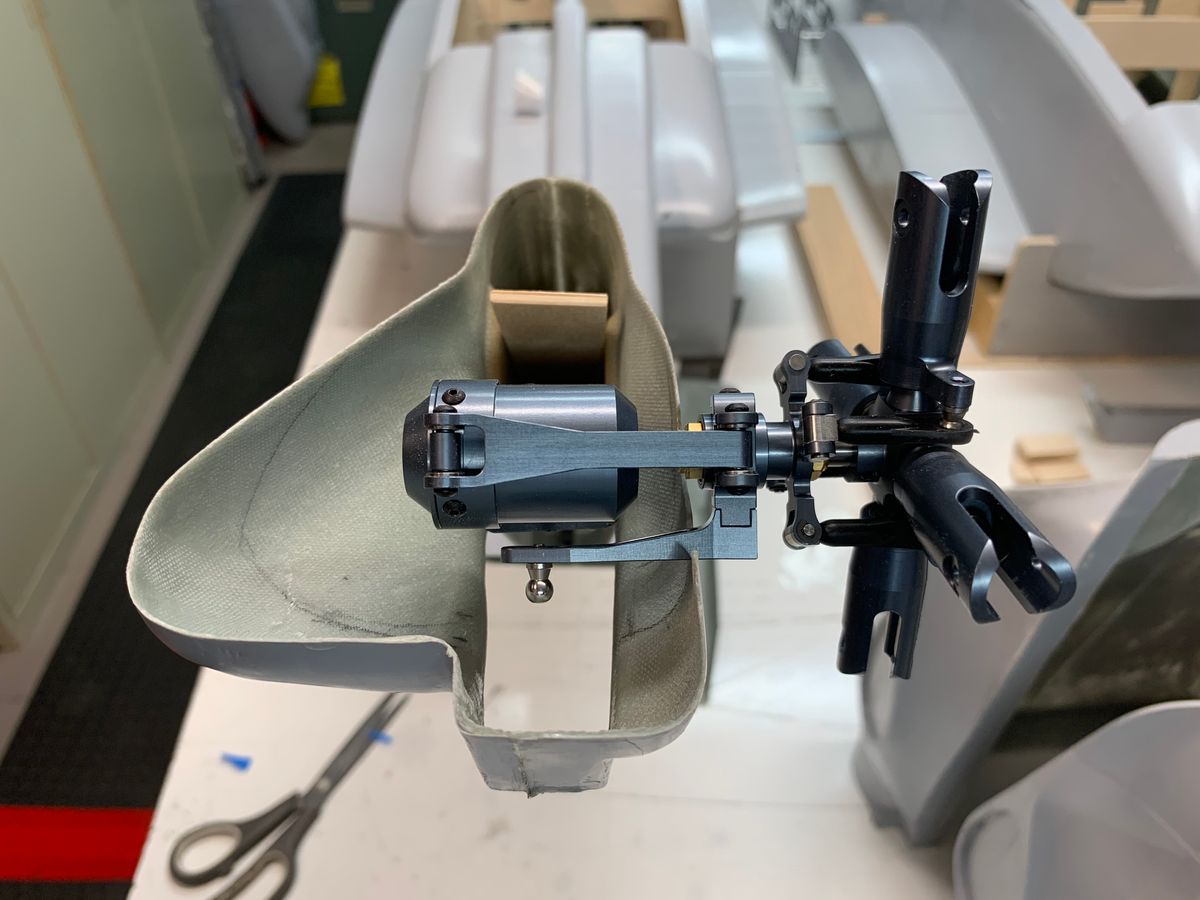
Next will be assembling the mechanics and mounting them to the mount rails. This will be used as a “fixture” to align everything so the tail drive can be mocked up and the fit checked. Once this is complete, I can move forward with getting things bonded together.
That will be a monumental achievement and a step closer to getting this thing in the air.
Attached are a few photos of the recent progress.
Thanks for dropping by.
UIH,
B
231 Comments
Hey Butch, this looks incredible!! As a fellow S-76 fan, I will be especially interested in this story!!
It's interesting that you sand and prime BEFORE cutting out the fuse. What is your strategy here?
What material did you use to print? How thick is the wall?
PLA 2mm
Michael,
Great question. This is a buck to make a mold from. Once the buck is finished sanded and has several coats of mold release wax, i will make mold(s) for each section of the fuse. Here are a few photos of the mold making process from the buck from my S-67 Blackhawk.
Aahhhaaaahh!! I now understand!
Looking good Butch! can't wait to see it in the flesh, that's going to be a big box!
Very cool! Glad I found this thread. I work on VH-92's at Sikorsky.
This is a awesome helicopter!
" In my professional career I have never referred to the heli I have worked on as “she” or “her”."
Also hearing someone say "ship" or "bird" when referring to acft, gets on my nerves also.
I can see that being annoying to some, but it’s also standard practice in some places. In Bell test, most of our test aircraft are referred to by sequential number of the prototype. A lot easier to talk about Ship 1 or Ship 2, than Bell 525 serial number 62002.
It's like fingers on a chalkboard...
I learned something new today about the naming of helicopters. Maybe that is what I have been doing wrong all these years......
Looking great! Making a lot of progress. Definitely an intense cycle of sanding and priming to get that perfect smooth finish.
Progressing well Butch. Fill sand, fill sand! hard work but I'm sure it'll come up nice. Have you considered removed the sponsons and molding these separately to avoid hardship in mold making layup and removal of plug from the molds? Also future layup of the fuselage in the molds might be harder to layup or remove from the molds.
Regarding the name, Sikorsky named the S92 the "Helibus" for a good reason. Maybe a simple name like the "bus"?
Hey Craig,
I have not finalized just how the molds will be sectioned. I may think out side of the box and instead of side and side, why not top and bottom. I am removing the float provisions on the tail boom as it was not correct. The MLG float do cause a problem with laying up the molds so may mold them before I cut them off to help make things easier. VH does not have floats but that option should be available if desired.
I still have a ton of dust to make and sleep with the build design under my pillow for the next several month so hopefully it will come to me.
B
A pic.
Beautiful!!!!!
I have been trying to find out who the R G is with the Oscar Award. Lol
Painstakingly these machines are my daily grind. This machine looks to be in good condition. I maintain offshore S92's that pound their way out into the offshore oil fields each day carrying rig workers. I think our machines are some of the highest time airframes in the world with 15,000hrs + and in excess of 65,000 landing cycles. Sikorsky have recently limited the airframe life to 30,000hrs. Those many rivets you mention help maintain a very tough and durable airframe. Just needs a 5-blade rotor to make them ride a bit smoother. Let me know if you need anymore detailed pictures.
Looking good!
Wise decision Butch, obviously these will make mold making a lot less complex and can easily be added as scale details later. Loving the updates.
Thanks Craig,
At this point I feel I have a 90-95% solid plan for the mold layout. The main fuse appears to be pretty simple as it is a "box" for the most part. I am feeling 3 major sections, bottom, right and left sides. The cockpit 2 molds right and left, the ramp door area also a right and left. Tail boom and pylon should be fairly simple but have yet to put a bunch of thought towards that just yet.
The fun part will the the upper cowlings. Their will be 4 or 5 removable sections. The aft engine cowling section, right and left MGB cowlings, and either one big Racecar or forward MR fairing or possibly 2 sections. The top cowlings could be 5 but up to 12 individual molds not including the engine inlets. This will all come together at some point.
I sleep with this thing under my pillow for the "osmosis" effect which has become slightly troublesome.
Dat funny,
UIH,
B
Too bad I can't get you any close ups or general pictures of the most photographed helicopter in the world 😉. I think a scale VH92 would be awesome!
The work that this model has is impressive
Im really glade to see the new part lined up well. with moving the shop I needed to re calibrate the printer to the location.
Looking good!
Thanks Joe,
Not moving along as I like as work is off the hook. The sanding part is the most hated, in my opinion, part of this process. I know it will pay off in the end but still a PITA.
B
I know exactly what you mean. Of all the plane kits I have built over the years, finishing is always the worst part of the build.
Exciting! I enjoy seeing your updates Butch. Merry Christmas.
Hi Butch, looking good!
I know you are a long way off, but, what scale will this be and what are you thinking for mechanics?
Thanks Joe,
Scale is 1/10th. At 80” in length and 19” wide at the sponsons it had to fit into my Pacifica with my RAH-66 and my S-67.
As for the mechanics that are the same as in my S-67. The mechanics are semi custom with off the shelf bearing blocks and main shaft. The tail lay shaft, one way sprague bearing support are also
custom machined. Main gear and pinion are off the shelf.
It appears i can only post one pic so will post in another chapter.
I am learning that these custom, one off builds are truly that... Custom. I assume you are cutting or making the side plates as well. Would it be feasible to use a Roban or Vario mechanic setup or is that too costly?
These builds and even the builds from say Heli-Factory and others just amaze me!
Joe,
Any suitable mechanics could be used. The end user would have to modified or make the support structure for the mechanics that will be installed.
I prefer to mount my mechanics on rails. I incorporate a 2° forward tilt in my mechanics which allows me to build the structure square and not deal with a non square mounting surface.
The 4 ribs in the cabin section will be CNC routed. Those ribs would be left solid for the end user to cut and fit suitable mechanics support of their choice.
Good stuff! Thanks for explaining. Now back to it! 😂
Looking 👍. It's great to see how this whole process unfolds. Definitely above my abilities and know how plus the fact that I am WAY too impatient.
Looking awesome Butch!
That is a beast, Butch!
Thanks Michael,
It is actually 4" smaller that our 76 however the big square body and fuel sponsons certainly make a statement.
I am trying to decide if I should make the tail boom and pylon removable. If removable, the easiest area for the separation would be aft of the ramp in the square section of the boom. Not too difficult but the attachment may be troublesome.
Hummm
I may have to sleep with this under my pillow for a few nights so it can soak in.
UIH,
B
If you are around 7 feet or so, I’d leave it. With my two HeliClassics, I’ve grown a bit weary of the separate pieces but I have no choice
Good point. My thought was smaller mold sections but not sure it really matters. Will press on without a removable boom and see what we come up with.
Thanks,
B
I’m eager to see!!
I think i like this.
Thoughts,
B.
Four bolts to attach plus a dog bone?
Hey Michael,
No bolts. It will be glassed to the fuse. The main fuse will be one piece. The trailing edge fairing of the tail pylon, the intermediate gear box (IGB) cover and tail gear box (TGB) covers are not shown in the mold templates. The Fairing General Arrangement will be similar to how the fairing was installed on our 76 with the exception of the IGB cover. It will be on the LH side of the fuse since the stab mounts to the RH side in the recess shown. This is still a "design in progress" . Access needs to be as simple as possible.
B
Looking good, Butch! The VH-92 program is about completed. I am now out on the 53k. Did you know there is no conventional cyclic in that aircraft? It is a side controller. Hope all is well.
Looking great Butch!
Finally all waxed up. Will begin installing parting boards pretty soon.
Looking good! Never realized how involved mould making is.
Amazing, make Richie do all the mixing lol
Looking good Butch, can't wait to see the results.
Nice
Good stuff!
Looking good mang!
Nice work! Not that I would know any better! 😂 One thing I noticed though looking at you pictures, are the inlets going to have to be made separately?
Great question Joe,
The inlets have many "nooks" and "cranny's" that would be difficult to incorporate into the engine cowl mold. It will be easier to remove the inlets and mold separately away from the cowls or to 3D print the inlets.
Another question. Will you leave each mold section bolted together fore and aft and separate along BL 0? Then lay up the fiberglass so you end up with a complete l/h and r/h fuselage?
This whole process for a 1 off fuselage is amazing and very impressive!
Joe,
I will be able to bolt mold sections together and do larger lay ups. When the mold section has several curves or compound curves, I find it easier to work those in smaller sections. When I build a mold, the flanges can be 8-10 layers. Where the part will be made will be about 6 layers.
I am impressed with your work
Thanks, for the kind words.
I do have to go in for remedial training occasionally from "My other brother Darrell" to keep me in line. I forget stuff or like most times simply have no clue.
That is some cool shizzle!!
He said "Schnizzle"
Thanks Michael.
Very well done Butch! keep me in mind for S/N:002
Engineering genius!!
Thanks Michael,
You obviously have not noticed my sign.
You are really moving along! Where you have the aft dog house parted (I call it the whale tail) is pretty much to scale. 👍
Joe,
Thou shall rename the, "Whale Tail"
That would have to be a pretty short dog to fit in that "dog house" anyway.
The Master at work!
Wow Butch! Amazing work as usual!
Nice! You called it the "whale tail" 👍😂
Yep and thanks for correcting me on that one. That came from my days on the 53 Echo models back in the day.
Big son of a gun! I'm on the 53K now. I'm impressed by the amount of composite they worked into it. At least 90% of the airframe is composite now.
Looking good, Butch
Amazing work as always!
That's just nuts! In a good way! 😀
Great Job Butch so far.
Well done Butch! Huge accomplishment!!
For a guy like me, this is unfathomable!! 😳😳
Looks Great Butch! That is an important milestone to reach, congratulations!
Fantastic! This is quite the process and sheds a lot of light on why quality fuselages are so much money!
Really cool, thanks for sharing!
Thanks Jason. Happy to share.
Amazing
Thanks
B
Bet it will be nice to get both hands in to work at the same time!
I'm sure I have asked already, but what size mechanics are you planning on using?
I will be using custom mechanics for my build. The same mechanics as in my S-67. This may be a stretch for 700 size mechs. I am sure there are a number of Vario mechanics that would more than meet the task among many other options.
Wow Butch that’s amazing!!!
Amazing work there Butch !
Awesome! With the 3 view you get a good idea how big it will be 👍.
Incredible !!!!
Banged out the tail gear box fairing halves today.
Another pic.
Well done! make me one..
Craig,
The first man fuse less upper cowlings should be joined this week. It takes roughly 2 weeks to get all the sections laid up for the main fuse and guessing another week or so for the upper cowlings. you are on my list.
B
Looks good Butch! They don't call it the helibus for nothing.
Yeehaw!!
Hole-eee-crap! That’s going to be beautiful! You guys amaze me. Love this site.
Holy smokes! That is a lot! bigger than I imagined! Looks great!
Looks great! Amazing craftsmanship!
Looking good wild man!
Well done! very nice.
Just plain beautiful
Thanks folks.
B
Amazing
I know what the bagging does for it. But what is the overall quality difference between bagging and not bagging the layup?
I feel the overall quality difference is very noticeable. The peal ply that goes down after the layers gives a nice surface to bond the structure to or if additional glass work is added. There are a lot of sharp 90 degree angles on this fuse. Bagging also helps with air bubbles in those areas.
What a massive project is this, every time you post I can't believe at the details and the planning that you put into this masterpiece... WoW
Nice work on the glassing.
Looking good wild man!
Looking great Butch
Thank's Gents,
This has been a lot of work. I will say, it is very gratifying to see this all coming together piece by piece. Its like, "I made dat schit".
Looking good!
Fantastic work!
This baby is beautiful. I’ve done some simple glass work and the things you guys do is terrific. I appreciate being a fly on the wall!! Thanks all.
Great weekend at the “factory” with the Professor!
How many layers and weights of cloth are you using for the layup?
Hey Gary,
I use a total of 4 layers one 2 oz, one 4 oz and two 6 oz. In some areas I will add an additional layer.
Truly Wonderful all the way through just what i needed too -), can i ask would you put rivet detail on molds to make life easier later on?
Hey Malcolm,
That’s a really good question. It’s a little late for that now since the molds are complete and production has begun. I have done both. Added them to molds or the plug and added after. Personally I prefer after. Mainly because I can sand the fuse then place the rivets after sanding. Either way, with a build like this there will be thousands of rivets installed at some point. Once I get going with the glue rivets, it moves pretty quickly and the end result is the same.
Thanks for asking,
B
Very Nice, But, I see the my fuselage, the one in the middle, is missing some parts compare to the other... 😊 lol. This project is so impressive. It will be ready for the next IRCHA, If you plan to attend?
#2 already! Amazing work as usual. 👍
If a picture can paint a thousand words then put me down for your DVD, this is a real treasure trove of learning material here thank you
I second that
Wow!
Looking great Butch!
Looking really good Butch.
#3 already! Man you're fast! On the other hand #18 is coming along also. Impressive work as usual.
if you happen across some drawings I know someone who can make one of those.
:)
Super work!!!
Awesome work Senio’r!
Love it, thanks for sharing, plenty to take away from those pictures
Awesome Butch! Are you selling these and if so, I am interested in purchasing one.
Jason,
Yes these will be available if interested.
Thanks,
B
Brilliant! Just plain brilliant!!
Amazing Butch
I think that will be easy for you. I am looking forward to how your going to do the inlets.
Those pesky challenges!
Love the shop, Butch!
Thanks Gents,
Joe, For the inlets, I am leaning toward having them resin printed. I have not really played around with making molds for them however they are not that big and have a lot of angles therefore printing may give the best results.
Sean, I love the challenge. Lets just hope it works. Ha!!!
Michael, Thanks buddy. I out grew my shop several years ago. It works but I could easily use twice the size if not more.
B
Great... 10pm and now all I can think about is burgers! 🍔
And your work looks just as good, as usual. Merry Christmas.
Ha….now I know what the hamburger comments are all about……
Butch... just out of curiosity... do you get to reuse the vacuum bags or is this a one time use only?
K
Good,
Yes I reuse the vacuum bags and can get several uses out of each. The clear or white bag is twice as thick as the green film and does not conform to intricate part shapes. Originally I was taping the film to the mold flange. That worked well but I have been making the bags and place the entire mold into then pull the vacuum.
Yeah, why I am hungry now🤣. Well done Wizard!
Your shop is amazing! What you do in it is even more impressive!
Thanks Michael but it gets real small real fast. Like I mentioned some time ago, I could easily use twice the size.
Gary,
Good question as to who I purchase supplies from. I like Fibre Glast for cloth and bagging materials. It is a one stop shop which makes things pretty simple. They always ship promptly and the supplies are usually here in a couple days. I believe they are in OH.
I have used or tried different fabrics for what I am doing and have a fair list of products they sell that work for my application.
I use West System for all my epoxy needs.That schit is the bomba (thanks my Brother Darrell).
Hope that help’s. If you would like a list of products please let me know. Will be happy to forward.
Merry Christmas to al. My Brothers.
🧑🏻🎄
Thanks Butch! I started with Fiber Glast many years ago, but always looking out for new sources.
Beautiful as always, Happy New Year also!
They look great! You mentioned that the swash will be "above" the upper cowlings. Won't that be kinda high?
Shouldn’t be.
Ah... Right. I should have known that 🤦
Well lookie here.
Looking really good, Butch..
Man that’s some excellent work Butch!
I just noticed the printed station lines on the formers... Nice touch!
Thanks gents.
To engrave the station numbers takes about 2 minutes with the Stepcraft. The fuse will come with a drawing that calls out the stations so the user will know where each bulkhead is to be placed or at least get them in the ball park. Next fuses will have stations labeled on the inside of the fuse for for reference.
B
Looking real nice Butch! For the TRD shaft going up from the IGB to the TGB, do you plan to run this on the aft side of the vertical former like the real machine? When the back vertical fairing is removed the TRD is in full view. This will make access very easy. Also what IGB and TGB do you plan on using?
Thanks Craig,
The TRDS will be aft of the tail pylon spar. There will be full access to the TRDS with the trailing edge fairing removed. I will post up some pics this evening. S/N 002 will have the Vario 50 degree IGB and S/N 003 will have a PSG Dynamics adjustable IGB. I have the TGB's for both machines but I forget the manufacture. I will post that up this evening as well.
Thanks for the question,
B
Craig,
The TGB are from Baumann. The main rotor heads are Peka. The mechanics are custom the same as in my S-67 Blackhawk. They use turbine gears and pinion but with custom sprague and lay shaft. These will be fitted with clutches. The main shaft is 12mm and control is 4 servo biased at 45°
The shaft log in the photo is from my S-76. I am using it for mock-up just to get alignment in the ball park. The TR servo will mount on the pylon spar for a straight shot from the servo to the control input.
I do not believe i can post more than one pic in a reply but will try.
Thanks,
B.
TGB
UIH,
Here a shot of the PSG Dynamics IGB.
Unbelievable work! Great job mang!
that s cool great job
Thanks Mang,
B
🤯crazy amazing.
Fantastic work as usual!
Thanks gents,
It is very satisfying to see what I thought up several years ago finally coming together.
Joe have a question. The color inside the 92 fuse. Years ago when I worked for SA, the inside of most all aircraft were the standard zinc chromate color. Is SA still using that or have they gone to the waterborne coatings and a different color?
Thanks Mang,
B
Hi Butch, the airframes we had come through had a brighter, almost yellow-lime green hue to it. It is now a eco friendly primer. It definitely isn't as dark as the older zinc chromate primer.
This is close.
Thanks Joe,
Just looking for the color to paint the inside of the fuse when the time comes.
B
S/N 92004 under construction.
:)
We did 920924 - 920947 for VH. Lol
WOW!!! I have a really long way to go to catch up.
HA,
B
I can't explain how marvelous this job is to me.
Very nice work, the adjustable PSG angular gear is superb, just as the Baumann tailrotor. All top gear! I follow.
A quick video
https://youtu.be/gdsb-EsAtcs?si=uiQwaSD8WeCMQW1A
That's awesome! So how would you go about changing rotation direction out of the IGB?
Hey Joe,
The IGB will remain the same but the TGB rotation will change.
The IGB with the 4 gears that allow it to be adjustable, changes rotation from input to out put. From pilots view, CCW input to CW output.
Actually pretty simple. I will just need to move the tail rotor output shaft gear from the right side of the gear box to the left side of the gear box. I will need to re-check shimming and gear mesh, move a spacer and it will be ready to go.
Some gear boxes have replaceable gears. The input and output shafts have machined flats for the gear set screws to seat against and hold the gear in place. They also have shims and spacers to set the correct mesh.
hope that helps.
B
The progress is looking superb, Butch. Can't wait to see it at the field in flight.
Awesome work Butch!
Dang,
All the photos did not load. Let me see what happened.
That looks fantastic sitting on its feet I can see all the pics
That is looking pretty sharp, Butch. I think this will be the best one you have made.
Thanks Rob,
It is moving along nicely.
B
Envious work you do there , Butch! The picture looking at the nose, it really has the correct stance. 👍 Hauling it to MA?
Thanks Joe,
I have yet to load the 92 in my hauler with other helicopters. I will have to give it a try my next outing. If all fits it will be there.
B
Butch, out of curiosity you installed the retracts without cutting the windows to ensure that the fuse keeps the shape or any other reason?
Remy,
Good question.
I leave all windows installed until the structure is bonded in to help the fuse hold its shape. As you know, fiberglass moves around until some sort of skeleton support it. I will leave the cockpit windows installed for flight test or until the glazing is molded and can be installed. There will come a time when access is need in the cockpit area requiring the windows to be removed.
Thanks for asking,
B
Looking great Butch! Unfortunately I won’t be able to make LI fly. My Daughter and Grandbaby are coming in from California at the same time. Hope to see you in Mass.
Nyyice! 👍
Excellent detail, Butch!
Fantastic!!!
Those are some good lookin’ mechanics and super cool motor/clutch setup😉😉
Ya think? Lol
Swash Stay installed
Swash stay.
Wow Butch! Amazing
Butch, a question about the CB. The swash servos are connected to Axon... Axon to CB is single wire... what else will come to CB? Just the retracts? (trying to make sense and justify my own use of CB) Klem
Klem,
You are correct on the wiring. I will be installing brakes as well that will also go the the CB. Any other sub system such as lights, ramp door, winch if installed would all run to the CB. The 92 does not have gear doors but if it did, they would run to the CB as well.
A nice feature of the CB is redundant power inputs which I run on all my scale machines. I use 2 each 3 channel receivers for further redundance. Having a couple EXT ports to plug in expanders is nice for telemetry as well.
Hope this helps,
B
Butch
Thank you for the reply and confirmation. It does make sense...
Klem
LOOKING GOOD!!!!!!!
Hey Butch... That is a work of art!!
You guys are too kind or easily amused.
This is the culmination of, days, Weeks ,MONTHS!!! of mock up with little visual progress. And a note book of notes so it can be done again. "That guy, He funny".
UIH,
B
You may need to start a new “notebook “ after 50 chapters! I’m actually not sure though 🤣
I can do that.
B
always setting the BAR!!
smooth as silk.. nice
Awesome... such a slow start, LOVE IT !!!!!!
Silky smooth!!
Looking really great, butch. Can't wait to see it fly.
Nice and clean. How do you go about connecting an axon and a powerbox ?
Julien,
Thanks for the question,
In the first photo you can see two leads coming from the Axon to the CB200. I use EXT pin 15 on the CB 200 to pin "B" on the Axon for the EX Bus. EXT pin 14 is used for an additional power to pin "A" on the Axon.
The CB 200 will be replaced with a CB 210. This 200 was sitting around in my junk box and already configured so using that as a slave until I take the time set-up the 210
Great question,
B
Great Job 👍
Fantastic job Butch, definitely a work of art. Nice the safety idea for the servo connection too.
Thanks Massimo
That works really well without a big plastic clip of sorts. Its heavy duty sewing thread tied as you would tie aircraft wiring harness.
Best of luck on the maidens, and safe travels amazing job
Great work as always!
Here is a scheme for you to consider! They finally moved the POTUS with it at the D- convention.
Thanks gents
I am leaning towards that scheme but nothing firm just yet.
B
Fantastic job ! Amazing how compact the mechanic is.
Wiring is very clean.
Thanks Danny,
Wiring is not finished up yet. All leads are still full length and there is a rats nest of sorts under the mechanics. I will clean that up over the next few days before the maiden. At some point once placement of all the devices are determined wire length may be adjusted.
The retract and wheel brake system controllers are not installed therefore not functional at present. Nose wheel steering has power only, mainly to keep the nose wheel straight until I can set up the steering. Plans are to have it on a logic switch so it does not move when retracted.
B
Great photos Butch! Very much looking forward to our maidens😉😉
Sean,
Me too. Looking forward to a week of heli schnizzle. Hope everything fits in my van.
B
love it!! looking forward to seeing it in Hinesville. i have TONS of questions.
Good luck Butch!!
God speed, 👍🏻👍🏻👍🏻👍🏻👍🏻 waiting for the video of the flight..
Let it Ripppp good luck post video👍🏼👍🏼
They look awesome! Can't wait to see them finished. After following this build, you should be more than confident in it's airworthiness. Thanks for 50! chapters of tips and ideas!
sooo AMAZING!!!!!!!
totally just got schooled
after re looking at this chapter, I see I have A LOT of work to do!!!
Excellent documentation here. I see what you are doing here!