

Sikorsky S-92. Book 2, “Polyphia”
 Butch W.
“Helicopter Mechanic, OFF DUTY”
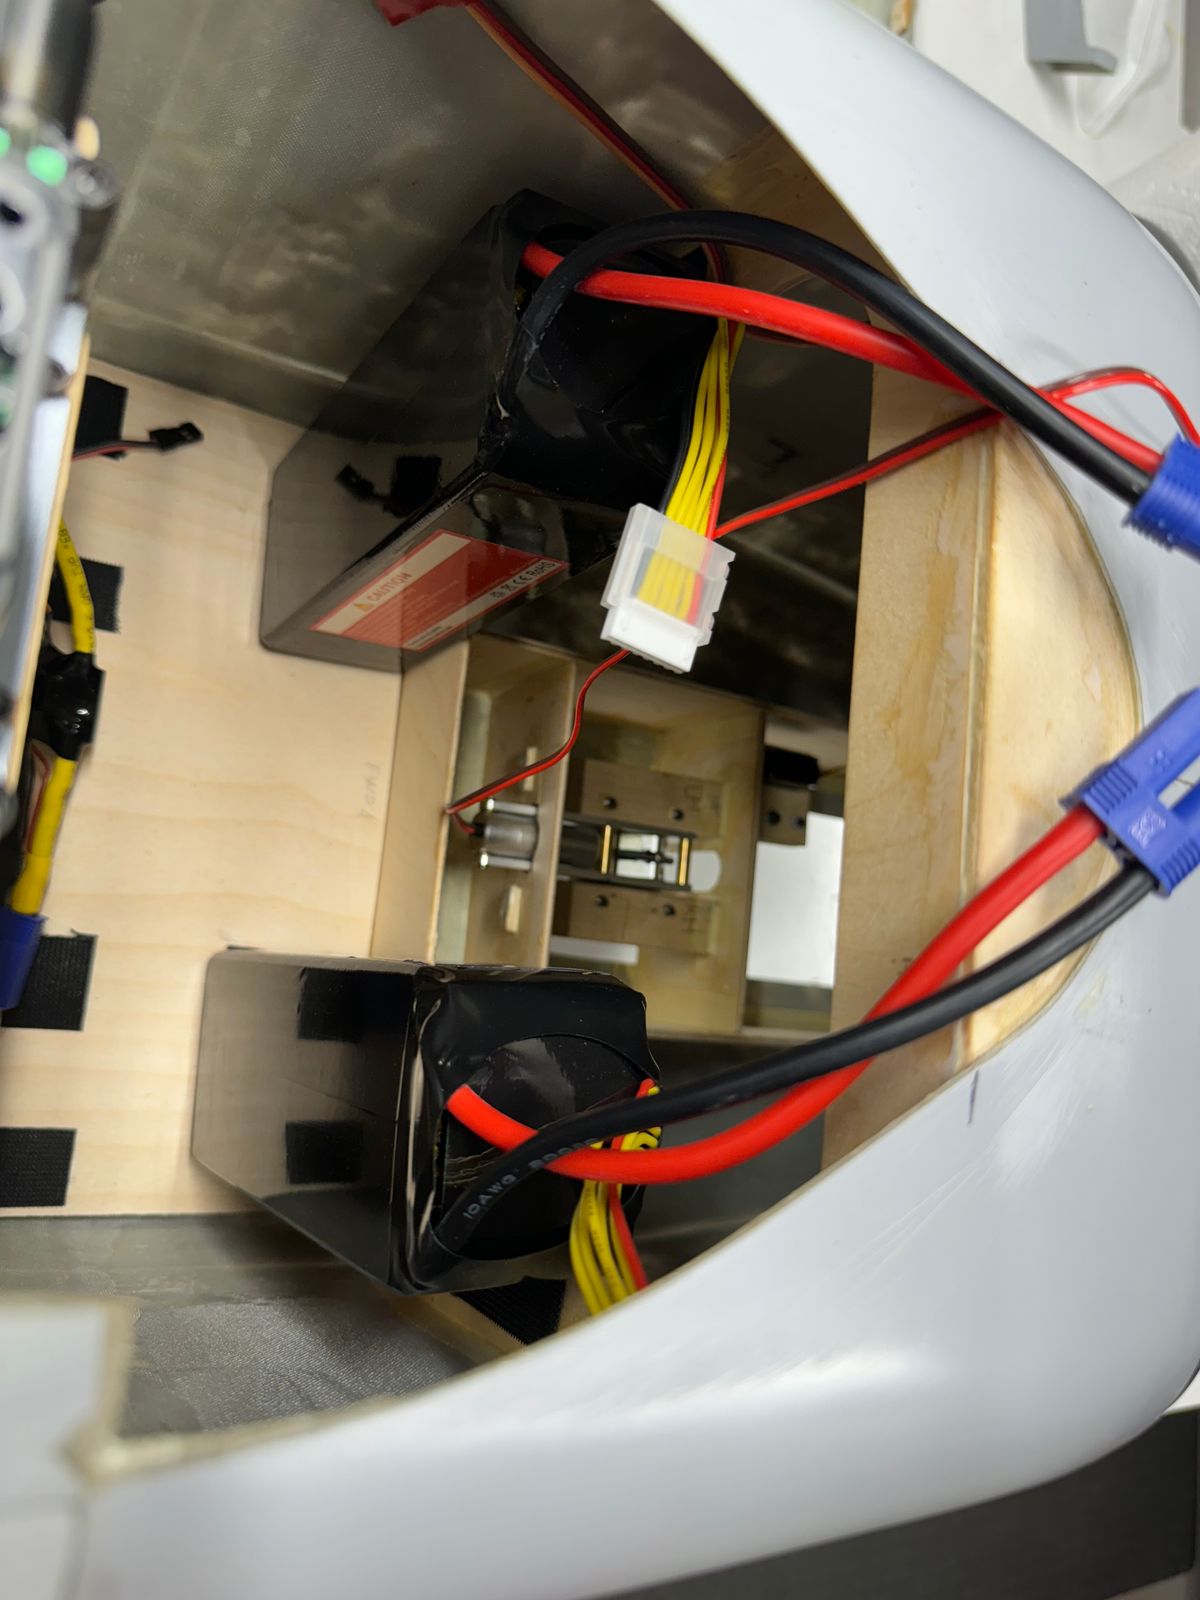
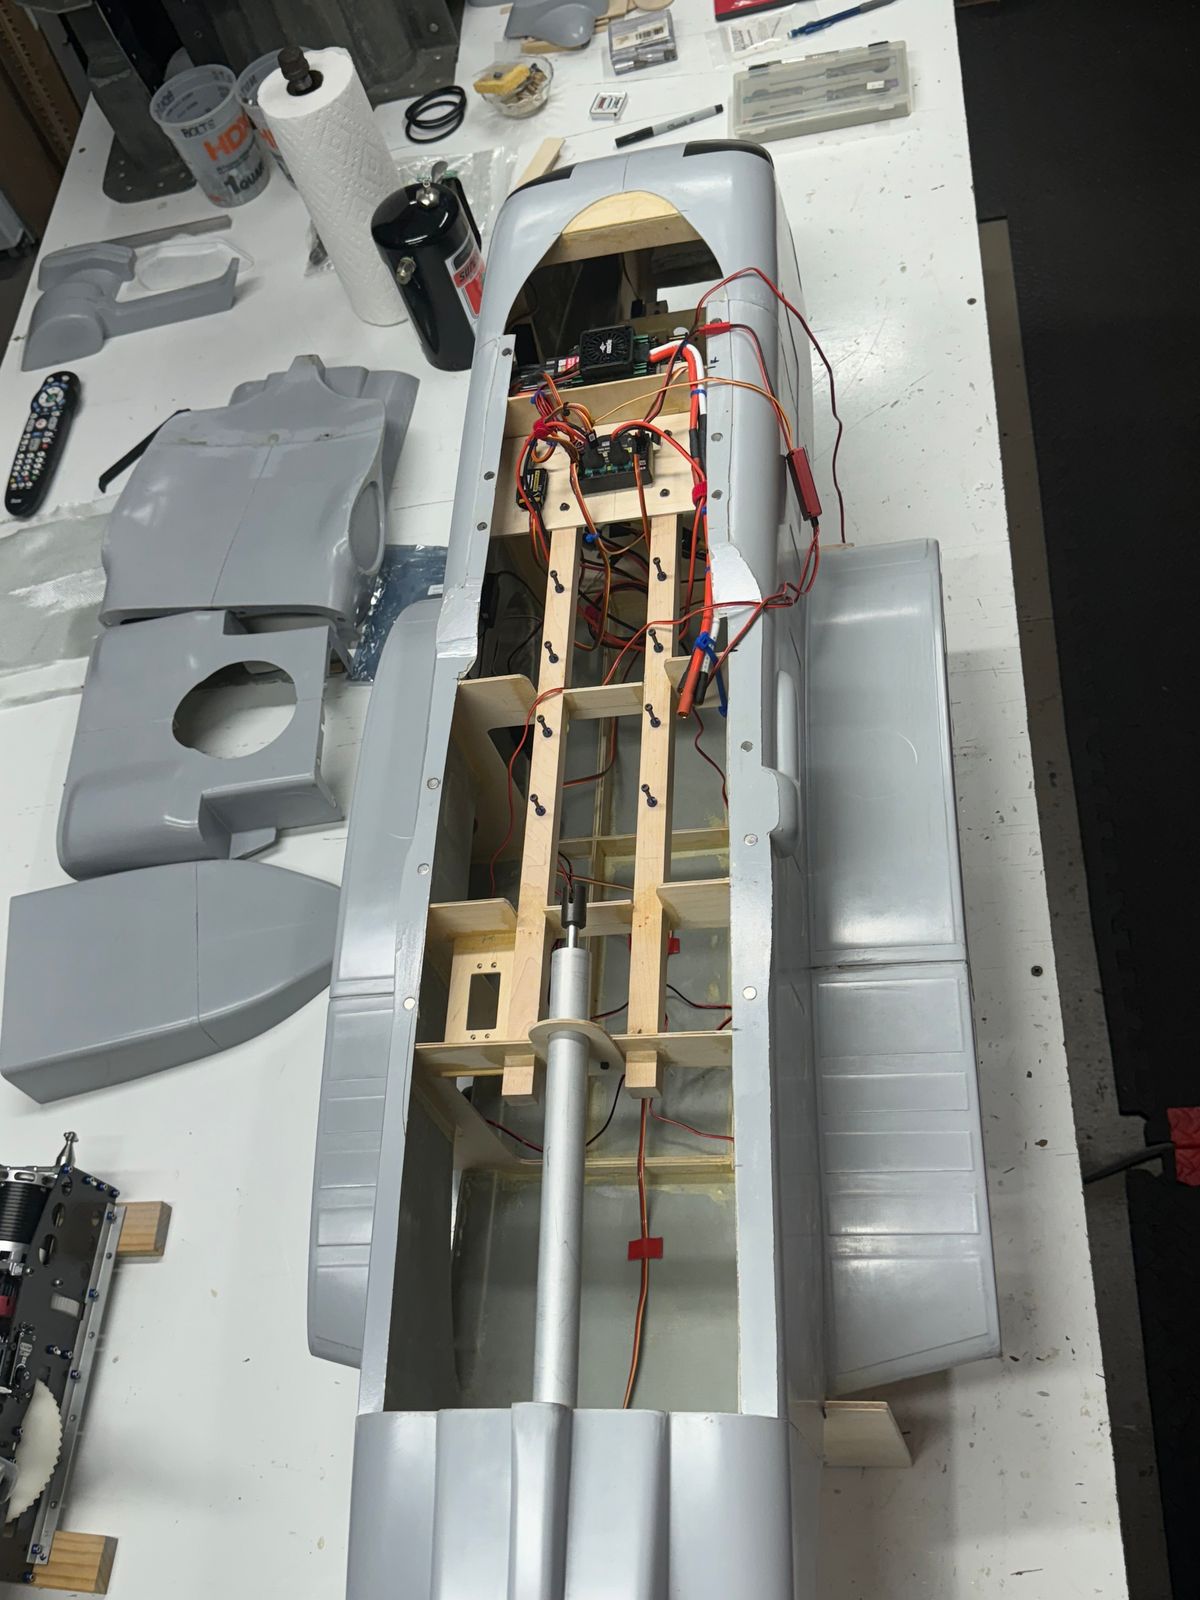
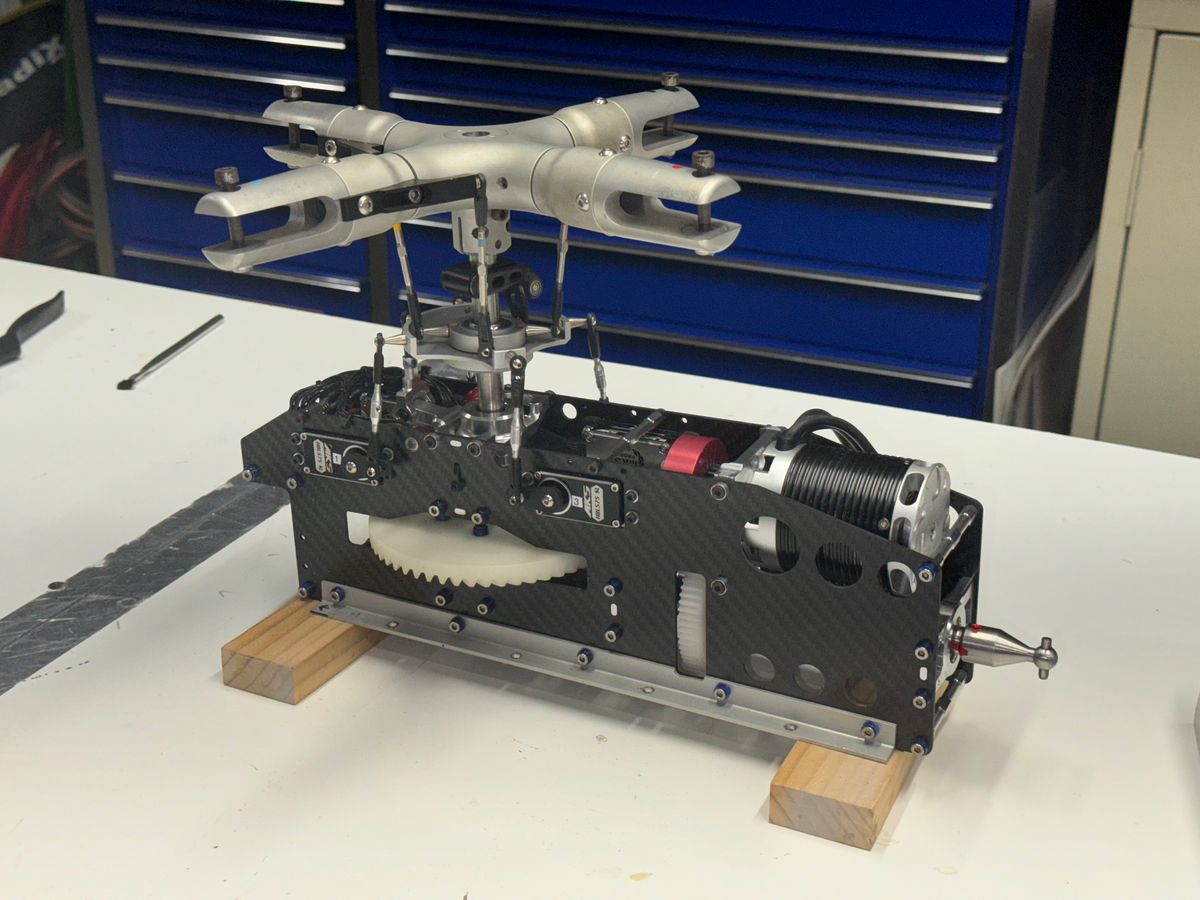
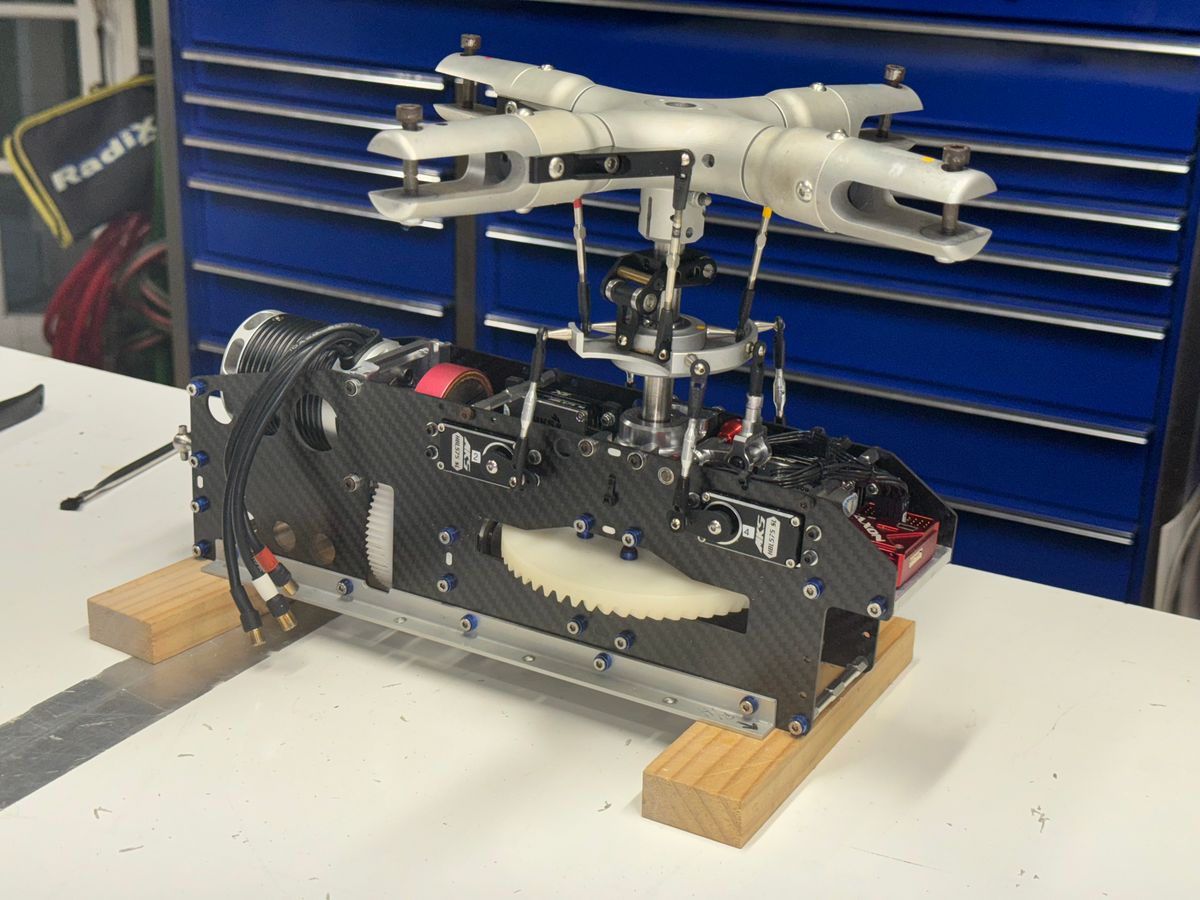
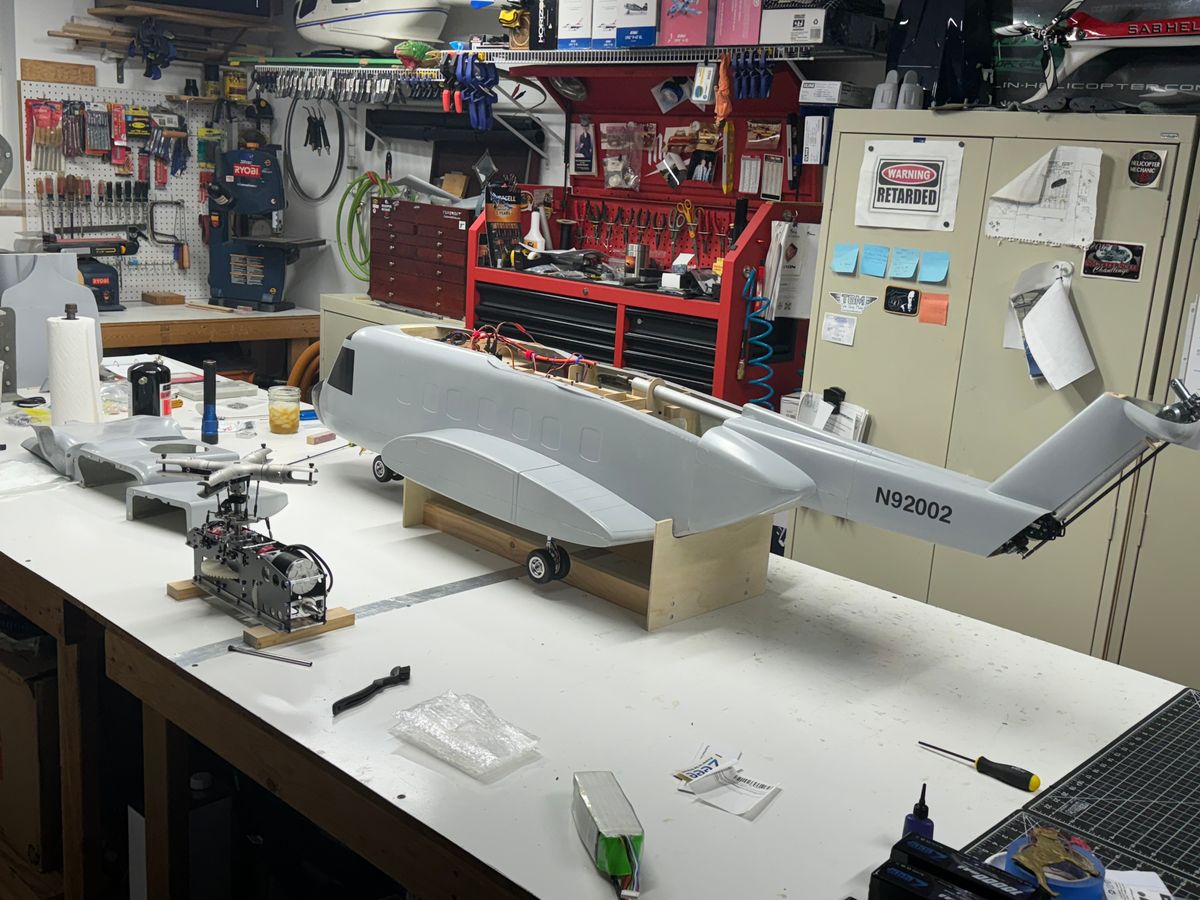
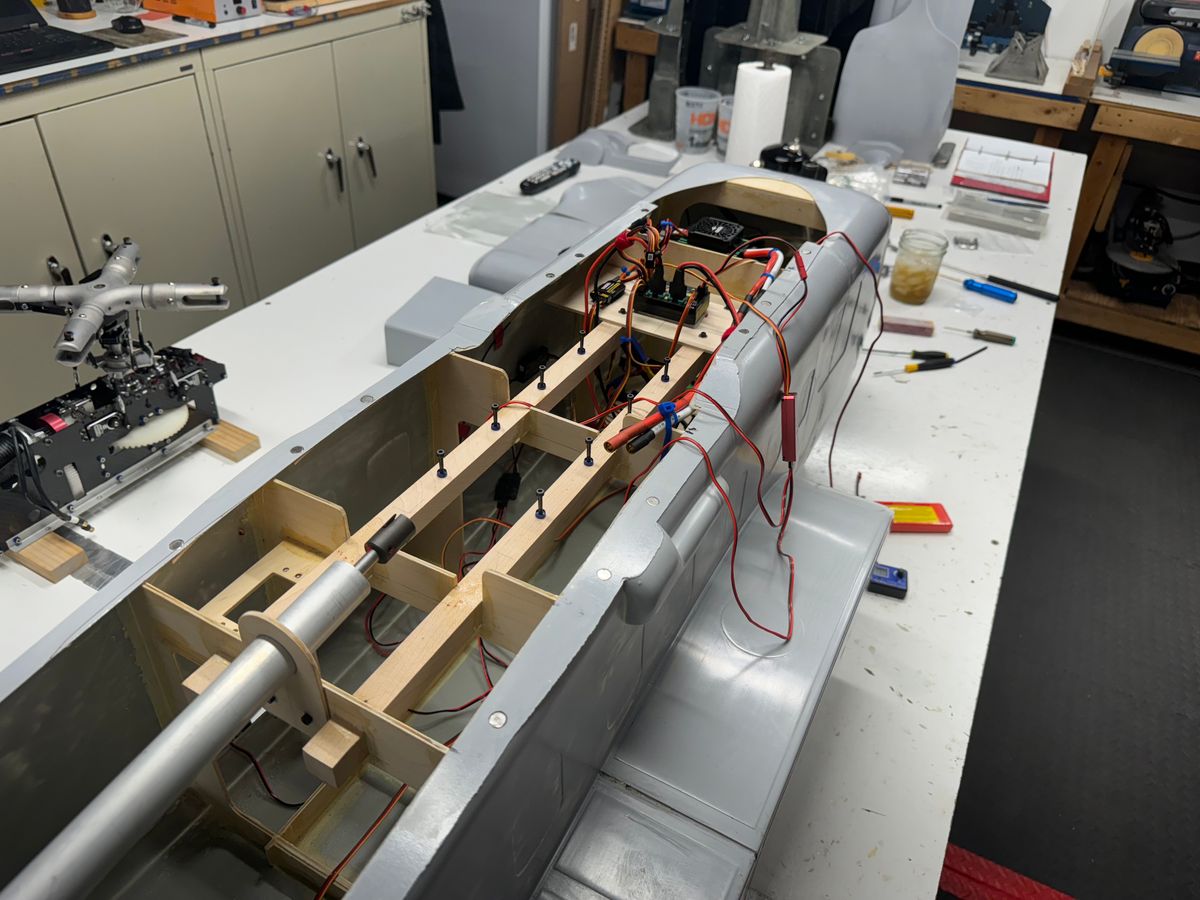
What does and model S-92 look like after 25 minutes of flight? I was wondering the same thing. Until a few days ago I had no friggen clue.
See photos below.
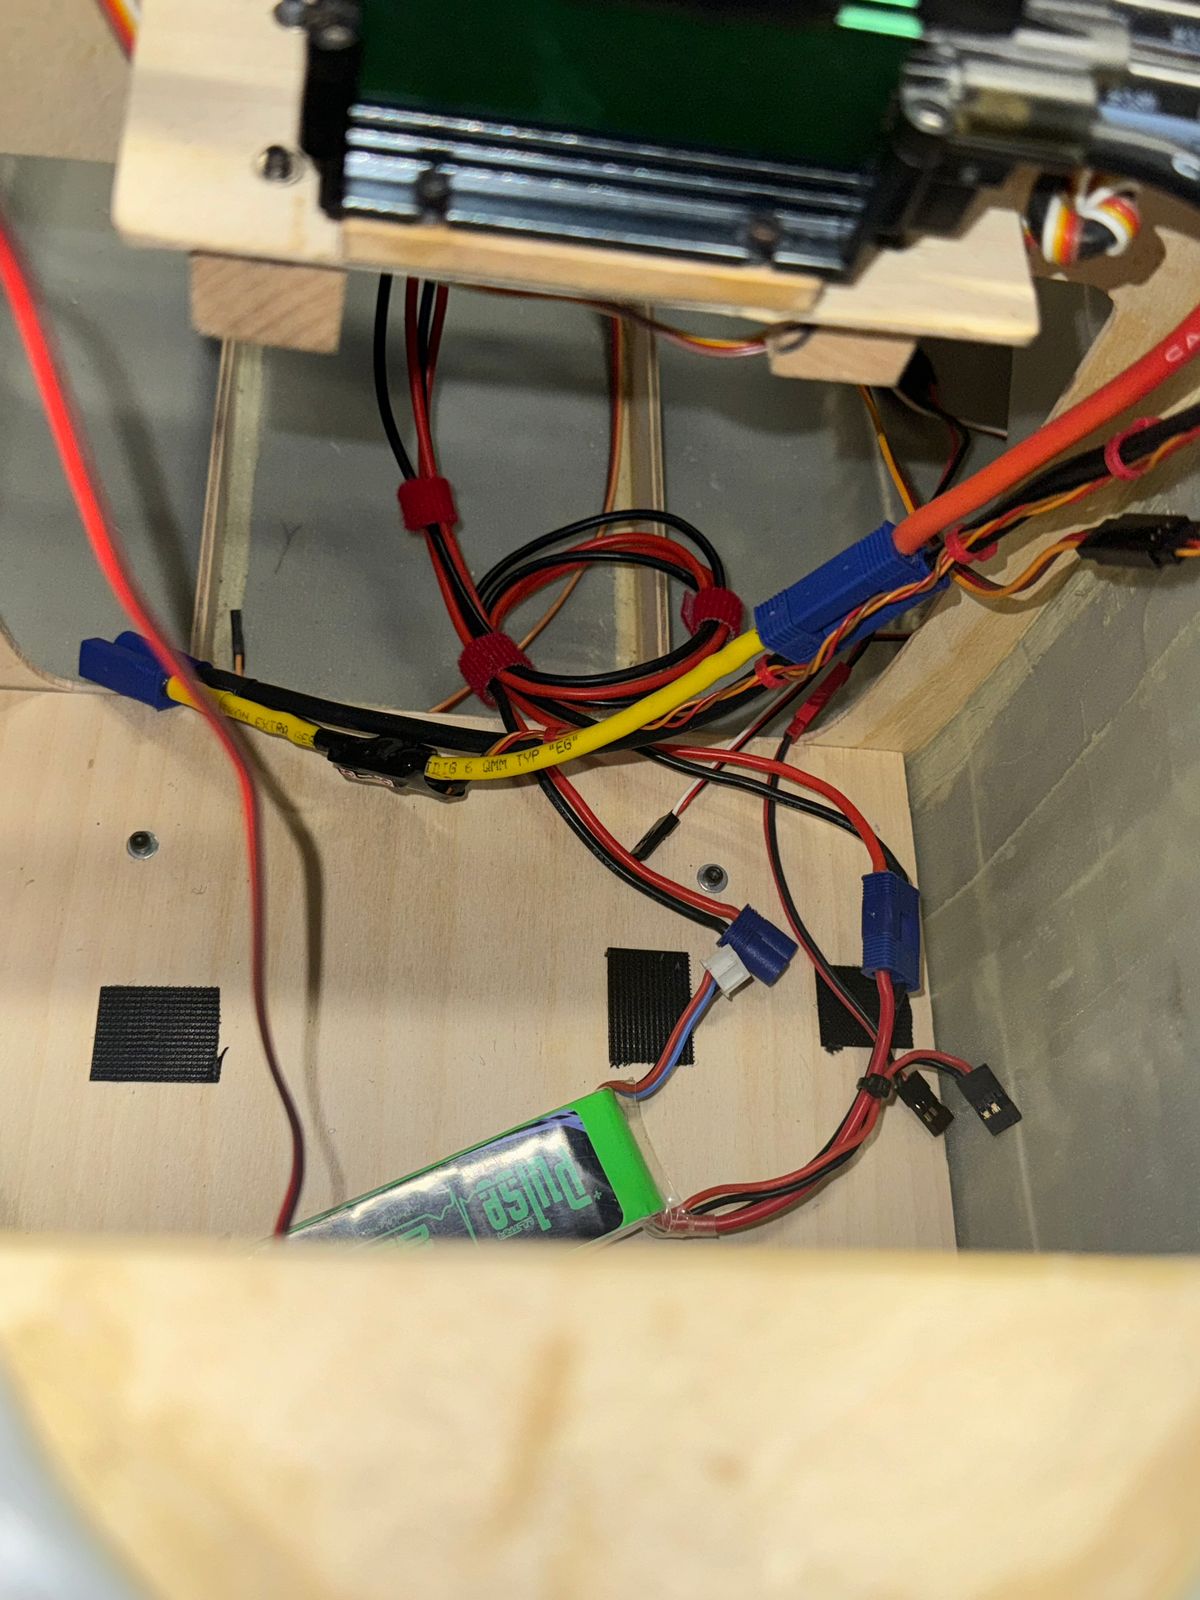
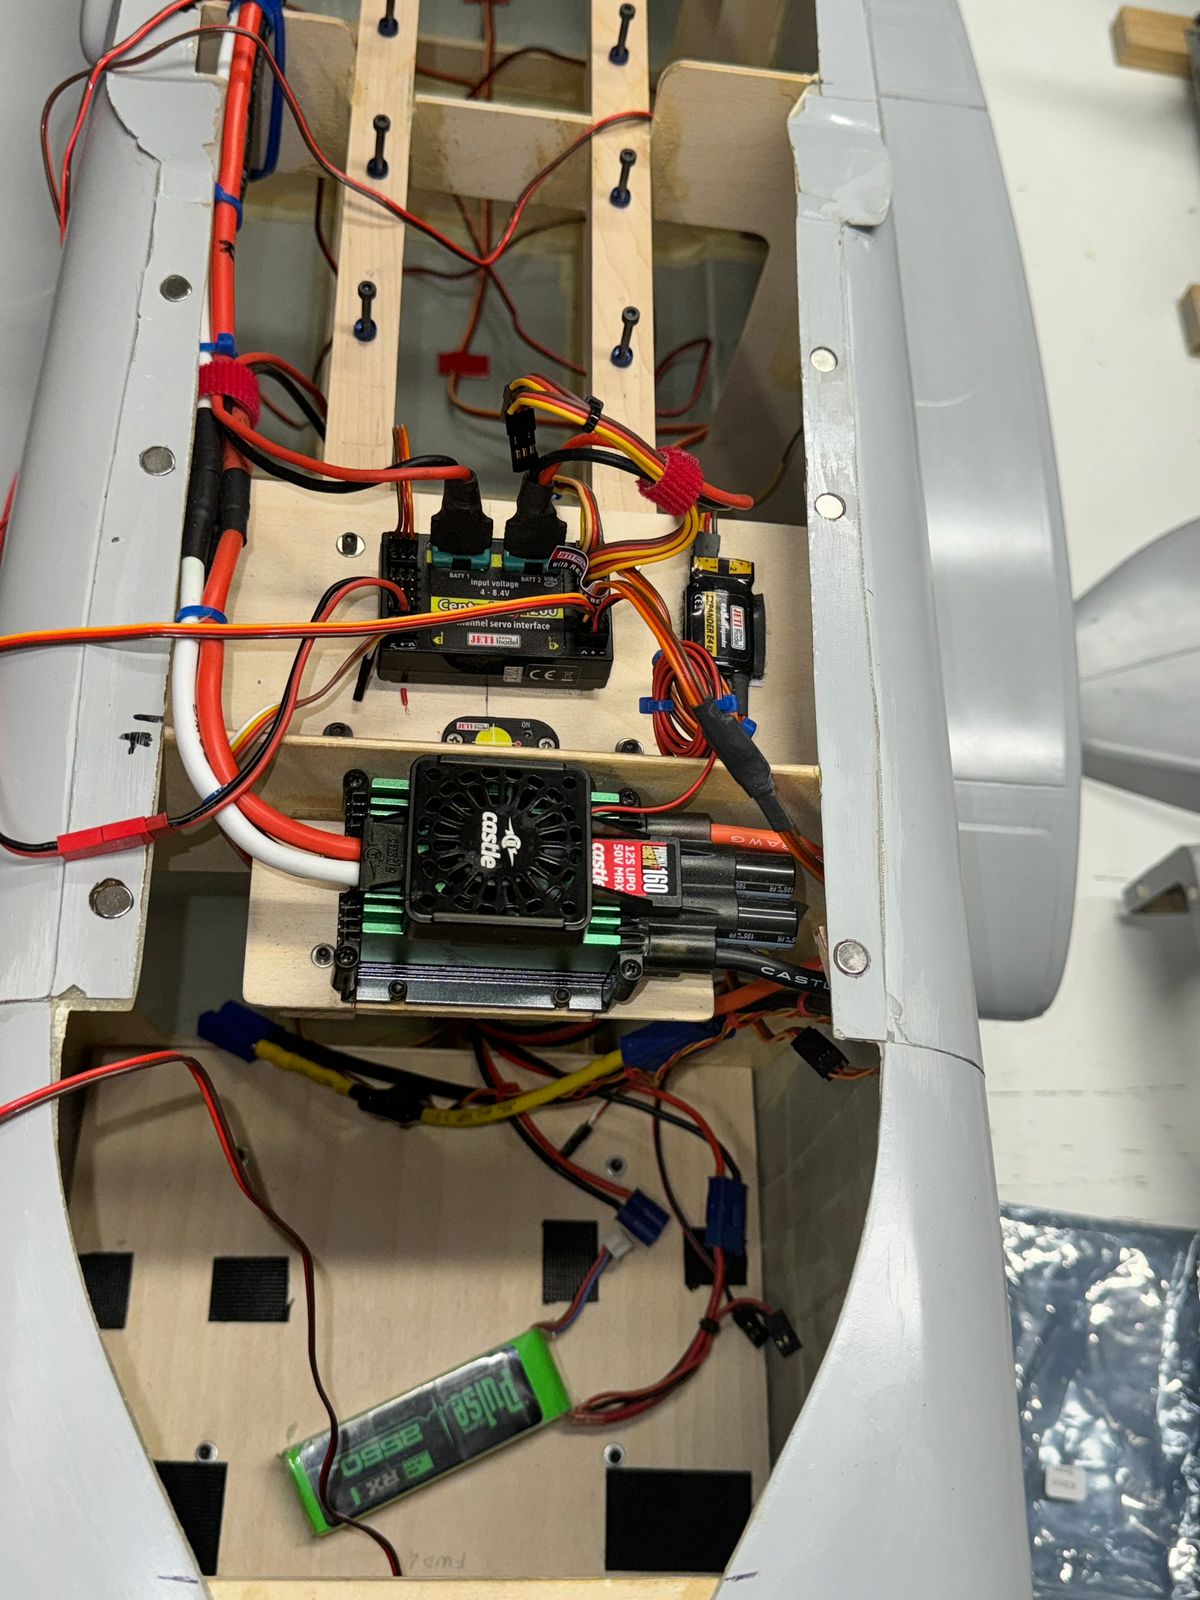
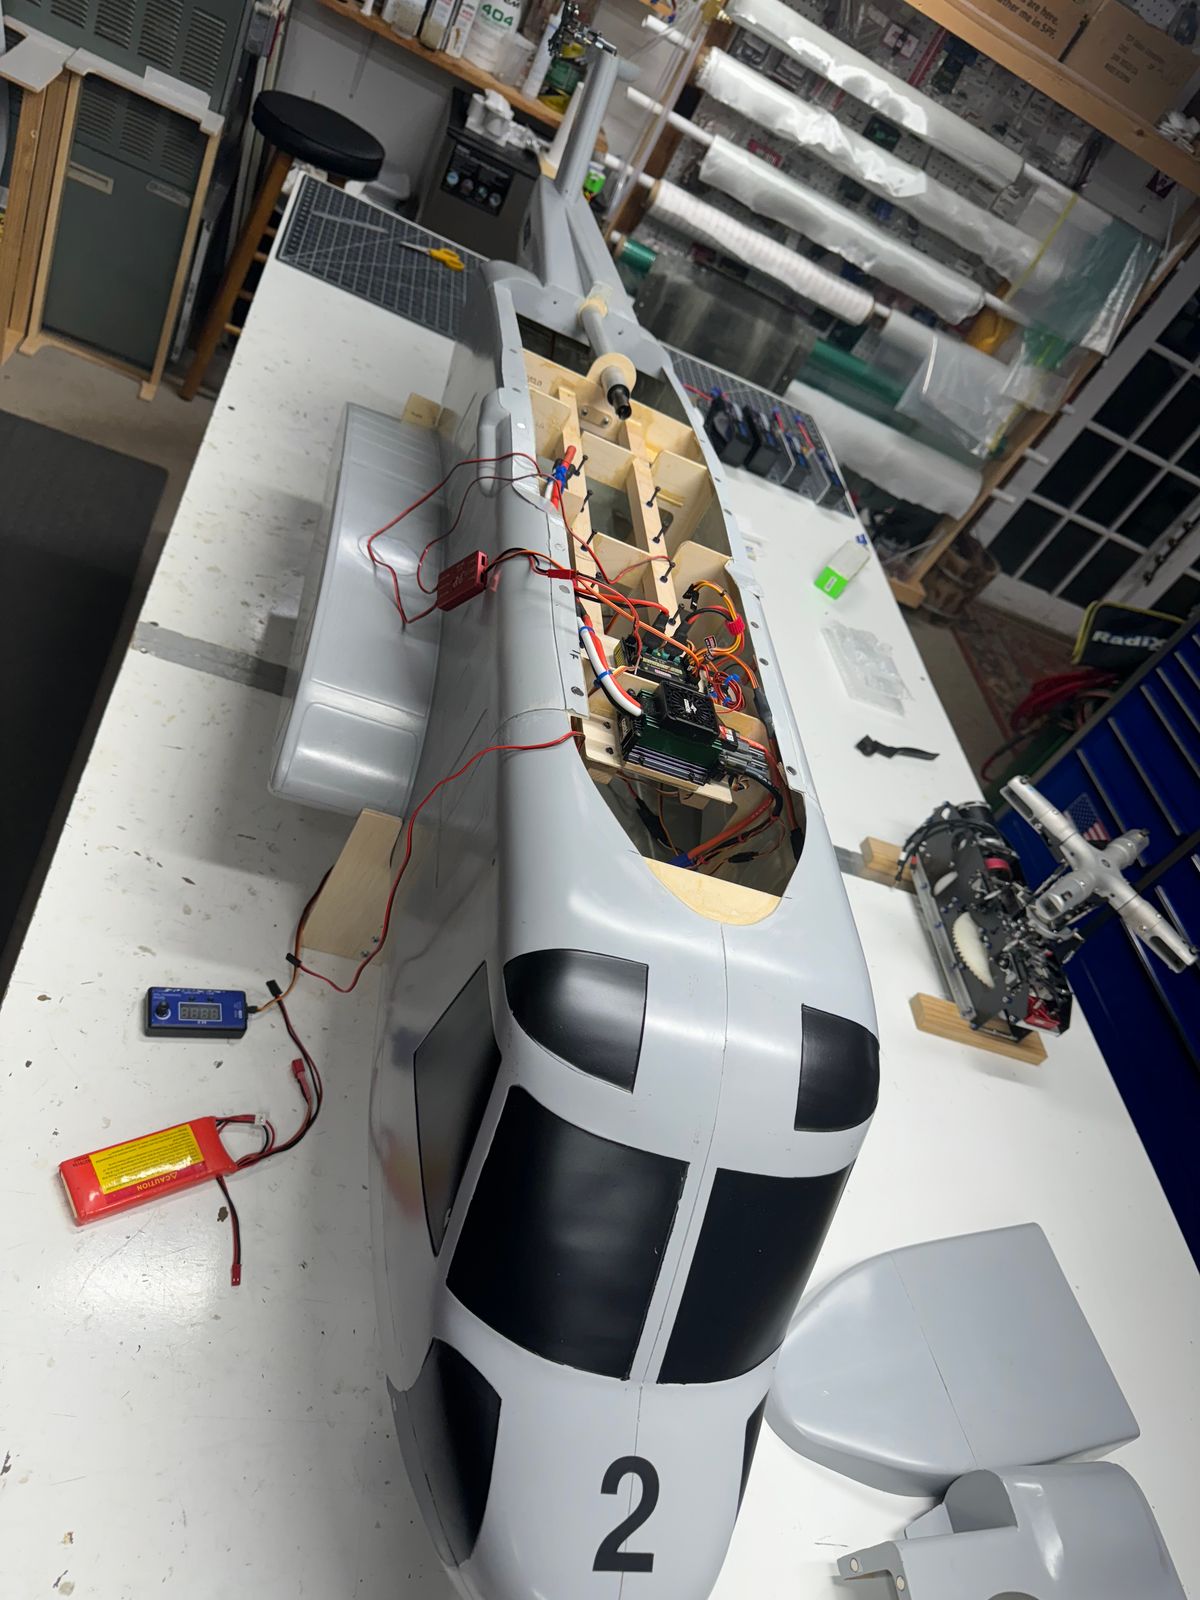
This was a good time to rip everything apart and make sure there were no issues with the powertrain after a few flights. I am happy to report everything look great. I installed the main wheel brake and retract controller. (Dammit Man, wheel brakes on a heli!!!) well yea, it has wheels. Ha.
Now I have to address the “rats nest” of wiring for brakes and retract and I have not even gotten to the lighting yet. Dang this is fun. Battery and controller mounts will be here tomorrow and can place systems and work out wiring from there.
Some other installations will be a cockpit floor and laying up the gear fairings which cover the main gear openings.
A few photos.
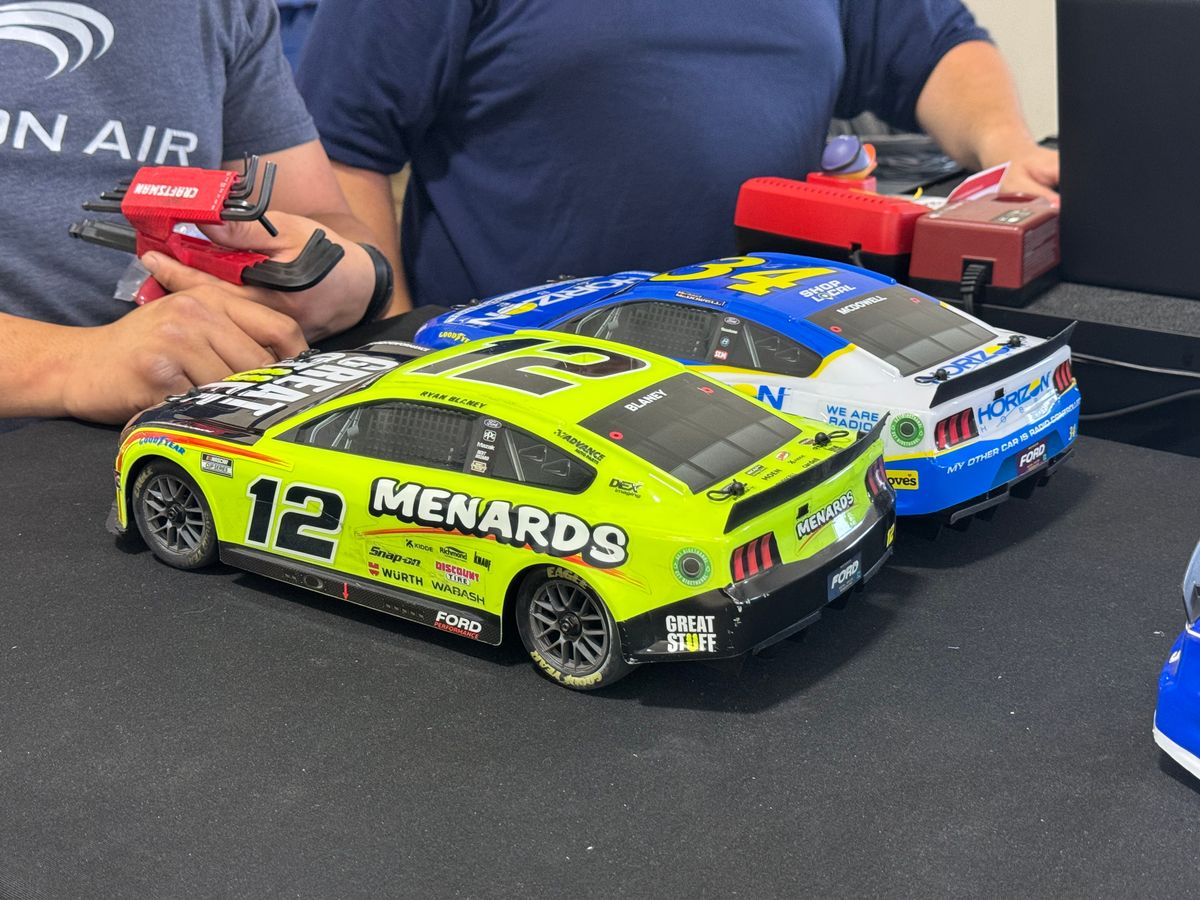
A side note: We have a little NASCAR race daily at work.
Thanks for stopping by,
B
168 Comments
Congratulations on the Maiden, amazing accomplishment!
That's fantastic! 👏
Awesome. Congratulations.
👏🏻👏🏻👏🏻👏🏻👏🏻👏🏻 nice job
Awesome. It is soo cool to see this in the air...
And that my friends is how it is DONE!!!!
Congratulations!
Cool 😎 great job
Nice job Sean, good video butch👍🏼👍🏼👍🏼
So nice!
Congratulations Butch!!
Amazing, Butch. That was a great video and achievement of this awesome project 👏 👍👍👍👍👍
Awesome Butch!
They look great! "Nice job boys!"
The spool up sound really nice , nice job
Great videoing Ro!
So C😎😎L.. 👍👍
Wow great job Butch!!
Just in case you all don't know this.... Not only is this 2 scratch builds done at the same time, but to have a double maiden.....
Butch you are a true definition of "THE GOAT"
Great job! I enjoyed meeting you both at the event. I was very impressed with the quality and attention to detail that you have put into these machines.
Niceeeeeeeee👍🏼
Very impressive!!!!
Nice work man! Looking forward to my next test flights!
Excellent Butch
Igor would be proud! 🤣 👍
Very nice!
The fuse looks calm and neutral which is great news.
Can see little tendency to find its horizon slighty tilted on the left. Don't think its related to wind as doing this in different situations during whole flight. Have you noticed the same? I would eventually revisit main shaft angle for actual configuration (CW rotation, AC side and rotation).
I'm raising this because I'm looking after an Ecureuil AS350 1:4 and he ´s neutral position is slightly tilted on the right for many videos I've seen. Not realistic for me when hovering or to land on a trailer.
Appreciate clarification from anyone to understand this behavior and what is the setup to mitigate. I should know already but didn't encounter this with my helis, like the Bell 212 turbine (gas exhaust is an additional factor for pushing around axis, we can deal with thru adjustments, eg CG balance, to look same as real one).
https://youtu.be/5LsPX-TpLYk?si=FDQROxLfdIAurbLC
Gents,
Thanks for the very kind words about this build. It has been fun and will be working towards a finished project.
Remy, A great question.
Most Sikorsky helicopters have about a 5 degree longitudinal tilt and little to no tilt laterally built in to the MGB. I have built all my Sikorsky models with a 2 degree forward tile which looks pretty scale like for the size models. Most Sikorsky are counter clockwise rotation so hover left wheel low
When a helicopter hovers with its left side low, it is often due to a phenomenon known as "translational lift" and the effects of rotor dynamics. Helicopters have a main rotor that spins in one direction, creating torque that wants to rotate the helicopter in the opposite direction. To counteract this torque, pilots typically apply right cyclic input, which can cause the helicopter to tilt slightly to the left. Other factors would be control input as stated, weight distribution, wind conditions and ground effect can contribute to this as well.
Since the AS350 is a clockwise rotation, naturally it would hover right skid low as you mentioned.
Hope that helps.
Thanks for dropping by,
Butch
Amasing work man ! Respect for the impressive work.
Thanks Butch for your time, much appreciated. Another factor is maybe on which side is the AC. Mine is CCW with Baumann AC metal gearbox on the right side (spinning CCW) = also more weight on the right!
Done this as I wanted to have it same side as the real, contrary to build manual.. This setup does maybe also contribute to my no noticeable lateral tilting.
Thanks again Butch !
Looking good
Hi Butch. For wire management I have gotten some nylon cable clamps from Amazon and just use a small pan-head wood screws to mount them. Cable Clamp 200 Pcs Black Nylon Plastic R-Type Cable Clamps 3/16" 1/4" 3/8" 1/2" 3/4" 1" Clips Fasteners Assortment for Cable Conduit https://a.co/d/cPyXA6I
Hey Joe,
Thanks for the tip on the clamps. I hope to get this cleaned up this weekend. The Velcro straps will go away once things are finalized. As much as I like the look of the black Ty-string I will most likely use the little tiny black ty-wraps.
Once it's all done, then the real test comes, Can I remove everything leaving the harness in tact? Hope so. Ha
Thanks again,
B
Super clean!
The speed of the retracts is very close to the real one, around 4-5secs. Great!
https://youtu.be/xeWt8o8YOhg?si=TzMNDzgXXf-_nZtR
I use a lot these, they are very handy to install also afterwards as we can open them. Material is not just basic plastic and is heat resistant. I use a lighter to stabilize the tips when I cut them. Excellent product.
https://www.hebu-shop.ch/?s=gewebe&post_type=product&dgwt_w...
Remy,
Thanks for the tip. I do have something very similar I have thought about using. I did work on this last evening shortening connections but still have a way to go.
Thanks again,
B
Hummmm.
Hand tie or zip tie???
I thing that just looks cool.
UIH.
B
Cable lacing is well used in aerospace. Find very interesting article:
https://www.kitplanes.com/wire-bundle-lacing/
String-Ty 👍
Oh the waxed string brings back memories from the wrenching days lol
Angels among us ! Both do beautiful work
Yea. I am thinking the String Ty once everything is finalized. Just looks friggen cool.
UIH,
B
Well done
Fantastic !!!!!
Thanks Gents,
I downloaded the ESC data. Looks pretty darn good. Now its time to start pushing this thing.
B
I see inlets! They look great! Did you print them? Also the String-Ty is the bomb!
Thanks Joe,
Evan printed them. They are just taped on and need some slight adjustments but look great. I am glad I went with the String Ty. It is a nice cleaner look. I still have to do the wiring on the mechanics but there plenty of time for that.
Thanks again,
Butch
Yes indeed!
Great flights Butch!
Fantastic Butch!!! Congratulations!!
Nice flying!
Looking good! Just wondering what your head gain is at for this flight on the 3x? I want to compare to what I settled on with the 550 size heli with 4 blade head going into the MQ-8?
Hey Joe,
I am using the Axon however it is very similar to the 3X. Currently my head gain is set to 80. Keep in mind "80" is just a number. There are many factors that will or can affect this number. My 92 Nr is 800, it weights 35 lbs and flying flat bottom metal blades. Your MQ-8 will and can be much different. Today in fast forward flight, it began to show its true colors. Not bad but need some work.
Don't be afraid for main or tail rotor gain. It will tell you if its too high. Back down 3- 5 points and in most cases you will be golden.
B
What a master piece !!!!! Awesome job Butch...
Great flying Butch!
FULL SPEED AHEAD CAPTIAN!!!!
👍🏼👍🏼👍🏼👍🏼
Very nice work!
Sounds and look incredible!
Nice work Butch!
Thanks Gents,
B
Great work Butch!!!
Looks great Butch!
Only a perfectionist would notice 5mm Butch!! Good for you!! Looking great
Very nice work
Remember that red wiring can be very visible! (your gears will be out sometime)
Remy,
Thanks for the reminder.
We are a long way from being finished here. In the end, any visible wiring will be covered with TechNet or some sort covering to disguise as much as possible. Detail Master has a lot of goodies for this kind of stuff.
B
I know one guy that can make that happen, YOU !....
You are way too kind.
I am a ways away from the detail stuff however it is never too soon to begin thinking about the process. Living in Zoo York I spend a lot of time on the on the highway. Traffic here can be daunting so gives me time to think oppose to running some ass clown over .
Will be very interested in the progress.
The furnace in your shop reminded me I am due to have mine cleaned... Awesome work as always! 👍
Great work Butch!
Impressive build ! Nice work.
One tip for such piece is NOT to be air tight: internal pressure must ideally equalize with ambiant. All depends how mounted, rigidity, volume and internal struts if any.
Mines started to inflate after returning from a meeting located at different altitude. Drill a tiny hole afterwards, if needed (e.g., if stab directly glued to tail and air can't circulate btw).
Remy,
I recall you mentioned this on a post awhile back. For V1, there is a access panel on the bottom side of the stab. That will not be there on subsequent stabs. The support pins are mounted to the fuse side. The pins slide into brass tubes on the stab side. When the stab is removed it will be open to ambient.
Butch
Nice piece of milling.
Thanks Thomas,
Old school. No DRO or CNC. Just a frugal bench top mill. Set up watch the dials and go.
B
Beautiful !!!
Very nice, rock solid !
I hate to be the one to point out that you only have one stab on that heli. Geez, Butch... ; )
Yea, It was too much work to put one on the other side plus I was losing interest.
Ha,
B
Looking good. 👍
Hey Joe,
I wonder how many rivets are on the S-92? Any chance you could get a quick count for me?
That pretty funny.
B
Nice mill work wild man!
I'm not sure, but with all the mods, there is a lot of new ones. It was definitely a good program for structure work. I have heard that HMX-1 has all 23 now.
Looking great Butch!
Cool. Your a master!
That's such nice work. A lot to be said about patience.
Before you cut the window on the personnel door, keep in mind there isn't one on the VH 😜
Thanks Joe,
When the plug was printed I should have addresses the big window. I chose not to fill the plug before molding and made a plug to fill the recess.
Maybe you can answer this question.
Are the deleted windows on the VH simply covers over the window cutout or does the aircraft skin cover the cutouts?
Thanks,
B
Great work wild man!
Hey Butch,
The deleted windows are composite plugs from the inside that used the original rivet pattern for the window. The plugs have a relief that fills the window opening with a flange to rivet in place from the inside, if that makes sense. The second cabin window aft on the port side is a "special" window that is known as the Presidents Window
Thanks Joe,
I did a little searching and found a photo of #315/16982 during flight test at Coatesville in 2018. All the windows are installed so this helped.
Look at all those rivets and doublers.
They are going to be fun I am sure.
B
Amazing!
PSG adjustable angular gearbox is perfect, the best there is ! Very nice clean work, respect !
amazing... as usual
So cool 😎 Project
E have a question about the tail rotor, 🤔 the original is not 90° to the tail 🤔 have the same in auer project?
I don't can see i the pictures
Impressive machine, looks very good in flight. Nice work Butch!
Thanks Danny,
Its been a long journey but well worth it.
B
WoW
Well done!
Great test work Butch!
Great shop work too!
Magnificent Butch!! I am in awe😊
I want one, looking great Butch
I will be happy to put a fuse together for you.
B
Impresses Butch…Outstanding!
Very nice! Love that smooth slow start, and looks great in the air!
Wow great 👌
Really nice
That's looking good! Can't wait to see it painted!
Starting #4! Where do you find the time? I've had to put modeling aside for now. Just too much going on.
Butch, could you elaborate as to what your Axon changes were?
Hey Thomas,
My 92 has always felt good however there were a few things I just never took the time to really address. The end of last year and up until maybe 3 or 4 weeks ago, it was always windy when I had the chance to fly. Making adjustments in 12-15+ winds with gust just didn't make much sense to me. Once we got some calm weather I noted how the thing was flying and began making some adjustments. Where I noticed the biggest changes were in Direct Control, Decay rate and Elevator filter. I was running each of these towards the higher side. I lowered each listed above maybe 2-3 points, went for a flight. To me and my flying style, it felt much better. Working with Agility and ALT Hold settings along with expo in the TX its coming together nicely. Its hard for me to notice changes with a single point adjustment. I made 2-4 point changes on the smaller scale, and larger adjustments maybe 4-6 points to the larger scale adjustments. Did it that make it better or worse? Then worked from there.
I will add, my S-67 has wings and a big stabilize and a big vertical fin. The settings are quit different for that machine.
I referenced the great articles By Mr. Fehlmann, Mr. McFadyen, and Mr. Kranitz to keep my head on straight.
I hope this helps.
Butch
Absolutely helps. Thanks you for taking the time to explain. I have read those articles and they were most helpful. It’s good to hear of others experiences
Very nice and compact mechanics, massive gears !
That’s some good heavy maintenance and upgrades there Butch!
Very nice...
Thanks Massimo. There is a very long way to go here however moving in the right direction.
B
The IP is going to be very cool!
Looks great Butch!
Thanks guys. If it finishes up as I hope, it should look pretty cool.
UIH,
B
UIH!!!
The pieces are coming together. We have all the glazing molds ready for a test pull. There is a local shop dealing in scale war bird plans and supply's that has vacuum form abilities. We will see where things go after the first pull.
B.
Love to see the progress
Evan,
Should have windows tomorrow.
Will post pics.
Thanks,
B
Very very nice Butch.
Looking great Butch!
Real nice Butch!
Looking great Butch!
Thanks,
More progress over the weekend.
Not sure why the video is not in the added photos.
B
Amazing work Butch ! A very animated cockpit.
Fantastic !!!!
Amazing Butch…As usual 😊
That's awesome 👍
Nice Butch... Are you programming the Arduino's ?
Butch, FWIW, I used a metal template to space screws in the Lama’s glazing. Perhaps you already have this or another method. Tedious work and I don’t envy your task ahead. Your build story is enjoyable to see. https://helistorm.com/discussions/f543cf13-f91c-480c-95a7-a62e1d4f1.... Chapter 14
Thomas,
Thanks for your input. I have something similar from a thin piece of metal that works great on the relatively straight areas. In the past I have used or made a tool for the straight areas but "free handed" the more complex curved sections. They have always come out great so far. This machine has a lot of screws attaching the windows. I will have to sleep with this under my pillow for a day or two so it will soak in.
Thanks for the suggestion.
B
I wonder if a flexible 3D filament (like TPU/Bambu filament ) printed in a strip/long template with spaced holes would work. Screws inserted into drilled holes as they are drilled thru the template spaced guide holes, glazing and body, then the template flexed and bent as you go. Maybe two screws thru the template and body then bend and drill the next one. I’ve used the TPU with success and it is tough stuff. Just a thought.
Looking great Butch!!!!
The arrangement of the displays looks fantastic. I'm excited to see the final result.
“…. so when it gets busted off it easy to replace….” Ha!
Looking good.
Amazing Butch!
Very clean build, woodwork very solid. Very good accessibility.
Amazing work Butch !
Thanks Folks,
One photo shows the most forward bulkhead which was only glued on the aft side. The outboard sides of the stringers in the nose section were not glued either. There was no access until I cut out the cockpit windows. This has been addressed which makes me happy. I have yet to decide on the fuse interior color. I always hope things will come to me when I am wondering around behind the little animals however, that has yet to happen. My 67 has a zinc chromate interior finish that works well with the matt black finish. The VH in HMX-1 livery, not sure that will be the best choice.. Maybe a trip to HD to the color chart wall is in order.
Thanks for dropping by,
B
315- that was acft 23 if I remember correctly. The end (supposedly) of VH support at Sikorsky.
Looking good as always.
Clean work, Butch!!
Thanks Mang,
I believe I like the 10 mm spacing better.
Hummm
B
Looks great Butch , as always!
love the supervisor....
That's Clifford. He just turned a year and is pushing 120lbs. He keeps an eye on things.
Ha
It all looks so nice. I cannot guess at the man-hours for those panels alone!
I wont guess either. I believe I work for about $.01 per hour but maybe a little less. UIH,
The small details require a lot of attention, but ultimately they greatly enhance the realism. Keep it up, it will pay off in the end.
You are correct Uwe. The kind of stuff that "makes" the model takes most of the time. I actually enjoy this part of a build. Seeing the "thought" or "idea" come together in a component then installed on the fuse is rewarding.
UIH,
B
“.. i get the feeling my fingers will never be the same after detailiing…”…HA! No doubt…. It continues to looks amazing.
Ohhh, I gotta say that vacuum bag process is most interesting! I need to review this pics again and again. Are those clay strips used to seal the plastic layers?
Thomas,
Thanks for the reply.
The yellow strip is a double sided tape about .125" thick to seal up the bag. I have purchased it from Fiber Glast and also from Amazon. The lay up was 5 total layers. A 2 oz then a 4 oz then a 6 oz another 4 oz and another 2 oz. Each layer was biased 45 degrees. A layer of peel ply followed by a 4 oz breather/bleeder to soak up any extra resin. I use the Stretchlon bagging film as it is very thin and flexible to get into the tight spots. I pull about .2 kPa or about .5 in Hg while curing.
I went with bagging every part on this model. With the complex shape of several of the parts especially around the fuel sponsons, engine and exhaust cowls it was a little more troublesome to get things set up for the vacuum process but the outcome of the finished part out weights the setup time.
B
Ha…nice pizza (and awesome work too)
😊 A nice white pie with ricotta, mozzarella, pecorino romano, dried soppressata some jalapenos and sauteed escroll all on a caulipower crust, topped off with a splash of "Franks Red Hot, I put that S**T on everything".
And thanks, the heli is coming along nicely.
UIH,
HA
Awesome work indeed 👍
Pilot seating well ?
Remy,
Thanks for the comment.
You are correct. The seat and pilot are from Comanche and too tall for this model. I have roughly the same size pilot for the VH however the seat will be much different. The drivers will not be wearing helmets but Bose Headsets which should give a "smaller" overall appearance. I am sure the pilots will need some sort of leg and arm plasty.
Ha
UIH,
B
WoW!!!!! I can't wait to see all those parts put together.
You and me both. Lol.
I ASSUME that beast will be ready for HeliStorm at IRCHA! 😏
Is that a YES?
VH-92A BuNo 169182 "will be in flight status but not in livery.
Today's news About Heli Storm was great news. Thank's for your work to keep it alive
I had not planned on IRCHA or the NAT's this year however, I am trading in a 5 day work week and 2 day weekend, for a 2 day work week and 5 day weekend the end of June.
This is NOT out of the question. Plus I have other schit to fly.
The competition stuff will be fun for sure.
B
Yes, coming along extremely well.
What did people do before 3D printing! I am reminded as I read that “Butch is a very patient man”. I always enjoy the updates too.
Thanks Thomas.
Glad you enjoy the updates. I hope they are informative and with a little humor.
Thanks again,
B